
Just finished this custom pedalboard/sampler combination. I use effects and samples a lot in my band and have always had a a bunch of stuff on the floor. I used to have separate pedalboard and sampler units but have since combined them for streamlining purposes. I wanted everything as compact and portable as possible with minimal external cabling. This is actually version 2. Version one was very slapped together.
Anyways, the structure is all build from 1/2" sande ply, except for the sampler top piece which is doubled up 1/4" sande ply. I used the doubled 1/4" ply for the top so that I could cut out button and knob insets out of one of the pieces then glue them together, as a full 1/2" was too deep for the parts that I had but 1/4" may have been too flimsy. The exterior edges were rounded over with a 1/4" router and everything was rolled with two coats of Duratex.

The sampler is programmed in Go and is run on a Raspberry Pi 3B with a PiSound add on board. Button control is handled by a Teensy 4.0 micro-controller programmed as a USB MIDI device.

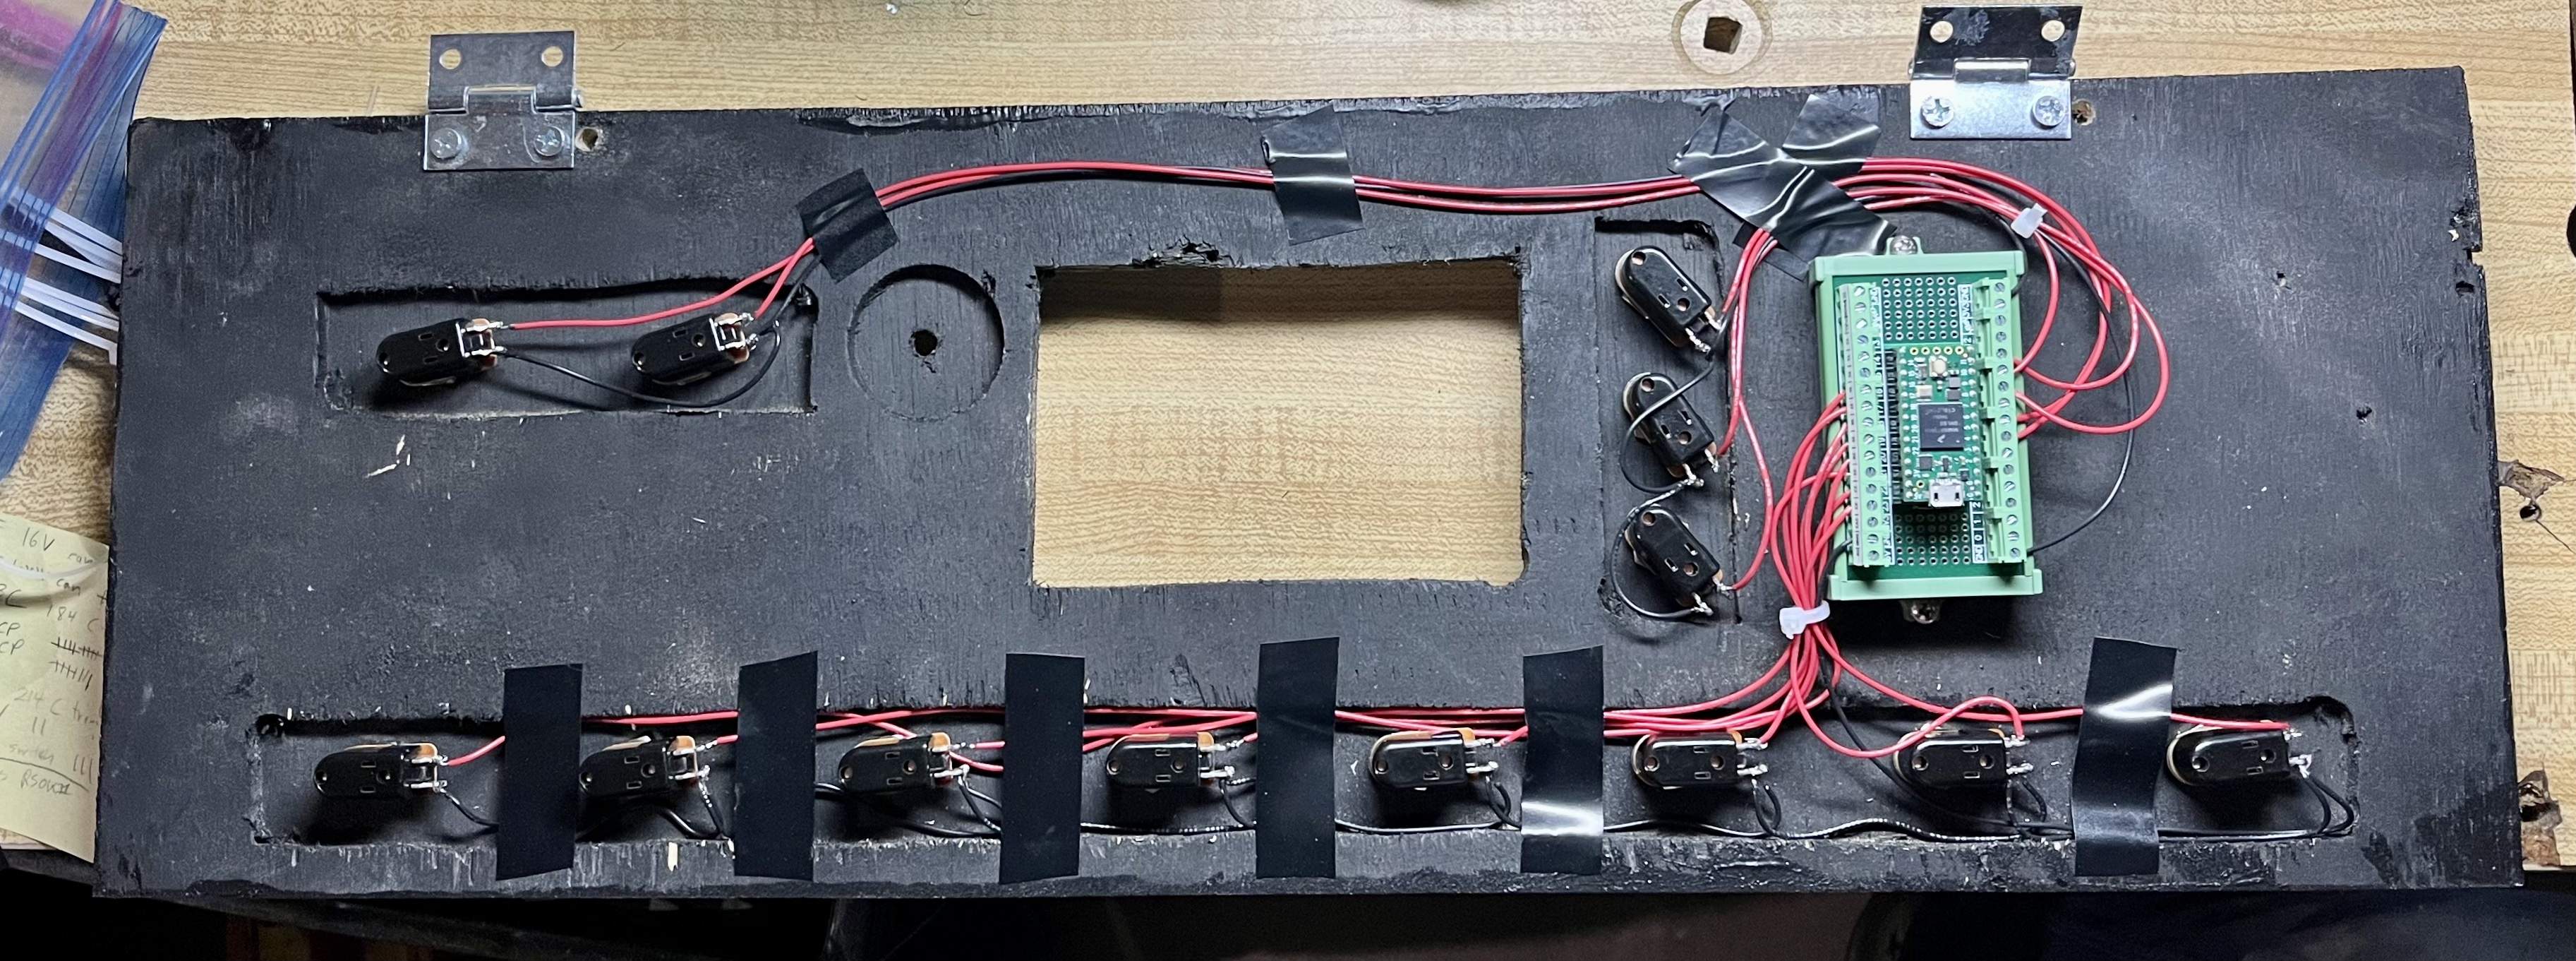
Eight sample trigger switches are mounted along with a pair of banking switches and three more switches for menu control. All switches are attached by screw terminals to the Teensy board.
There is also a 5" screen mounted to the top board for the user interface.

There is also a 1/4" bass signal pass thru with a bend knob for the sampler output. This is mostly a convenience feature when practicing on my own so that I can run bass and samples through a single amp. There is also a dedicated DI for the sampler output. The parallel out from the DI is run through an active buffer before the bass/sampler blend knob to avoid the bass signal from bleeding back into the DI signal.
There is also an isolated USB power adapter for the computers to help keep digital noise from creeping into the pedal power. The top is hinged and closed with velrco on the lower side for ease of access.

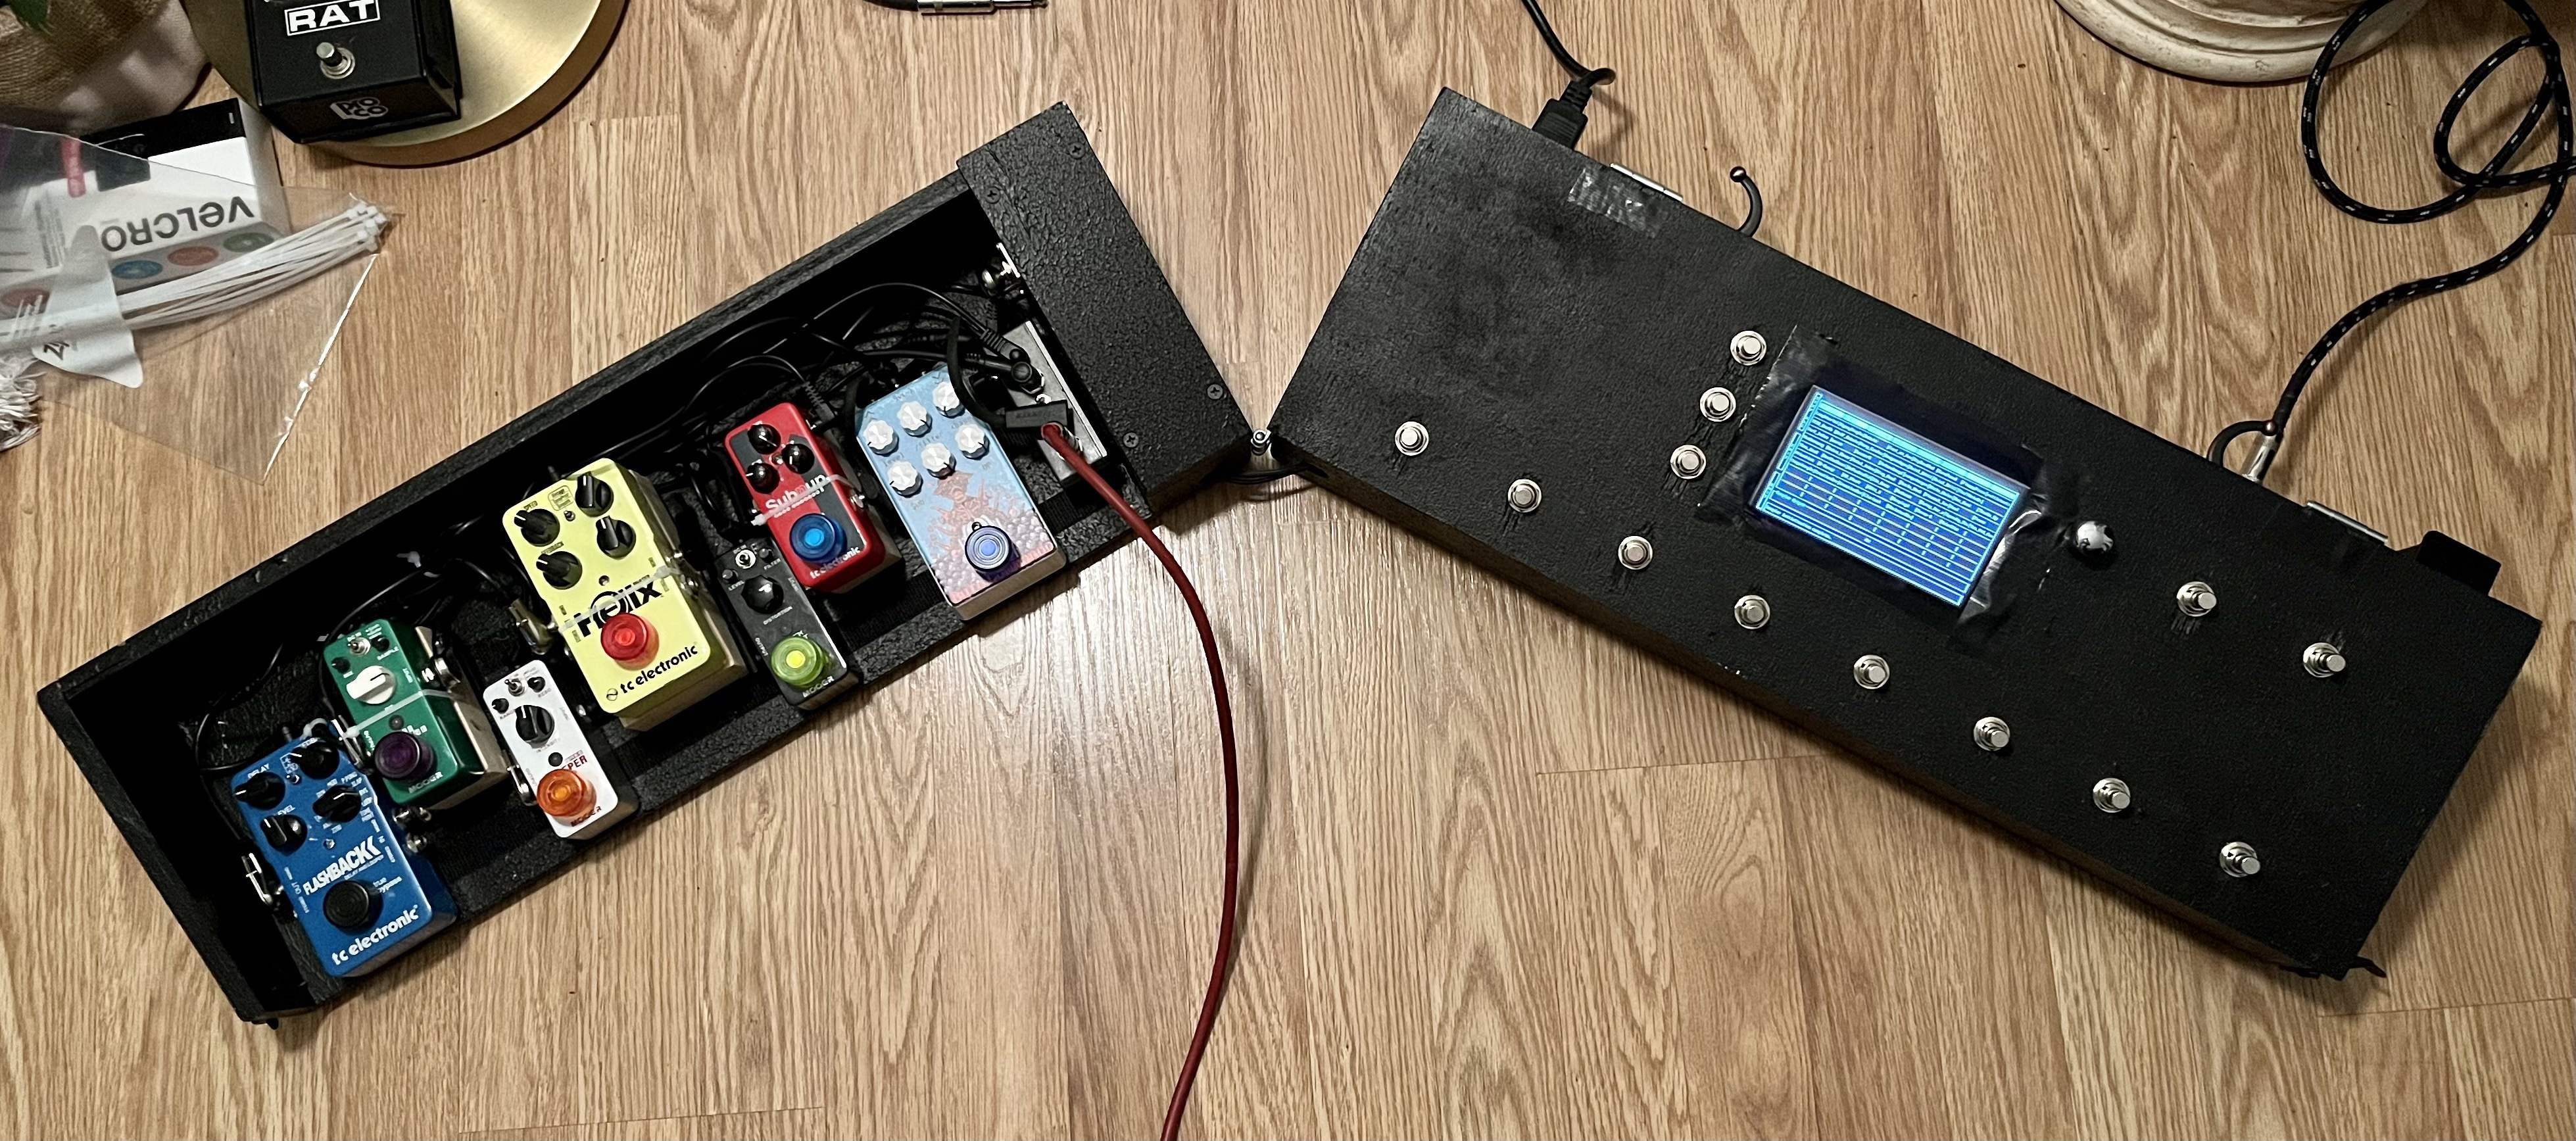
Pedal power and a shielded audio cable are routed from the main unit to the pedal board side. The bass signal plugs into a Byte Heaven SC-1 crossover pedal that feeds a high and low frequency signal chain.
The high chain is: Byte Commander -> Sub'n'up -> Black Secret -> Helix
The low chain is: Bass Sweeper -> Lo-Fi Machine
The high/low signals are summed by a passive 1K ohm loaded mixer cable and run into the Feedback delay pedal. The delay pedal is run through the bass pass-thru line back into the main unit.
Since the skinny pedals can make stomping on the correct pedal difficult, alternating pedals are raised up on 1.5" wood blocks and set back a bit to keep that from happening.

The two sides are connected by a strap hinge so that the whole thing scissors closed with a latch on the opposite side for packing up.
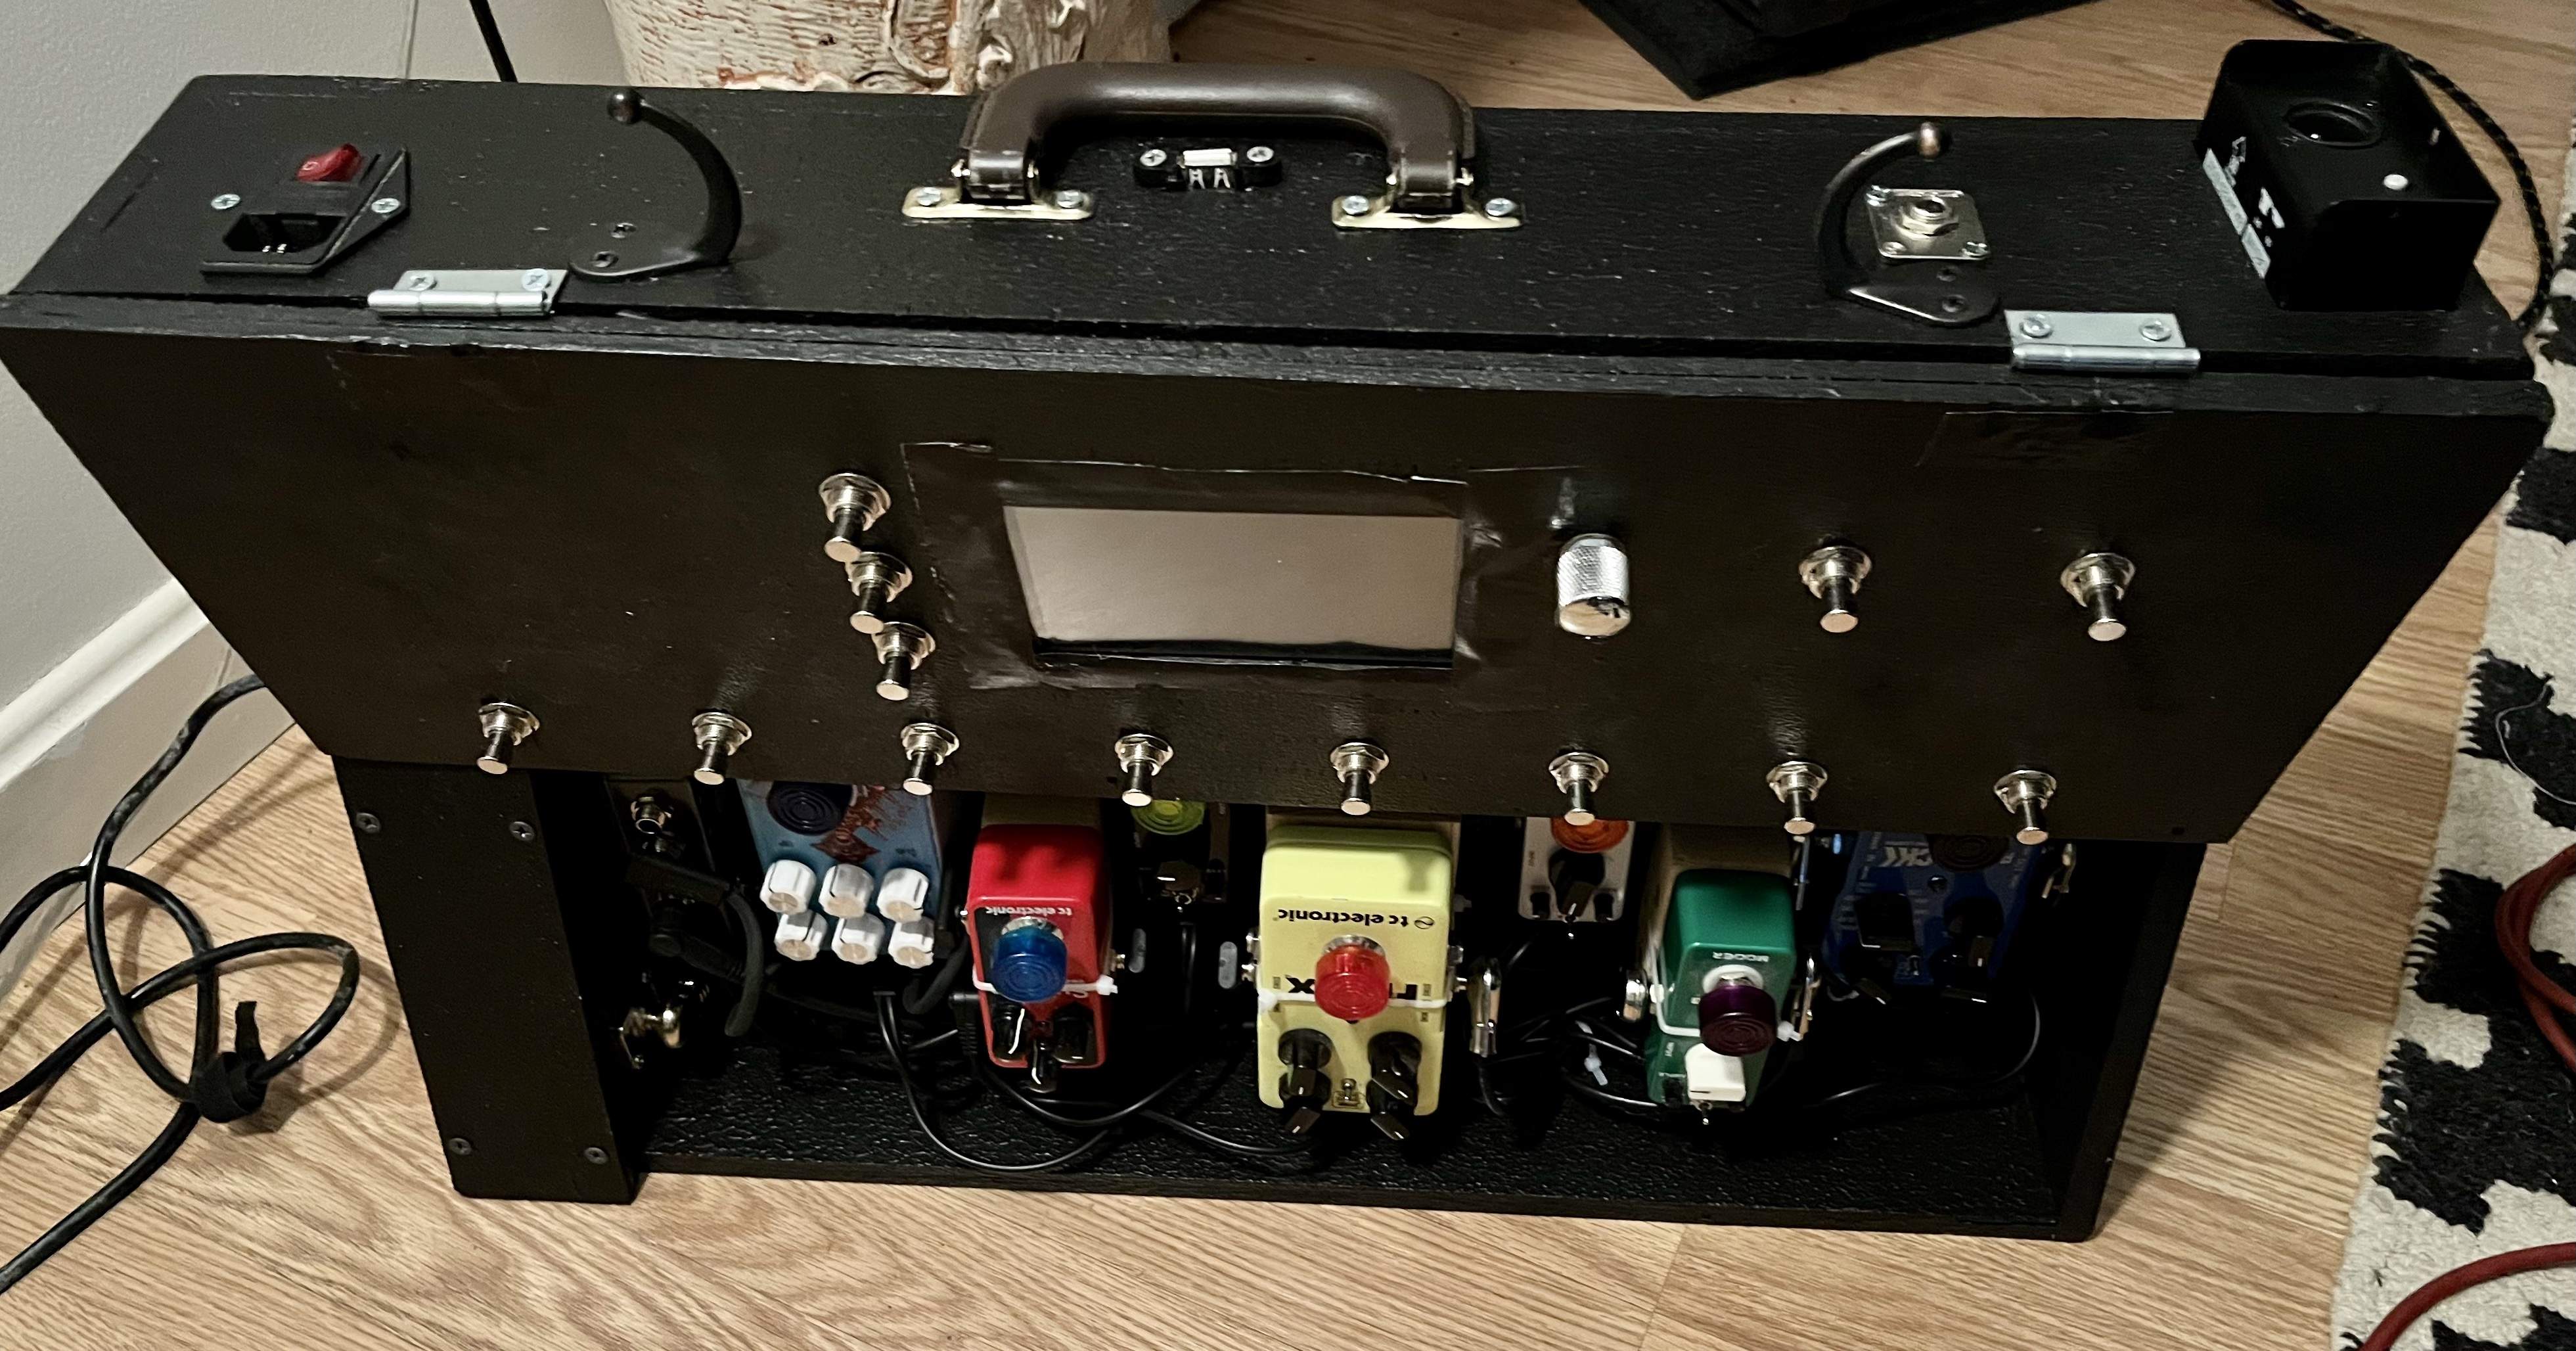
Power comes in through a fused switch with a standard D plug and there's also a breakout USB port for the Raspberry Pi. Also added some cable wrap hooks and a suit case handle for carrying.
The whole thing sets up and packs up in about a minute and is pretty light as well. I'm pretty happy with the build.
Anyways, the structure is all build from 1/2" sande ply, except for the sampler top piece which is doubled up 1/4" sande ply. I used the doubled 1/4" ply for the top so that I could cut out button and knob insets out of one of the pieces then glue them together, as a full 1/2" was too deep for the parts that I had but 1/4" may have been too flimsy. The exterior edges were rounded over with a 1/4" router and everything was rolled with two coats of Duratex.
The sampler is programmed in Go and is run on a Raspberry Pi 3B with a PiSound add on board. Button control is handled by a Teensy 4.0 micro-controller programmed as a USB MIDI device.
Eight sample trigger switches are mounted along with a pair of banking switches and three more switches for menu control. All switches are attached by screw terminals to the Teensy board.
There is also a 5" screen mounted to the top board for the user interface.
There is also a 1/4" bass signal pass thru with a bend knob for the sampler output. This is mostly a convenience feature when practicing on my own so that I can run bass and samples through a single amp. There is also a dedicated DI for the sampler output. The parallel out from the DI is run through an active buffer before the bass/sampler blend knob to avoid the bass signal from bleeding back into the DI signal.
There is also an isolated USB power adapter for the computers to help keep digital noise from creeping into the pedal power. The top is hinged and closed with velrco on the lower side for ease of access.
Pedal power and a shielded audio cable are routed from the main unit to the pedal board side. The bass signal plugs into a Byte Heaven SC-1 crossover pedal that feeds a high and low frequency signal chain.
The high chain is: Byte Commander -> Sub'n'up -> Black Secret -> Helix
The low chain is: Bass Sweeper -> Lo-Fi Machine
The high/low signals are summed by a passive 1K ohm loaded mixer cable and run into the Feedback delay pedal. The delay pedal is run through the bass pass-thru line back into the main unit.
Since the skinny pedals can make stomping on the correct pedal difficult, alternating pedals are raised up on 1.5" wood blocks and set back a bit to keep that from happening.
The two sides are connected by a strap hinge so that the whole thing scissors closed with a latch on the opposite side for packing up.
Power comes in through a fused switch with a standard D plug and there's also a breakout USB port for the Raspberry Pi. Also added some cable wrap hooks and a suit case handle for carrying.
The whole thing sets up and packs up in about a minute and is pretty light as well. I'm pretty happy with the build.
Last edited:


