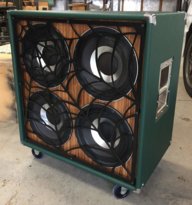
Assembly:
Once I sanded/filed/routed down the tenons to fit the mortises assembly went pretty smoothly. The pieces assembled nicely with a mallet and the bracing didn't require any clamping or any manual locating whatsoever. Some inaccuracy was introduced when I filed down parts of the tenons but it didn't seem to make much difference. I applied loads of PL premium to all joints and drove them home. It should be noted that PL premium is NOT a great glue for joinery like mortise and tenon or box/finger joints becase it's viscous and doesn't really flow into the joints that well. This can cause problems with air sealing in the cabinet. For that reason I caulked along the interior seams to compensate and create a seal.
Even with the difficulties I had with the mortise and tenon and exterior box joints I would still do it that way again. In fact I would do full box joints along the entire exterior. The cabinet is tremendously rigid and stout, I had not difficulty whatsoever getting all the pieces in the right place, and the box joints look fabulous with the finishing I'm doing.
View attachment 7272591
Here is the back panel bracing installed. Note the caulking.
View attachment 7272592
Here is the back panel viewed from the outside. Note the water stains and visible tenons. This all ended up cleaning up very nicely after sanding. The tenons are very visible in the finish but I don't mind. If anyone asks about them it just gives me an opportunity to brag that I know what a mortise and tenon is.
View attachment 7272596
Here is the damping foam. It's not shown but I also put foam in the mid chamber. The foam was too tall and would have pressed against the backs of the mid range drivers so I just cut the tips of the foam peaks off with a knife until it cleared the drivers. I attached the foam with spray adhesive. Make sure to spray some adhesive on a test piece of foam to make sure that it doesn't dissolve the foam.
Lesson learned: I think it would be better to cut all the pieces to size then set them aside and install them after assembling the cabinet. This design calls for several bracing pieces that span across the inside of the cabinet. I made these braces but forgot about them when I installed this foam. I have had to remove several pieces to make room for the interior bracing.
View attachment 7272593
Here is the box all clamped up. I installed the back last and I designed the mortise and tenon features with this assembly order in mind. You need to be careful with this type of joinery or you can accidentally make a box which is impossible or very difficult to assemble. It was kind of difficult to glue the back piece in.
Lesson learned: If I could go back I would design the cabinet so that the last panel to install is butting up against a perpendicular surface not a parallel surface. In my design I installed the back panel last but it had to slide into place between the sides, top, and bottom. This smeared the PL premium. I plan to caulk along the inside after finishing before installing the drivers so it's probably not a big deal but it could be improved.
View attachment 7272595
Here is the 5/16" round over. This was my first time using a router. It went pretty well but I would recommend getting more practice first. I burned a few spots by going too slower but it sanded out. The vertical edge shown here looks good but the other side is ratty from the water jet and the ratty edge was difficult to follow with the router bit. I ended up sinking the router too far in at one point. Oh well.