
There are 400w to 100w switch on 800c.I have gigging gear. I just want something decent for my practice room - bonus if I can grab it for an acoustic gig. Also looking at a used Ibanez Soundgear 35.

Enjoy the benefits of a premium membership!
Upgrade Account
-
TalkBass has been independent since 1998. Add your voice.
Create a free account to reply to discussions, view embedded media, and browse with fewer display ads.
Join free Log in
Want zero display ads or expanded classifieds tools? Compare plans.
You are using an out of date browser. It may not display this or other websites correctly.
You should upgrade or use an alternative browser.
You should upgrade or use an alternative browser.
More options
Who Replied?
I found the 40 too small in my house by myself. YMMV of course. Then after deciding to get a bigger Rumble, I did indeed talk myself into the 800. I love the 800, but if I were to do it again, I'd probably get the 200 over the 100--15 inch goodness, and can add a cab if feeling frisky.I have gigging gear. I just want something decent for my practice room - bonus if I can grab it for an acoustic gig. Also looking at a used Ibanez Soundgear 35.
Edit: The 400->100 switch @Yahboy mentions is what sold me on the 800.
I still loving how nice the tone from Rumble 200c + Vintage button ON + Pbass myself.I found the 40 too small in my house by myself. YMMV of course. Then after deciding to get a bigger Rumble, I did indeed talk myself into the 800. I love the 800, but if I were to do it again, I'd probably get the 200 over the 100--15 inch goodness, and can add a cab if feeling frisky.
Edit: The 400->100 switch @Yahboy mentions is what sold me on the 800.
But the 800c with Vintage button engage has slightly different vibe than both 200c and 500c , less bloom , more focus, firm and tighter low mid to my ear.

I though I posted a pictureThat’s my Rumble in the middle, in case you forgot.
Different picture, the Rumble on the bottom.
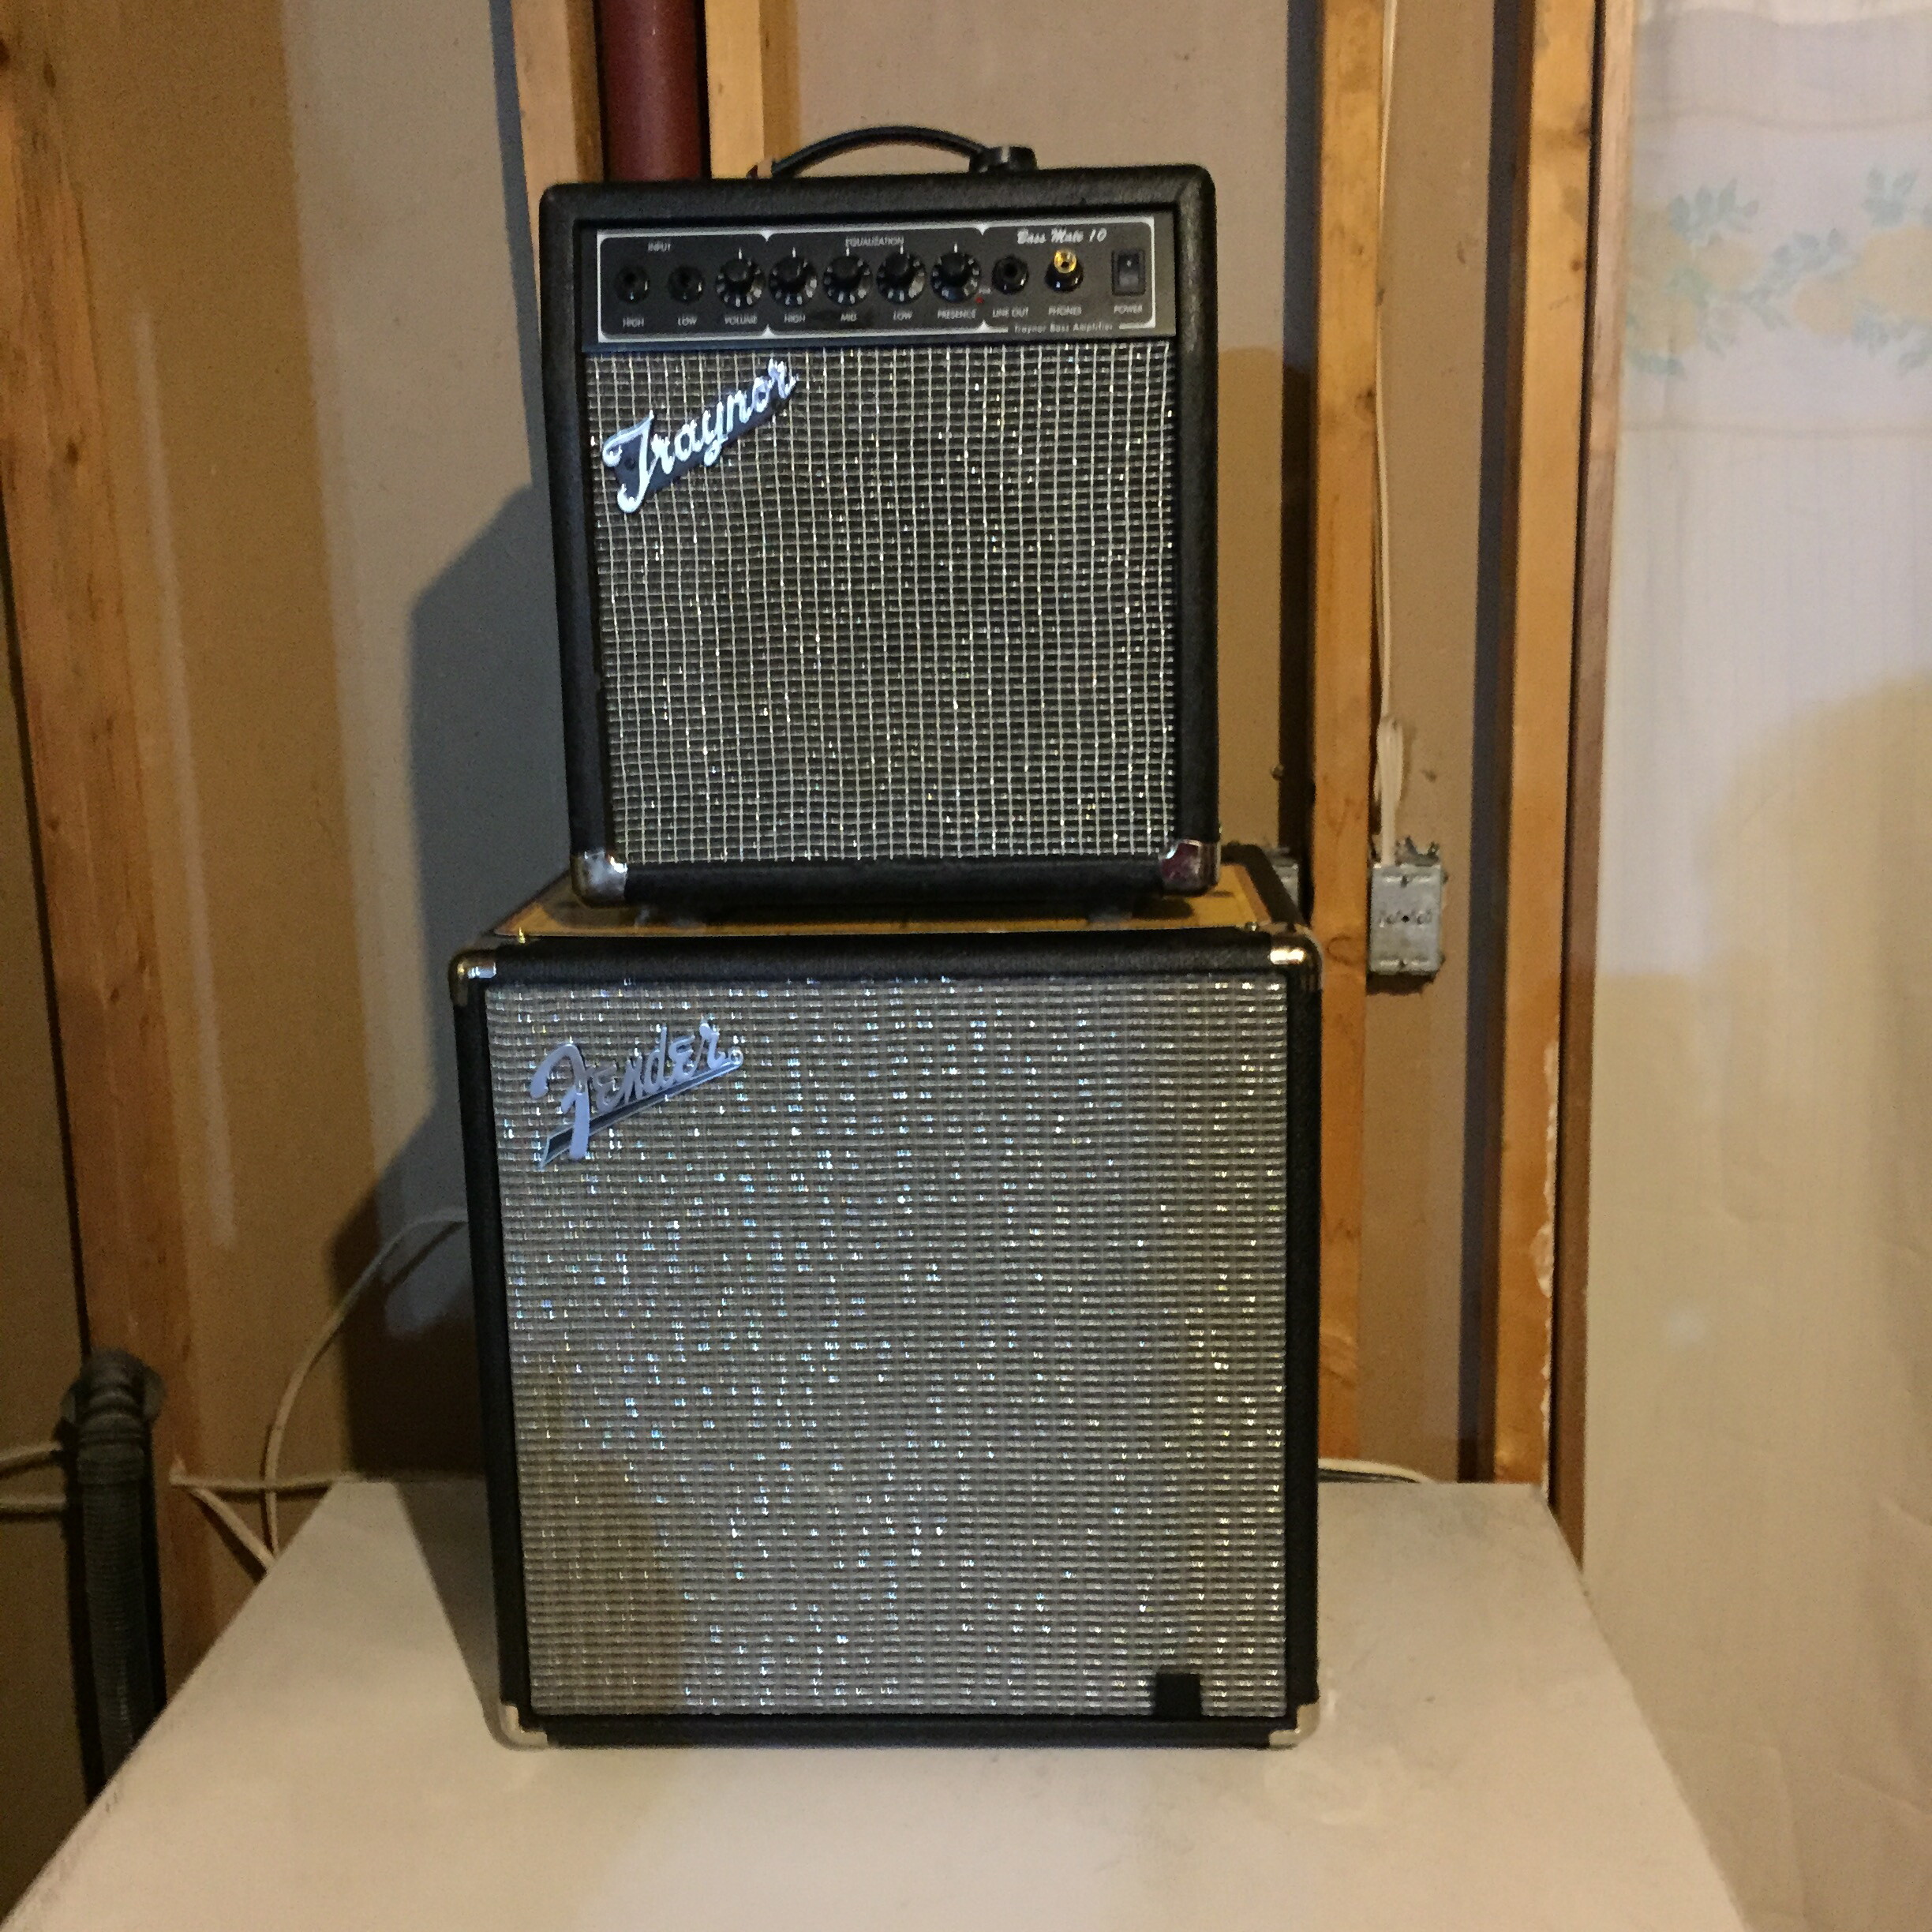

buldog5151bass
Kibble, milkbones, and P Basses. And redheads.
I have Rumble 500 and GK MB500 heads and a Revsound 212 and Rumble 210 and 112. I'm looking small.I found the 40 too small in my house by myself. YMMV of course. Then after deciding to get a bigger Rumble, I did indeed talk myself into the 800. I love the 800, but if I were to do it again, I'd probably get the 200 over the 100--15 inch goodness, and can add a cab if feeling frisky.
Edit: The 400->100 switch @Yahboy mentions is what sold me on the 800.
The 40 sounds fine—I just wanted a bit more volume, and an FX loop. I would expect finding a 40 in a local store to not be hard, so maybe go see if it seems to be loud enough for your needs. If it’s not, then sounds like the 100 will be OK for you.I have Rumble 500 and GK MB500 heads and a Revsound 212 and Rumble 210 and 112. I'm looking small.

I can attest that a 100 works great for in home practice and for playing smallish rooms or outdoor venues. Two is even better. 8^)The 40 sounds fine—I just wanted a bit more volume, and an FX loop. I would expect finding a 40 in a local store to not be hard, so maybe go see if it seems to be loud enough for your needs. If it’s not, then sounds like the 100 will be OK for you.

The 40 sounds fine—I just wanted a bit more volume, and an FX loop. I would expect finding a 40 in a local store to not be hard, so maybe go see if it seems to be loud enough for your needs. If it’s not, then sounds like the 100 will be OK for you.
Regret to inform you that the regular Rumble 40 does not have an FX Loop.

The Rumble Studio 40 has dual FX Loops for StereO!
Thanks for clarifying my imprecise phrasing. Yes, we have no bananas, er, FX loop on the vanilla R40.Regret to inform you that the regular Rumble 40 does not have an FX Loop.
The Rumble Studio 40 has dual FX Loops for StereO!

I can attest that a 100 works great for in home practice and for playing smallish rooms or outdoor venues. Two is even better. 8^)

I’ve used my Rumble 100 with bands for rehearsals, small indoor gigs, backyard parties, and even on July 4th parade floats (the later with PA support). It’s an overachiever for sure, and though I’m squeezing everything I can out of it the amp has been reliable and trouble free since I bought it new over 4 years ago.
Yeah, my 40 was from a Rewards program at work.
If it was my money, I’d probably have got the 100.
But both work for my purposes.
If it was my money, I’d probably have got the 100.
But both work for my purposes.

Okay, I know it's been too long! This project got sidetracked with other projects and life, in general!3.1 Stripping The Adhesive
It took some elbow grease to get the black spray adhesive off the lower back of the cab.
View attachment 7409658
I had to use the Acetone and an old t-shirt to strip the heavy layers of the adhesive off. Wet the t-shirt with the acetone and and scrub vigorously and the adhesive will ball up in little pills. Brush the pills off and repeat until you finally get all the heavy concentrations off.
*When using the acetone, do so in a well ventilated area (I had a fan circulating the air with the window open.), wear gloves (you really don't want that stuff to seep into your hands or dry your skin out) and no open flames (or powered electrical equipment. The Variac, buss strip and meter in the corner were unplugged).
4. Prepping The Cabinet
Next, I started sanding using an orbital sander with 60 grit sandpaper. Several areas still has a thin layer of residual adhesive. This residue will pill up as you sand. Just keep brushing it away and keep sanding until the surface is mostly clean and leveled. At this point you should be able to switch to an 80 grit paper and this should pull any remaining residue off the surface. Once everything is sanded, then I sand it again, this time with a 120 grit paper.
From here, I dusted everything off, in preparation for the next step.
View attachment 7409672
The bottom section in this photo is where that black spray adhesive was and is stripped down to the bare MDF. The remaining black is the flat black spray paint, inside the chassis compartment.
I have one spot on the cabinet that is going to require filling. It's at the bottom-middle of the front, below the grill opening.
View attachment 7409677
If you look closely, you'll see a crack radiating down and to the right from the gouge. I thinned few drops of Titebond with a a couple drops of water, mixed it with a toothpick and then worked a few drops off the toothpick, down into the crack. The thinned wood glue will seep into the crack through capillary action. I then took a couple pieces of scrap wood and a pair of clamps and pressed the MDF back in line.
View attachment 7409696
I will have to let this sit until tomorrow, then I'll be able to remove the clamps and fill the gouge with some wood putty. That should give me time to go to the hardware store to get some more wood putty, as what I had has dried out solid.
More to come...
While waiting on my Reliced Olympic White Precision I needed to make some workspace again, so I finally got around to finishing this project.
In my rush to finish this up, I did make some mistakes.
The first mistake was I applied the top and the back/bottom panels first, the I did the sides.
 This puts the seam on the wrong side and makes for a poor looking seam. This also puts the top chassis screw close to the seam, causing the vinyl to lift and twist as the screw was tightened.
Also, in my rush, I forgot how to cut the corners and they came out very poorly. By the time I got to the second side, I did better, but they were covered by the corner protectors. Aside from the top back corners, they are okay and are hidden from view. The top back corners and the control panel cutout.

The most noticeable is the seam twisted up around the screw. I need to find the correct size stainless steel screws and dress washers. That will help hide the squish. The outside radius didn't trim and line up neatly and made for the ugly slit.I do feel I did a decent job on the inside radius, around the input jack. I made the V-cut with a piece of Tolex inside the radius curve.
I did get the new port tube cut and installed tuned for the speaker. I installed it with some black RTV.

With the Eminence Alpha 8A.

And the completed conversion:
It's not bad, but not up to my standards. I do like the looks and the brown handle suits it well. I need to pull the corners and polish them.
As for the speaker, it sounds really good. I do want to go over to my buddy's studio and compare it to his kid's R25. To the best of my memory, it is deeper sounding and louder. The best I can remember, it sounds punchier and more articulate. I can't say for sure, but it seem to be that way.
I did do this change on a whim, for the fun of it and I don't regret doing it. It does look cool and, in my opinion, sounds better. Would I do it normally? Nah, it's still just an R25, but it is different. For now, it will go into my bedroom with my Ashdown Studio 8
I do have sufficient scrap wood/fall-off to make another frame and might have to see how it looks with my Oxblood grill cloth.

I sold the 40 Studio months ago. My musing about getting a broken 40 Studio to use the preamp+effect section was just that — musing.Sell the 40 studio, get the 800 stage along with extent 210 cab.
The price difference between 800 and 800 Stage gets a better (gasp!) multi-effect pedal and a lighter combo and makes the 800 Stage a really tough sell. At least for me, YMMV.
Okay, I know it's been too long! This project got sidetracked with other projects and life, in general!
While waiting on my Reliced Olympic White Precision I needed to make some workspace again, so I finally got around to finishing this project.
In my rush to finish this up, I did make some mistakes.
The first mistake was I applied the top and the back/bottom panels first, the I did the sides.
Also, in my rush, I forgot how to cut the corners and they came out very poorly. By the time I got to the second side, I did better, but they were covered by the corner protectors. Aside from the top back corners, they are okay and are hidden from view. The top back corners and the control panel cutout.
View attachment 7564549
The most noticeable is the seam twisted up around the screw. I need to find the correct size stainless steel screws and dress washers. That will help hide the squish. The outside radius didn't trim and line up neatly and made for the ugly slit.I do feel I did a decent job on the inside radius, around the input jack. I made the V-cut with a piece of Tolex inside the radius curve.
I did get the new port tube cut and installed tuned for the speaker. I installed it with some black RTV.
View attachment 7564551
With the Eminence Alpha 8A.
View attachment 7564557
And the completed conversion:
View attachment 7564567
It's not bad, but not up to my standards. I do like the looks and the brown handle suits it well. I need to pull the corners and polish them.
As for the speaker, it sounds really good. I do want to go over to my buddy's studio and compare it to his kid's R25. To the best of my memory, it is deeper sounding and louder. The best I can remember, it sounds punchier and more articulate. I can't say for sure, but it seem to be that way.
I did do this change on a whim, for the fun of it and I don't regret doing it. It does look cool and, in my opinion, sounds better. Would I do it normally? Nah, it's still just an R25, but it is different. For now, it will go into my bedroom with my Ashdown Studio 8
I do have sufficient scrap wood/fall-off to make another frame and might have to see how it looks with my Oxblood grill cloth.
Yay, Mad! I knew you could do it. I had faith in you.

So, I've linked this Completion as Step 5 of your "Recovering A Tolex Combo Cab" mod near the end of the Modifications section of your Rumble Club Wiki page, right above the Speaker Replacements section.


That amp looks REALLY good! Nice job!Okay, I know it's been too long! This project got sidetracked with other projects and life, in general!
While waiting on my Reliced Olympic White Precision I needed to make some workspace again, so I finally got around to finishing this project.
In my rush to finish this up, I did make some mistakes.
The first mistake was I applied the top and the back/bottom panels first, the I did the sides.
Also, in my rush, I forgot how to cut the corners and they came out very poorly. By the time I got to the second side, I did better, but they were covered by the corner protectors. Aside from the top back corners, they are okay and are hidden from view. The top back corners and the control panel cutout.
View attachment 7564549
The most noticeable is the seam twisted up around the screw. I need to find the correct size stainless steel screws and dress washers. That will help hide the squish. The outside radius didn't trim and line up neatly and made for the ugly slit.I do feel I did a decent job on the inside radius, around the input jack. I made the V-cut with a piece of Tolex inside the radius curve.
I did get the new port tube cut and installed tuned for the speaker. I installed it with some black RTV.
View attachment 7564551
With the Eminence Alpha 8A.
View attachment 7564557
And the completed conversion:
View attachment 7564567
It's not bad, but not up to my standards. I do like the looks and the brown handle suits it well. I need to pull the corners and polish them.
As for the speaker, it sounds really good. I do want to go over to my buddy's studio and compare it to his kid's R25. To the best of my memory, it is deeper sounding and louder. The best I can remember, it sounds punchier and more articulate. I can't say for sure, but it seem to be that way.
I did do this change on a whim, for the fun of it and I don't regret doing it. It does look cool and, in my opinion, sounds better. Would I do it normally? Nah, it's still just an R25, but it is different. For now, it will go into my bedroom with my Ashdown Studio 8
I do have sufficient scrap wood/fall-off to make another frame and might have to see how it looks with my Oxblood grill cloth.
Although it was probably not your intention, the slightly uneven look of the tolex gives it an "aged" appearance. Along with the grille cloth and logo, the amp looks "period-correct" for the early 60s.
It would look great on a stage!
But... that black webbing hanging off the bottom of the grille, that has GOT to go ...

Maybe try what I did when I made replacement grills for my R200 and R100 amps?
(Link to my post: https://www.talkbass.com/threads/fender-rumble-club.1118826/page-2910#post-28645376 )
I shortened the pull tab so that it doesn't quite reach to the front edge of the cabinet.
The webbing makes a "loop" that's just large enough that I can insert a small screwdriver to use as a handle to pull the grille loose.
You might be able to find some webbing (or heavy fabric/canvas) that is less visible than the black.


