• TalkBass has been independent since 1998. Add your voice.
    Create a free account to reply to discussions, view embedded media, and browse with fewer display ads.
    Join freeLog in
    Want zero display ads or expanded classifieds tools? Compare plans.

Finished Custom Paint Job

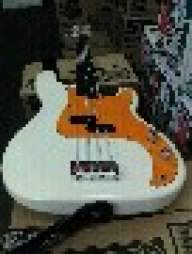
Hi guys! So i finished my custom paint job a few weeks ago and I thought it about time I upload it. The only thing that bugs me is the 'orange peel' effect because of it being paint in a spray can and this effect really shows in certain angles of light but hey, it's my first time!

Because of attachment limits etc, I can only upload two photo's so the one is where I started to sand it and has its original colour and the other is the finished work.

Let me know what you think!

Also, because it's a cheap beginner bass, would it be worth changing the pickups for something better like EMG's because right now it sounds awful XD
 

Attachments

  • DSC_0650 (1024x768).jpg
    DSC_0650 (1024x768).jpg
    65.6 KB · Views: 132
  • DSC_0689 (1024x768).jpg
    DSC_0689 (1024x768).jpg
    61.1 KB · Views: 178
That's a unique color; I like it! I can't see that much detail in the picture, but it looks like you did a good job. Lots of people do pickup swaps on cheap instruments, and some people even do them on very expensive instruments! If you like your bass, then it's certainly worth upgrading pickups, and I think you'll find it makes quite a difference. Then, you'll like it even more.
 
We, the colour was custom made. It's royal Caribbean blue which actually isn't made anymore. I did buy a white pearloid pickguard for.it but it looked horrible. I really like the black and blue anyway. I think it just needs a good pair of pickups and a lower action.
 
Looks good. :)


As for the orange peel texture. That doesn't really come from the fact that you used spray cans. You have just skipped the last step in painting: Wet sanding. ;)

Every good finish require a light sanding to make it completely flat. You also need to polish the paint after sanding (the paint will have a matte texture after sanding which looks horrible). It's a lot of work, but worth it IMO. Just make sure to practice on a painted scrap piece of wood to see how the paint behaves. :) Search around here on TB and you'll probably find lots of info on this topic.
 
If you want to change pups and don't want to spend a fortune may I suggest Axesrus in the UK?
You can buy a good upgrade for around £26.00. You may want to change your pots at the same time - these are cheap (but not as cheap as the ones fitted as standard to low-end instruments:D).

Shielding the cavity properly on a low-end instrument makes a big difference too, as does the action height. Even an inexpensive instrument can sound good and play nicely with a bit of tweaking.

I like the paint-job. Take a look around this forum for more paint advice - there's plenty, and some amazing finishes on show - some done with a spray-can.
 
The color looks great! Did you use a clearcoat over it? Could he use polish right on the paint if he didn't clearcoat it?

Also, did you sand it all the way down? What did you use to sand it? I'm wanting to do a repaint of an older squier I have but am having anxiety about sanding on the body.
 
Oh, yeah, you will need a clear coat. (Several coats, actually)

Clear coats are especially important on metallic paints. Metallics won't look very good at all without a clear coat, it will only look dull and rough because of the particles in the paint. Just remember to NOT sand a metallic paint. Ever. When painting with metallic paint you simply lay down the color (on top of a primer as usual) and then coat it in several coats of clear, THEN you can sand it flat and polish. If you sand directly on the metallic paint you will cut down the particles that make the paint sparkle.

Also keep in mind that you will need more clear coats on metallic paint than on normal paint. This is because you have to bury all the metallic flakes in clear lacquer.
 
Yep, a I did exactly as you just described! Primer, paint, clear coat. Also used T Cut as polish.

And to Airskank, I didnt have to take the paint completely and utterlly off so it was bare wood. Just enough to take off the clearcoat etc. Oh, and for sanding I used a 'sanding bloci' which is.just a block of wood to wrap sanding paper around, although I would suggest getting a proper made of rubber so.it curve to any curlers in the bass body itself otherwise you have to use the palm of your hand to get any contours or curves. Just remember to sand in one direction. Better to go from the top of the body to the bottom and back up etc etc.