• TalkBass has been independent since 1998. Add your voice.
    Create a free account to reply to discussions, view embedded media, and browse with fewer display ads.
    Join freeLog in
    Want zero display ads or expanded classifieds tools? Compare plans.

Fretless 5 Comp, Drake Custom build

Drake Custom

Commercial User
Aug 24, 2010
440
1,082
Iowa
www.drakecustombass.com
Disclosures
Builder/Owner:Drake Custom Bass Guitars
I have been busy with other projects and just now am getting around to my build. I have seen many of the other builds and am very impressed with the designs I have seen. I already see a couple builds that have my vote. At this point I am just trying to make something that will be fun to play.
I decided to use only wood that I have laying around the shop. As I do not have any suitable stock in the shop, I dug through the scrap pile and squared up some left overs from some other custom builds.
You can see my basic shape that I am going to use. I plan to make a center block style with laminated body wings. The neck will have binding and the FB will have fretlines.
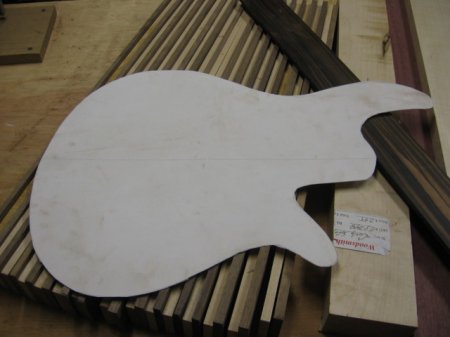
02-003.jpg


I know what some of you are thinking...
Cripes, here comes another bass with stripes! Oh well, I will probably go with a Zircote FB too so be nice.
02-001.jpg


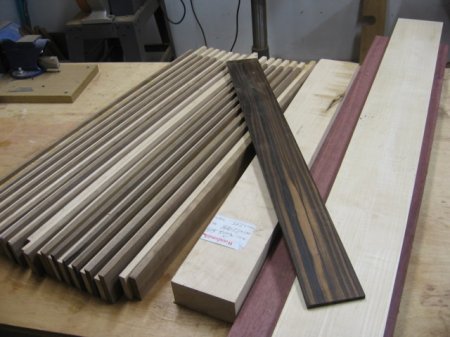
As you can see here, I have some scrap pieces of Maple and Walnut (I have machined them down to a uniform thickness before the photo), a piece of Curly Maple and a piece of Purpleheart from another project, a Curly Maple neck blank that I made in January of 2010, and a Macassar Ebony fretboard that I made two quite a while ago. Like I said, I may switch the fret board out for Zircote.
02-004.jpg

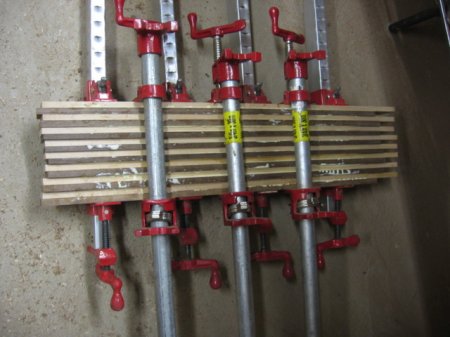
I started by glueing the thin pieces together to form one of the two body wings which will be attached to a center block of Curly Maple.

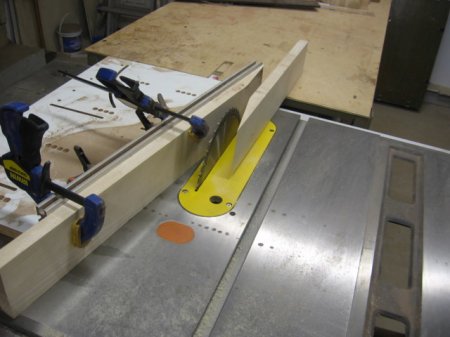
For those who have seen my builds before know that I use scarf joints in my neck construction. I glue my headstocks onto the end and not under the neck blank like some do. I like how the fret board over-lays the joint and it seems to be stronger. The next two pics show the jig I use and the glue up in progress. The neck blank is made of two pieces of quarter sawn wood for strength. I buy kiln dried Maple, make it into thick blanks, let them dry a year, and then machine them down to size just before the build.
02-005.jpg


02-007.jpg


I will next make a center block and glue the other body wing together. Thanks for checking out my build.

 
Ok another post of my progress on my entry into the fretless 5 comp. Thanks guys for the comments. Some of your builds put mine to shame so I decided that I would throw another change into my plans. I was going to just have the stripes with a center block but I have abandoned the idea and decided to make a top for the bass instead. I have also changed the shape a bit to make this bass like my last 4 string build with the ball style upper horn. I am still only going to use the materials stated at the start of the build. I am challenging myself to stay with that idea so no surprise fancy woods are going to show up in this build. Sorry.

As you can see here I use my famous "tonewood":D toothpicks to line up the headstock wood to the rest of the body blank. It keeps the piece from moving about when clamped with glue. I plan on doing a "One hundred and one uses for toothpicks" thread down the road.
02-006.jpg


And here you can see the headstock being clamped up for drying.

02-007.jpg


Next I am building the other body wing using my toothpicks to make sections that will be glued together later. I work by myself most of the time and when I have to glue up a bunch of small pieces they always want to move around and squish out of the clamps. I know that the most prudent course of action would be to glue a few at a time but I am not good at waiting around and March is coming on fast. So I start by clamping four or five pieces together and drilling a small hole through them. I then place a tooth pick through the hole. I make three of these "stacks" and set them aside. Then I disassemble them in order and leave the last one with the toothpicks sticking up. Then I quickly glue and stack using the toothpicks as a guide and to hold the group together until I can get them into the clamps. I place the toothpicks in the waste areas and trim off the ends so that they don't prevent the pieces from joining together smoothly. I also use the toothpicks as the soft wood does not hurt my blades or bits when I have to cut through later on. Awhile back I used staples that I cut off to form tines but after I hit one with an expensive router bit, I swore off the staples.

02-041.jpg

02-043.jpg


Fast forward a day and you now see me planing down the old body wings getting them nice and flat so that I can resaw them and open them up bookmatch style.
03-001.jpg

03-003.jpg


And here I have layed the pieces of both "bookmatched" wings out and glued them together to form a large two toned top. I took care in using my jointer to true up the edges and to make the lines a more uniform thickness as to not disrupt the pattern. I also joined the Walnut stripes to Walnut stripes as the darker wood hides the glue line better.
You may think that all of this is not very impressive....well it isn't, but I have another change in mind that I will show next time. Any guesses on what I will be doing?
03-015.jpg
 
Back agian. As you can see I am cutting the large top into angled strips so that I can make them into a sort of Heringbone type pattern. This will be a thicker top that I can safely carve with lots of contours.
03-016.jpg

03-023.jpg


03-017.jpg

Here you can see the basic look of the top on a bass body. Please note that this template is not the shape I will be using as I will be drawing out something different. This is just to show the pattern.
Yes I do see the one stripe that is a bit wider than the rest. It is at a seam where two pieces of Walnut are joined. I think that both edges where on the out side of the blank and maybe a couple of the pieces did not get properly sized so that when I glued up the wing the out side pieces squished in a little. I knew that some of the pieces were thicker than others but I might have missed one that tapered thinner than I wanted. It is what happens when I use limited scrap material. The seams are all tight with no gaps so at least the structure will be sound. I think that as the body gets cut out it will be less noticeable. We will see. Hey, they can't all be zingers.


03-022.jpg

Here comes the Purpleheart board that I am going to use for the back side of the body. This is some wood that I have had around the shop from another build and I wanted to use it up on something cool. It is quatersawn and has a light curly figure to it though it may not show in the photos. It is a little shy of an inch thick and here I have it cut into two pieces for a two piece body.
I then draw out my shape onto the top pieces and cut out the basic shape of the body. Then I layed each side onto it's piece of Purpleheart and traced around them so that I can cut the back to match the top. I do this for a reason. When I clamp the top down I like to put my clamps right over the outside edge of the actual bass as to ensure that the seam is tight and that the glue line is minimal. My clamps will not reach across a large area to reach the area I want to clamp so I cut out the basic shape leaving plenty of slop. Note that I leave several flat areas in the back wood. These are so that I have a flat surface for my pipe clamps to hold on to when I join the two sides of the body.


03-025.jpg

Then in order to glue the body down without the top sliding around, I use my trusty tooth picks to act as an anchor. Notice the pencil line on the top in the picture. That is the outside of the bass. I drill the hole for the tooth pick in the waste area. I do this on both ends.


03-027.jpg

I insert a toothpick and lift off the top.

03-028.jpg

Here you can see how the toothpick acts as a guide to line up the top with the back and to hold both pieces in place during the glue up.


03-034.jpg

And now the one side is in the clamps and is drying. I will do the other side the same way. This may not be the prefered way to do this but it works for me as I am a low-tech type of a guy.

Thanks for checking out my post and for those in the competition, keep up the good work.
 
04-006.jpg

Now to glue up the two sides to make the body. I first use my jointer to true up the edges for glue. I then put the two sides into the clamps to get them all set and to line up the stripes just the way I want. If you look in the lower left hand corner you can see that I again use a toothpick to center the two pieces together. There is a coresponding hole on the other side to receive the toothpick. This way my stripes will all line up with each other and this prevents one side from rising up during the glue up. I left the long extention of wood in front of the future neck pocket just for this purpose.

04-007.jpg

Now you see the body in the clamps with glue. I will let her sit most of the day.

05-002.jpg

After the glue had set up I removed her from the clamps and took her to the band saw to cut the rough shape out. I leave the area around where the neck pocket will be so that I can attach my template for cutting out the pocket. I will make the neck first before I do that as I make my pocket templates for each neck.

05-003.jpg

The bahookie.

05-005.jpg

She is starting to look more like a bass.

03-031.jpg

Now I move on to the peghead veneer. I have plenty of the striped top wood laying about so I cut it down and flattened the sides for glueing and clamping. Yes that is a toothpick you see holding the two sides level so the stripes line up.

04-002.jpg

A few hours later I ran it through my planer to achieve a thickness of about 3/32 of an inch. I then cut it down to the right size to overlay my peghead.

04-003.jpg

In the clamps being glued down.

Next I plan to slot and line the finger board as well as route the truss and carbon fiber channels. Maybe I can get the finger board glued on too. I will also be routing out the electronics cavity and pickup holes if I have time.

Thanks again for looking at my build.
 
Through the planer at 3/32"? Damn Drake, with the grain turned like that it takes some gumption. Cool build. I find myself sitting here thinking through all the ways you could cut that top to get different patterns.

I see that you matched the herring bone pattern maple/maple and walnut/walnut instead of contrasting like you originally laid it out. Any particular reasons or just personal preference?
 
Thanks Guys.

I too have been thinking of all of the possibilities with the herringbone type stripes. I could counter saw and keep zig zagging the patttern all of the way across the body or do something like an adaption of a checker board scheme. That would require some prep work. I have three builds going on so I decided to keep it simple.
Correction on the peghead thickness. I rechecked and show about 1/8 of an inch. My planner says that it can go to 3/32 and I bottomed it out making the veneer so I assumed that it was 3/32.
As far as the pattern not being a true herringbone, well there is a reason for my change. Remember I was going to have a striped bass with stripes running lengthwise down the body seperated by a center block. I had to make sure the Walnut/Maple billets would be wide enough to cover the body wings so I did not plane every piece to the same thickness as I would not have enough width when I was done (I only had the limited amount of scrap wood for the wings). I just trued up pieces so that they were uniform enough to make a pattern that would be matched on each side of the center block. Then I changed my mind after I glued up the striped billets and thought about doing the herringbone idea. Problem was that the stripes would not be perfect matches (widthwise light to dark) and would not look right to me. When I resawed the billets I noticed the stripes line up perfectly on the center line but only as chevrons and not as a herringbone pattern. I will do this again someday and will do the herringbone pattern then. I learned some cool things for future builds doing this project.
 
Hey everyone,
I had some issues with my fingerboard over the last few days. I had purchased a Zircote fingerboard awhile back and I was going to use it on the fretless but I noticed it has checking through the first 5 inches and is unsuitable to use as a fingerboard for this project. Things happen and I decided to order a Gabon Ebony board from a trusted source this time. I know I said I was going to stick to the materials I had at hand but I had nothing suitable for a finger board, so I had to put $36 into new material. I hope it will be here by the 1st of Feb.
Since I can't show the process I use to do lined fretless boards, I will move to the truss rod and carbon fiber installation. I am sure there are many ways to do this that are acceptable but this is the easiest way I have found to do this.


06-002.jpg


First I use a flat rasp to flatten the peghead veneer where it sticks up past the surface of the neck blank. I get it as smooth as I can and then run the surface over the jointer to level everything. I checked for square and everything seems to be OK.

06-004.jpg

Next I use my carpet tape to stick the neck blank down to a very flat surface like this table saw.

06-005.jpg

Here you see the neck blank fixed in place. I put it over to the edge of the table so my guide will run smoothly along the side of the neck blank without touching the table top to keep the router from leaning as my guide is a little deep.

06-011.jpg

Then using these 3 bits I make my channels. The first is a Stewmac 3/8 bearing bit (the bearing is not needed for this but it is a good carbide bit for doing what I need here). A 1/4 inch straight bit as my truss rods are 1/4 wide. And a special stewmac bit matched for the carbon fiber rods that were also purchased from Stewmac.

06-008.jpg

Next I measure each componet to get the depth each channel needs to be.

06-009.jpg

I then make marks on the side of the neck blank to mark the depths.
06-007.jpg

I have penciled out the neck profile on the face of the blank to help visualize where everything will go. I lay out the positions of the componets and mark them.
06-006.jpg

I then set up my router and edge guide to cut the adjustment section of the truss rod. I use the 3/8 bit for this. I position the bit directly over the center of the blank and lock the adjustment screws on the edgeguide. Before this I did checked the depth against the marks on the side of the neck blank marking the adjustment section (of the truss) depth. I dropped the bit down to the correct height and set the depth stop on the router. A few passes later, that section is cut. I switch out the bit with out touching the alignment. I then checked the depth of the second bit (1/4) against the mark on the neck blank for the main length of the the truss rod. And then cut it in several passes.

06-010.jpg

Here is the completed channel for the truss rod. I put the rod in it's channel to check fit before moving on to the carbon fiber rods. I do the same process for each of them.

06-012.jpg


Here the rods are in place and everything fits good. I use a metal rule to make sure there is no gaps or high spots that will mess with the fingerboard install.

06-014.jpg

Next, to lock the rod in place i use a 3/8 wide piece of soft Ash to make a stop block. I used a rat tail file to round the under side to match the truss shape. It is glued in place and when the glue is set, I will use this sharp chisel to remove the excess wood and make the stop block flush with the surface of the neck blank.

06-013.jpg


You can see here that the carbon fiber runs the length of the neck. The second line is where the 24th fretline will be and where I will cut the neck blank off.

I have the cavities routed in the body and will show those next time. I also hope to have my new fingerboard and be able to show my fretline process.

Thanks for checking this out.
 
It has been a while since I last posted and I have gotten behind with the updates. I finally got a new finger board in as the last one showed up in two pieces. These things happen and Stewmac was great with the return process. I will cover my method of fret/finger board construction, glueing the FB onto the neck, and lining the fret slots. I will also show how I get the neck taper using templates and my router. I am sure all of my techniques have been done before but hopefully some of my pictures will be of help to someone.

09-005.jpg

Here is my new Gabon Ebony finger board. I have trimmed it to a shade under 3 inches wide.

09-006.jpg

Next I will mount it onto this metal scale template with carpet tape.

09-008.jpg

Then the template and finger board go into my miter box. This is the Stewmac version of the fret slotting miter box and saw. They seem to work great and I have not had any issues with it.
I have my FB stuck on the template back a little as this is going to be a medium scale bass so the first fret will actually be the nut. I will now saw each fretslot as I would with any fretted instrument.

09-010.jpg

Don't forget to collect the Ebony dust as it comes in very handy as filler for inlay work.

09-012.jpg

Next it is time to glue the FB onto the neck blank. I use my toothpicks again to keep the FB straight on the neck. I marked the center points and clamped the FB down. I then drilled the small holes in the waste portion of the FB. Inserting the toothpicks into the holes makes perfect guides and pins to hold the FB straight during the glueing.

09-016.jpg

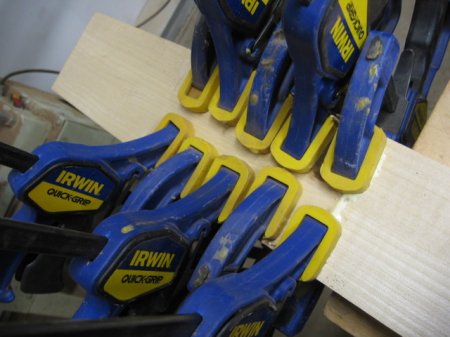
Then I applied the glue and used about 1000 clamps to hold the FB in place until the glue is dry.


NEXT DAY
09-022.jpg

OK, from here until the end of this post is about 2 hours worth of work. I need to make some wood "lines" to mark the
finger board. I start by slicing thin strips of this Maple veneer.

09-024.jpg

Then I have penciled the taper onto the finger board so that I can see how long each fretline needs to be. I did not worry about cleaning up the FB surface first as the whole mess gets gets leved and radiused later. I cut each line long so that it extends past the edge of the FB. I cut and fit them all before I start to glue.

09-027.jpg

I then superglue all of the strips into their slots and let the glue dry. Some NCF speeds things up a bit.

09-028.jpg

Here they are all glued.

09-029.jpg

I use a wood sanding block and coarse stikit paper to sand the lines down flush with the FB. I then repencil my neck taper lines and center line and saw out as much of the waste with my bandsaw. This is so that the router will not have to work as hard.
09-030.jpg

I attach my template to the face of the FB with carpet tape and then mount the whole neck assembly onto a thin piece of scrap to give the neck some clearence with carpet tape. I then mount everything to the top of my table saw with...you guessed it, carpet tape. "Most human problems can be solved by an appropriate application of carpet tape".
Da Vinci, I think?

09-031.jpg

Using this 3/4 inch bearing bit I will trim the taper out of the blank.

09-032.jpg

So then, lets get to routing.

09-033.jpg


Here is the end result. I am thinking of binding the FB with Curly Maple. Pros are that it looks cool and clean. Cons, it is nice to be able to see the side of the fretlines as reference points while playing and binding would hide that. Any opinions of what you would like to see?
Thanks for checking out my build.
 
You can take your maple binding strips, before installation, and slot them from what will be their outer edges, making sure to leave a uniform remaining depth. Then fill the slots with ebony veneer. When you install them you will then get a beautiful double binding effect from the front, as if you had laid one continuous white strip and one with black lines.
 
pilotjones said:
You can take your maple binding strips, before installation, and slot them from what will be their outer edges, making sure to leave a uniform remaining depth. Then fill the slots with ebony veneer. When you install them you will then get a beautiful double binding effect from the front, as if you had laid one continuous white strip and one with black lines.

That may be the same thing barnacle was suggesting, not sure.
 
Thanks guys. I like it and think I will give the alternating light vs. dark positon lines a go. I like to try something new every time I build one of these things. Until 2 months ago I had never bound a neck before and now I am always binding, so this will be a nice new tactic for me to add to my arsenal provided it turns out Ok. If it doesn't...well anything can be fixed.
I have some figured Maple to make up the binding and I have tons of Macassar Ebony veneer to make the small slivers. I will probably put in some dark side dots in the standard positions like a fretted bass would have. I usually do that on lined fretless basses anyway.
 
...I am thinking of binding the FB with Curly Maple. Pros are that it looks cool and clean. Cons, it is nice to be able to see the side of the fretlines as reference points while playing and binding would hide that. Any opinions of what you would like to see?
Thanks for checking out my build.

I'm probably late... anyway... Here's my POV. A binding would look very nice on an unlined f/board. But if one needs a lined f/board then the reference points on the side are indeed helpful.

If the white/black against black/white thing becomes tricky to see, then it defeats the purpose of having a lines f/board in the first place. The idea is cool. But I would want to test it before committing ;)

BTW, this is a very nice build and I like what you're doing with the arrangement of the contrasting woods. Really cool! Nice pictures too :)

ps: side dots are a good thing on lined f/boards