- Aug 24, 2010
- 440
- 1,082
- Disclosures
- Builder/Owner:Drake Custom Bass Guitars
Thanks guys for the great advice and opinions.
I decided on a course of action and we will see if the results were worth it. I went back and forth a few times but I figured that since this is not a customer build, the worst thing that could happen is that I would have re-work some things and maybe not get finished in time. As of now it looks as if I will have this bass done by the end of the month so I have some time.
Just to refresh everyones memory I decided to extend the fretlines out into the binding. I had some very fragile pieces of Maple binding laying around so I will use them. I needed to be able to slot the very thin pieces to match the lines on the finger board. Here is how I did it.
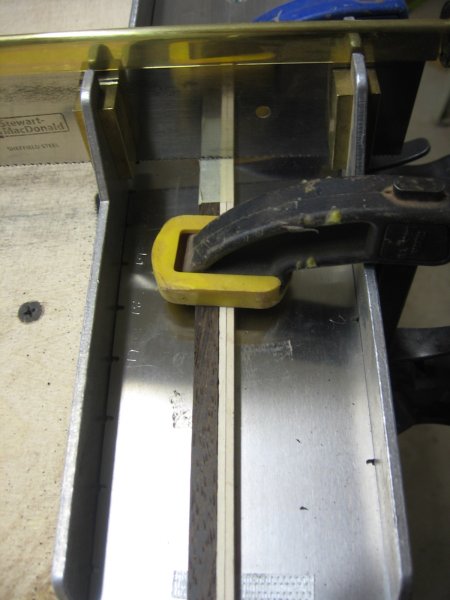
I taped the two pieces of Maple to a scrap piece of Wenge to make everything rigid and as straight as possible. I then used my carpet tape to stick the pieces to my scale template. I used some squeeze clamps to hold things still but I also had to pinch the pieces together with my fingers as I carefully sawed the slots. Note to self: Put the two pieces between two pieces of scrap in the future. I got in a hurry and that is bad but it turned out OK. After I was done slotting the Maple strips I had to remove them from the carpet tape. They are even more fragile with the slots cut through them especially in the upper regions of the FB. I used Naphtha dripped onto the carpet tape to disolve the adheisive. They then lifted out just fine.
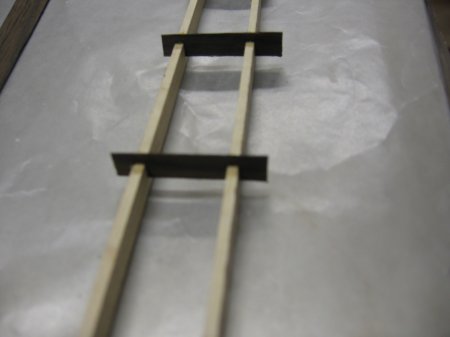
No I am not building a model train set but I am filling the slots with veneer to make the dark portion of the fretlines. This was the best way I could think of to do this. I thought about filling the slots with dust and superglue after the strips were glued to the FB but if glue hardened in the slots that would be a pain in the butt.
I put a small bit of superglue in each slot and slid the Macassar Ebony veneer pieces into the slots. Only once did the glue set up before I could get the piece firmly seated.
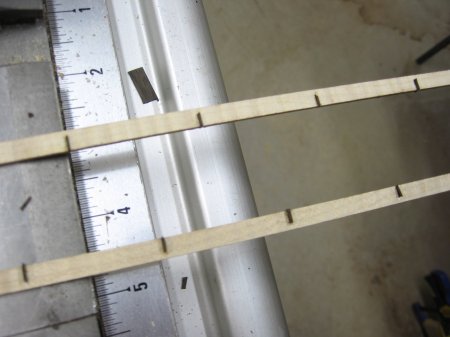
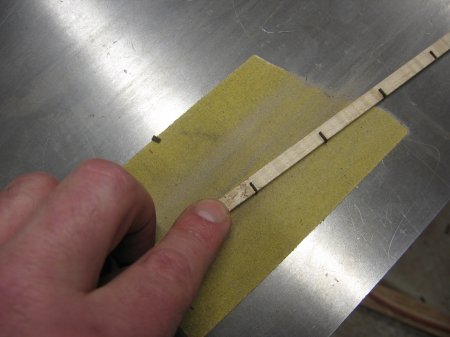
After the glue dried (with the help of NCF) I used some very sharp scissors to cut the Ebony off as close to the binding as I could. The part of the Ebony that stuck up above the binding was easy as it snapped off cleanly as the grain ran in favor of that way. To sand back the lines flush with the binding I stuck some stikit sandpaper to my table saw surface and sanded as you see above. Since the glue and veneer has been added the binding strips are rigid again and easier to work with.
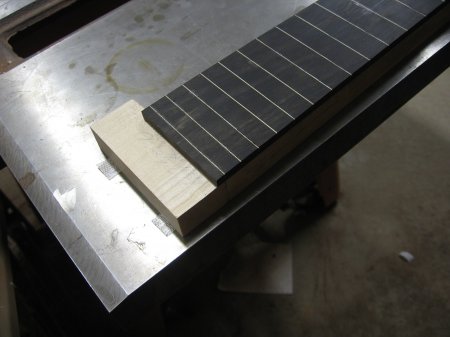
Now to channel the FB to receive the bindings. I secured this piece of scrap (cut off from the same neck blank as to match thickness perfectly) with carpet tape to keep my bit from chewing up the FB when I run out of neck. I had to find this out the hardway back when I first tried binding. The neck is also secured with carpet tape.
Side note: I almost think that one can build a bass with nothing but glue, toothpicks, carpet tape, and a router. Maybe a good build-off some day.
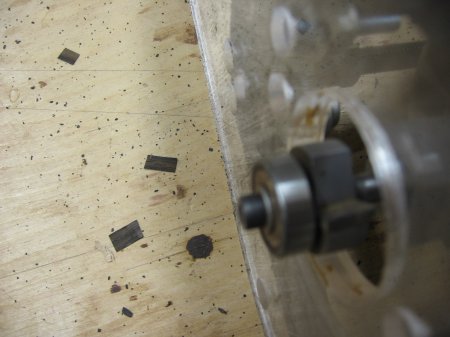
Here is the bearing bit that I used to make the channel. It can be bought through Stewmac. It is set to route the channel to match the binding I have.
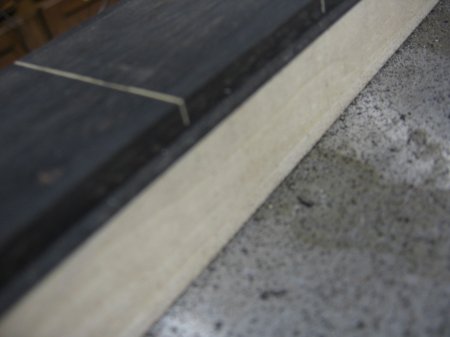
Here is the finished channel. A bit blurry but you get the idea.
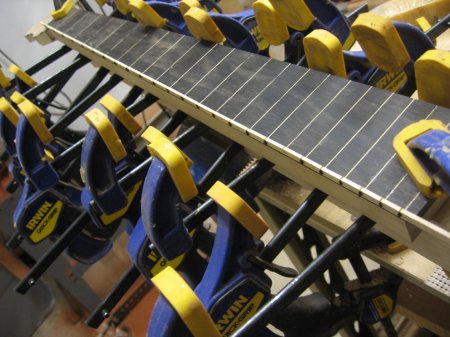
Here is my new invention that holds my squeeze clamps in line so that I can apply wood binding. I spent way too much time making this thing but it worked for this time. I probably will go back to the tape method as this was a pain to set up.
You can see the slot that did not get filled with Ebony veneer. I fixed it before the glue up of the binding.
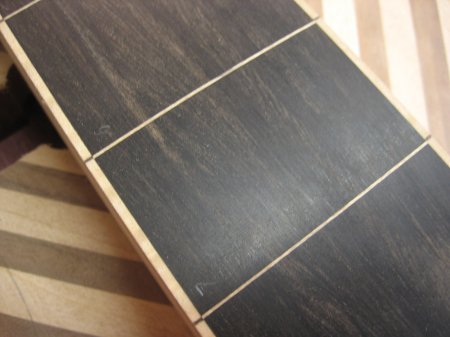
And here is a close up after the glue has dried and I radiused the FB down.
Next time I will show the routing of the cavities and neck pocket. I have already completed the work so I know how it turned out. It turned out.......
Thanks for reading my post. Thanks for the comments and feedback.
I decided on a course of action and we will see if the results were worth it. I went back and forth a few times but I figured that since this is not a customer build, the worst thing that could happen is that I would have re-work some things and maybe not get finished in time. As of now it looks as if I will have this bass done by the end of the month so I have some time.
Just to refresh everyones memory I decided to extend the fretlines out into the binding. I had some very fragile pieces of Maple binding laying around so I will use them. I needed to be able to slot the very thin pieces to match the lines on the finger board. Here is how I did it.
I taped the two pieces of Maple to a scrap piece of Wenge to make everything rigid and as straight as possible. I then used my carpet tape to stick the pieces to my scale template. I used some squeeze clamps to hold things still but I also had to pinch the pieces together with my fingers as I carefully sawed the slots. Note to self: Put the two pieces between two pieces of scrap in the future. I got in a hurry and that is bad but it turned out OK. After I was done slotting the Maple strips I had to remove them from the carpet tape. They are even more fragile with the slots cut through them especially in the upper regions of the FB. I used Naphtha dripped onto the carpet tape to disolve the adheisive. They then lifted out just fine.
No I am not building a model train set but I am filling the slots with veneer to make the dark portion of the fretlines. This was the best way I could think of to do this. I thought about filling the slots with dust and superglue after the strips were glued to the FB but if glue hardened in the slots that would be a pain in the butt.
I put a small bit of superglue in each slot and slid the Macassar Ebony veneer pieces into the slots. Only once did the glue set up before I could get the piece firmly seated.
After the glue dried (with the help of NCF) I used some very sharp scissors to cut the Ebony off as close to the binding as I could. The part of the Ebony that stuck up above the binding was easy as it snapped off cleanly as the grain ran in favor of that way. To sand back the lines flush with the binding I stuck some stikit sandpaper to my table saw surface and sanded as you see above. Since the glue and veneer has been added the binding strips are rigid again and easier to work with.
Now to channel the FB to receive the bindings. I secured this piece of scrap (cut off from the same neck blank as to match thickness perfectly) with carpet tape to keep my bit from chewing up the FB when I run out of neck. I had to find this out the hardway back when I first tried binding. The neck is also secured with carpet tape.
Side note: I almost think that one can build a bass with nothing but glue, toothpicks, carpet tape, and a router. Maybe a good build-off some day.
Here is the bearing bit that I used to make the channel. It can be bought through Stewmac. It is set to route the channel to match the binding I have.
Here is the finished channel. A bit blurry but you get the idea.
Here is my new invention that holds my squeeze clamps in line so that I can apply wood binding. I spent way too much time making this thing but it worked for this time. I probably will go back to the tape method as this was a pain to set up.
You can see the slot that did not get filled with Ebony veneer. I fixed it before the glue up of the binding.
And here is a close up after the glue has dried and I radiused the FB down.
Next time I will show the routing of the cavities and neck pocket. I have already completed the work so I know how it turned out. It turned out.......
Thanks for reading my post. Thanks for the comments and feedback.




 . Very nice work