
Enjoy the benefits of a premium membership!
Upgrade Account
-
TalkBass has been independent since 1998. Add your voice.
Create a free account to reply to discussions, view embedded media, and browse with fewer display ads.
Join free Log in
Want zero display ads or expanded classifieds tools? Compare plans.
You are using an out of date browser. It may not display this or other websites correctly.
You should upgrade or use an alternative browser.
You should upgrade or use an alternative browser.
Fretless five competition: Mad scientist edition
- Thread starter Big B.
- Start date
More options
Who Replied?
I am curious why you guys think the truss rod cover is too thick? The strings will clear the top of it if you were concerned about the function of it. If I were using a plastic cover or something unattractive I would probably make it thinner but since it looks so nice I like the extra profile it adds to the headstock. The other thing is that the magnets require the cover to be a certain thickness as well and I would hate to sand through to the magnet.
The other option would be to inset the cover into the headstock but then the accent lines on the bottom would be covered and that is not going to happen.
I have used thick covers like this in the past and while it looks a bit odd now once the machines and strings are in place it will blend in nicely.
As far as the EMG pickups go I am not completely happy with the eq potential for the kind of sound I like. I found that I was really boosting the lows and almost completely cutting the highs. They are really great for getting a super clean sound but I had a hard time getting the fatness I look for.
I think it might be a matter of aesthetics. Like if you rounded it out more instead of having that sharpish beveled edge so that it fit the more organic look of the rest of the bass, it might work better.
I, personally, like the truss rod cover and think it will look fantastic once the bass is done. It adds a really neat 3D element to the headstock.
lowsound
lowsound

Drake Custom
Commercial User
- Aug 24, 2010
- 440
- 1,082
- Disclosures
- Builder/Owner:Drake Custom Bass Guitars
I love this basses lines. The blend of the neck into the body is perfect. Clever cavity cover too. I have not had time to check out other builds for a time and I am always surprised to see what you come up with week to week. Looks great!

adam.beauchene
Commercial User
Looking great, B! How you've made all the contours flow softly into each other really goes with the laminates. I love it.


Musiclogic
Commercial User
- Aug 6, 2005
- 6,505
- 73
- 60
- Disclosures
- Owner/Builder: HJC Customs USA, The Cool Lute, C G O


the mad scientist is so mad that he's assumed other builders' identities!

Never turn your back on a mad bassist...

adam.beauchene
Commercial User
I have this recurring nightmare of walking into my house, saying 'honey, I'm home!' And seeing someone else's family sitting there on the couch...cause I'm in the wrong house...
I just felt like that guy. Sorry big B, I posted my progress in my own thread
I just felt like that guy. Sorry big B, I posted my progress in my own thread
I have this recurring nightmare of walking into my house, saying 'honey, I'm home!' And seeing someone else's family sitting there on the couch...cause I'm in the wrong house...
I just felt like that guy. Sorry big B, I posted my progress in my own thread
What you had posted looked nice btw. I've been following your build as well. I just had to bust your stones since you left the door wide open.

Lab Journal #31: So... in my feverish haste to get through with my finish sanding I actually managed to do a terrible job of finish sanding. :scowl: Once my first coat of shellac went on I felt pretty silly and got the sander back out. A few sanding pads (in strict order of grit this time ) later and the bass is now actually ready to be finished.
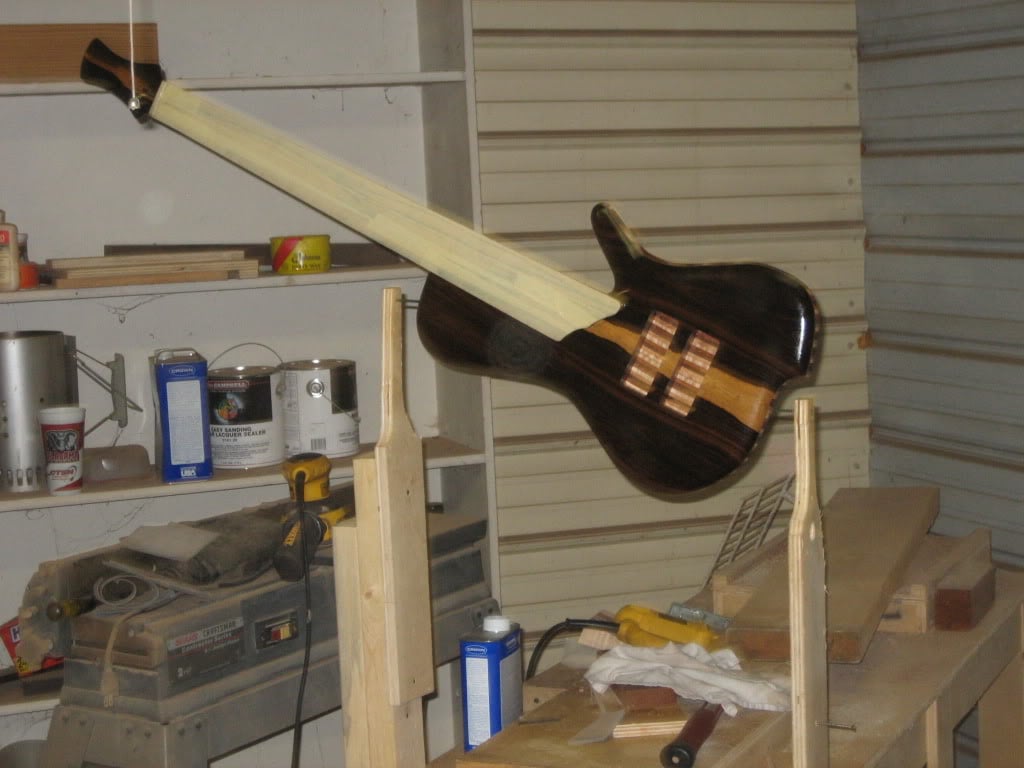
Finishing a neck thru can be a real PITA due to the fact that there is no surface to mount to a stand such as a neck pocket or bolt holes on the neck heel. I have a permanent well made stand for this job but it is locked up in storage with my big equipment so I made a quick jack-leg version to get through this build. The stand basically consists of two vertical arms with 3" screws that screw into the strap button holes. This pic is after 3 sealer coats of de-waxed shellac have been applied.
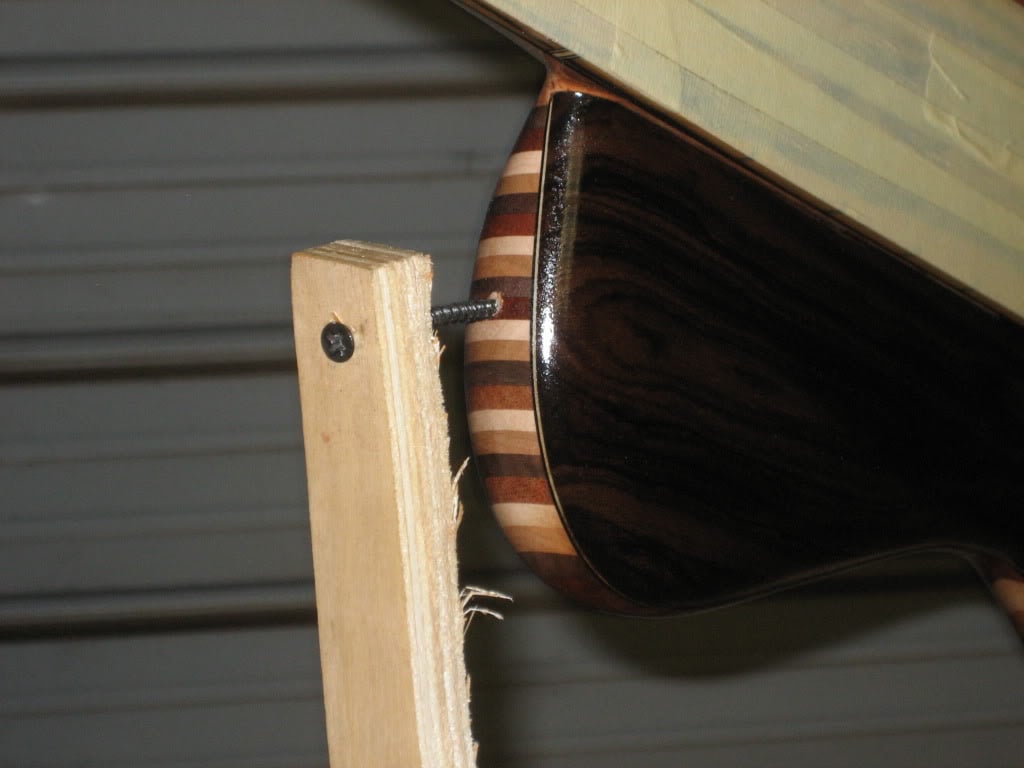
Pics of the mounting screws:
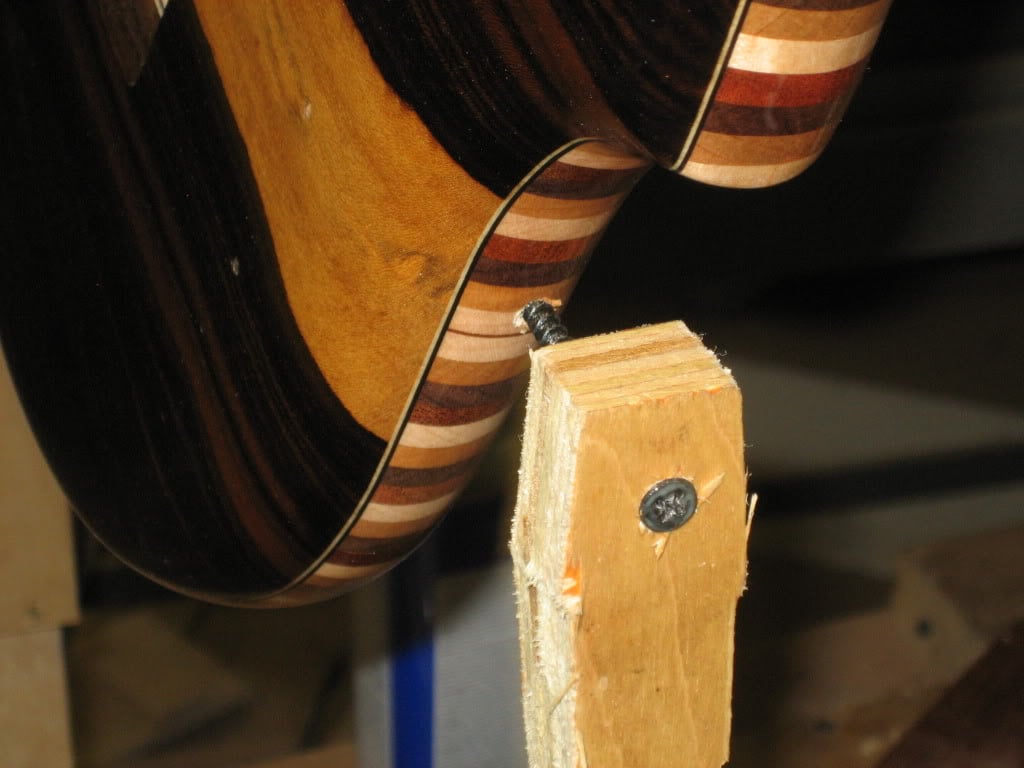
By tightening the mounting screws the bass can be turned and will stay in any position so I can get to all sides to spray evenly. For example, I can turn the back towards me and it will stay suspended:
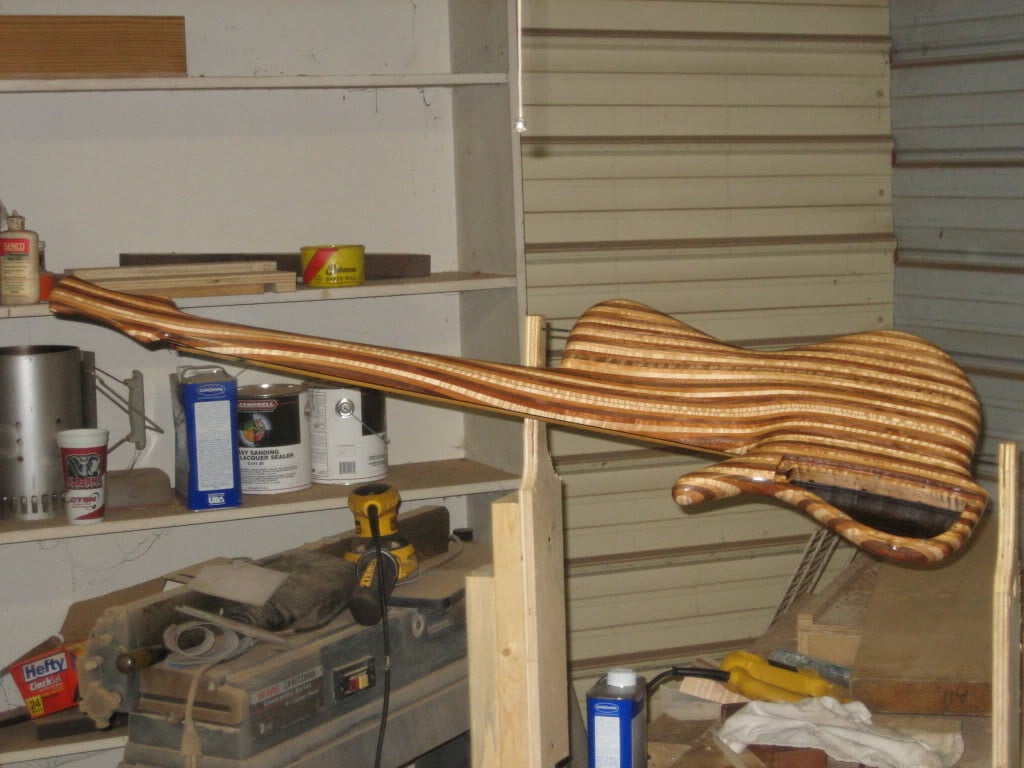
Or I can turn the front around for easy reach:
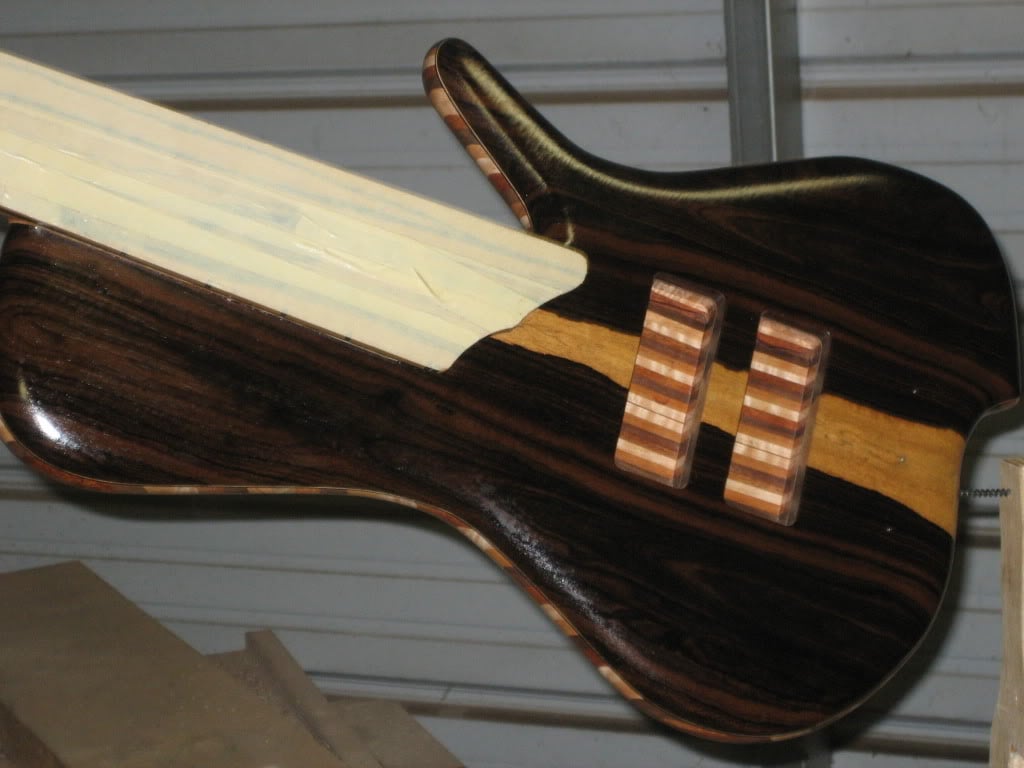
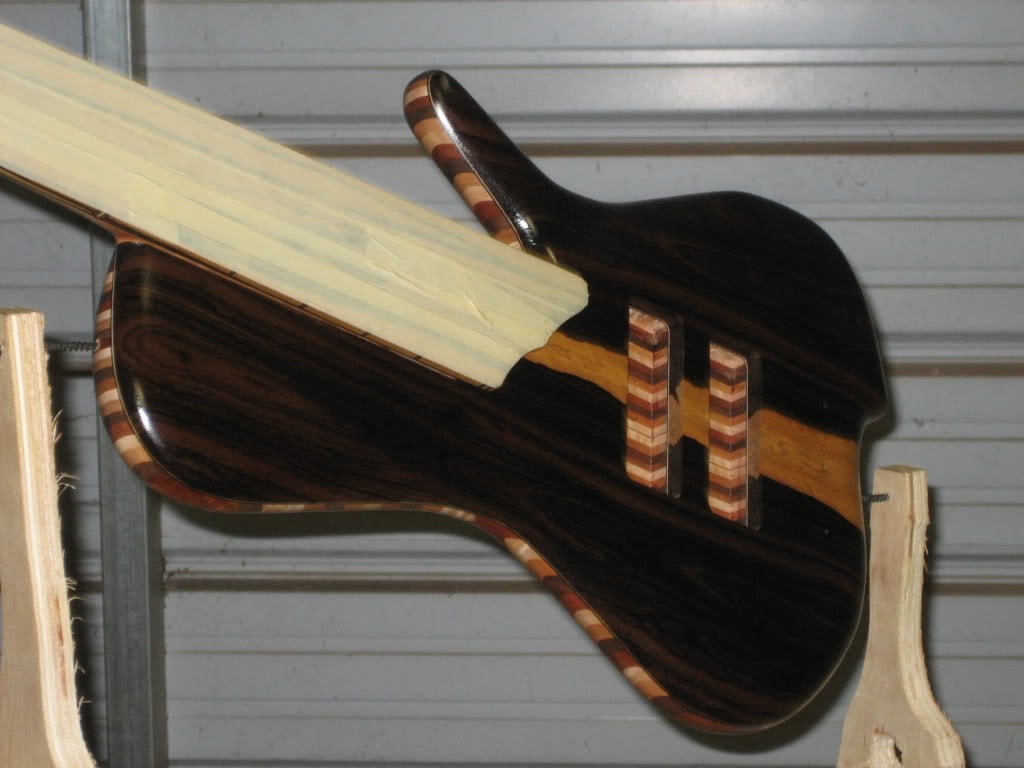
The shellac turned out to be a great sealer for the ziricote. (Thanks to Jazzdog for the great suggestion ) It turned out still a little darker than I wanted but it really brings out the black grain lines in the ziricote.
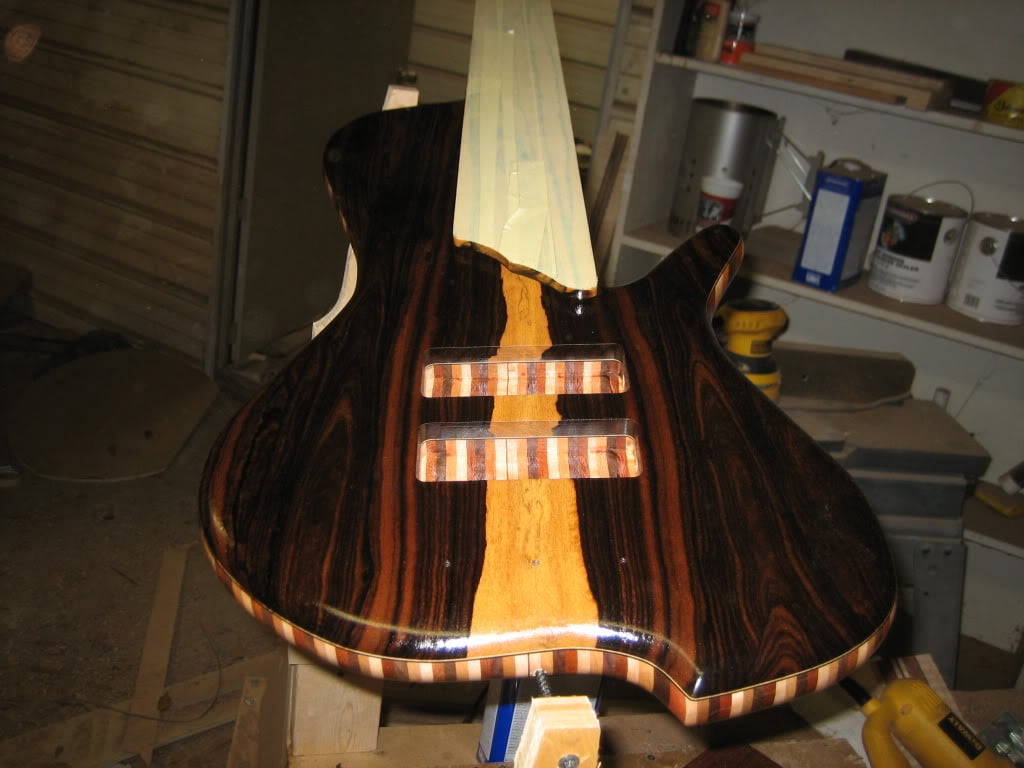
I still havent decided on tuners or a preamp so those holes will get drilled when those parts arrive. I may be mad but I am not mad enough to drill those holes before I have the hardware in hand.
) later and the bass is now actually ready to be finished. Finishing a neck thru can be a real PITA due to the fact that there is no surface to mount to a stand such as a neck pocket or bolt holes on the neck heel. I have a permanent well made stand for this job but it is locked up in storage with my big equipment so I made a quick jack-leg version to get through this build. The stand basically consists of two vertical arms with 3" screws that screw into the strap button holes. This pic is after 3 sealer coats of de-waxed shellac have been applied.
Pics of the mounting screws:
By tightening the mounting screws the bass can be turned and will stay in any position so I can get to all sides to spray evenly. For example, I can turn the back towards me and it will stay suspended:
Or I can turn the front around for easy reach:
The shellac turned out to be a great sealer for the ziricote. (Thanks to Jazzdog for the great suggestion
) It turned out still a little darker than I wanted but it really brings out the black grain lines in the ziricote. I still havent decided on tuners or a preamp so those holes will get drilled when those parts arrive. I may be mad but I am not mad enough to drill those holes before I have the hardware in hand.

The ziricote really darkened alot. Looks great.
I hope you don't mind if I steal your finishing stand. I build neck throughs and finishing them is always a pain because of no good way to hang them. This'll work great!!
I hope you don't mind if I steal your finishing stand. I build neck throughs and finishing them is always a pain because of no good way to hang them. This'll work great!!

- Dec 21, 2007
- 15,222
- 45,007
- Disclosures
- Lark in the Morning Instructional Videos; Audix Microphones

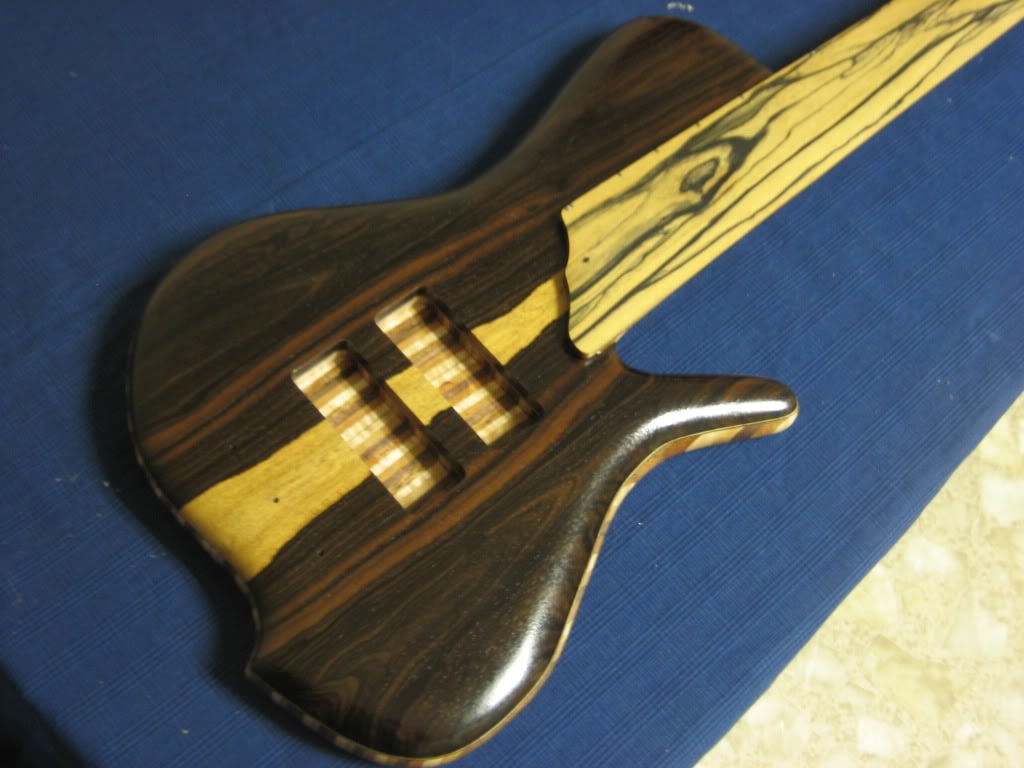
Lab Journal #32: Alright folks, spent a little more time this evening working with the finish and finally got my last sealer coat dry. After the finish dries the ziricote grain really pops through. I removed the tape from the fingerboard to get some pics of the two together and I think I like it. The shellac has not yet been sanded so some serious sanding will go into it before the first coat of lacquer goes on. The first pic is with a flash and the second one is without. The real color is somewhere in between the two.
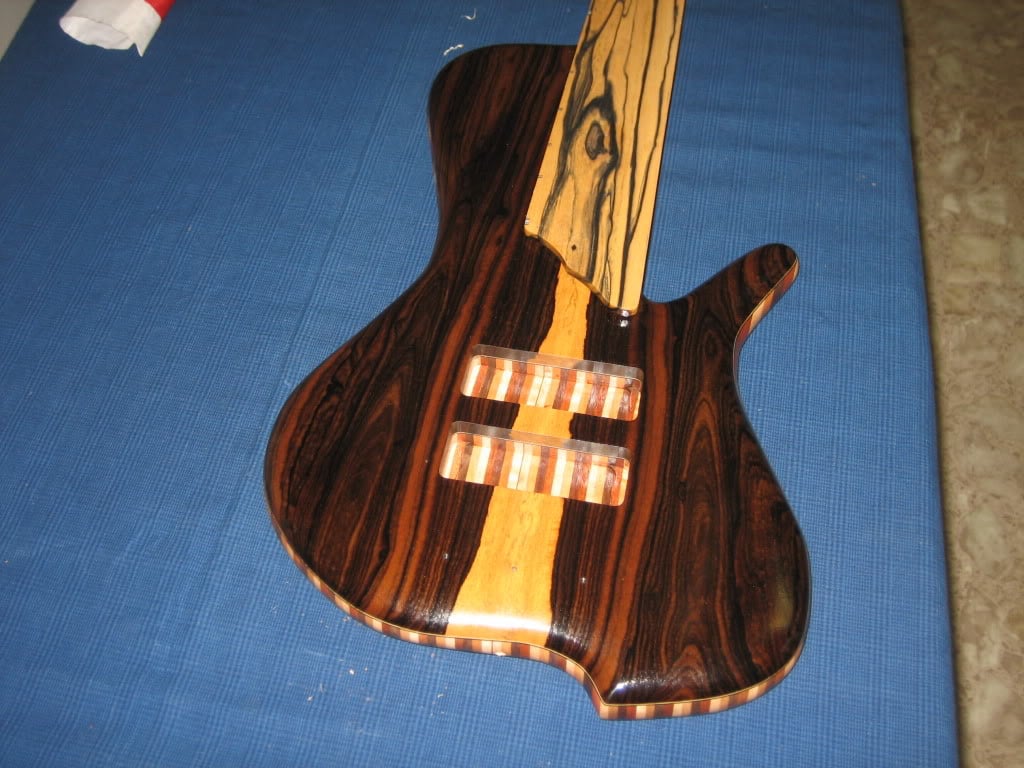
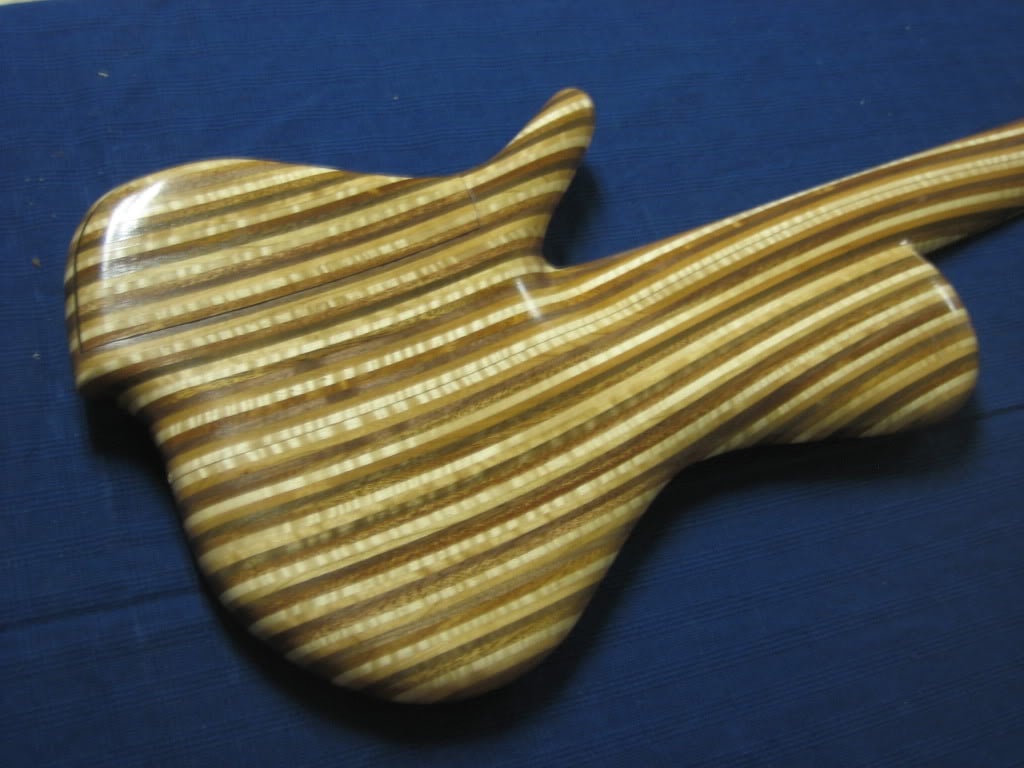
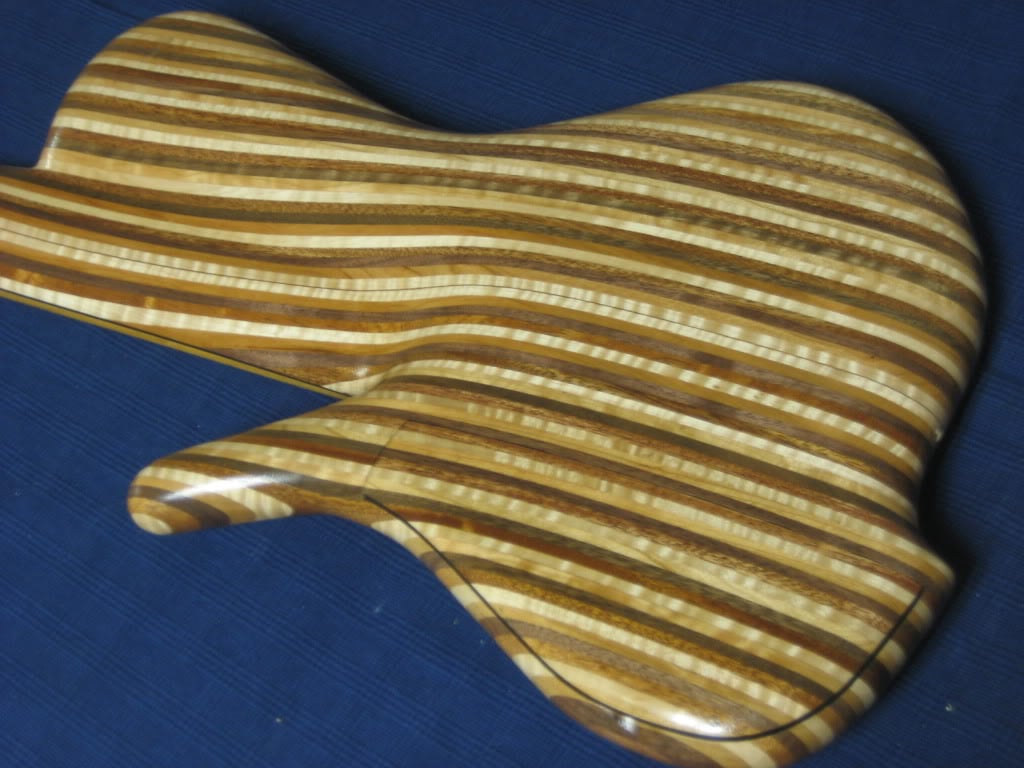
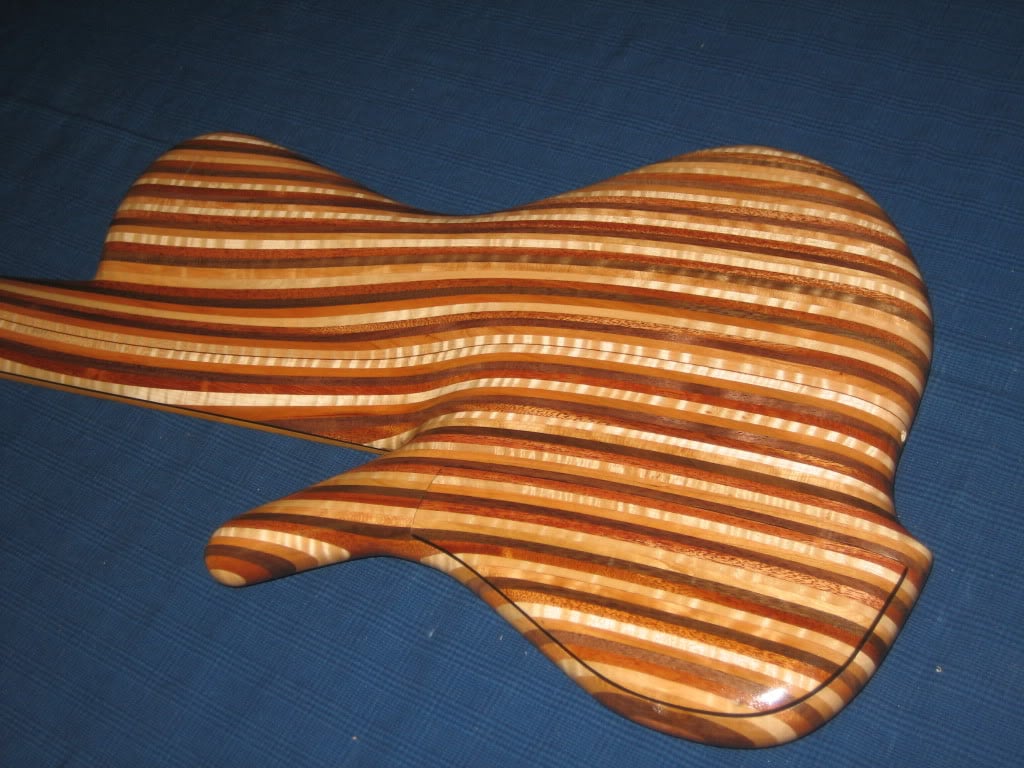
and some pics of the back with the cover attached. Again, the one with the flash is a little brighter but the real color is in the middle.
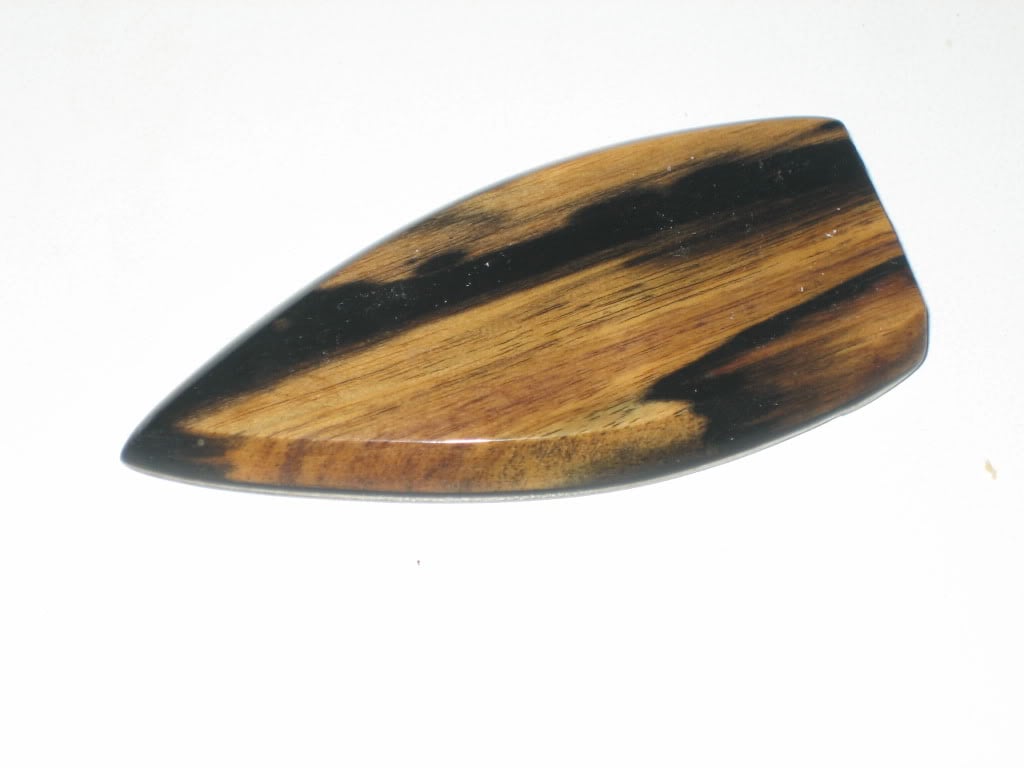
I intend to do a CA coating on the fingerboard but I have not used this method before with CA glue so I did my first test with the truss rod cover. After experimenting with different techniques I got a thick enough coat to sand down and polish out to a mirror shine. You can see a couple of tiny little spots that still need to be sanded out but the finish turned out great. The fingerboard will be absolutely stunning once the coating is applied and polished.
Thanks again for checking in, my minions, (I've always imagined myself having minions and as a mad scientist it seems like a prerequisite, hope that's cool) and look for more coming soon.
and some pics of the back with the cover attached. Again, the one with the flash is a little brighter but the real color is in the middle.
I intend to do a CA coating on the fingerboard but I have not used this method before with CA glue so I did my first test with the truss rod cover. After experimenting with different techniques I got a thick enough coat to sand down and polish out to a mirror shine. You can see a couple of tiny little spots that still need to be sanded out but the finish turned out great. The fingerboard will be absolutely stunning once the coating is applied and polished.
Thanks again for checking in, my minions, (I've always imagined myself having minions and as a mad scientist it seems like a prerequisite, hope that's cool
) and look for more coming soon.

Beyond all the awesome work craft that went into this, I am totaly impressed with all the detail that went into the planning of this bass. I really love the shape fo the back where the neck heel and body come together. It's like the intersection of the leg and hip of some smokin' hottie.


