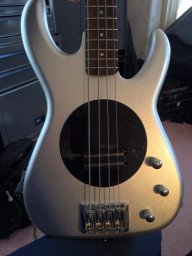
That is awesome! And they are a GREAT band! It must have been super fun! Love me some Cake!Ahhh, from a band I know well and have worked with many times (in the pro audio world).


TalkBass has been independent since 1998. Add your voice.
Create a free account to reply to discussions, view embedded media, and browse with fewer display ads.
Join free Log in
Want zero display ads or expanded classifieds tools? Compare plans.
That is awesome! And they are a GREAT band! It must have been super fun! Love me some Cake!Ahhh, from a band I know well and have worked with many times (in the pro audio world).



HOLY CRAP! No wonder my amp guy wanted to change me $60...and I decided not to try it myself.I just replaced the LED's and cleaned the potentiometers in my Streamliner 900 and made an illustrated guide on how. It's on my site here:
Link Removed
And so... my love for this amp and it's people has grown even more!I'm cross-posting this from the other thread... to reinforce why I recommend a qualified, experienced tech to do the repair. There is no reason whatsoever to disassemble the amp at all (other than remove the tubes). There's the correct way to do the repair and there's the hard way to do the repair, an experienced tech will do it the easy way and charge accordingly (hopefully). It's not really a DIY type repair, but it can be done. You can also turn a perfectly good amplifier into a mess...
Ugh... nice attempt and a really nice presentation but a couple of really serious and potentially catastrophic errors here.
1. NEVER test an LED directly across a 9V battery, it's likely to damage the die. The current must be limited to less than 20mA to prevent damage, which might not show up for a while. If you look closely, you will see that the package has a flat side which aligns with the flat side of the silk screen.
2. Do not use solder braid on double sided boards with plated through holes. If you have a really light touch it might be ok, but the approved method is to remove the LEDs and clear the holes with a mechanical/vacuum solder sucker. Even though these are really rugged PCBs, it's easy to damage the pads and through hole plating with braid.
3. With the DeOxit, only a TINY TINY amount is necessary. More can lead to premature failure from washing lubricant to places it should not be, and attracting dirt down the road.
4. There is no reason whatsoever to remove the PCB from the chassis. The entire operation can be performed from the top in about 3 minutes from start to finish without any risk of damaging anything else.
5. There is ~350 volts present all over the inside of the chassis, be absolutely sure the HV (high voltage) bus is discharged... removing wiring/connectors can remove safety bleeders. Always measure before sticking your hands anywhere inside an amp like this.

I'm cross-posting this from the other thread... to reinforce why I recommend a qualified, experienced tech to do the repair. There is no reason whatsoever to disassemble the amp at all (other than remove the tubes). There's the correct way to do the repair and there's the hard way to do the repair, an experienced tech will do it the easy way and charge accordingly (hopefully). It's not really a DIY type repair, but it can be done. You can also turn a perfectly good amplifier into a mess...
Ugh... nice attempt and a really nice presentation but a couple of really serious and potentially catastrophic errors here.
1. NEVER test an LED directly across a 9V battery, it's likely to damage the die. The current must be limited to less than 20mA to prevent damage, which might not show up for a while. If you look closely, you will see that the package has a flat side which aligns with the flat side of the silk screen.
2. Do not use solder braid on double sided boards with plated through holes. If you have a really light touch it might be ok, but the approved method is to remove the LEDs and clear the holes with a mechanical/vacuum solder sucker. Even though these are really rugged PCBs, it's easy to damage the pads and through hole plating with braid.
3. With the DeOxit, only a TINY TINY amount is necessary. More can lead to premature failure from washing lubricant to places it should not be, and attracting dirt down the road.
4. There is no reason whatsoever to remove the PCB from the chassis. The entire operation can be performed from the top in about 3 minutes from start to finish without any risk of damaging anything else.
5. There is ~350 volts present all over the inside of the chassis, be absolutely sure the HV (high voltage) bus is discharged... removing wiring/connectors can remove safety bleeders. Always measure before sticking your hands anywhere inside an amp like this.

Similar problem.
Lights work after amp has been on for an hour or so. I can then turn it off and they function normally until it cools, less than 20 minutes. Never gets more than warm to the touch (fan running).

PM @agedhorse and I suspect he can get you up and runningSimilar problem.
Lights work after amp has been on for an hour or so. I can then turn it off and they function normally until it cools, less than 20 minutes. Never gets more than warm to the touch (fan running).