
Enjoy the benefits of a premium membership!
Upgrade Account
-
TalkBass has been independent since 1998. Add your voice.
Create a free account to reply to discussions, view embedded media, and browse with fewer display ads.
Join free Log in
Want zero display ads or expanded classifieds tools? Compare plans.
You are using an out of date browser. It may not display this or other websites correctly.
You should upgrade or use an alternative browser.
You should upgrade or use an alternative browser.
GEO's 1st bass restoration
- Thread starter JIO
- Start date
More options
Who Replied?
- Jun 30, 2010
- 49,619
- 222,152
- Disclosures
- musician/artist/owner - Gildaxe
No harm no foul. It's stable/unaffected - there wasn't that much pressure. It's a common procedure that usually works.But your poor level!
- Jun 30, 2010
- 49,619
- 222,152
- Disclosures
- musician/artist/owner - Gildaxe
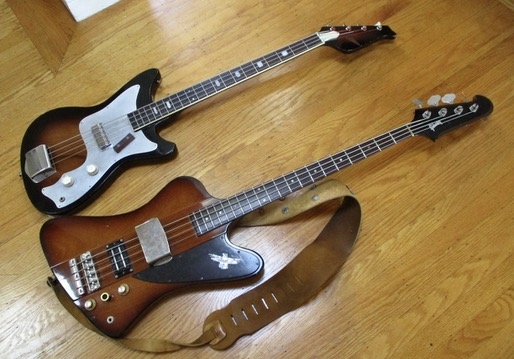
Other than a physical retrieval of something I owned from the distant past, like a favorite toy - now that it's somewhat playable I can make some observations/reflections. The neck is definitely 'baseball bat'. I had big hands, even as a kid! It has a 1-3/4" nut, so keying off a P-bass. The heal width is 2-3/8", also like a Fender. It has a Gibson style set-back hs, and a 'skunk-stripe' which runs the length of the neck from hs tip to heal butt. It appears to be maple. The neck & body are mahogany and it actually has a very nice rosewood fb with pearl fb markers. Neck binding but no side markers. No belly scallop or elbow bevel - pretty much a slab. Thin "banjo" frets and a solid plastic nut. Boxed tuners that came on many basses back then. Massive hs reminiscent of a vintage T-bird. Metal pg as was common then from Japan. The bridge although crude is actually a good design offering accurate string to string adjustability/intonation. An improvement over many much cruder bridges coming out of Japan then.
The pu is 27" center from the nut so more mid-positioned. It has strong output, and the tone knob is set up as a Fender - rolled on= treble, rolled off= bass. Most Japanese guitars & basses from the '60s were wired the opposite. Whether shielding the control cavity had anything to do with it - the pu is dead quite for a single. Most likely it would have had flats, but I can't recall. I strung it up with old rounds, so maybe a new set would give it a bit more character. I have little to no memory of playing that 1st base in 1966 other than I recall it felt like the strings were way high off the fb and it was physically taxing to fret it. I had no idea that it could be adjusted, so I just learned on it as-is. I must have really wanted to learn how to play bass!
It weighs 7lbs/4oz, so a very nice weight for a full-sized solid body bass! I currently strive to hit close to that weight for my custom builds, so it's cool to realize I started off on a relatively light bass. Hands off it goes to horizontal, so a bit of neck-dive as the upper horn is at the 14th fret. It could be worse. After this bass, my next two were short-scale - one a hollow-body Vox Cougar and the other a Gibson EB-3. But after those two - the next was a '63 Thunderbird II, in a few ways similar to my 1st bass. Similar, but very different.
As is, I could play many of the songs on both of my bands' set-lists but it would be a left hand workout so not likely to happen.

The pu is 27" center from the nut so more mid-positioned. It has strong output, and the tone knob is set up as a Fender - rolled on= treble, rolled off= bass. Most Japanese guitars & basses from the '60s were wired the opposite. Whether shielding the control cavity had anything to do with it - the pu is dead quite for a single. Most likely it would have had flats, but I can't recall. I strung it up with old rounds, so maybe a new set would give it a bit more character. I have little to no memory of playing that 1st base in 1966 other than I recall it felt like the strings were way high off the fb and it was physically taxing to fret it. I had no idea that it could be adjusted, so I just learned on it as-is. I must have really wanted to learn how to play bass!
It weighs 7lbs/4oz, so a very nice weight for a full-sized solid body bass! I currently strive to hit close to that weight for my custom builds, so it's cool to realize I started off on a relatively light bass. Hands off it goes to horizontal, so a bit of neck-dive as the upper horn is at the 14th fret. It could be worse. After this bass, my next two were short-scale - one a hollow-body Vox Cougar and the other a Gibson EB-3. But after those two - the next was a '63 Thunderbird II, in a few ways similar to my 1st bass. Similar, but very different.
As is, I could play many of the songs on both of my bands' set-lists but it would be a left hand workout so not likely to happen.
- Jun 30, 2010
- 49,619
- 222,152
- Disclosures
- musician/artist/owner - Gildaxe
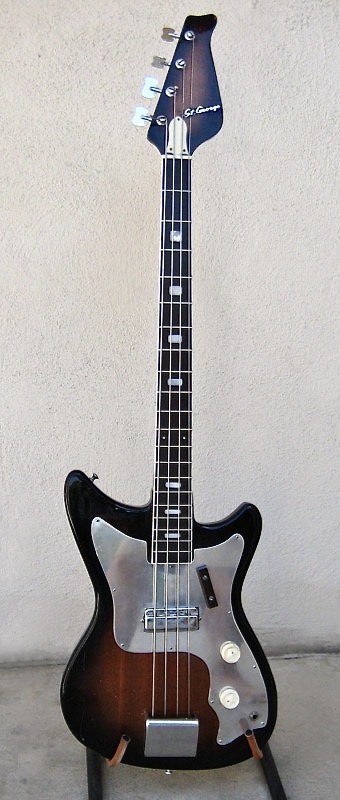
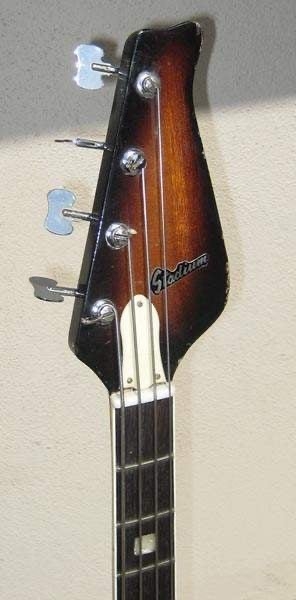
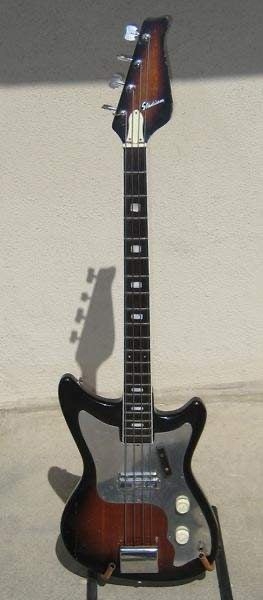
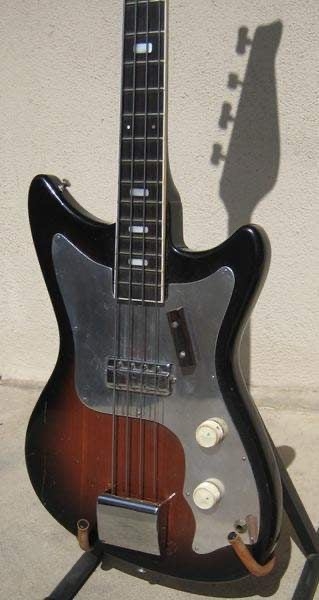
This is really interesting. This is a St. George. Memories of mine are foggy but I think it was badged "Stadium" (below) as I would have remembered a bass with my saint name and Tempo doesn't ring a bell. Same bass whatever it was badged. Ok.., so what I find curious is the pg, pu & bridge placement. As you can see in this straight-on pic (and compared to mine above), both the pu & bridge look cock-eyed. (off) I saw this on mine and thought, oh well - 1966 Japan. But they are both off in the exact same way! Measuring from the heal to the top of the pu is 2-13/16" E-side, and 2-11/16" on the G-sde and the bridge plate is 9-3/16" E-side and 9-1/4" on the G-side. And... the gaps on both sides of the pg at the heel are 'off' exactly like mine! (1/4" E-side / 1/8" G-side) I'd have to see a third example for certainty, but the two are so much the same it would seem that all basses like this were off in the same way. Also, you can see the tug-bar screws w/o the white plastic plugs.
Last edited:
- Jun 30, 2010
- 49,619
- 222,152
- Disclosures
- musician/artist/owner - Gildaxe
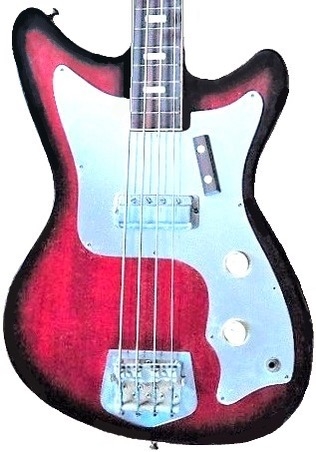
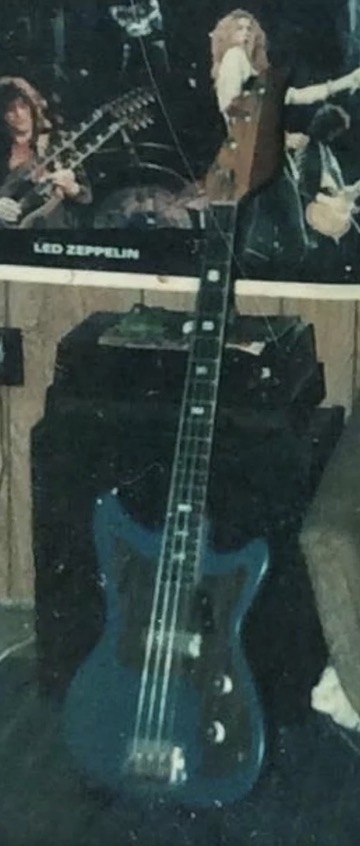
Found another couple pics of this model in red-black burst and what looks to be a dark teal grey-blue. Check out how far the strings are off the pu poles on the red one! Way off because the pg is way off (no gap on the E-side of the heel and a huge gap on the G-side. If moved over toward the E-side, the strings would probably align. I'm guessing in general these basses weren't assembled very well. Not sure what's going on with the dark wood laminate on the teal one's hs. Maybe it was all teal and someone stripped the neck finish off?
Last edited:
- Jun 30, 2010
- 49,619
- 222,152
- Disclosures
- musician/artist/owner - Gildaxe
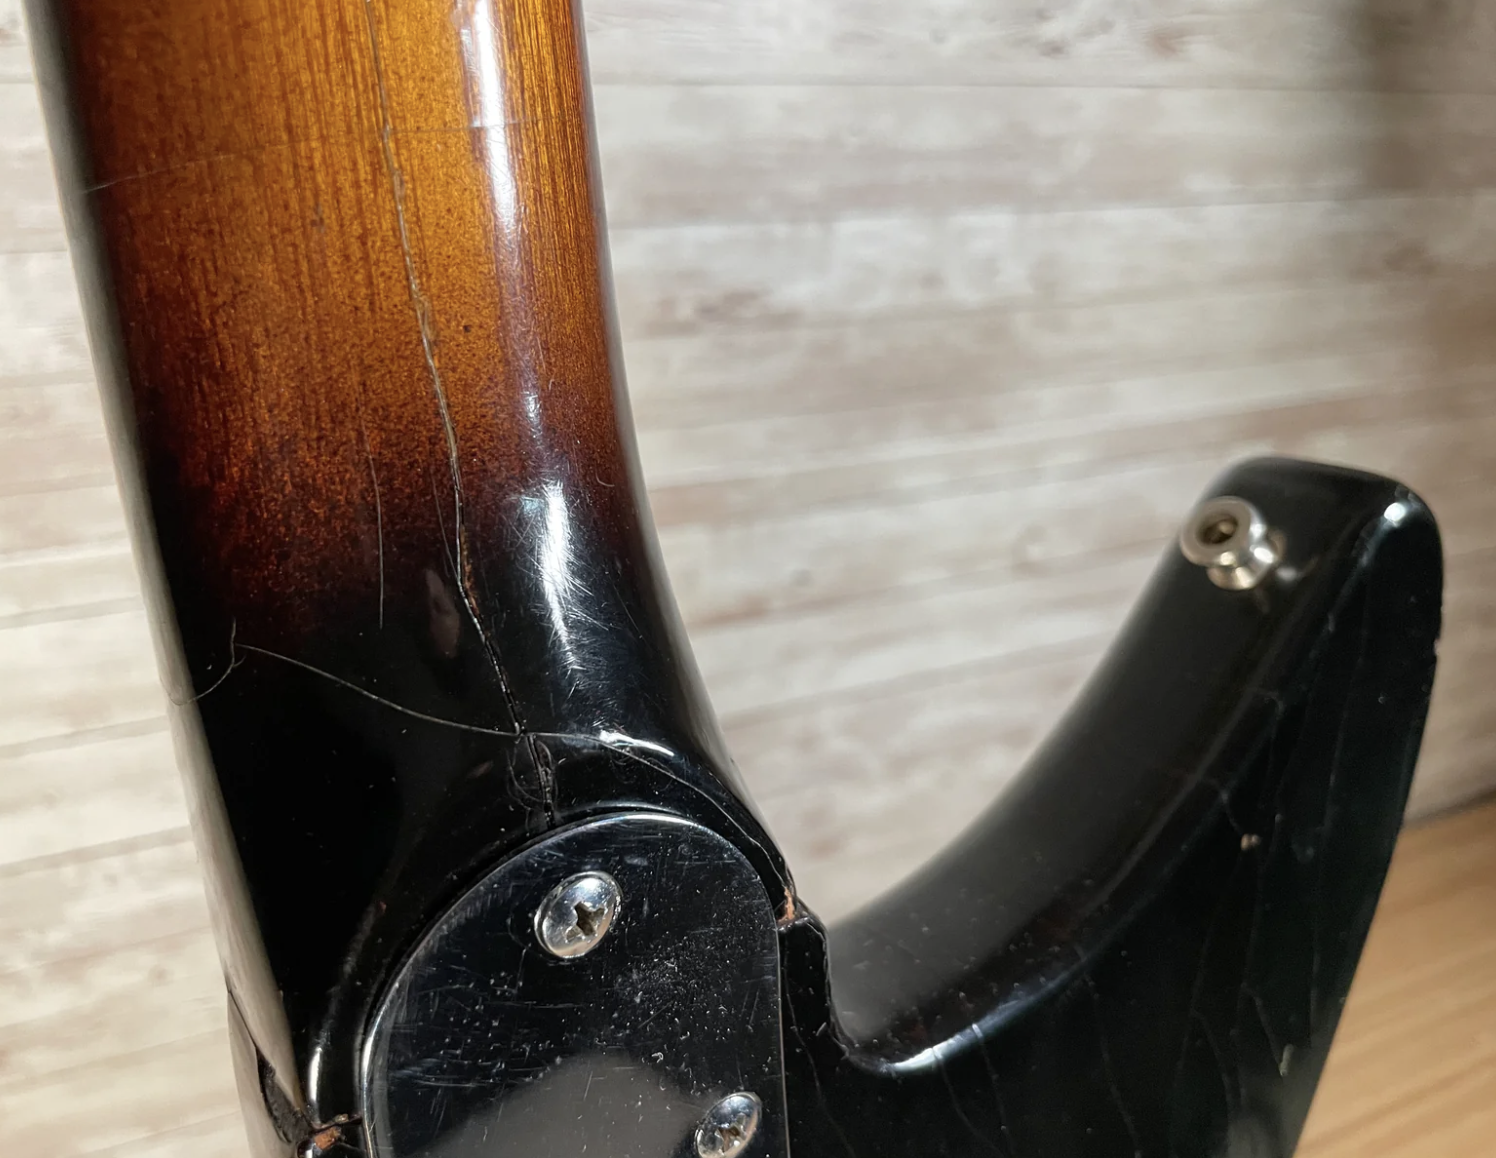
More... this one a Beltone, with non-original knobs. All of these examples found on Reverb have sold.
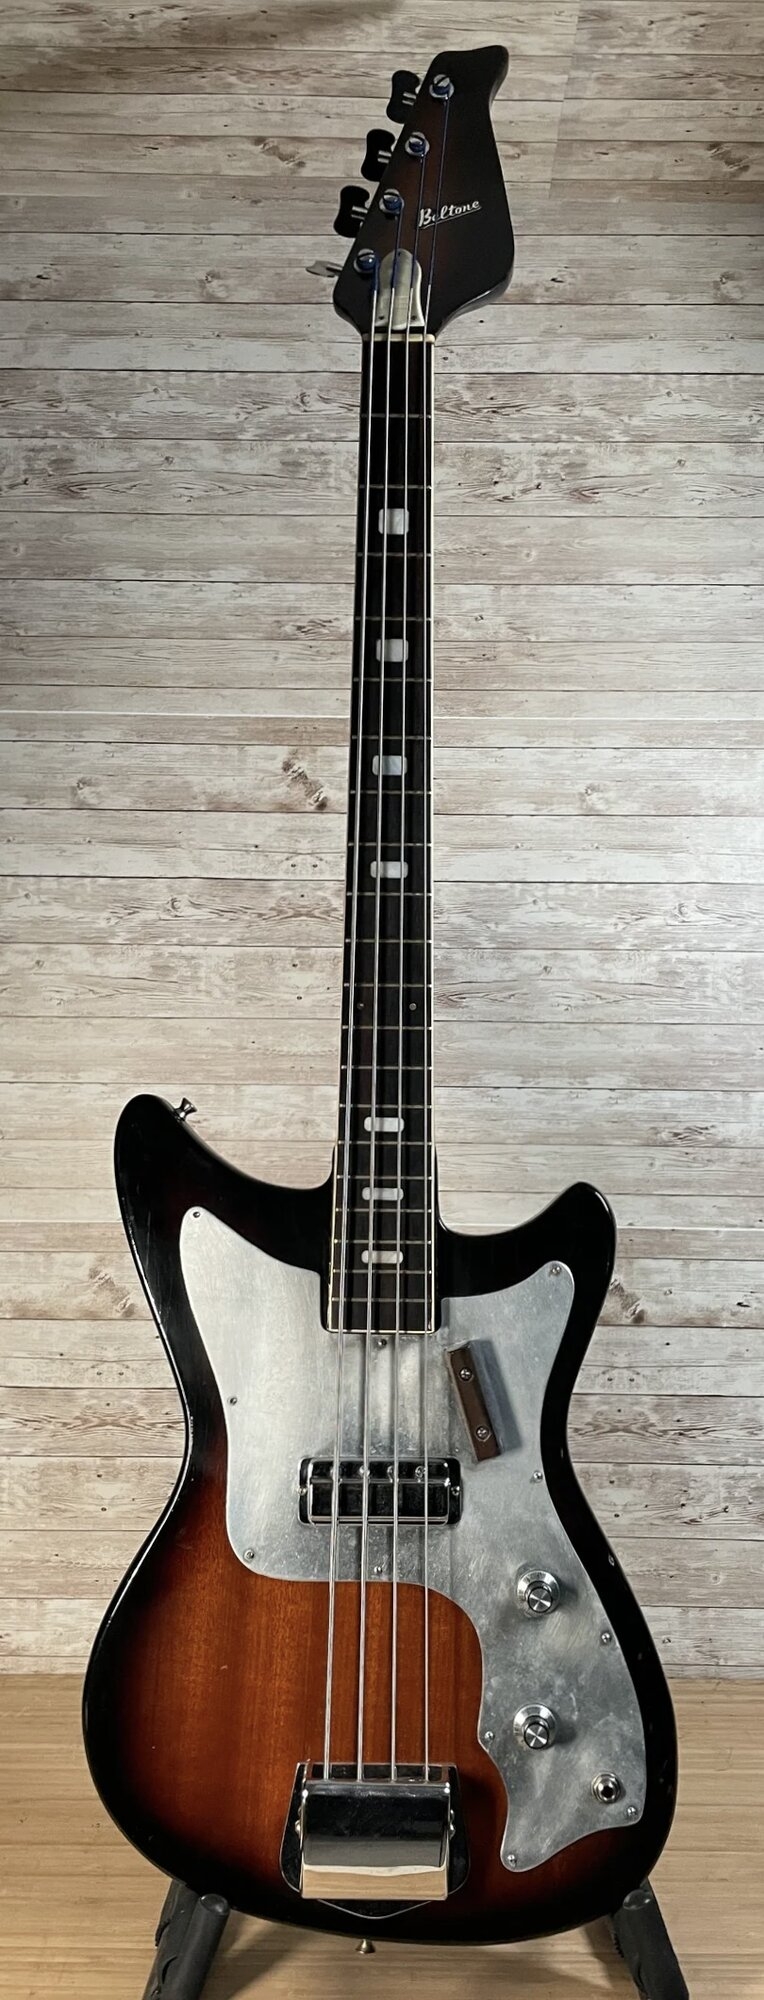
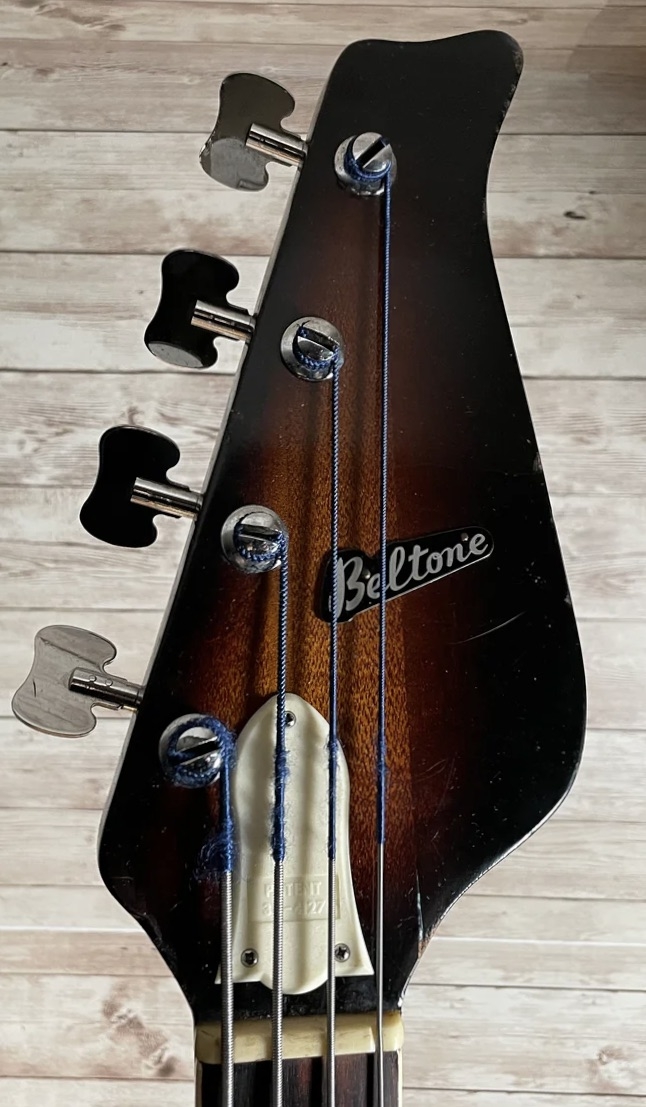
Similar de-lamination at the heel - looks to have been a chronic issue on this neck. Note bolt-on heal division.
Here's a '70s Kawai version with a different neck, shiny chrome pg and elbow contour. Nice OHSC also.
More conventional heel. Belly bevel -
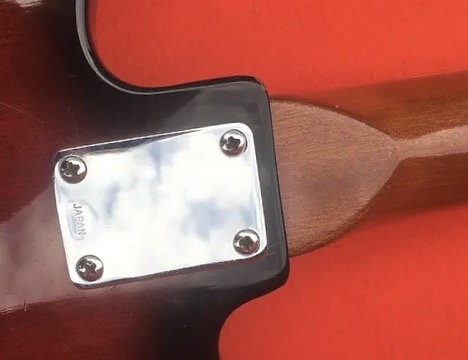
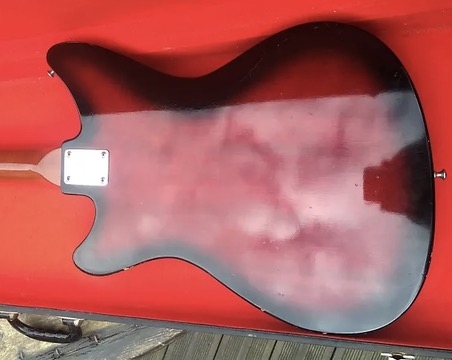
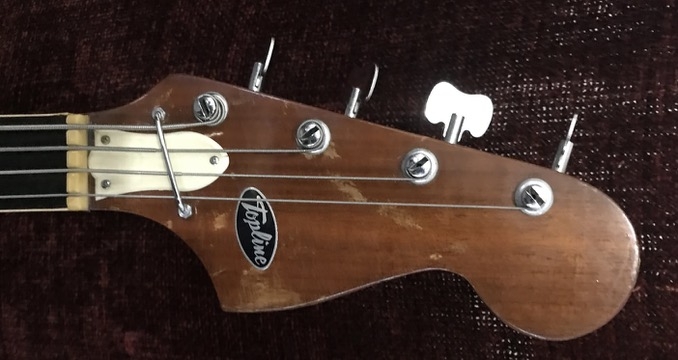
A '70s version (badged Topline) with body re-fin. I like the way it looks finished like that. .
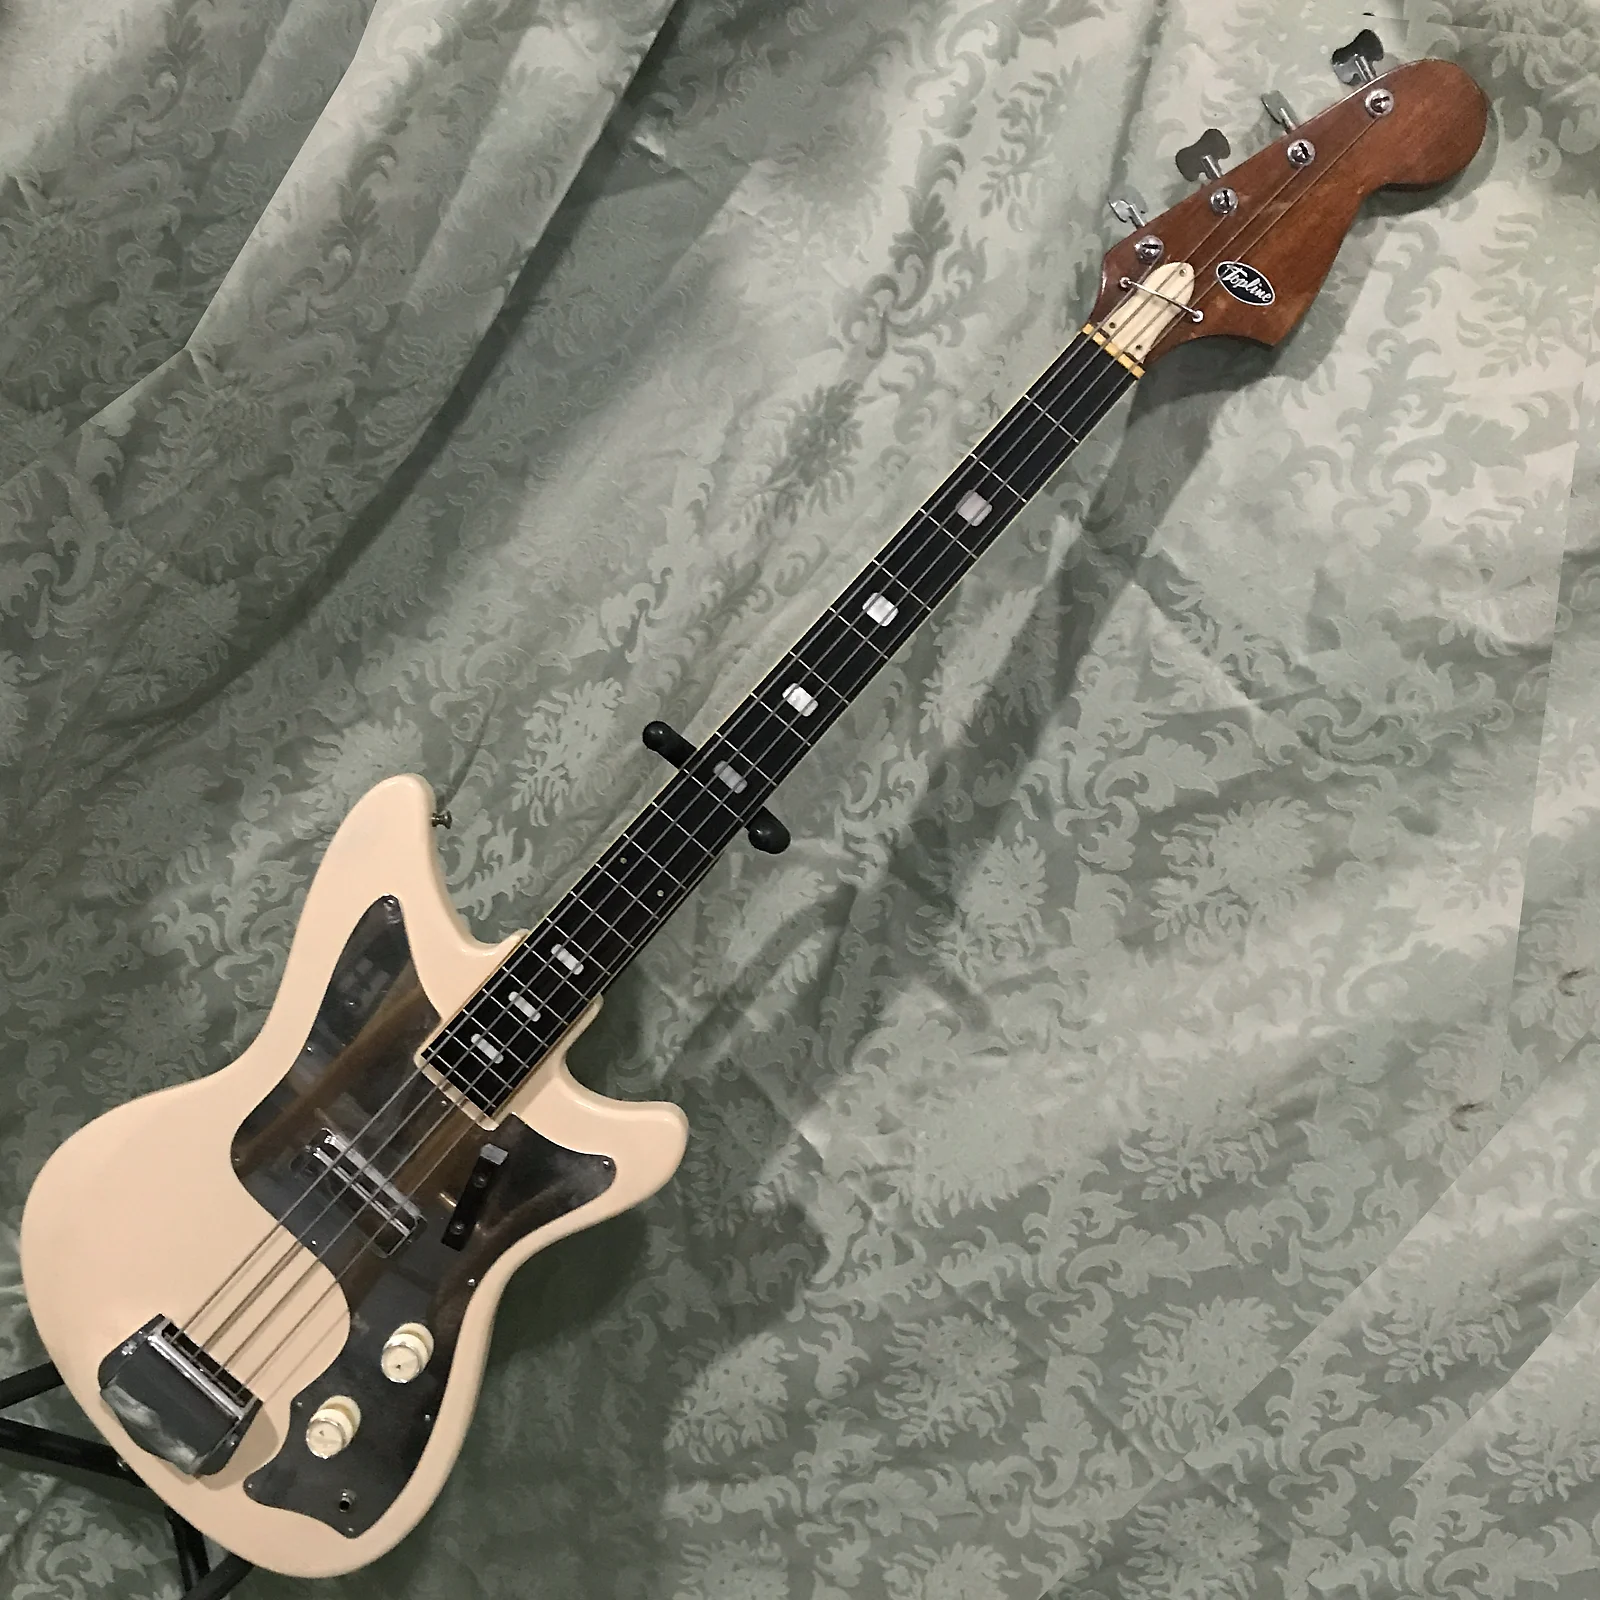
Looks like the thumb-wheels on this one were removed. On mine, the bridge is reversed. (saddle adjustment screw access at the top) Mine is the way it was as the unaltered grooves correlated to the strings gauge. This one looks mucked with. The red/black-burst example above has it positioned like mine, which I believe is the correct positioning. The thing that is consistent regarding these vintage Japanese basses is that over time people muck with them. Specifically concerning mine - someone (not a professional) decided the best way to "fix" the neck issues was to glue it into the pocket. Brilliant. Many crimes have been committed in the name of DIY ~
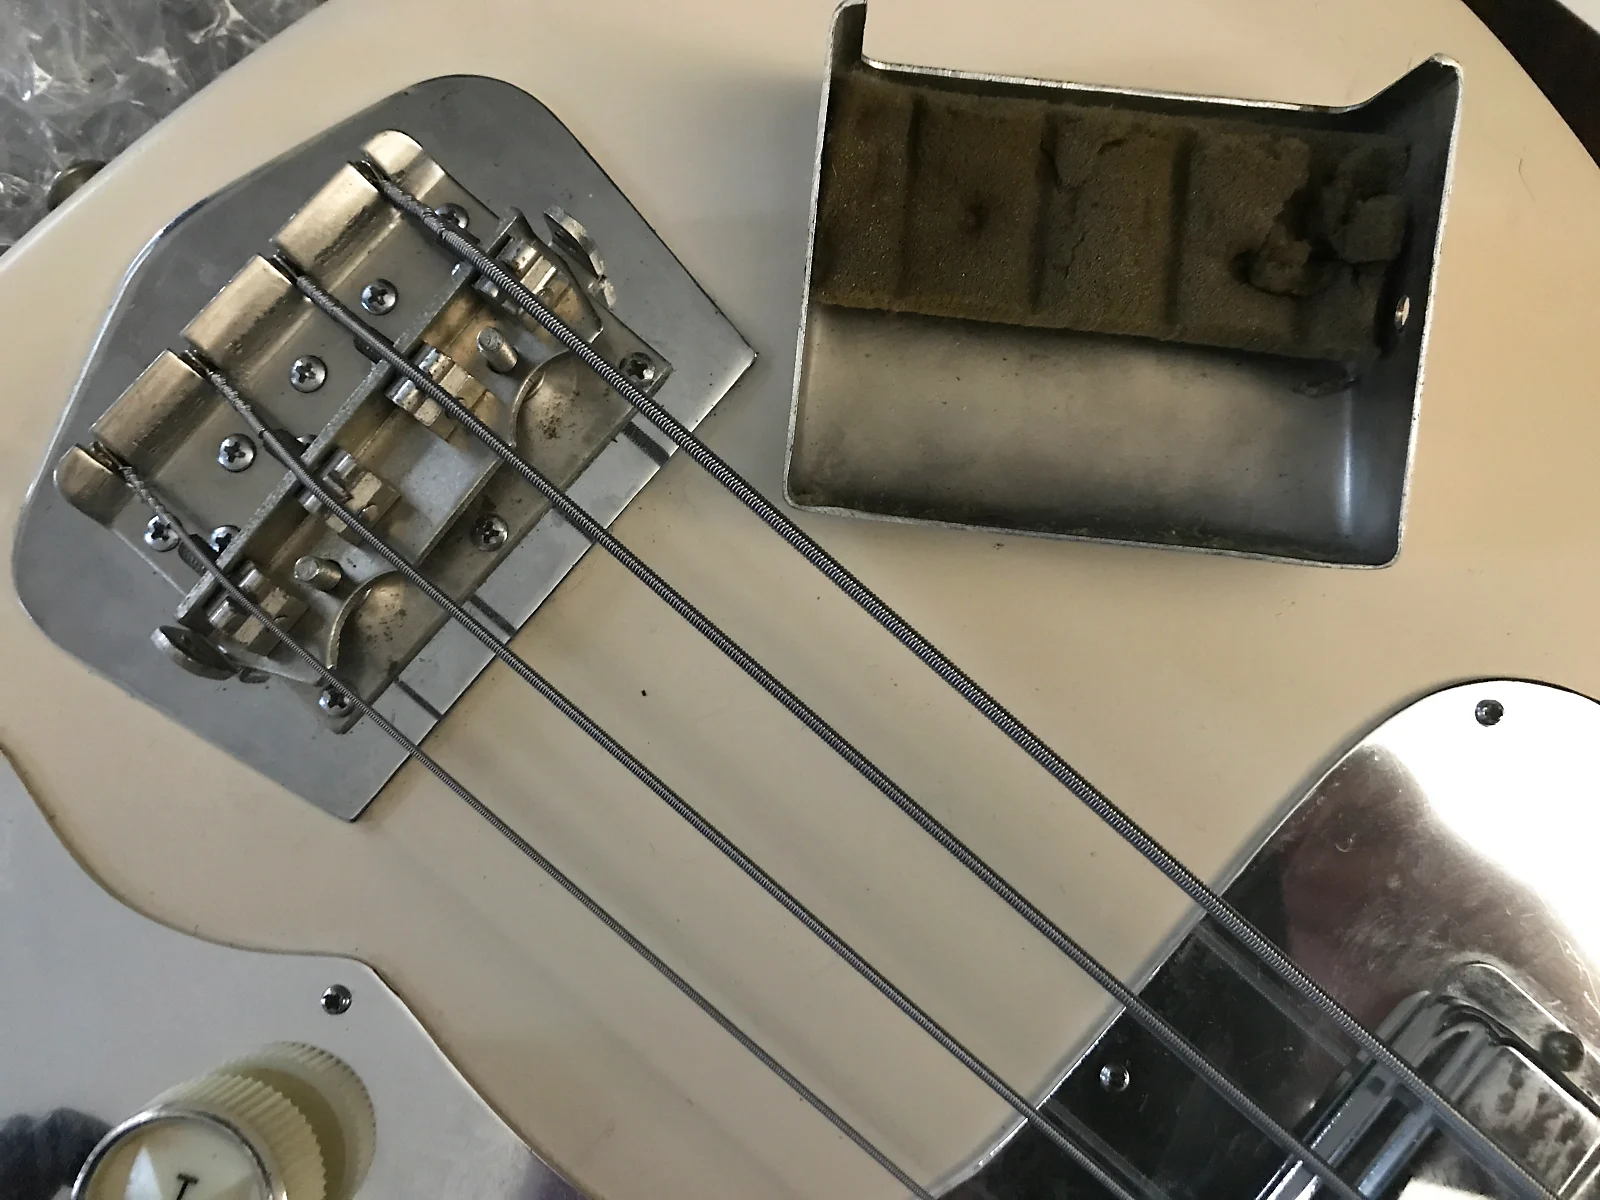
Fender-style non-setback hs and bar string-restraint.
Similar de-lamination at the heel - looks to have been a chronic issue on this neck. Note bolt-on heal division.
Here's a '70s Kawai version with a different neck, shiny chrome pg and elbow contour. Nice OHSC also.
More conventional heel. Belly bevel -
A '70s version (badged Topline) with body re-fin. I like the way it looks finished like that. .
Looks like the thumb-wheels on this one were removed. On mine, the bridge is reversed. (saddle adjustment screw access at the top) Mine is the way it was as the unaltered grooves correlated to the strings gauge. This one looks mucked with. The red/black-burst example above has it positioned like mine, which I believe is the correct positioning. The thing that is consistent regarding these vintage Japanese basses is that over time people muck with them. Specifically concerning mine - someone (not a professional) decided the best way to "fix" the neck issues was to glue it into the pocket. Brilliant. Many crimes have been committed in the name of DIY ~
Fender-style non-setback hs and bar string-restraint.
Last edited:

- Jun 30, 2010
- 49,619
- 222,152
- Disclosures
- musician/artist/owner - Gildaxe
I considered that but for all I know it could have been epoxied. I wasn't anticipating needing to do a major repair on a cheap bass acquired primarily because of nostalgia. Maybe someday...You could always release the neck from the body with some heat/ steam and reset it, or even convert it back to a bolt on.
- Jun 30, 2010
- 49,619
- 222,152
- Disclosures
- musician/artist/owner - Gildaxe
I'm not saying the neck can't be dislodged from the pocket, but consider the neck heel design we are dealing with. Until I see one with the neck removed - I'm pretty sure it's similar to this stepped design on my '68 Custom Kraft hollow-body. (with an additional upper flange/platform) If it were a standard design, I could score the sides with a knife and wedge a putty knife into the base & pop it apart. But with a stepped design, there are the steps to dislodge, and if they are epoxied together... Add to this, the G-side of the fb is pretty good, but the E-side has major wonk-age past the 12th fret. But... if the neck could be removed, there would be options.
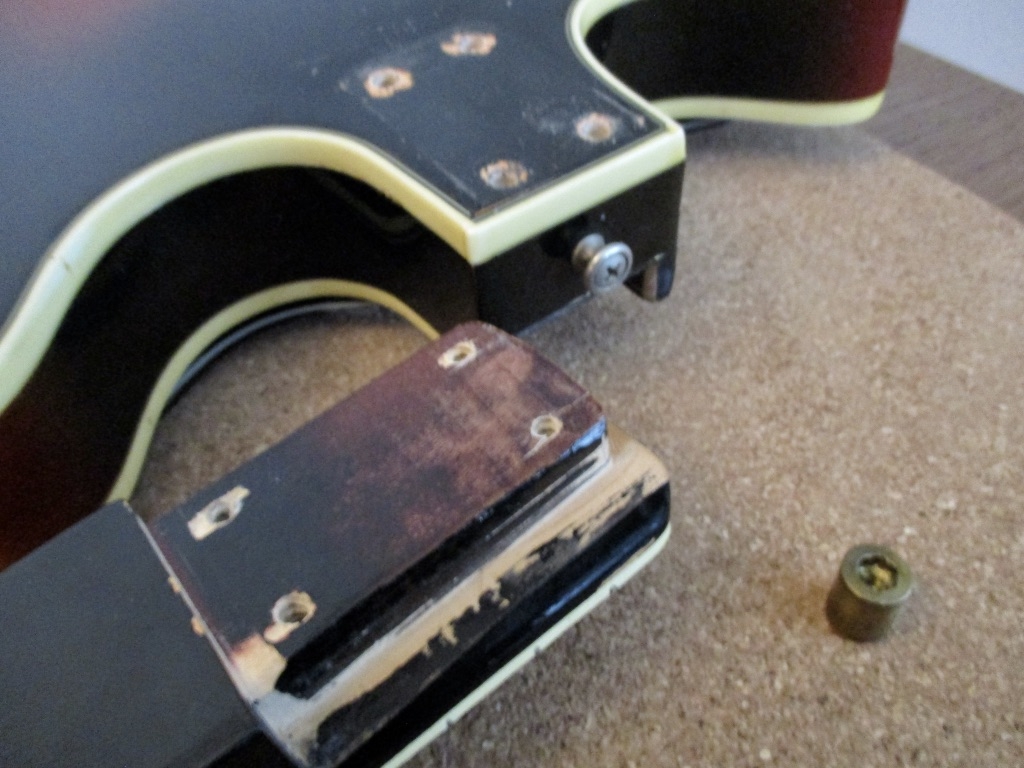
As a test, I removed the two wood-screws that the DIY "fix" added and nothing changed. They were probably added after it was glued together instead of clamping.
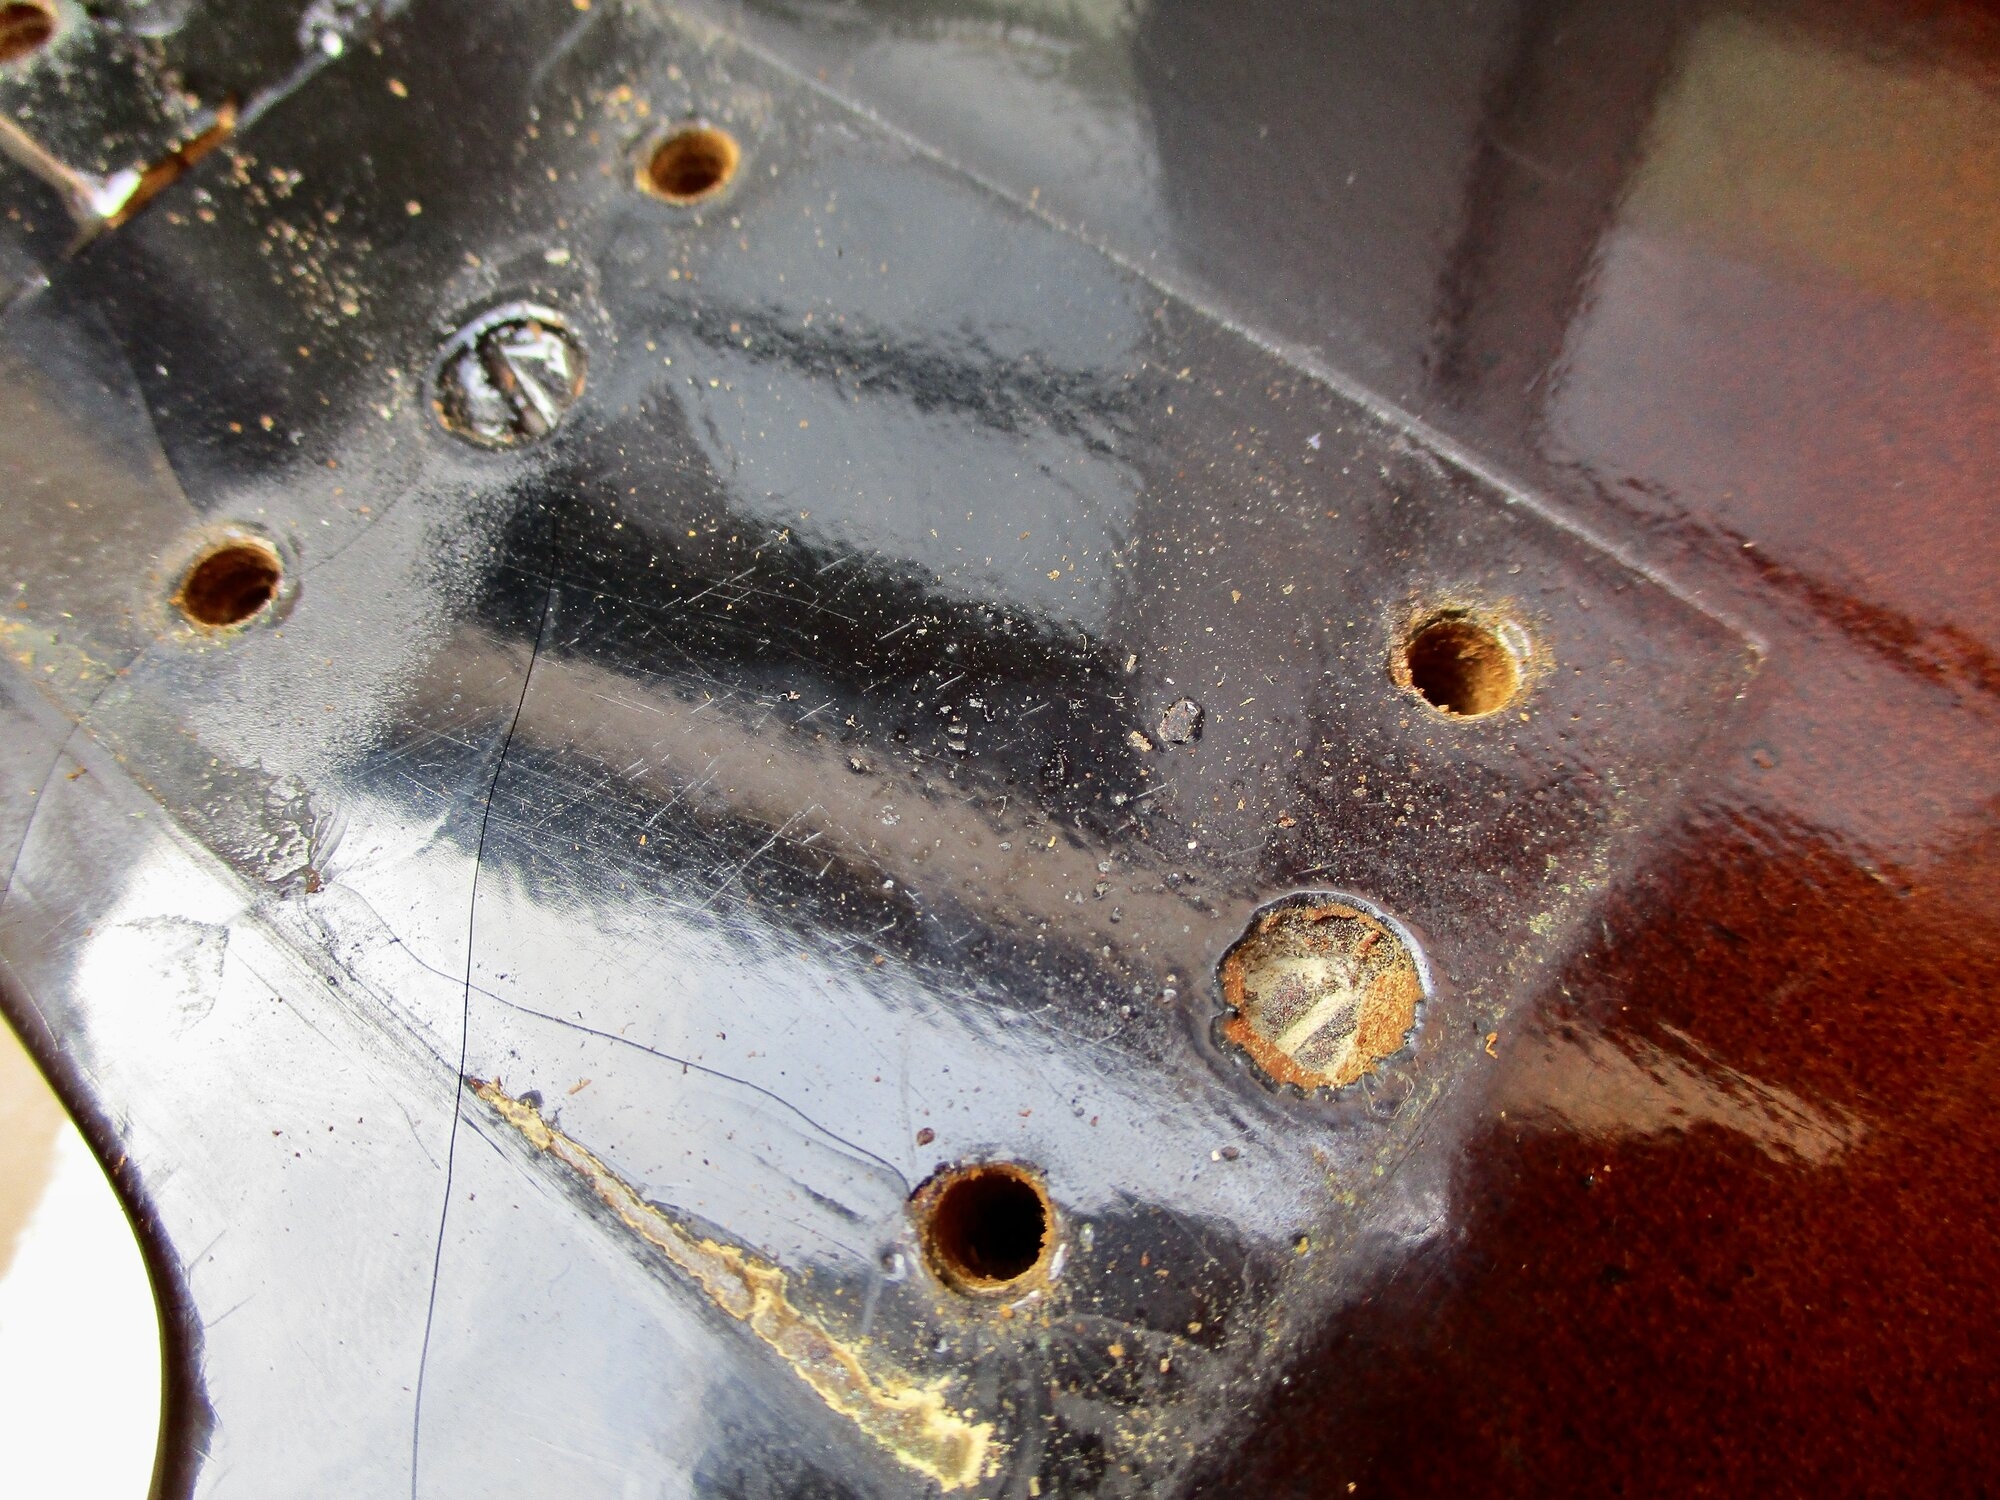
As a test, I removed the two wood-screws that the DIY "fix" added and nothing changed. They were probably added after it was glued together instead of clamping.
Last edited:
- Jun 30, 2010
- 49,619
- 222,152
- Disclosures
- musician/artist/owner - Gildaxe
I'm starting to consider doing a major once-over on the Tempo in order to make it a playable instrument. I've decided that I got my 'nostalgia fix' but I can't stand having a bass that is unplayable regardless of why I bought it. As in, it could be a "wall hanger" - but to me that's a dust collector taking up valuable space. It reminded me how NOT "valuable" nostalgia is... which is something I've always avoided indulging in.
The first thing I would need to do is remove the neck from the body which could be an arduous task. I'll start off testing with heat and hope it's wood-glue, but if epoxy.., WCS. If it were a standard heal/pocket I would have more confidence, but because of the 'shelved' design (as I pointed out in post #29) - it will be difficult. WCS it could really create an ugly mess. But anything can be repaired - so I'll know more once I attempt the extraction. The neck/fb has compound warps so one way or another it will need the lions-share of work. If I'm going that far, I decided I'll remove the finish on the body & neck and do something clean & fresh. (no vintage brown-burst etc) The opaque painted examples I found gave it a promising look. It's all original with all original parts and the pu is strong so if it was given a new lease on life it could be a rockin' bass.
What do you think?
The first thing I would need to do is remove the neck from the body which could be an arduous task. I'll start off testing with heat and hope it's wood-glue, but if epoxy.., WCS. If it were a standard heal/pocket I would have more confidence, but because of the 'shelved' design (as I pointed out in post #29) - it will be difficult. WCS it could really create an ugly mess. But anything can be repaired - so I'll know more once I attempt the extraction. The neck/fb has compound warps so one way or another it will need the lions-share of work. If I'm going that far, I decided I'll remove the finish on the body & neck and do something clean & fresh. (no vintage brown-burst etc) The opaque painted examples I found gave it a promising look. It's all original with all original parts and the pu is strong so if it was given a new lease on life it could be a rockin' bass.
What do you think?
- Jun 30, 2010
- 49,619
- 222,152
- Disclosures
- musician/artist/owner - Gildaxe
Here we go...
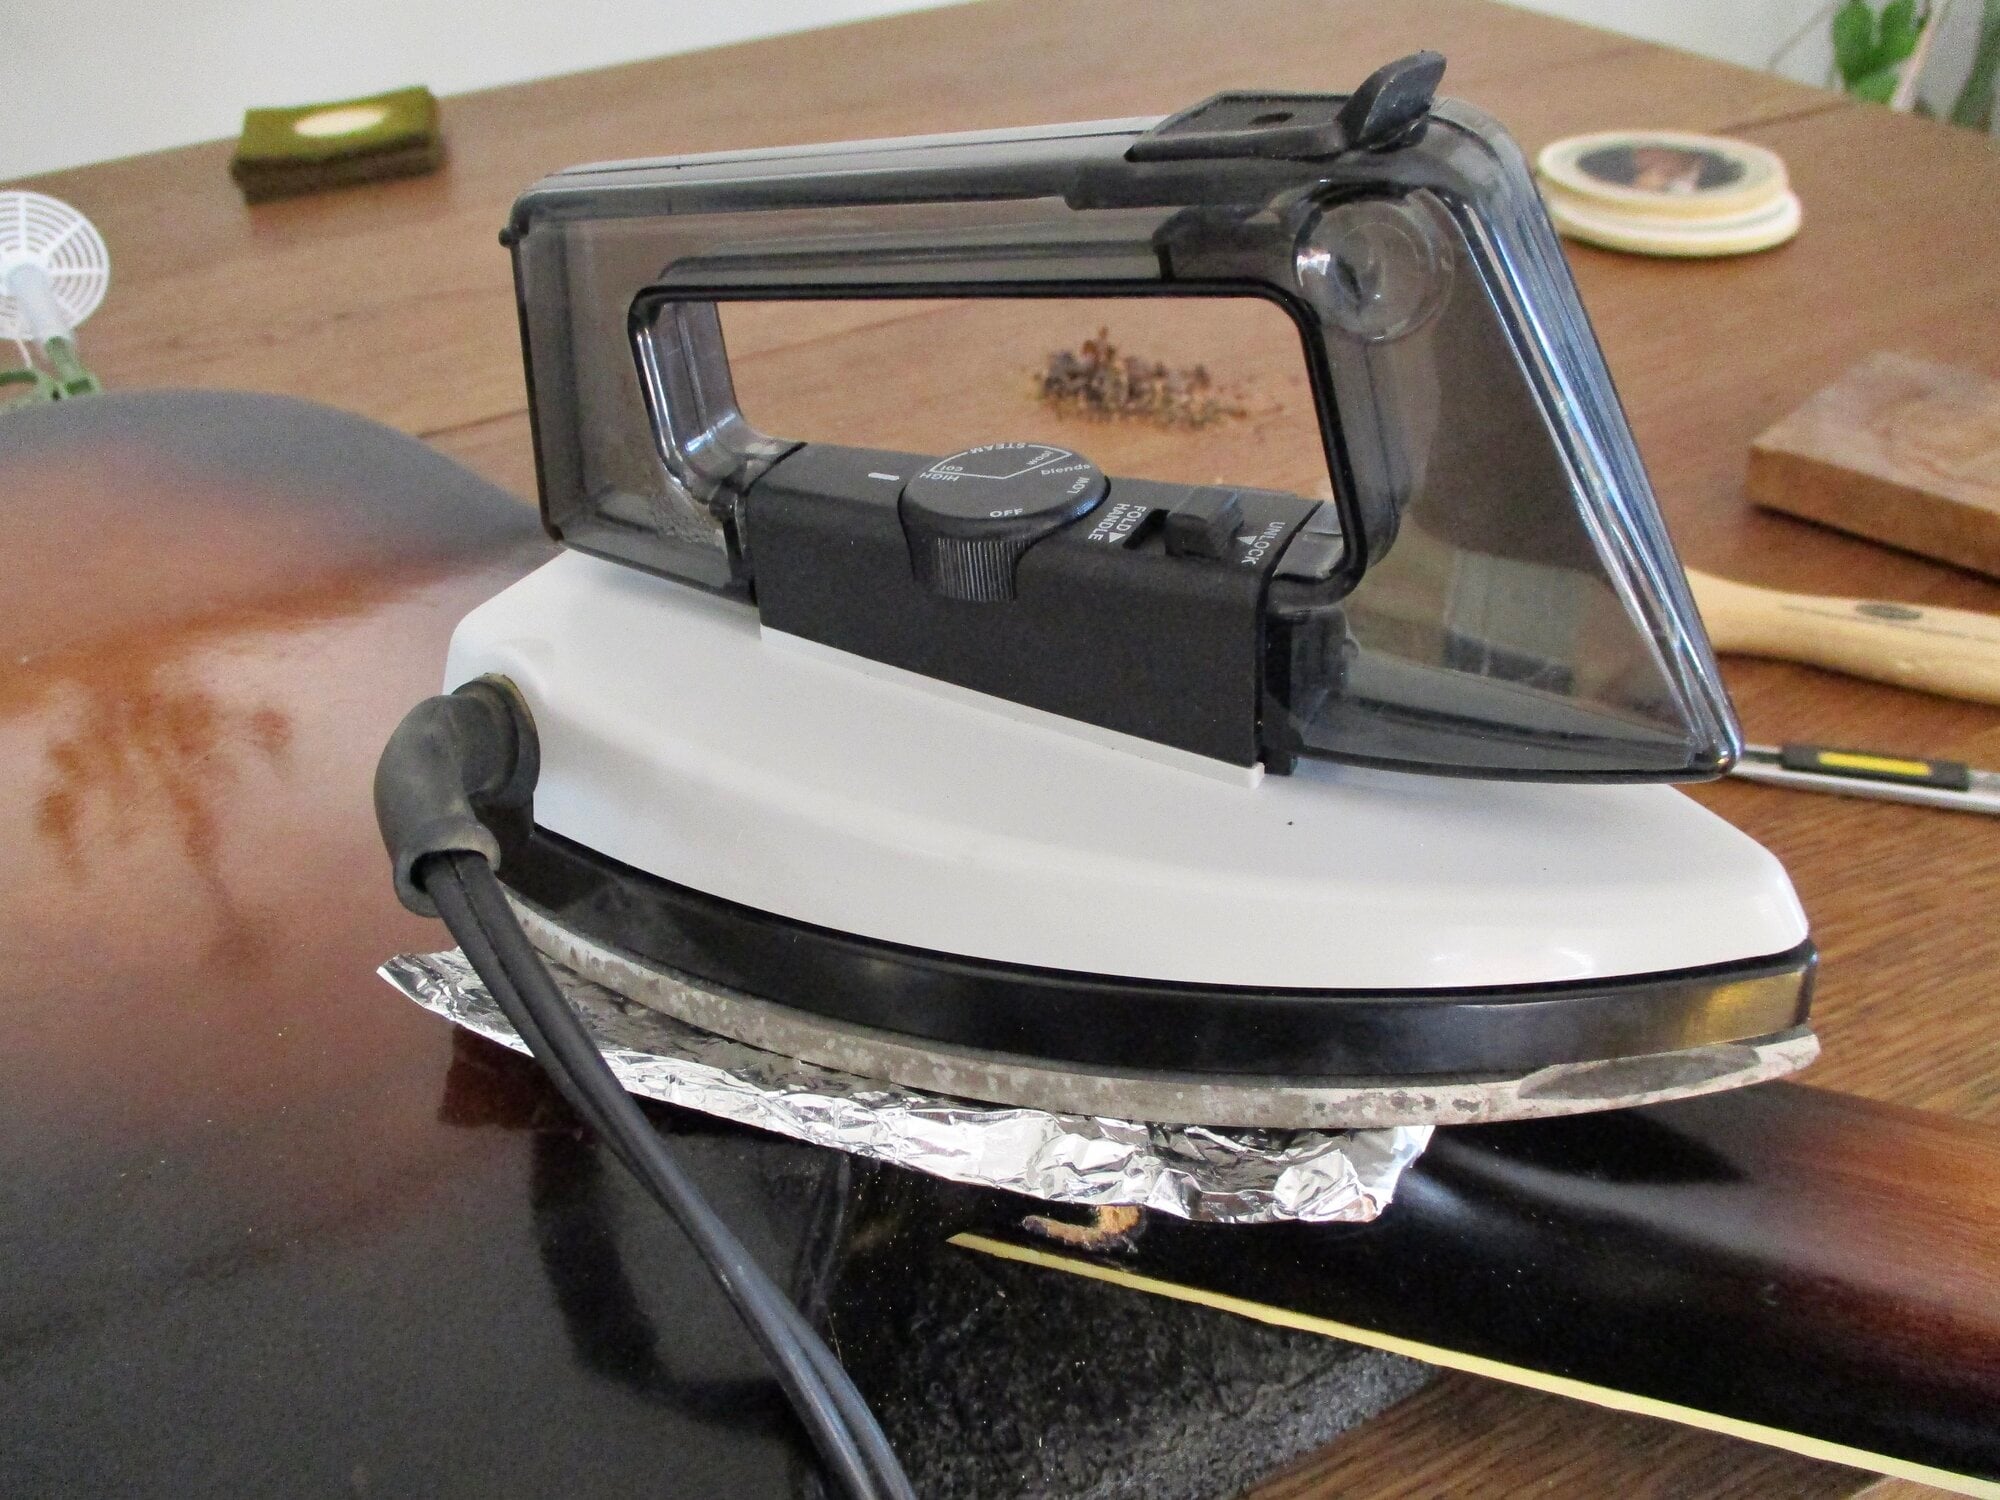
Had to remove the finish as it was bubbling from the heat - but as you can see I separated the neck from the body
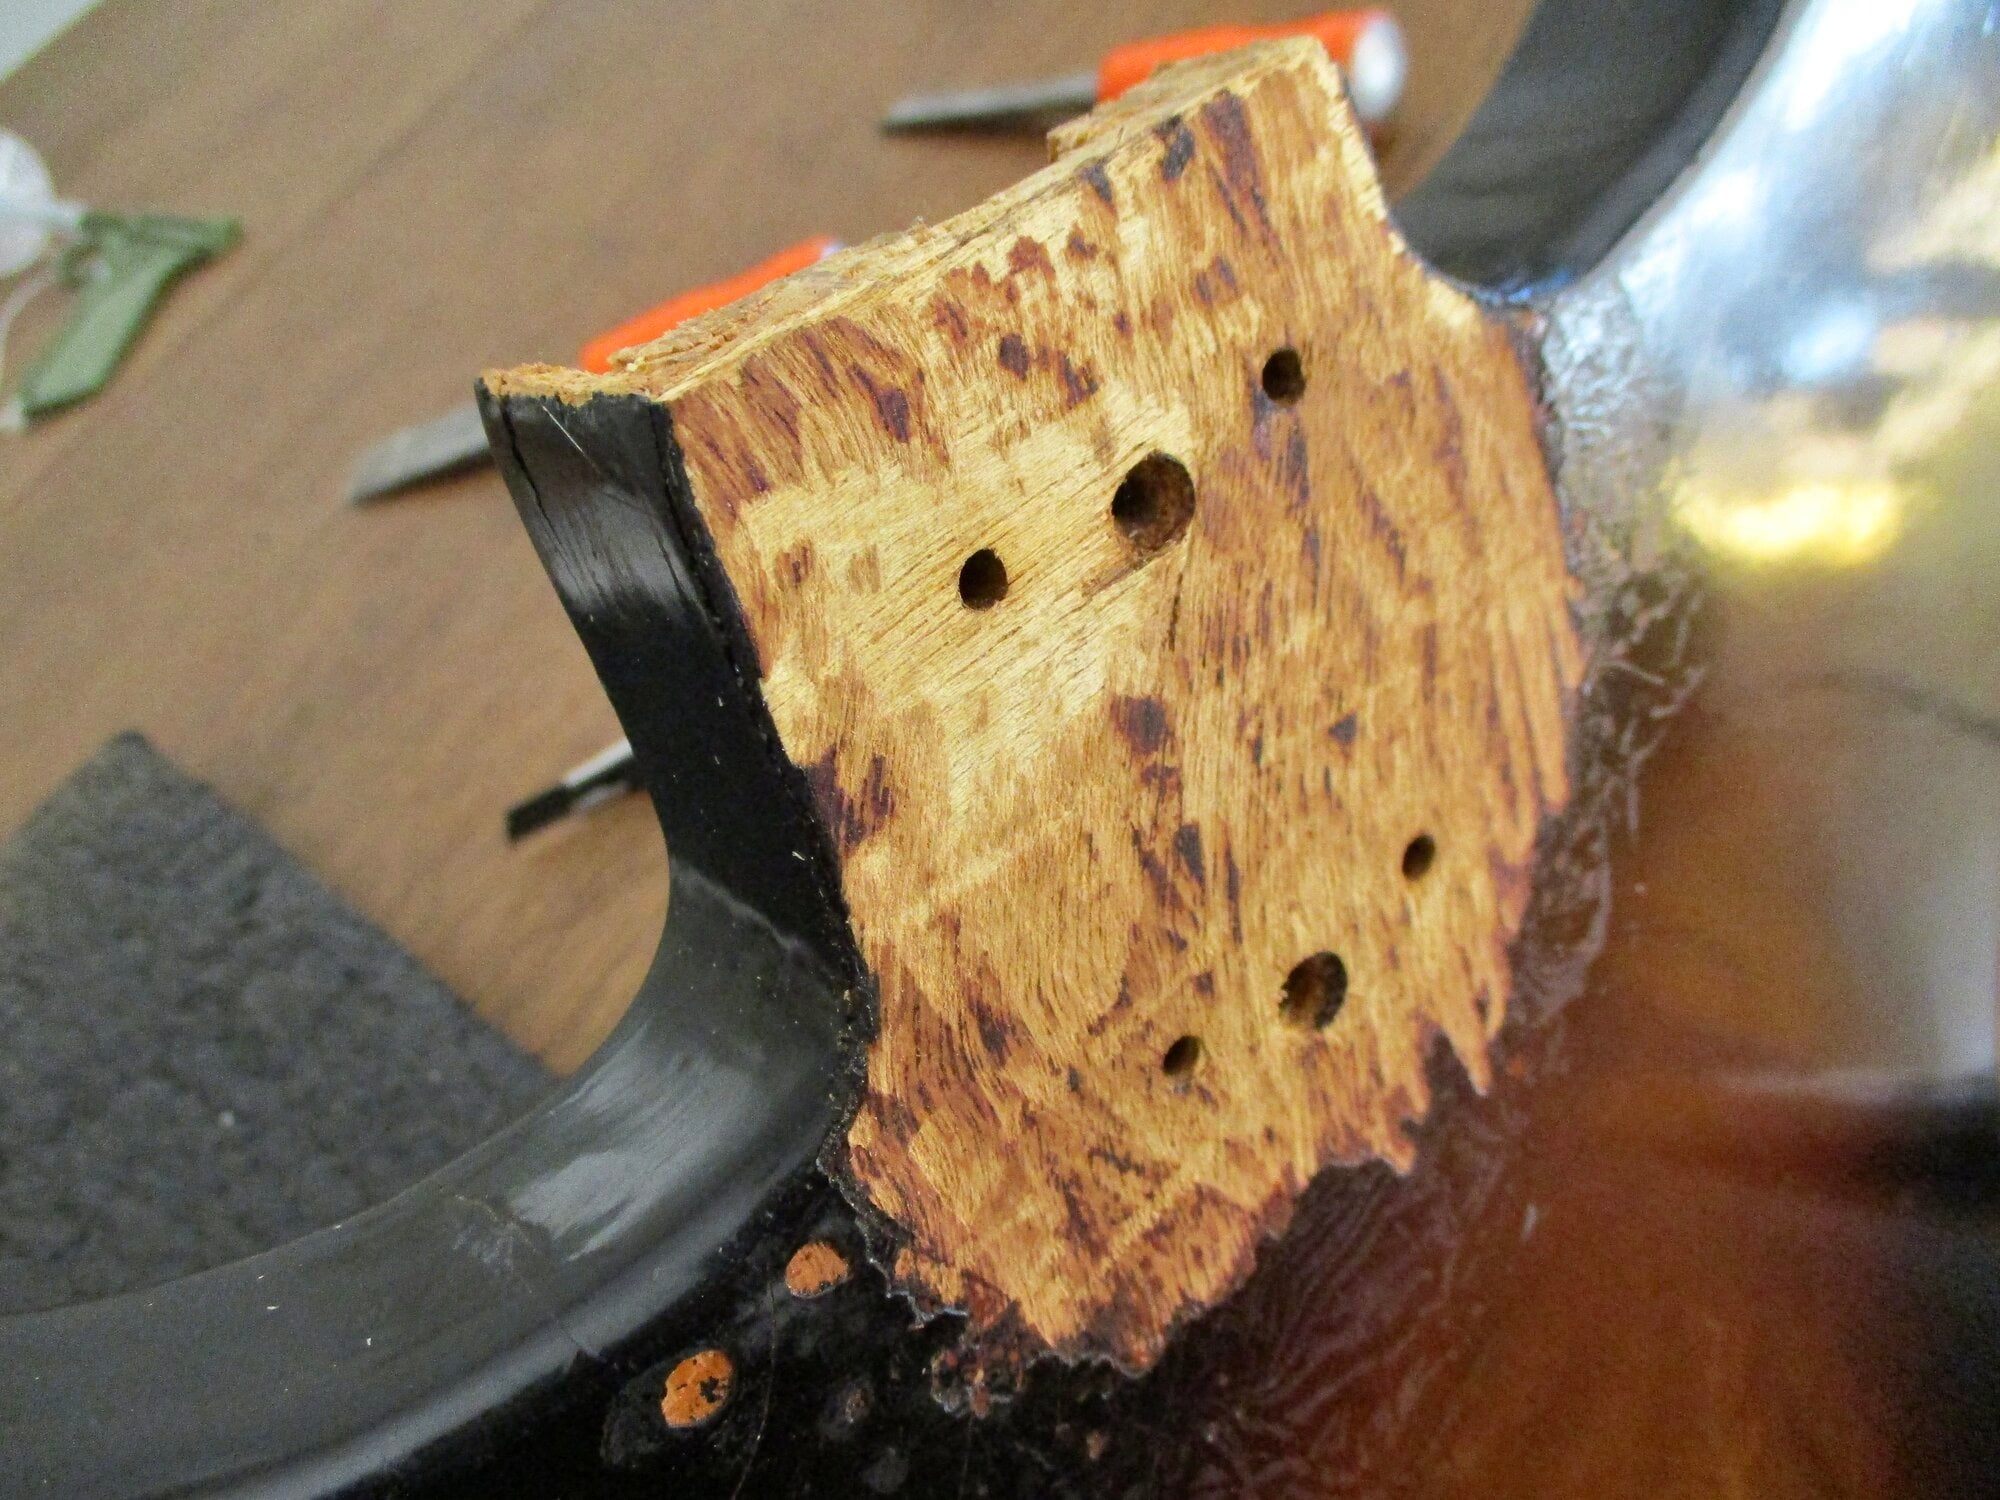
...and as expected, it was ugly. I scored the paint-seam, used a knife & pallet knife to separate the neck as much as I could after heating and finally got it removed. Lots of white wood-glue... a real DIY job ~
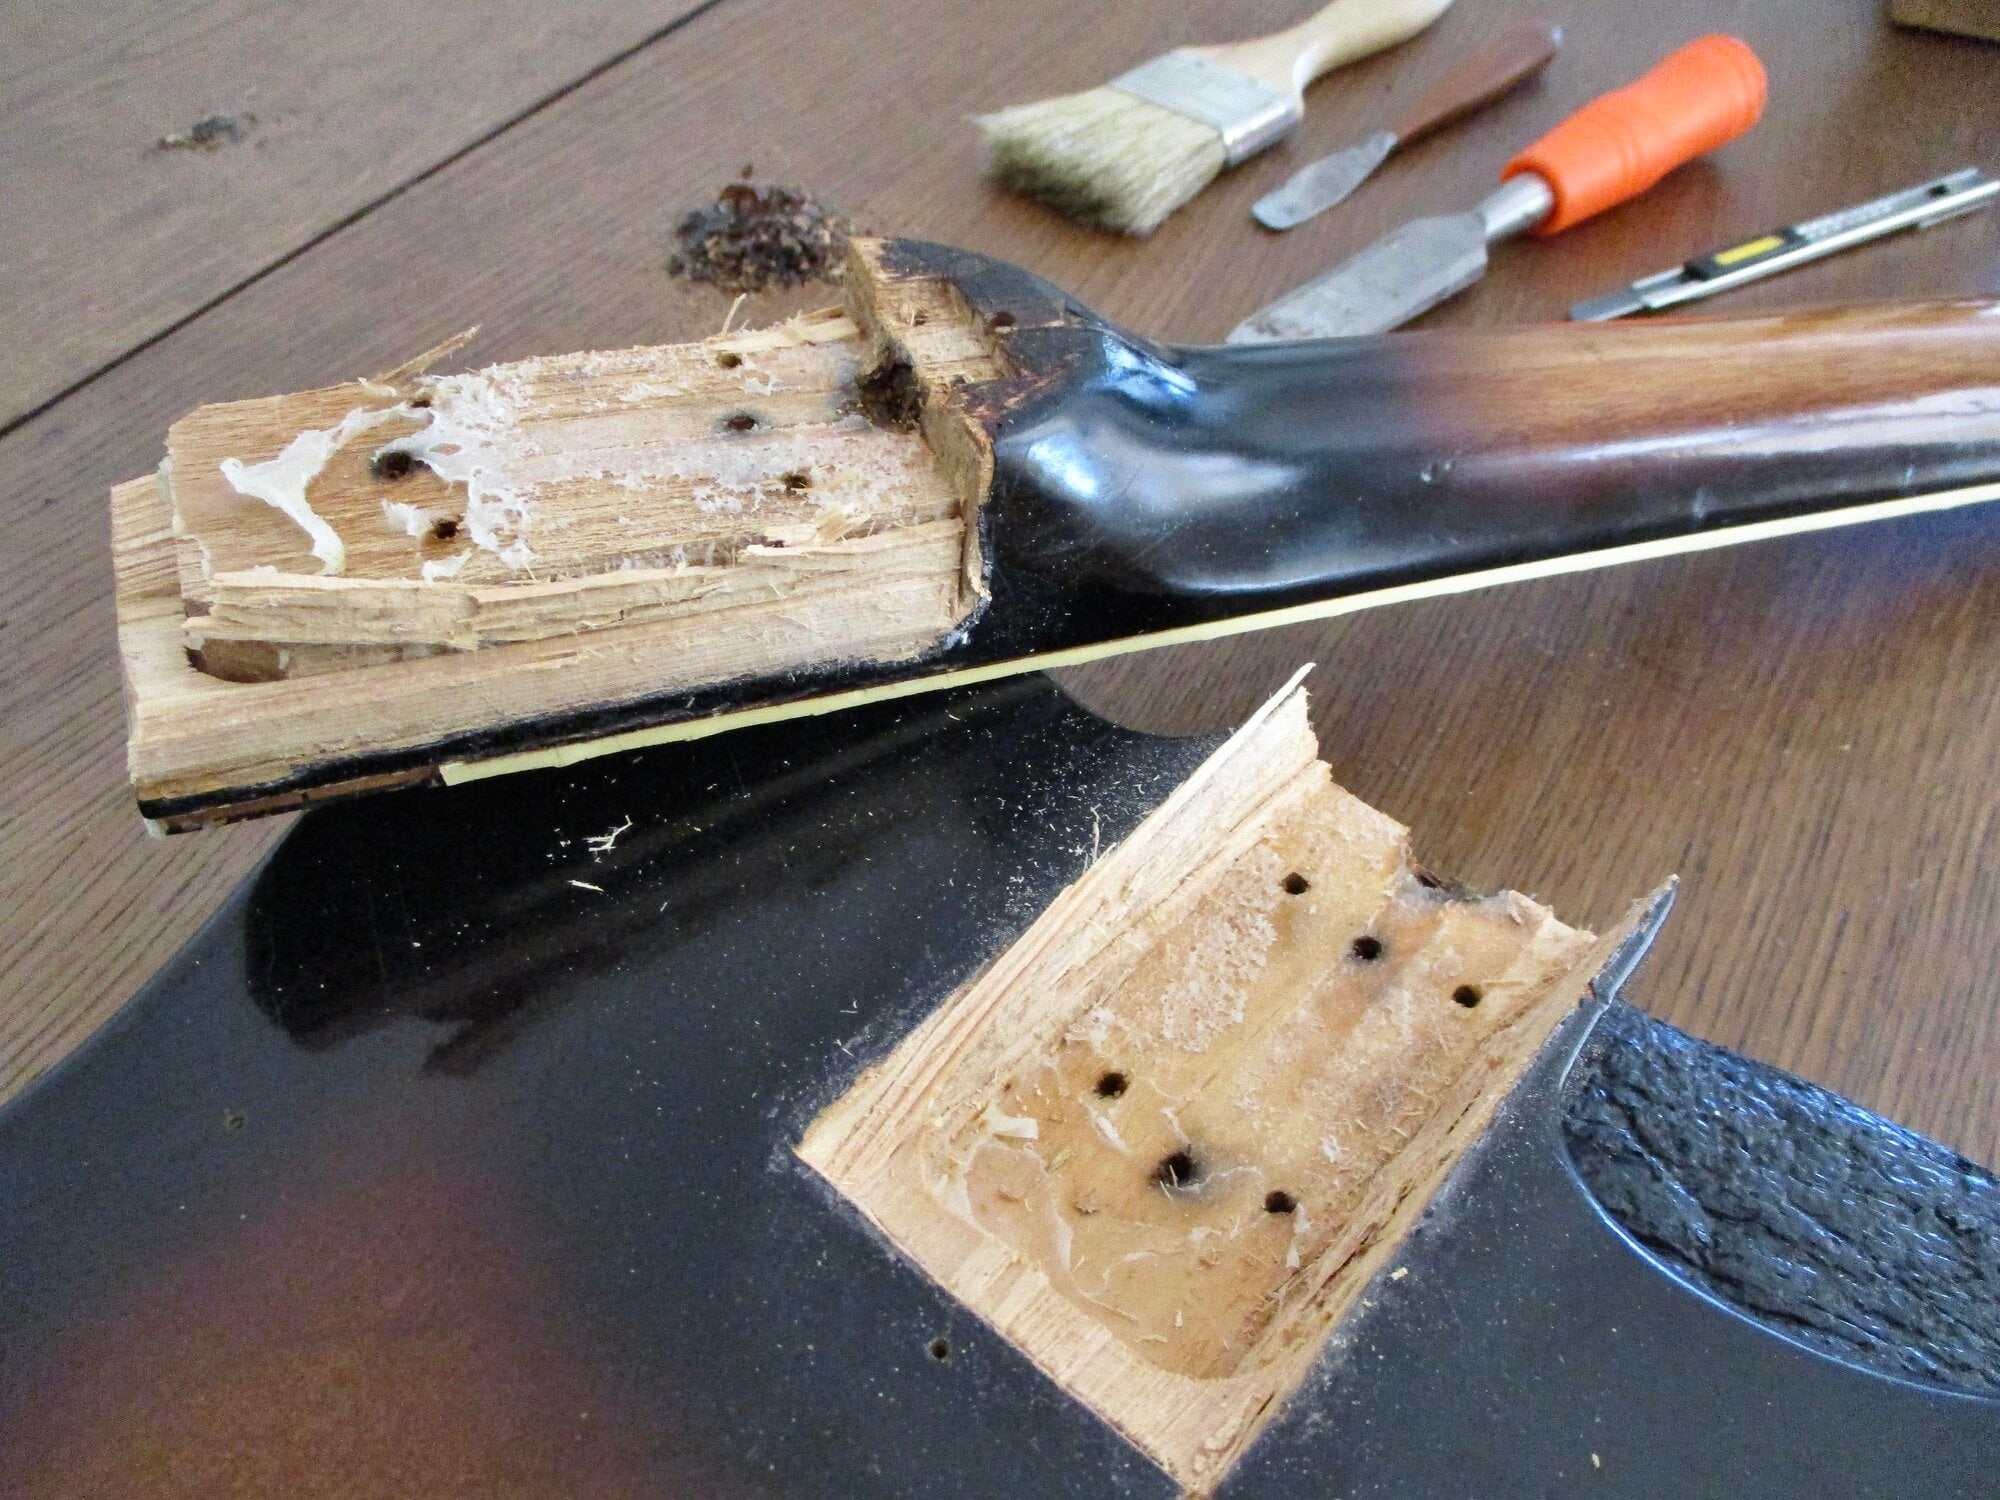
The pocket shelf broke away from the pocket, but I know how to address it -
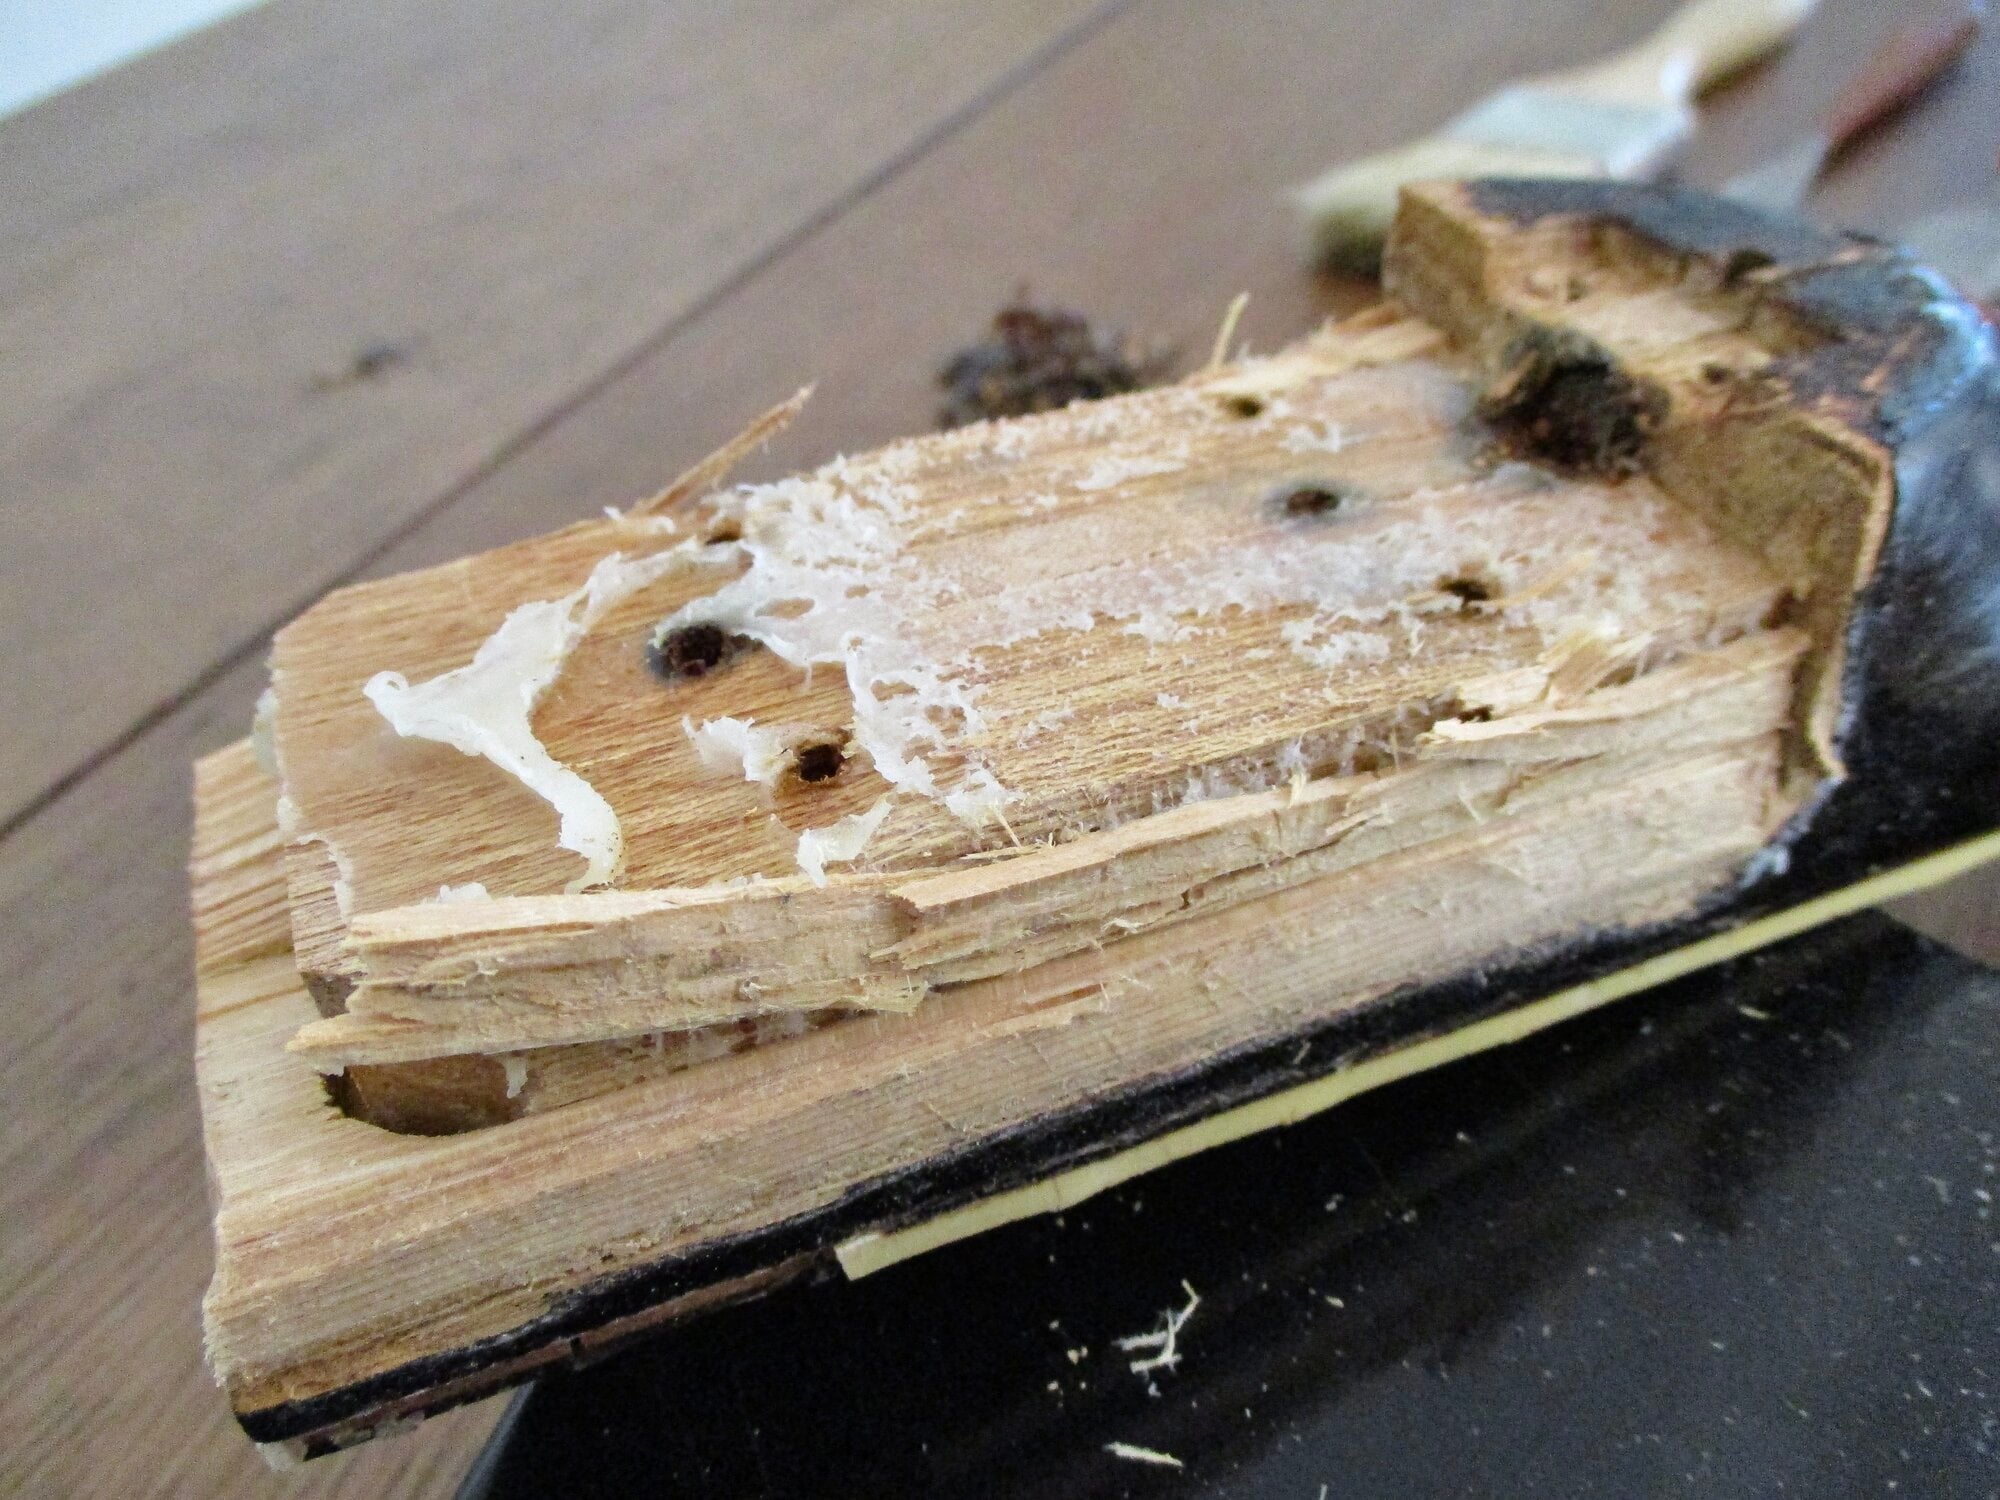
Again - globs of white glue (Gorilla Glue?) - shows the inner pocket that conforms to the heel -
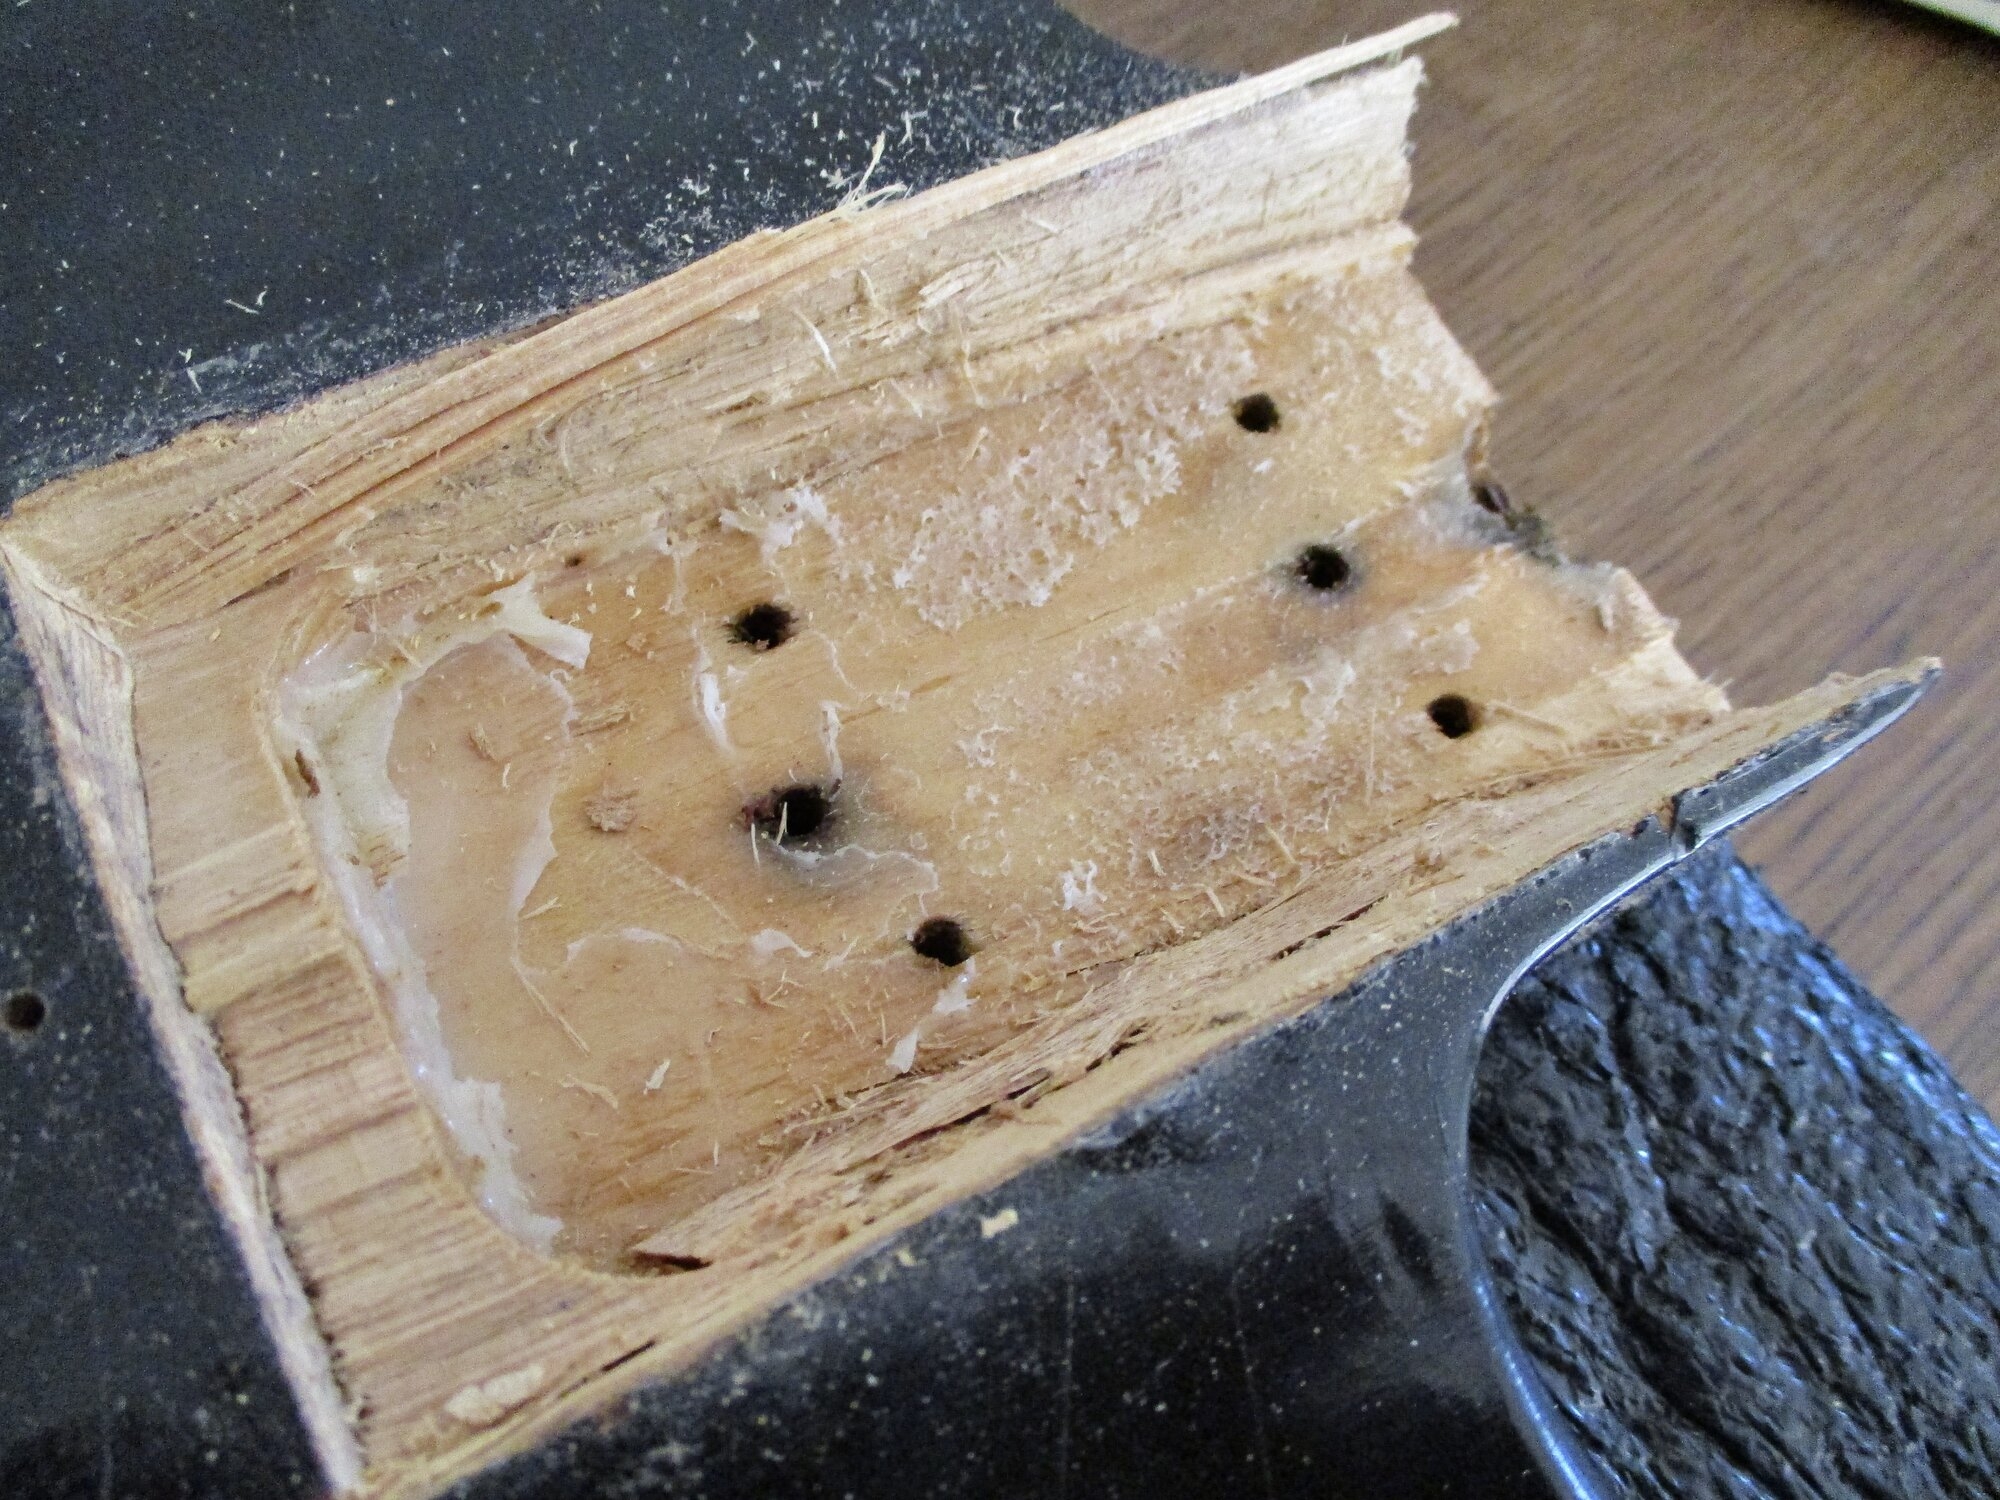
Did an initial clean-up, but will use a router & chisels to square it off -
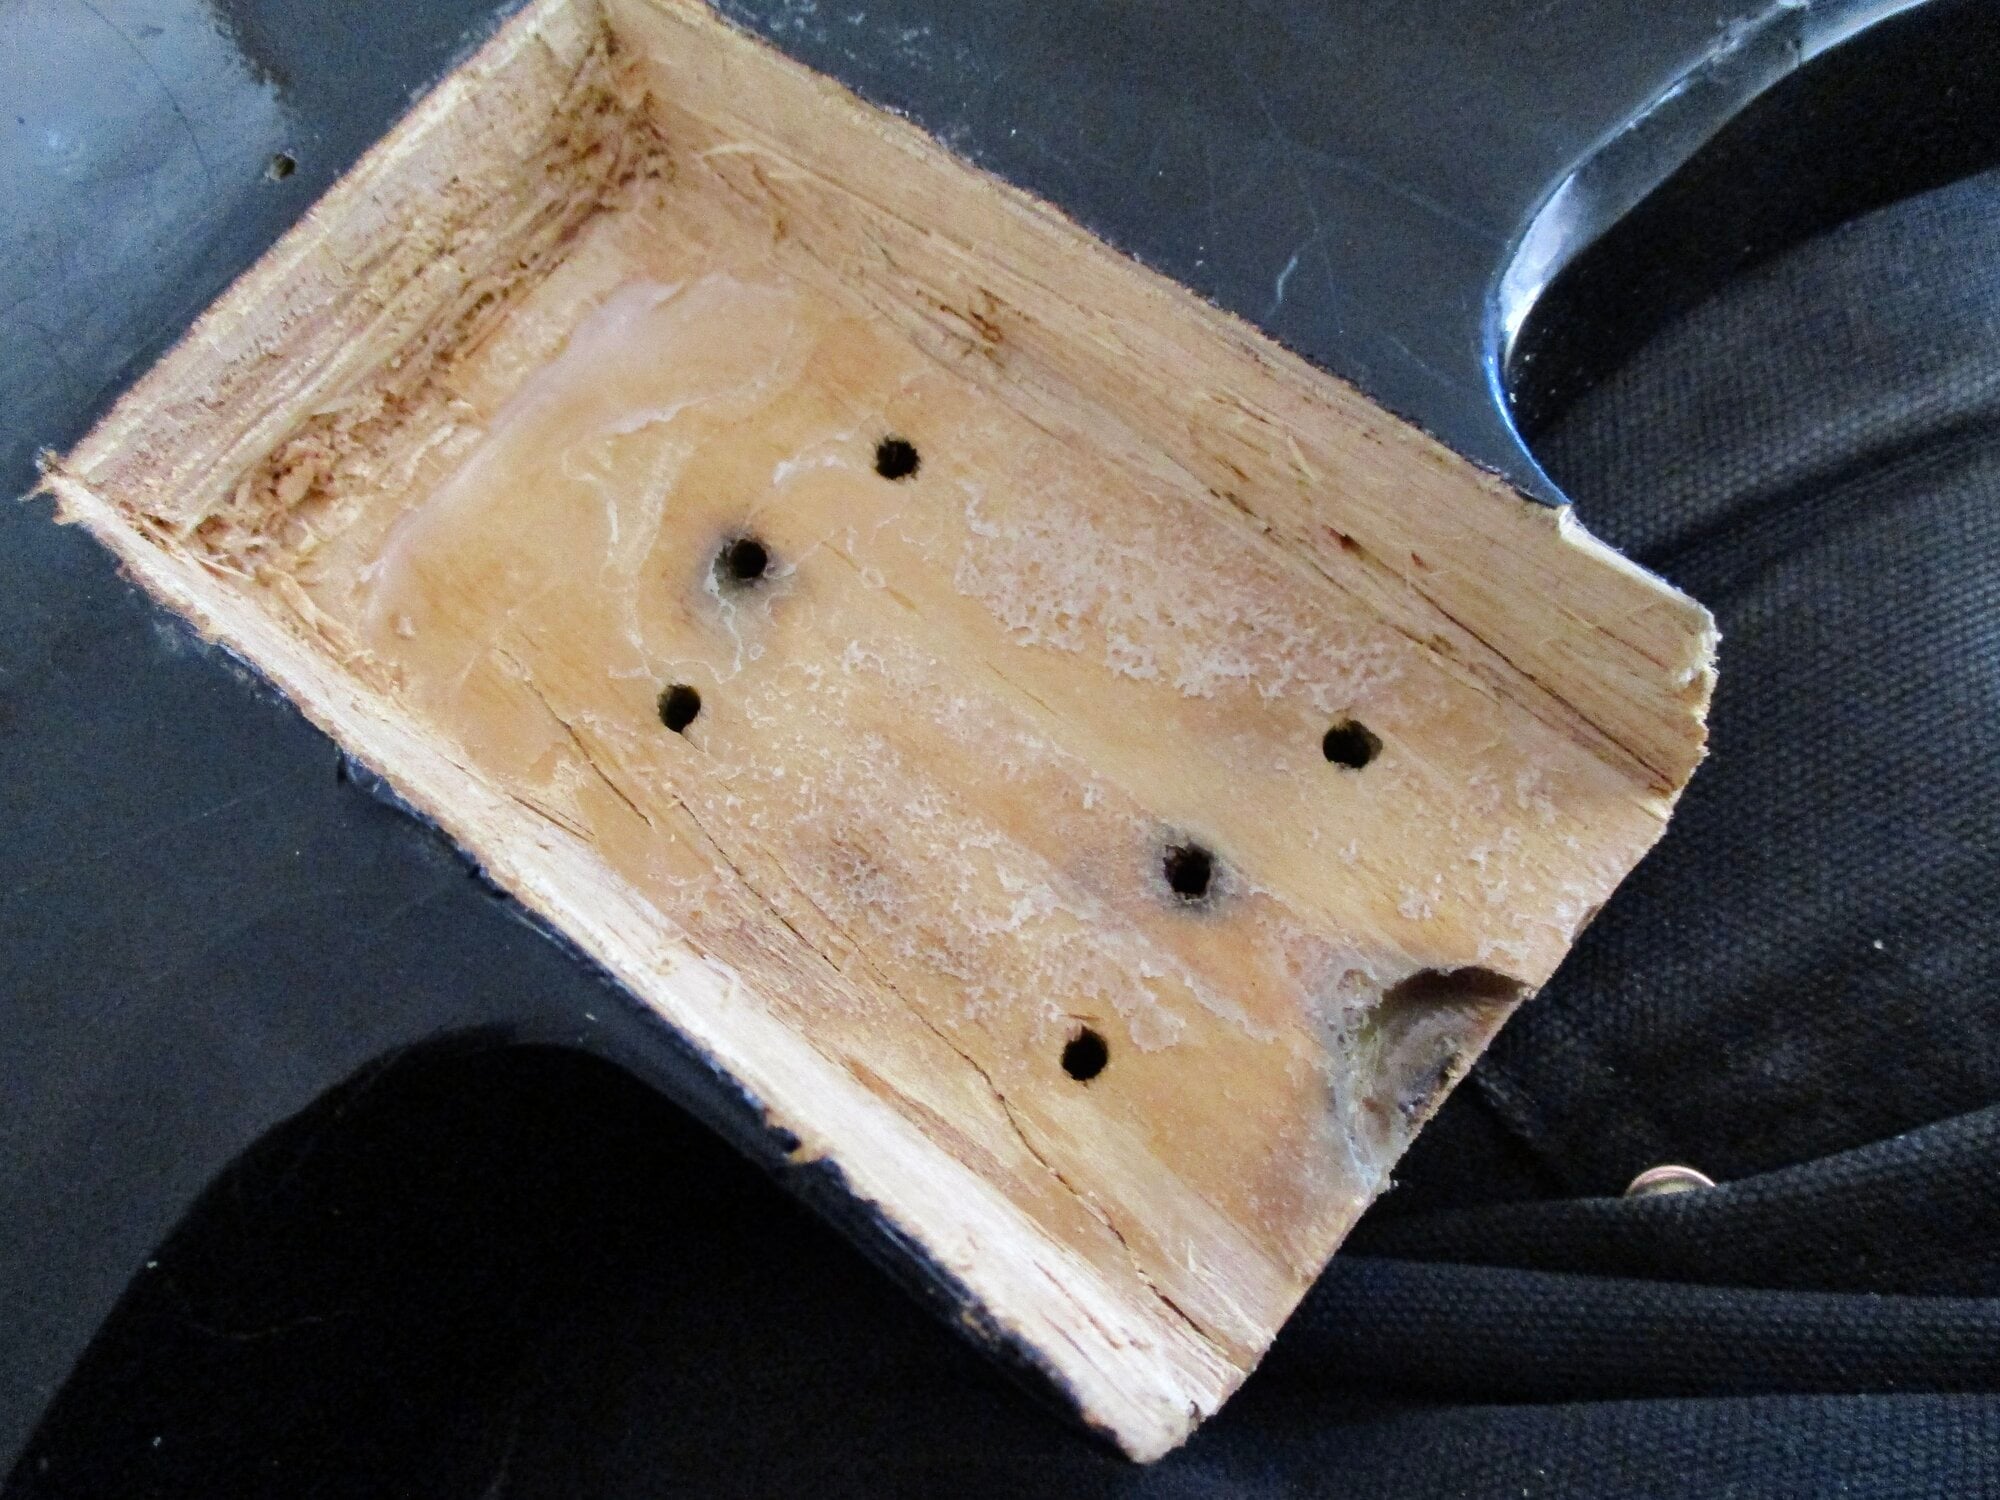
The heel needs the lower side removed and replaced but it faired better than the pocket.
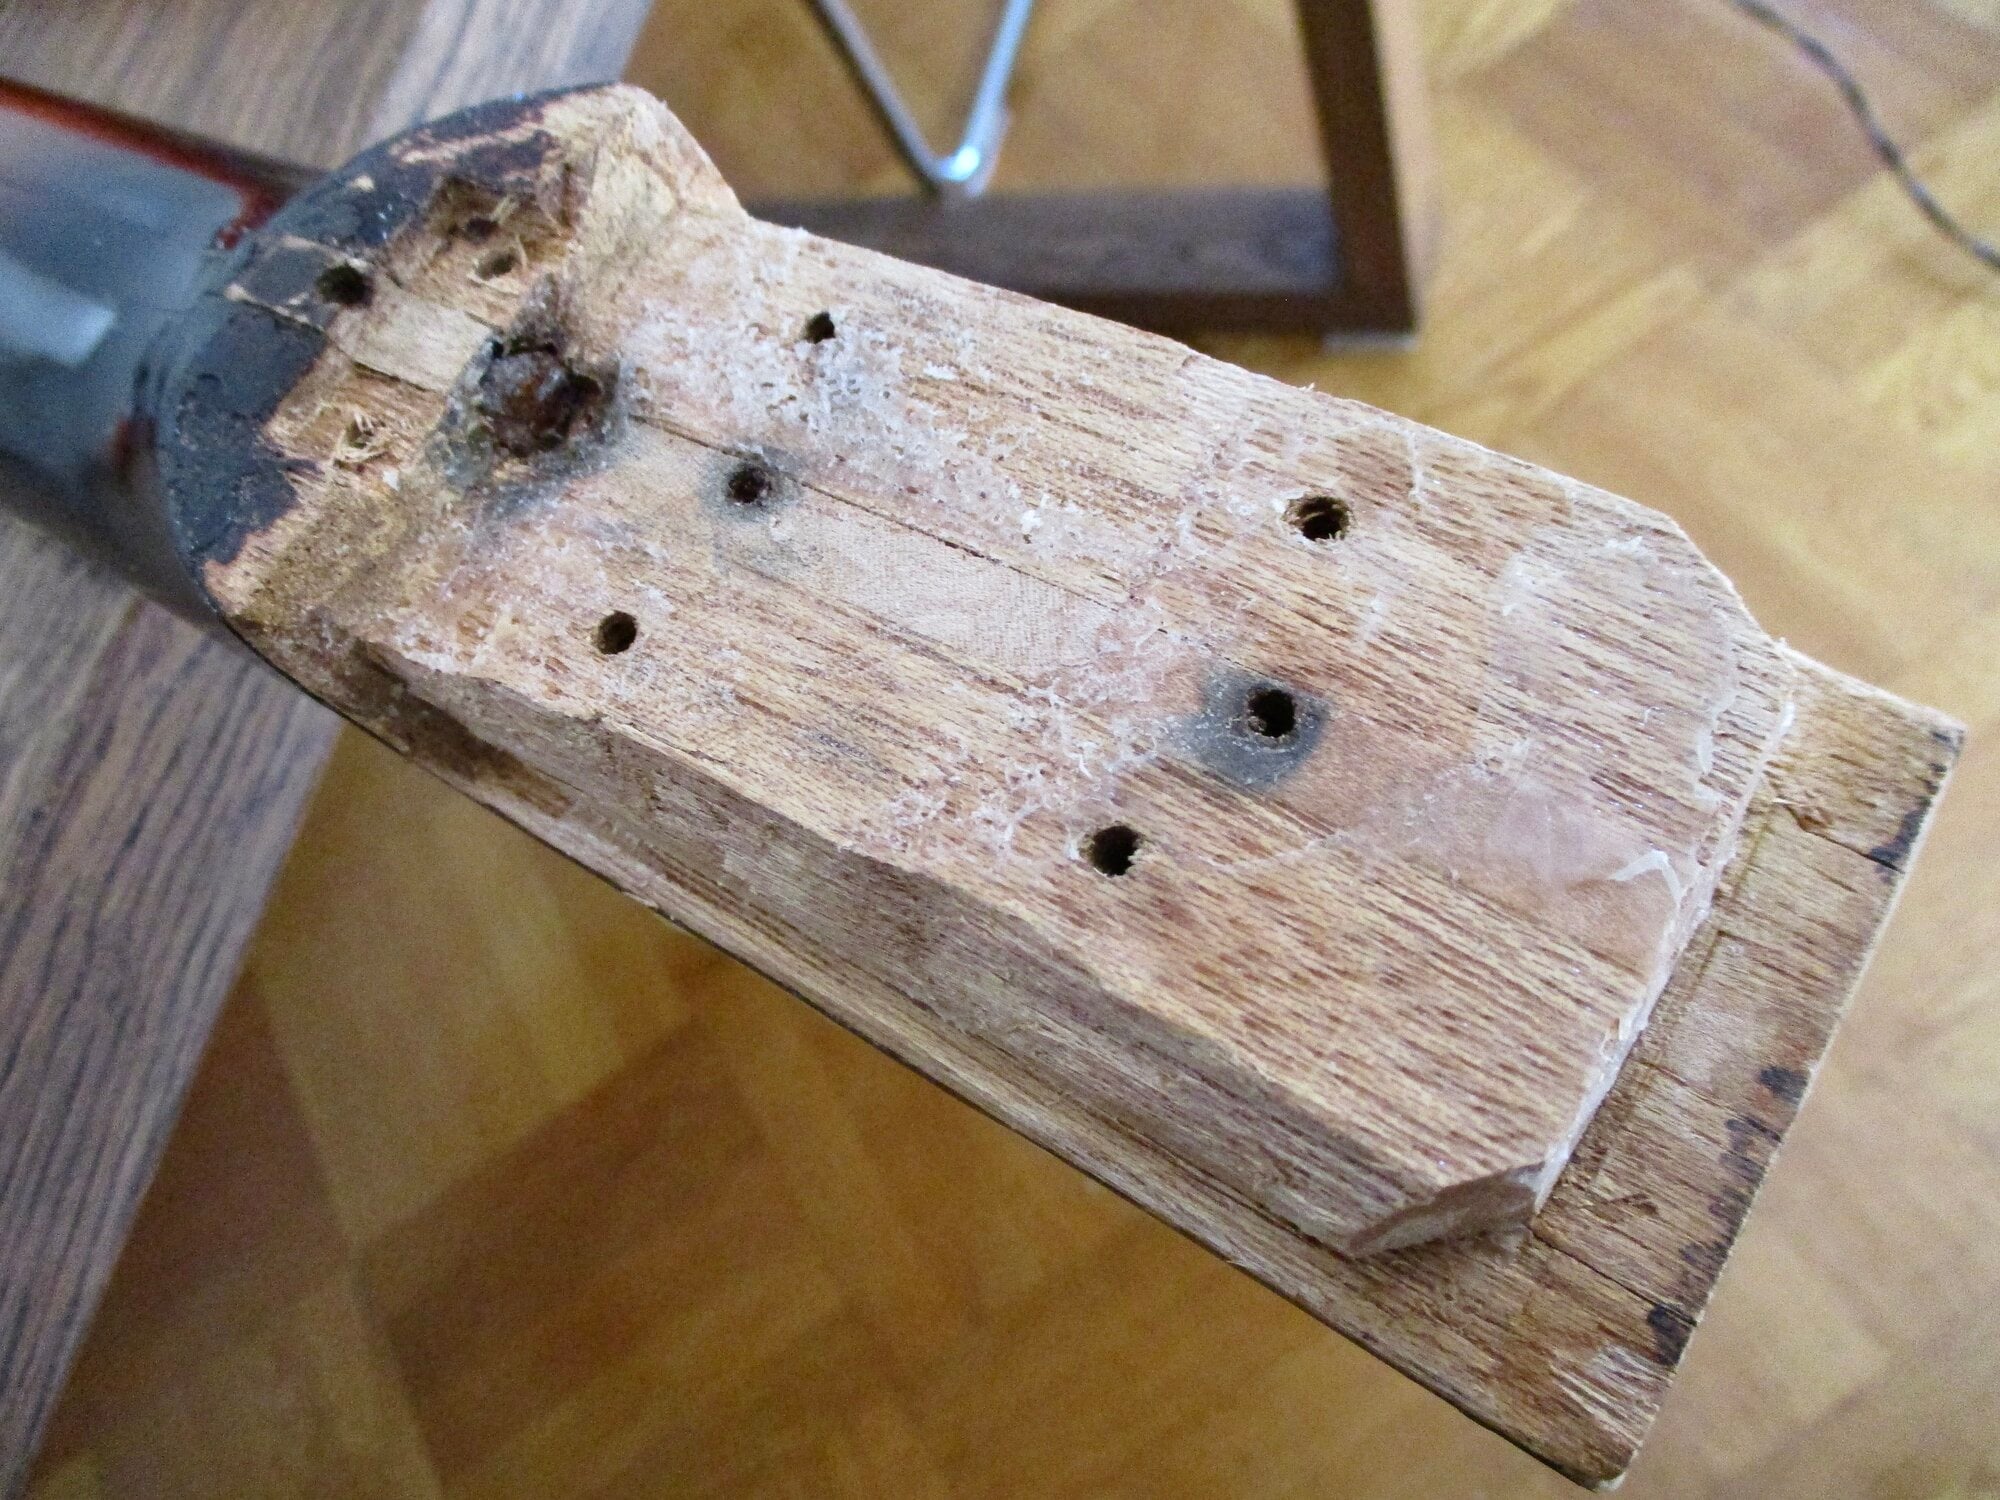
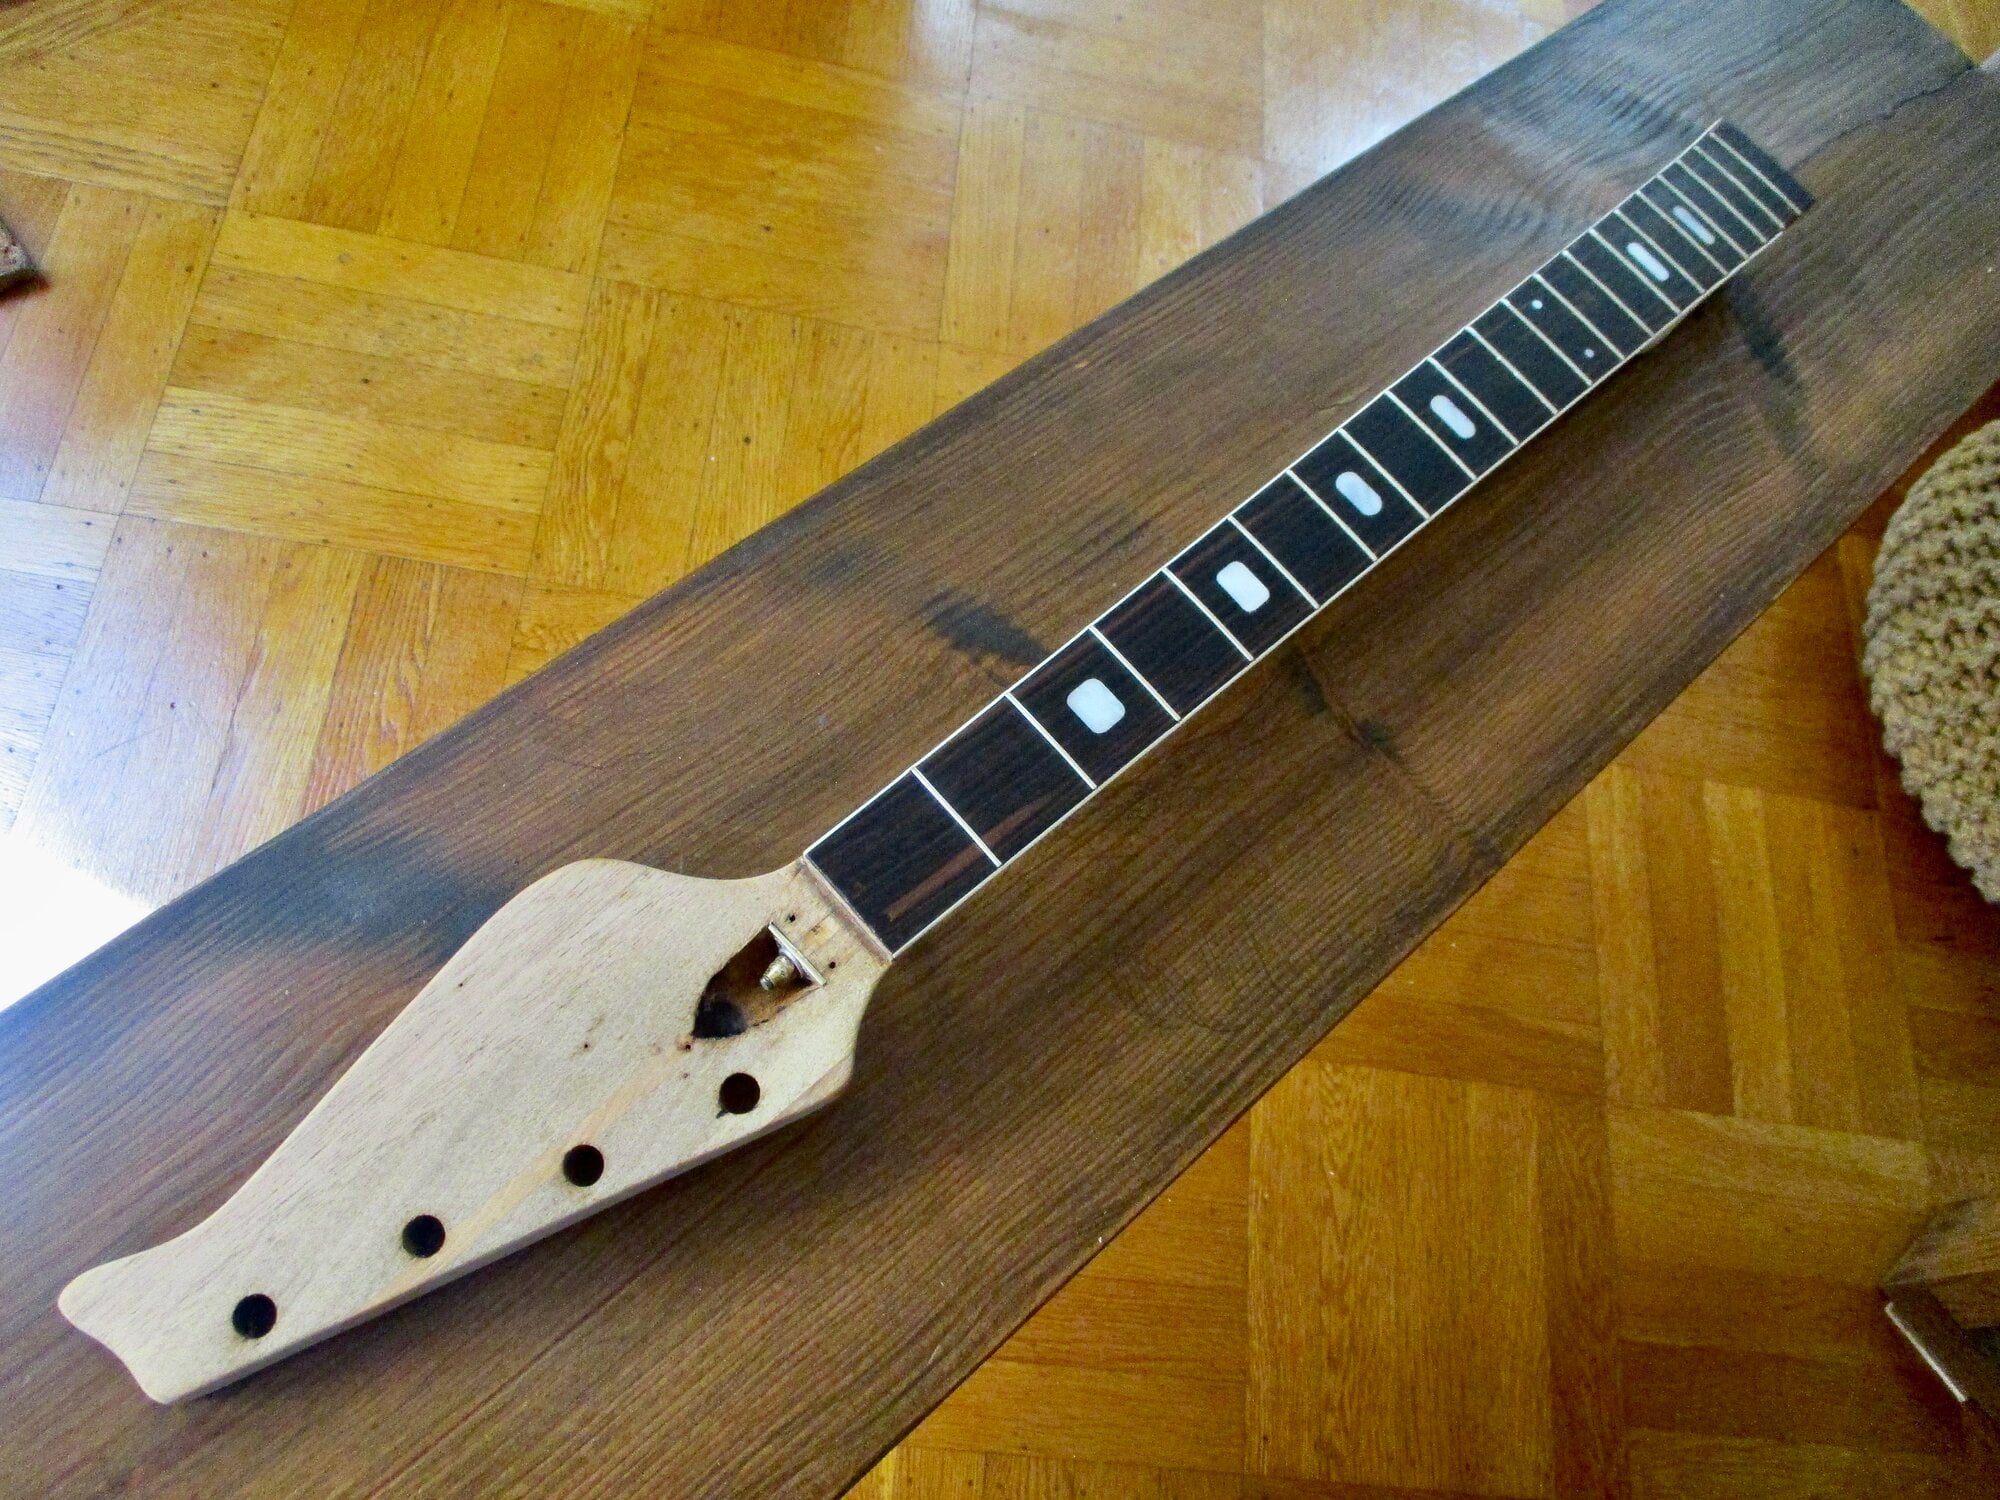
Removed the 50+ yr old finish and did initial sanding - while at it I filed & sanded the neck in first position to slim it - it's a bit of a baseball bat.
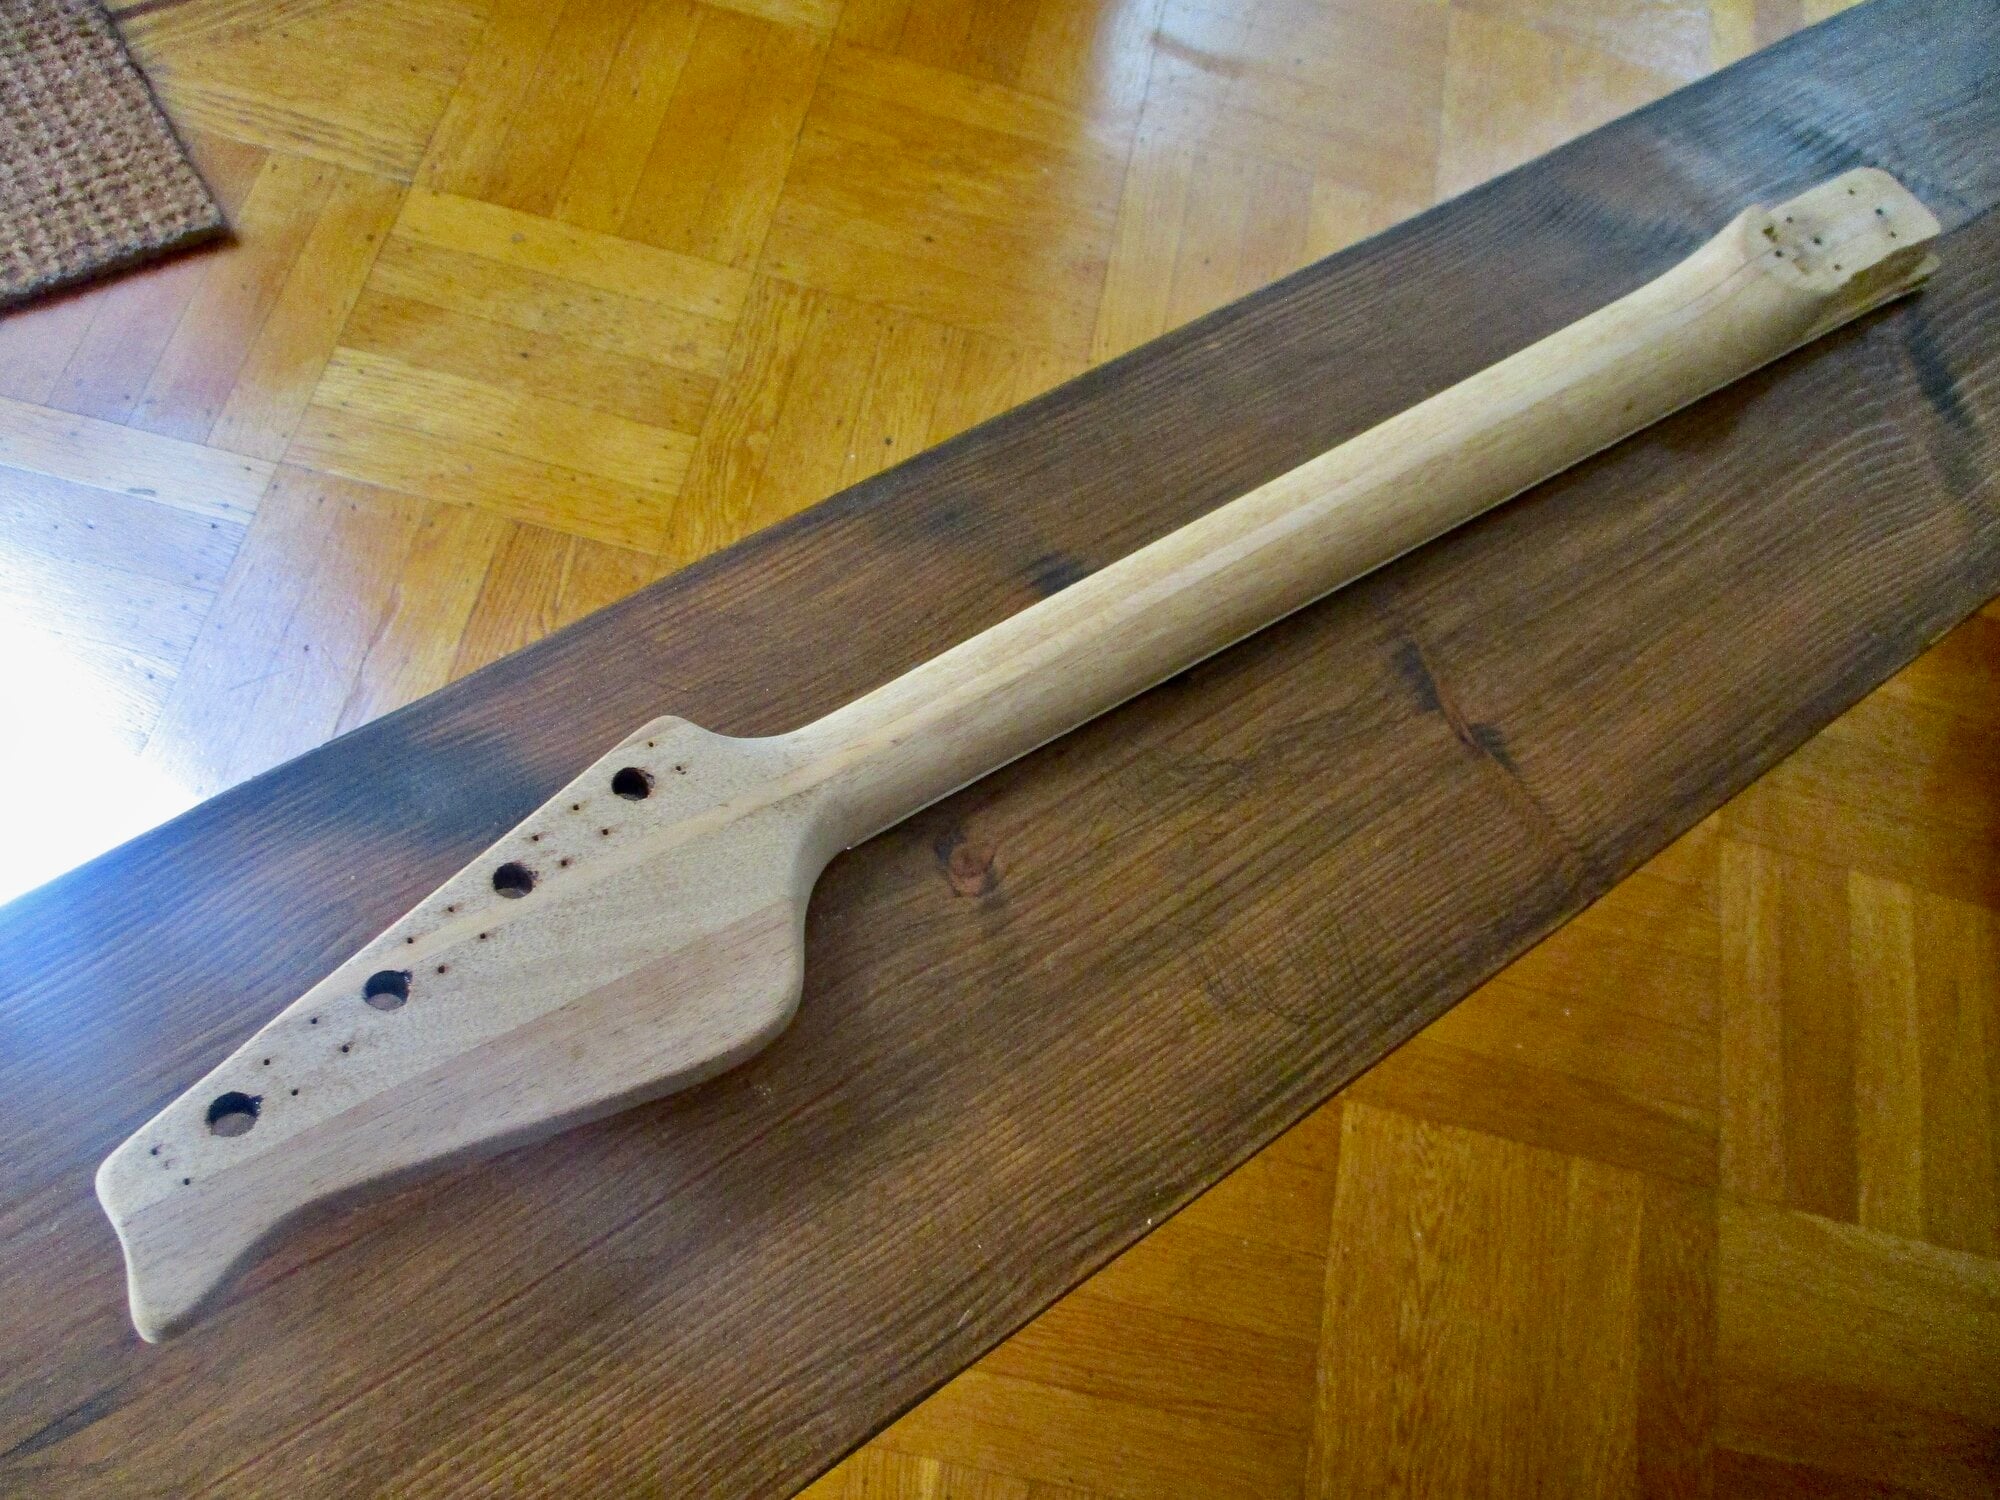
I doubt I'll do a natural finish but I could change my mind - probably finish the neck like the body with an opaque colour. What colour? ... we'll see.
Had to remove the finish as it was bubbling from the heat - but as you can see I separated the neck from the body
...and as expected, it was ugly. I scored the paint-seam, used a knife & pallet knife to separate the neck as much as I could after heating and finally got it removed. Lots of white wood-glue... a real DIY job ~
The pocket shelf broke away from the pocket, but I know how to address it -
Again - globs of white glue (Gorilla Glue?) - shows the inner pocket that conforms to the heel -
Did an initial clean-up, but will use a router & chisels to square it off -
The heel needs the lower side removed and replaced but it faired better than the pocket.
Removed the 50+ yr old finish and did initial sanding - while at it I filed & sanded the neck in first position to slim it - it's a bit of a baseball bat.
I doubt I'll do a natural finish but I could change my mind - probably finish the neck like the body with an opaque colour. What colour? ... we'll see.
Last edited:
- Jun 30, 2010
- 49,619
- 222,152
- Disclosures
- musician/artist/owner - Gildaxe

I dig the old school burst finish. What do you want the final bass to be? A resto? Resto mod? A modern root beer sparkle with black burst edges could be cool. Or even the guilding with a burst, if you wanna modernize the finish that is. If everything else stays stock then maybe just something period correct?
- Jun 30, 2010
- 49,619
- 222,152
- Disclosures
- musician/artist/owner - Gildaxe
At this point I first-off want the bass to be playable and look cool with a fun finish in the end. As the hardware/chrome isn't in great condition, a slick shiny finish would clash. No gilding either, I'll probably do one of my own 'low rent' rattle-can finishes so it all looks cohesive when re-assembled. Possibly incorporating some Glitter-Blast. Now that I have a spray-can of Stew-Mac gloss tobacco, a burst could be re-introduced. I've yet to try a burst and always wanted to, so a tobacco burst over something with Glitter Blast sparkles sounds interesting. I might just have to visit Blicks art store in SF and scan their huge selection of Montana rattle-can colours. Tobacco burst over deep purple, with gold Glitter Blast?I dig the old school burst finish. What do you want the final bass to be? A resto? Resto mod? A modern root beer sparkle with black burst edges could be cool. Or even the guilding with a burst, if you wanna modernize the finish that is. If everything else stays stock then maybe just something period correct?
Something like this with a tobacco burst topped off with a satin clear-coat?

I would do it. Good luck!I'm starting to consider doing a major once-over on the Tempo in order to make it a playable instrument. I've decided that I got my 'nostalgia fix' but I can't stand having a bass that is unplayable regardless of why I bought it. As in, it could be a "wall hanger" - but to me that's a dust collector taking up valuable space. It reminded me how NOT "valuable" nostalgia is... which is something I've always avoided indulging in.
The first thing I would need to do is remove the neck from the body which could be an arduous task. I'll start off testing with heat and hope it's wood-glue, but if epoxy.., WCS. If it were a standard heal/pocket I would have more confidence, but because of the 'shelved' design (as I pointed out in post #29) - it will be difficult. WCS it could really create an ugly mess. But anything can be repaired - so I'll know more once I attempt the extraction. The neck/fb has compound warps so one way or another it will need the lions-share of work. If I'm going that far, I decided I'll remove the finish on the body & neck and do something clean & fresh. (no vintage brown-burst etc) The opaque painted examples I found gave it a promising look. It's all original with all original parts and the pu is strong so if it was given a new lease on life it could be a rockin' bass.
What do you think?
Edit:
Yeah, I see you did it

Last edited:
- Jun 30, 2010
- 49,619
- 222,152
- Disclosures
- musician/artist/owner - Gildaxe
Thanks! Yah, it was bugging me looking at it and not being able to play it. I needed a project anyway and it's definitely a project. I'm going to repair the neck heel to get it back to the way it was and similarly the neck pocket and then send the neck to FIX AN INSTRUMENT'S WARPED NECK in Texas. It has a compound warp (at the heel area on the E side and the nut area on the G side) and hopefully their steaming process will fix it. I've replaced tr's and corrected slightly off necks/fb's but this normally would have been a lost cause for me. It should be easier for them now that it doesn't have a finish I suppose.I would do it. Good luck!
Edit:
Yeah, I see you did it
I know a guy who runs a metal polishing biz in the Bay Area who's done some work for me polishing custom aluminum pg's/control plates I made to a gloss chrome-like sheen so I'll take the metal pg to him to renew. I considered cutting my own of any choice of colours/styles of pg material but the metal pg is one of the original things I want to keep in the mix.
This later (early '70s) example illustrates what a shiny pg would look like. And after seeing this again - rasping an elbow bevel looks like something I will do to enhance player interface. It doesn't have a belly bevel either, which I will add. Also, seeing this shiny finish makes me re-consider how I'll go about it. What I can do is, I'll do the purple w/Glitter Blast finish on the body & hs face and then send it to Pat Wilkins to do a tobacco burst /tobacco neck and gloss clear-coat. Yah, that's the ticket!

Last edited:


It looks dramatic and pretty awful! But I'm confident that in the end it will be a playable and beautiful instrument!Here we go...
View attachment 7242442
Had to remove the finish as it was bubbling from the heat - but as you can see I separated the neck from the body
View attachment 7242443
...and as expected, it was ugly. I scored the paint-seam, used a knife & pallet knife to separate the neck as much as I could after heating and finally got it removed. Lots of white wood-glue... a real DIY job ~
View attachment 7242444
The pocket shelf broke away from the pocket, but I know how to address it -
View attachment 7242445
Again - globs of white glue (Gorilla Glue?) - shows the inner pocket that conforms to the heal -
View attachment 7242446
Did an initial clean-up, but will use a router & chisels to square it off -
View attachment 7242448
The heal needs the lower side removed and replaced but it faired better than the pocket.
View attachment 7242449
Removed the 50+ yr old finish and did initial sanding - while at it I filed & sanded the neck in first position to slim it - it's a bit of a baseball bat.
View attachment 7242450
I doubt I'll do a natural finish but I could change my mind - probably finish the neck like the body with an opaque colour. What colour? ... we'll see.
View attachment 7242451
- Jun 30, 2010
- 49,619
- 222,152
- Disclosures
- musician/artist/owner - Gildaxe
Pretty awful indeed. If it didn't have personal significance I would not have taken it on. My record for restoring basket-cases is pretty good, so I'm determined to make it worthy of my efforts.It looks dramatic and pretty awful! But I'm confident that in the end it will be a playable and beautiful instrument!
Stripped the body using a heat-gun & scraper, followed by stripper to remove residue. The body appears to be made of five ply's of wood and three top-to-bottom lengths at the core. The center is 7/8" the front is 3/8" with a thin veneer of mahogany, and the back is 1/4" with a thin veneer mahogany. So not a "plywood" body as in thin layers, but a multi-lam construction. This steers me away from creating bevels, as it would expose multiple seams that will eventually ghost through. One less thing to do.
The sides have a hand applied coating of black stain(?) under the paint. Possibly done to make sure the tobacco covered w/o excess coats. I'll have to ask Pat about that. Sanded it smooth enough for now. I'll start working on the pocket, finish work on the heel and assemble for neck to pu to bridge alignment. I'll prime after that's done. If I were doing a transparent finish I would need to do a lot more sanding, but regardless of how it looks the bulk of it is smooth enough to prime as it will need sanding/filling imperfections etc and re-priming/sanding/leveling before adding colour.
Last edited:
- Jun 30, 2010
- 49,619
- 222,152
- Disclosures
- musician/artist/owner - Gildaxe
Routed the pocket cavity...
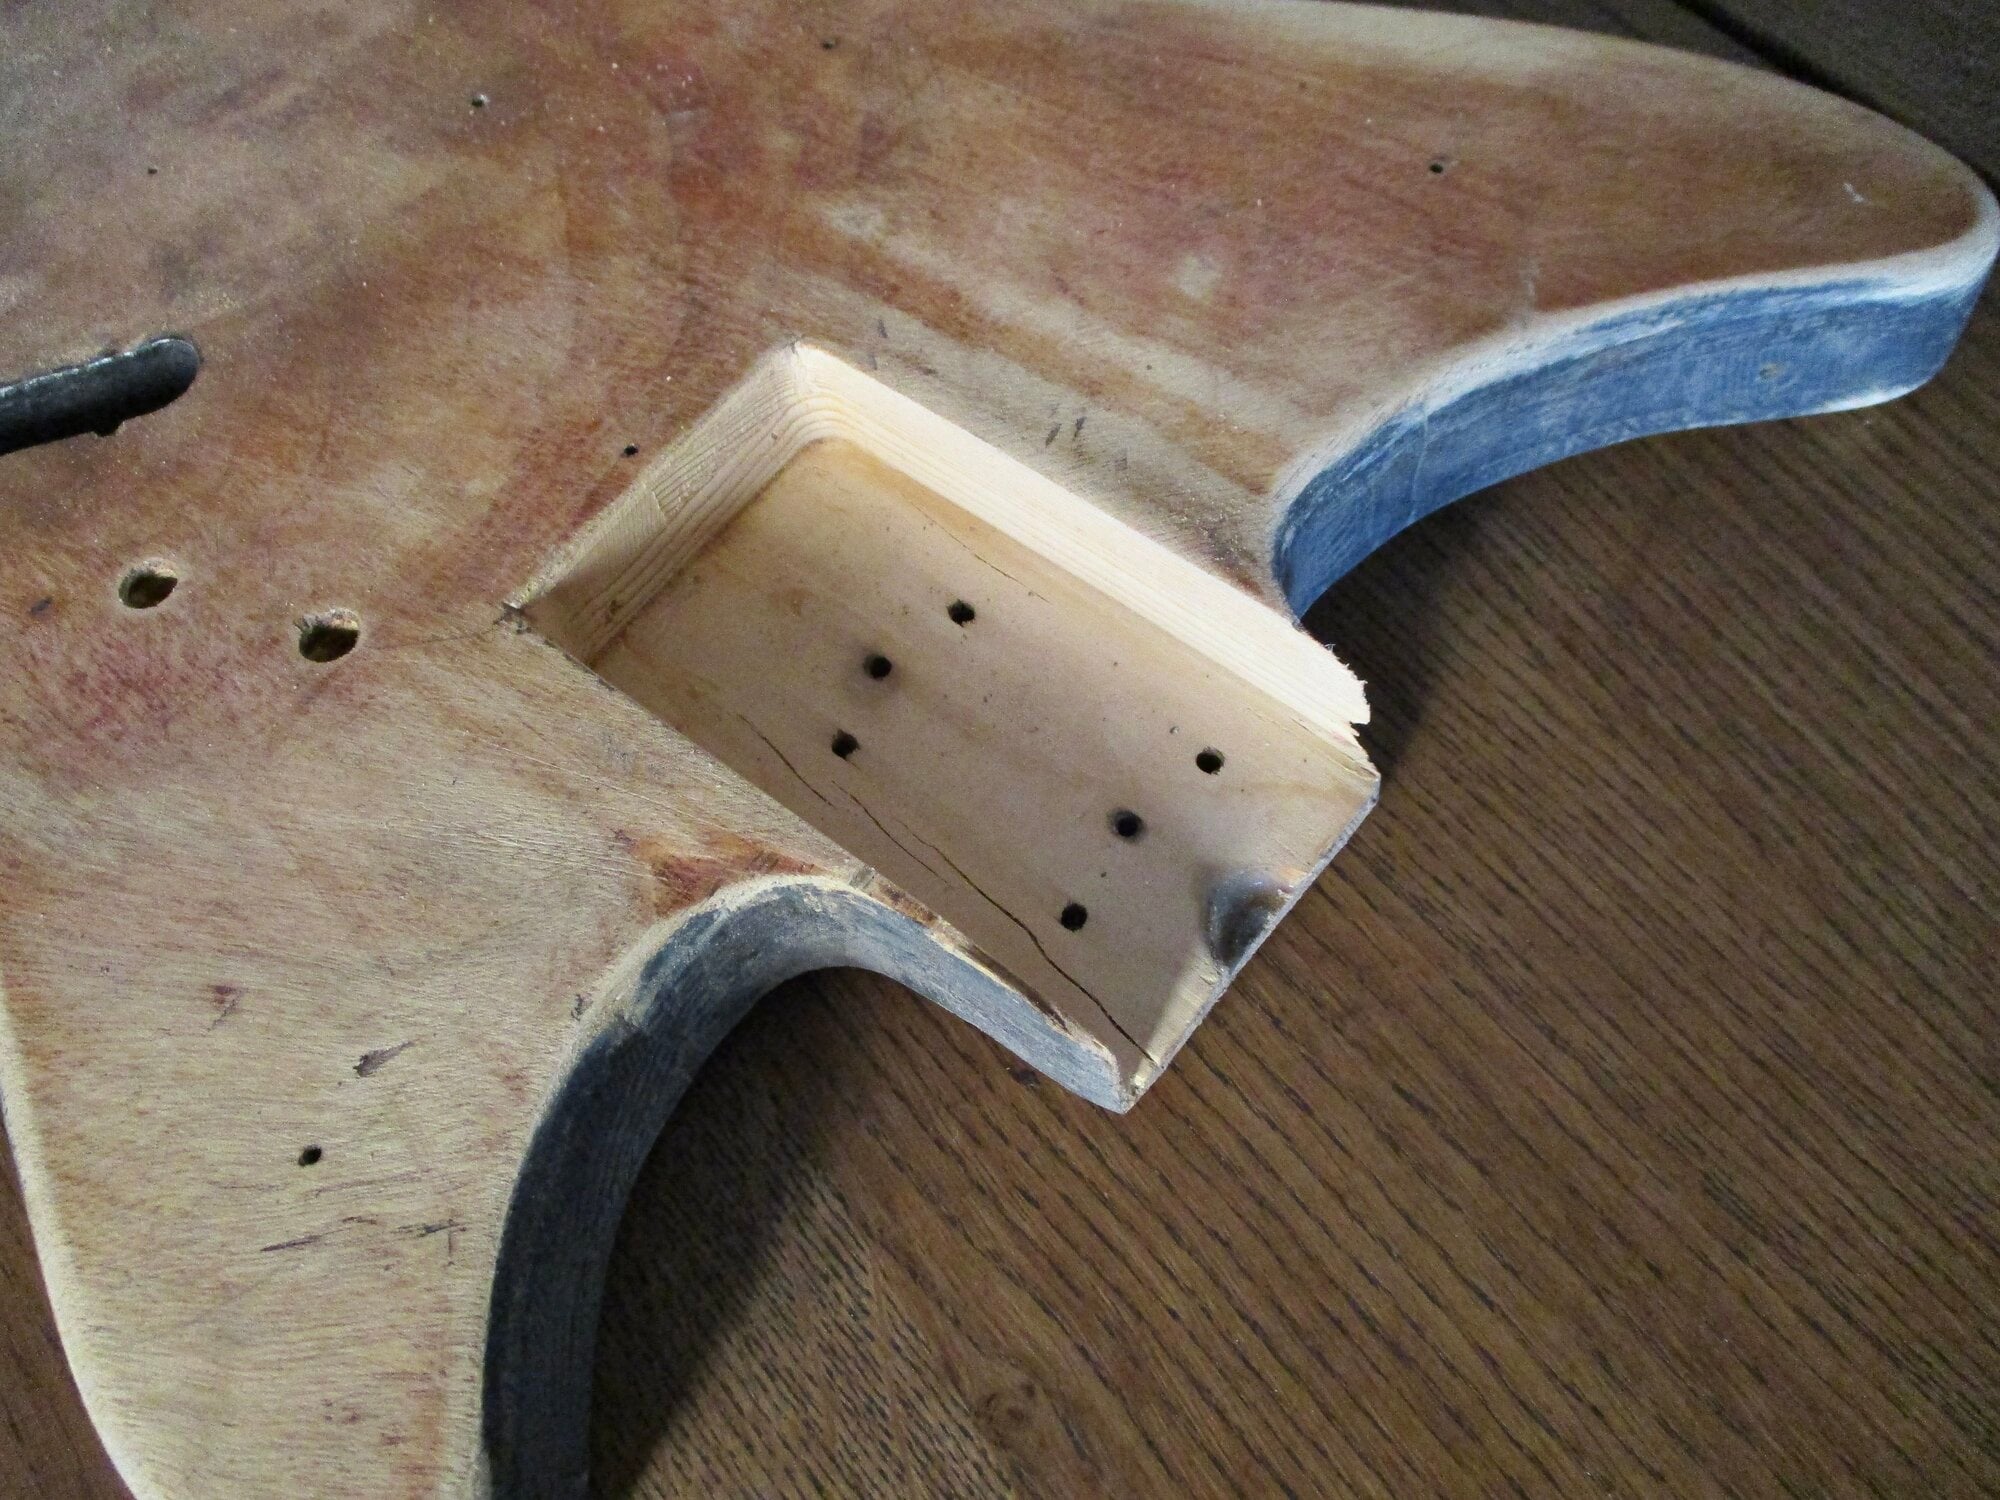
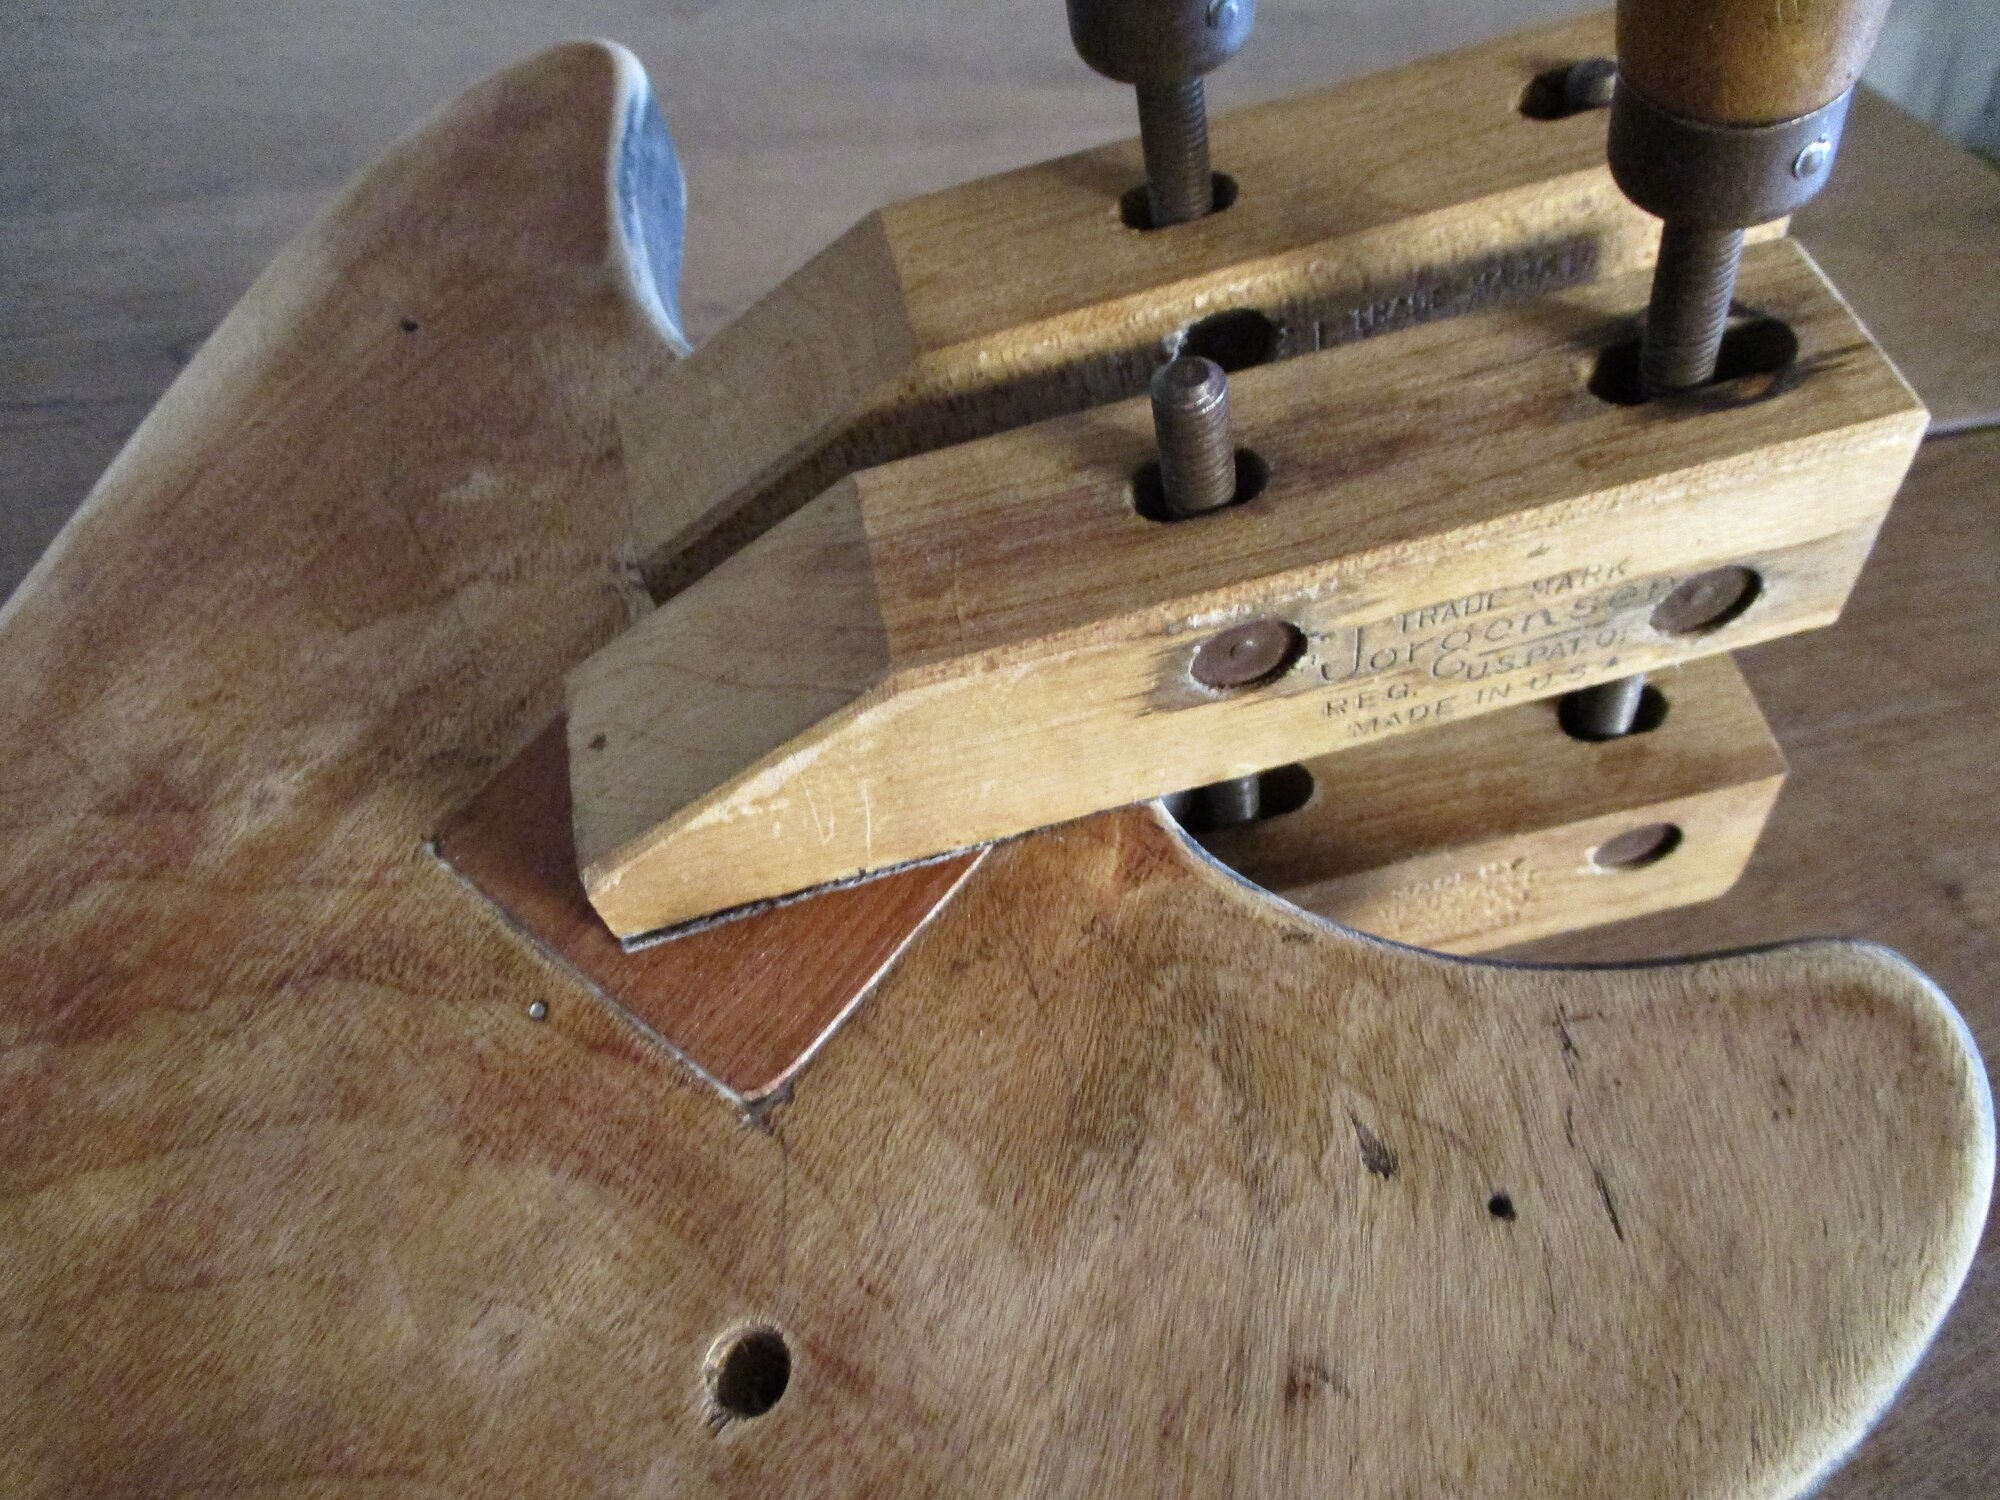
...made a 'plug' of mahogany -
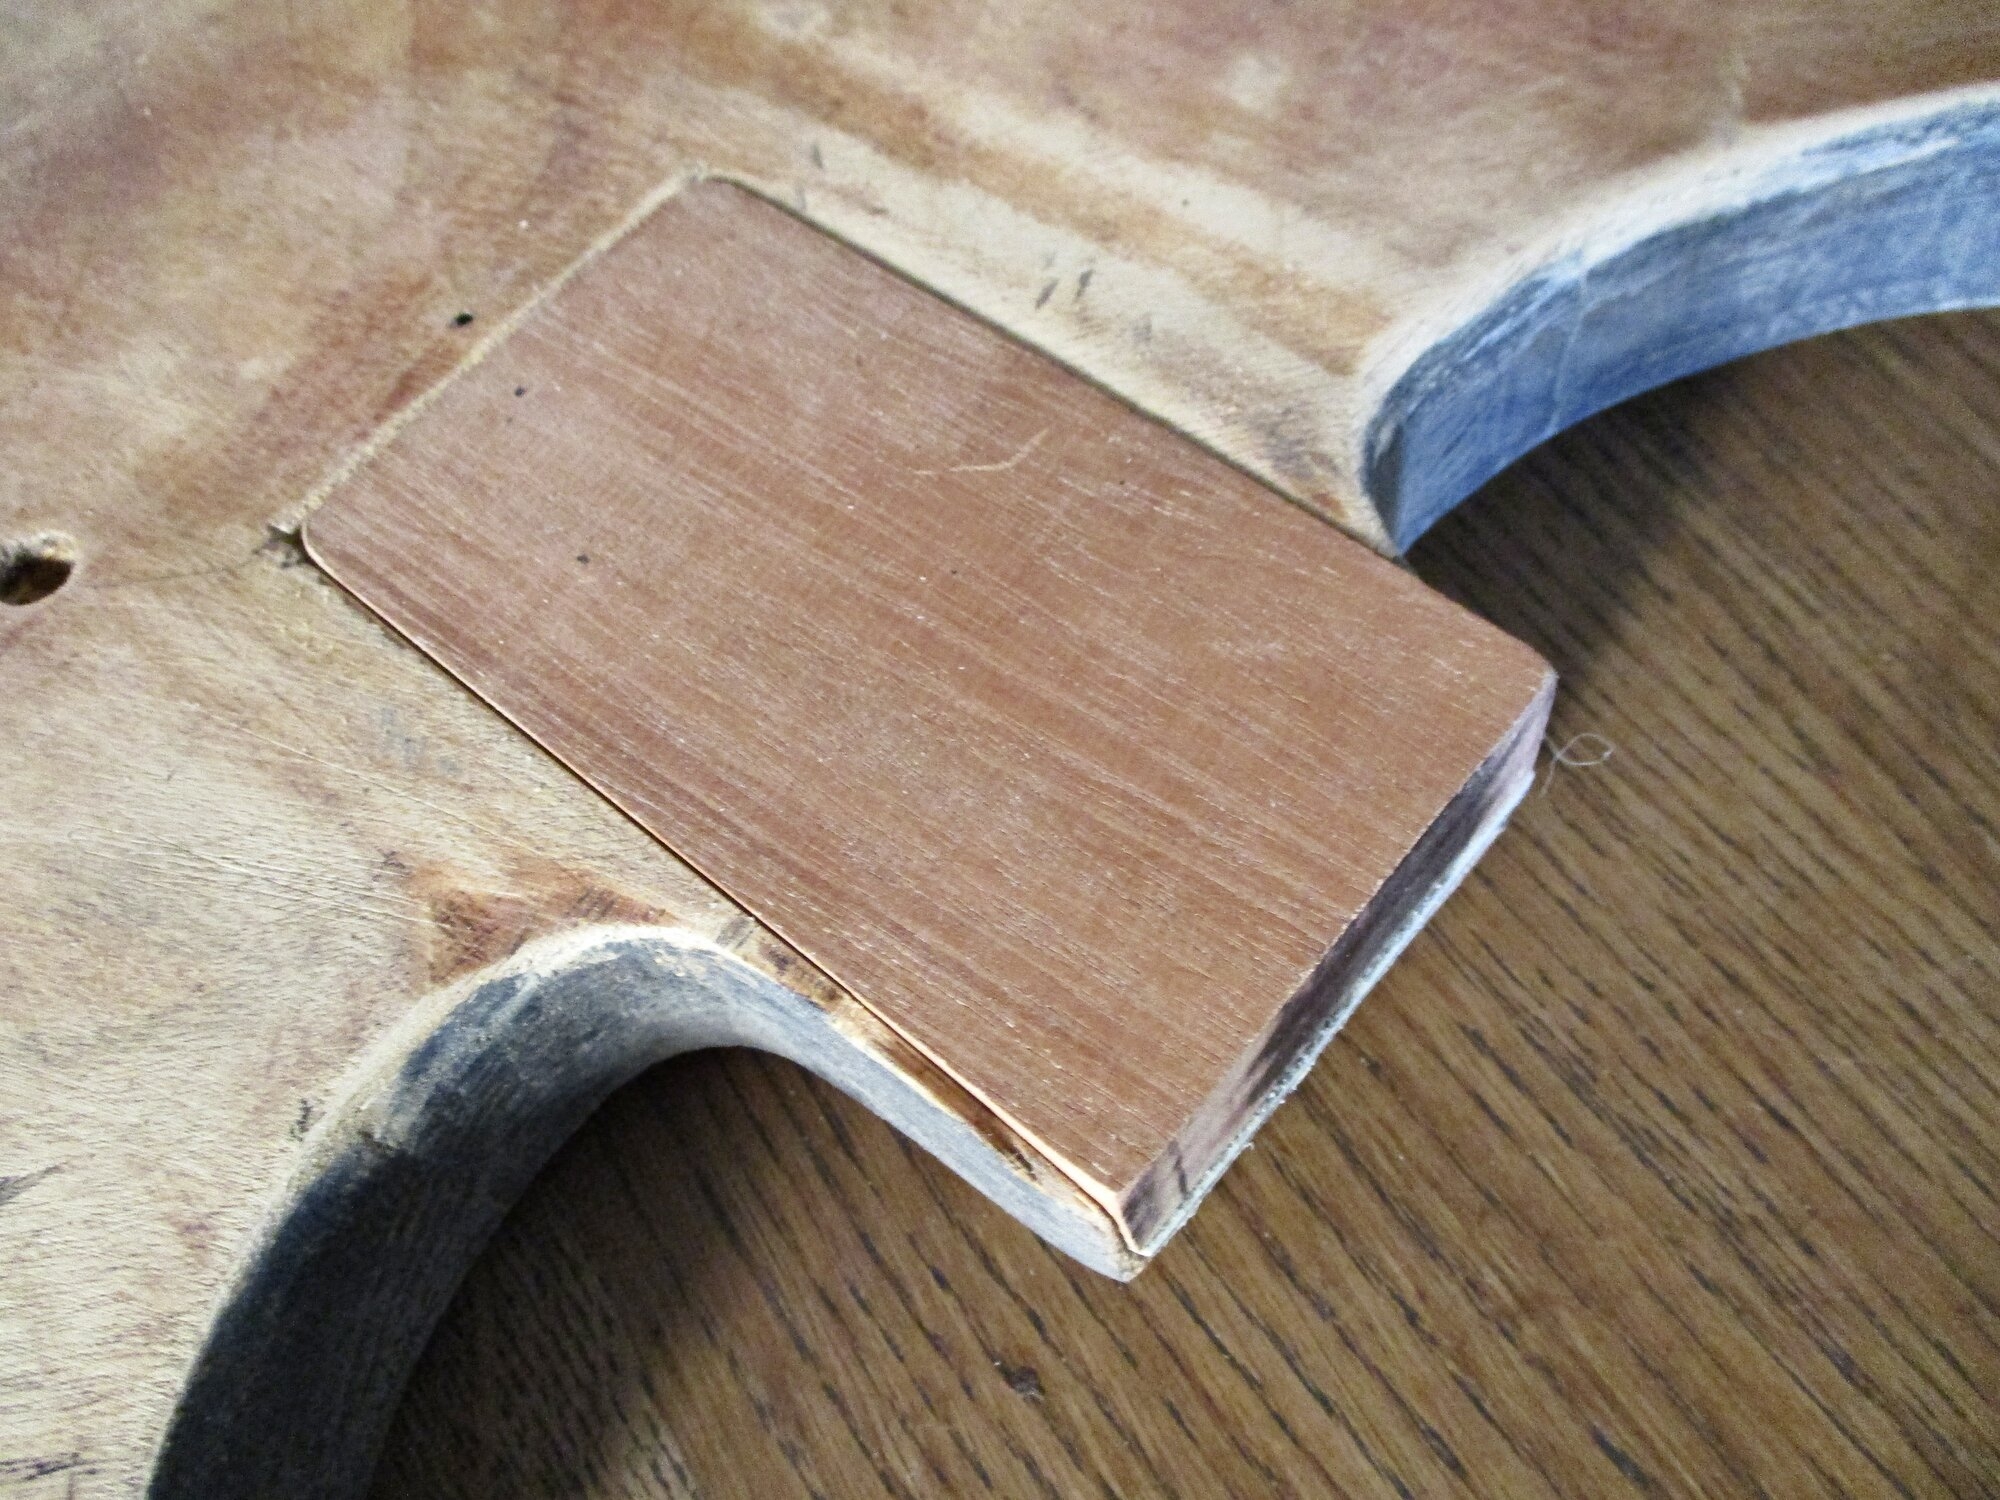
...and glued & clamped - next step (tomorrow) is to rout the stepped neck heel cavity.
...made a 'plug' of mahogany -
...and glued & clamped - next step (tomorrow) is to rout the stepped neck heel cavity.
Last edited:


