• TalkBass has been independent since 1998. Add your voice.
    Create a free account to reply to discussions, view embedded media, and browse with fewer display ads.
    Join freeLog in
    Want zero display ads or expanded classifieds tools? Compare plans.

Harrison inspired 4001 ric build

Dec 24, 2018
1,387
4,604
Hello everyone, this is my first posting here. I have posted on other forums in the past but this is my first here. For a bit of background, I am a music teacher in upstate NY and formerly (before the three kids dropped in) a touring/studio musician. I play most anything with strings but the bowed instruments are my bread and butter. Bass has always been in my toolbox since my teen years in the jazz band at my high school, and is my go-to when I want to casually jam for fun alone or with friends. I also am an amateur instrument builder who has a lot to learn and really enjoys reading through build threads. I find inspiration and motivation through the work here, and am excited to start a bass build in your company. I am also looking for advice along the way so don't be shy.

So years ago my buddy was moving to Texas, and he happened to be an Afghan Whigs superfan. Since a real rosewood tele was out of the budget, I though it would be neat to build him one, and build myself a jazzmaster (the guitarists in the band used these instruments). It came out nice, and as it was only my second build I can say I got plain lucky with many steps.

Significantly, I used Bolivian Rosewood (not a true rosewood but very similar and look and weight), which I had a severe reaction to. Every surface of skin the dust touched swelled and itched like the worst case of poison ivy, sending me to the hospital twice to get it under control. At one point my eye was almost swelled shut and my forehead was overhanging my face like an old school caveman character. I finished it up in a hazmat suit. I will not be using this wood again!

Anyway, the combination of the rosewood and thin maple stripe, chrome hardware, and black pickguard seemed the perfect spartan combination to me. I always wanted to apply the idea to a range of instruments.

For some reason, I have become fascinated with the lines of the Rickenbacker 4001/4003 lately. Having just built a 325, I figured I should give the 4001 a go. This would be my first neck through instrument. I scanned my woodpile and found a stash of 7 year old rough cut walnut, and some long old maple scraps as well. Plenty enough to make a bass a few times over. So I am going to combine the idea of dark wood and maple center using walnut instead of rosewood. In keeping with the restrained idea of the rosewood tele, I will use dot inlays and no binding. The hardware will be chrome and the pickguard and truss cover with be black/white/black like on the tele.

I will use a single truss rod, but would like to keep all other appointments as a stock 4003. Wiring will be a push pull 4003 with ric-o-sound. The pickup spacing and profiles will be taken from a 70s model based on my templates and a friend's 70s 4001.

So that's the plan for now. I am also doing a dual 51 p bass build with one of my high school students I will post separately for anyone interested. I have attached a thumbnail of the rosewood tele I built for my buddy to show where the inspiration comes from.

Thanks again for all the entertaining builds over the years, looking forward to being a part of the community rather than just a lurker!
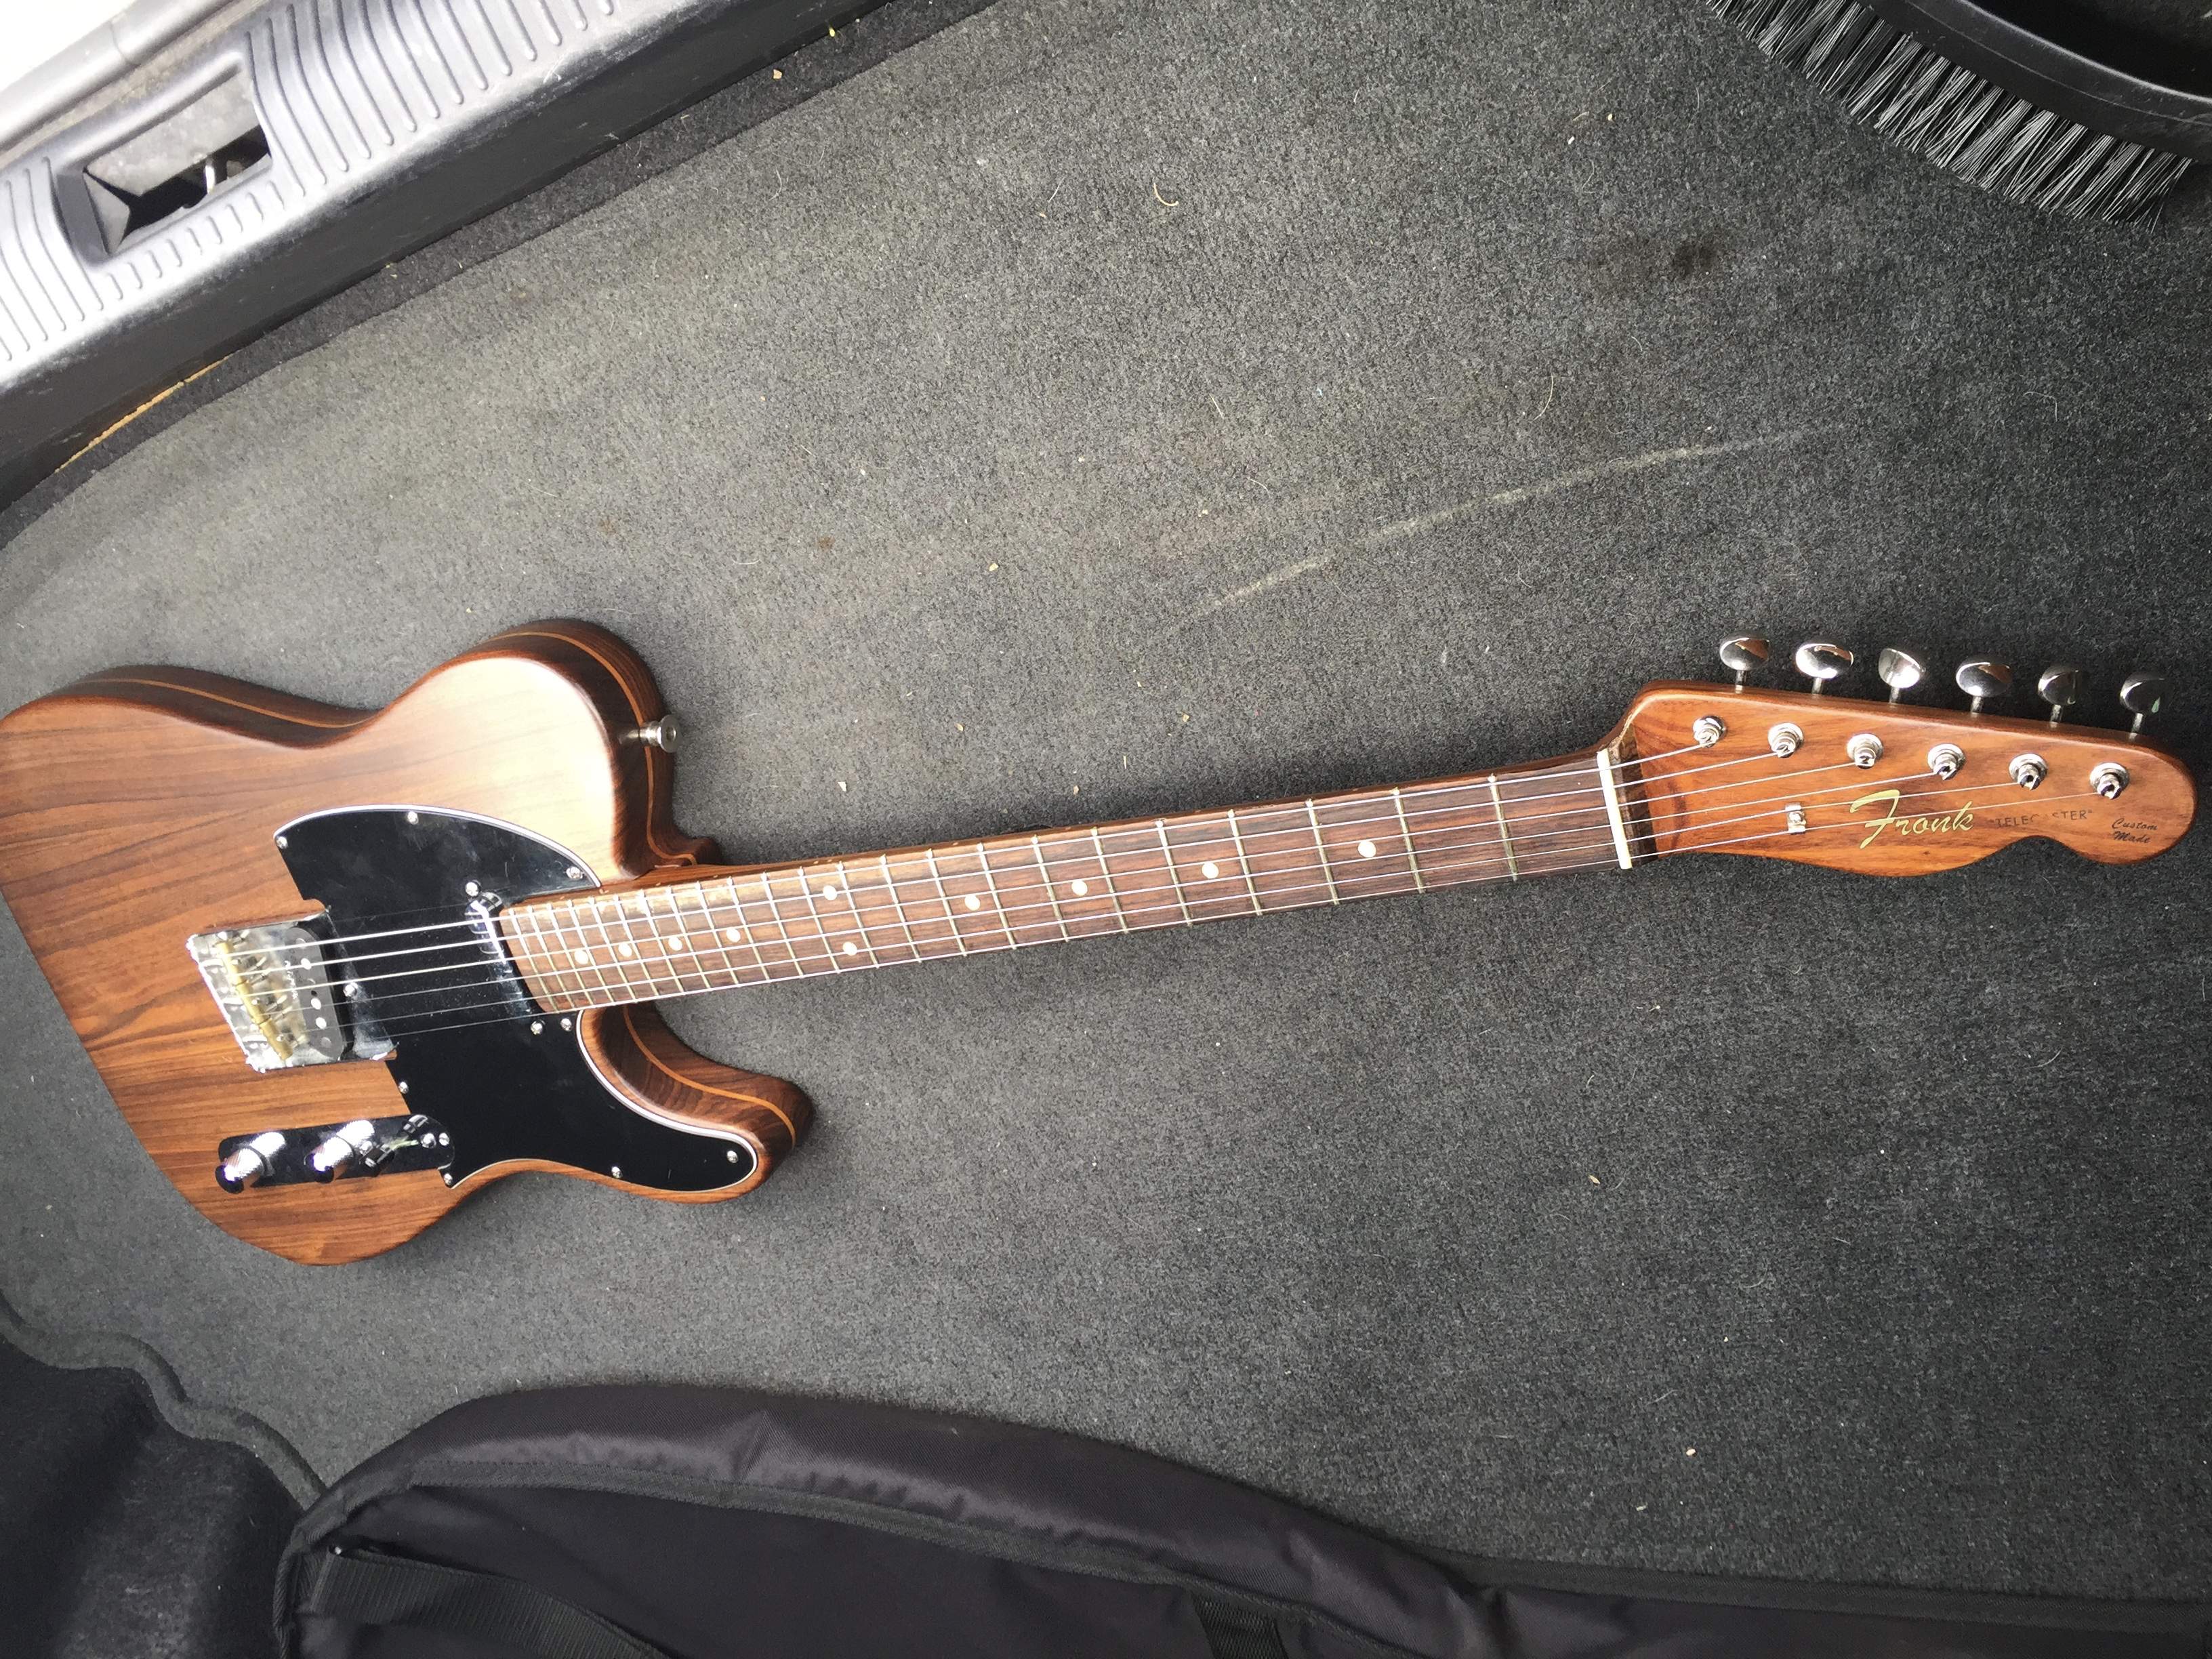
Rosewood Tele.jpeg
 
Last edited:
I have my workshop in my garage, an old 50s concrete slab that seems to radiate moisture. So last week I determined to begin this build and start with a simple step 1: glue two pieces of wood together for the neck through portion of the bass.

I pulled out my planer, and as I went to adjust it it did not budge. Corrosion on the pillars. My fault, I did not winterize my tools last season and this is the price of my negligence. I will take it apart this spring and make it right.

Plan B: hand tools. I have a full set of hand planes that I cleaned and tuned up this summer. Used them a lot until the school year started and loved working with them. Pulled down my #4 and #7 (made in the late 1800s, so cool!). They were covered in surface rust. I even oiled them up a few months back but that apparently was not enough. Plan B is out.

Soooo I take apart the power planer, blast it with pb blaster, change blades, and clean up the whole tool. Get it running smooth again and give the table a good waxing. Then I dismantle my hand planes, dunk in the rust remover, clean and level, and sharpen the irons so I can shave with them. This whole process takes a week, I grab a few minutes here and there when my three young kids are eating and between two jobs.

I power plane my rough cut walnut board, and run it through the table saw to give me two long thin boards that measure just over 1.5" square. I have to make the cuts in several passes because the power line to the garage is basically good for running a light and trips the breaker every time I push the table saw. That needs to be upgraded. I clean them up dead flat on the sides to be joined with my #7 and #4 planes.

So, after a week getting here, I finally do what I thought would be done a week ago: Glue two pieces of wood together. So I guess this is the start!
IMG_2950.jpg
IMG_2951.jpg
 
I really dig your concept :thumbsup: I've got a friend with a MIJ rosewood tele and it is a fantastic guitar. I love the look and I think it should translate well in the Ric shape. Can't wait to see how it turns out.

Sub'd
 
  • Like
Reactions: nixdad
Thanks, hoping for it to turn out well, this is a complex build for me compared to what I have done in the past. Plus, buying authentic ric parts is a good chunk of the actual cost of a new instrument! I like to imagine, since Roger Rossmeisl designed lots of classic Rickenbackers and the rosewood tele, that maybe this is something he would have come up with if he stayed with Rickenbacker. Luthier fan fiction.
 
I am farther east in a little town called Argyle, just north of Saratoga Springs. Fun fact, Argyle this very year repealed its prohibition era law prohibiting the sale of alcohol. I thought it was a neat quirk.
 
  • Like
Reactions: dwizum
So here is how you know this is actually going to happen. If you are willing to plunk down the cash for ric parts, you are much more likely to follow through. I can sit on a p-bass pickup for years, and I have a collection of fender style bass bridges. I have tuners I don't even know about, apparently they reproduce when nobody is looking.

But Rickenbacker parts are a commitment. They are beautiful though.
Ric Pic Pic.jpg
 
Welcome! There are several of us here who are enamored with the graceful sweeping lines Rossmeisl penned for Rickenbacker. My build from two years ago quickly became my very favorite instrument. I have plans to build more in the very near future!

Subscribed for updates. :cool:
 
So the first tragedy has already occurred... My glue joint did not come out well. Both the pieces mated very well on my dry run, but the issue was inexperience. I don't do much woodworking in the winter as my garage shop is basically shut down during the cold months up here in the northeast. We use a wood stove for most of our heat, and I have never done a large glue up like this in the house under these conditions before. I spread the glue and my curious 7 year old was asking questions about every step (which is great!), but as I spread the glue, taking time to answer questions, I noticed that it was tacking up incredibly fast. The warm and very dry air from the wood stove was really changing how the glue was setting compared to the longer open time I was used to. I should have scraped it off and sanded it flat again, but typically I thought I could make it. Clamping a big piece like this takes time even with proper preparation, so I didn't make it. Some spots closed up fine (I started clamping from the middle, middle closed up well), but as you get to the ends the glue was too far set and didn't give me a good join.

So I will fight the urge to plane it down and hope things look better towards the middle. I have an extra piece of walnut from the same board cut, so I have a few shots at this. So I have to cut these apart, resurface and rejoin. If I do not succeed a second time, I will have to make it a three-piece neck. If I fail two more times after that, I will have to introduce a maple center. That leaves me only 6-8 more attempts. Hopefully I have built in enough redundancy to succeed.

In all seriousness though, these kind of things are how we grow and learn the best. I have read similar things, and it was in the back of my head, but sometimes you just don't know until you experience it for yourself. I will modify my clamp setup to get them in place more quickly, maybe enlist some help for this long join. I may also try this in the early morning when the fire is just embers left from the night before and the house temp is very low.
IMG_2977.jpg
IMG_2978.jpg
 
Ouch. Too bad about that glue-up. But, as you say, it's all part of the process. :thumbsup:

My build is here: 4004CTM There have been several other excellent Rick-inspired builds here too, such as @Gilmourisgod's excellent two builds; search the Luthier's Corner for anything with "Rick" in the thread title.
 
Just plain old titebond. That is generally my go to glue. I used titebond II a few times and that was fine as well, I just don't see my guitars in the water often. I use hide glue (actual, NOT the titebond bottle stuff, that doesn't do so well over time for stressed repairs) for bowed instrument repair, but that is a whole different beast. I also went for a thin application as I prefer not to have a ton of squeeze out to clean, which accelerated the issue. Live and learn.
 
Sweet! Another Ric build. Me and @ctmullins were getting lonely. I have a full set of drawings and templates for a current style 4003, PM me if you need anything. Some TB builders have lent me tools in my hour of need, so I have some Karma debt I'd like to repay! Here's a link to my two builds, the first one includes about every error you could make, the second went a little smoother. What are you using for a bridge? I went with an Allparts Ric copies,$50 instead of $150, and functionally identical. The Hip shot is nice too.

The Hossenfeffer Bass Build

The Hossenfeffer II Build
 
Gilmourisgod I have studied your builds intently, and you also pointed me to Mapleglo as well, thanks! The hossenfeffer thread was great to follow, in particular! I could use the depth of the bridge route if you have it, here is what I have gathered for the cavity depths:

Neck: 3/8" deep to start, may need to deepen
Bridge/Control: 7/8" or just shy of 1"

Not sure about the bridge yet, the hipshot seems to make the most sense from a functional perspective, but it is lacking from an aesthetic standpoint. I hear the new issue ric bridges address a lot of the old issues such as tail lift and makes intonation adjustments easier. How is your allparts holding up?

I hear you on the $, ric stuff is pricy. Then again, if this works I won't buy a ric (for a while).
 
OK take two, here is what I did in case you run into the same issue:

1. Cut old glue joint with my tablesaw
2. Sharpened my #7 jointer to the point I could cut any earthly substance just brushing it with the iron
3. Carefully adjust it to get transparent shavings
4. Used two trusted straight edges (one of my 4 foot levels and a piece of angle aluminum) to make sure it was dead straight everywhere
5. Used much more glue than last time to avoid a thin layer drying out
6. Got things lined up at the joint first to keep everything from slipping without pressure (alignment clamps)
7. Starting from the middle, apply pressure clamps, starting with 3 spread far apart
8. Squeezout cleanup
9. Filled in spaces between the first pressure clamps
9. Squeezout cleanup
10. Repeat

The joint looks great all around, in most places it is only visible because of thickness inconsistencies of 1/32" here and there from when I used a block plane to hog off my glue sqeezout from the first attempt (I did not do a great job last time with squeezout). Those will obviosly be planed flat.

So I have high hopes that this time will be the one. My blank is smaller than it was, about 2.62" wide by 1.58" thick and is purposely long at around 56". You know, in case I screw something up.
IMG_2990.jpg
IMG_2991.jpg
IMG_2993.jpg
 
@Verner
PM me, I'll send you my drawing show bridge, pup, and cavity routes. The All parts bridge has been in the HF 1 for three years now, no sign of it bending or other problems Apparently it has extremely minor cosmetic differences from the factory bridge that cork sniffers notice, but at one third the price, hard to justify buying the "real" Ric bridge for $100 more. The Allparts also has chromed saddles which I think look better than dull zinc in the factory bridge. I bought a 4003 harness from Pick of the Ricks, but a TB'er @Aceonbass bass makes custom harnesses for around $90. Neck glue looks good, going with a single DA trussrod?
 
  • Like
Reactions: Aceonbass
@Gilmourisgod thanks so much for your generosity and information! Single truss rod, yes. I saw you used a 24" rod, but that seem like it won't fit when I eyeballed it. Did you have any issues with the length? I have a 22" oddball rod hanging around if needed.
 
OK take two, here is what I did in case you run into the same issue:

1. Cut old glue joint with my tablesaw
2. Sharpened my #7 jointer to the point I could cut any earthly substance just brushing it with the iron
3. Carefully adjust it to get transparent shavings
4. Used two trusted straight edges (one of my 4 foot levels and a piece of angle aluminum) to make sure it was dead straight everywhere
5. Used much more glue than last time to avoid a thin layer drying out
6. Got things lined up at the joint first to keep everything from slipping without pressure (alignment clamps)
7. Starting from the middle, apply pressure clamps, starting with 3 spread far apart
8. Squeezout cleanup
9. Filled in spaces between the first pressure clamps
9. Squeezout cleanup
10. Repeat

The joint looks great all around, in most places it is only visible because of thickness inconsistencies of 1/32" here and there from when I used a block plane to hog off my glue sqeezout from the first attempt (I did not do a great job last time with squeezout). Those will obviosly be planed flat.

So I have high hopes that this time will be the one. My blank is smaller than it was, about 2.62" wide by 1.58" thick and is purposely long at around 56". You know, in case I screw something up.View attachment 3622407 View attachment 3622408 View attachment 3622409

Nice recovery and way to stick with it! :) I will also throw in a recommendation of Titebond III if you need more open time for glue-ups. It is a wonderful glue to work with, but it does have a darker color... which would have been fine in this case.

Looking forward to more. :)


