• TalkBass has been independent since 1998. Add your voice.
    Create a free account to reply to discussions, view embedded media, and browse with fewer display ads.
    Join freeLog in
    Want zero display ads or expanded classifieds tools? Compare plans.

Double Bass Homebuilt EUB build thread

I realized last night that a few toothpick sized pins probably would have held the sloped pieces in place better than the clamps and tape did.
But then I would have had holes to fill and patch...

Look into buying or borrowing a 23ga pinner. I'd be lost without mine. They can be driven by a small pancake compressor.

The pins are so small they're usually not noticeable. I've used them to keep scarf joints (for joining angled headstocks to necks) from sliding under clamp pressure. I bought a cheap one from HF, then when I got tired of it jamming and noticing that I was using it constantly I sprung for a refurbished Porter-Cable. They're not terribly expensive.
 
  • Like
Reactions: Videojunkie
Do you pull them out, or set the deep enough to ignore?
They're so tiny that you usually don't need to pull them out. Actually I've never tried. I think you'd do a lot of damage to the surface trying to remove them. 23ga is about 0.023". That's the size of a sewing needle. If visible at all, it's just a tiny metallic dot. The pinner will often set them slightly below the surface so a very small spot of filler will hide them, but to be honest, they'll almost disappear, particularly with an open-grained wood like oak or mahogany.
 
  • Like
Reactions: Videojunkie
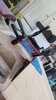
So I had a few minutes this morning to look over the results of the glue up, and I'm not happy with this corner. So I decided to cut out the glue with a very fine kerfed saw and I will try to work either some CA glue or epoxy into the joint and get it to close. In the second picture, I have cut out the offending epoxy joint.

20210923_094656.jpg 20210923_095051.jpg
 
  • Like
Reactions: Jeff Siddall
You might want to read this thread on fingerboard scoop (relief to bass guitar player).

Correct fingerboard scoop..

(It may not be relevant to your build if the neck is similar to a BG but still worth reading.)
Thanks for the link. I am aware of FB scoop, but not quite sure how to get there other than trial and error. The one thing I do know is that the starting point is a flat fingerboard, and this isn't there yet.
 
  • Like
Reactions: delta7fred
Thanks for the link. I am aware of FB scoop, but not quite sure how to get there other than trial and error. The one thing I do know is that the starting point is a flat fingerboard, and this isn't there yet.
I bought a Stagg EUB on a whim. With the truss rod slack to the point of rattling the fingerboard was still dead flat and it buzzed like crazy. The fingerboard was some sort of hardwood, probably maple, that was "ebonized" so there was no way you could plane one bit without taking all the black off or re coating it with something the same colour.

I loved playing it (except for the buzzing) and after much deliberation decided that rather than spend a lot of time on or sink a load of money into what would always be a cheap instrument (that I might never be happy with) I would be better off putting it towards a better one.

I found a guy in the UK who made EUBs (FarWest Instruments) and after a long phone conversation with him came t the conclusion that he knew what he was talking about and ordered one. (A decision I have not regretted for a second.)

It's a few yeas ago now but I seem to remember him saying that all the relief/camber/scoop needs to happen before the 7th fret position (if it had frets) because as you go up the neck the strings meet the fingerboard at an increasing angle and the string excursion is dropping because of the shortened string length so buzzing becomes far less of a problem.

From a physics point of view this makes perfect sense and it seems to work in practice because I can dig in as hard as I like and only get a slight bit of buzz when I know I'm getting way too enthusiastic.

(He started out with a Stagg and decided he could do a lot better. He omitted the truss rod and did a lot of testing to determine the optimum scoop. When he started producing them he made a jig so he could machine the required scoop in and make every neck the same.)
 
You need straight rulers of different lengths then you can see where the light shining through if there are any high spots. Move the shorter ruler along the fingerboard to see that the scoop is the same.
Since I’m a bit anxious to damage the board I used a scraper and only did a little bit starting around the fifth and then extending towards my and octave. But I only correct things and go very slowly. Better have it partly done play that for a while and then go further if needed than going too far.
My rosewood Stagg had a bit of a negative scoop, so I started to make the surface straight first and made the scoop at the G 1 mm and at the E a bit more, towards 2 mm.
 
  • Like
Reactions: Videojunkie
Looking good! There are a lot of funky angles in there so I am guessing lining it all up is tricky.

If you look closely, you can see where I am using clamps as blocks to keep things from sliding around.

None of this is square, all of it is angles on top of angles. All of it wants to slide around. If I wasn't using epoxy, I am not sure it would work at all. I usually have to try several different approaches to make sure the clamps all work the way I want without shoving other parts out of place.