• TalkBass has been independent since 1998. Add your voice.
    Create a free account to reply to discussions, view embedded media, and browse with fewer display ads.
    Join freeLog in
    Want zero display ads or expanded classifieds tools? Compare plans.

Double Bass Homebuilt EUB build thread

My question: who started calling "that reinforcement at the start of the headstock" a volute in the first place?
Here's how I see it...
I feel like that "reinforcement"...or that flare- out behind the nut that... probably reinforces ... is just part of the traditional decorative form of a peg box. Which also serves to stop the hand from bashing into the tuning pegs.
The scroll...down to that little flare out behind the nut... are all the same line.
Like the unfurling of a shell.
Screenshot_20211104-131939_Google.jpg

So... on a peg-BOARD... for guitar with no old timey decorative scroll... we still use the ergonomically functional and reinforcing aspect... of the volute.

 
Last edited:
Here's how I see it...
I feel like that "reinforcement"...or that flare- out behind the nut that... probably reinforces ... is just part of the traditional decorative form of a peg box. Which also serves to stop the hand from bashing into the tuning pegs.
The scroll...down to that little flare out behind the nut... are all the same line.
Like the unfurling of a shell. View attachment 4461732
So... on a peg-BOARD... for guitar with no old timey decorative scroll... we still use the ergonomically functional and reinforcing aspect... of the volute.

That's the best explanation I have heard -- thanks for clearing that up. Henceforth I will call it "the first bit of a volute" when talking about in a non-true volute context.
 
That's the best explanation I have heard -- thanks for clearing that up. Henceforth I will call it "the first bit of a volute" when talking about in a non-true volute context.
Thanks...
Maybe... "lower volute".. like upper and lower bout?
The "upper volute" being strictly decorative with scrolls, lions, grotesque masks, cherubim, swans... etc...
...the lower, being the functional bit.
But always in the form of ...a Volutidae...
Or in Leo F's case... a pseudo sideways Volutidae :roflmao:
Screenshot_20211104-162238_Chrome.jpg
 
More work on the headstock tonight. Made a new nut, this will be the one that I take over to the luthier to file.

Getting all the little scratches out is a tough job, but I think I got most of them.

Part of my motivation is that it's supposed to be 70 over the weekend and I might be able to get some coats of lacquer on it. This will likely be one of the last days in the 70s til march...


20211104_202810.jpg 20211104_202815.jpg
 
Last edited:
Several pieces are finish ready. So I started with the bridge. I am looking forward to seeing how this all finishes out!

That color though!

Speaking of colors, as I get closer to the finished surface, I am getting less inclined to stain it except for a faux French polish effect on the neck.:drool::woot:

20211105_172221.jpg
 
  • Like
Reactions: Jeff Siddall
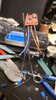
Getting serious about the wiring. Got the input jacks wired up correctly. Now I get to wire up the other 3 jacks and the output stage.

And this is just the piezo side... there's the mic preamp too...

Hmm. Where am I going to put all those pots... and battery boxes.... and output jack?

 

Attachments

  • 20211105_201315.jpg
    20211105_201315.jpg
    576.7 KB · Views: 68
  • 20211105_201714.jpg
    20211105_201714.jpg
    563.5 KB · Views: 62
  • 20211105_204911.jpg
    20211105_204911.jpg
    580.7 KB · Views: 65
  • Like
Reactions: Jeff Siddall
Several pieces are finish ready. So I started with the bridge. I am looking forward to seeing how this all finishes out!

That color though!

Speaking of colors, as I get closer to the finished surface, I am getting less inclined to stain it except for a faux French polish effect on the neck.:drool::woot:

View attachment 4463003

Yeah, I'm as big fan of natural finishes so I won't be sad if you don't stain it!

Getting serious about the wiring. Got the input jacks wired up correctly. Now I get to wire up the other 3 jacks and the output stage.

And this is just the piezo side... there's the mic preamp too...

Hmm. Where am I going to put all those pots... and battery boxes.... and output jack?

You have a lot of stuff to wire up, but good news, you have a huge hollow space to put it into!
 
Getting serious about the wiring. Got the input jacks wired up correctly. Now I get to wire up the other 3 jacks and the output stage.

And this is just the piezo side... there's the mic preamp too...

Hmm. Where am I going to put all those pots... and battery boxes.... and output jack?
Dang, did you talk about these electronic components earlier in the thread? I vaguely remember talk about the piezos and a mic but not the preamp boards. I guess I need to review because this looks like it might be fertile ground for diy preamps.
 
  • Like
Reactions: Videojunkie
Dang, did you talk about these electronic components earlier in the thread? I vaguely remember talk about the piezos and a mic but not the preamp boards. I guess I need to review because this looks like it might be fertile ground for diy preamps.

If there was one area on the bass that I have spent an embarrassingly large amount of money with zero returns, it's the electronics. I probably should have just bought the nifty preamp from Best Bass Gear.

I tried to make the preamps, but every time I thought I had the right components, I would figure out that I had the wrong type of something. And then I found these boards in a 3 pack for something like $8. :banghead::poop::spam:

Part of this complexity is because I am making this so that each string can be individually balanced (which may or not be overkill). And then the summed piezos will be one side of a blend pot with the microphone on the other. There are no magnetic pickups in the bass.

There's also an active 3 band eq after the blend pot. So, there's quite a bit of stuff going on. I actually considered building a multi-pin umbilical to an off board preamp, but that would have been even more complicated.

At least I have all of the resistors and other components to last me a lifetime...
 
Last edited:
About 15 coats of shellac, and I think I am pretty close to having the bridge ready for the next step. This was sanded with 320 and doesn't feel like wood anymore. Next up 400 and beyond.

The neck has been sanded down and feels amazing, the fingerboard is like glass. I'll lay a second set of coats on the neck tomorrow. Then I can start on the body.
20211106_222834.jpg
 
Final shot on the bridge before I start with the finish coats. I know there are others for whom this is marginal work, but for me this is the first time I've really focused on doing a proper finish job. I'm getting surfaces from wood that I've never done before. The fingerboard has a mirror shine - just from the shellac, I can't wait to see the poly!

When I started the bridge, there were grain holes throughout the surface, and now there are a couple of places where I have a low spot. Most of those however, will be under the bridge saddles.
20211107_220809.jpg


20211107_221444.jpg
 
Last edited: