
Enjoy the benefits of a premium membership!
Upgrade Account
-
TalkBass has been independent since 1998. Add your voice.
Create a free account to reply to discussions, view embedded media, and browse with fewer display ads.
Join free Log in
Want zero display ads or expanded classifieds tools? Compare plans.
You are using an out of date browser. It may not display this or other websites correctly.
You should upgrade or use an alternative browser.
You should upgrade or use an alternative browser.
How To: Fretboards
- Thread starter mikeyswood
- Start date
More options
Who Replied?
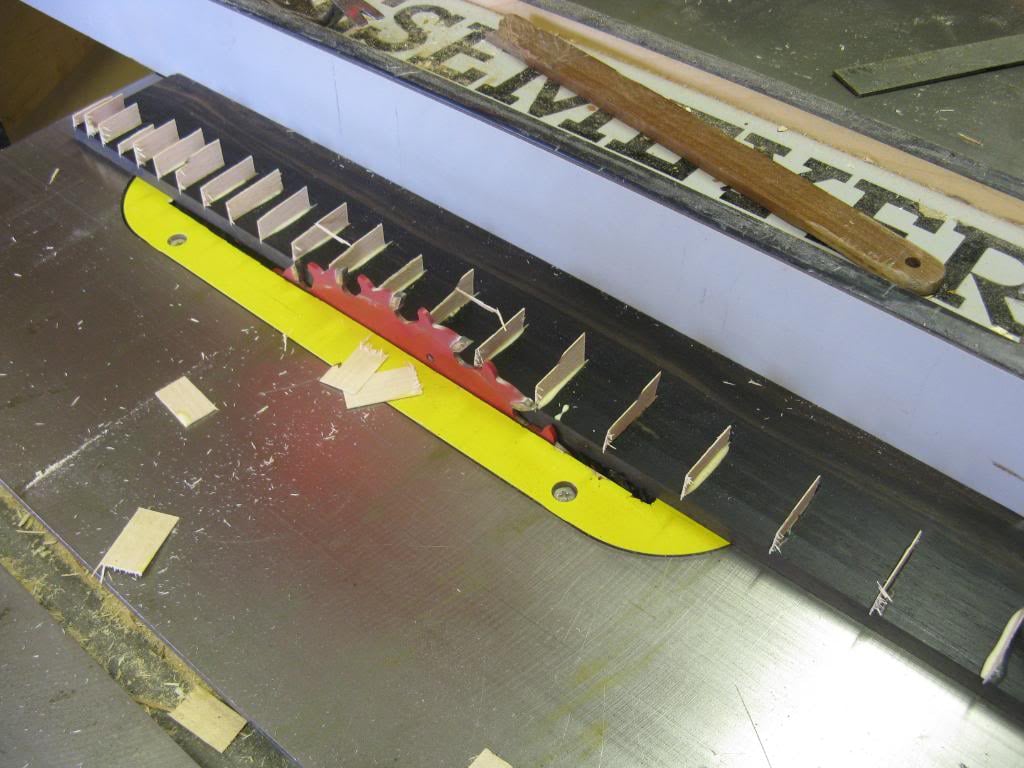
The slotting part of this - is exactly how I do multiscale slotting. I find it easier for me to line up the blade by removing the blade guard, then (with the saw off of course...) you can pull the edge of the blade over the board and look straight down onto the line to line everything up. Then saw-ON and pull.
*DISCLAIMER* - I do NOT recommend removing the blade guard!!!! But what I do with my own tools is my own business.
I personally prefer to radius first, then slot. Then I know how deep to cut the slot. If I'm adding binding, I will also taper before slotting.
The radial arm saw is definitely luxurious here - but you can also run into trouble if you pull all the way across the board (where the blade exits the slot) and then allow the saw to pull back into the starting position with the blade still going. You basically end up cutting the slot twice and it can wind up wider than if you cut only on the pull stroke. You can get away with it if you stop *right at* the edge of the board (so the blade does not exit the slot), but its better to cut only on the pull, then switch off, move the board out of the way, and let the saw return to the starting position before lining up the next slot.
This is one advantage I see with the table saw method (cutting on a single stroke).
I really like the StewMac templates - they are actually not that hard to make even.
*DISCLAIMER* - I do NOT recommend removing the blade guard!!!! But what I do with my own tools is my own business.
I personally prefer to radius first, then slot. Then I know how deep to cut the slot. If I'm adding binding, I will also taper before slotting.
The radial arm saw is definitely luxurious here - but you can also run into trouble if you pull all the way across the board (where the blade exits the slot) and then allow the saw to pull back into the starting position with the blade still going. You basically end up cutting the slot twice and it can wind up wider than if you cut only on the pull stroke. You can get away with it if you stop *right at* the edge of the board (so the blade does not exit the slot), but its better to cut only on the pull, then switch off, move the board out of the way, and let the saw return to the starting position before lining up the next slot.
This is one advantage I see with the table saw method (cutting on a single stroke).
I really like the StewMac templates - they are actually not that hard to make even.
Thanks! This is a great tutorial. I was just wondering do you cut the taper for the fretboard on your mdf templates?
- From the resawn step
Attach my template to the back side of the fretboard:
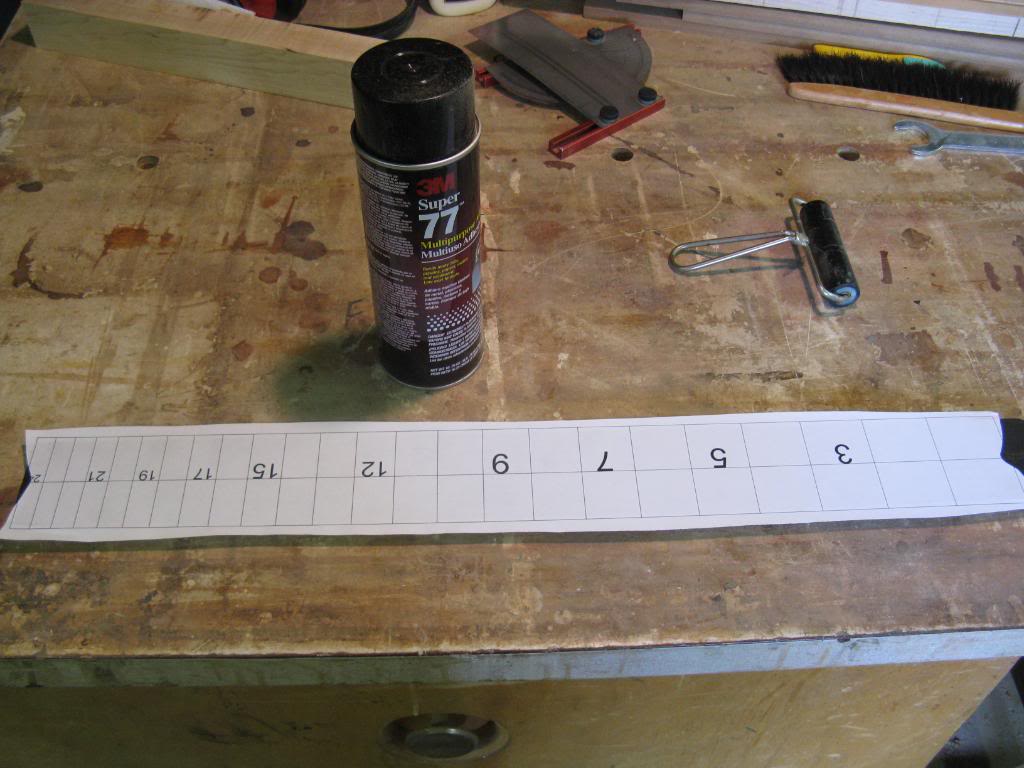
I cut through half-way on the player side only (it's a fretless - therefore the tolerances are slack :
:
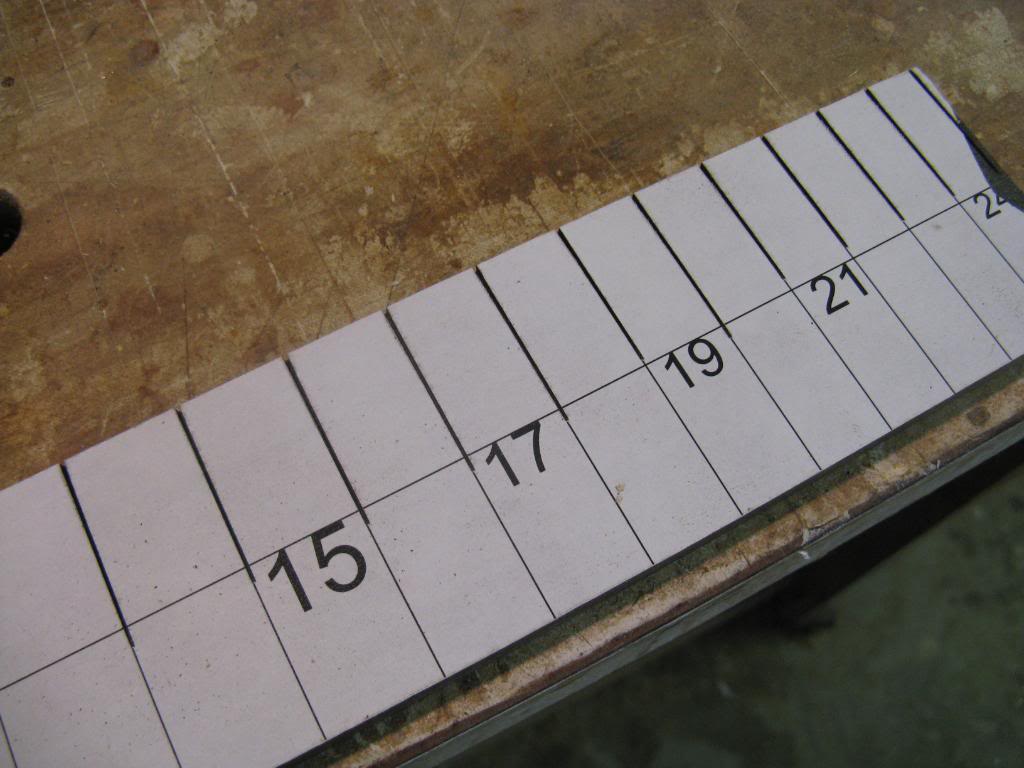
Remove the template and glue the veneer:
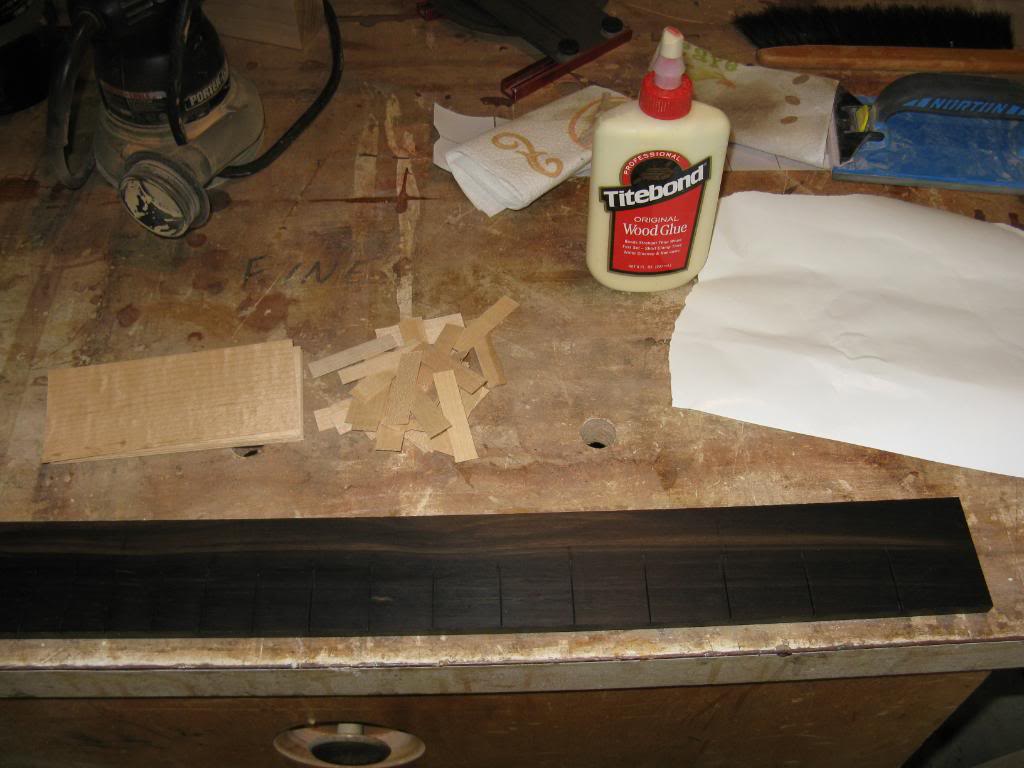
Rip away the excess:
Trim the top and plane the underside for a perfectly flat surface:
And proceed as usual. The Maple position markers will be seen by only the player and the fretless board will be a beautiful streak of Ebony.
Attach my template to the back side of the fretboard:
I cut through half-way on the player side only (it's a fretless - therefore the tolerances are slack
:Remove the template and glue the veneer:
Rip away the excess:
Trim the top and plane the underside for a perfectly flat surface:
And proceed as usual. The Maple position markers will be seen by only the player and the fretless board will be a beautiful streak of Ebony.
have any of you used the templates from LMI that are used in conjunction with a miter gauge on the table saw? I used them in school and they seem to give a more consistent result the the radial arm saw or doing it by hand. a bit pricey if you use more than a few scale lengths and you still have to get that table saw blade from stewmac but it is a lot more worry free.
http://www.lmii.com/CartTwo/thirdpr...Fretting&NameProdHeader=Power+Slotting+System
http://www.lmii.com/CartTwo/thirdpr...Fretting&NameProdHeader=Power+Slotting+System
oh so thats the bottom. i was looking at it, and saw they werent all even, and i said no. Slater would never allow something like that out.
have any of you used the templates from LMI that are used in conjunction with a miter gauge on the table saw? I used them in school and they seem to give a more consistent result the the radial arm saw or doing it by hand. a bit pricey if you use more than a few scale lengths and you still have to get that table saw blade from stewmac but it is a lot more worry free.
Experience, confidence, and skill are the most worry free aspects in life.
Mine line weights are printed to the width of the blade. Combine that with years of experience and machines with tight tolerances and you will have a precision set up.
For anyone starting out those materials may hold a greater value. For me I do not see the return on investment.
oh so thats the bottom. i was looking at it, and saw they werent all even, and i said no. Slater would never allow something like that out.
Kelly would never allow Slater to go wrong. Screech is another story.

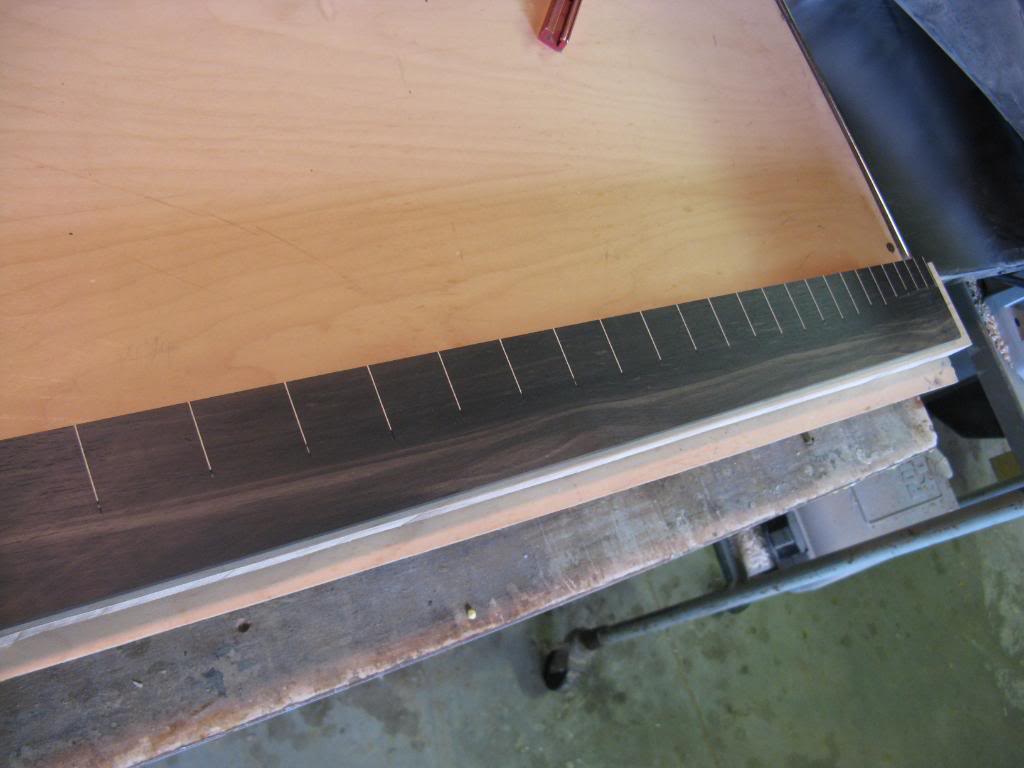
I do it by eye. Using a .023" line weight when I print so the blade cuts through the entire line:
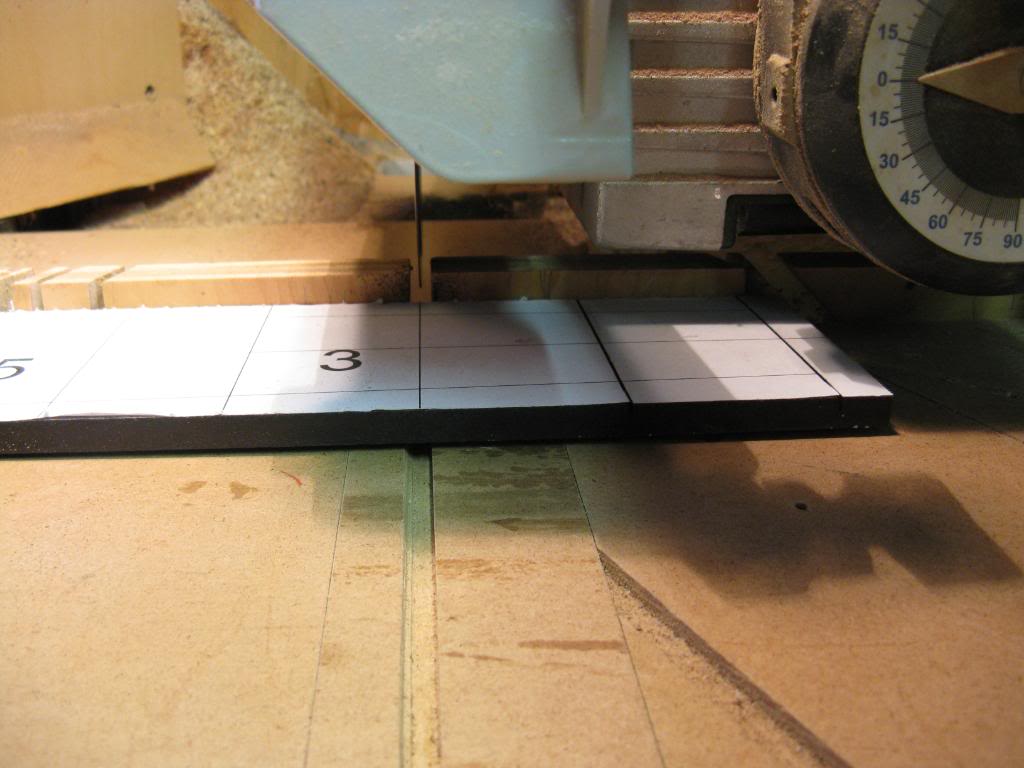
Yes; to both. Your consistency is paramount. If you cut a hair to the left of the line then always cut a hair to the left of the line and cut the nut a hair to the left as well. You will get into to trouble when you have left and right tolerances. Controlling that is one thing that comes with experience. But you also get a little forgiveness in that no one will detect a few cents off of a note and there is no such thing as a perfectly intonated fretted instrument.
Excellent tutorial Mikey.
This is the only part of it I would be uncomfortable with, but if you are actually getting the printed line the same width as the saw kerf it would be attainable. How long did it take you to print a .023" line?
I have been lucky enough to have a friend with standard scale length templates so I have not even considered not using them.
Have you considered making template your self? I would think a piece of hardwood the size of the blanks with notches, and a registration pin along the fence. Or maybe a series of premeasured stops?
Nice Jason. I was old-school at one time but the arm saw is a true luxury. There are many that do it with a tablesaw but I really like being able to see the cut as I make it. Hopefully John or others will post some pics using a table saw with this blade.
I am also a fan of a good radial arm saw. But I would be picky when buying one, I have seen some lightweight models with questionable accuracy.
In AutoCAD a lineweight of .60mm prints slightly smaller at .023", so not long at all.
If I were to make templates they would need to be from metal since indexing wood would wear it out quickly. The time to get the templates correct will exceed the cutting of ~50 boards by this method. As long as you are able to repeatedly hit a line when you are cutting then your skill makes the templates ineffective.
A good arm saw with perfect travel is indeed a requirement for this step. Delta's single and dual arm saws are the best on the market in my opinion.
There are other ways of doing it but I have found that this method is the most efficient for my skills.
If I were to make templates they would need to be from metal since indexing wood would wear it out quickly. The time to get the templates correct will exceed the cutting of ~50 boards by this method. As long as you are able to repeatedly hit a line when you are cutting then your skill makes the templates ineffective.
A good arm saw with perfect travel is indeed a requirement for this step. Delta's single and dual arm saws are the best on the market in my opinion.
There are other ways of doing it but I have found that this method is the most efficient for my skills.

I've gotta admit those hidden markers are sweet. Nice way to subtly add function without affecting the aesthetics in a signficant way.


Rickett Customs
Commercial User
Question - where can I source ebony binding in 1/8" strips? I looked at stewmac and lmii and theirs are .080".
John,
Typically what I do, is order spare fretboard material, For 1 fretboard you can get enough for a few necks.
Rickett Customs
Commercial User
Cool, thanks Jason. You and Mikey have given me some awesome resources to build my first neck!
I guess I'll be getting an ebony "parts fingerboard."
It also works good for smaller parts as well... I order mine through LMII and also they sell "back strips" that are 1/4" x 1/8" x 26" too.
http://www.lmii.com/CartTwo/thirdpr...indings+&+Purflings&NameProdHeader=Backstrips
But if you order a fretboard for this purpose... try and get a "5 string" or "6 string" (Wider and longer), first or 2nd grade, 2nd grade is of course cheaper, though you may find some gray streaks in some.
Invalid Link Removed
The back strips sounded perfect until I discovered that they don't sell them in plain ebony, but only with basswood laminates on the edges...  I guess it's back to ordering a 50 dollar plus shipping fingerboard to bind one fretboard or else just skip the binding. I suppose I could just go with the thin binding Stewmac has...
Anybody wanna sell me some binding?
Thanks again, Jason.
I guess it's back to ordering a 50 dollar plus shipping fingerboard to bind one fretboard or else just skip the binding. I suppose I could just go with the thin binding Stewmac has... Anybody wanna sell me some binding?
Thanks again, Jason.
Rickett Customs
Commercial User
John,
You can pick up an ebony board for $34
(WFBSAE1), actually it's "1st grade" at that, it'll be slightly wider than a fender P bass FB (2.5" + IIRC)
You can pick up an ebony board for $34
(WFBSAE1), actually it's "1st grade" at that, it'll be slightly wider than a fender P bass FB (2.5" + IIRC)
The back strips sounded perfect until I discovered that they don't sell them in plain ebony, but only with basswood laminates on the edges...
Anybody wanna sell me some binding?
Thanks again, Jason.
You can buy a rather large piece of Ebony for $50 that will be good for more than binding. Small piece for tasks like that are gotten from my scrap bin.
Question - where can I source ebony binding in 1/8" strips? I looked at stewmac and lmii and theirs are .080".
here is where I get my ebony binding
http://grizzly.com/products/Ebony-Binding-34-5-/T1096


