I think Jimtoonz has just put everyone to shame.
+1 on that, however, if I were a shop owner and saw him using any of that on my instruments I'd kick him out of the store.

TalkBass has been independent since 1998. Add your voice.
Create a free account to reply to discussions, view embedded media, and browse with fewer display ads.
Join free Log in
Want zero display ads or expanded classifieds tools? Compare plans.


+1 on that, however, if I were a shop owner and saw him using any of that on my instruments I'd kick him out of the store.

crank the amp to 11 and slap out higher ground


good thinkingFixed it for ya.
I'd go with what's already been said- play what you're gonna play on it throygh aamp similar to what you've got.
Don't forget about the "shopworn" discount. Very important.
Bob

indeed

+1 on that, however, if I were a shop owner and saw him using any of that on my instruments I'd kick him out of the store.

Sometimes you will need to explain to the shop owner or staff person that you are making a significant investment, one that you will have to live with for what might be a long time. Given this, you need to make a serious examination of the bass before you buy.

has anyone ever recommended that you receive psychiatric help?
j/k, it might seem a bit eccentric to the rest of us, but you're damn well justified.

I usually ask it what the square root of 3978 is.

I plug it in and play it.
If I like it, it passes.
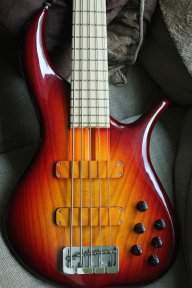
If you are going to the store with the intent to purchase, then you should take a few tools. I have a small kit I carry with me that has the following:
1. Cardinal HSDC-20 digital hanging scale - Let's face it, weight is going to be a comfort factor with any instrument you buy. The GC guys are known to lie about the weight question and you may not have the accurate "calibrated arm" that you think. Take the guesswork out of it with this.

2. Mitutoyo micrometer model 122-126 (or equivalent). Sure, the spec sheet says that nut width is 1.75 inches, but are you willing to take that as gospel? This guy will help you establish the truth.

3. Mabis Signature Electronic Stethoscope - Do you really know where those dead spots, defects, and other tonal pockets are located in that prospective new bass? You simply can not afford to guess. This will allow you to get an accurate map of the tone woods with your ears.

4. Lisle 52500 Mechanics stethoscope - While the standard electronic stethoscope is great for getting the overall picture of what is going on with the body woods, inspecting the neck and fingerboard requires a more precise inspection tool. Before making that purchase decision, know exactly where the dead spots are located.

5. Lisle 68100 Feeler Gauge Set - How well is it put together? A few quick checks on the assembly points with this and you will get a good picture as to the craftsmanship of the instrument.

6. Fluke Ti-10 Infrared imaging camera - If you are buying an active bass, you are concerned with making sure that the electronics are "top-notch". Cold solder joints, substandard electronic components, and faulty assembly can mean problems down the road. By looking at an IR image of the preamp while it is in action, you will be able to pinpoint any areas of the circuit where abnormal operating temperatures may indicate problems that will cause excess battery drain.

7. Fluke 117 Digital Multimeter - Passive electronic components in the preamp need to be checked to ensure that they are within specified tolerance. Any substantial deviation and the preamp may not perform within design limits, often with an impact on your tone. This will allow you to carefully test each component and to take voltage/current readings while the preamp is in operation, ensuring that it is performing as designed. Also, this is useful for routine continuity checks on passive instruments.

8. Kassoy L-820 Jewelers' Loupe - The finish may look fine to the naked eye, but small defects that may eventually become checks and visible surface flaws can only be identified with a more discriminating look. The loupe will allow you to find these with ease.

Each of these tools will allow you to make a detailed examination of the instrument under consideration. Make sure that you take the time to use them thoroughly.
OTOH, I heard from an owner of his brand that Roger actually uses these tools on every bass that comes out of his shop, so if you are buying one of those, you may be able to skip all this.


I have received a couple of PMs asking about a reliable way to inspect the control cavity on an active bass. The best technique I have found for this is to use the some make of fibre optic borescope. The one I use is the Vision Optics Z509-3610. This unit has a 10mm bore making it fairly easy to maneuver in the control cavity and (best of all)runs on 4 AA batteries. You can also get a smaller bore version if the bass you are inspecting has a particularly crowded cavity. The Z509-3610 is pictured below.

+1...good suggestion...also, I like to look at the grain structure of the wood through a tunneling electron microscope.
Yes, this is very effective for identifying hidden grain structure defects that can effect neck rigidity and body resonance. Most players may be unable to use a STEM, as they are quite expensive. If you are lucky enough to have a friend in a university science department who can make a STEM available to you, then you will definitely want to make this a part of your inspection. Should you be unable to obtain the use of a STEM, then you can obtain the services of an X-ray inspection company(often used to locate structural damage caused by pests) to examine the wood for defects.