

Enjoy the benefits of a premium membership!
Upgrade Account
-
TalkBass has been independent since 1998. Add your voice.
Create a free account to reply to discussions, view embedded media, and browse with fewer display ads.
Join free Log in
Want zero display ads or expanded classifieds tools? Compare plans.
You are using an out of date browser. It may not display this or other websites correctly.
You should upgrade or use an alternative browser.
You should upgrade or use an alternative browser.
JIGS....A luthier's Best Friend
- Thread starter Thumpin_P
- Start date
More options
Who Replied?

I was in a bind not too long ago... I needed to route a truss rod slot but didn't have the 7/16 router bit for the new truss rods I'd ordered from Stew-Mac. I remembered a vid that Colorado luthier Robert O'Brien posted about using a modified drill bit to route the intricate classical guitar peghead shapes on a drill press. I decided to give it a try by cutting the head off of a bolt with a 7/16" shank and grinding an angle into it. I chucked it up and added a fence and then cut the truss rod channel into my neck by 'plunging' in 1/16" steps with each pass. It worked remarkably well... so much so that it's the method I have been using since.
Here are a couple of pictures with a scrap piece of wood I routed to show how fine a job this 'free' bit does:
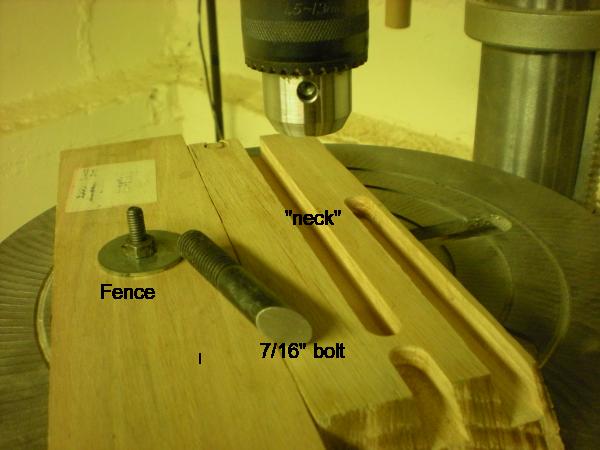
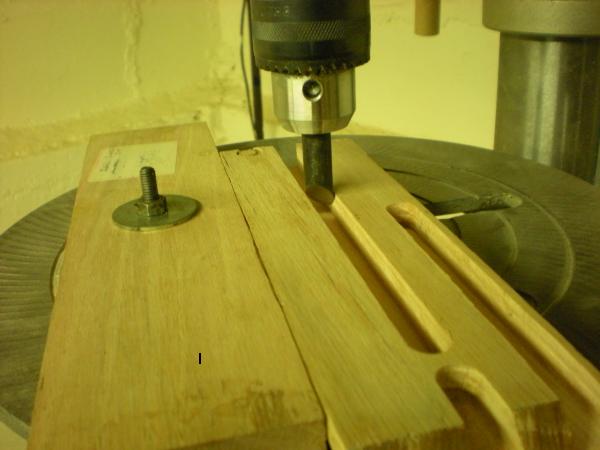
Here are a couple of pictures with a scrap piece of wood I routed to show how fine a job this 'free' bit does:
Wow!!!! Very nice! I like this because it can be really cheap, and gets a great job done!
Thanks for adding this one to the thread.
Thanks for adding this one to the thread.
- Mar 25, 2005
- 1,172
- 10
- Disclosures
- Builder: Mailloux Basses
Here's my radius sanding jig, its essentially from the old LMII design with lots of inspiration from Son of Magni's version posted on this forum several years back. I've added more functionality to it by making it adjustable from 6" to 20" radiuses, compound radiuses can be done on it and i've added the thumbscrews for micro adjustments.
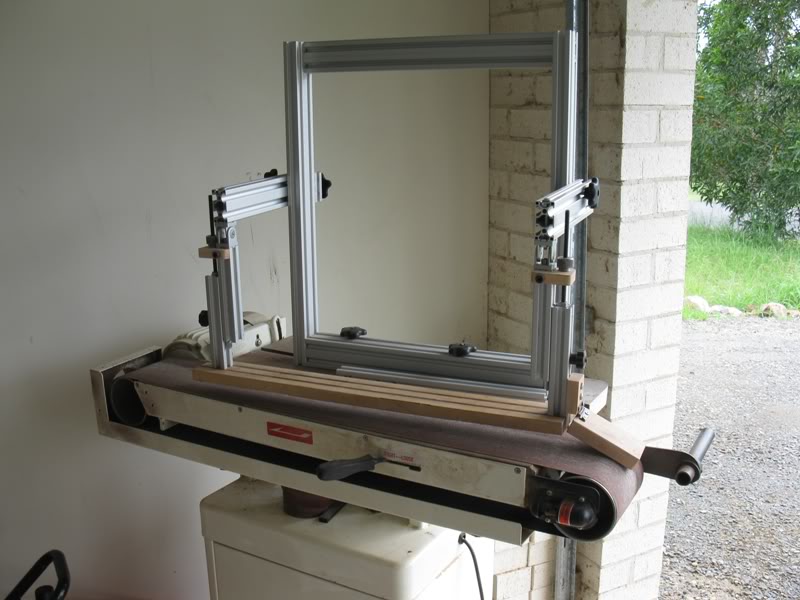
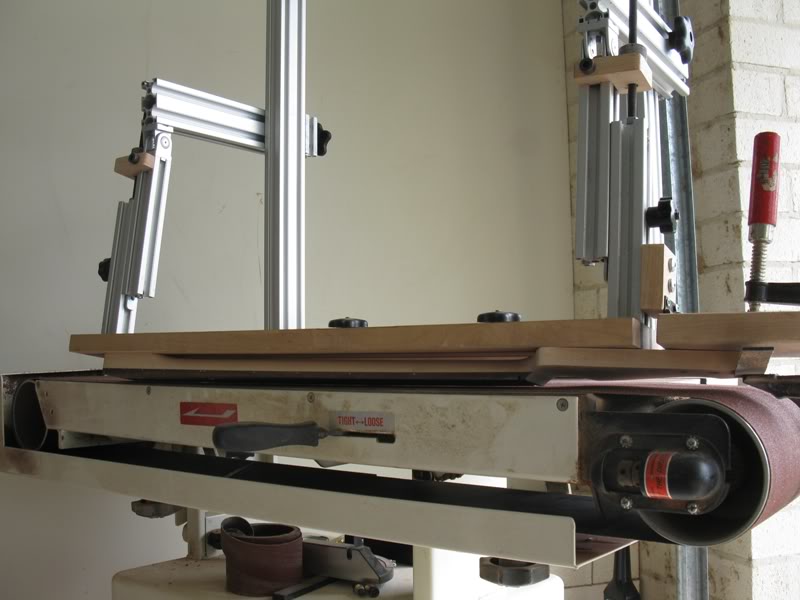
Wow! Very inspired by that one! I especially like the hinged extension, for stabilizing the headstock. Way to go!
Where do you find the aluminum channel stock?
Where do you find the aluminum channel stock?
- Mar 25, 2005
- 1,172
- 10
- Disclosures
- Builder: Mailloux Basses
Do a search on t-slot aluminium extrusions or 8020 extrusions and you'll find craploads of suppliers and differents brands of it. I found a local supplier of these in Australia. There's also an ebay supplier out there of 8020 extrusions, that one is probably best for US based customers
Awesome! Those can really come in handy for setting up jigs and appliances. Thank you again, Phil.
- Mar 25, 2005
- 1,172
- 10
- Disclosures
- Builder: Mailloux Basses
Double sticky tape with a bit of help of the clamp on the headstock end. That ended up being not that solid on finished neck like the one on the pic (you're looking at a pic of the first neck I did on that jig) so on all other necks after this one I radiused the fingerboard before I carved the back of the neck which means the whole length of the neck is double-sticky-taped. Here' a more recent pic to show the difference. At some point in the future I'll upgrade the jig to vacuum-clamp the neck on it.
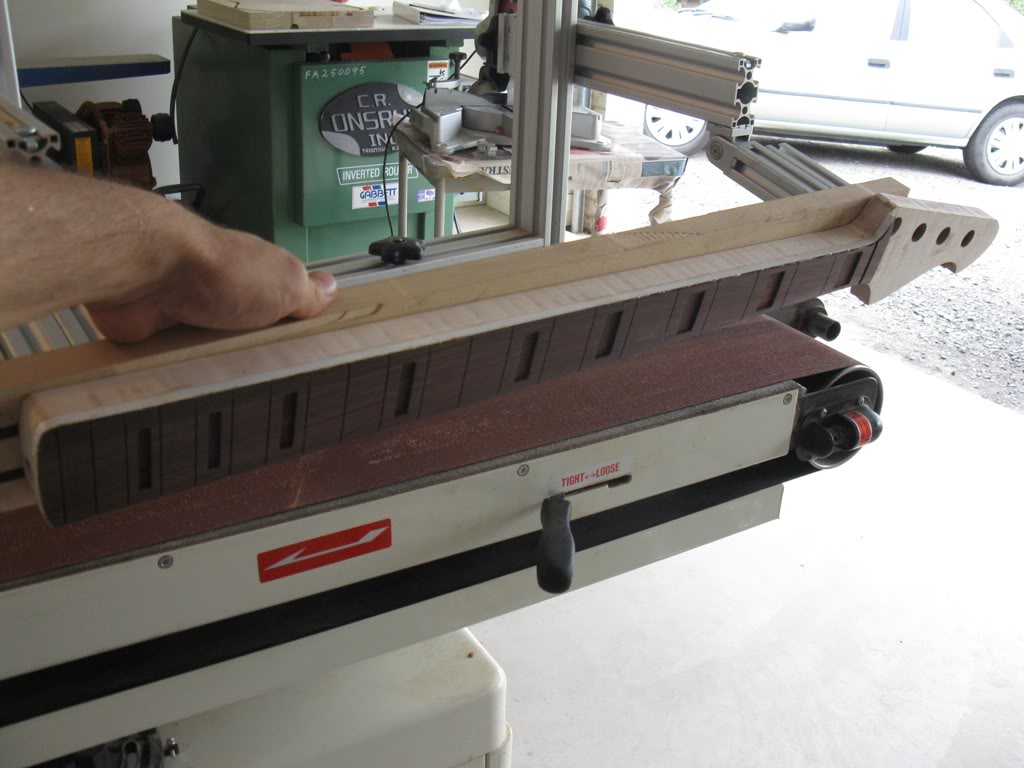
Just found this too.
Fretboard Radius Jig - YouTube
Guitar fretboard radius device 1.wmv by Sakis - YouTube
Fretboard Radius Jig - YouTube
Guitar fretboard radius device 1.wmv by Sakis - YouTube
found this on youtube and I think it is the best so far. Also, you could use it to cut a radius.
http://www.youtube.com/watch?v=nc66Gm5jcys&feature=plcp&list=PL73514E205C7BEBE7
I also have other links on my youtube account.
http://www.youtube.com/watch?v=nc66Gm5jcys&feature=plcp&list=PL73514E205C7BEBE7
I also have other links on my youtube account.
This is how I cut my scarf joint, you need a 12 inch mitre saw and your blank can't be wider than 4 inches, but it works beautifully and takes less than a minute.
I cut a 12 degree angle on two 2x6s that were screwed together.
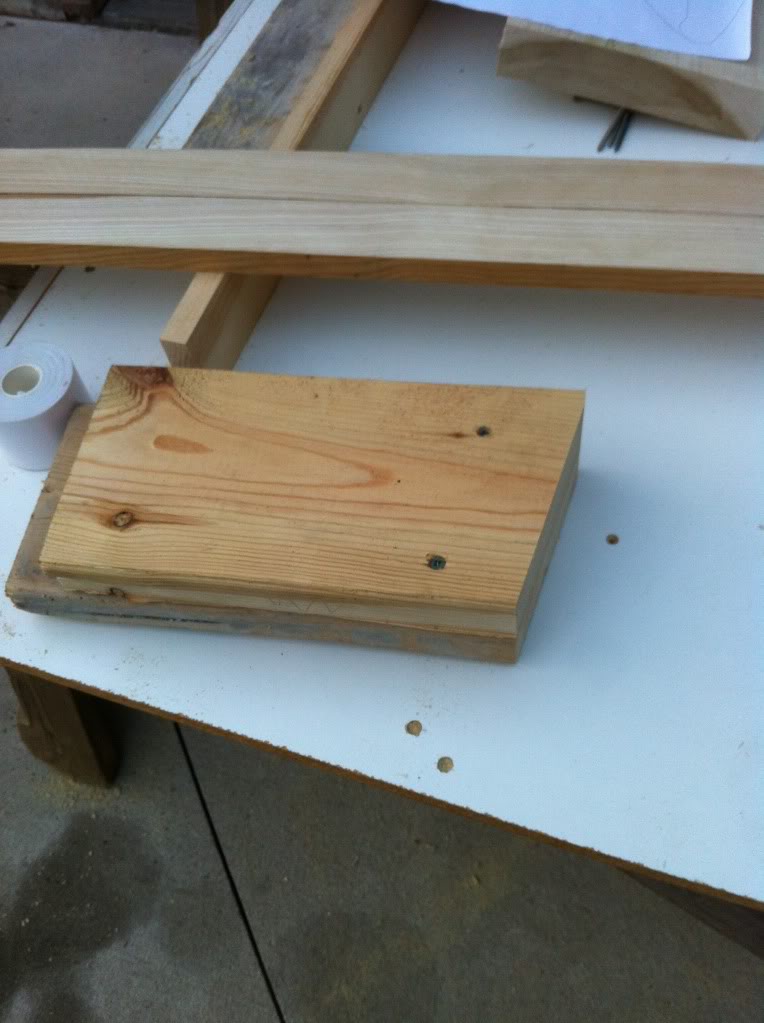
Then I double sticky tape the blank on it
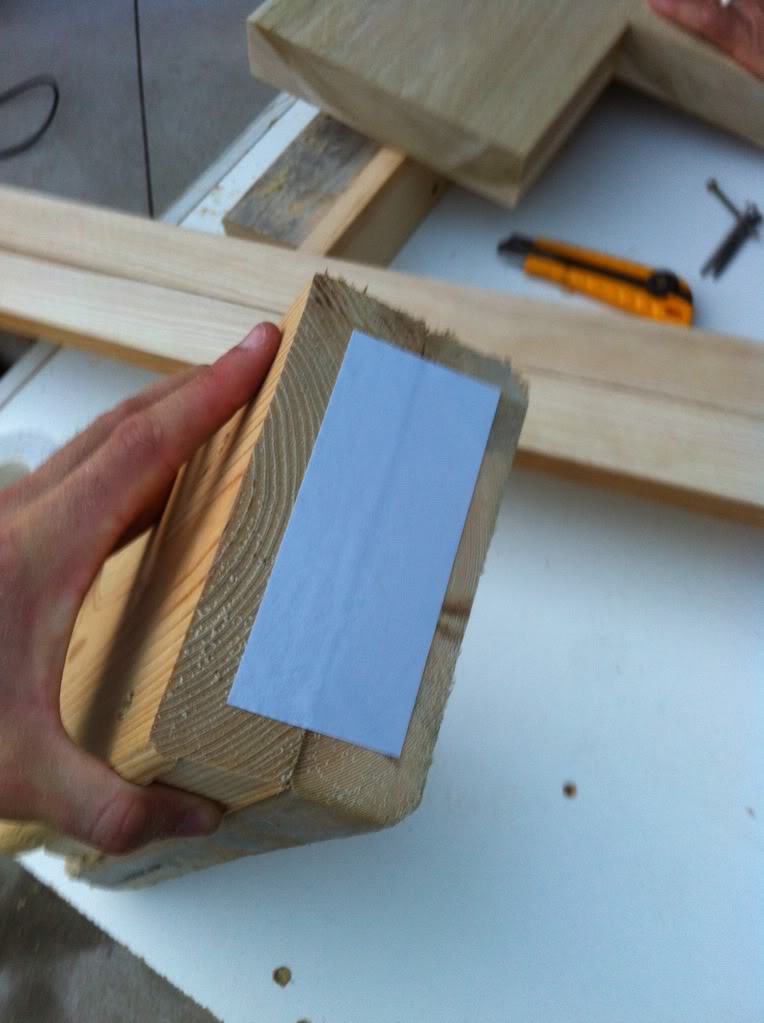
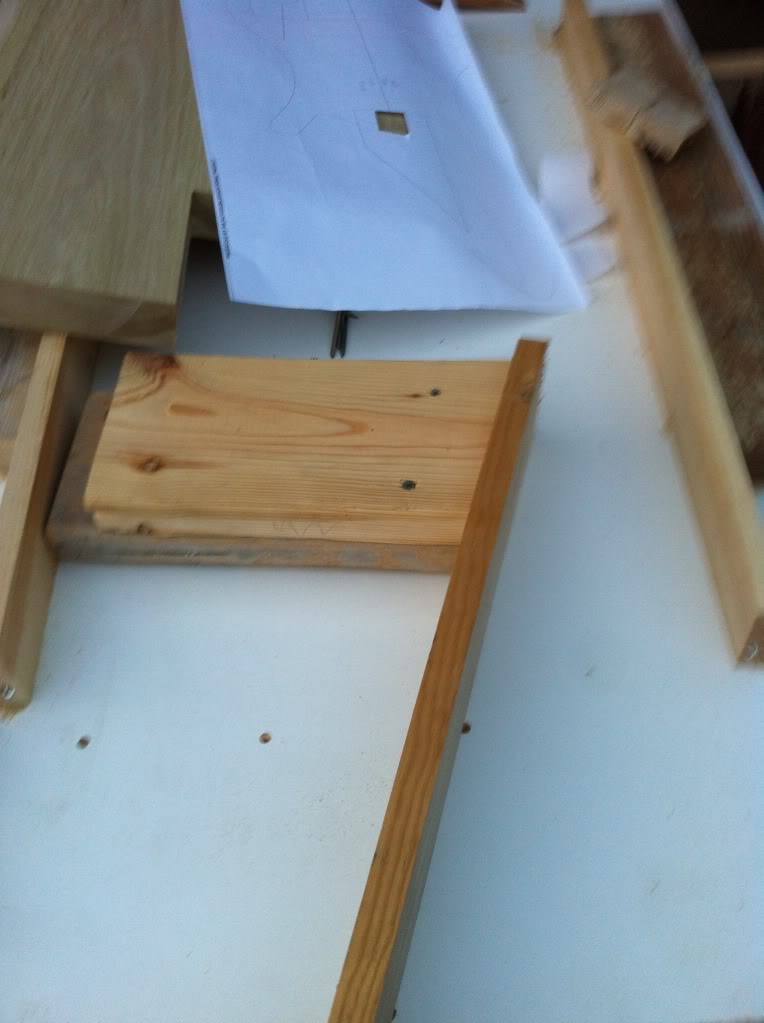
Set the saw to 90, line it up and cut
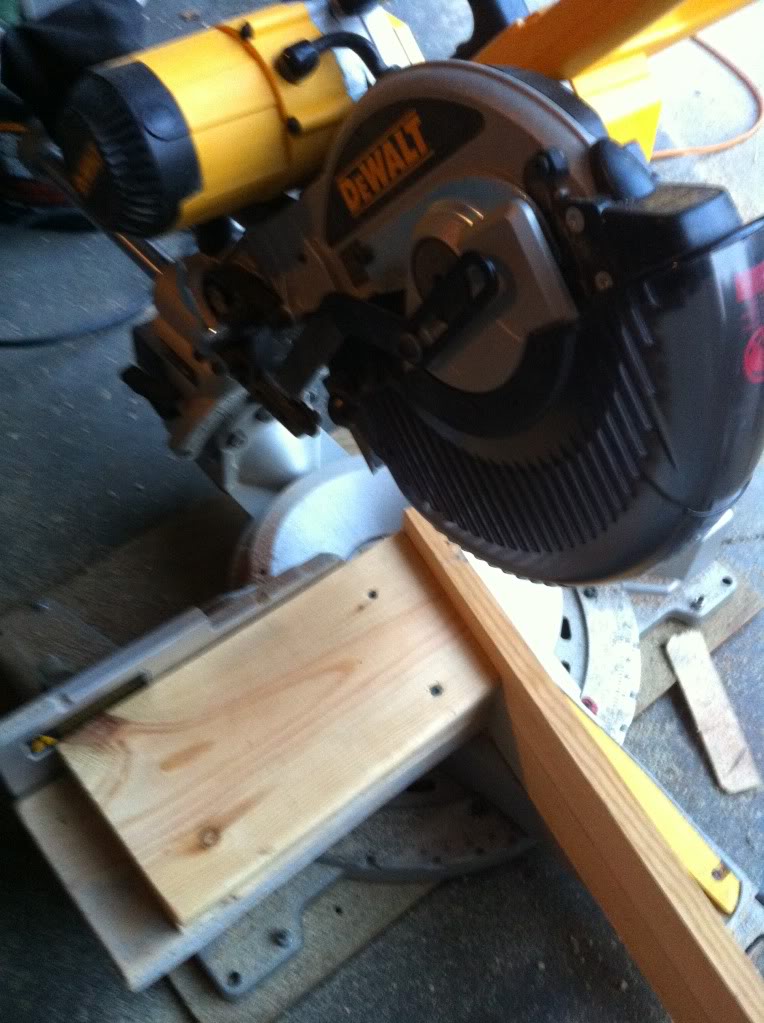
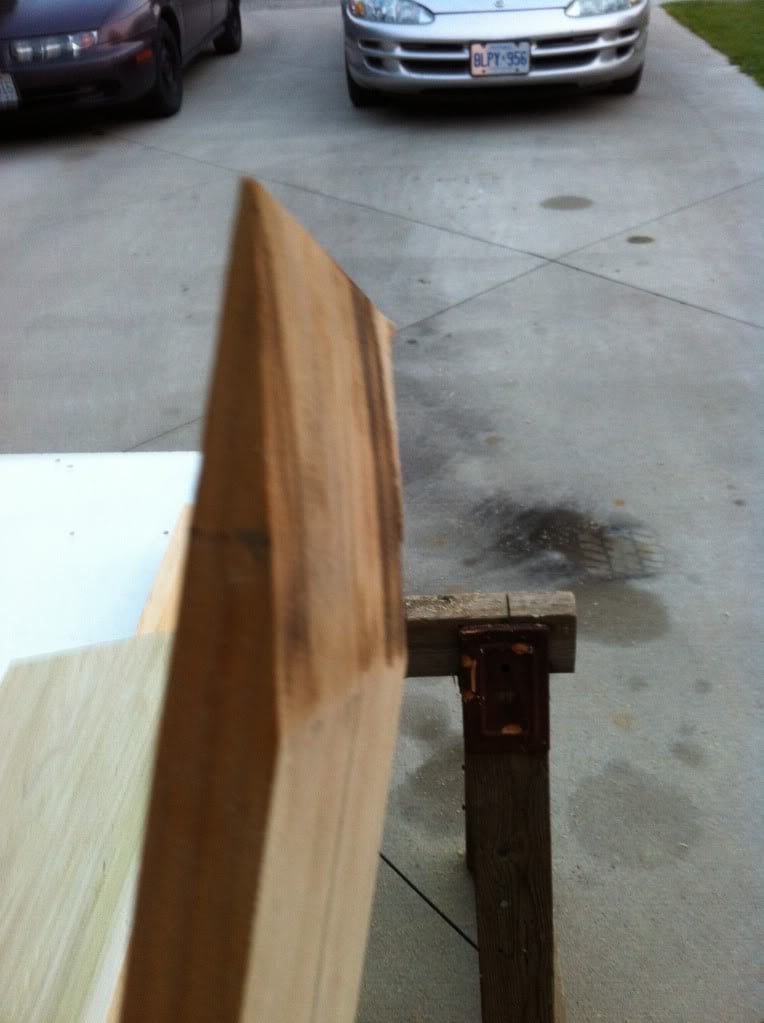
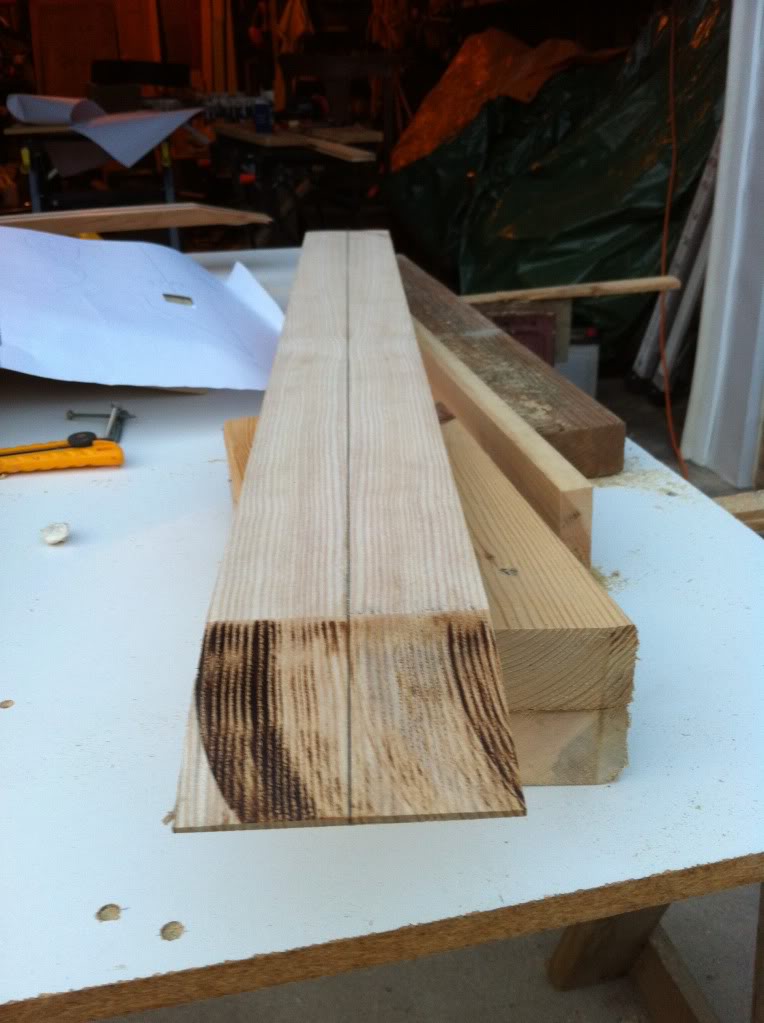
There you go, a very easy way to cut a scarf joint, if you have the right saw. This method will require you to cut a separate headstock piece.
lowsound
I cut a 12 degree angle on two 2x6s that were screwed together.
Then I double sticky tape the blank on it
Set the saw to 90, line it up and cut
There you go, a very easy way to cut a scarf joint, if you have the right saw. This method will require you to cut a separate headstock piece.
lowsound
Not only would that carve a neck profile (the video above), but just changing the cams would allow you to radius a fretboard too. Compound radii would be possible too.
Edit: I missed the whole post above, so forgive me for re-stating the obvious....
Edit: I missed the whole post above, so forgive me for re-stating the obvious....

Here's one for y'all.
This is my new favorite jig!
It's a super simple and highly effective fret/fingerboard leveling jig.
For bolt necks I like to get 'em bolted up to a junk body like the one in the picture that way I can bolt down the body rather then clamp it.
The headstock gets clamped to the bench via a piece of scrap, then with the bass fixed in and in tune I position the 2x4 pins against the back of the neck and clamp them down with the board on top.
With all that I can remove the strings and the neck holds tension!
This jig cost me about ten dollars and works like a charm.
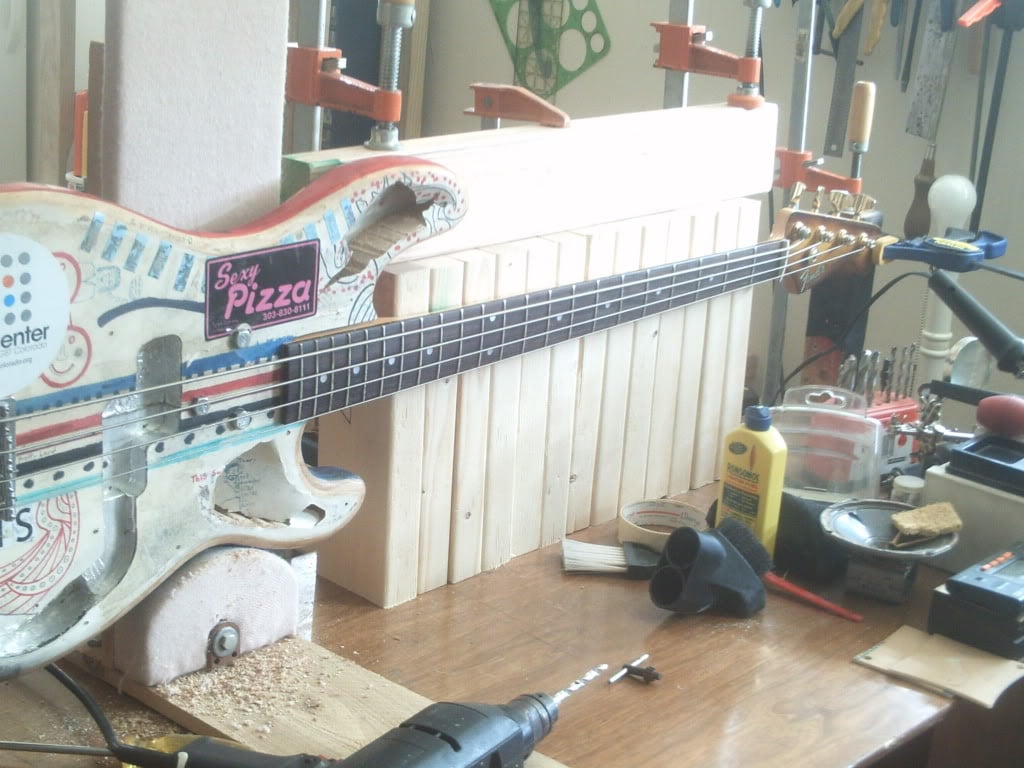
This is my new favorite jig!
It's a super simple and highly effective fret/fingerboard leveling jig.
For bolt necks I like to get 'em bolted up to a junk body like the one in the picture that way I can bolt down the body rather then clamp it.
The headstock gets clamped to the bench via a piece of scrap, then with the bass fixed in and in tune I position the 2x4 pins against the back of the neck and clamp them down with the board on top.
With all that I can remove the strings and the neck holds tension!
This jig cost me about ten dollars and works like a charm.


