Factorbird?? what... what is this?? Drooool drool...

Enjoy the benefits of a premium membership!
Upgrade Account
-
TalkBass has been independent since 1998. Add your voice.
Create a free account to reply to discussions, view embedded media, and browse with fewer display ads.
Join free Log in
Want zero display ads or expanded classifieds tools? Compare plans.
You are using an out of date browser. It may not display this or other websites correctly.
You should upgrade or use an alternative browser.
You should upgrade or use an alternative browser.
Kubicki... straplocks?
- Thread starter ModuMan
- Start date
-
- Tags
- kubicki straplocks
More options
Who Replied?
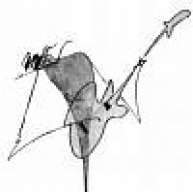
Factorbird?? what... what is this?? Drooool drool...
Not sure but that's the most ergonomic approach to a Thunderbird I've ever witnessed. Like to see the whole thing...extra points for a faux headstock!
Riis


You can take any machine screw to a hardware store, then use their display to figure out what size it is (10-24, M4, etc).
When you find the size, buy that kind of screw.
If the head is too big for the strap button hole, you can easily grind it down a little smaller using a grinding wheel or even a dremel or just a file. Once it fits in, mount the button to the bridge assembly.
The original button uses Loctite Blue to keep it in place, but also allow it to be removed in the future. You may want to apply that to the screw threads to keep the button in place.
You could also just grind the head of your existing bolt to fit the button.
I would not recommend drilling any straplock button setup EVER.
In Dunlop, you'd just destroy the straplock aspect of it. The groove inside holds the straplock assembly in. Drill that away and you have no straplock.
In Schaller, the walls of the button would be thinner and it would likely fail.
Hope that helps!
When you find the size, buy that kind of screw.
If the head is too big for the strap button hole, you can easily grind it down a little smaller using a grinding wheel or even a dremel or just a file. Once it fits in, mount the button to the bridge assembly.
The original button uses Loctite Blue to keep it in place, but also allow it to be removed in the future. You may want to apply that to the screw threads to keep the button in place.
You could also just grind the head of your existing bolt to fit the button.
I would not recommend drilling any straplock button setup EVER.
In Dunlop, you'd just destroy the straplock aspect of it. The groove inside holds the straplock assembly in. Drill that away and you have no straplock.
In Schaller, the walls of the button would be thinner and it would likely fail.
Hope that helps!

- Jun 30, 2010
- 49,603
- 222,065
- Disclosures
- musician/artist/owner - Gildaxe
Factorbird?? what... what is this?? Drooool drool...
Not sure but that's the most ergonomic approach to a Thunderbird I've ever witnessed. Like to see the whole thing...extra points for a faux headstock!
Riis
I think @JIO made a thread about it. Can't remember, but for sure I have seen pics of it pop up from time to time in his excellent build diaries.
If you aren't familiar, it's worth spending some time checking his work out.
Thanks Charlie - I don't have a build diary thread on it as I created it nearly 20 yrs ago but since I frequently get asked to tell it's story - I just started a thread for it so I don't keep highjacking threads!
 - enjoy! Factorbird Fretless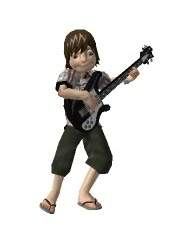


I would not recommend drilling any straplock button setup EVER.
In Dunlop, you'd just destroy the straplock aspect of it. The groove inside holds the straplock assembly in. Drill that away and you have no straplock.
In Schaller, the walls of the button would be thinner and it would likely fail.
Hope that helps!
Right, and this is where the operation can run into a snag. Grinding down the screw cap head makes sense. But the Schaller straplock button is still just a *little* too small for the screw. I don't think it would take much at all to make it work.
I can tell you that after 30 (!) some years, the Loctite was still working. I wasn't sure I was getting that out of there at first.
I get the rubber washer thing that people are suggesting but the truth is that the current wide-winged button works just fine. I just don't like dealing with it and - straplock debates/opinions aside - my goal is to have something smooth and simple. I do take my strap off so I want that to be as easy as possible.
JIO's Factorbird is awesome and he built in his own solution. I was hoping to see how other people dealt with this issue... if anyone did!
Oh yeah, just drill or file that out, no problem there. I've done that a lot over the years, no issues.Right, and this is where the operation can run into a snag. Grinding down the screw cap head makes sense. But the Schaller straplock button is still just a *little* too small for the screw. I don't think it would take much at all to make it work.
Oh yeah, just drill or file that out, no problem there. I've done that a lot over the years, no issues.
Then we have a plan...
OK, next step is acquiring a duplicate machine screw and shaving metal!

If you know a machinist,he can turn the head of the screw down to the appropriate size so you dont have to modify the bass. Send it to me and I'll do it.
For anyone who was wondering (anyone? anyone at all?) I was able to use some suggestions here regarding modifying the strap button and screw.
I don't have a lathe so I improvised with a file, duct tape (of course), a drill and another file for the inside of the strap button.
Behold! This is how much adjustment the screw needed. The inside of the strap button wasn't bad at all, just needed a little filing.
So, for anyone considering this it is quite doable!
The replacement screw is #8-32 x 3/4" This is a little longer than the original, but there was plenty of room for it.


I don't have a lathe so I improvised with a file, duct tape (of course), a drill and another file for the inside of the strap button.
Behold! This is how much adjustment the screw needed. The inside of the strap button wasn't bad at all, just needed a little filing.
So, for anyone considering this it is quite doable!
The replacement screw is #8-32 x 3/4" This is a little longer than the original, but there was plenty of room for it.
I have an '86 Kubicki ExFactor and I wanted to replace the original strap buttons with straplocks. However, the screw for the strap button was pretty tight and I didn't want to force anything so I decided to just leave it alone. The elongated shape of this type of strap button does a great job of retaining the strap and I haven't had one come loose yet. It works much better than the standard round strap button.

For anyone who was wondering (anyone? anyone at all?) I was able to use some suggestions here regarding modifying the strap button and screw.
I don't have a lathe so I improvised with a file, duct tape (of course), a drill and another file for the inside of the strap button.
Behold! This is how much adjustment the screw needed. The inside of the strap button wasn't bad at all, just needed a little filing.
So, for anyone considering this it is quite doable!
The replacement screw is #8-32 x 3/4" This is a little longer than the original, but there was plenty of room for it.
View attachment 2799577 View attachment 2799578
Yeah, it's a 5 year old post, but thanks! This is exactly what I was looking for. Was the upper horn a standard install?
Yeah, it's a 5 year old post, but thanks! This is exactly what I was looking for. Was the upper horn a standard install?
Yes indeed, the upper horn was the easy part since that was a just a regular install.
I'm really pleased with the bridge screw solution since it wasn't difficult (just a little patience while filing) and doesn't alter the instrument at all. And is completely reversible!
The only thing I'd change now is using the newer Schaller S-Locks.
Yes indeed, the upper horn was the easy part since that was a just a regular install.
I'm really pleased with the bridge screw solution since it wasn't difficult (just a little patience while filing) and doesn't alter the instrument at all. And is completely reversible!
The only thing I'd change now is using the newer Schaller S-Locks.
I’m still 5-6 months out on a new build and the strap locks was the only problem I saw. Your post fixed that. Thanks!
Awesome, glad it was helpful! Be sure to post your new bass in the Kubicki Club, can't wait to see it!


