Anyone Remember the Fat Head?
A few days ago I got inspired by these things as a way to cover some old screw holes in my headstock left by the original (larger profile) tuners.
Having some brass good for this I decided to make one.

Now, being that I had another bass with this issue and had some more material (not brass this time) lying in my shop I figured why not make another and show how I did it, the following is just that.
I first stated by removing the tuners and by laying the headstock on it's back over a sheet of paper I traced the profile of the headstock.

Then I took said tracing and using a set of drafting tools (pictured below) I took the drawing in 3/16 of an inch around the bulk of the profile.


In the process I eyeballed the neck to headstock transition area and came up with a profile for that part of the plate that I thought would work well.
After getting all that out of the way I took my drawing and cut it out with scissors, laid it on the back of the headstock and checked it to make sure all was well and good.(it was)

Next step transfer to metal!
Using a sharpie and a little tape to hold the paper down I traced it onto the plate, then using a pair of tin snips I cut it out just outside of the line.

(Note you could use any variety of cutting methods, this one just seems to have been the most practical for me.
Also on the note of other things I have tried.
I have used a jig saw in the past for cutting thin metal like this and it's darn near impossible to hold onto while cutting because the saw is constantly binding up and catching the piece you're cutting.
This is problematic as it tends to end up bending your metal and it's also pretty dangerous!
You can however double stick your metal to a piece of plywood or similar to get a steady cut but by the time you've done all that you could have been done had you used a better method in short don't try a jig saw.)

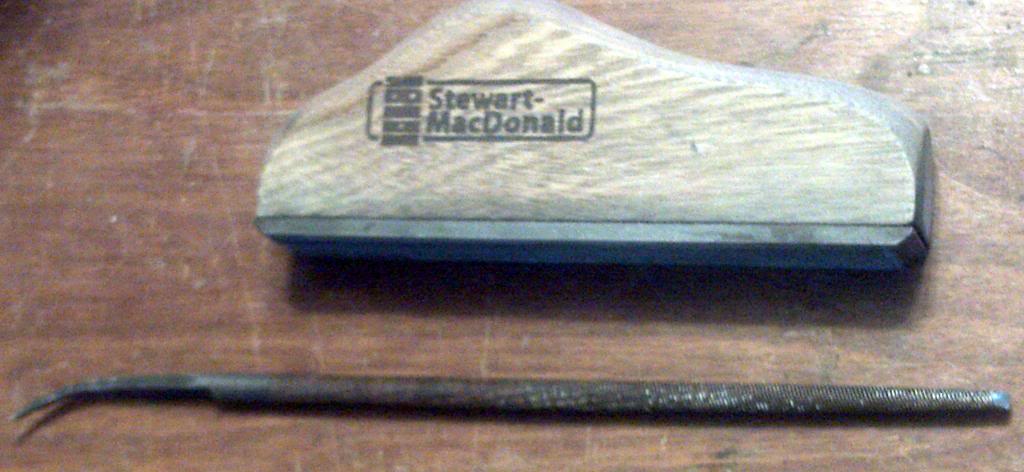
After getting it cut I used a series of files to get it into shape a stewmac fret leveling and 1/4 round file did the bulk of it.
Once the profile was there I set it on the headstock into position and clamped it in place being sure as to not cover the tuner holes with the clamp.
Then flipped it over and with my sharpie I traced the tuner holes onto the plate.

With that I used those markings to first using a ¼ bit to drill the center and then following that up with a step bit that is designed for metal work to drill it to final size.
If you do this I'd advise against just using any old bit you find as a standard spiral cut bit is going to go through and then grab the metal causing a kink around the hole.
You need something that won't grab and if done slowly a step bit does a pretty clean job of it.
Here's the bit I'm talking about.

With those holes drilled and trimmed of their sharp edge using a dremel grinding attachment. (you could use a round file as well)
I then placed it back in place on the headstock and this time set the tuners in place and marked the places for the screws, took it and drilled once more (a normal bit works fine for this as it is so small)
Now I had kind of gotten ahead of my self at this point as after I first trimmed it I went through 100, 180 and 220 grit sand paper in sanding the surface.
Next time I do this I'll wait until I've drilled the holes as I ended up going back and having to re-sand it due to scratches I put on it through the drilling process.
With this plate I wanted a polished surface so I ended up doing a lot of sanding and then a couple stages of buffing and it was worth it!
Although I will say If hammered brass like the first one I made will look good that is a major short cut.
With that one all I had to do was rough trim it drill it and hammer it taking probably at least an hour less to complete.
Anyways here's the finished product of a few hours work on number two.

A few days ago I got inspired by these things as a way to cover some old screw holes in my headstock left by the original (larger profile) tuners.
Having some brass good for this I decided to make one.
Now, being that I had another bass with this issue and had some more material (not brass this time) lying in my shop I figured why not make another and show how I did it, the following is just that.
I first stated by removing the tuners and by laying the headstock on it's back over a sheet of paper I traced the profile of the headstock.
Then I took said tracing and using a set of drafting tools (pictured below) I took the drawing in 3/16 of an inch around the bulk of the profile.
In the process I eyeballed the neck to headstock transition area and came up with a profile for that part of the plate that I thought would work well.
After getting all that out of the way I took my drawing and cut it out with scissors, laid it on the back of the headstock and checked it to make sure all was well and good.(it was)
Next step transfer to metal!
Using a sharpie and a little tape to hold the paper down I traced it onto the plate, then using a pair of tin snips I cut it out just outside of the line.
(Note you could use any variety of cutting methods, this one just seems to have been the most practical for me.
Also on the note of other things I have tried.
I have used a jig saw in the past for cutting thin metal like this and it's darn near impossible to hold onto while cutting because the saw is constantly binding up and catching the piece you're cutting.
This is problematic as it tends to end up bending your metal and it's also pretty dangerous!
You can however double stick your metal to a piece of plywood or similar to get a steady cut but by the time you've done all that you could have been done had you used a better method in short don't try a jig saw.)
After getting it cut I used a series of files to get it into shape a stewmac fret leveling and 1/4 round file did the bulk of it.
Once the profile was there I set it on the headstock into position and clamped it in place being sure as to not cover the tuner holes with the clamp.
Then flipped it over and with my sharpie I traced the tuner holes onto the plate.
With that I used those markings to first using a ¼ bit to drill the center and then following that up with a step bit that is designed for metal work to drill it to final size.
If you do this I'd advise against just using any old bit you find as a standard spiral cut bit is going to go through and then grab the metal causing a kink around the hole.
You need something that won't grab and if done slowly a step bit does a pretty clean job of it.
Here's the bit I'm talking about.
With those holes drilled and trimmed of their sharp edge using a dremel grinding attachment. (you could use a round file as well)
I then placed it back in place on the headstock and this time set the tuners in place and marked the places for the screws, took it and drilled once more (a normal bit works fine for this as it is so small)
Now I had kind of gotten ahead of my self at this point as after I first trimmed it I went through 100, 180 and 220 grit sand paper in sanding the surface.
Next time I do this I'll wait until I've drilled the holes as I ended up going back and having to re-sand it due to scratches I put on it through the drilling process.
With this plate I wanted a polished surface so I ended up doing a lot of sanding and then a couple stages of buffing and it was worth it!
Although I will say If hammered brass like the first one I made will look good that is a major short cut.
With that one all I had to do was rough trim it drill it and hammer it taking probably at least an hour less to complete.
Anyways here's the finished product of a few hours work on number two.