• TalkBass has been independent since 1998. Add your voice.
    Create a free account to reply to discussions, view embedded media, and browse with fewer display ads.
    Join freeLog in
    Want zero display ads or expanded classifieds tools? Compare plans.

Making my own luminescent side dots.

Hey guys,

I decided this project should have its own thread seeing that it is moving in the right direction and I am getting pretty close to a functional final product.

I started by making my own clear silicone mold.
WhatsApp Image 2024-02-23 at 13.51.47_eb541fff.jpg


After a few failed attempts I managed to make something close to what I wanted.
WhatsApp Image 2024-03-06 at 22.24.08_b8f8e3cc.jpg


It took me some time to deal with the air bubbles and the uniformity problems. It was just a matter of learning to work with high-viscosity UV resin in tiny little molds.

After several more attempts, I have now virtually solved the problem.
WhatsApp Image 2024-03-18 at 15.02.25_509156e5.jpg


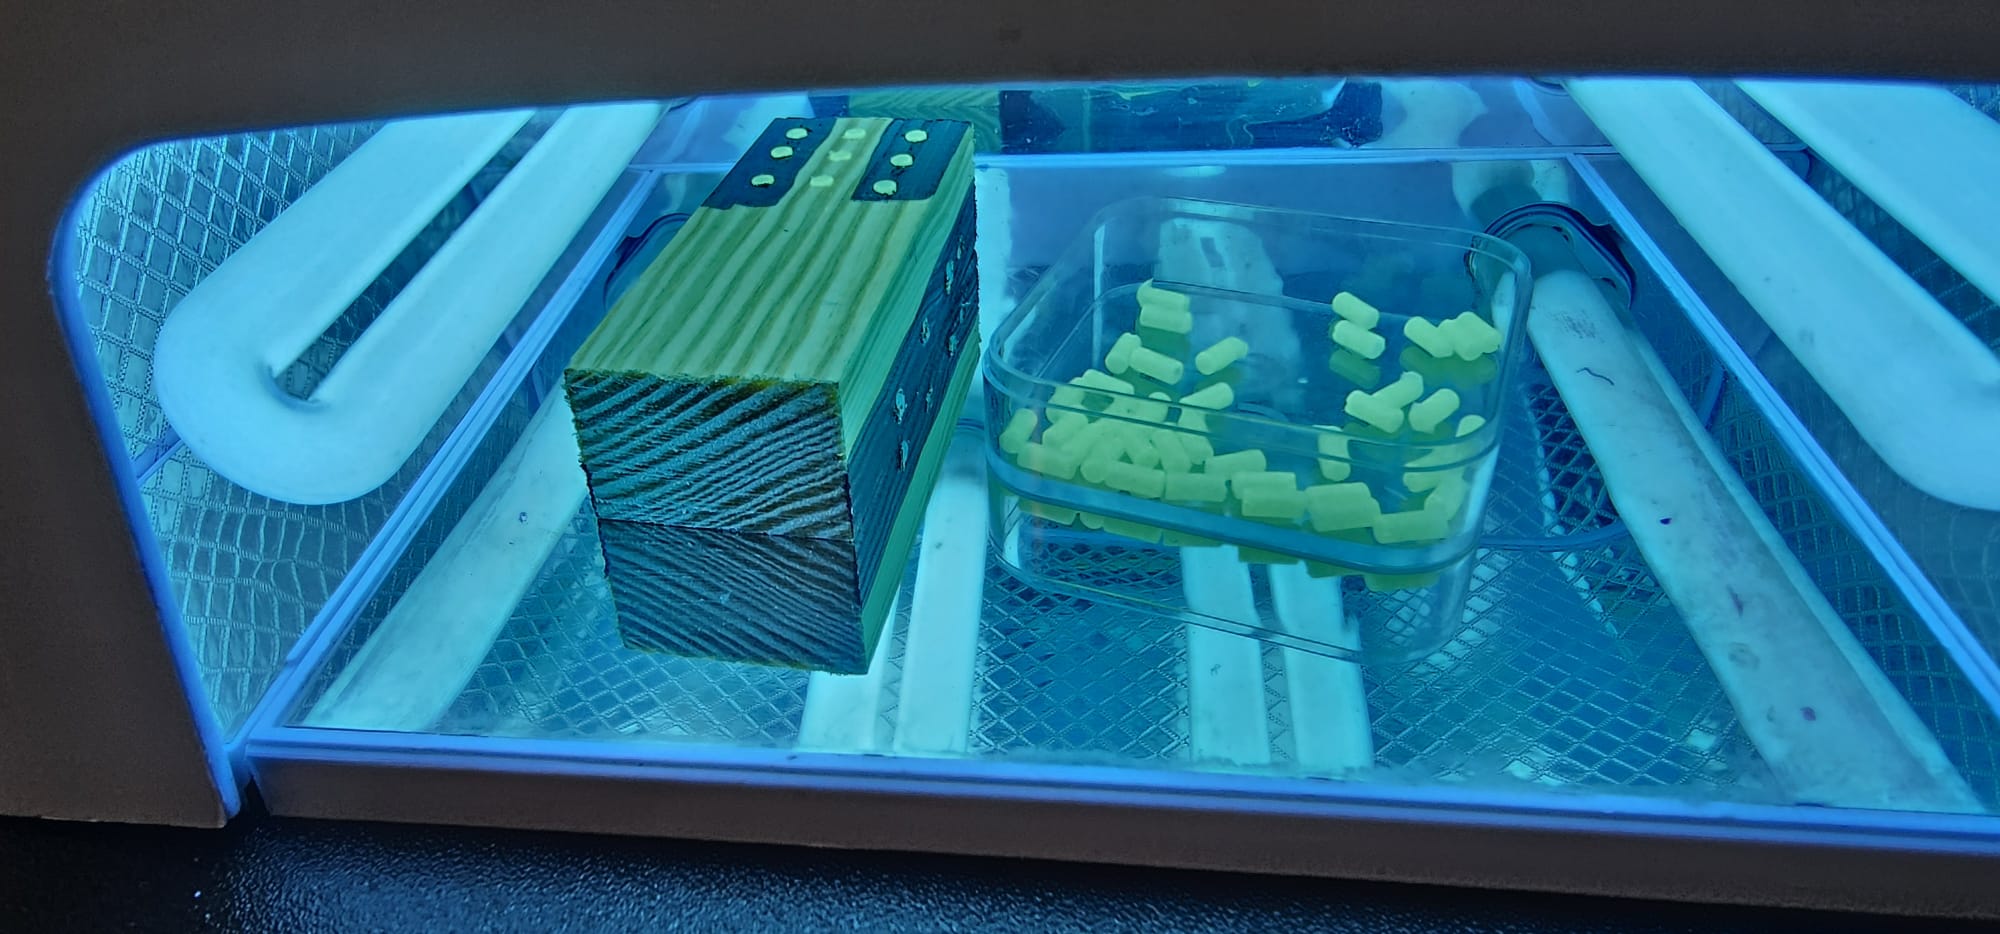
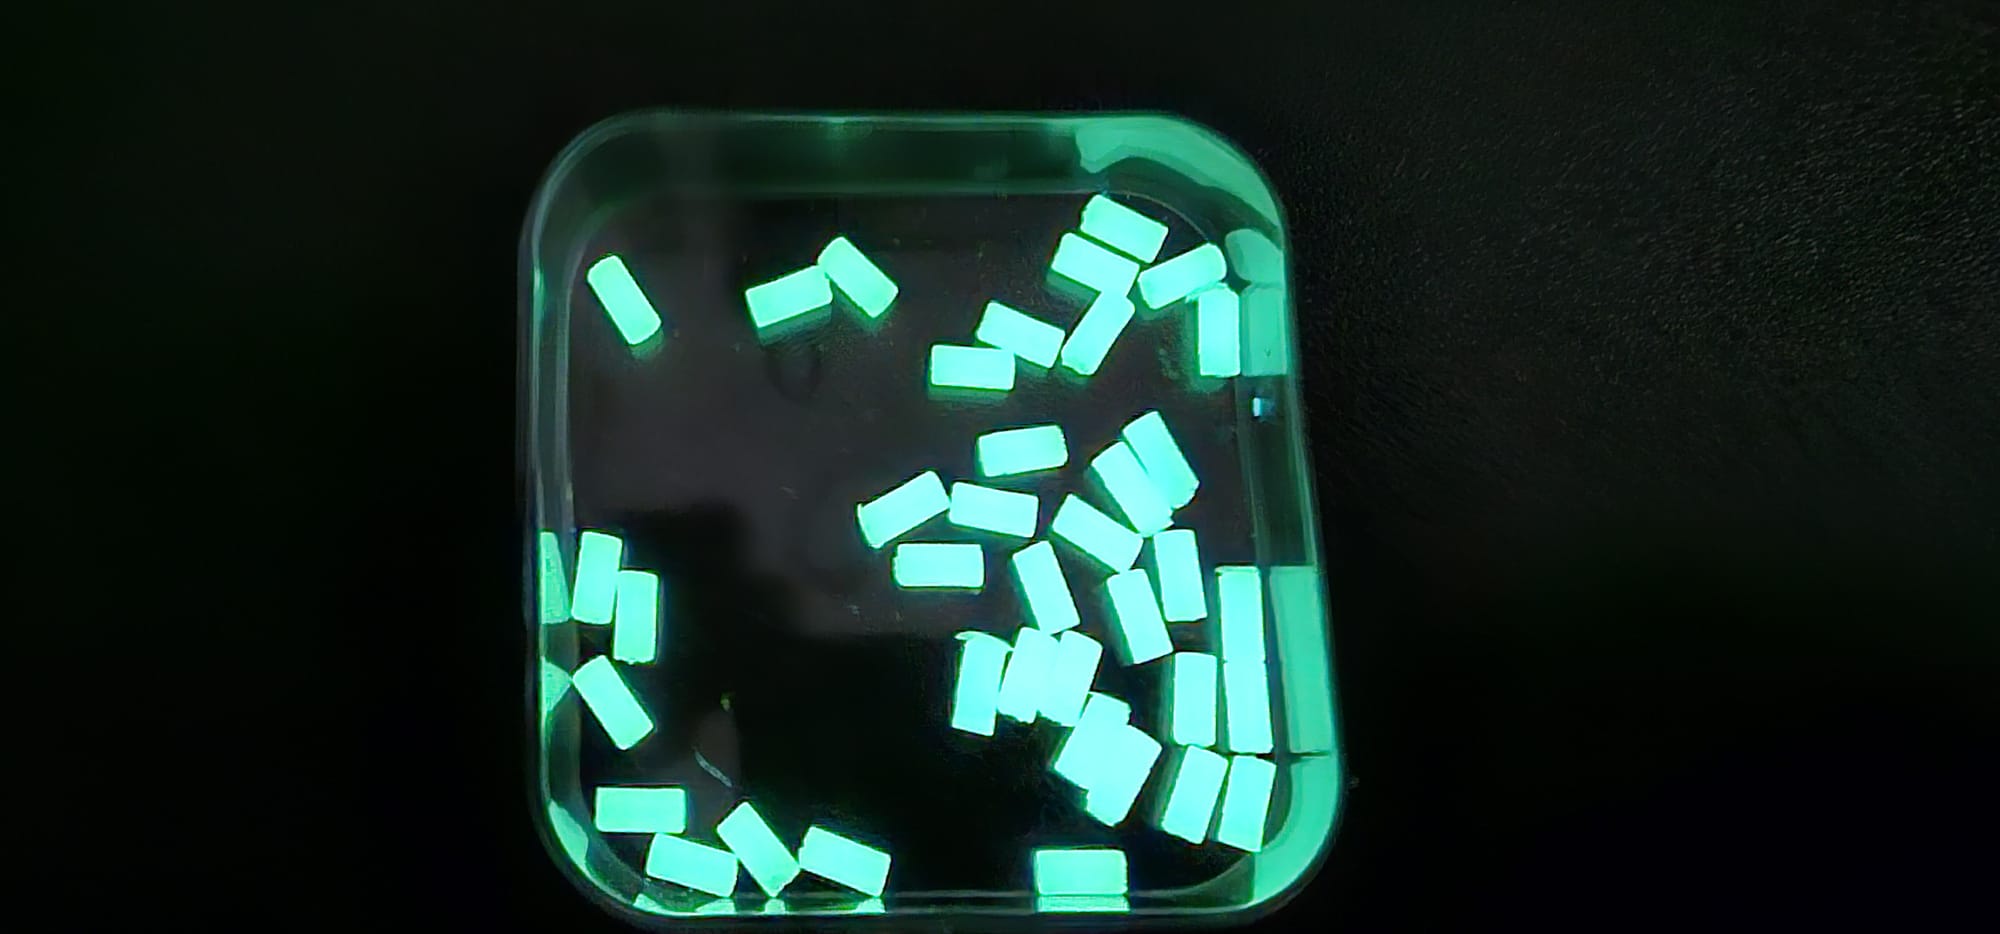
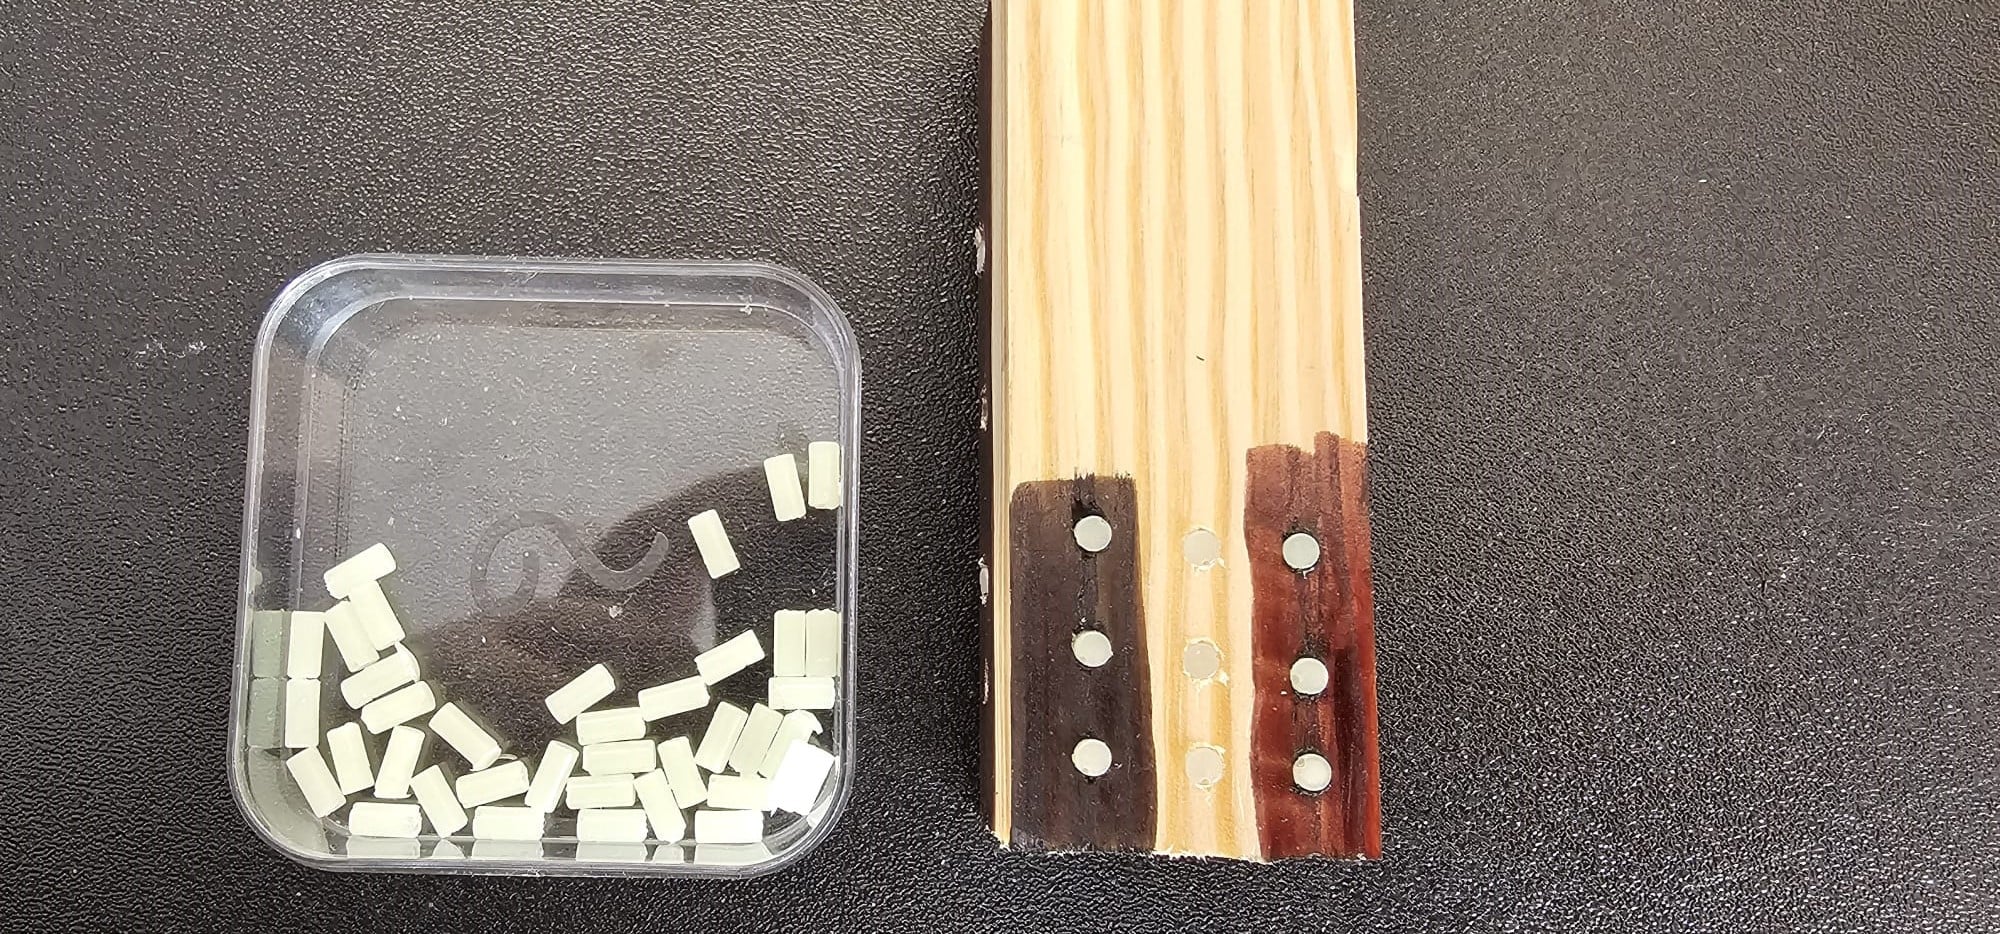
And I am getting very close to a final product.
1.jpg
2.jpg
3.jpg
4.jpg
5.jpg


At this point, I need to measure how long the dots emit visible light and I need to install a set in an actual neck to see how usable they really are. So that's what's coming.

A special thanks to @Bruce Johnson who inspired me to start this journey.
 
Last edited:
What was the trick to solving it?

Using a needleless syringe to introduce the resin from the bottom of the mold. It's all about being slow and steady. By doing so, the bubbles just float to the surface and the dots come out very uniform in color and luminescence.

Nice work, what kind of casting resin are you using? Have you solved the bubbling issue? Placing the mould in a pressure vessel can sometimes help, although it depends a lot on curing time, viscosity etc.

I'm using UV resin. From my discussions with Bruce, I know that I should be using slow curing thin epoxy but I can't do that because of my birds. Uncured epoxy fumes are potentially harmful to them so I had to find an alternative. UV resin is potentially toxic too but it cures in minutes so it's much safer.
The problem with the UV resin is that it's quite thick so I don't know how well a pressure or vacuum chamber would work especially considering the puny size of the molds (3mm/6mm). But at this point, I'm getting very consistent results with very few bubbles so I'm pretty happy.
 
Last edited:
That looks great! How long are you casing the rods? It looks like they’re long enough to get several dots out of each. You’re getting me close to wanting to try this.

They are 3mm in diameter by 6mm in length, I think they are suited for just 1 dot per rod but I'm not sure. That's actually one of the things I want to test, to see how big a difference there is in the dot's luminosity according to their length. I would think a 5mm rod would emit more light and last longer than a 3mm one but since they would both be encased in wood, I'm not sure. I will test it soon.
 
  • Like
Reactions: Bloomfield
That looks great! How long are you casing the rods? It looks like they’re long enough to get several dots out of each. You’re getting me close to wanting to try this.

In my experience, it really wasn't worth the trouble to do that. We made the molds about 1/4" deep. After casting the dots were 1/4" long with a mushroom head on top. That made it easy to pick them up and stick them in the hole in the neck.

Also, remember that the brightness of the dot is related to the volume of the dot, the area times the depth. Deeper dots will be brighter. We liked 1/4" depth as a good amount. We'd drill the holes slightly deeper than 1/4" in the neck, then glue in the dots with the mushroom head hitting the surface. After filing off the mushroom head, the dots would all be the same 1/4" length. And all equal brightness.

If you are sawing off little chunks of rod stock, you have to be careful to get them all the same length.
 
They are 3mm in diameter by 6mm in length, I think they are suited for just 1 dot per rod but I'm not sure. That's actually one of the things I want to test, to see how big a difference there is in the dot's luminosity according to their length. I would think a 5mm rod would emit more light and last longer than a 3mm one but since they would both be encased in wood, I'm not sure. I will test it soon.

A longer rod will be brighter, but the glow won't last longer. It's all about the volume of powder that's in the dot.

Powering the dots: Mike used to buy little pen-light flashlights that had UV bulbs. He would include one with every guitar that had the luminescent dots. You'd do one dot at a time, holding the bulb end right against the dot for about 3 seconds. It would take maybe 40 seconds to charge the whole neck, and they'd be good for a whole 3 hour gig.

There's a saturation limit to how much light they can store up. 3 seconds seemed to be enough to fully saturate them. Holding it on there for longer wouldn't make them brighter or last longer.
 
In my experience, it really wasn't worth the trouble to do that. We made the molds about 1/4" deep. After casting the dots were 1/4" long with a mushroom head on top. That made it easy to pick them up and stick them in the hole in the neck.

Also, remember that the brightness of the dot is related to the volume of the dot, the area times the depth. Deeper dots will be brighter. We liked 1/4" depth as a good amount. We'd drill the holes slightly deeper than 1/4" in the neck, then glue in the dots with the mushroom head hitting the surface. After filing off the mushroom head, the dots would all be the same 1/4" length. And all equal brightness.

If you are sawing off little chunks of rod stock, you have to be careful to get them all the same length.

So that confirms what I was expecting. Also, you made me realize something. Up until now, I saw those "mushroom tops" as pure waste and I discarded them as soon as I removed the rods from the mold but now I understand that they can be used as applicators of sorts so I should probably keep them in place until they get mounted. I will soon get to mounting into a neck so I will try and see how I prefer it. Thanks, Bruce!
 
A longer rod will be brighter, but the glow won't last longer. It's all about the volume of powder that's in the dot.

Powering the dots: Mike used to buy little pen-light flashlights that had UV bulbs. He would include one with every guitar that had the luminescent dots. You'd do one dot at a time, holding the bulb end right against the dot for about 3 seconds. It would take maybe 40 seconds to charge the whole neck, and they'd be good for a whole 3 hour gig.

There's a saturation limit to how much light they can store up. 3 seconds seemed to be enough to fully saturate them. Holding it on there for longer wouldn't make them brighter or last longer.

I do have one of those little lamps but mine is weak, it doesn't work great. The green powder I am using for the "good" dots (final testing before mounting) is made of larger particles and seems to be of much better quality. It charges very well from a simple desk lamp with a 13w warm white LED bulb, much better than the other 2 I have been using so far, they get a better charge from a UV source.
 
The other presumed factor with depth (or rod length) is that at some point when they are embedded in wood, more length won't help, because the light to charge can't get in there to charge them. If it some how could then the light from the stuff back there glowing couldn't get out. Returns from additional length will, at some point, diminish.
 
  • Like
Reactions: llmk
The other presumed factor with depth (or rod length) is that at some point when they are embedded in wood, more length won't help, because the light to charge can't get in there to charge them. If it some how could then the light from the stuff back there glowing couldn't get out. Returns from additional length will, at some point, diminish.

I agree. By some experimentation, we liked the 1/4" depth. It was a good combination of brightness and ease of installation.
 
In my experience, it really wasn't worth the trouble to do that. We made the molds about 1/4" deep. After casting the dots were 1/4" long with a mushroom head on top. That made it easy to pick them up and stick them in the hole in the neck.

Also, remember that the brightness of the dot is related to the volume of the dot, the area times the depth. Deeper dots will be brighter. We liked 1/4" depth as a good amount. We'd drill the holes slightly deeper than 1/4" in the neck, then glue in the dots with the mushroom head hitting the surface. After filing off the mushroom head, the dots would all be the same 1/4" length. And all equal brightness.

If you are sawing off little chunks of rod stock, you have to be careful to get them all the same length.


Ok. For whatever reason they looked longer in the picture.
 
  • Like
Reactions: Gary_M