• TalkBass has been independent since 1998. Add your voice.
    Create a free account to reply to discussions, view embedded media, and browse with fewer display ads.
    Join freeLog in
    Want zero display ads or expanded classifieds tools? Compare plans.

Multiscale Chambered 8-string Hybrid Singlecut

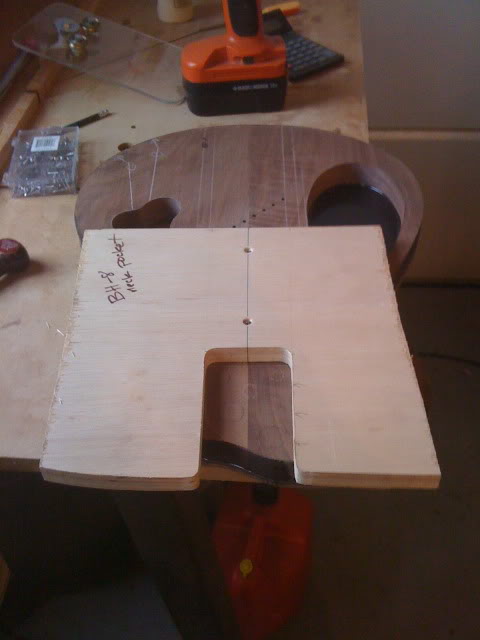
Neck pocket action - here I am screwing the template to the body to assure that it won't slip. The screw holes are located in pickup routs so they will be routed away eventually. Here I'm routing into the body core and later I will rout into the top.
neck27.jpg


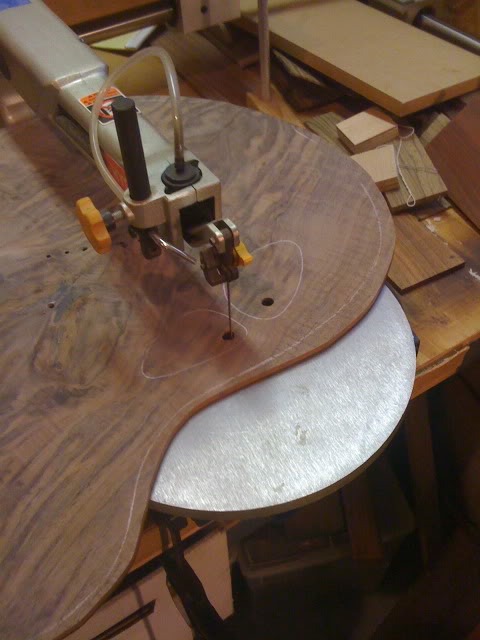
Here the soundholes are roughed out using a scroll saw and cleaned up on the spindle sander.
top2.jpg


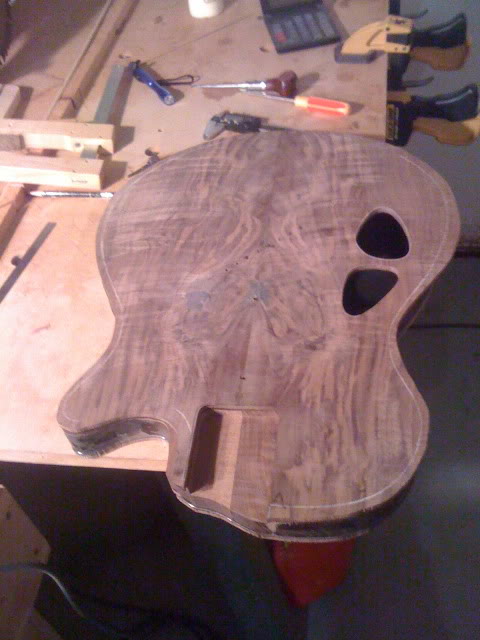
Here is the top replete with soundholes and neck pocket.
top3.jpg
 
Erik, I like the idea alot of a multiscale chambered 8-string hybrid :cool: and I'm very curious how the final result will be... but I'm even more impressed by your way of working and your accuracy! That integral binded fb looks awesome! This build thread is very instructive and entertaining to follow, keep it up!!

 
Got the fretboard glued up today - West System epoxy for this, a thin coat applied onto the neck and spread evenly with an expired Starbuck's card. The strip of tape down the center is to keep the epoxy off the truss rod, which has its threads wrapped in a thin layer of plastic wrap (same goal there).

neck28.jpg


The fretboard is stuck on, then the whole works is flipped over and place into the neck glue press. The fretboard surface rests in a hardwood caul that is radiused to match the fretboard radius, then the whole works is clamped tight so that the epoxy cures with everything dead straight.

neck29.jpg


Here the devil is in the details - epoxy can be really difficult to clean up if it gets where you don't want it to. So the radiused caul is lined with wax paper. The fretboard surface and edge is covered with blue painter's masking tape so that the epoxy won't get on the board. Then another narrow white masking tape strip is applied to the fretboard edge, and flares out away from the fretboard to catch the epoxy squeeze-out, which I peel off (with everything still clamped up) after an hour or two while the epoxy is still soft but very tacky. That takes care of all the squeeze-out cleanup except at the nut and heel ends, which are taken care of with a 1/4" chisel to scrape off the excess.

neck30.jpg


These steps are easy to take and minimize the sanding needed to clean up when the neck comes out of the press - 3 days from now.
 
Worked on the body as well today - routed some wiring channels into the body core before the top goes on.

top5.jpg


The strip of wood between the soundholes is an area that can be prone to breaking if it takes a modest hit, so I reinforce it underneath with a thin layer of carbon fiber composite sheet.

top6.jpg


I am not quite ready yet to glue the top on, as I want to finish the work on the neck first, attach the tuning keys, bolt it onto the body (with top tacked on), and check the balance of the instrument. We *may* think about some additional chambering of the body core if the balance works out.
 
Yes PJ that's the procedure. The trick is to lay the glue/epoxy thin enough that it won't squeeze out into the channel.

I'll be doing the same with the wiring channels and string-thru holes in the body when it comes time to attach the top.

Erik,
I don't know if you have tried this yet.........so far on my last 3 builds I've used packing tape, cut it close to the channel and just leave it there, works for me. I just don't put much epoxy or glue on top of the tape.
 
Happy Holidays Erik,

This axe is really looking terrific. I love the idea of having a carbon fiber support for the sound holes. It's things like this that I feel set you apart from production builders. Attention to detail, and a completely unique way of approaching a build. Keep up the great work, I'll be seeing you in no time.
 
Thanks for the props guys! Yeah Ben, I think you'll be making a trip down this way before the tulips bloom up in PA.

Jason I've never left the tape on - you're probably OK as long as you don't get beads or ridges of glue between the tape and fretboard, as you say.

Popped the neck out of the clamps today, cleaned up the edges and started work on the fret ends. Next will be to glue ears to the headstock and begin work on the headstock veneers.
 
More progress over the last few weeks. Got the headstock laminates thickness & trimmed, engraving done (local laser engraver who I work with a lot) and filled with black epoxy, then glued up and trimmed.

neck31.jpg


neck33.jpg


neck35.jpg


Here it is with the tuner holes drilled out. Still a bit of work to do to smooth the transition with the ebony fretboard, and clean up the truss rod access.

neck36.jpg


Finally, was able to install the tuners and check the balance, which is quite good - so I will not upset that balance by routing more out of the body core. Figured top is now in the glue press and should be ready for routing out for the pickups in a few days.
 

Latest posts