• TalkBass has been independent since 1998. Add your voice.
    Create a free account to reply to discussions, view embedded media, and browse with fewer display ads.
    Join freeLog in
    Want zero display ads or expanded classifieds tools? Compare plans.

New bass build

Hello All,

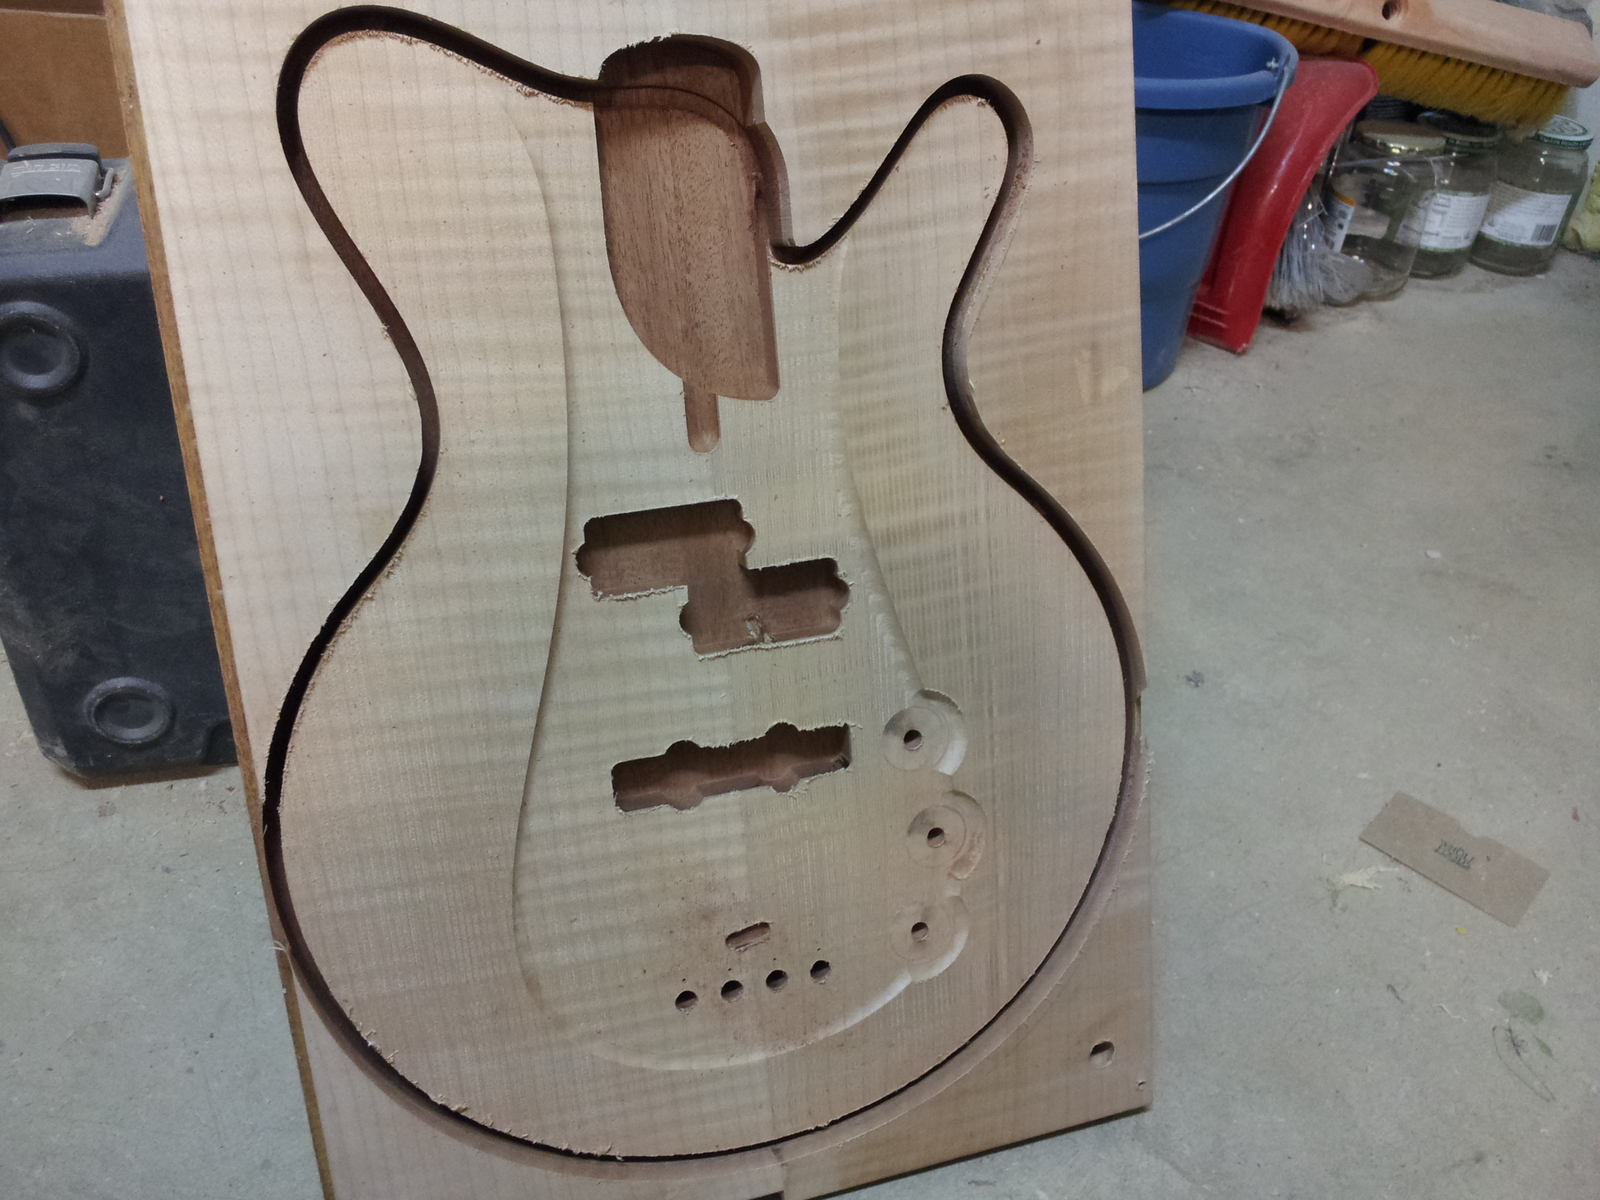
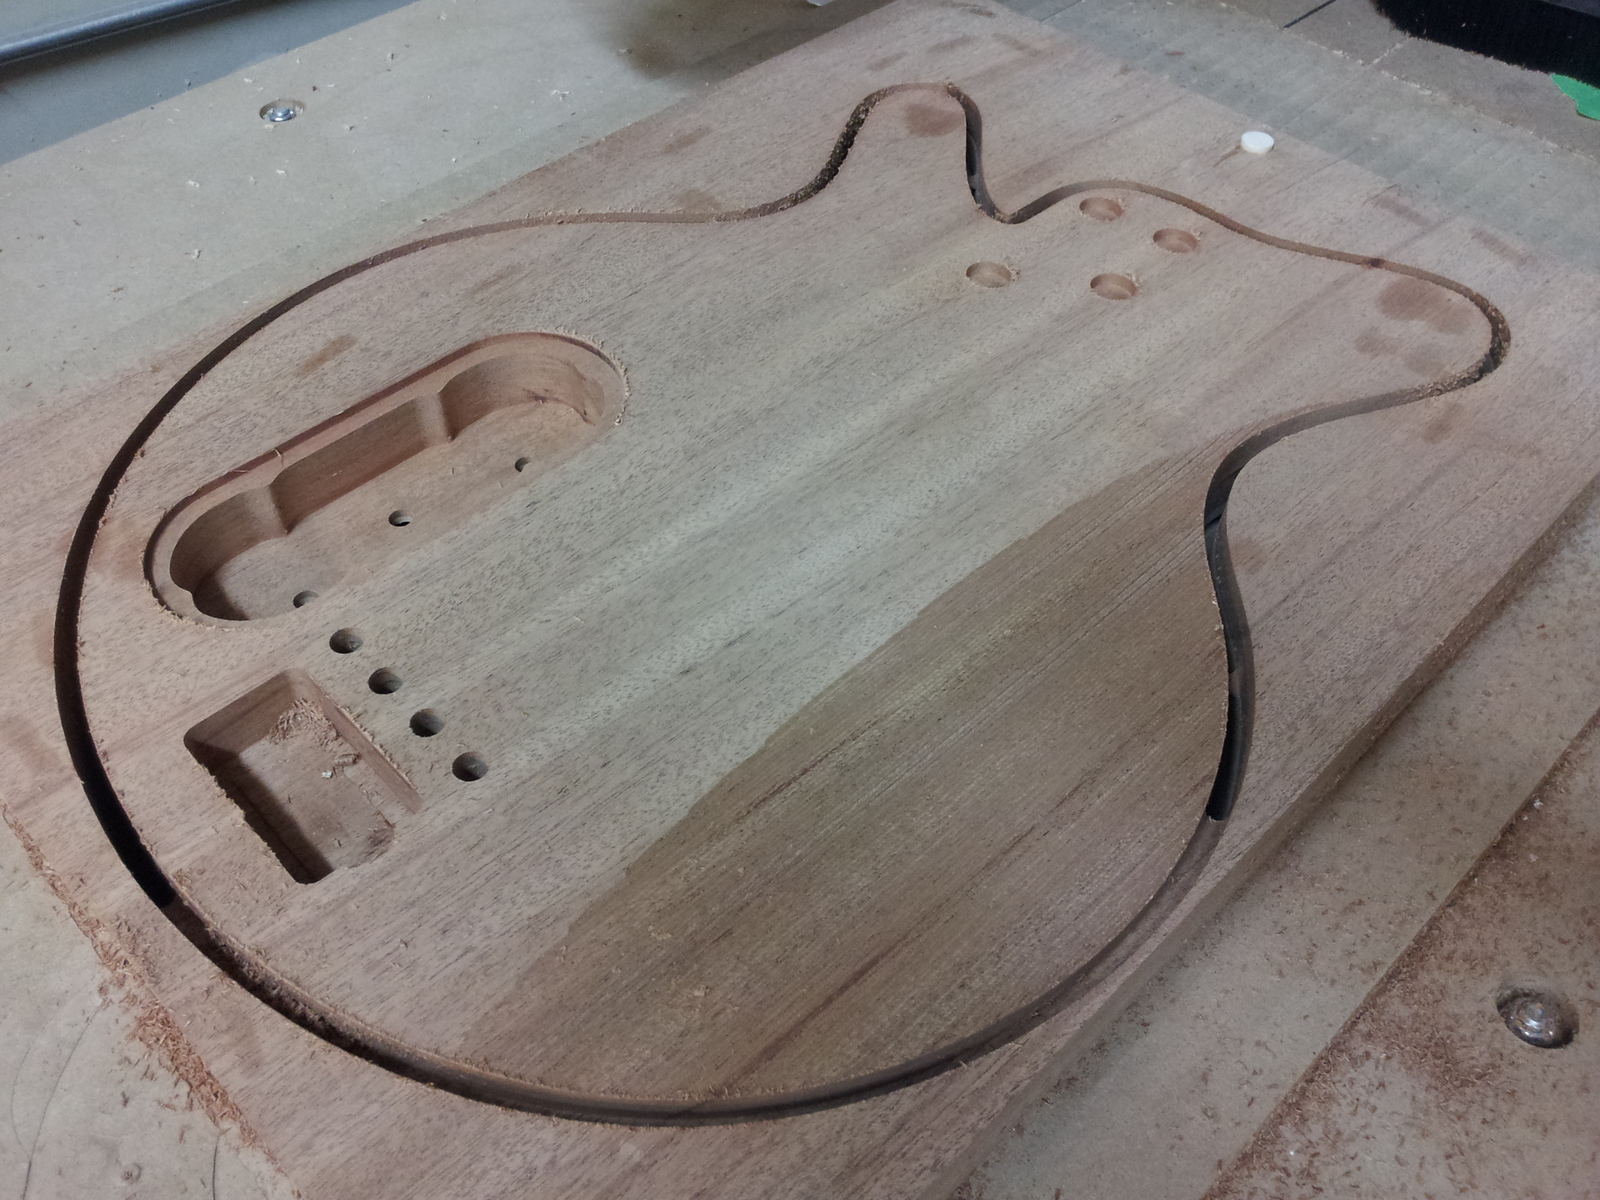
This is my first time posting on the forum. We traditionally build electric guitars, but have started on a couple of bass models, so I figured I'd share a few pictures. Here is the first prototype fresh off of the CNC.

bassfront.jpg


bassback.jpg


Thanks for looking,
Bobby
 
Thanks for looking! The sunken area actually makes it more comfortable to play because your wrist can be straighter. I know many play with their thumb on the body to give elevation over the strings, so this is my answer to that somewhat fatiguing position. We will see I guess :)

My client likes Les Paul basses, so I kept the design similar to that, but something more curvy with a big booty.

I will be posting more pics and construction ideas as the build progresses
 
Thought the resessed area was for a pickguard...

Some of my guitar designs have the inset center with a pick guard. For the bass, I thought it might get the right hand in a more relaxed position to have the strings a bit lower.

It's going to get a two tone stain. The center will be left natural and the outside blue. The inset definitely helps define the two areas. It's going to look killer, I think.
 
I started working on a test neck. Since this is a new design, and I use a CNC, I have to run tests to make sure the programming won't mess up a nice neck blank.

The first thing I did was take a 4x4 piece of pine and resaw into a .875 thick neck blank. I then roughed it out on the bandsaw.
2013-04-06%2010.43.22.jpg


I have a melamine spoil board attached to my machine with screws. I use the melamine because it holds double stick tape much better than mdf does.
2013-04-06%2010.46.23.jpg


You can see I have some indexing holes in the spoilboard. The holes will be used when flipping the neck blank to machine the back, as well as machining the fingerboard later on.

So, I stuck down the blank using the spoil board lines to align the center of the neck blank to the spoil board. I also use an index hole on the spoil board as my xy zero. I find that a reference point that is in contact with the work piece works out best for me. I've always had issues flipping parts when xy zero is at an external touch point to the part.

I machined the entire top of the neck including the index holes for the fingerboard, truss and carbon slots, face of the headstock, and peg holes.

2013-04-06%2011.57.21.jpg


From there, I zeroed my machine to the index hole on the spoil board for the back side of the neck. I then flipped the neck to that side of the spoil board, and used pins to index the piece. Again, carpet tape to hold it down.

2013-04-06%2013.03.53.jpg


And, here's the finished neck
2013-04-06%2013.18.00.jpg


I leave part of the headstock back for hand shaping, mainly because the material is unsupported in that section.

I don't know about you guys, but before I got the cnc, it would take me an entire afternoon to shape the back of the neck with my spoke shave, etc. This test neck back and front took me 2 hours including all of my tool changes. I think I'm the slowest worker with hand tools. The cnc really makes things easier, and much more accurate. I spend the majority of my time in front of the computer modeling and programming, which for me works out great. I can be at home sitting in bed working on guitars. All of the thinking and design is done up front so that there are no surprises when building. It works out well for me. I'm the type that if I don't have every detail thought out ahead of time, I'll definitely screw up the build. :)

So, here are a few shots of the test neck in the body.

2013-04-06%2013.21.18.jpg


2013-04-06%2013.21.48.jpg
 
Today I worked on the fingerboard test. Again, a piece of cheap pine, but made sure to have no knots in it since we're using some tiny end mills on this part.

I typically would rough out the fingerboard, but I was lazy since this was just a test. Anywho, I started out by double stick taping the piece to the cnc to drill out the indexing holes that match up to the neck.

2013-04-07%2010.14.32.jpg


Next, I flipped the part over and machined the playing surface operations. First, I pocketed my fret markers. I do thin blocks. I like this because then I don't need side markers. The real bass is going to have an ebony fingerboard, and these block markers will be curly maple. It makes for a nice and functional look.

2013-04-07%2010.49.47.jpg


2013-04-07%2011.03.07.jpg


Next, I switched to a .5" ball nose end mill, and cut the radius. 9.5 - 14" compound. Yes, I copied fender's specs :)

2013-04-07%2011.37.44.jpg


The machining marks aren't that bad at all. Some quick sanding and what not, and they're gone. You're left with an absolutely perfect conical radius. This also means barely any fret leveling when it comes time to fret the thing.

Then I switched to the .023 end mill to machine out the fret slots.

2013-04-07%2013.54.12.jpg

2013-04-07%2014.18.10.jpg


I was only running at 10 IPM, but even at that slow of speed, it was done much quicker than if I was manually slotting them. And not to mention it would be impossible to get the slots to stop before the end of the fingerboard using any other method. As I'm sure you've noticed, I love cnc. :)

Lastly, was a little inlay detail (This bass is actually for a woman, don't worry ;) )

2013-04-07%2014.32.00.jpg


The test came out very nice. Next up, the real neck and fingerboard!
 

Latest posts