

Enjoy the benefits of a premium membership!
Upgrade Account
-
TalkBass has been independent since 1998. Add your voice.
Create a free account to reply to discussions, view embedded media, and browse with fewer display ads.
Join free Log in
Want zero display ads or expanded classifieds tools? Compare plans.
You are using an out of date browser. It may not display this or other websites correctly.
You should upgrade or use an alternative browser.
You should upgrade or use an alternative browser.
New Build: Chambered 4-string fretless bass
- Thread starter HaMMerHeD
- Start date
More options
Who Replied?
I sanded all the scratches and excess glue off the fingerboard today.
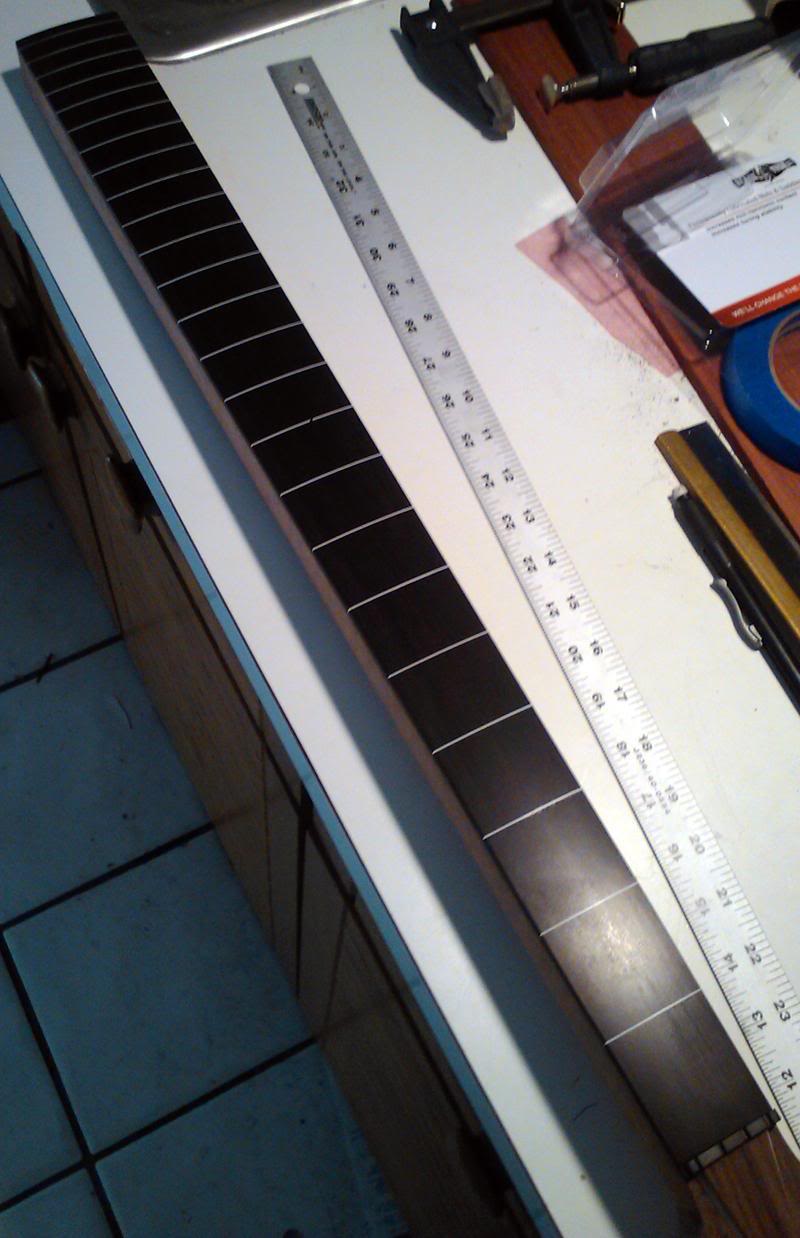
The little missing notch at the 9th fret is due to some tearout that happened while I was trimming the plastic after I glued it into the slot. The only two solutions are to either remove the plastic (which means sawing it out with a fret saw), or fill the little gap with white epoxy. Neither option sounds very appealing to me, so I think it's going to stay as is. It's not perfect...but it's good enough for the likes of me.
Unless the mood strikes me later, it's as polished as the fingerboard is going to get. Next step is to install side dots, then I wait on the body templates to arrive so I can trace the neck pocket onto the neck, and then profile the thing.
The little missing notch at the 9th fret is due to some tearout that happened while I was trimming the plastic after I glued it into the slot. The only two solutions are to either remove the plastic (which means sawing it out with a fret saw), or fill the little gap with white epoxy. Neither option sounds very appealing to me, so I think it's going to stay as is. It's not perfect...but it's good enough for the likes of me.
Unless the mood strikes me later, it's as polished as the fingerboard is going to get. Next step is to install side dots, then I wait on the body templates to arrive so I can trace the neck pocket onto the neck, and then profile the thing.

Looks very nice! What about filling the gap with a splinter of the same material as the veneers using epoxy? If you're lucky, you can't even see it anymore after fixing..
It's plastic...so there are no splinters. But I guess I could cut a tiny piece out and glue it in. The problem is, it's less than 2mm wide and about 1mm deep. There wouldn't be much gluing surface for the epoxy to hold, so I think it'd fall out pretty easily.

Epoxy can be pretty strong. But I think an approach to take, if it's possible for you as far as tools and skills, would be to enlarge the hole so it is square on the ends and increased in depth, to full slot depth if possible. I'm wondering if you could use a modified razor or exacto (hobby knife) blade to do it.It's plastic...so there are no splinters. But I guess I could cut a tiny piece out and glue it in. The problem is, it's less than 2mm wide and about 1mm deep. There wouldn't be much gluing surface for the epoxy to hold, so I think it'd fall out pretty easily.
It's plastic...so there are no splinters. But I guess I could cut a tiny piece out and glue it in. The problem is, it's less than 2mm wide and about 1mm deep. There wouldn't be much gluing surface for the epoxy to hold, so I think it'd fall out pretty easily.
Epoxies bond by mechanical adhesion (not by molecular forces like many other glues). Most epoxies bond poorly to most plastics, because the smooth surface of the plastic does not have any tooth for little epoxy protrusions to key into. So, if you are going to use epoxy to fill the missing piece, you can do two things to increase the stability of the repair. The first is, as Pete suggested, enlarge the hole to provide more surface area. The second is to sand the plastic sliver with fine sandpaper to increase its "tooth." In fact, I would sand it, and then wet sand it with epoxy before inserting it into the slot. That will force the eopxy into the sanding-created grooves in the plastic and should be plenty strong enough.
The other option is to use CA glue, which does bite into and partially solve many plastics (try it on a little scrap first, of course). The strongest CA, which I use for the most critical repairs is, believe it or not, the Gorilla brand CA (not Gorilla Glue), which is really tough and responds to accelerator like normal CA glues. You can get it at home centers.....
Good luck with it,
Joe
Well, I scraped the little gap clean with a scratch awl. Turns out it's way less than 1mm deep, like maybe half of a mm. It had a bunch of ebony sanding dust in it, making it look worse than it is. Cleaned out, it's hardly noticeable from more than a couple of inches away. I think the best course of action to fix it is to sand the radius on the board a little more. However, seeing it cleaned out and free of dust, I am less inclined than I was before to do anything about it. If I was going to sell the thing, I would fix it. As it is, it's just for me, and I can live with it how it is.

It's plastic...so there are no splinters. But I guess I could cut a tiny piece out and glue it in. The problem is, it's less than 2mm wide and about 1mm deep. There wouldn't be much gluing surface for the epoxy to hold, so I think it'd fall out pretty easily.
That's my limited knowledge of the English language.. by splinter I just meant a small piece, not necessarily a splinter as a byproduct of machining the material. You could use a knife to cut the piece that you need. And as a glue, you could use the same as you've used when you glued in the veneers in the first place.
Well, I scraped the little gap clean with a scratch awl. Turns out it's way less than 1mm deep, like maybe half of a mm. It had a bunch of ebony sanding dust in it, making it look worse than it is. Cleaned out, it's hardly noticeable from more than a couple of inches away. I think the best course of action to fix it is to sand the radius on the board a little more. However, seeing it cleaned out and free of dust, I am less inclined than I was before to do anything about it. If I was going to sell the thing, I would fix it. As it is, it's just for me, and I can live with it how it is.
In this case, I may think glueing in a little piece wouldn't be a good solution. I think it could be fine as it is.

Musiclogic
Commercial User
- Aug 6, 2005
- 6,505
- 75
- 60
- Disclosures
- Owner/Builder: HJC Customs USA, The Cool Lute, C G O
Just a small bit of sanding dust in some epoxy or CA will fill adequately and blend well with the rest of the board
I made my first bookmatched plate today:
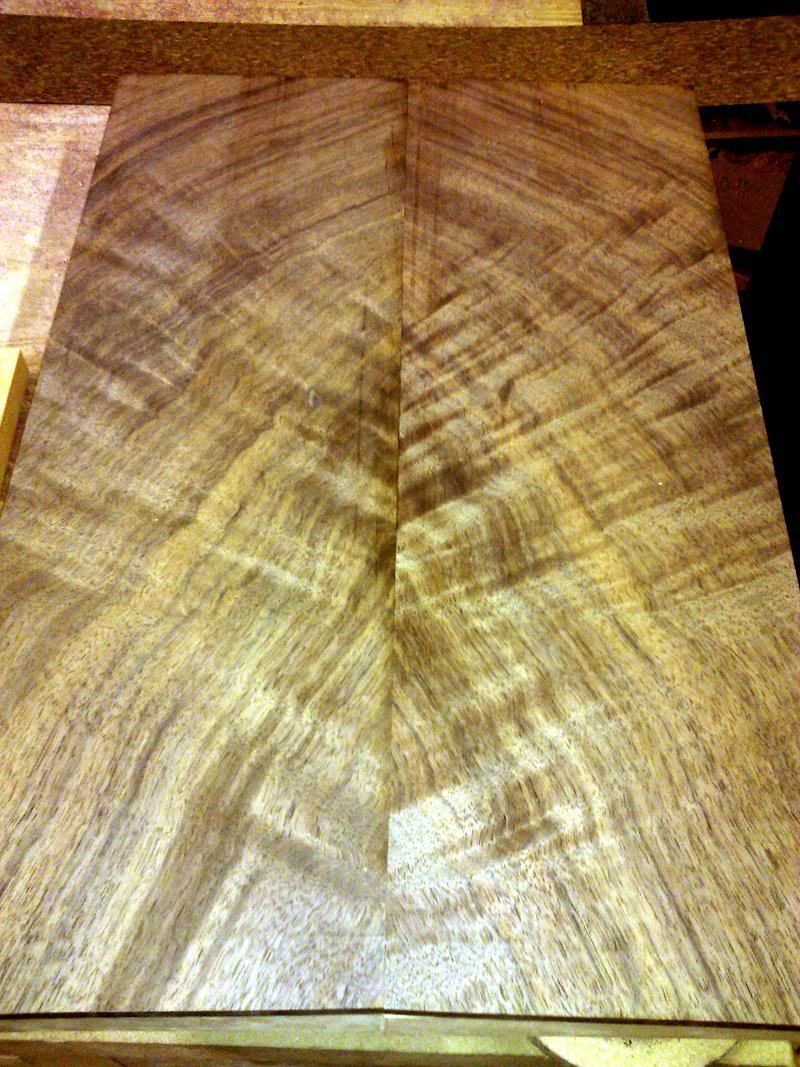
It started as a 1.5" thick billet. I sawed it in half in 2 passes with a 12" table saw. Then I jointed one face of each piece on an 8" jointer. Next, I joined the bookmatched edge. Then I thickess-planed both pieces until they were flat and even. It came out to almost exactly 1/2" thick.
Looks good, I think.
I also got the ash body blank planed down to 1.5" thick. As soon as the templates arrive (they were delayed, because ronny had to recut, because he wasn't happy with how the first run came out), I'll be ready to start shaping the body.
It started as a 1.5" thick billet. I sawed it in half in 2 passes with a 12" table saw. Then I jointed one face of each piece on an 8" jointer. Next, I joined the bookmatched edge. Then I thickess-planed both pieces until they were flat and even. It came out to almost exactly 1/2" thick.
Looks good, I think.
I also got the ash body blank planed down to 1.5" thick. As soon as the templates arrive (they were delayed, because ronny had to recut, because he wasn't happy with how the first run came out), I'll be ready to start shaping the body.
Musiclogic
Commercial User
- Aug 6, 2005
- 6,505
- 75
- 60
- Disclosures
- Owner/Builder: HJC Customs USA, The Cool Lute, C G O
Musiclogic
Commercial User
- Aug 6, 2005
- 6,505
- 75
- 60
- Disclosures
- Owner/Builder: HJC Customs USA, The Cool Lute, C G O
The chatoyancy and the lighting, along with flash can be culprits. Wood can be very difficult to photograph especially in bright light
I did a little work this morning. The templates arrived on saturday, so I transferred the body silhouette and chamber lines to the ash blank.
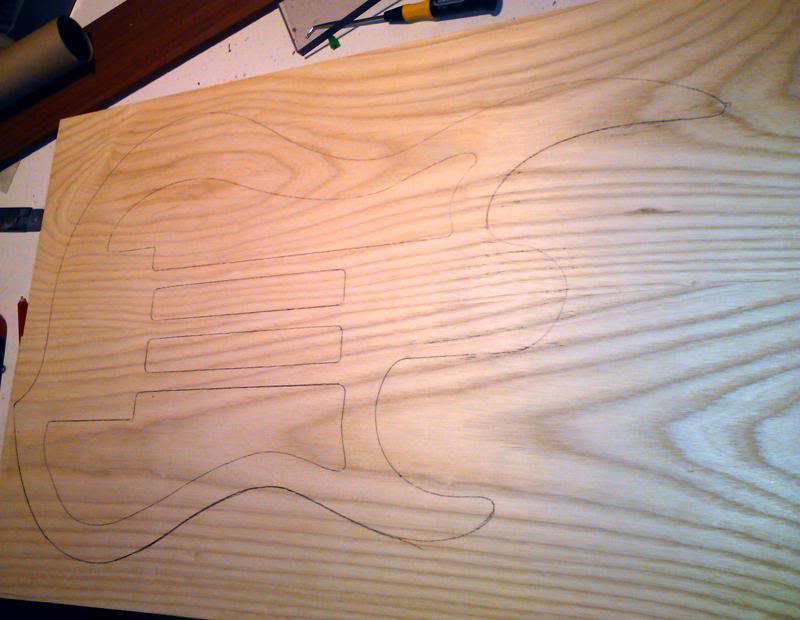
With some of the excess, I am going to make a laminated ash+walnut cavity cover.
I also made a little plate gluing "jig"...It's pretty much just a few pieces of 1/8"x3/4" angle aluminum clamped to the plate to keep everything flat.
The first piece and aforementioned aluminum:
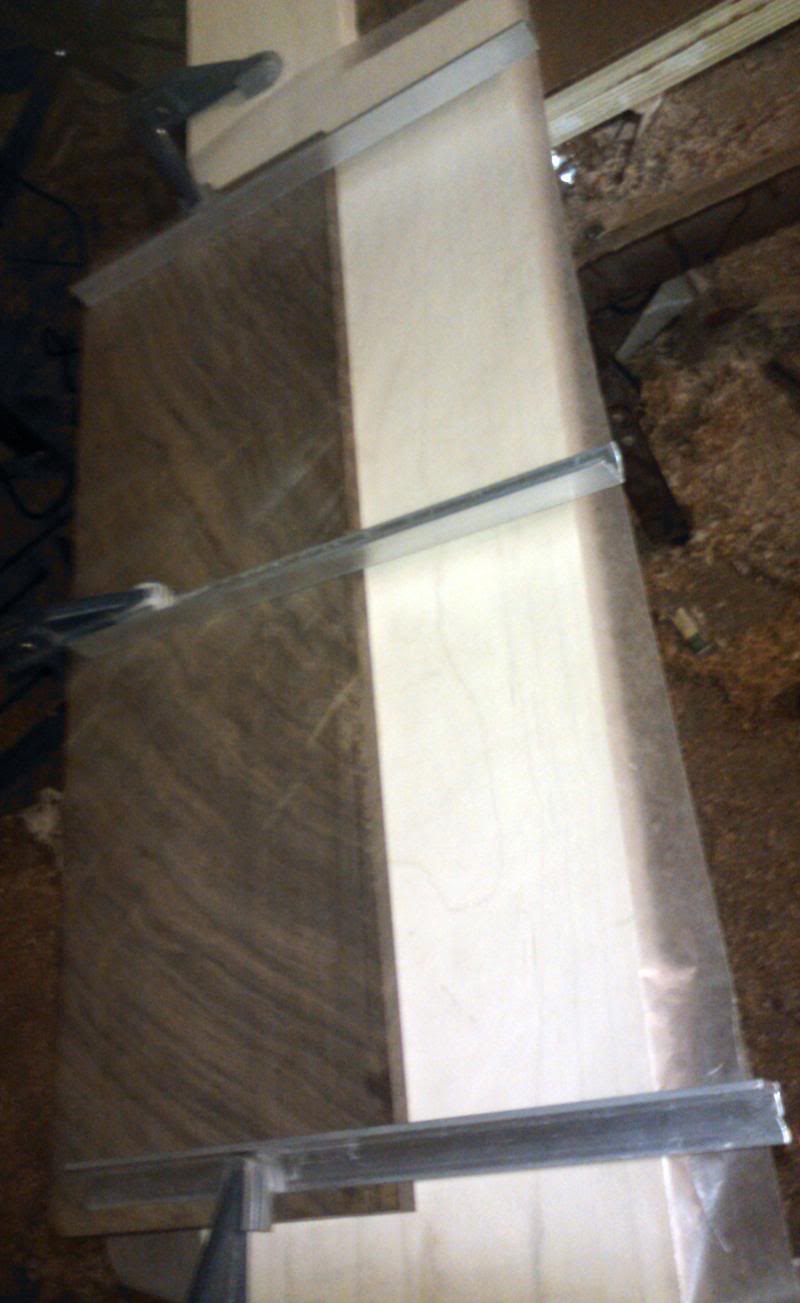
Then you just slide the second piece under the aluminum:
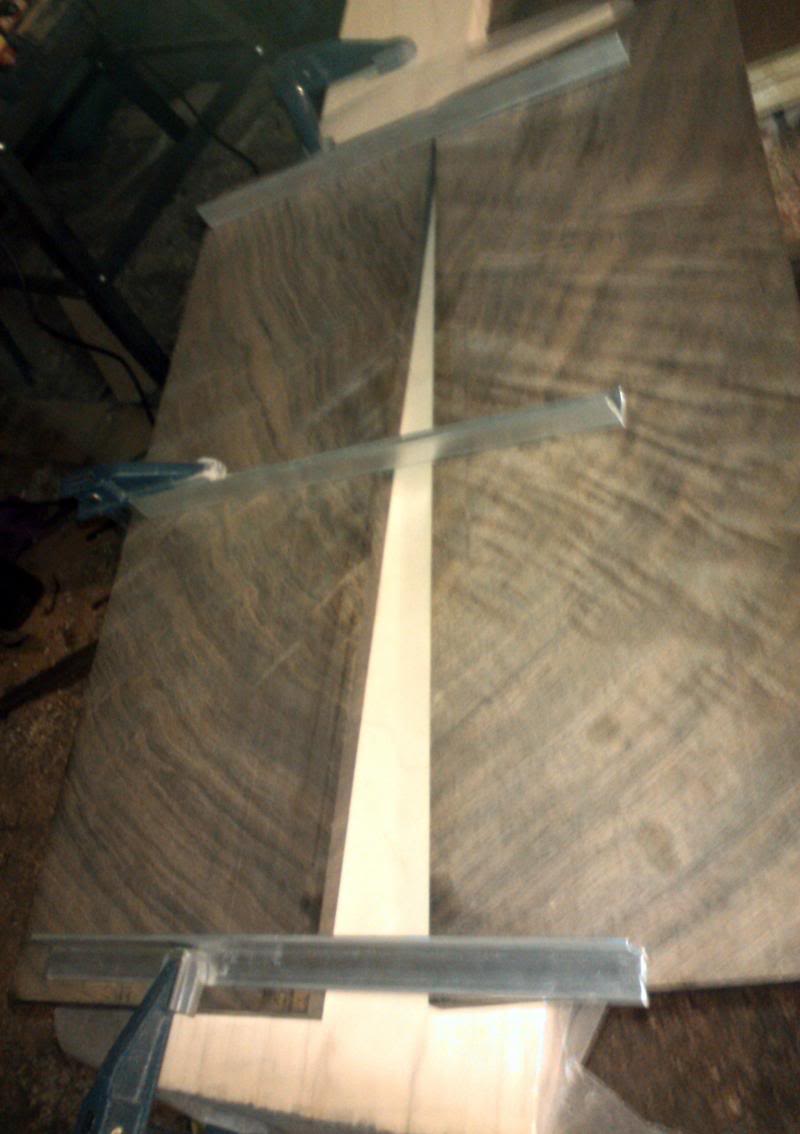
And clamp the crap out of it:
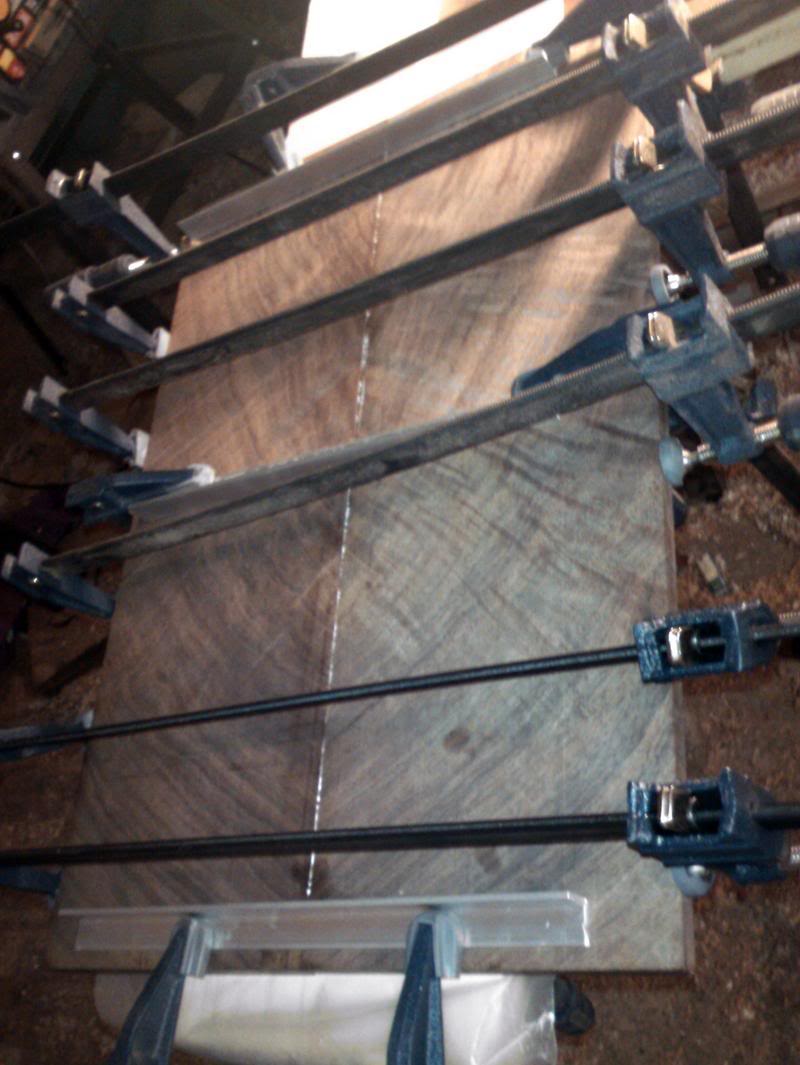
It's not perfect. It's not perfectly flat by about .25mm. But that can be sanded out pretty easily, so it's close enough for me.
With some of the excess, I am going to make a laminated ash+walnut cavity cover.
I also made a little plate gluing "jig"...It's pretty much just a few pieces of 1/8"x3/4" angle aluminum clamped to the plate to keep everything flat.
The first piece and aforementioned aluminum:
Then you just slide the second piece under the aluminum:
And clamp the crap out of it:
It's not perfect. It's not perfectly flat by about .25mm. But that can be sanded out pretty easily, so it's close enough for me.

Thanks. I'm not sure why it looks so yellow, except that both my camera and my skills as a photographer suck. It is a very dark brown and black piece.
Nice build and Walnut board

For better results when photographing wood, use natural light as much as possible and set your camera's white balance to mach the light. Upon downloading the picture, adjust levels on your computer - some software offer an automatic adj which is good enough.
Use artificial light only if you can set the angle of the flash(s) to avoid reflections and shadows behind the subject.
Also, digital cameras are almost always automatically set to a wide angle lens on start up, which is not very good for this purpose as it distorts the image and if you're using the built in flash it will overexpose the picture. Set the zoom to a mid distance instead - 50mm lens equivalent and above - and move back a bit until you get the right framing.
Any more than this gets pretty boring

Thanks miz. I've been using my phone for photos, so there aren't many tweaking options. I use photoshop to touch everything up, but there is only so much it can do.
Anyway, the ebony stock I have turned out to be too small for the bridge design by about 1/16" (1.5mm). So I decided to use a really nice piece of bloodwood for it.
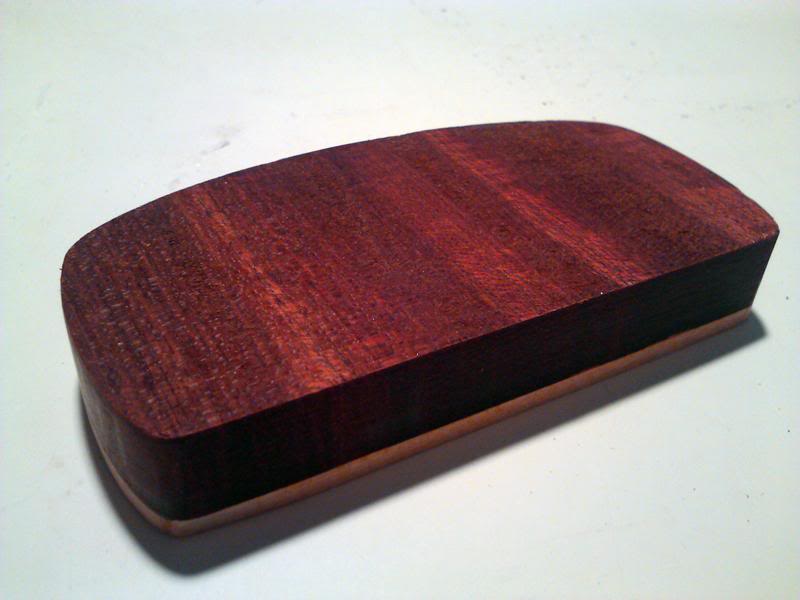
It's the most dynamic bloodwood I've ever seen. Aside from looking more blood red than brick red, it shimmers and shines in changing light. It's really pretty intense. To make it "fit", I'm also going to remake a new truss rod cover out of the same stock. I may make the rear cavity cover out of the same thing too.
Anyway, the ebony stock I have turned out to be too small for the bridge design by about 1/16" (1.5mm). So I decided to use a really nice piece of bloodwood for it.
It's the most dynamic bloodwood I've ever seen. Aside from looking more blood red than brick red, it shimmers and shines in changing light. It's really pretty intense. To make it "fit", I'm also going to remake a new truss rod cover out of the same stock. I may make the rear cavity cover out of the same thing too.


