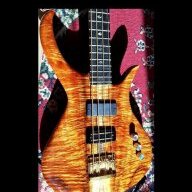
Greetings, LC. First I want to again thank everyone who has assisted me in my learning process. I decided about 5 years ago that I wanted to to build basses, and the Luthier's Corner has been an absolutely indispensible resource ever since.
I am soon starting on my third build. It is based on my first build, but modified quite a bit. I started (and aborted) another build that was number 3, but wood problems have made me abandon that particular build. It just wasn't happening the way I wanted it to be, so I scrapped it.
I've been planning it for a while, but I'm just posting it now because I finally have all the wood pieces I need for it. The last piece, a walnut top billet, arrived today.
So here it is:
Epoch Chambered 4-String Fretless Bass
Specs:
4-strings
Fretless with lines (white plastic lines)
Chambered Ash body with walnut top
Ebony fingerboard, 10 radius
5-piece bolt-on mahogany, walnut, and maple neck
Ebony bridge
EMG AT-125U undersaddle piezo pickup
Graphtech TUSQ saddle
Hipshot Ultralite Tuners
Cafe Walter PZP-1 piezo buffer pre-amp, 9v
Passive Tone and Volume Controls
Grizzly Dual-Action Truss Rod
Sadowsy style aluminum knobs
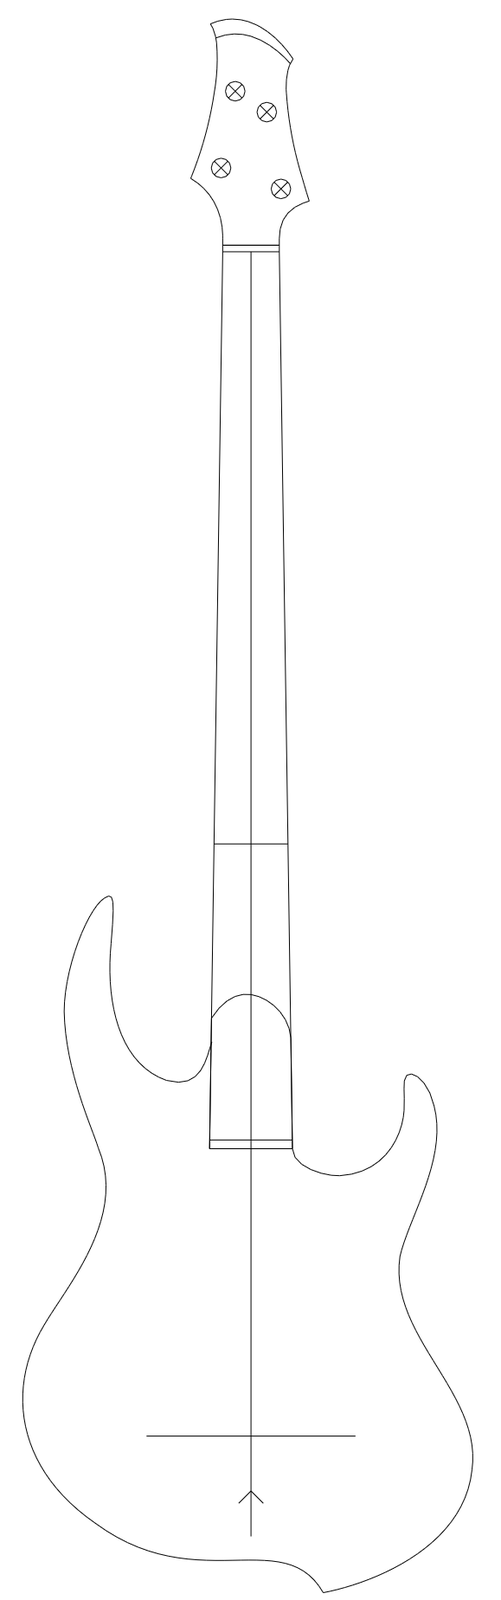
Here's the overall design:
I have ordered these templates from Ronny Trigo at GuitarBuildingTemplates.com.
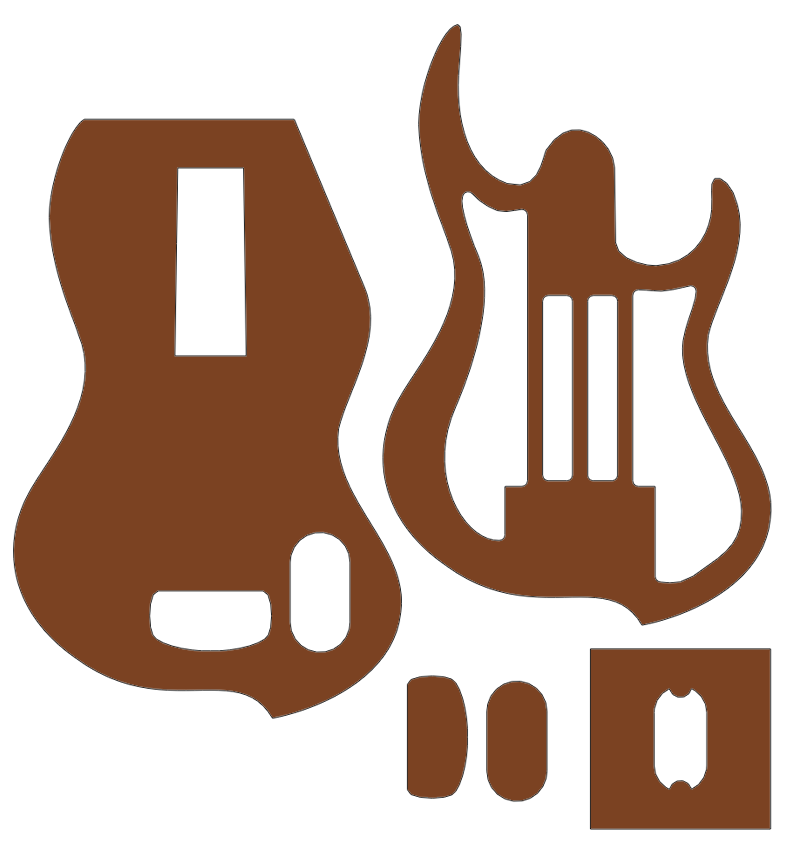
I used a custom template from him with my 7-string baritone project, and I was very pleased with the results.
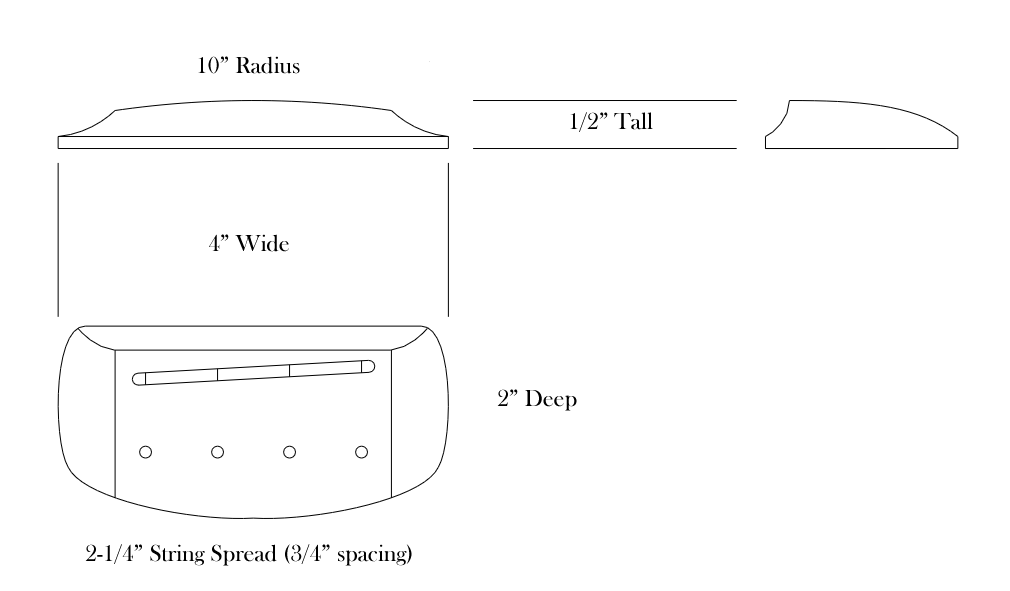
The bridge will be shaped from ebony, and will look like this:
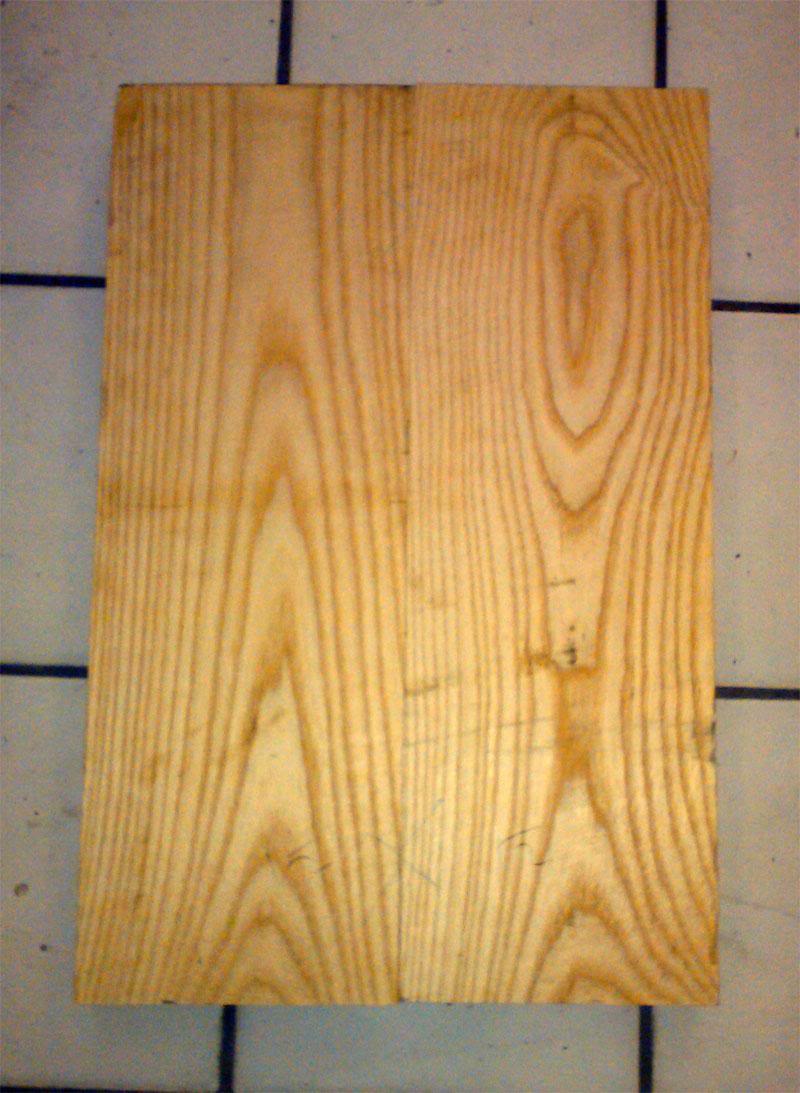
Here's the ash:
And the walnut billet:
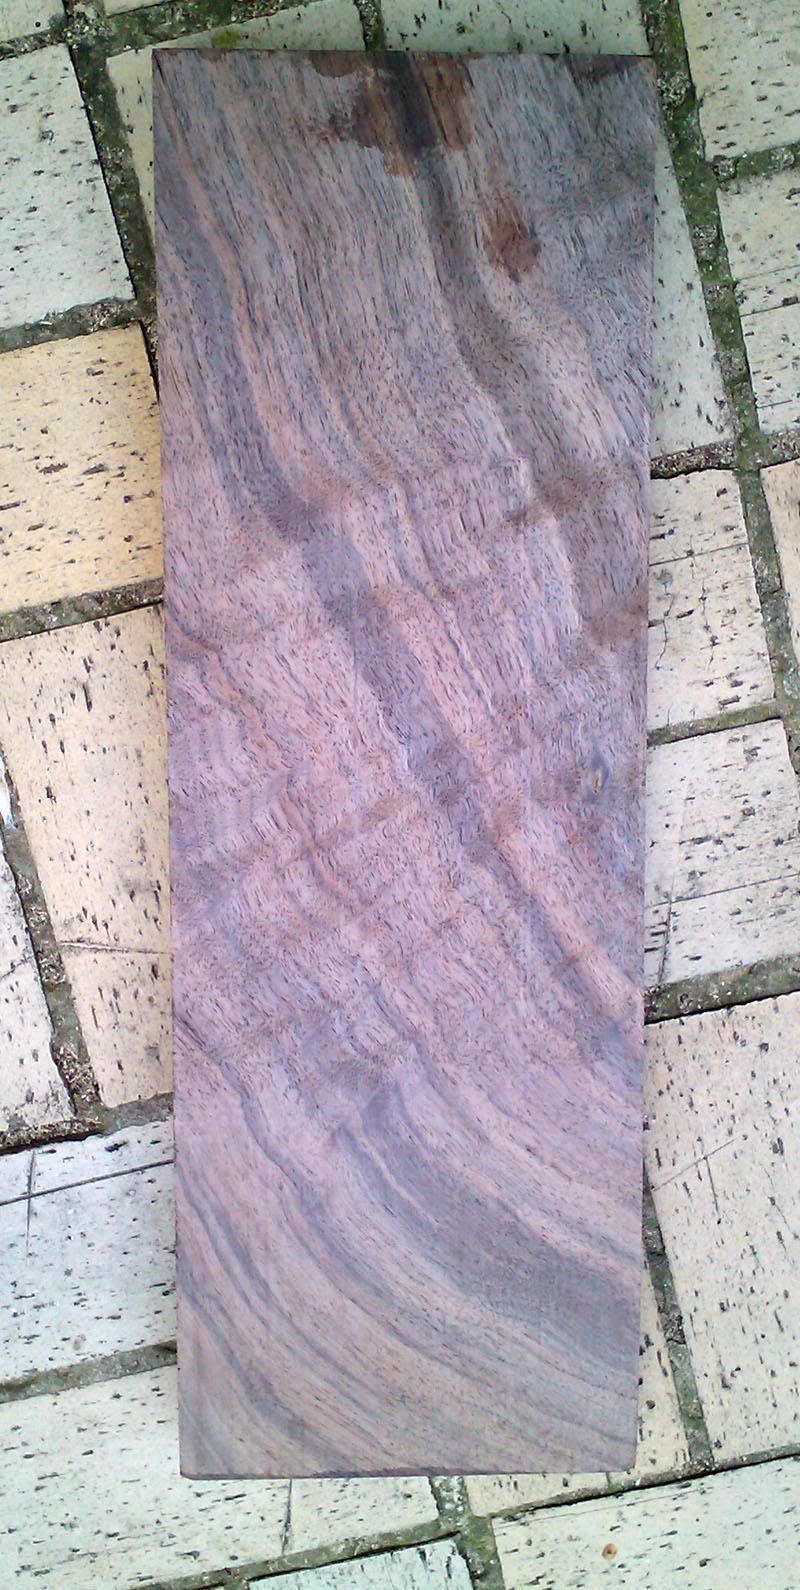
This bit arrived today from Goby Walnut in Portland. Still needs to be resawn/jointed/planed into a bookmatched top.
And here are the neck woods:
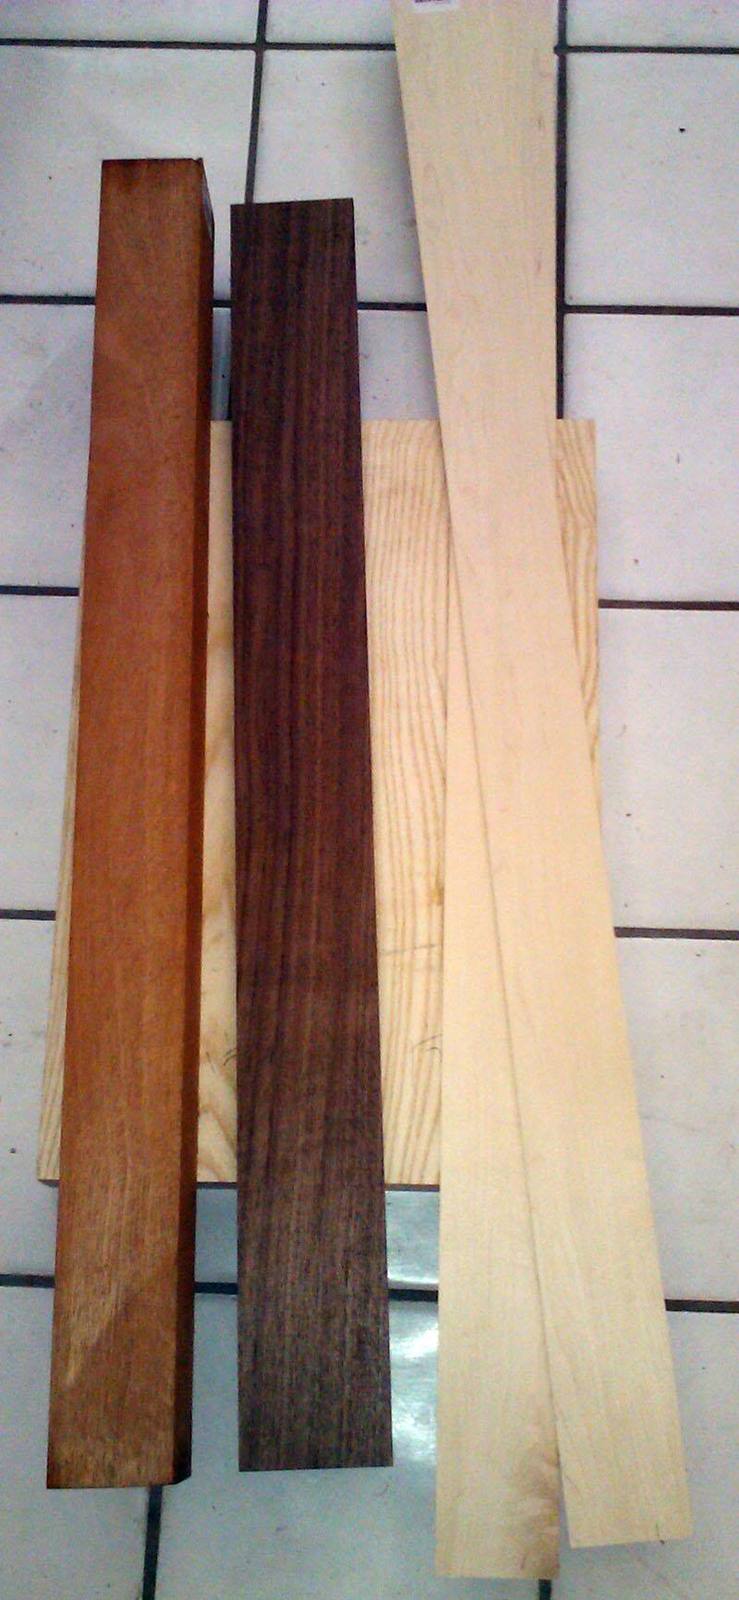
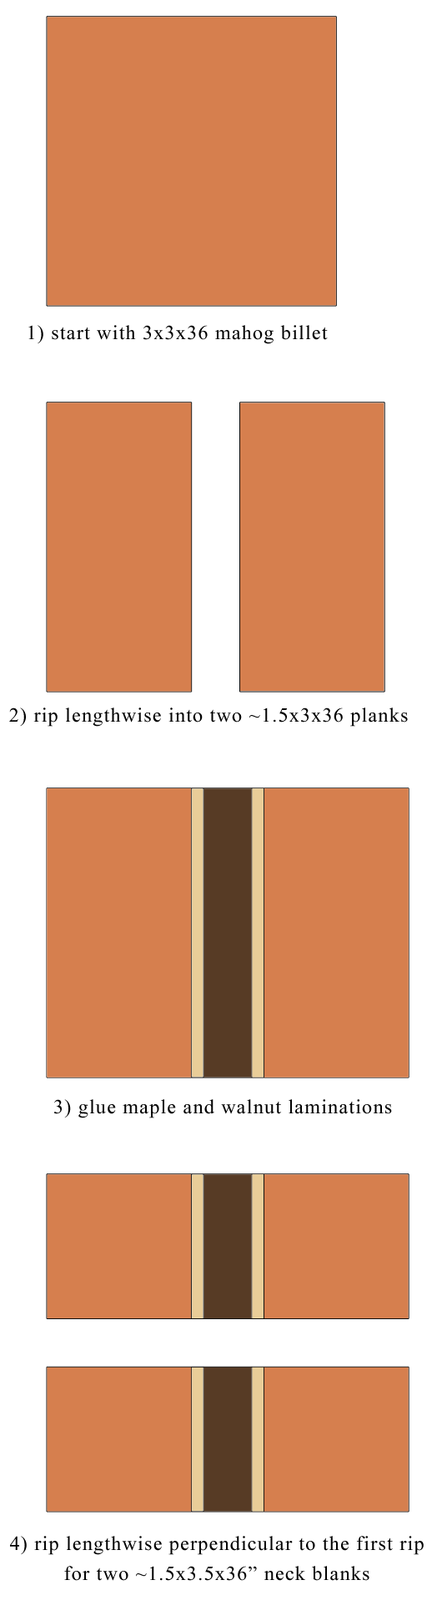
It'll be 5 pieces: Mahogany, Maple, Walnut, Maple, Mahogany. The Mahogany bits will be roughtly 1.5" wide each before shaping. The maple strips are 1/8 thick wide, and the walnut stip is 1/2" thick.
The plan for constructing the neck is as follows:
And finally, here are all the parts I have so far:
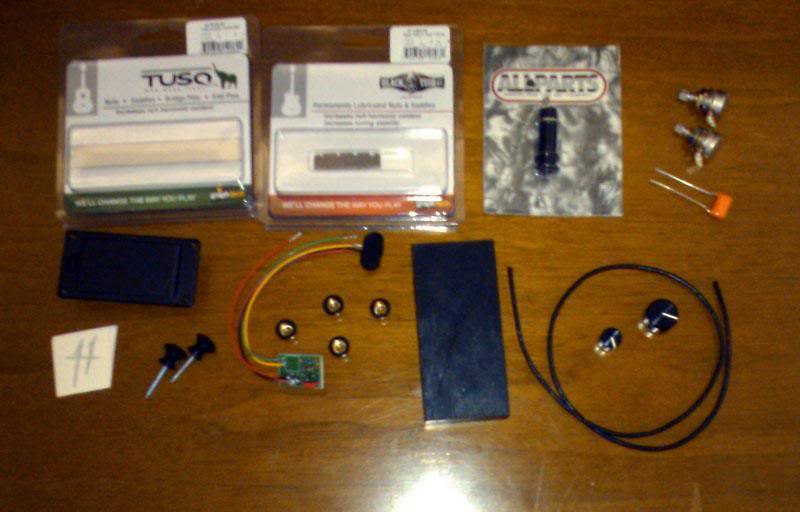
Not pictured is the EMG undersaddle pickup. It's around here somewhere, just didn't make it into the group photo. All I lack are the hipshot tuners.
Right now, the ash is 2.0" thick. I'm thinking I will get it thicknessed down to 1.5" before chambering. The walnut billet is thick enough that it should be able to be made into a 1/2" thick top plate. That'll put the whole thing at around 2" thick when it's all put together. The templates should arrive in about 2 or 3 weeks, at which point there will be more progress.
In the meantime, thanks for looking, and thanks again to all the experienced peeps who have helped me out.
I am soon starting on my third build. It is based on my first build, but modified quite a bit. I started (and aborted) another build that was number 3, but wood problems have made me abandon that particular build. It just wasn't happening the way I wanted it to be, so I scrapped it.
I've been planning it for a while, but I'm just posting it now because I finally have all the wood pieces I need for it. The last piece, a walnut top billet, arrived today.
So here it is:
Epoch Chambered 4-String Fretless Bass
Specs:
4-strings
Fretless with lines (white plastic lines)
Chambered Ash body with walnut top
Ebony fingerboard, 10 radius
5-piece bolt-on mahogany, walnut, and maple neck
Ebony bridge
EMG AT-125U undersaddle piezo pickup
Graphtech TUSQ saddle
Hipshot Ultralite Tuners
Cafe Walter PZP-1 piezo buffer pre-amp, 9v
Passive Tone and Volume Controls
Grizzly Dual-Action Truss Rod
Sadowsy style aluminum knobs
Here's the overall design:
I have ordered these templates from Ronny Trigo at GuitarBuildingTemplates.com.
I used a custom template from him with my 7-string baritone project, and I was very pleased with the results.
The bridge will be shaped from ebony, and will look like this:
Here's the ash:
And the walnut billet:
This bit arrived today from Goby Walnut in Portland. Still needs to be resawn/jointed/planed into a bookmatched top.
And here are the neck woods:
It'll be 5 pieces: Mahogany, Maple, Walnut, Maple, Mahogany. The Mahogany bits will be roughtly 1.5" wide each before shaping. The maple strips are 1/8 thick wide, and the walnut stip is 1/2" thick.
The plan for constructing the neck is as follows:
And finally, here are all the parts I have so far:
Not pictured is the EMG undersaddle pickup. It's around here somewhere, just didn't make it into the group photo. All I lack are the hipshot tuners.
Right now, the ash is 2.0" thick. I'm thinking I will get it thicknessed down to 1.5" before chambering. The walnut billet is thick enough that it should be able to be made into a 1/2" thick top plate. That'll put the whole thing at around 2" thick when it's all put together. The templates should arrive in about 2 or 3 weeks, at which point there will be more progress.
In the meantime, thanks for looking, and thanks again to all the experienced peeps who have helped me out.