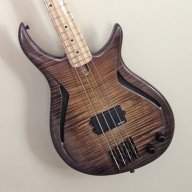
• TalkBass has been independent since 1998. Add your voice.
    Create a free account to reply to discussions, view embedded media, and browse with fewer display ads.
    Join freeLog in
    Want zero display ads or expanded classifieds tools? Compare plans.

NOTO Narwhal 6

Thanks for the interest guys. Really appreciated ;)

Here´s how the inlays are coming out. Rough sanded but not leveled yet:

IMG_7662.jpg


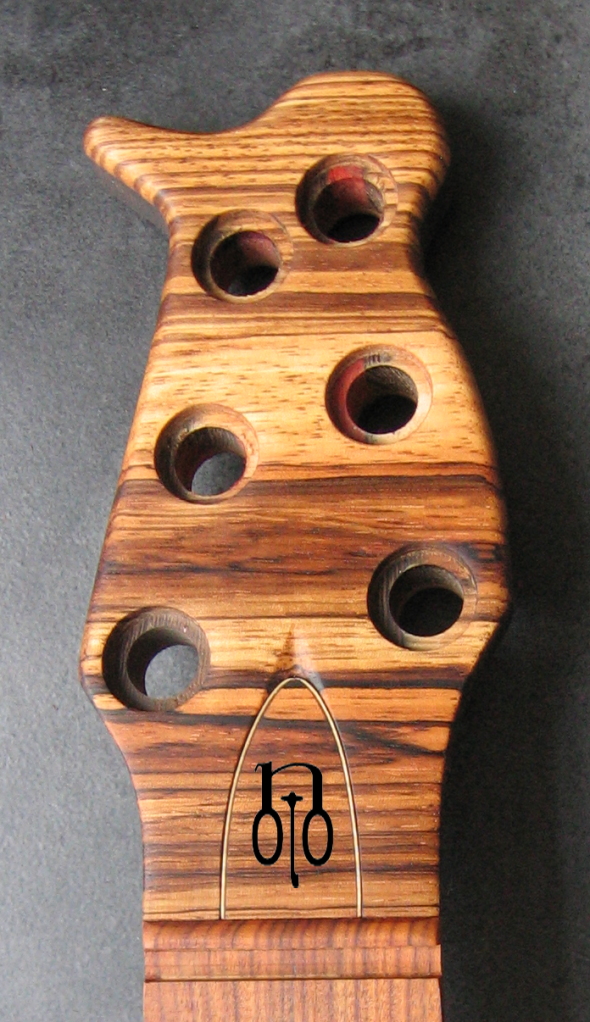
Yeah, my headstock is indeed weird. I expected it to generate love-hate reactions.

You know... Haters gonna hate :spit: :D

Seriously, I have many other more traditional HSs designs (well sort of), but there are a couple of things I expect to achieve with this one.
I wanted to be small, because I like small HSs aesthetically, but also to make it lightweight. At the same time I also wanted it to pop up when on stage. I want to think of it as Cindy Crawford´s mole :D
I wanted the shape to mimic the letter "n" in Noto, like being a logo in itself (there´s a proper logo that I´ll share with you in the next episode).
Lastly I just wanted to give myself the freedom to try...

Onto business:

I finished shaping it and I almost done sanding it, same goes for the neck. I applied some mineral spirits for the shots:

IMG_7653.jpg


IMG_7657.jpg


IMG_7659.jpg


IMG_7658.jpg


I´m applying the Grace Jones approach when designing and building...


Next episode:
Body work
 
Ok fellas, here comes to you a new episode of the Narwhal build. It has been a very exciting couple of weeks and I´ll tell you why. I´ve done some planned things and some others completely out of script. Fortunately all have turned out "wood".
I first started driling the strap buttons holes, that are the flush type of Dunlops, and the jack hole. I used a very useful articulated arm that came with a German jig I bought some time ago:

IMG_7663.jpg


Went ahead with the controls and the friking preamp´s led:

IMG_7670.jpg

IMG_7671.jpg


Now here´s where I did a twist. The former plan was a set joint, but I could not help being bitten by the bolt on bug. I ordered some ferrules and screws when the idea wasn´t yet nested in me, but it grew fast, so was the shipping :D
So...

IMG_7679.jpg

IMG_7680.jpg

IMG_7681.jpg


Obviously I assembled her but I´ll leave a full length picture for later :p
Now, the ferrules entered fairly tight, so now I can´t take them out without leaving marks on them. Since theres still some sanding to do there I´d really like to take them out... I can always put some tape over them...

Anyway if anybody can suggest something would be greatly appreciated.

I also radiused the fretboard, which is a flat one, or in a more fancier way "infinite" (I love that one :cool:). I decided to go for it after I re-encounterd the classical Spanish guitar, when I gave my wife one for her birthday. I started playing it and remembered how nice are those flat fretboards, actually how nice is that instrument as a whole. Not in vain it´s "the original".
This also made the inlays pop up suuper nicely. But you´ll have to believe on that one because I haven´t taken pictures of it. I´ll do so once I´ve progressed some more.


Before ending this episode I´d like to hear your opinions on the logo and its placement:

LogoplacementV1.png


Next episode:
Finishing shaping and sanding the body, and perhaps fretting :)
 
Now that's a bad-ass singlecut, for sure. It's hard for me to like 'em. Bingo on this one, though. I don't know what it is about that headstock, but it reminds me of the headstock on the Allen Holdsworth Signature Carvins. Translation? Bad-ass. Beautiful build. Good stuff.


How about a top to bottom shot of it? Or, bottom to top shot, whichever you choose. I ain't picky.....:hiding:
 
If you still need to get the ferrules out, you should be able to dig a sharp plastic or wood thing (so not to scratch them), in to the screw hole and lever them out. I encountered the same thing on my last build, pushed them in nice and snug then thought "oh ****, how do I get them out!" I used a wooden skewer if I remember correctly.

Really neat build, keep it up!
 
Very, very nice work on the body! I like the veneered pup cavities. Clean work, nice design, very cool! :)

Now that's a bad-ass singlecut, for sure. It's hard for me to like 'em. Bingo on this one, though. I don't know what it is about that headstock, but it reminds me of the headstock on the Allen Holdsworth Signature Carvins. Translation? Bad-ass. Beautiful build. Good stuff.

How about a top to bottom shot of it? Or, bottom to top shot, whichever you choose. I ain't picky.....:hiding:

wow, it's looking great!! congratulations!

Haven't looked at this in a while... what a nice bass! I really like the contoured body, all the details, all I can say is WOW, great job!!!!!

Thanks guys, appreciated.

By the way, the control cavity cover seems to me to match perfectly... hod did you get it done?

Just choosing the right grain direction and trying to match the stripes of sapele. The laminate I used was sliced from one of the blanks that made the body, that surely makes it easier, as the colors will be pretty much the same. You still need to pay attention to the match though.

If you still need to get the ferrules out, you should be able to dig a sharp plastic or wood thing (so not to scratch them), in to the screw hole and lever them out. I encountered the same thing on my last build, pushed them in nice and snug then thought "oh ****, how do I get them out!" I used a wooden skewer if I remember correctly.

Really neat build, keep it up!

I thought of just leaving them there, cover them with tape and apply the finish. Do you think I may be in trouble that way?
 
Ok guys, time for a new chapter.

Disclaimer: many things done, many pictures. Don´t hate :hiding:

Went ahead with the fretting. For this one I´m using Stewmac´s medium/higher fret wire. It came in 4 straight pieces so I didn´t have to unbend at all. I bought it like 1,5 years back. I thought I didn´t buy enough (at that time I did not plan to build a sixer) but it turned out to be fine. BTW: I hammered them on.

I cut 3mm of tang from the edges as I find finer not having them visible on the side. I use this trick to quickly get the sawdust from a piece of scrap, then mix it with CA. It´s kind of obvious but the CA cures quickly so I recommend mixing small quantities and as soon as it gets tacky it´s time to prepare more, otherwise it will not penetrate properly the gap below the fret.

IMG_7702.jpg

IMG_7706.jpg

IMG_7708.jpg

IMG_7711.jpg

IMG_7713.jpg

IMG_7719.jpg


I decided to take a picture of the guardian of my workshop. I cannot describe how safe I feel knowing that he´s around (the he is a guessing as I haven´t dare to look for he´s balls, the assumption comes from the low pitch of his voice...)

IMG_7721.jpg


Now into the nut. I bought a Black tusk blank for this build. I used a Stewmac spacing ruler bought also long ago. I first prepared the blank to get a tight fit on the slot. That went perfect. Unfortunately I did not pay enough attention after slotting the marks done with the ruler and I ended with an odd spacing. I realized it when it was too late. Now that I see the pictures of the marks the error is pretty clear. Ironically I did have chances to fix it as my nut is over the fb, so I removed a lot of material... Anyway, I´m going to redo the nut afterwards, for the moment it will work just fine. I have some bone blanks, problem is that I don´t fancy the color combination. I may try to find some brass, but it may add too much weight. Black Tusk is extremely light. If I find a blank as big as this one in the EU I may buy another.

IMG_7715.jpg

IMG_7716.jpg

IMG_7726.jpg

IMG_7737.jpg


With the nut half the way baked I could align the bridge and recess it:

IMG_7727.jpg

IMG_7730.jpg

IMG_7731.jpg


Had to use my dremel router and a chisel to get the corners done. The fit is perfect:

IMG_7733.jpg

IMG_7735.jpg


Using the momentum I did the Bridge, Pups and Tuners screws holes. This small drill chuck that can be used also in the screw driver is great for these tasks:

IMG_7741.jpg

IMG_7738.jpg


How about a top to bottom shot of it? Or, bottom to top shot, whichever you choose. I ain't picky.....

Just so you don´t say I´m cheap (mineral spirits mode on):

DSC02387.jpg

DSC02389.jpg

DSC02392.jpg

DSC02390.jpg

DSC02394.jpg

DSC02388.jpg

DSC02393.jpg

DSC02395.jpg

DSC02396.jpg

DSC02397.jpg


Finally, so that you can make an idea of the proportions:

DSC02399.jpg


Let me know if I´ve been too enthusiastic posting pictures. I know it can be annoying loading the freaking page...


Next episode:
Stringing the thingy, fret and nut work