• TalkBass has been independent since 1998. Add your voice.
    Create a free account to reply to discussions, view embedded media, and browse with fewer display ads.
    Join freeLog in
    Want zero display ads or expanded classifieds tools? Compare plans.

Double Bass Pfret knot, Pfiddle Pfixed!

Howdy friends,
A goodly measure of my free time this past year has been spent on this rebuild. I thought I would retro- share the process with the TB nerdster crowd.
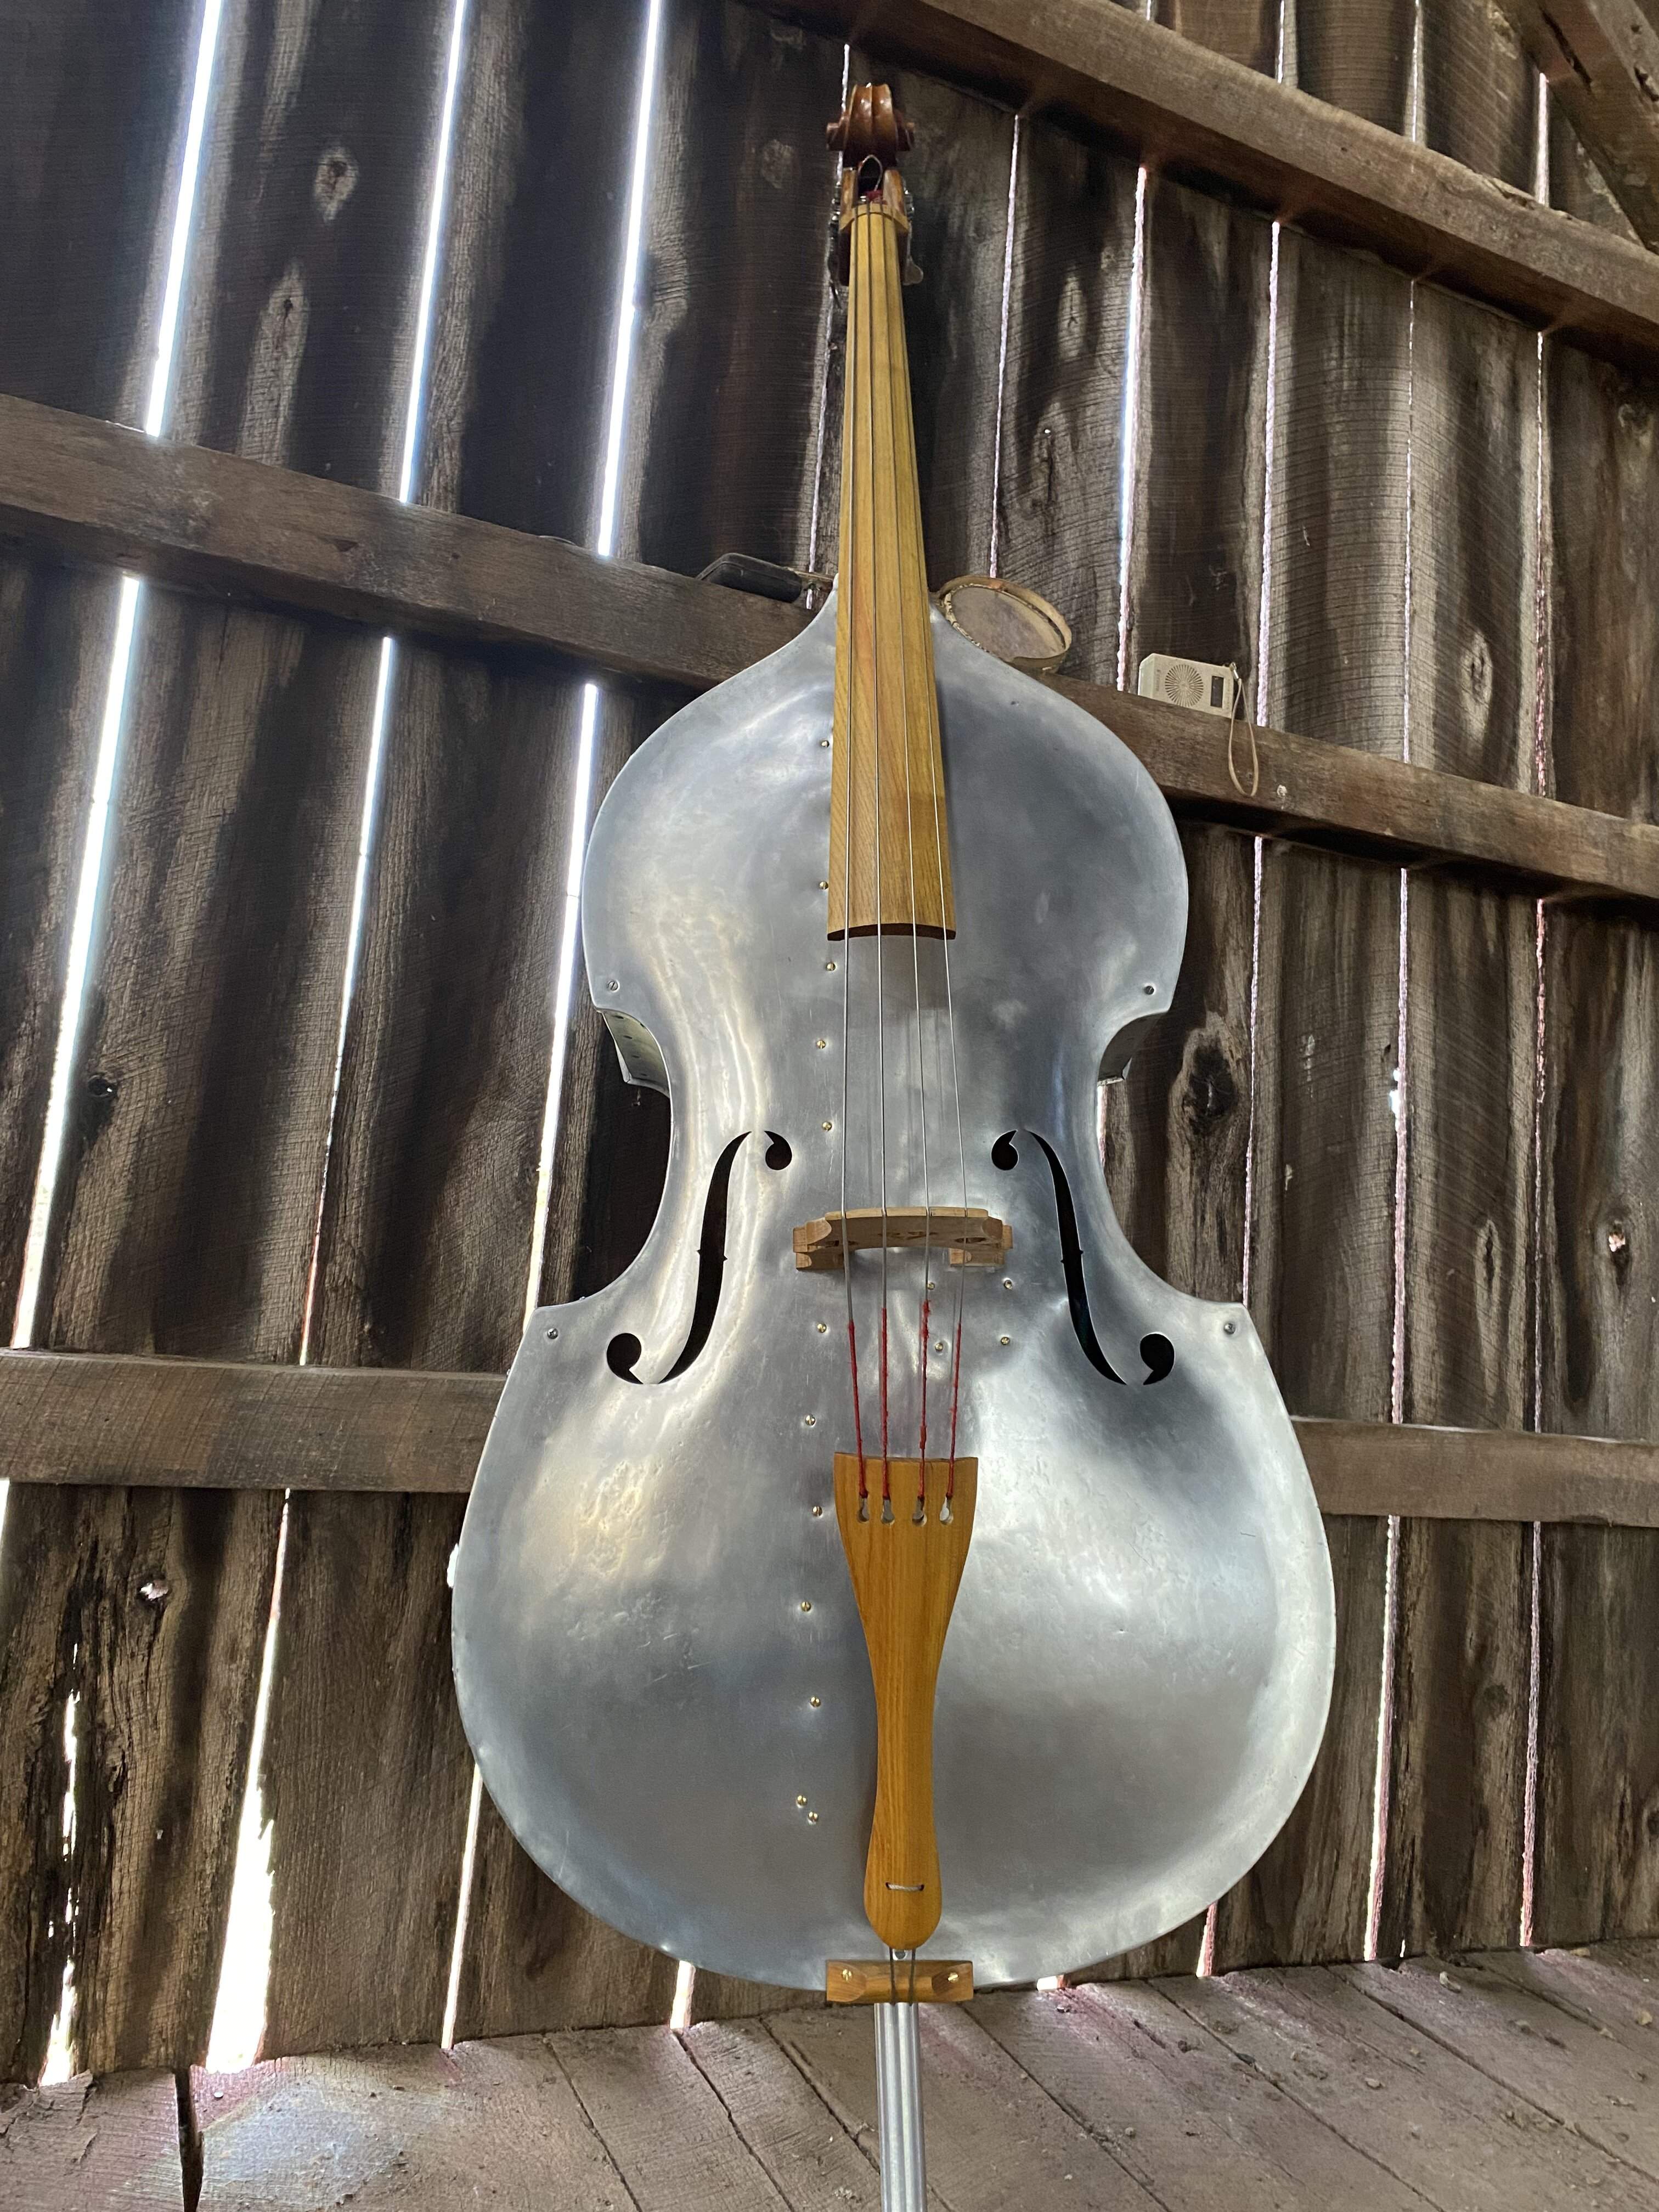
ED80446D-5D69-4CD8-933F-8146D1B86A1A.jpeg
 
Each of my project basses have been judged as beyond the “repair costs will exceed the final value” stage of their careers. This one was no different. The pegbox had been previously detached and repaired. The ebony fingerboard had been rent completely in two, and poorly, re-affixed. The endpin was undersized, and shimmed in the end block with cork!
Upon loosening the strings, the neck lollygagged from side to side. Upon removal of three screws, I had the neck completely free, in hand.
Fifty-seven screws later, it looked like this:
1889EDFB-D978-4B64-B204-795B8DE8D04B.jpeg
 
Thank you James, I knew you would chime in!
Your enthusiasm is a real hoot!

Don,
It’s just brown paint, applied with a brush. As for the tag/number, I won’t speculate. It was put there before the silver spray, but the tag doesn’t look like it could be 90-ish years old.
 
  • Like
Reactions: Don Hergert
Don,
It’s just brown paint, applied with a brush. As for the tag/number, I won’t speculate. It was put there before the silver spray, but the tag doesn’t look like it could be 90-ish years old.

Very good, thank you!

Interesting about the paint. I wonder if the paint affects tone???

And yes, my understanding from talking with James is that actual SNs/FONs on Pfretzschner aluminum DBs are extremely rare if not non-existent.
 
Examination thus far indicated that the neck block would need to be replaced.
B975D87F-6C22-461A-9803-207B4B95CEED.jpeg

The cheeks on the original block had been broken completely away. On a new block, they still would be so thin they would be unsupportive long-term.

Also, the top most row of screw holes on the original block are too high to allow a deep mortise as done on previous projects.
769C2ED1-791B-40C5-B959-E050BA762F14.jpeg
in this photo, it can be seen that the glue on the top surface of the block was holding nothing. The neck was only held in place by the three screws at the very point of the heel, and the tension of the strings pulling down on the neck.
 
My list of needed repairs now included:
A neck graft
A new neck block
A new fingerboard
An alternative to the standard mortise for securing the neck
The first two were familiar exercises, the others were new challenges.
Now, please bear with me for an essential side story.
Events transpired to put me within a day trip to Asheville, NC and the shop of @james condino. I had been hankering to visit, He said to bring a project along, so I grabbed the old neck and headed that way! James let me see some of his “Jethro to Jedi” jigs, techniques and tools, and I got to run his vintage Wysong belt sander! He generously spent an entire Saturday afternoon answering questions and sorting through my ideas.
On my way home, I found a vintage Wysong sander on FB, and brought home the Jolly Green Giant!
E47D6148-38B0-4F8B-BCAA-C8C8743E08F1.jpeg
 
The JGG has right/ left handed, 34” platens, and the 4” idler at the end serves as a spindle sander. Now, I had a stationary power tool for neck block shaping, neck graft fitting, and the ability to try, from scratch, a fingerboard!
08CBBD33-8AC0-4172-B594-B94A4E2F274F.jpeg A2E4983E-7634-4C42-BFA2-42AC810B7D48.jpeg
This neck is crafted of cherry, nearly stiff as maple, but a little lighter weight, and should naturally darken to closely match the color of the original pegbox. It is also strengthened with dual carbon fiber rods.
 
Cherry wood begins to darken fairly rapidly with exposure to UV light, and will for years. I was anxious to hasten the process, here it is with a coat of Watco oil.
D120C7D8-A7DE-4099-BEC4-7104D27B9BD7.png

Meanwhile, a new neckblock was shaped. At first I thought I would cut it as was done previously, planning to do a glued mortise connection. Then I realized it would need to be a mechanical join. I gleaned different ideas from TB and other internet sites for the simplest and inexpensive method. Once again, I relied on @james condino ‘s project pics for the solution. Hardware store, threaded screw inserts in the neck heel, with bolts through the neckblock from inside the body.
63A5F02E-F2DD-44A2-875F-28CB6FB6C96C.jpeg
 
I’ve become pretty much comfortable with the previous steps, but the next, creating a fingerboard from raw lumber, would be a fresh challenge! Typical fingerboard wood is kinda pricey, and not something one can afford to do wrong. The decision was made to try something non traditional and less expensive. I have access to a small stash of local, aged and dry hardwoods at the family farm. One of the wood choices is Osage orange. It has several attributes as a tonewood/ fingerboard candidate. It is hard, well seasoned, it has incredible dimensional stability, a pleasant natural luster, and a ringing tap tone. Unfortunately, around here, it comes from trees that aren’t much more than big woody weeds. It is very difficult to find a piece straight grained, quartersawn, and large enough to fashion a double bass fingerboard. I happened upon a suitable specimen.
10168909-515C-477D-BDC4-35F3C57E1EFE.jpeg
 
I have seen well-aged Osage orange, and it was a very nice dark brown.
Possibly after you get it shaped and installed, you could treat in such a way as to artificially oxidize the surface, achieving the dark color sooner. (Just a thought…I’m not certain of the best way to accomplish that, without damaging the wood.)
 
Hi again friends,
I’ve been sidetracked with other projects, but need to carry on with this story.
When the top comes off an Al Pfretzschner, the simple ingenuity becomes apparent. As the edges overlap the sides, the resulting Al to Al contact was dampened with a thin, green felt. The bass bar is screwed directly to the underside without dampening, as is the sound post belly block.
IMG_0606.jpeg
I replaced the felt around the perimeter with 1mm cork. I decided there was a possibility the interface of the bass bar and belly block might benefit from dampening as well. The thin cork was added there as well.