• TalkBass has been independent since 1998. Add your voice.
    Create a free account to reply to discussions, view embedded media, and browse with fewer display ads.
    Join freeLog in
    Want zero display ads or expanded classifieds tools? Compare plans.

Project Bloodline

Got lots of stuff done this weekend. (Although it doesn't look like it...)


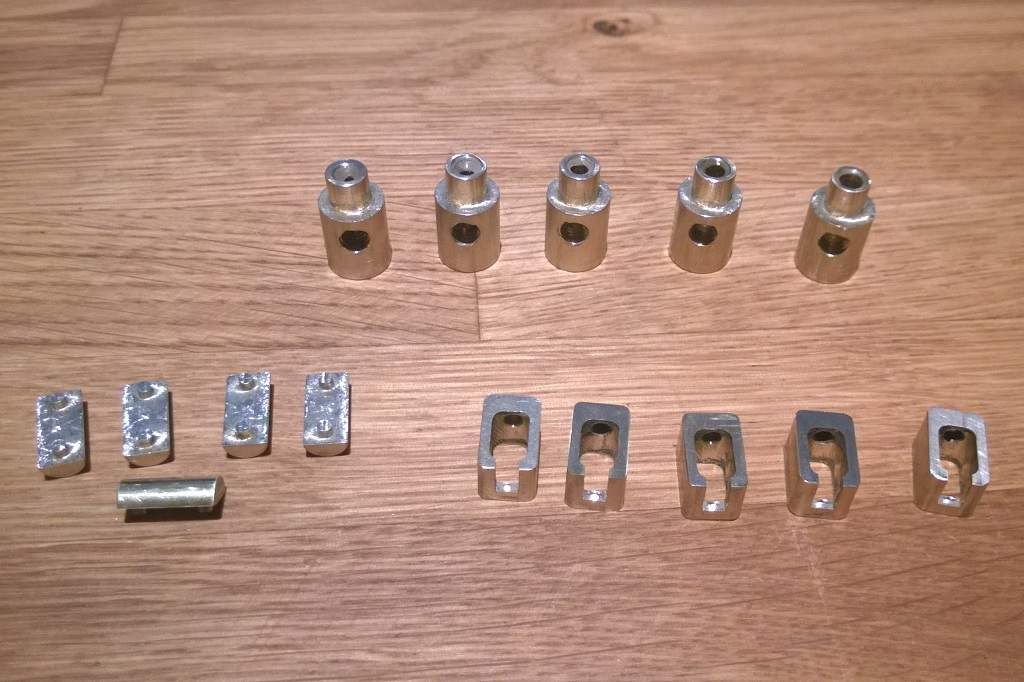
Some small metal bits milled:
111.jpg

To the left there are some string saddles. On the right the string anchor for the bridge end and on the top are the string anchors for the headstock.

The saddles are simply press fitted onto the "adjustment thingy" ;)
112.jpg


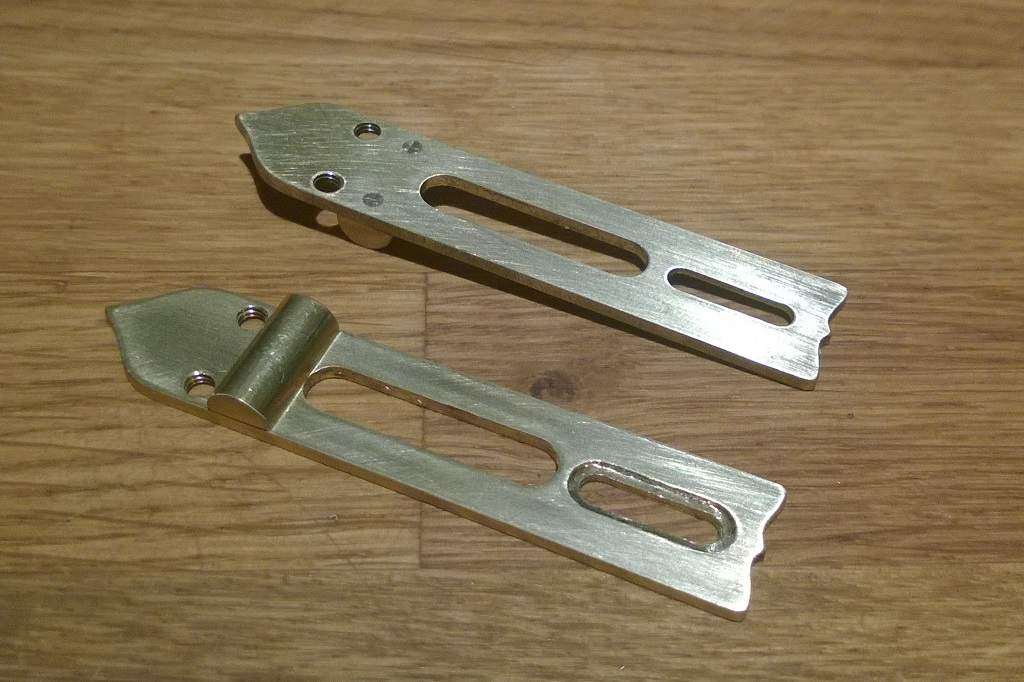
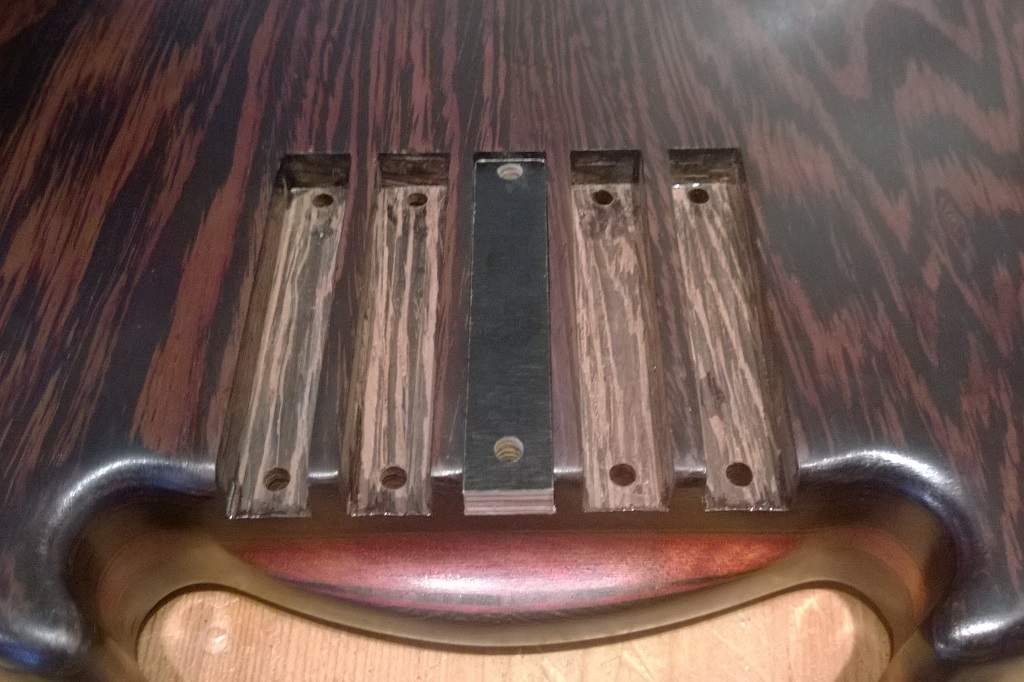
I alse began the dreaded part of drilling the holes for the screws that will hold the bridges in place. The small piece of plywood is a template for positioning the holes. It's made from the same CAD-file as the bridges to ensure perfect fit.
113.jpg

I was really hoping to avoid having to do this. My original plan was to make a n adapter plate that the bridge would slide onto from the end of the body. In the end the idea seemed too weak and too difficult to do right.

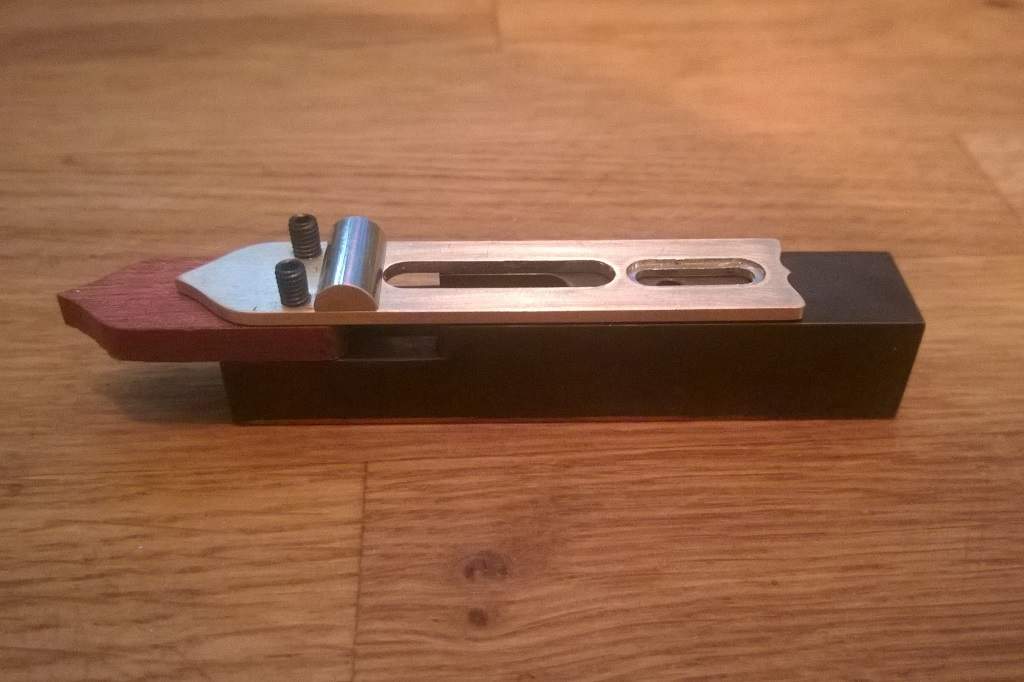
Bridge piece more or less put together.
114.jpg

The knob and screw to lock the intonation is still missing. The screws for the height adjustment will be cut down when I know exactly how long they need to be. I will also be filing a groove for the string to sit in. The small piece of bloodwood have a groove on the underside that ride on the small tenon on the bridge housing. On top of the wood piece there are two shallow holes for the height adjustment screws. This ensures next to no sideways play.

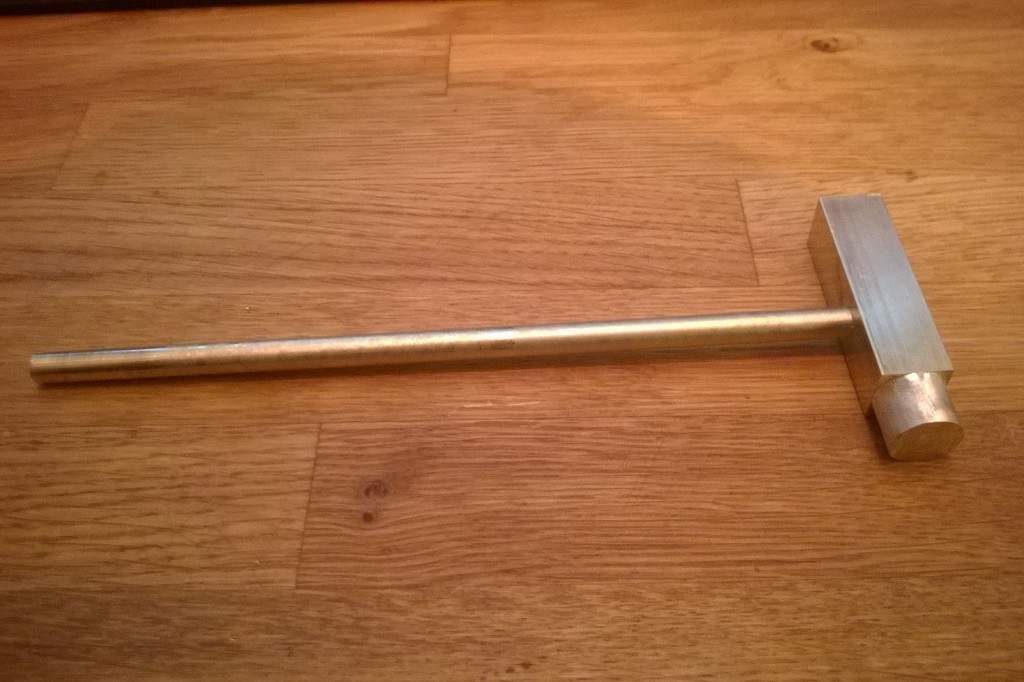
I also made a tiny rudimentary hammer from some scraps. :)
115.jpg

I use if to tap the bridges and string anchors into place as the fit is quite tight.


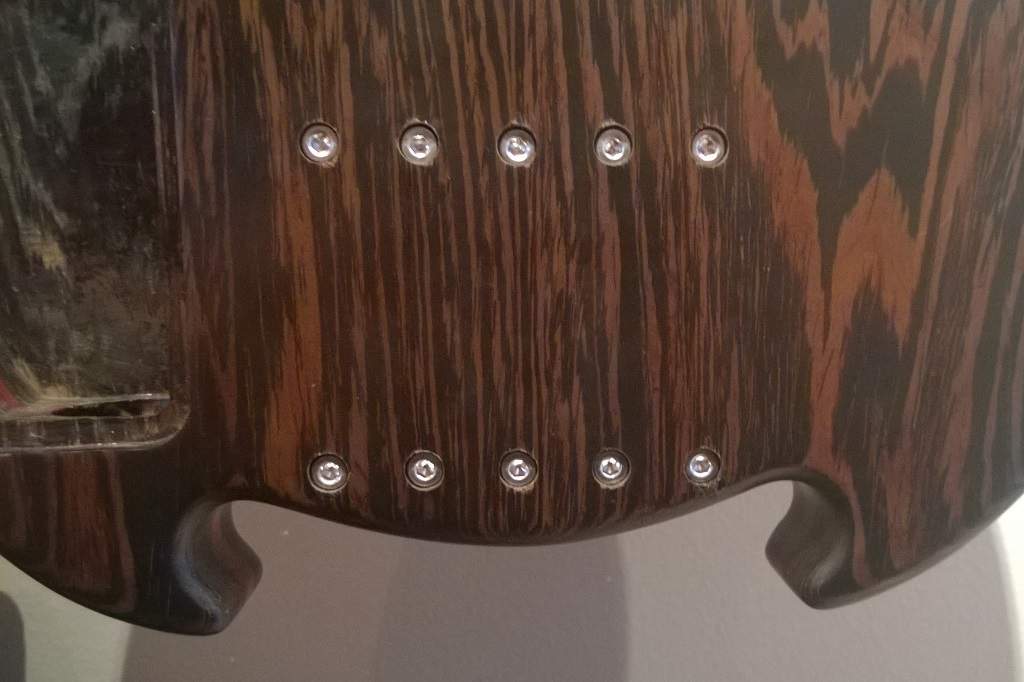
Mounting holes from the back:
116.jpg

These were drilled through a template cut on the CNC mill to get the spacing right without having to measure all the holes. I did have some minor tearout, but that should be easily fixed. I have to redo the finish anyway.

So things are slowly but surely getting there. Most of the rough work is done. The remaining work is quite fiddly, so it'ill probably take quite a bit of time to get done right.
 
  • Like
Reactions: BioWeapon
Thanks. :)

Well, I don't even know if the design will even work yet. :p Will need to figure that out before I can even consider making more. :)

I'm currently in the middle of headless builds using an original Steinberger 5 string bridge, and a Hipshot 5 string bridge. From an engineering/functional stand point your bridge set looks as if it will work as good as, if not better then, those units. Your bridge takes functionality and adds art, that's a ++ 1 in my book.

If it would be helpful, I could take some detailed photo's of the two headless bridges in my work shop and upload them.
 
  • Like
Reactions: BioWeapon
Nice. :) Do you have a build thread for them? In the early planning phase of this project I was considering using the Hipshot system. In fact, that's where the idea of bending the string on the headstock anchor came from. The anchor in the tuner is inspired by the steinberger system. The difference is that mine is rotated 90degrees. I did this to make the ball end work as a pivot. By doing this I don't have the same need to angle the tuners. That's in theory anyway. In my current design the string does actually rub on the upper part of the bridge housing. I had to compromise there.

I don't think I'll need pictures at the moment, but thanks anyway. :)

I did hit a milestone today. I finally installed the strings. (I'll post a proper update with pictures later). Unfortunately I discovered that I had done a pretty big mistake. :(

It turns out that the bridge can't be adjusted low enough. I'm still unsure how that could happen. I suspect that the string height was based on an older drawing.

It seems like I have three options at the moment:

1: Make a new saddle and hope that it will go low enough, something I doubt it will do.

2: Lower the bridge assembly further into the body. This will actually look better because the bridge will get a lower profile. The downside is that I have to figure out a way to get the front part of the bridge to work.

3: Scrap the entire bridge design and start over. (Something I really don't want to do.)


I'll take a closer look at this tomorrow.
 
I think I fixed it! :)


So I ended up lowering the bridge assembly into the body:
118.jpg

To make this work I had to make some new pieces of bloodwood to sit at the front of the bridge. The new pieces doesn't follow the saddles as in the previous design, but are stationary. I cut some small grooves for the height adjustment screws to ride in. Since the tip of the height adjustment screws are slightly pointy I cut the groove very shallow and slightly smaller than the screw diameter. This prevent any sideways play on the saddles.

The pieces of bloodwood are also lowered 3,5mm into the body. I set then slightly proud of the surface to make the transition between bridge and body nicer:
119.jpg


This is how it will look. (Apart from the adjustment being far from correct at the moment...)
120.jpg

The downside of the new design is that the visible area of bloodwood will be uneven from string to string because of the intonation adjustment. To counteract this somewhat the bloodwood pieces on the treble side is slightly longer than on the bass side.


The "springs" does bend slightly from the pressure of the string and the rear set screw, but nothing to worry about so far:
121.jpg

The brass used in the springs are slightly softer and more flexible than in the rest of the construction, so they don't bend permanently. I imagine the adjustment procedure will be slightly more complicated, but shouldn't be much of a problem. I'll just set the intonation first, and be careful to tune the string as I do the height adjustment (Which is a good practice anyway).


In other news, I have more or less decided not to make a wooden cover for the pickup. I wanted to make one from bloodwood, but I think that it will be a bit too much.
 
  • Like
Reactions: lbridenstine
Thanks guys. :)

Ok, so now that I see it assembled, I understand what you're doing. Very nice!

I case you haven't considered it, you might want to get some oval point setscrews rather than standard cup point, in order to not tear up the bloodwood.

Good idea. I hadn't really thought about oval point screws. Maybe I'll just round of the screws I have. Fining normal set screws around here is difficult enough. I'm curious to see how much the screws will mar the wood. Bloodwood is incredibly hard, so it may even stand up to cup point screws.

And back to my earlier question about extra bridges for sale or trade. . . ;)

I really do love that bridge design. If you end up patenting that, I would happily test them out.

If I ever do a production run I'll let you know. :)
 
I really like bridge design! Especially how you incorporated wood into the design.

This makes me wish my school spent the tuitions on a CNC machine instead of buying more iMacs...
 
This weekend have been spent doing lots of small jobs.

Some pieces for the truss rod cover:
122.jpg

Ebony seems to behave really well in a CNC. :)

Truss rod cover and nut blank:
123.jpg

The truss rod cover is sanded to a wedge shape. There isn't enough room under the strings for the full thickness all the way. Besides, the wedge shape looks better. :)

That is the second nut I made, BTW. The first one was slightly too thin, and had the slots cut at the wrong spacing.


I also did another try at blackening the brass pieces:
124.jpg

Turns out that the hydrochloric acid didn't do all that much. The problem was the blackening process. After some trial and error I figured out that the flaking happens when the brass is left in the blackening liquid for too long. The optimal time seems to be right at the point where the black gunk starts forming on the surface.

What I did was to thin out the liquid to about 2 parts water and 1 part Brass black. I then put the piece into the liquid and watched it carefully. The brass will first turn brown, then a deep red, then blue/black before turning to a more matte texture. As soon as the brass had turned matte black I pulled it out of the liquid and rinsed it in running water while rubbing off the black gunk. This leaves a deep gray/silver color. (With some hints of blue)

It seems like the process can be stopped at any point to get all the other colors mentioned. It does however seem to be quite difficult to control exactly, so if there are several pieces that needs to be the same color it may be a good idea to thin the liquid further. I haven't tested this fully myself, so If anyone want to try this, do some tests first!

Leaving the pieces for longer or repeating the process just seems to make the surface to flake off.

If I had known all this from the beginning I would probably have tried to get a brown-ish color to match the overall color theme. I don't want to sand down all the surfaces of the pieces now. I'll see how this color looks first. I think It'll look ok. :)


Here is one of the bridges assembled.
125.jpg


I also made a cover for the electronics cavity, drilled the holes for the pots, leveled the frets and redid the finish.

The finish is now slightly thinner, giving me more of the effect I originally wanted. :)

More pictures of all that later.


Oh, and it's a good thing I used a double action truss rod. The neck is so stiff that It doesn't noticeably move from the string tension.
 
You're making me gas for headless now!
Wish I had the tools to make my own headless system... unfortunately, all I have is a jigsaw and a dremel!

Hehe. The GAS is always present. Building your own stuff feels more satisfying than buying. ;)

Well, you could do lots of nice stuff with a jigsaw and a dremel. The trick is to design for your tools. :)

LOVE IT!! Sub'd! and im #4 in line for a set of those bridges lol. ill take 6, but i want the brass shiny :)

Thanks. :)

I was considering polished brass for a while, but figured black fit this project better. Brass/gold would be a very close second, though. :)


Got some work done tonight as well. I managed to do a rough assembly:
126.jpg

The slots in the nut isn't cut yet, and the strings will be replaced. These ones are just used for mockup. The final strings won't have any silk. (Elixir)

Bridge and pickups installed:
127.jpg

For once it was nice to install a pickup/preamp where I didn't have to rewire the entire thing. The only unusual thing I did was to cut of the connectors for the preamp and solder on the cables to the PCB. There wasn't enough room for the connectors. ;)

I also have to make some knobs. Again... ;)
 
  • Like
Reactions: pilotjones