

Enjoy the benefits of a premium membership!
Upgrade Account
-
TalkBass has been independent since 1998. Add your voice.
Create a free account to reply to discussions, view embedded media, and browse with fewer display ads.
Join free Log in
Want zero display ads or expanded classifieds tools? Compare plans.
You are using an out of date browser. It may not display this or other websites correctly.
You should upgrade or use an alternative browser.
You should upgrade or use an alternative browser.
Project Silhouette
- Thread starter Smilodon
- Start date
More options
Who Replied?
I realize that I have neglected this thread a bit. Sorry about that. 
I have made progress, though. The work done since the last update have been a bit in between other things, but I'll post the rest of the pictures in this post.
This is how the heel of the neck looked:
[Invalid or Expired Link Removed]
After test playing for a while I figured out that I didn't like it, so it needed to be changed.
I did start with a rasp to shape it down, bit quickly discovered that rasping on a concave surface with a straight rasp is hopeless on hard woods.
So, I went out and got an angle grinder, a rasp disc:
[Invalid or Expired Link Removed]
A few seconds of rasping (litterally. Those discs are scary at 11000RPM...) and a bit of sandling later it looks like this:
[Invalid or Expired Link Removed]
Much better.
I also sanded the final shape of the other end of the neck:
[Invalid or Expired Link Removed]
I also got the taper on the maple/walnut transition more or less perfect as well. The maple as originally going to end in a very thin point, but the pressure from gluing seems to "blend" the wood together a bit thus creating a fade when sanded down like this. I'm OK with that.
I tehn went on to making the cavity covers:
[Invalid or Expired Link Removed]
Veneer glued to 3mm aluminum. I didn't want to make the cover entirely out of wood because the had to be so thin. It's also easier to mill a small lip into aluminum to make mounting the lids easier. The brass stock is ued as a rolling pin to squeeze out air pockets in the glue.
Glue dry:
[Invalid or Expired Link Removed]
The piece to the right is for the truss rod cover. The wood is made from offcuts from the neck. I used a fret saw to saw off a very thin piece.
This is how the truss rod cover works:
[Invalid or Expired Link Removed]
Cover in place.
To release the cover simply push an allen key into the small hole in the fretboard:
[Invalid or Expired Link Removed]..and remove the lid.
The rear of the cover have a couple of magnets glued in that stick to magnets in the cavity.
[Invalid or Expired Link Removed]
The magnets are offset slightly to pull the cover towards the bridge end to make sure that the gap between the cover and body is tight.
Cavity covers shaped and fitted:
[Invalid or Expired Link Removed]
I Must admit that I'm not entirely satisfied with the fit, but trying to sand them more will most likely just end up making things worse...
I then went on to mix the shellac for the grain filling.
I didn't have a weight to mix the ratios, so I had to make one:
[Invalid or Expired Link Removed]
The weights are offcuts of brass with a known alloy and volume. The numbers on them is their calculated weight.
The paper cup is where the shellac flakes go.
Finishing stand:
[Invalid or Expired Link Removed]
This idea is shamelessly borrowed from somebody else here in LC, but I can't remember who...
I just applied a couple of thin coats of shellac to lock down the grain in the wood. I then proceeded with the final sanding and drilling.
Drilling the channels between cavities:
[Invalid or Expired Link Removed]
I was pondering a bit over how to do this. The cavities are very deep and the body is thin so I was afraid to drill at an angle. I then remembered that I also had to make a hole for the jack. That solved the problem.
I got a box of After Eight mints for christmas. After it had given me a stomach ache I noticed the flaps on the box. Looks familiar, right?
[Invalid or Expired Link Removed]
(For those who haven't paid attention, look at my fretboard)
At this point I started the finishing. I didn't take any pictures from this, but the process more or less consist of lots of sanding, lots of layers of shellac, some more sanding and a couple of coats of 2K clear lacquer.
After more sanding, a polish and some fret leveling it looks like this:
[Invalid or Expired Link Removed]
If you look closely in the pickup cavities You'll see the base plates I mentioned earlier. I was planning on making some that covered the entire bottom of the cavity, but figured it was pointless, so I made some smaller ones for each screw.
The large holes were supposed to hold springs in place to hold up the pickups. That idea didn't work very well, so I ended up using dense foam instead.
Detail of the finish.
[Invalid or Expired Link Removed]
It's not the best finish I have done, but it'll have to do. Unfortunately the shellac sunk a bit after the clear coat was polished. It's not too bad, though. I may correct this at a later point, but I figured it was time to finish this project now.
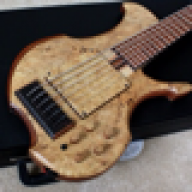
So here it is. The final product!
[Invalid or Expired Link Removed]
[Invalid or Expired Link Removed]
[Invalid or Expired Link Removed]
[Invalid or Expired Link Removed]
As always, it has been educational.
I have made progress, though. The work done since the last update have been a bit in between other things, but I'll post the rest of the pictures in this post.
This is how the heel of the neck looked:
[Invalid or Expired Link Removed]
After test playing for a while I figured out that I didn't like it, so it needed to be changed.
I did start with a rasp to shape it down, bit quickly discovered that rasping on a concave surface with a straight rasp is hopeless on hard woods.
So, I went out and got an angle grinder, a rasp disc:
[Invalid or Expired Link Removed]
A few seconds of rasping (litterally. Those discs are scary at 11000RPM...) and a bit of sandling later it looks like this:
[Invalid or Expired Link Removed]
Much better.
I also sanded the final shape of the other end of the neck:
[Invalid or Expired Link Removed]
I also got the taper on the maple/walnut transition more or less perfect as well. The maple as originally going to end in a very thin point, but the pressure from gluing seems to "blend" the wood together a bit thus creating a fade when sanded down like this. I'm OK with that.
I tehn went on to making the cavity covers:
[Invalid or Expired Link Removed]
Veneer glued to 3mm aluminum. I didn't want to make the cover entirely out of wood because the had to be so thin. It's also easier to mill a small lip into aluminum to make mounting the lids easier. The brass stock is ued as a rolling pin to squeeze out air pockets in the glue.
Glue dry:
[Invalid or Expired Link Removed]
The piece to the right is for the truss rod cover. The wood is made from offcuts from the neck. I used a fret saw to saw off a very thin piece.
This is how the truss rod cover works:
[Invalid or Expired Link Removed]
Cover in place.
To release the cover simply push an allen key into the small hole in the fretboard:
[Invalid or Expired Link Removed]..and remove the lid.
The rear of the cover have a couple of magnets glued in that stick to magnets in the cavity.
[Invalid or Expired Link Removed]
The magnets are offset slightly to pull the cover towards the bridge end to make sure that the gap between the cover and body is tight.
Cavity covers shaped and fitted:
[Invalid or Expired Link Removed]
I Must admit that I'm not entirely satisfied with the fit, but trying to sand them more will most likely just end up making things worse...
I then went on to mix the shellac for the grain filling.
I didn't have a weight to mix the ratios, so I had to make one:
[Invalid or Expired Link Removed]
The weights are offcuts of brass with a known alloy and volume. The numbers on them is their calculated weight.
The paper cup is where the shellac flakes go.
Finishing stand:
[Invalid or Expired Link Removed]
This idea is shamelessly borrowed from somebody else here in LC, but I can't remember who...
I just applied a couple of thin coats of shellac to lock down the grain in the wood. I then proceeded with the final sanding and drilling.
Drilling the channels between cavities:
[Invalid or Expired Link Removed]
I was pondering a bit over how to do this. The cavities are very deep and the body is thin so I was afraid to drill at an angle. I then remembered that I also had to make a hole for the jack. That solved the problem.
I got a box of After Eight mints for christmas. After it had given me a stomach ache I noticed the flaps on the box. Looks familiar, right?
[Invalid or Expired Link Removed]
(For those who haven't paid attention, look at my fretboard)
At this point I started the finishing. I didn't take any pictures from this, but the process more or less consist of lots of sanding, lots of layers of shellac, some more sanding and a couple of coats of 2K clear lacquer.
After more sanding, a polish and some fret leveling it looks like this:
[Invalid or Expired Link Removed]
If you look closely in the pickup cavities You'll see the base plates I mentioned earlier. I was planning on making some that covered the entire bottom of the cavity, but figured it was pointless, so I made some smaller ones for each screw.
The large holes were supposed to hold springs in place to hold up the pickups. That idea didn't work very well, so I ended up using dense foam instead.
Detail of the finish.
[Invalid or Expired Link Removed]
It's not the best finish I have done, but it'll have to do. Unfortunately the shellac sunk a bit after the clear coat was polished. It's not too bad, though. I may correct this at a later point, but I figured it was time to finish this project now.
So here it is. The final product!
[Invalid or Expired Link Removed]
[Invalid or Expired Link Removed]
[Invalid or Expired Link Removed]
[Invalid or Expired Link Removed]
As always, it has been educational.


Hopkins
Commercial User
That truss rod cover is ingenious. Its those little details that I really enjoy about watching build threads. Drilling the pickup cavity tunnel through the input jack hole was also very clever.
I love it man, you taught me two new tricks in one post.
I love it man, you taught me two new tricks in one post.
Wow, I'm really glad to see this done.
She's a beauty. Now sound clips
Lol +1


Just beautiful!!!! nice job!!!!! I love when I see people think "outside of the box". It is inspiring! Do a youtube video so we can see her in action! =)
Thanks for the nice comments everybody.
I have gotten lots of ideas from this forum so it's nice to give some back as well. Especially since it's my first scratch build.
I would post sound clips if I could actually play anything decent. Right now I'm pretty useless at actually playing bass. I'll practice a bit more and get back to you on that. 
That truss rod cover is ingenious. Its those little details that I really enjoy about watching build threads. Drilling the pickup cavity tunnel through the input jack hole was also very clever.
I love it man, you taught me two new tricks in one post.
I have gotten lots of ideas from this forum so it's nice to give some back as well.
Especially since it's my first scratch build.Wow, I'm really glad to see this done.
She's a beauty. Now sound clips
I would post sound clips if I could actually play anything decent. Right now I'm pretty useless at actually playing bass.
I'll practice a bit more and get back to you on that. 

How did this slip under my Luthier's Corner radar? 
This is one of the more unique and amazing builds I've seen on here. Brilliant! Simply brilliant!
This is one of the more unique and amazing builds I've seen on here. Brilliant! Simply brilliant!

Also have to say that this was a very informative and inspirational thread.
And, agreed, that truss rod cover is simply clever, functional and attractive at the same time. Creative enough to be a hallmark of your future builds imo.
Nice looking finish and creative solutions to arising issues.
Really nice work!
I also want to hear it...
wraub
And, agreed, that truss rod cover is simply clever, functional and attractive at the same time. Creative enough to be a hallmark of your future builds imo.
Nice looking finish and creative solutions to arising issues.
Really nice work!
I also want to hear it...
wraub

- Aug 15, 2011
- 571
- 171
- Disclosures
- Owner/Luthier:RoseBud Basses & Guitars LLC

Wery fine build sir. Have been fun watching this build. Have learned a lot!
Liker bassen!
Cheers
Tore
Liker bassen!
Cheers
Tore


