I started by filling any gaps (and there were a few!) with gel super glue and the colored wood filler, which was source at my local Home Depot. I then got down to sanding!
I did the bulk of the 'major' shaping with regular old coarse (60 grit) and medium coarse (100 grit i think!) sand paper. The three areas that needed the most were the upper horn, the lower horn and the back neck to body join.
After I was happy with the overall shape I went to work with 150 grit, getting the curves on the body to where I wanted them. The 150 grit was certainly the best for accurate shaping and then I went up through 220, 320, 400, 600, 800, 1000, 1200 to 1500 grit. I got all my papers (3M and Eagle Brand) from Stewmac.com. The 1000, 1200 and 1500 I used wet, but not oiled as per the recommendation. You really have to keep constantly wetting/cleaning the paper. Depending on what I was doing I used a soft rubber block, a wooden block or my hand for the paper.
Once I got everything to my likening, and there were several times when I went back to 220 to refine some shaping, I used a set of micro-finishing pads. These went from 2000 (I think) to 12000 grit; again from
Stew-Mac. The high grits were probably overkill, but it was fun to see what a shine I could put on the bass without using any type of lacquer of finish!
For the finish on the recommendation of Kevin Robertson at KRGuitars who I'd been building a bass with, I went with TruOil, which I bought from Lmii.com. I initially used the TruOil sealer to fill the grain, having sanded so fine this wasn't really necessary but I thought "what the heck". Allowing that to dry as per the instructions, I then went to work with the TruOil itself. After the initial first coast, which I evened out with 0000 steelwool, I found the best way to go was very sparingly wiped on with a rag and then very light buffing with the 0000 wool. I reckon I did about 4 applications of the TruOil, but it wasn't thick as I was buffing down.
I sanded the fingerboard using the higher grit papers (320 and above) till it was silky smooth and then applied StewMan fretboard finishing oil as per instructions, which gave me a very nice finish.
When I was happy with the finish I went to work on the control cavity cover. I bought a headstock piece of flamed maple from Lmii.com and went to work on it with my hand jigsaw to get the basic shape I wanted, using the original aluminum cover as a guide. I then sanded and shaped using 220 grit and as it was a thin piece of wood I didn't need to do much work at all. I then went to work with the higher grits and finally the finishing pads. It was then sealed and TruOiled.
I fitted a Wishbass control harness that I bought off eBay (but made by TBer 3stringpete). A little bit of soldering but nothing difficult. I also changed out the volume pot for a linear one, which worked better for me with the harness.
I bought the ebony control knobs again from Lmii.com fitted them and a set of Schaler strap locks and I was nearly done.
My final 'trick' was while a lot of folks think that the bridge is ebony it is actually a Corian bridge that Steve W sent me that I have sprayed with satin black Rustoleum from the can. I did about 5 coats and so far it stayed black really well! If I thought about it at the time, I would have done the same with the nut, but there you go, maybe on the next string change.
Finally I changed the round wound strings to Rotosound Jazz 77 flats; 45 - 105.
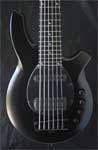
So there we have it: How to refin a Wishbass!
By the way if I've said in an earlier post but 'she' sounds as good as 'she' looks!
If you need any more info or explanation ask away!