

Enjoy the benefits of a premium membership!
Upgrade Account
-
TalkBass has been independent since 1998. Add your voice.
Create a free account to reply to discussions, view embedded media, and browse with fewer display ads.
Join free Log in
Want zero display ads or expanded classifieds tools? Compare plans.
You are using an out of date browser. It may not display this or other websites correctly.
You should upgrade or use an alternative browser.
You should upgrade or use an alternative browser.
Roberto-Venn: The Dream Starts...
- Thread starter Thumpin_P
- Start date
More options
Who Replied?
Well folks,
This will be short and sweet, as the pictures just wouldn't do justice to the progress. I did a lot of finish sanding to the bass today. hand sanded to 220 grit on the neck and the body. Then, moved on to 150 and 220 with the orbital sander. SWEET!!!
The images would not do this justice... I did some more work on the acoustic, though. Today, we were shown how to fit the top to the sides. We have not glued the back on yet, but, if we had, we would not be able to see inside the body, to properly fit the top to the sides. Another aspect which needed to be addressed, during fitting the top, is the tail block. We needed to ensure that there was not excess material near the kerfing. The objective was to sand the bevel away, until the top edge met up with the kerfing.
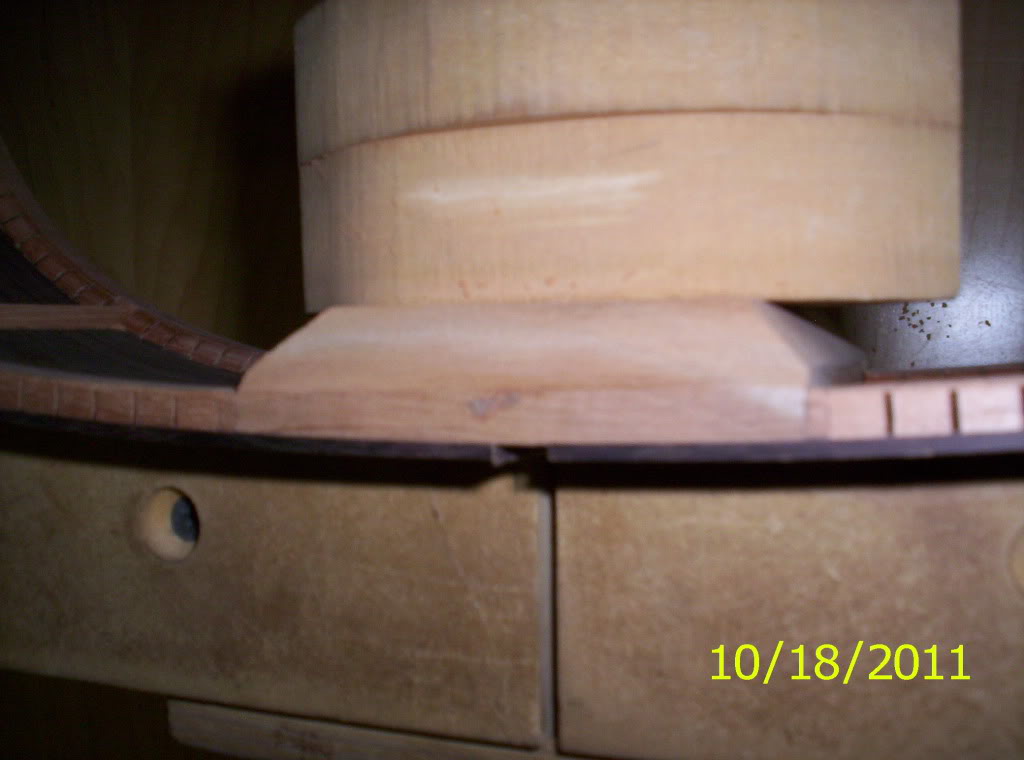
I have just a little left to go.
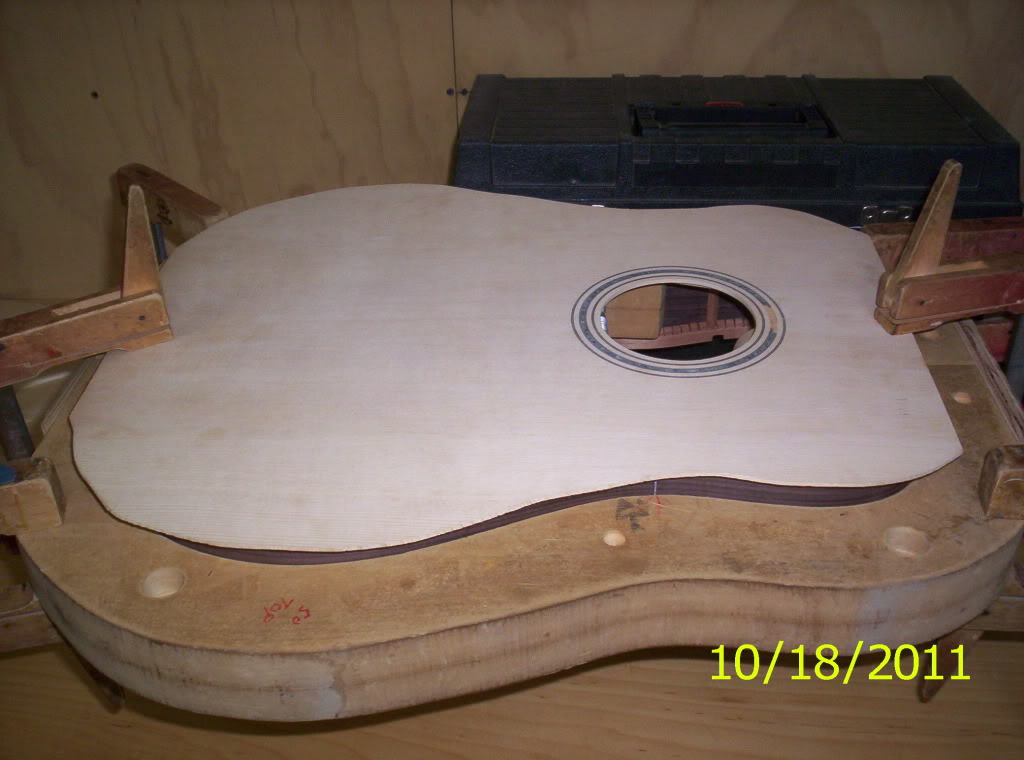
Next, some "in-progress" photos of tracing the guide lines for trimming the kerfing back.
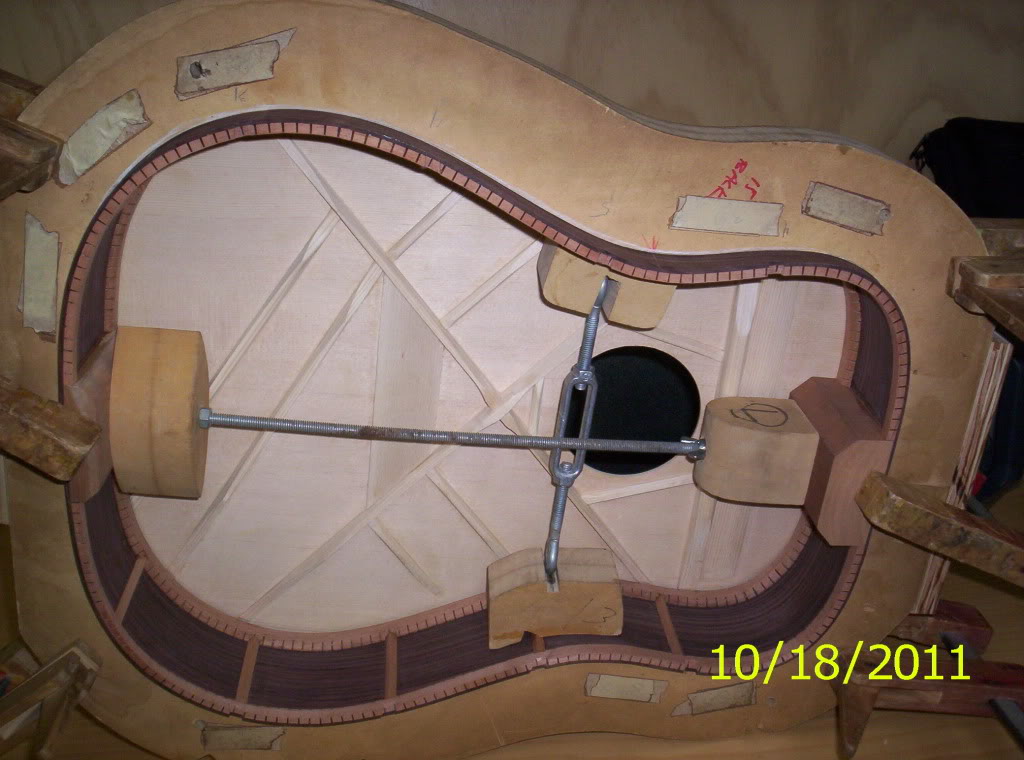
And... I just had to take a picture from this angle, I may never see it again, after the back is glued in place..
We were also issued some fretting clamping cauls. I will get images tomorrow. I just remembered them right now. That, is pretty much it. I did talk to Kris about a couple of other companies as far as job assistance. He gave me some good news. I will not spill the beans, for one reason, I don't want to jinx anything; and for the other, there;s not really any beans to spill yet. I did ask him what I need to do next, and I was told to work on a resume and a cover letter, bring them to him to check, and we would go from there.
That's all for today. I need to eat, discuss some ideas with JLund and then do some studying at my local coffeehouse.
Thanks for watching!
Thumpin_P
This will be short and sweet, as the pictures just wouldn't do justice to the progress. I did a lot of finish sanding to the bass today. hand sanded to 220 grit on the neck and the body. Then, moved on to 150 and 220 with the orbital sander. SWEET!!!
The images would not do this justice... I did some more work on the acoustic, though. Today, we were shown how to fit the top to the sides. We have not glued the back on yet, but, if we had, we would not be able to see inside the body, to properly fit the top to the sides. Another aspect which needed to be addressed, during fitting the top, is the tail block. We needed to ensure that there was not excess material near the kerfing. The objective was to sand the bevel away, until the top edge met up with the kerfing.
I have just a little left to go.
Next, some "in-progress" photos of tracing the guide lines for trimming the kerfing back.
And... I just had to take a picture from this angle, I may never see it again, after the back is glued in place..
We were also issued some fretting clamping cauls. I will get images tomorrow. I just remembered them right now. That, is pretty much it. I did talk to Kris about a couple of other companies as far as job assistance. He gave me some good news. I will not spill the beans, for one reason, I don't want to jinx anything; and for the other, there;s not really any beans to spill yet. I did ask him what I need to do next, and I was told to work on a resume and a cover letter, bring them to him to check, and we would go from there.
That's all for today. I need to eat, discuss some ideas with JLund and then do some studying at my local coffeehouse.
Thanks for watching!
Thumpin_P
Well guys, I took a lot of pictures, but I am very tired after today and I got a late start. I will catch you up tomorrow. Sorry, but I am wiped out!
See you tomorrow!
Thumpin_P
See you tomorrow!
Thumpin_P
Well..,
I suppose that I need to get everybody caught up. First, we were graded on our overall performance to date. I rounded up all of my wood, displayed it, and we were only being graded on our acoustic progress. But, I thought this would be a good opportunity for an updated photo op. So..,
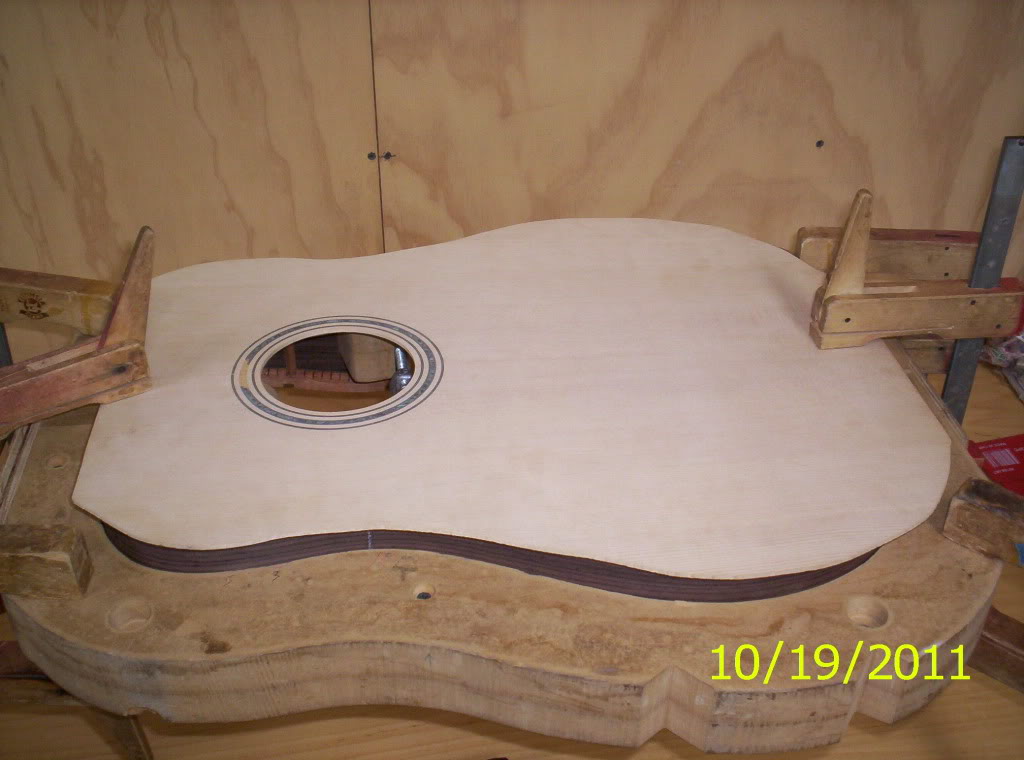
top fitted to the sides...
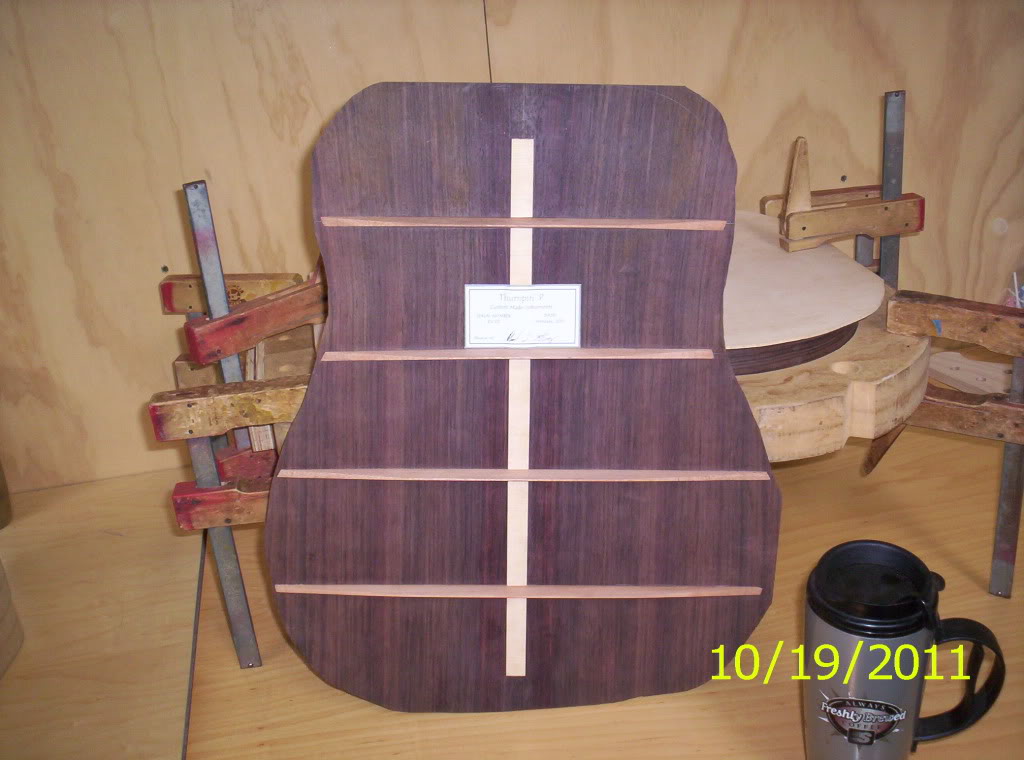
back, complete with label, sanded and fitted, ready for gluing...
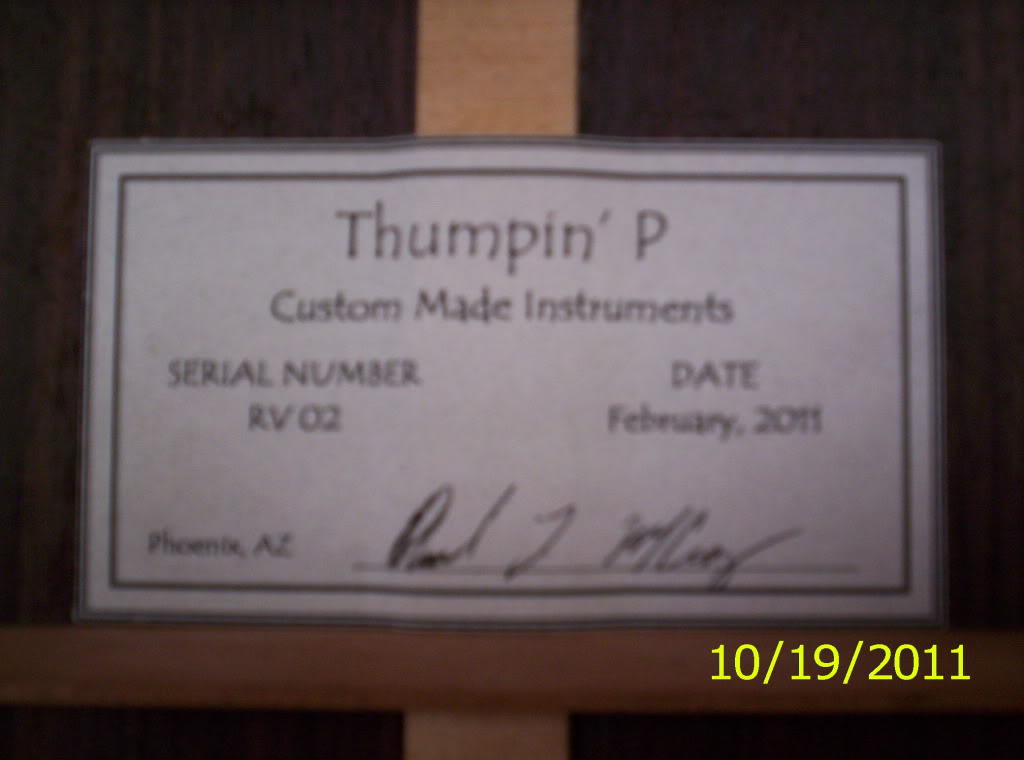
completed label, signed and glued onto back,
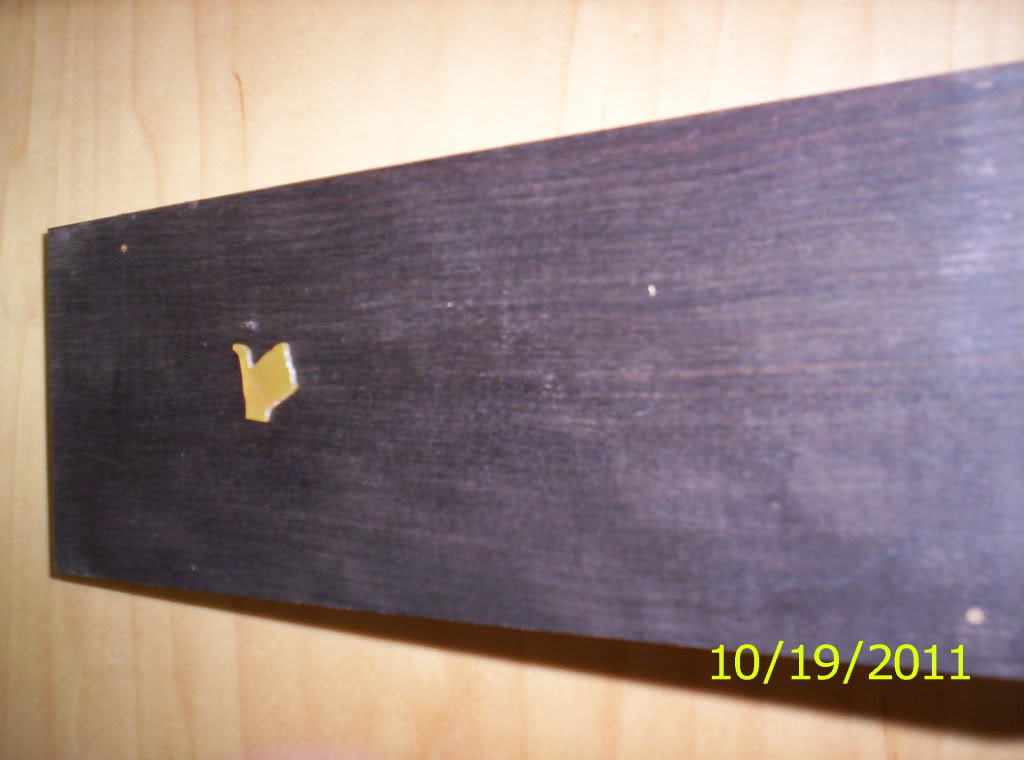
same 'ole acoustic headstock, complete with thumpin' thumb...
We really haven't done anything with the neck yet. I am wondering when we will...
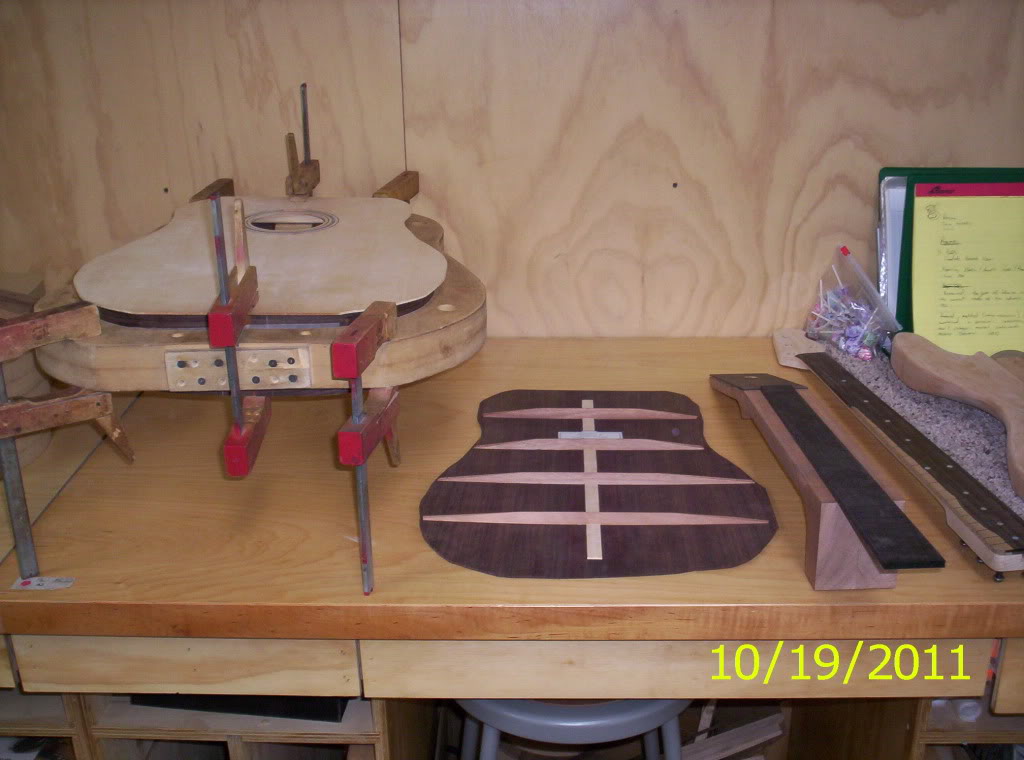
and the big picture... Next...
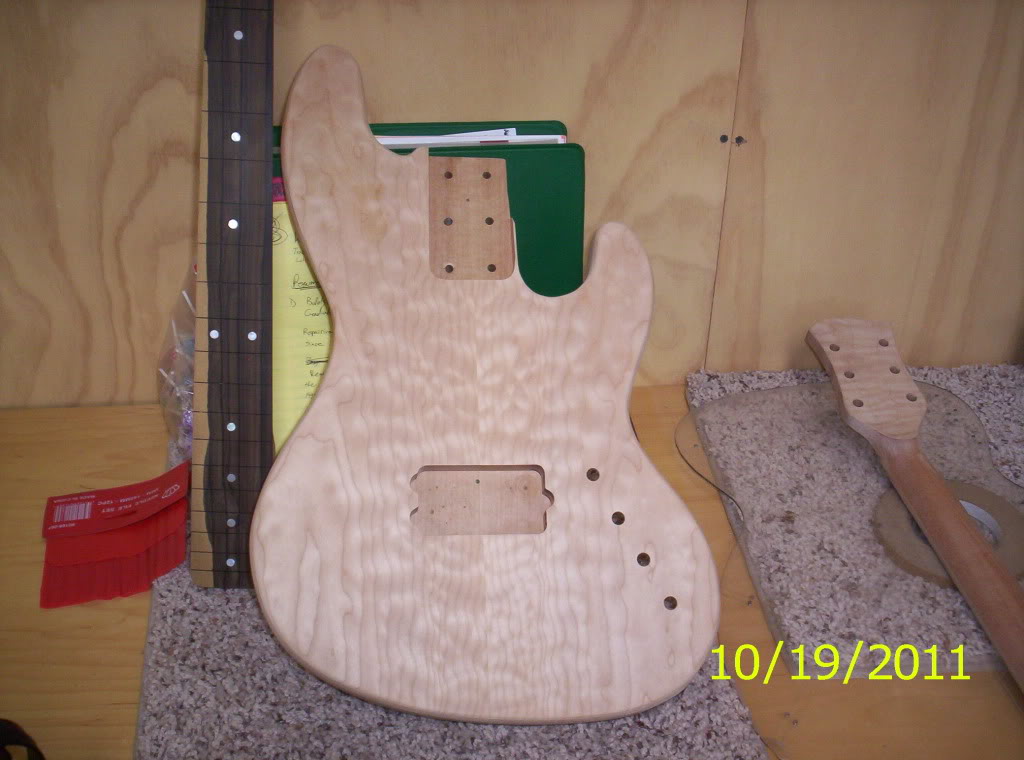
The sanded body...down to 220 grit, and,
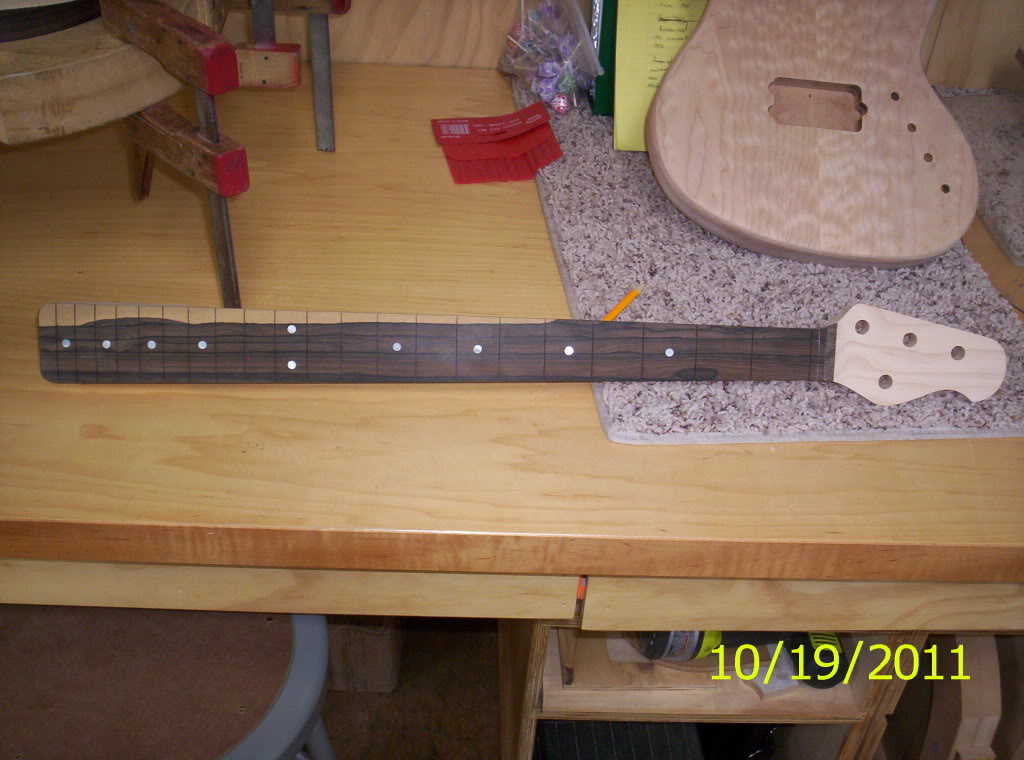
front of the neck, also sanded to 220 grit.
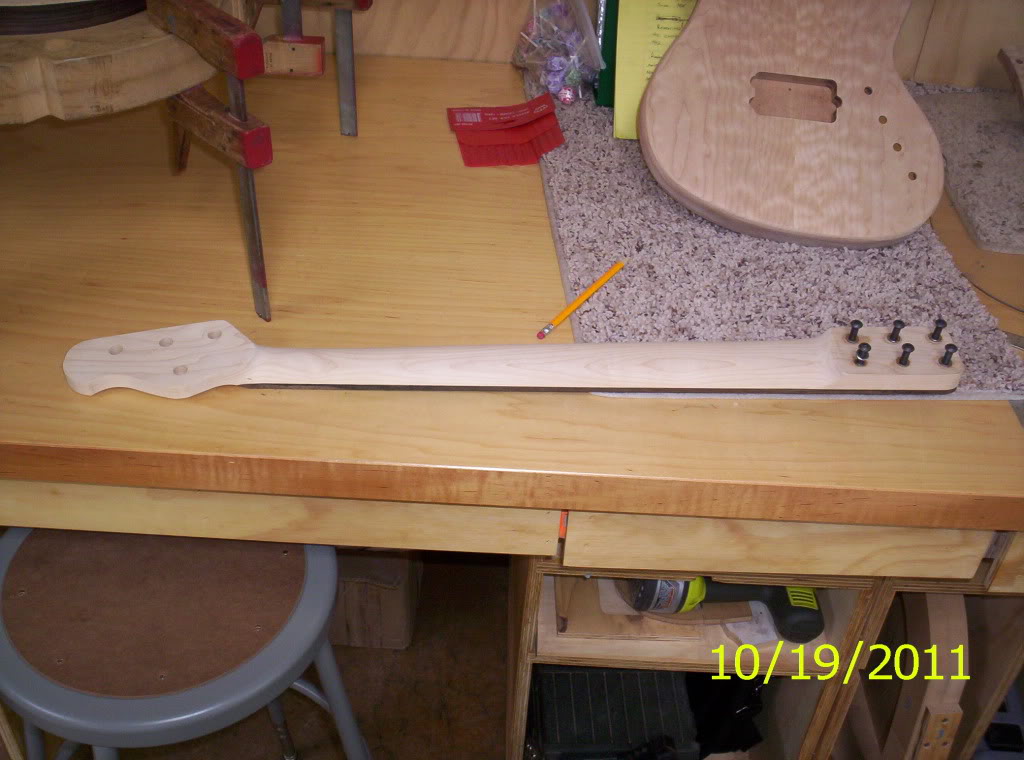
Man! That's a lot of bolts! I will bet that some of you will be jonesing for these next pictures...
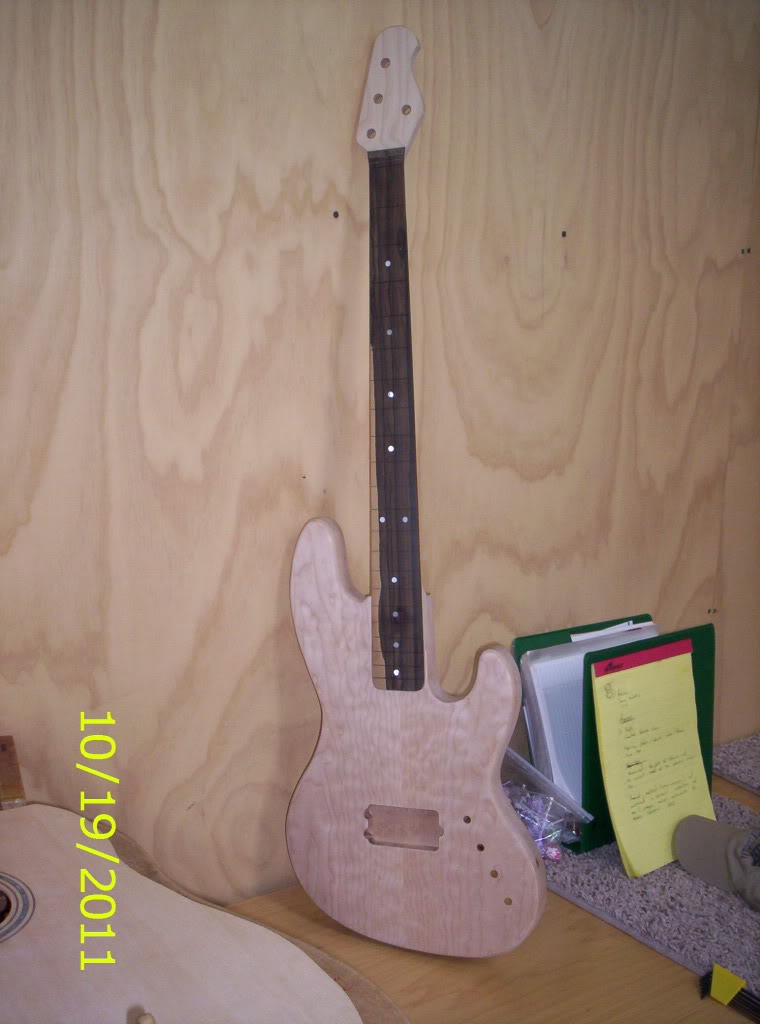
Isn't she pretty!!!!
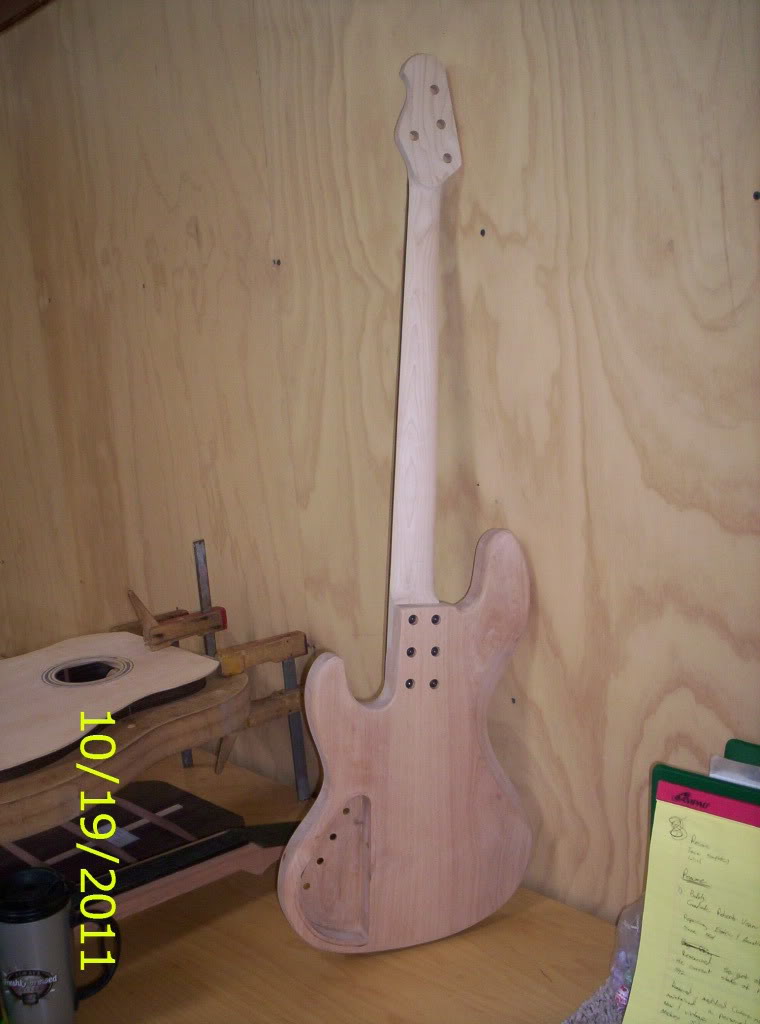
Yep...pretty big! I have not put it on a scale yet, but she is amazingly light! I would guess maybe 5-6 ponds. That will all change soon enough.
Now, today, I concentrated on two things, mainly. Gluing the back to the sides and my acoustic headstock design. I did not get a photograph of the drawing, but, imagine a Martin-style headstock with chrome Grover Rotomatics. It was approved by Josiah, and I am off and running to the next project...
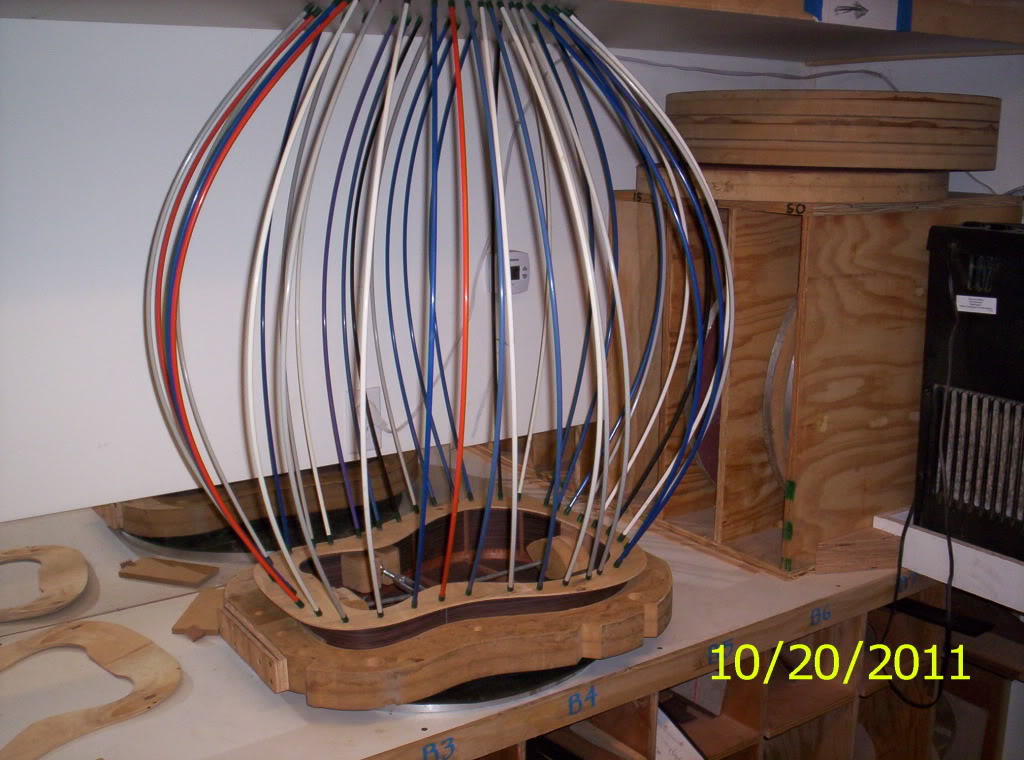
GO-BARS!!!!!
The process of gluing on the back to the side was trickier than one would expect. Not only did you need to glue the kerfing and neck and tail blocks to the back, but, you also needed to mix a paste of mahogany and Titebond, to fill in the gaps between the back braces and the kerfing. This way, the brace would not rattle when resonated, it would improve the appearance, and the joint between the brace and the kerfing would be stronger. Now, with everything, it was a waiting game. There might have been radius forms available, but, no go-bars. Needless to say, I took my time with perfecting the headstock design. When you are ready to clamp, you need to mix the putty, apply the putty, then quickly spread the remaining glue across the kerfing and blocks, clean up what was necessary, line up your center lines with the mold, turn it over, without screwing up your center lines, put the clamping caul over the top side of the kerfing, then begin with the go-bars. I think that I used around 40 go-bars, for about 30 minutes. I did not worry about glue cleanup, as I did not want to risk touching one go bar, and causing the remaining 39 to slip off. Here, you will see what I am talking about...
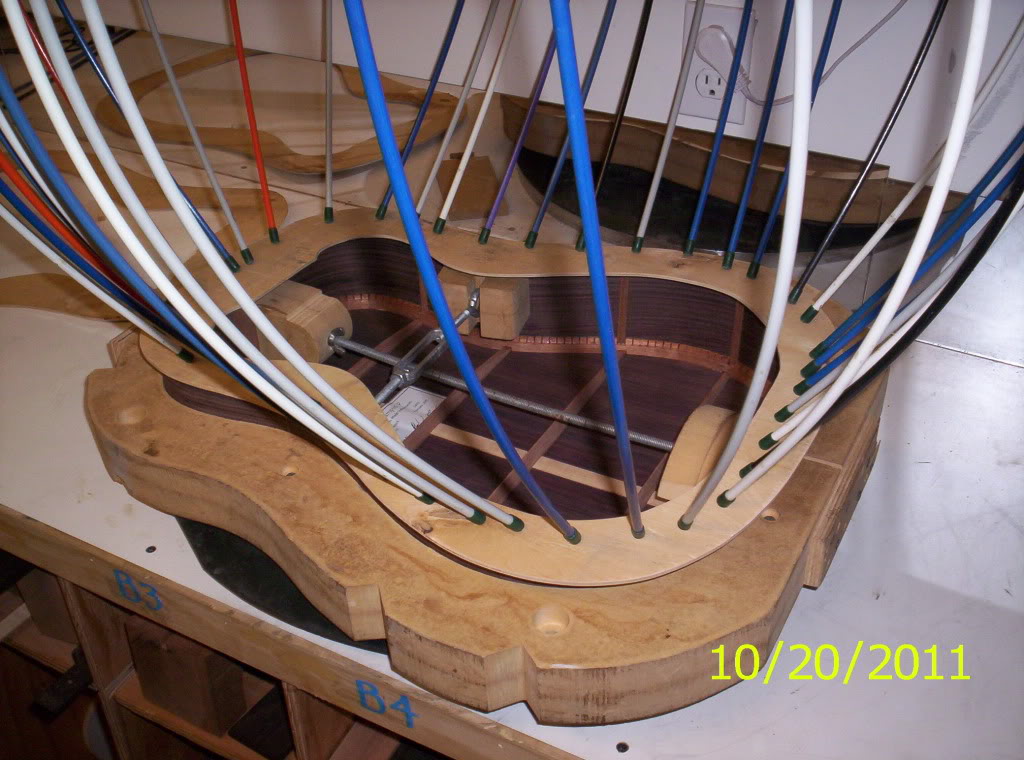
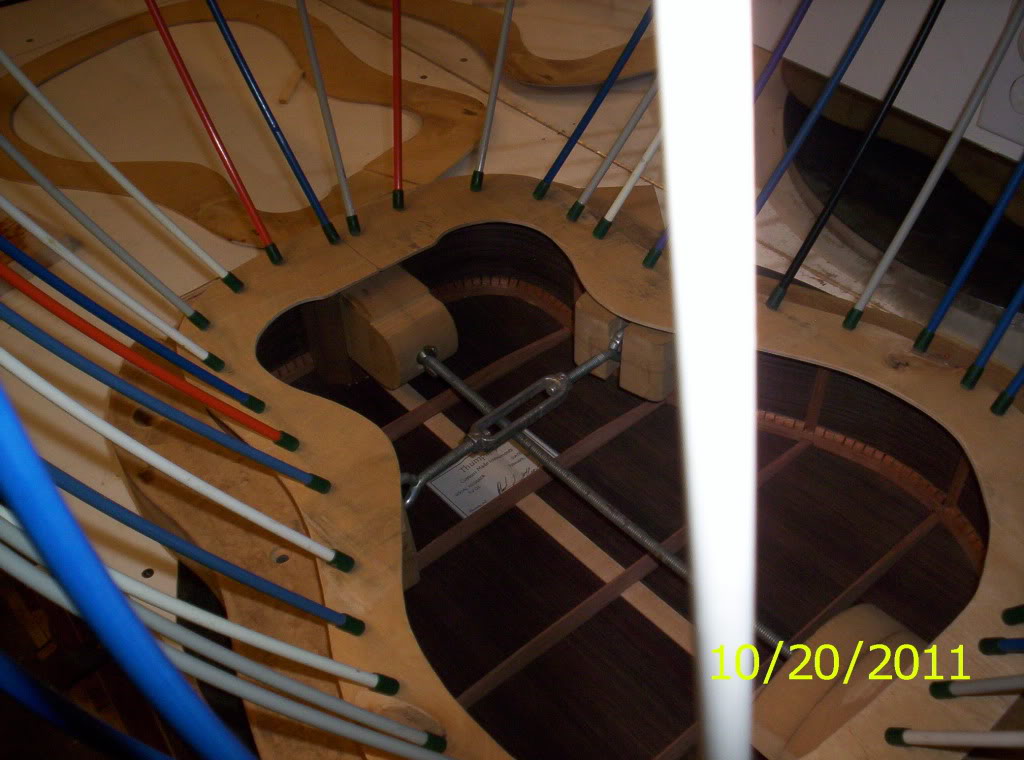
Squirrel cage!!!
When my 30 minutes were up, I carefully took all the bars off and check my seams...
It did not look good.
The corner of the bass lower bout did not glue at all, and, on the bass upper bout, there was a gap, with braces coming out the side.
I sought guidance...The back had somehow shifted 1/8" off of center, throwing everything off. I had to separate the back from the sides and start over.
Three weeks ago, this would have bothered me. Today...no big deal. I even cracked part of the back during the removal process, which was achieved by using a heat gun and a putty knife. Once again, no big deal. A little super glue in the crack, a little scraping, no one will ever know. This is what I now have...
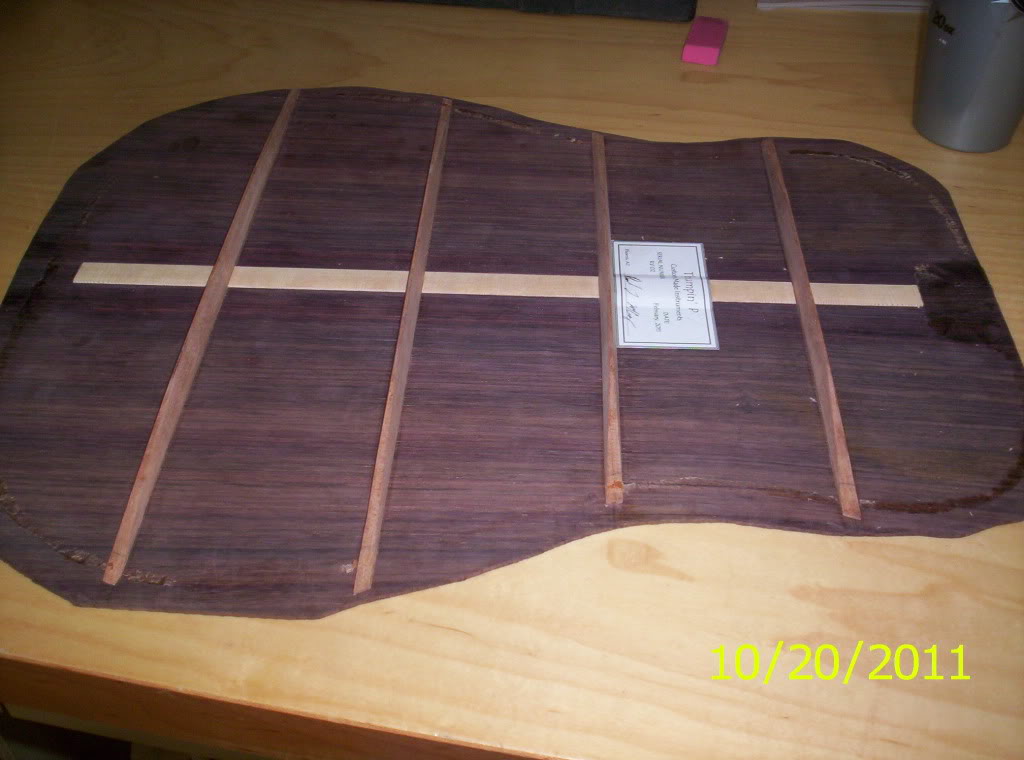
back, with glue crust, which needs to be scraped off.
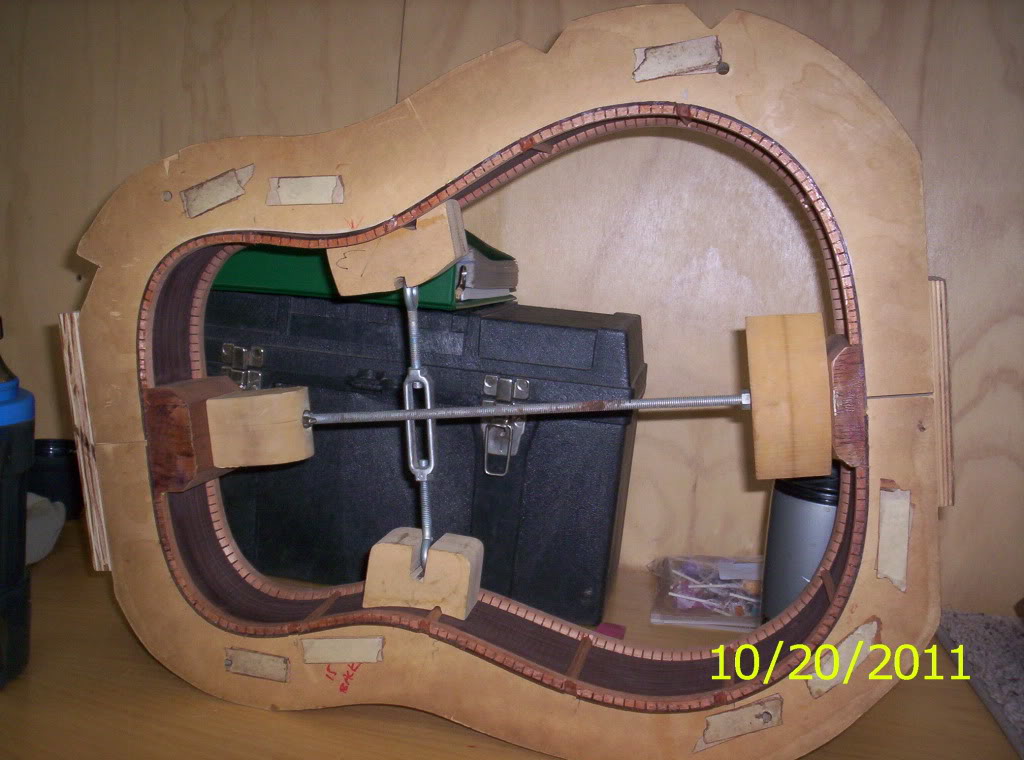
and sides, which needs to be re-radiused, to remove the glue, and I need to re-fit the back to the sides. Again, no big deal, just a small hurdle. By the end of class, I had scraped all the old glue from the back, radiused the sides, and was beginning the process of fitting the sides. I will complete that tomorrow.
And hopefully, we will be allowed to drill the hole for out output jacks tomorrow. I am really looking forward to drilling the last hole in the bass. Power tools make me a little nervous.
Now you guys know all that I know. I hope that you have enjoyed today's installment. Tune in tomorrow for more!
Thumpin_P
I suppose that I need to get everybody caught up. First, we were graded on our overall performance to date. I rounded up all of my wood, displayed it, and we were only being graded on our acoustic progress. But, I thought this would be a good opportunity for an updated photo op. So..,
top fitted to the sides...
back, complete with label, sanded and fitted, ready for gluing...
completed label, signed and glued onto back,
same 'ole acoustic headstock, complete with thumpin' thumb...
We really haven't done anything with the neck yet. I am wondering when we will...
and the big picture... Next...
The sanded body...down to 220 grit, and,
front of the neck, also sanded to 220 grit.
Man! That's a lot of bolts! I will bet that some of you will be jonesing for these next pictures...
Isn't she pretty!!!!
Yep...pretty big! I have not put it on a scale yet, but she is amazingly light! I would guess maybe 5-6 ponds. That will all change soon enough.
Now, today, I concentrated on two things, mainly. Gluing the back to the sides and my acoustic headstock design. I did not get a photograph of the drawing, but, imagine a Martin-style headstock with chrome Grover Rotomatics. It was approved by Josiah, and I am off and running to the next project...
GO-BARS!!!!!
The process of gluing on the back to the side was trickier than one would expect. Not only did you need to glue the kerfing and neck and tail blocks to the back, but, you also needed to mix a paste of mahogany and Titebond, to fill in the gaps between the back braces and the kerfing. This way, the brace would not rattle when resonated, it would improve the appearance, and the joint between the brace and the kerfing would be stronger. Now, with everything, it was a waiting game. There might have been radius forms available, but, no go-bars. Needless to say, I took my time with perfecting the headstock design. When you are ready to clamp, you need to mix the putty, apply the putty, then quickly spread the remaining glue across the kerfing and blocks, clean up what was necessary, line up your center lines with the mold, turn it over, without screwing up your center lines, put the clamping caul over the top side of the kerfing, then begin with the go-bars. I think that I used around 40 go-bars, for about 30 minutes. I did not worry about glue cleanup, as I did not want to risk touching one go bar, and causing the remaining 39 to slip off. Here, you will see what I am talking about...
Squirrel cage!!!
When my 30 minutes were up, I carefully took all the bars off and check my seams...
It did not look good.
The corner of the bass lower bout did not glue at all, and, on the bass upper bout, there was a gap, with braces coming out the side.
I sought guidance...The back had somehow shifted 1/8" off of center, throwing everything off. I had to separate the back from the sides and start over.
Three weeks ago, this would have bothered me. Today...no big deal. I even cracked part of the back during the removal process, which was achieved by using a heat gun and a putty knife. Once again, no big deal. A little super glue in the crack, a little scraping, no one will ever know. This is what I now have...
back, with glue crust, which needs to be scraped off.
and sides, which needs to be re-radiused, to remove the glue, and I need to re-fit the back to the sides. Again, no big deal, just a small hurdle. By the end of class, I had scraped all the old glue from the back, radiused the sides, and was beginning the process of fitting the sides. I will complete that tomorrow.
And hopefully, we will be allowed to drill the hole for out output jacks tomorrow. I am really looking forward to drilling the last hole in the bass. Power tools make me a little nervous.
Now you guys know all that I know. I hope that you have enjoyed today's installment. Tune in tomorrow for more!
Thumpin_P

slowburnaz
Commercial User
ok, just a small detour, it's a good thing it happened in class, so you'll know how to fix it if it ever happens again!
looking good as always, thanks for all the details!
looking good as always, thanks for all the details!
Thanks guys! J, you are exactly right. I am glad that this happened now, and it is truly just a small detour. Hopefully, I will have some more cool pictures and stories to share tonight! Thanks for watching and the feedback!
Thumpin_P
Thumpin_P

If I owned a mogwai, I would keep it in something like this so it wouldn't eat food after midnight.
If I owned a mogwai, I would keep it in something like this so it wouldn't eat food after midnight.
Nice!!! Did not think of that... bringing back some serious memories.
Hey guys!
Another fun-filled day! I really only worked on three major areas today. The output jack, fitting the back to the sides and leveling the fretboard on my electric.
First, I will tell you, rather than show you (as I forgot to take a completed picture...again), that drilling the hole for the output jack was a complete success. I used an older 1" spade bit in my trusty Ryobi Li-Ion cordless drill, burned the pilot hole (remember, I said the bit was old) and proceeded to cut a hole in the body. Perfectly centered. Perfect angle, because I used my 6" ruler, clamped it to 90 degrees with the flat area of my body, then sighted the bit with the ruler. I had a small amount of tear out on the inside of the cavity, which will be hidden by the shielding. You may ask why did I use such a large bit? I am using a Neutrik locking jack for this project, and with the micrometers, I measured .920" at the thickest part. 7/8" would simply not work. Needless to say, I will post picture of the hole, the jack in place, and the 6" ruler trick, for those interested, on Monday.
After the jack, I noticed people were receiving their pickups today, and I was no exception:
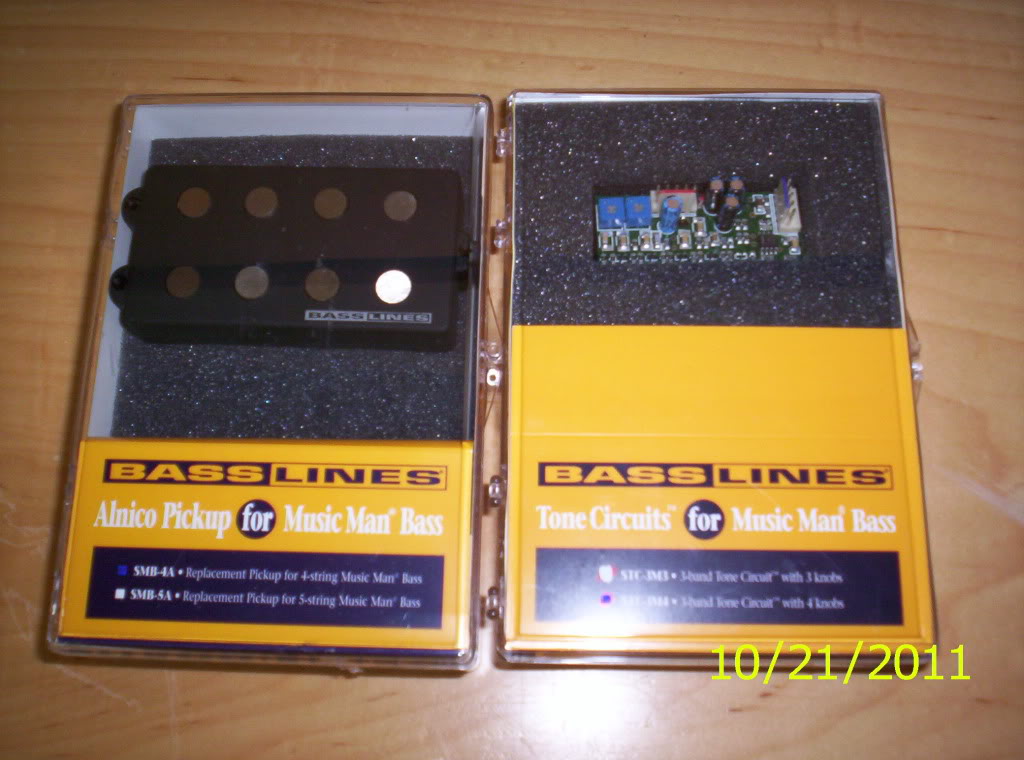
SD Alnico MM pickup, along with a four knob, 3 band EQ. Awesome! I tried fitting the pickup in the cavity, but, alas, the cavity is too small. I consulted with Kris and asked the best route. He asked about my Dremel accessory collection, looking for one particular bit... the 8.75 mm sanding drum. I have it at my apartment, so I may work on it Monday, also...
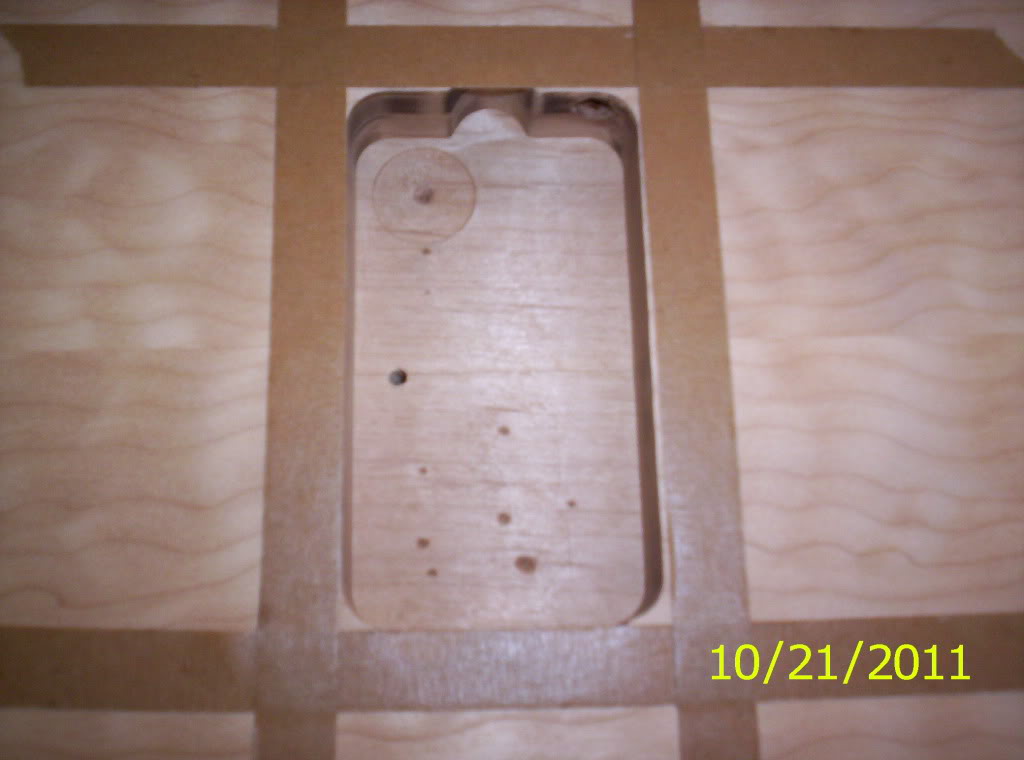
Here is the game plan, though. I will sand the corners larger, until it meets the tape, then smooth out the sides. This will take a little patience and time, as you can see by this photo, the pickup is larger than the tape lines.
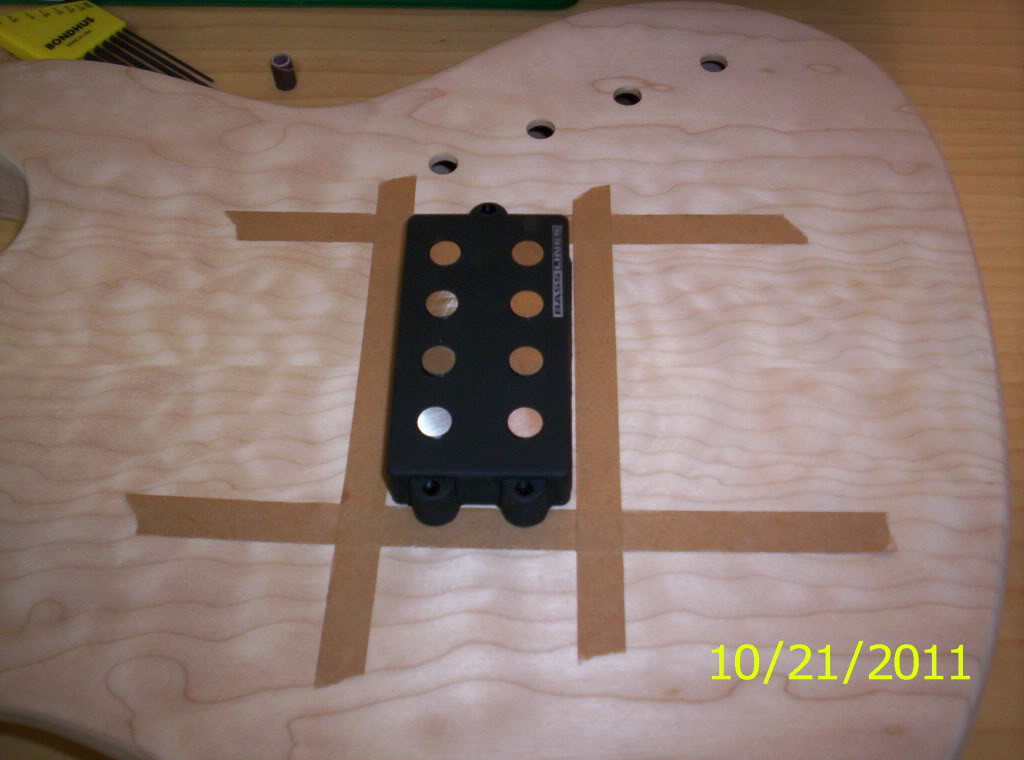
Kris then called for a lecture, regarding fretting. We started prepping the neck, by adjusting the truss rod to straighten the neck as much as possible. The next step was to level the fingerboard. This way, once we actually install the frets, there will be little need for leveling the frets, in theory. My personal experience, along with other people, was that the rods were impossible turn. This could be the fact that there is electrical tape wrapped around the rod. This was an experiment, by the school, to reduce vibration, and to facilitate easy removal of the rod, if necessary. My experience, though, required that I use pliers for extra torque just to be able to turn the rod 1/8 of a turn. This is not normal by any stretch of the term...trust me! Several of the students voiced their concern, but, I don't know if anything can be changed at this point. I did finally get the neck straight, but I will still need to sand the board a little.
Speaking of fretting, I promised pictures of the homemade fretting cauls, which were provided.
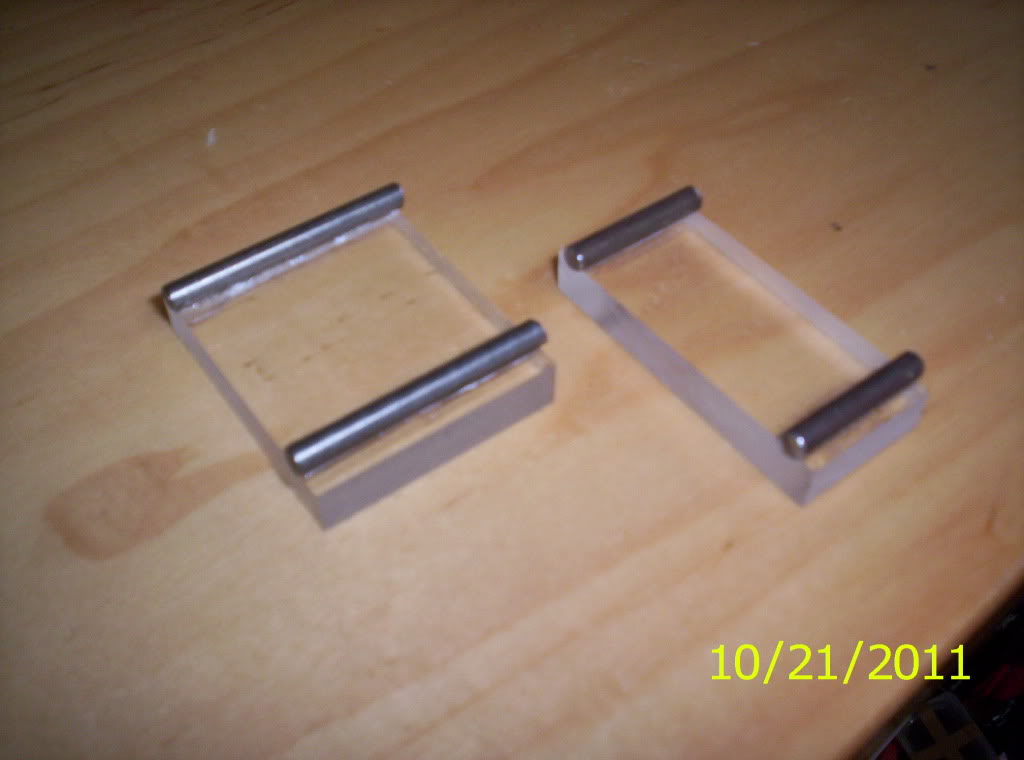
Big one for first through 12th, small one for 12 -??? Simple plexiglass with two grooves milled into it. 3/16" cold rolled steel stock super glued into the grooves and there you go!
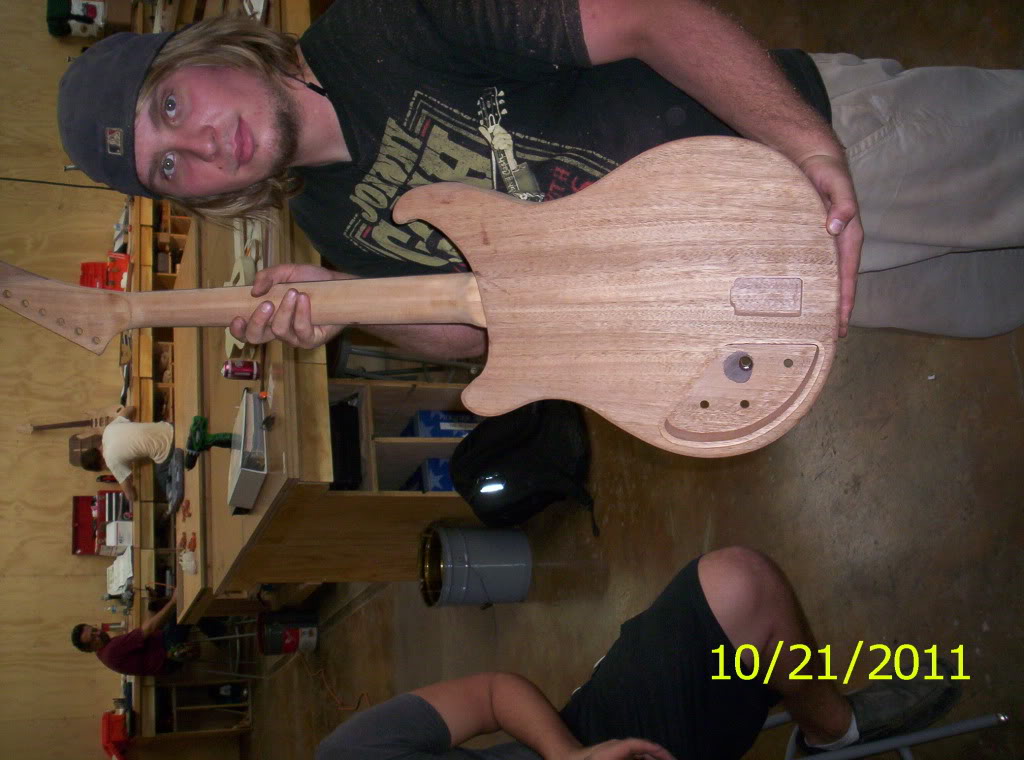
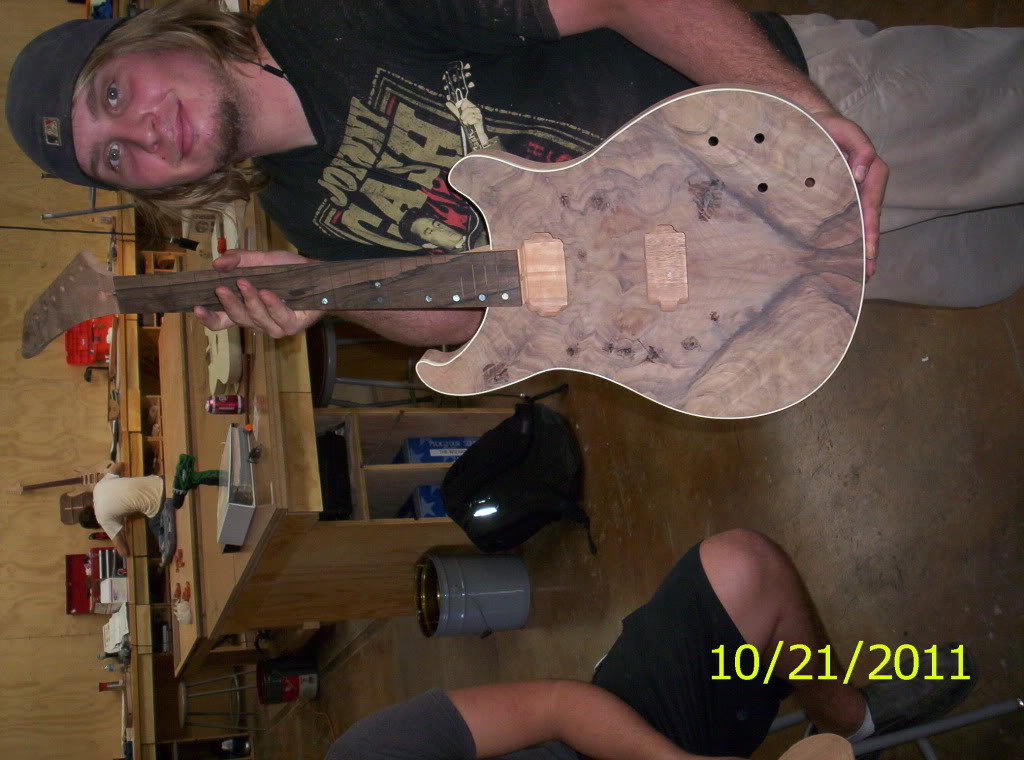
Before I start on my last project of the day, I need to feature my friend Scotty, He did a bang-up job with routing his battery box, and was very proud of his overall progress, which was slowed down significantly, by a truss rod busting through his first neck, during carving. He said, "hey, you should put my guitar on here!" To which I replied " You got it!"
Here you go, Scotty!
and dig this walnut!!!
I am very happy with the caliber of people in my class, I feel lucky to be around so many talented people, willing to share ideas and encourage each other.
Well, with that being said, I must move on to the last portion of the day, fitting the back to the sides.
I decided to get very precise this time, as I am slowly running out of room to radius the sides. I don't want to end up with a thinline! I lined up the center lines again, marked where I needed to, measured, and this time, used a straight edge between the marks on both sides of the body.
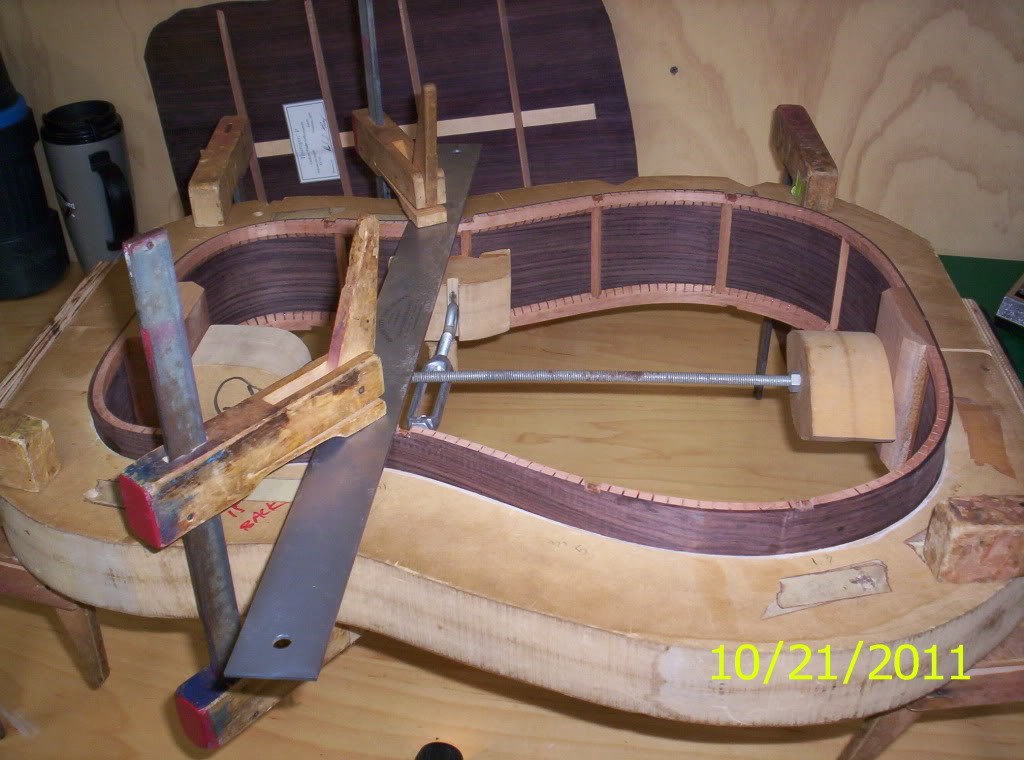
with my marks lined up, I cut little notches in the original slots. I thought, if the braces are straight, then using a straight edge, not only for measuring, but also as a fence for the razor saw, which I used to mark the exact location of the dremel cuts, would be ideal.
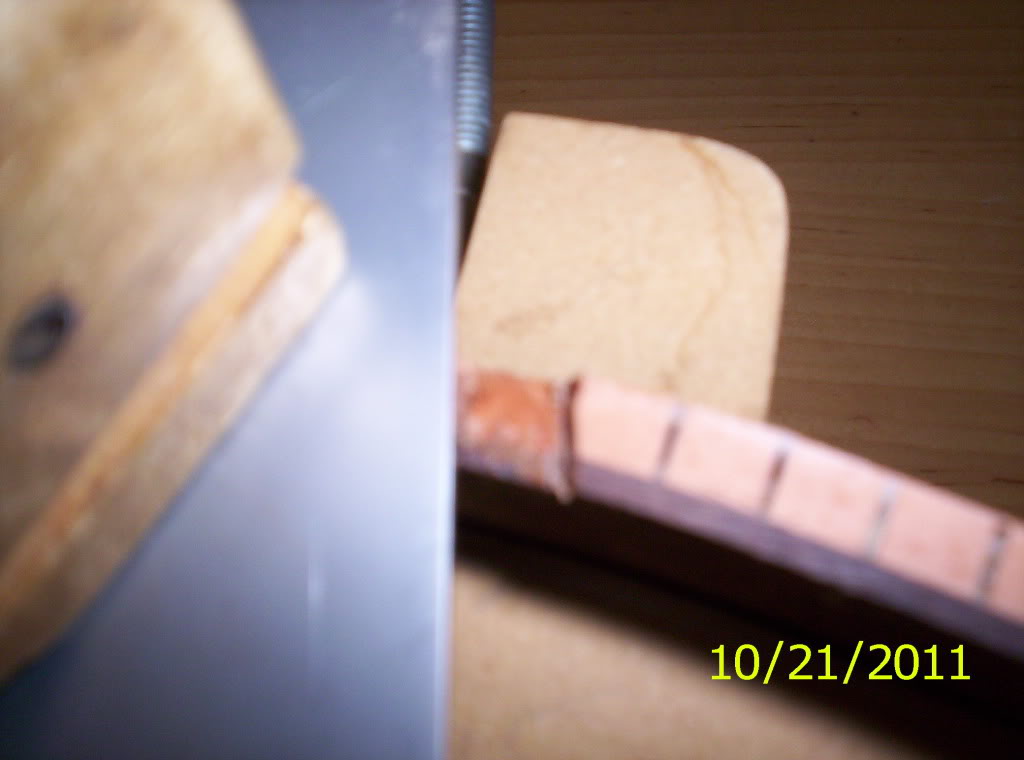
The concept worked, but, after I milled out the necessary wood, and checked the fit, I double checked the center lines. I was off again. I am done using the dremel. I am afraid of taking way too much wood out. Monday, I will use the needle files and get it sweet. I also have a side project, involving an original Electro-Harmonix Bass Synthesizer. I will keep you posted on that later. That's all I got for today. Everyone be safe, have fun this weekend, and thanks again for watching!
Thumpin_P
Another fun-filled day! I really only worked on three major areas today. The output jack, fitting the back to the sides and leveling the fretboard on my electric.
First, I will tell you, rather than show you (as I forgot to take a completed picture...again), that drilling the hole for the output jack was a complete success. I used an older 1" spade bit in my trusty Ryobi Li-Ion cordless drill, burned the pilot hole (remember, I said the bit was old) and proceeded to cut a hole in the body. Perfectly centered. Perfect angle, because I used my 6" ruler, clamped it to 90 degrees with the flat area of my body, then sighted the bit with the ruler. I had a small amount of tear out on the inside of the cavity, which will be hidden by the shielding. You may ask why did I use such a large bit? I am using a Neutrik locking jack for this project, and with the micrometers, I measured .920" at the thickest part. 7/8" would simply not work. Needless to say, I will post picture of the hole, the jack in place, and the 6" ruler trick, for those interested, on Monday.
After the jack, I noticed people were receiving their pickups today, and I was no exception:
SD Alnico MM pickup, along with a four knob, 3 band EQ. Awesome! I tried fitting the pickup in the cavity, but, alas, the cavity is too small. I consulted with Kris and asked the best route. He asked about my Dremel accessory collection, looking for one particular bit... the 8.75 mm sanding drum. I have it at my apartment, so I may work on it Monday, also...
Here is the game plan, though. I will sand the corners larger, until it meets the tape, then smooth out the sides. This will take a little patience and time, as you can see by this photo, the pickup is larger than the tape lines.
Kris then called for a lecture, regarding fretting. We started prepping the neck, by adjusting the truss rod to straighten the neck as much as possible. The next step was to level the fingerboard. This way, once we actually install the frets, there will be little need for leveling the frets, in theory. My personal experience, along with other people, was that the rods were impossible turn. This could be the fact that there is electrical tape wrapped around the rod. This was an experiment, by the school, to reduce vibration, and to facilitate easy removal of the rod, if necessary. My experience, though, required that I use pliers for extra torque just to be able to turn the rod 1/8 of a turn. This is not normal by any stretch of the term...trust me! Several of the students voiced their concern, but, I don't know if anything can be changed at this point. I did finally get the neck straight, but I will still need to sand the board a little.
Speaking of fretting, I promised pictures of the homemade fretting cauls, which were provided.
Big one for first through 12th, small one for 12 -??? Simple plexiglass with two grooves milled into it. 3/16" cold rolled steel stock super glued into the grooves and there you go!
Before I start on my last project of the day, I need to feature my friend Scotty, He did a bang-up job with routing his battery box, and was very proud of his overall progress, which was slowed down significantly, by a truss rod busting through his first neck, during carving. He said, "hey, you should put my guitar on here!" To which I replied " You got it!"
Here you go, Scotty!
and dig this walnut!!!
I am very happy with the caliber of people in my class, I feel lucky to be around so many talented people, willing to share ideas and encourage each other.
Well, with that being said, I must move on to the last portion of the day, fitting the back to the sides.
I decided to get very precise this time, as I am slowly running out of room to radius the sides. I don't want to end up with a thinline! I lined up the center lines again, marked where I needed to, measured, and this time, used a straight edge between the marks on both sides of the body.
with my marks lined up, I cut little notches in the original slots. I thought, if the braces are straight, then using a straight edge, not only for measuring, but also as a fence for the razor saw, which I used to mark the exact location of the dremel cuts, would be ideal.
The concept worked, but, after I milled out the necessary wood, and checked the fit, I double checked the center lines. I was off again. I am done using the dremel. I am afraid of taking way too much wood out. Monday, I will use the needle files and get it sweet. I also have a side project, involving an original Electro-Harmonix Bass Synthesizer. I will keep you posted on that later. That's all I got for today. Everyone be safe, have fun this weekend, and thanks again for watching!
Thumpin_P

Clearly, my work space is missing a bag of candy. Thanks so much for enlightening me on that point. I shall rectify it immediately.
Can you even call it a workspace without one?
Can you even call it a workspace without one?
The answer can only be no.
Thanks guys! I laughed by butt off! I am trying to quit smoking, not doing too well at the moment. But, It does help. We only get three breaks throughout the day, so I go through quite a few "dum-dums" in the period of my ten hours. Eamon (another student) asked me yesterday " So you work on coffee and lollipops...?", to which I replied "yep" I think he was surprised, he smiled to the point of holding back laughter.
Sorry for the delay, guys...
I have two days to catch up on, and a lot of pictures to share...
First off, I have glued the back onto the sides...again. This time, I drew the center line to where I could see it, while it was clamped up. After everything checked out, I started... When I took the frame out from the go-bars, it was perfect!!!
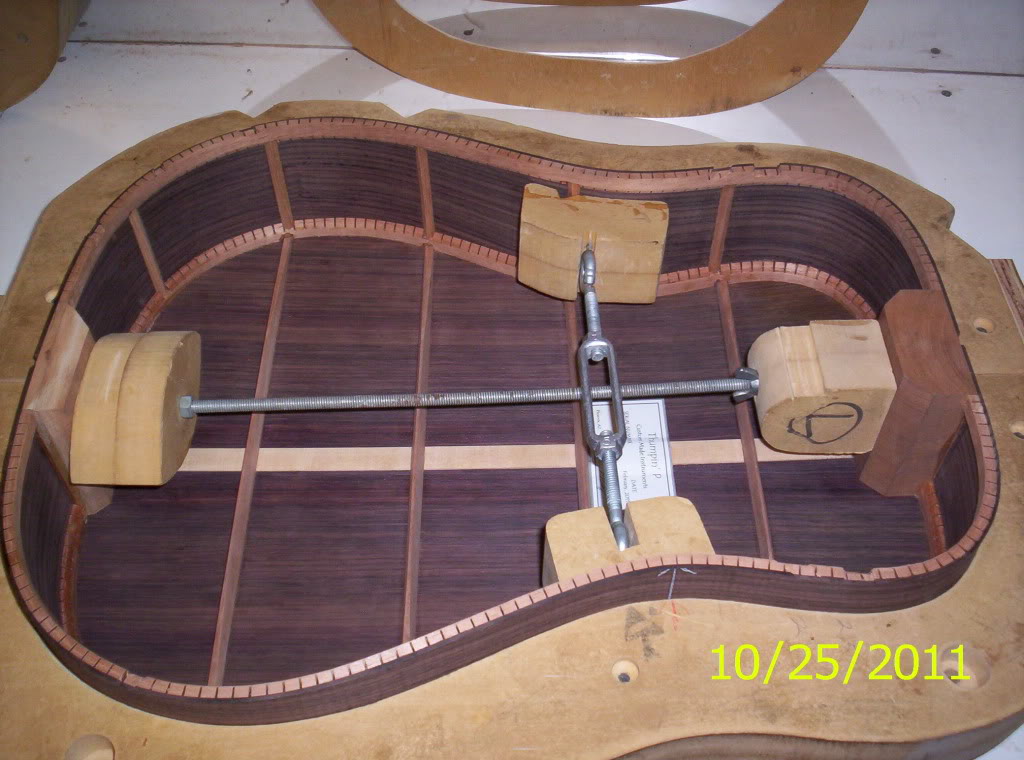
No gaps, solid as a rock!
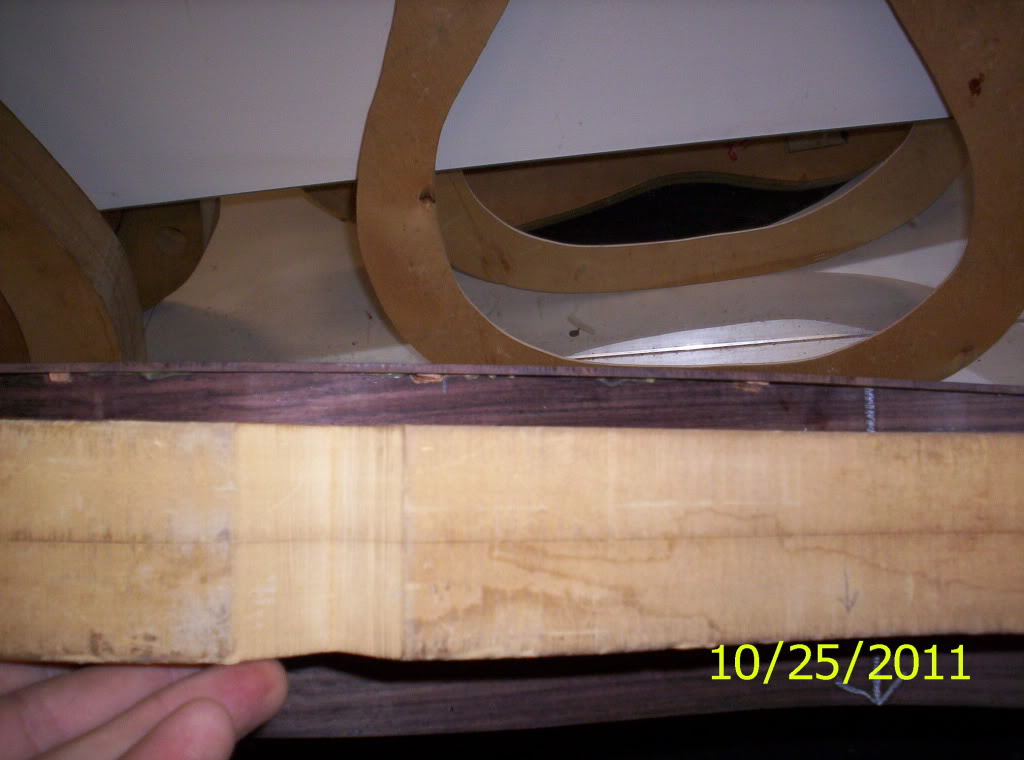
Next, was leveling the fretboard...
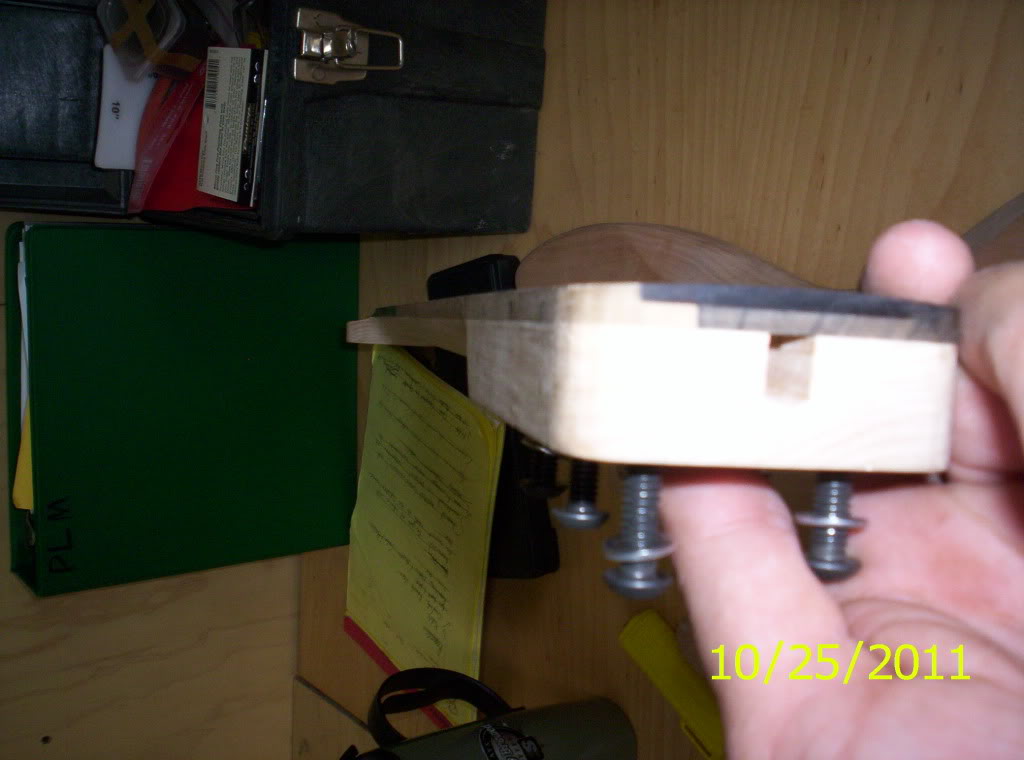
Done!!!
I then sanded it to 220 grit, in preparation for fretting. Something very cool happened, I put a gloss on the fretboard. I tried to take a shot of it, but it did not come through..
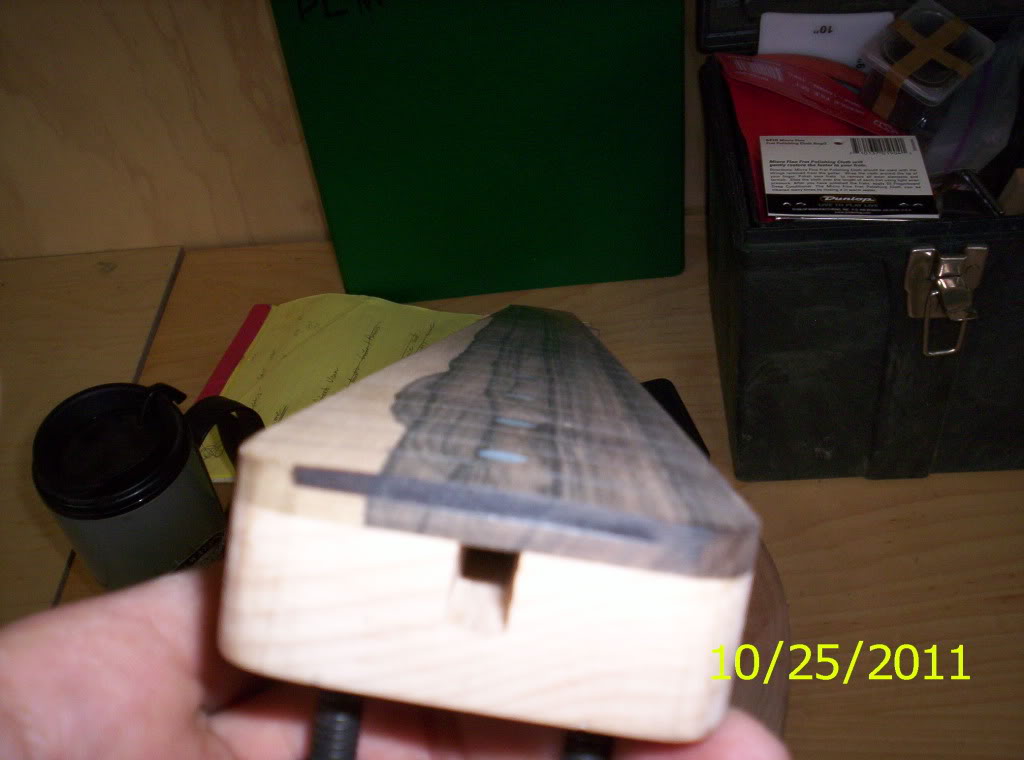
Now.. on to today!
I asked about string through ferrules, is that before or after finish. ( I kinda knew the answer, but just wanted to be sure before drilling holes in my bass) The following is a quick tour of that process...
First off, locate the bridge mounting holes and the string through holes...
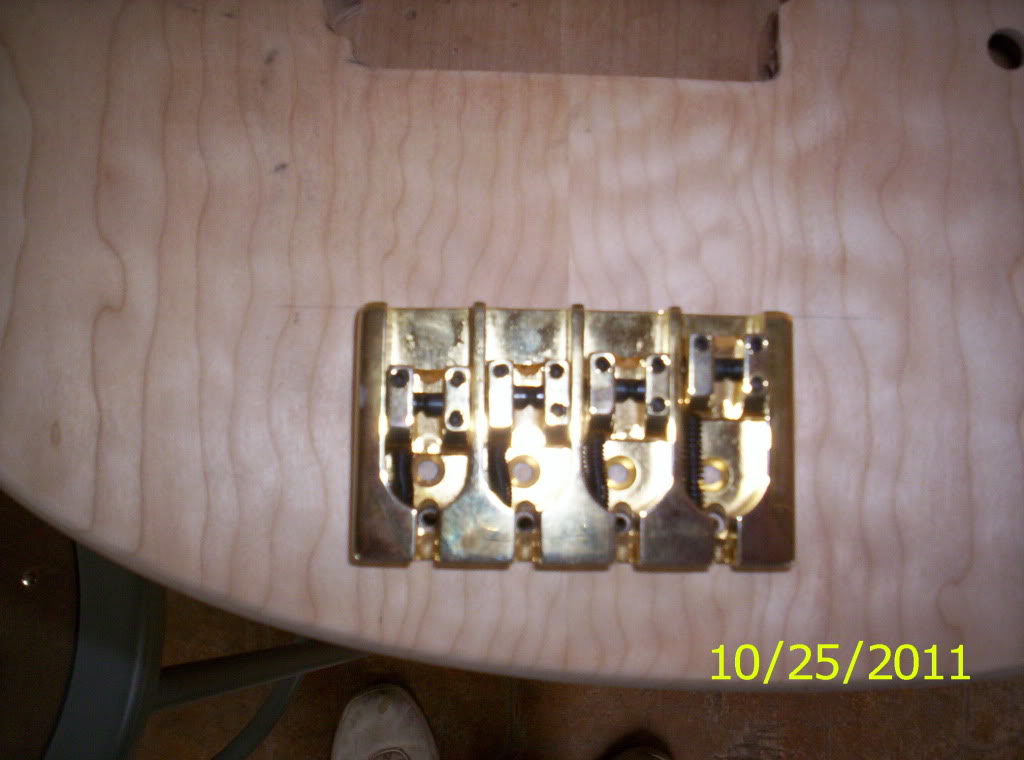
Don't worry, I am not doing gold, but I am doing A-style...next was to drill 1/8" holes through the body.
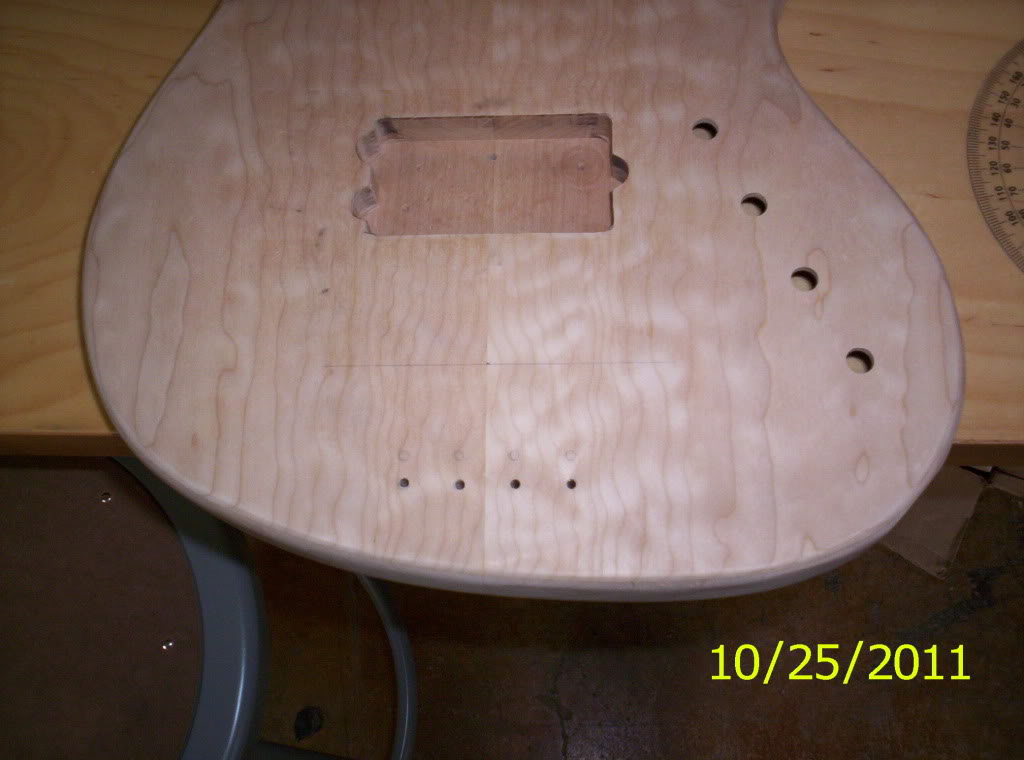
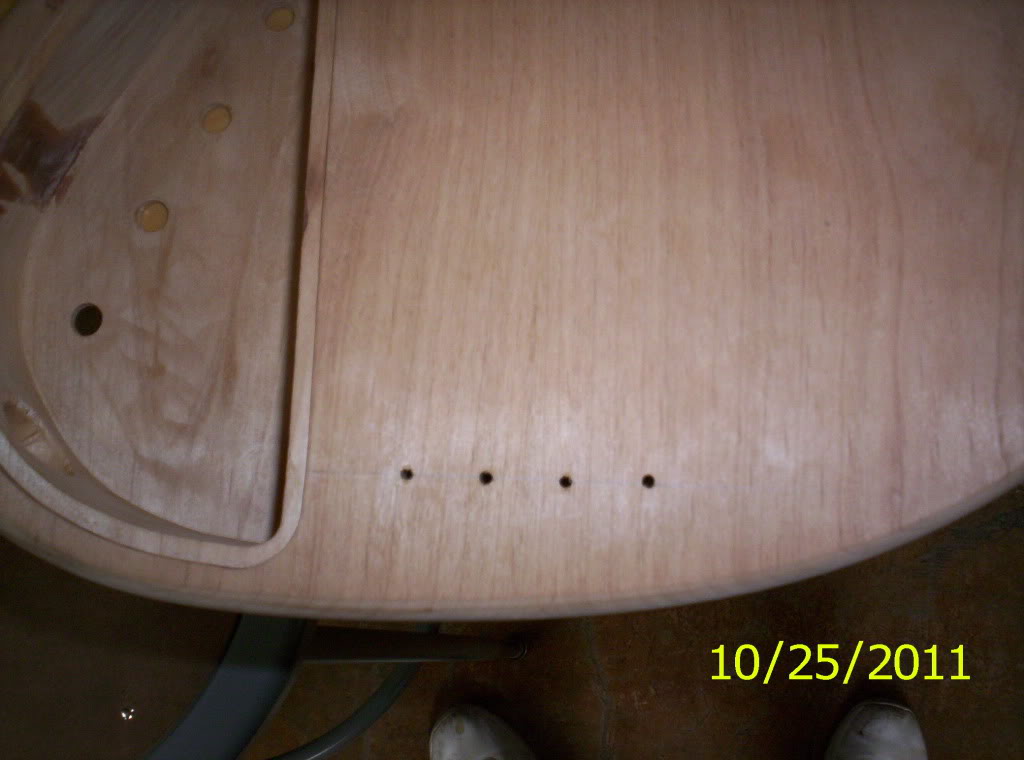
success!!! Next, I needed to make a template for the four ferrule holes. They needed to be spaced with the string spacing, which is .750. Drill holes for the ferrules in the template, then line up template with center line and perpendicular line, connecting string through holes...
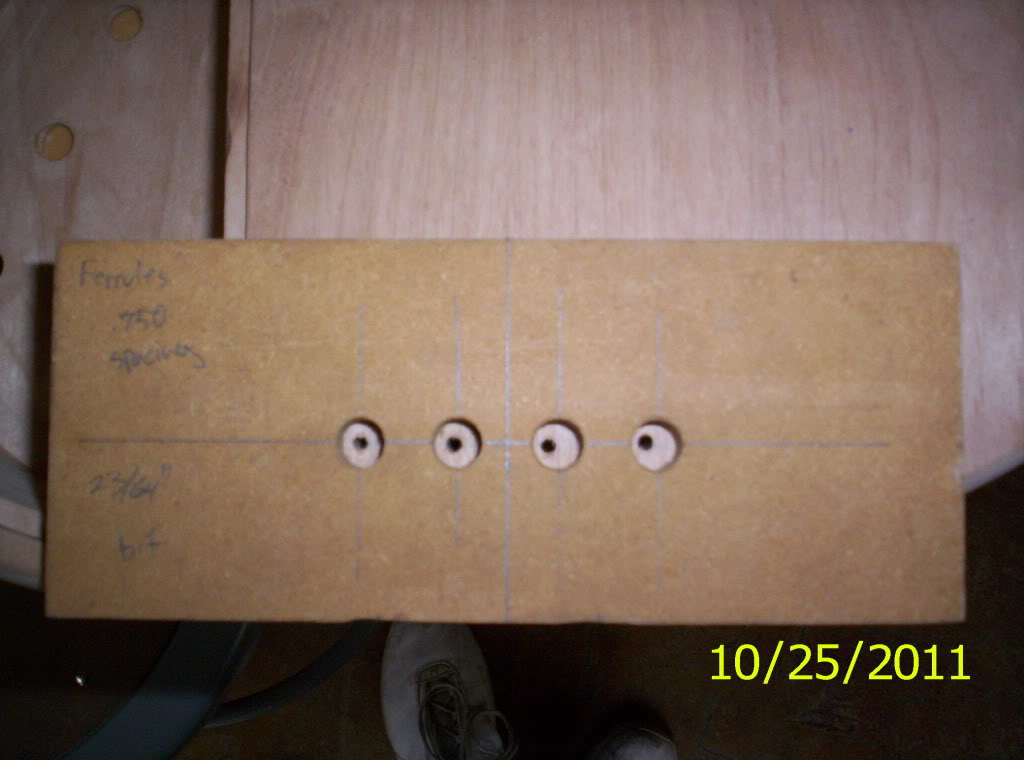
Measure the depth of the ferrules, the thickness of the template, and tape off the bit. Drill hole with a clean conscience, you have done all the right prep work...
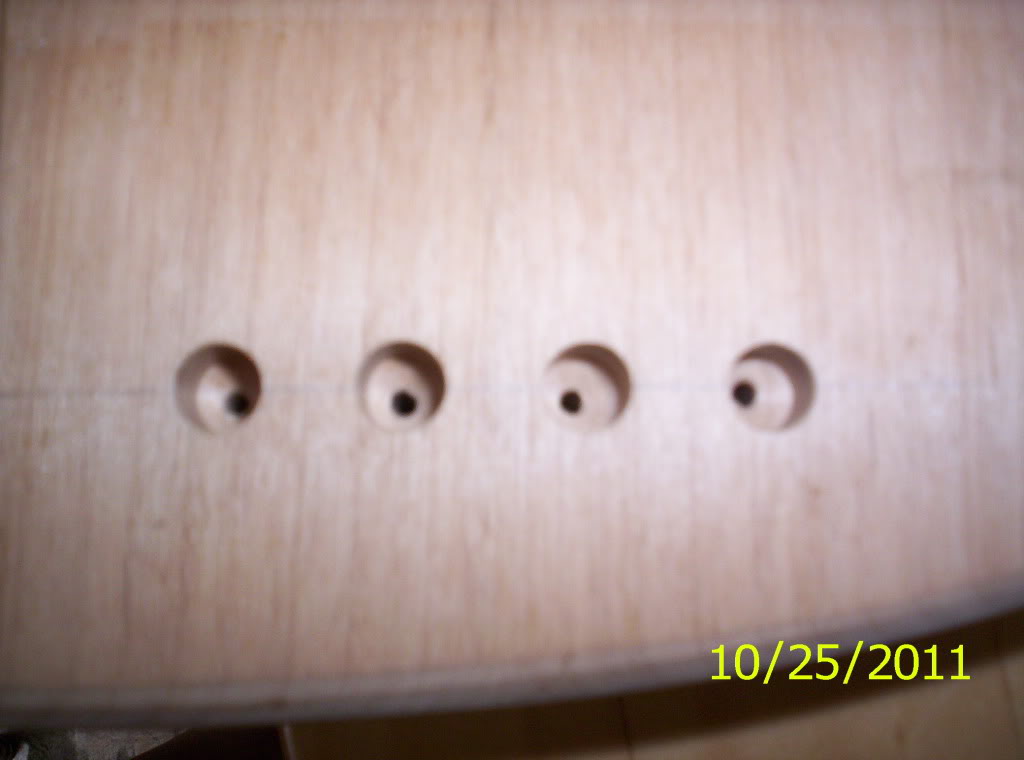
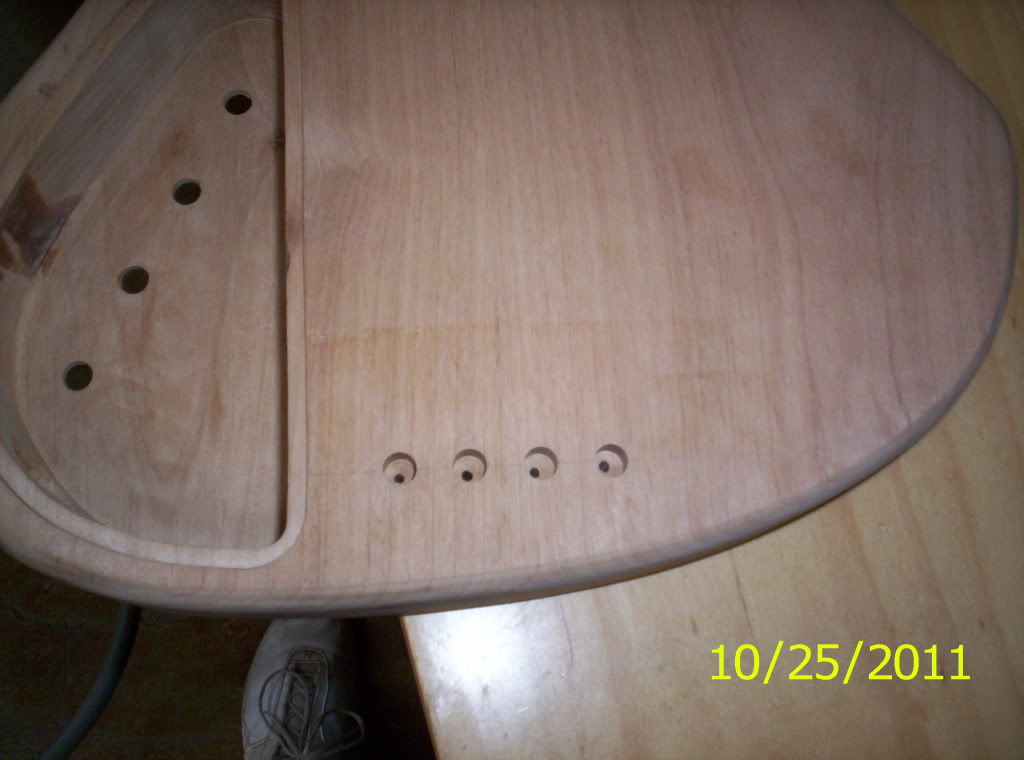
Even Kris was smiling at the sight of this...I am happy!
Next was prep for fretting. We used a dremel with a jeweler's burr, so that we could widen the fret slots. We checked by using a piece of scrap fret wire. If it fit well enough to lift the entire neck, it was the right fit. After the width was taken care of, we needed to chamfer the top edges of the fret slot, to aid in re-frets.
Here are the results...
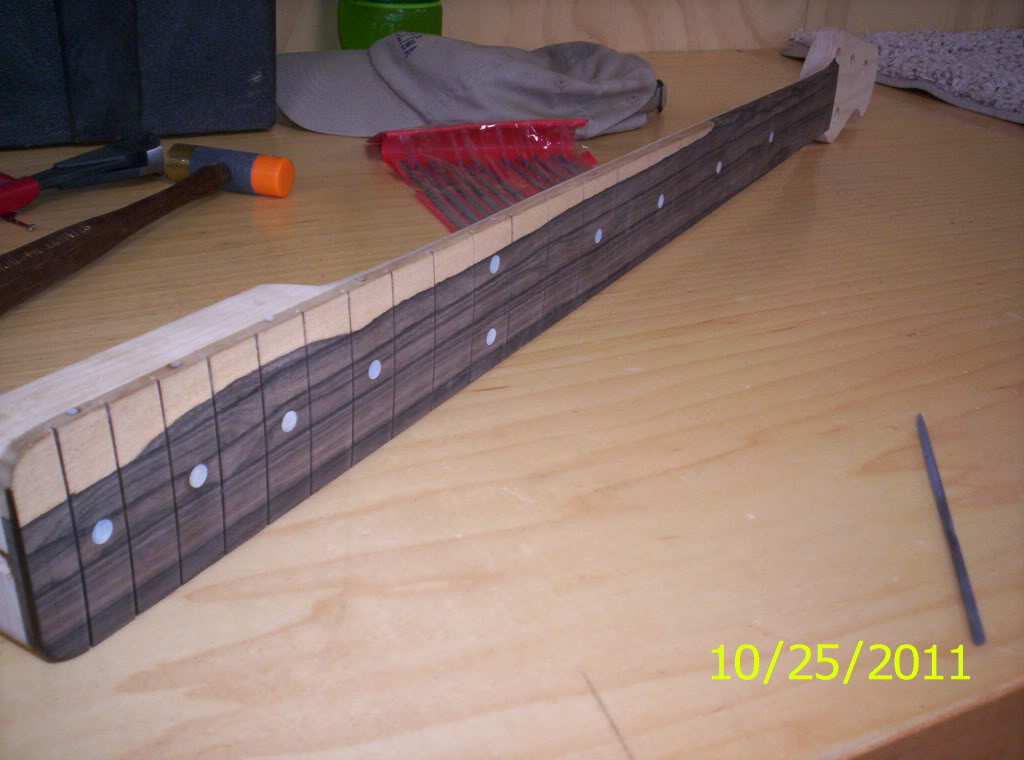
Here's the first one...twenty to go!!!
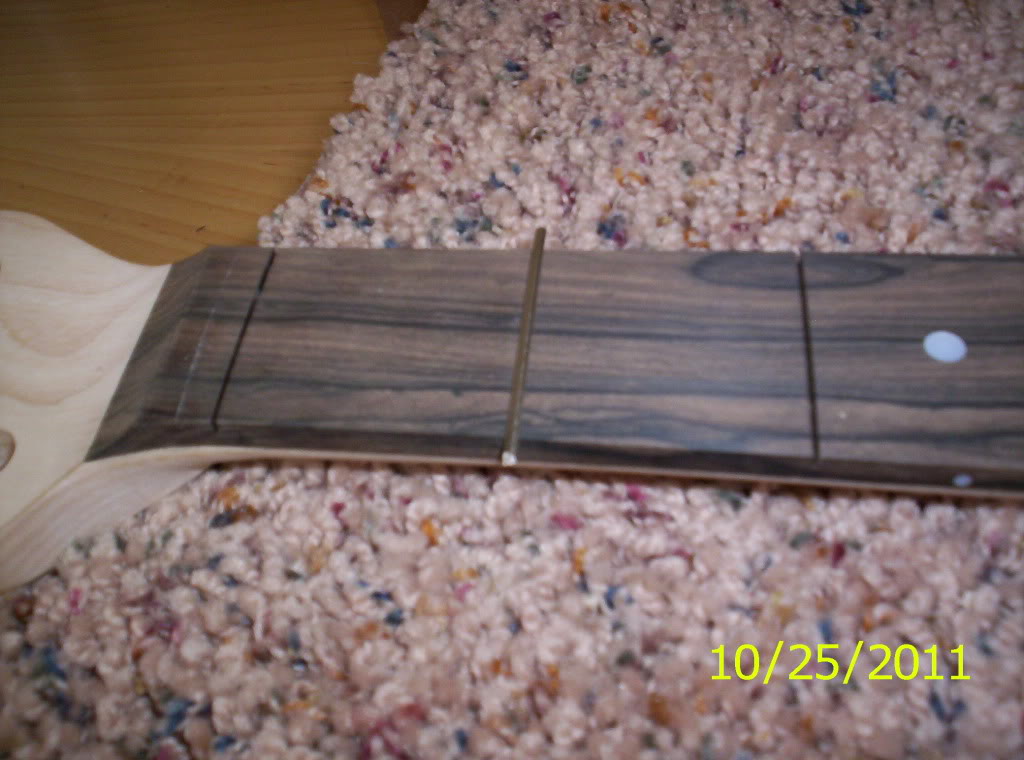
and after clipping the ends...
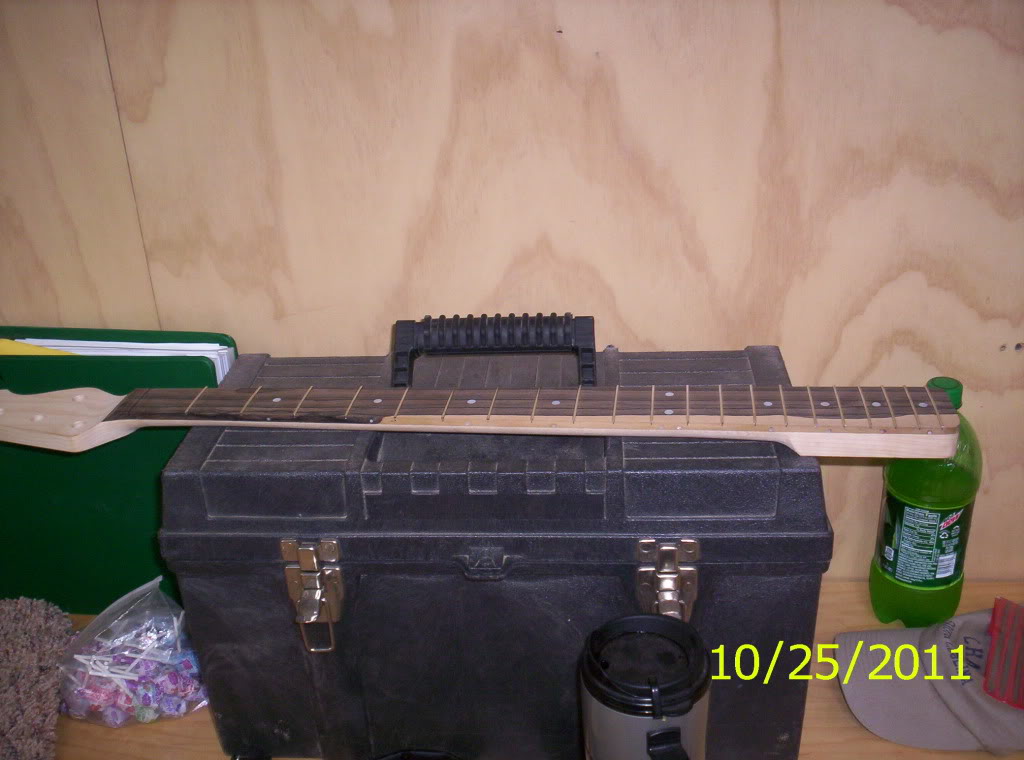
I am liking where this is going...
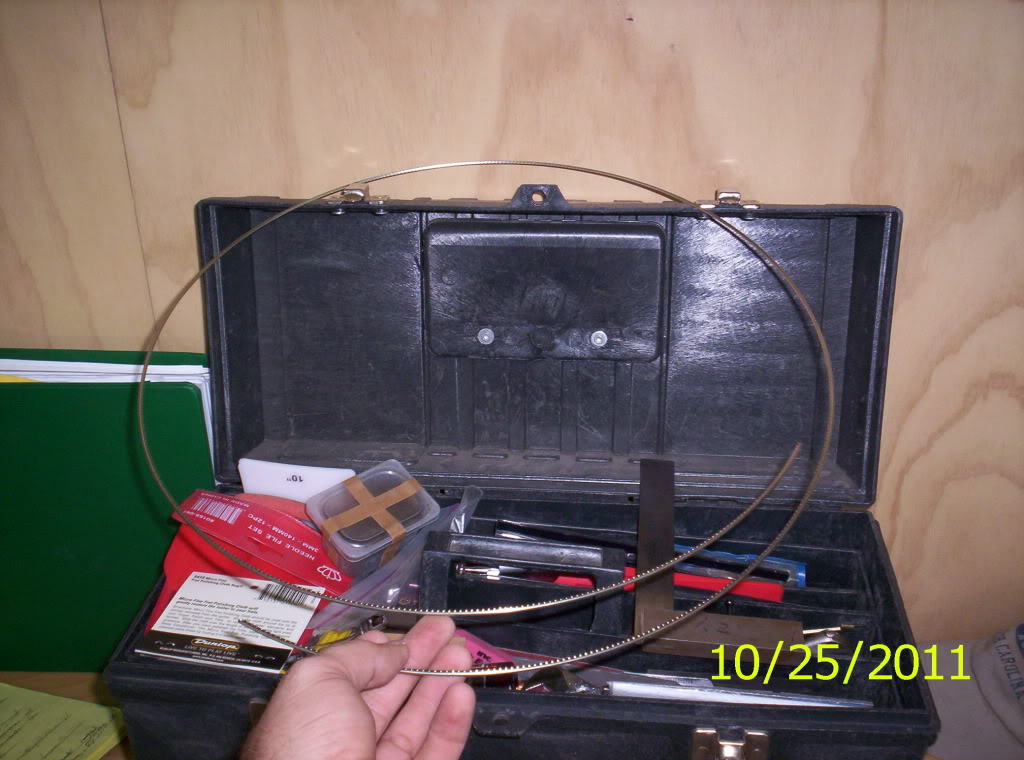
and one quick one for any noobs...this is how bulk fret wire comes to you, unless it is in straight pieces.
While waiting for the next lecture on fretting. I decided to begin my finish sanding. I started with the body at 220 grit. I then needed to raise the grain and sand to 220 again. Here's a nice shot wet with water... Love the quilt!
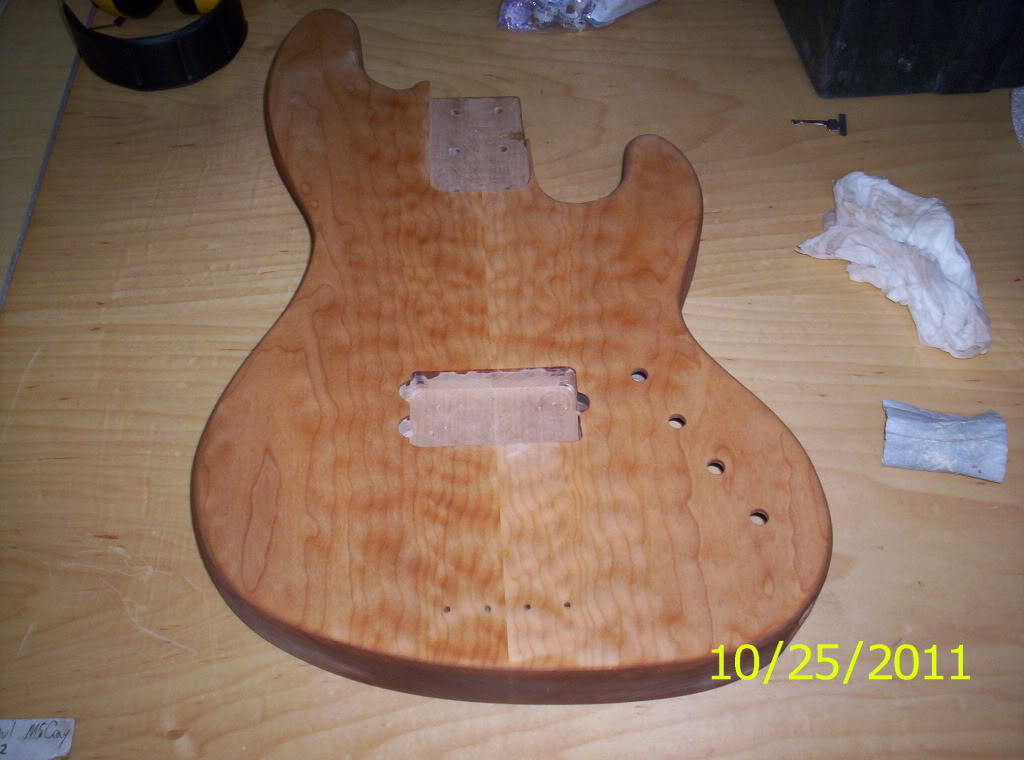
After the first soak, I needed the AZ sun to dry it out. After that, it was sanding!!!
The second and third soak and sand. I have a few scratches to still get out, I am working on that... tomorrow I will continue with fretting, gluing the top on, and finish sanding.
Thanks for watching!
Thumpin_P
I have two days to catch up on, and a lot of pictures to share...
First off, I have glued the back onto the sides...again. This time, I drew the center line to where I could see it, while it was clamped up. After everything checked out, I started... When I took the frame out from the go-bars, it was perfect!!!
No gaps, solid as a rock!
Next, was leveling the fretboard...
Done!!!
I then sanded it to 220 grit, in preparation for fretting. Something very cool happened, I put a gloss on the fretboard. I tried to take a shot of it, but it did not come through..
Now.. on to today!
I asked about string through ferrules, is that before or after finish. ( I kinda knew the answer, but just wanted to be sure before drilling holes in my bass) The following is a quick tour of that process...
First off, locate the bridge mounting holes and the string through holes...
Don't worry, I am not doing gold, but I am doing A-style...next was to drill 1/8" holes through the body.
success!!! Next, I needed to make a template for the four ferrule holes. They needed to be spaced with the string spacing, which is .750. Drill holes for the ferrules in the template, then line up template with center line and perpendicular line, connecting string through holes...
Measure the depth of the ferrules, the thickness of the template, and tape off the bit. Drill hole with a clean conscience, you have done all the right prep work...
Even Kris was smiling at the sight of this...I am happy!
Next was prep for fretting. We used a dremel with a jeweler's burr, so that we could widen the fret slots. We checked by using a piece of scrap fret wire. If it fit well enough to lift the entire neck, it was the right fit. After the width was taken care of, we needed to chamfer the top edges of the fret slot, to aid in re-frets.
Here are the results...
Here's the first one...twenty to go!!!
and after clipping the ends...
I am liking where this is going...
and one quick one for any noobs...this is how bulk fret wire comes to you, unless it is in straight pieces.
While waiting for the next lecture on fretting. I decided to begin my finish sanding. I started with the body at 220 grit. I then needed to raise the grain and sand to 220 again. Here's a nice shot wet with water... Love the quilt!
After the first soak, I needed the AZ sun to dry it out. After that, it was sanding!!!
The second and third soak and sand. I have a few scratches to still get out, I am working on that... tomorrow I will continue with fretting, gluing the top on, and finish sanding.
Thanks for watching!
Thumpin_P

Musiclogic
Commercial User
- Aug 6, 2005
- 6,505
- 75
- 60
- Disclosures
- Owner/Builder: HJC Customs USA, The Cool Lute, C G O

- Aug 15, 2011
- 571
- 171
- Disclosures
- Owner/Luthier:RoseBud Basses & Guitars LLC

Your in the home stretch. soon there will be nitro
Loven the thread, and the guitars.
AMEN!!!!
Well... today was a wonderful day, I got so much accomplished, but, you guys will never see it. I felt like such a goober, I forgot my memory card for my camera. Long story short, the top is glued onto my acoustic. The excess is trimmed from the top and back, and it is now flush with the sides. We took the spreaders out, and took them out of the molds. Woo Hoo!!! I also finished gluing the frets in on my bass, we had several short lectures about dressing the frets. I will probably bevel the edges tomorrow, along with some other stuff. Gotta get going to dinner now, talk to you guys later.
Thanks for watching...
Thumpin_P
Thanks for watching...
Thumpin_P
Latest posts
-

-
 Would you play gigs with a band that doesn't have a great PA?
- Latest: Thumpin6string
-

-

-