Wait, what happened to the tele? I'm confused. Please show more of the tele build! It's awesome!

Enjoy the benefits of a premium membership!
Upgrade Account
-
TalkBass has been independent since 1998. Add your voice.
Create a free account to reply to discussions, view embedded media, and browse with fewer display ads.
Join free Log in
Want zero display ads or expanded classifieds tools? Compare plans.
You are using an out of date browser. It may not display this or other websites correctly.
You should upgrade or use an alternative browser.
You should upgrade or use an alternative browser.
Roberto-Venn: The Dream Starts...
- Thread starter Thumpin_P
- Start date
More options
Who Replied?
Wait, what happened to the tele? I'm confused. Please show more of the tele build! It's awesome!
The Tele was a three-day project made during the tool seminar, before school actually starts. What you saw is as far as RV takes that body, as its just made so you know which end of a band saw to not stick your hand in on the first day of class.

The school could have charged me for 2 sets, but I don't think they did.
Thumpin_P
I hope they don't read this post and realize their mistake!


thanks for posting, keep it up!

Touche J!!!! I had to chuckle, then, say to myself "yyeeeaahhhh" ala "Office Space"
Brizzle, Knucklehead is right. If I want to, I can work on finishing the neck pocket, after fitting a tele neck to it. I do need to steam some dents. Time will tell...
Brizzle, Knucklehead is right. If I want to, I can work on finishing the neck pocket, after fitting a tele neck to it. I do need to steam some dents. Time will tell...
......I did not have the money to start my own shop, or invest in several specialized tools, so, Uncle Sam Is helping me with Financial Aid for the school, and there you go...
Thumpin_P
Its great to have a "rich uncle" (or maybe not-so-rich anymore) to help foot the bill!.....It is a good thing too, because the tuition to Roberto-Venn is staggering! A friend of mine went there and said it was worth every penny.
I'm just catching up on some threads after my 'puter has been out of commission for a while.
Good luck to you!

- Aug 15, 2011
- 571
- 171
- Disclosures
- Owner/Luthier:RoseBud Basses & Guitars LLC
Alum. Spring, 2008. I loved RV! We were the last class to shoot nitro in the outhouse, and yep, my bench was in the tin hut. Now is a good time to make lots of mistakes. You have the people who have been there done that to show you how to fix them and thats a good way to learn. Be careful, things can snow ball quickly, where you feel you wont finish, but you will. Dont worry about a third guitar. If you have spare time, pay attention to jigs and tools (take pic.s even, thats how I built my fret slotting sled and that drum sander, I need to build one of those. If you get the blue prints send them my way. It dose jobs for guitars nothing you buy can.) and see what you can build not buy. If you want to pursue Luthiery after class your goanna need all that stuff, and theres plenty of time in the future to build another guitar. By guitar I mean basses of corse.
 Keep all your hand outs (if posible get a 3 3ring binder, sheet protectors and those section labels, you might want doubles of some hand outs. Depending on how organized you want to be) and make sure you get them all. (I didnt get all mine
 ) You can essentially make the best how-to book ever. I still reference mine. Have you heard you cant build a guitar till youve built a guitar yet? Reuter and Kris really do know what theyre talking about there just hard to pin down; Matt tele Baker is good for help too, dont know the other guys. Make the most of your time there; its a lot of info. In a short amount of time. I would still go back and take the class again if I could. As far as my toolbox tele., its in a toolbox. I would finish it, but I got basses to build. With all that said have fun building guitars and Ill keep reading about it. My RV guitars
We were the last class to shoot nitro in the outhouse, and yep, my bench was in the tin hut. Now is a good time to make lots of mistakes. You have the people who have been there done that to show you how to fix them and thats a good way to learn. Be careful, things can snow ball quickly, where you feel you wont finish, but you will. Dont worry about a third guitar. If you have spare time, pay attention to jigs and tools (take pic.s even, thats how I built my fret slotting sled and that drum sander, I need to build one of those. If you get the blue prints send them my way. It dose jobs for guitars nothing you buy can.) and see what you can build not buy. If you want to pursue Luthiery after class your goanna need all that stuff, and theres plenty of time in the future to build another guitar. By guitar I mean basses of corse. Keep all your hand outs (if posible get a 3 3ring binder, sheet protectors and those section labels, you might want doubles of some hand outs. Depending on how organized you want to be) and make sure you get them all. (I didnt get all mine) You can essentially make the best how-to book ever. I still reference mine. Have you heard you cant build a guitar till youve built a guitar yet? Reuter and Kris really do know what theyre talking about there just hard to pin down; Matt tele Baker is good for help too, dont know the other guys. Make the most of your time there; its a lot of info. In a short amount of time. I would still go back and take the class again if I could. As far as my toolbox tele., its in a toolbox. I would finish it, but I got basses to build. With all that said have fun building guitars and Ill keep reading about it. My RV guitarsAttachments


'Sup T? I'm glad to have you back!I'll post more in a little while. It'll be worth checking out.
Hello folks!!!
First off, Mr Arose; thank you for the helpful advice. You bring up some very valid points. Power tools, jigs, molds. Really great ideas!!! I will be keeping every single handout (complete with sheet protectors). Any other advice, which comes to mind, PLEASE!!! feel free to add to this thread. This is for everyone! I really hoped that it would help prospective students, giving them an idea of what to expect, and for everyone else, for a little bit of "edu-tainment".
With that said, ON TO TODAY!!!!
I am mentally feeling great, but, the heat has kicked my butt today. 111 degrees is just a little much...Kris even said so. we covered quite a bit today, recieved quite a few more handouts today. mostly dealing with acoustic instruments.
My personal progress:
I joined the two slabs of alder, glued them together, and had to bandsaw them apart, because they shifted in the clamps. No problem, I am getting much better at squaring! After the second squaring, no light in between, clamped and glued...and,
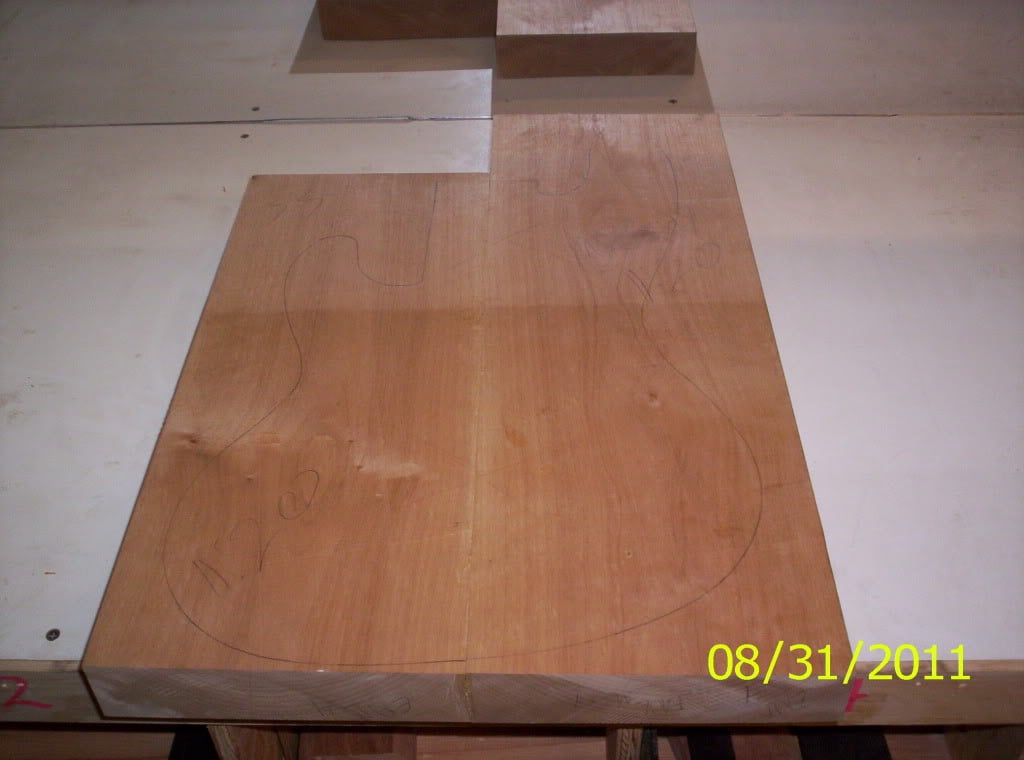
This is the back side..., I did not make a lefty. After planing, all will be right in the world.
Next, I drew out the outline of the acoustic fretboard, trimmed it, sanded it smooth, drew up a centerline, and then used a table saw and a jig for fret slotting. The result;
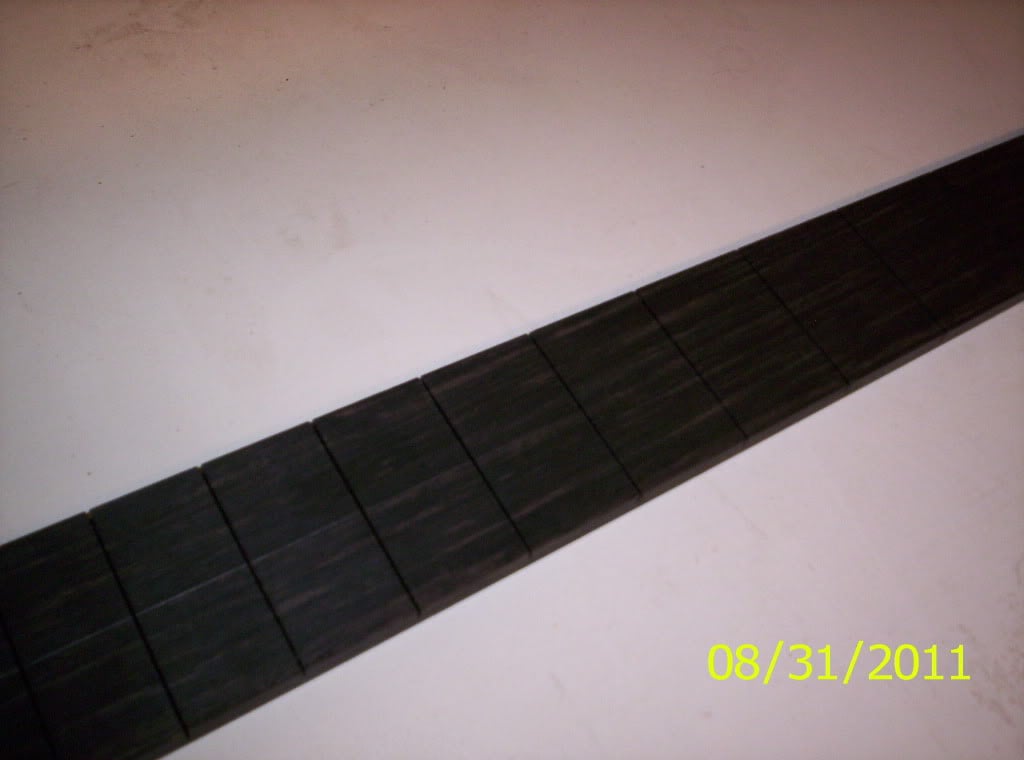
20 fret slots, and some pretty streaking.
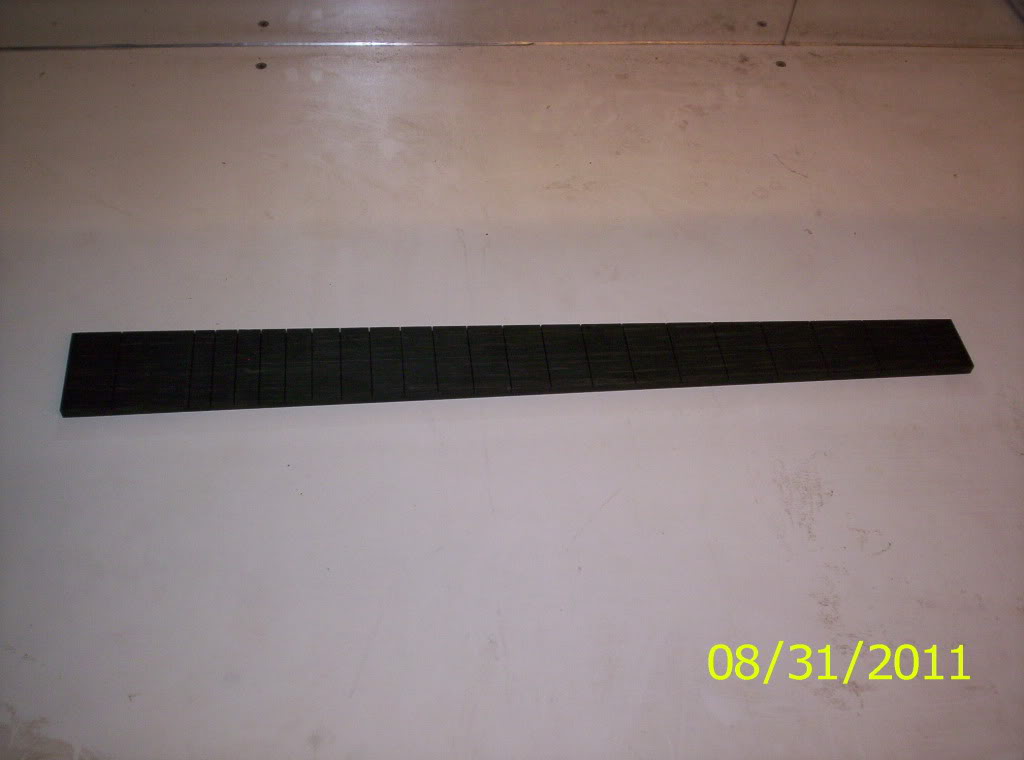
And I will definitely keep the streaking...
There has been another change in plans, the "vintage Martin D-28" is out because they will not let you use plastic binding, it has to be wood. That's OK, I just have to change a few things. On that note, the spruce top was planed down, and looks very nice...
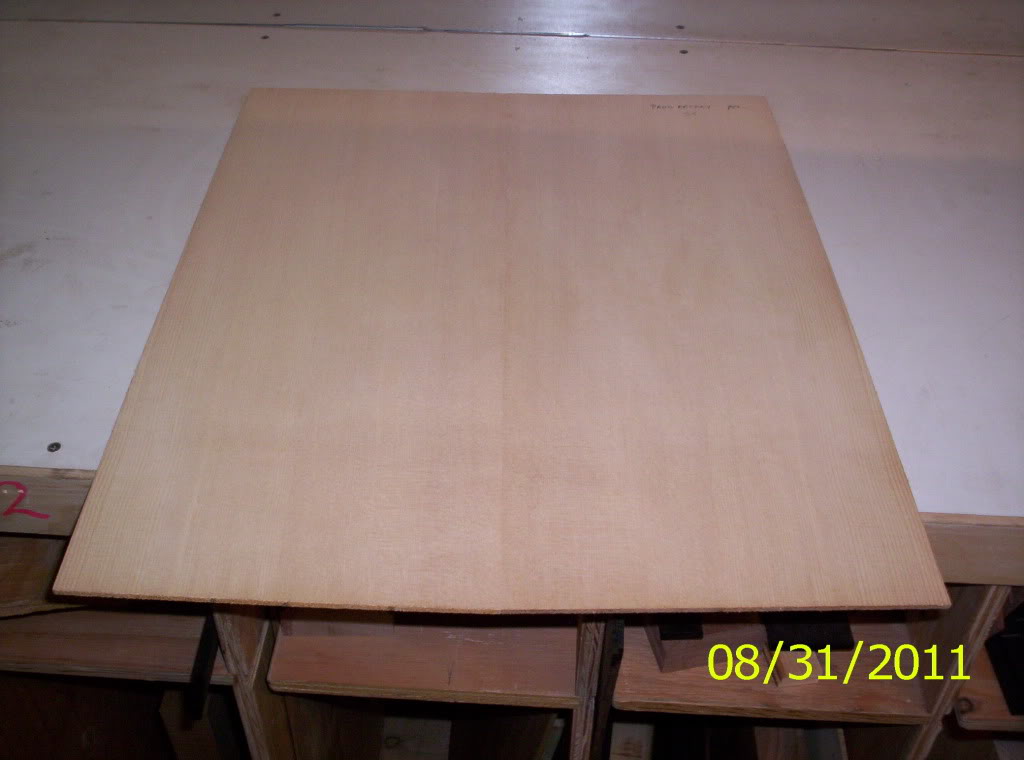
and the back, without tape...
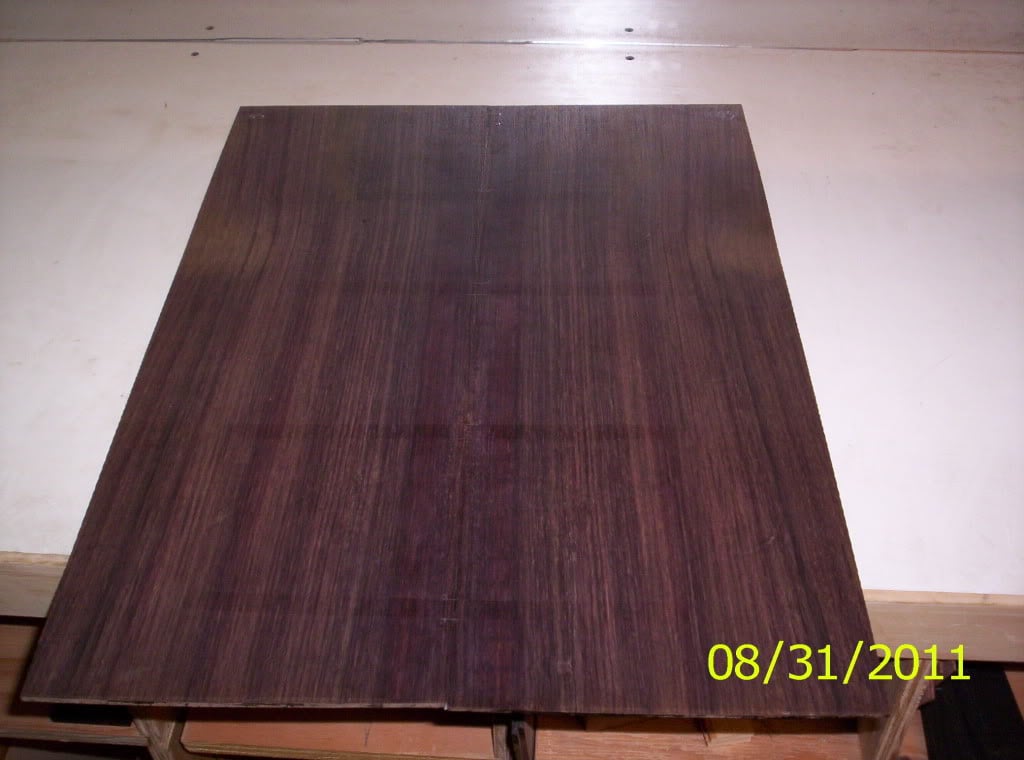
Now... it was another good day for wood. We were allowed to pick the top for our electric (required). My plan from the beginning was quilted maple, and that was what I got!
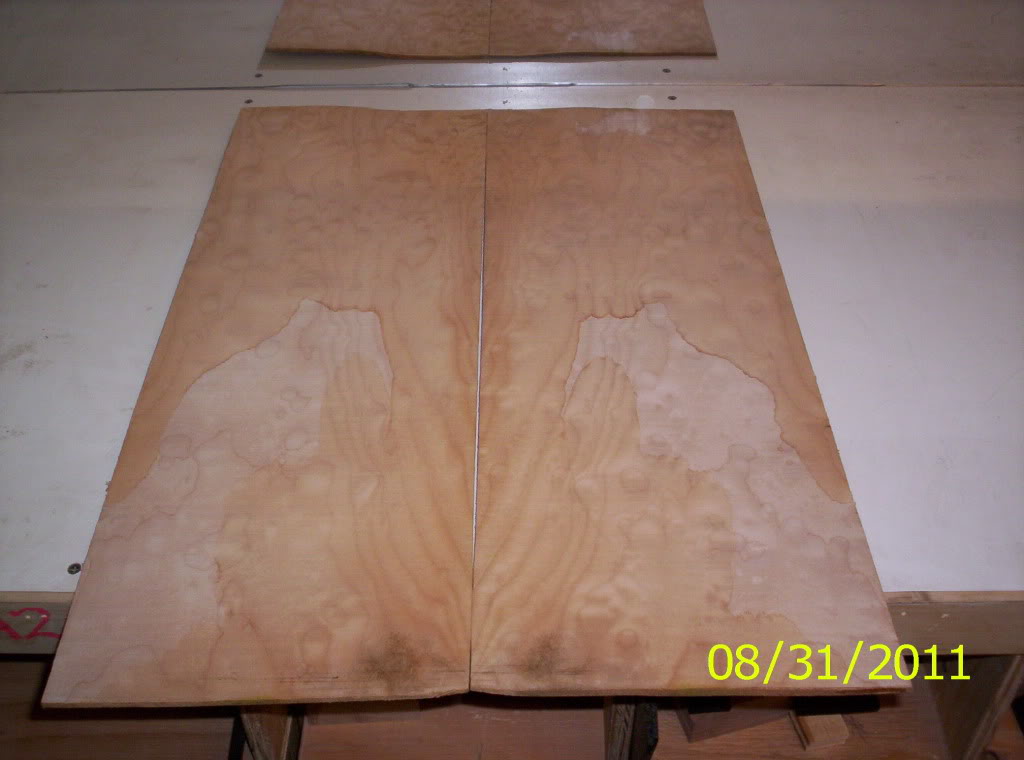
and here is a closeup of some of the figure...
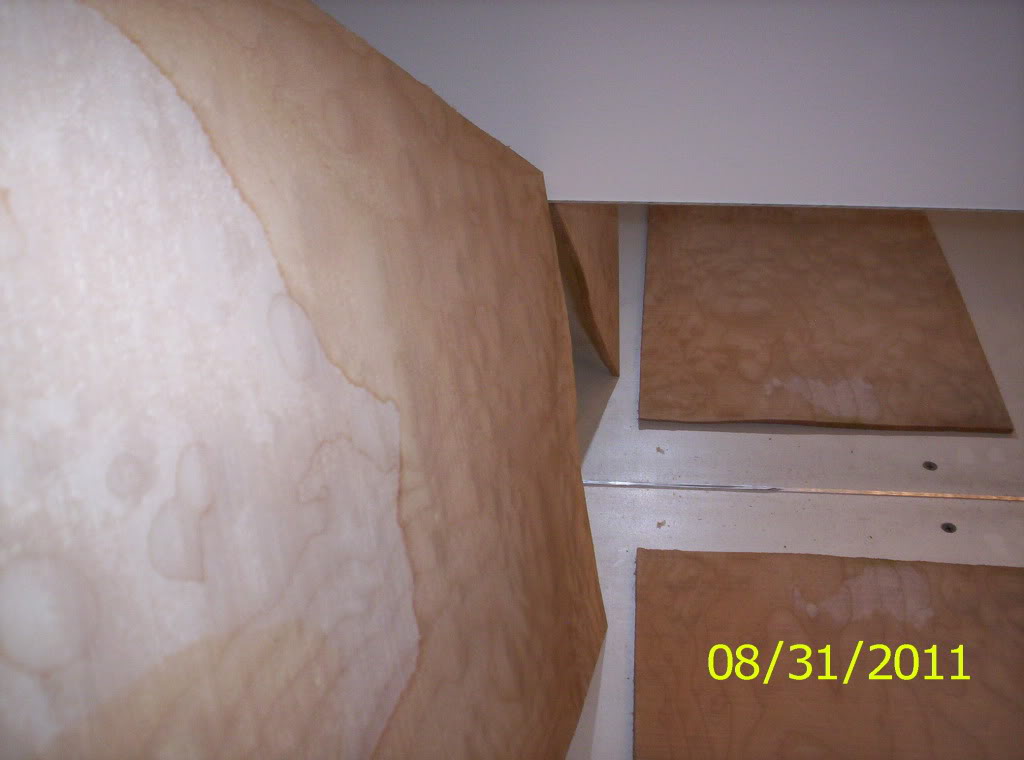
I achieved quite a lot today, but, as usual, I have a lot to get done tomorrow, I still need to thickness sand the acoustic sides, square the top edges, trace the side template, cut the sides out, then smooth out the other edges. Then, I need to begin squaring and joining the electric top. Whew!!! I have a lot, and there will be more to do tomorrow! But, all is good! Thanks for all the support, I am still welcome to suggestions, and please, keep watching!
Thumpin_P
First off, Mr Arose; thank you for the helpful advice. You bring up some very valid points. Power tools, jigs, molds. Really great ideas!!! I will be keeping every single handout (complete with sheet protectors). Any other advice, which comes to mind, PLEASE!!! feel free to add to this thread. This is for everyone! I really hoped that it would help prospective students, giving them an idea of what to expect, and for everyone else, for a little bit of "edu-tainment".
With that said, ON TO TODAY!!!!
I am mentally feeling great, but, the heat has kicked my butt today. 111 degrees is just a little much...Kris even said so. we covered quite a bit today, recieved quite a few more handouts today. mostly dealing with acoustic instruments.
My personal progress:
I joined the two slabs of alder, glued them together, and had to bandsaw them apart, because they shifted in the clamps. No problem, I am getting much better at squaring! After the second squaring, no light in between, clamped and glued...and,
This is the back side..., I did not make a lefty. After planing, all will be right in the world.
Next, I drew out the outline of the acoustic fretboard, trimmed it, sanded it smooth, drew up a centerline, and then used a table saw and a jig for fret slotting. The result;
20 fret slots, and some pretty streaking.
And I will definitely keep the streaking...
There has been another change in plans, the "vintage Martin D-28" is out because they will not let you use plastic binding, it has to be wood. That's OK, I just have to change a few things. On that note, the spruce top was planed down, and looks very nice...
and the back, without tape...
Now... it was another good day for wood. We were allowed to pick the top for our electric (required). My plan from the beginning was quilted maple, and that was what I got!
and here is a closeup of some of the figure...
I achieved quite a lot today, but, as usual, I have a lot to get done tomorrow, I still need to thickness sand the acoustic sides, square the top edges, trace the side template, cut the sides out, then smooth out the other edges. Then, I need to begin squaring and joining the electric top. Whew!!! I have a lot, and there will be more to do tomorrow! But, all is good! Thanks for all the support, I am still welcome to suggestions, and please, keep watching!
Thumpin_P

- Apr 18, 2008
- 16,008
- 1
- 31,708
- Disclosures
- I'm highly opinionated and extremely self-assured
Watching expectantly - looking forward to the Ray!
Way back in early January, our band got a gig at the local Hard Rock. We were scheduled to take the stage later in the same evening as the Doobie Brothers (great concert!). As the Brothers were clearing away their stuff, and we were setting ours up, this guy on the DB crew walked up to me and noticed my homemade 8-string on the stand. He asked about it, and was very complimentary, and generally a nice guy. I totally forgot his name, but he said that he sometimes teaches at R-V.
Any idea who that might have been?
Way back in early January, our band got a gig at the local Hard Rock. We were scheduled to take the stage later in the same evening as the Doobie Brothers (great concert!). As the Brothers were clearing away their stuff, and we were setting ours up, this guy on the DB crew walked up to me and noticed my homemade 8-string on the stand. He asked about it, and was very complimentary, and generally a nice guy. I totally forgot his name, but he said that he sometimes teaches at R-V.
Any idea who that might have been?
Joe Vallee... I look forward to meeting him.
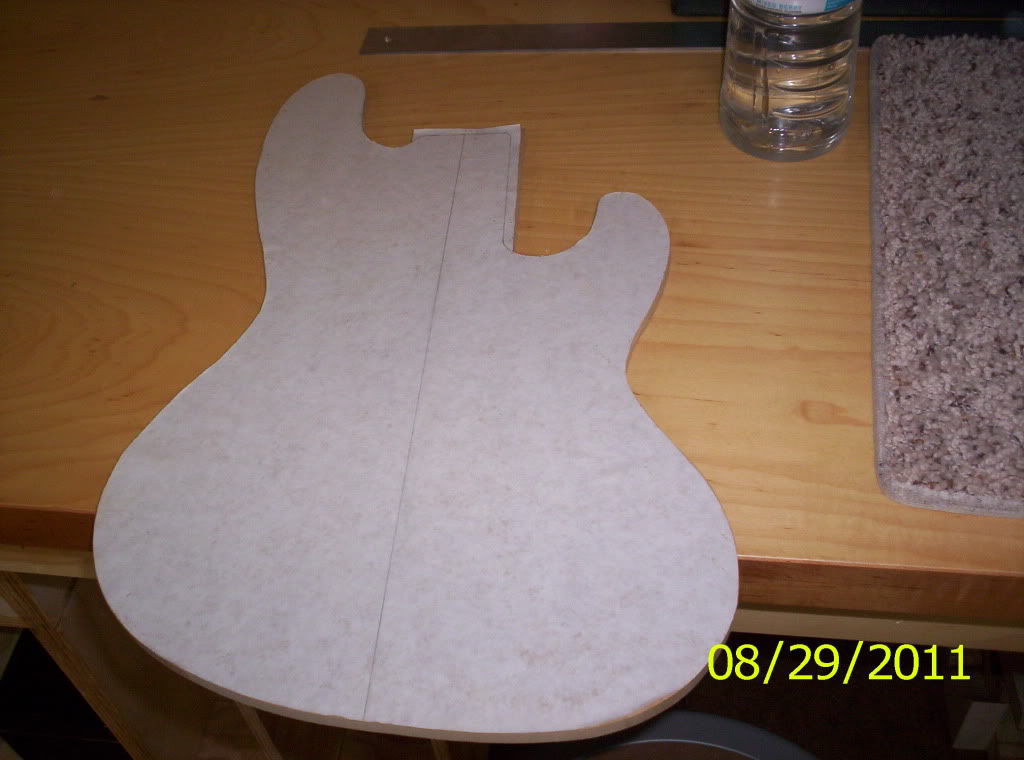
Did you notice that the 'Ray had to change body shapes? I am still sticking to everything else, even pickup placement, and probably headstock. The problem was, there were no templates which even came close, so, I modified a precision and a jazz, gave it 22 frets, with a six bolt neck attachment. It looks huge, but, after planing the thickness down, and with the maple neck, I think the upper horn placement, along with the shift of the lower cutaway, should be nice! Thanks!
Did you notice that the 'Ray had to change body shapes? I am still sticking to everything else, even pickup placement, and probably headstock. The problem was, there were no templates which even came close, so, I modified a precision and a jazz, gave it 22 frets, with a six bolt neck attachment. It looks huge, but, after planing the thickness down, and with the maple neck, I think the upper horn placement, along with the shift of the lower cutaway, should be nice! Thanks!
- Apr 18, 2008
- 16,008
- 1
- 31,708
- Disclosures
- I'm highly opinionated and extremely self-assured
Yeah, that's a shame about the body shape. I mean, I'm sure it'll turn out fabulous, but personally, I dislike the aesthetics of the Jazz's offset waist. A true Ray shape would have been much prettier, IMHO. Glad you're going to use Ray-like pickup placement and headstock shape. 
However, the important thing is the experience, and it sounds like you're getting a good solid grounding in the techniques!
However, the important thing is the experience, and it sounds like you're getting a good solid grounding in the techniques!
Ok, my faithful watchers,
Today was another whirlwind day, full of action! Quite a bit was accomplished on the acoustic and a few desicions were made. First, I FINALLY got the sides thickness sanded to .085", sanded the "top" side smooth, used a side template for dreadnaught, traced the outline, cut the scrap (which I saved) and...
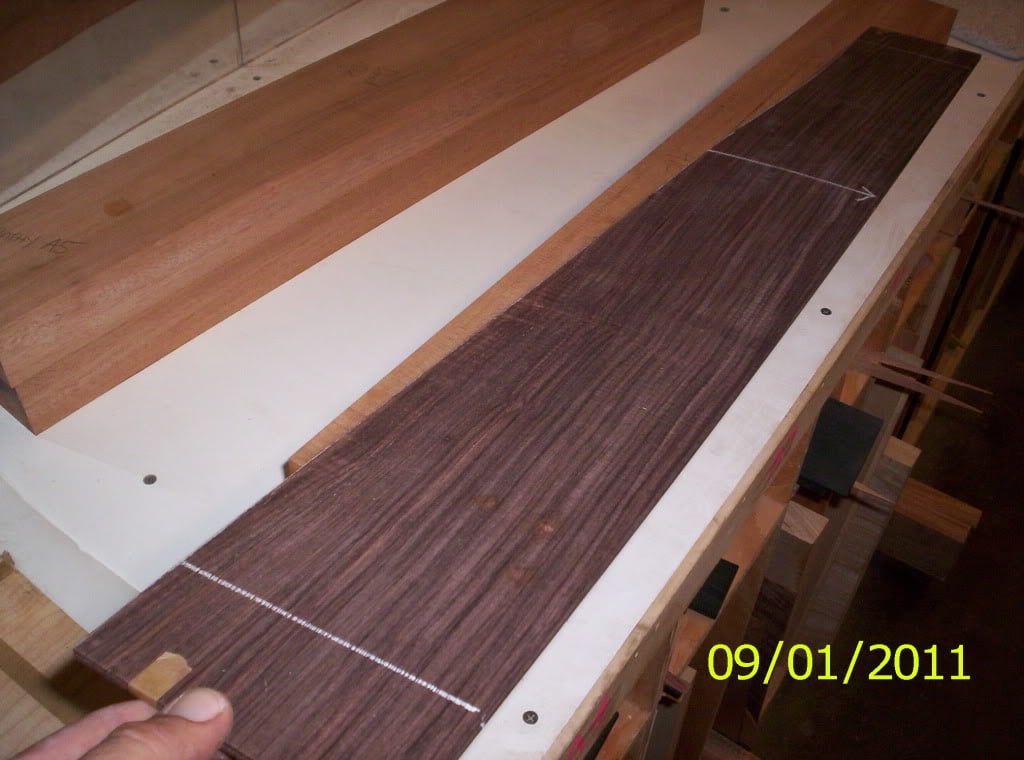
There you go! There are arrows indicating the top side, the upper and lower edges, for meeting up in the mold.
The back was planed down, to remove any glue and reveal the true beauty of the seam, and, I gotta tell you, I think I hit this one out of the park! We discussed using a backstrip, and the different choices, which are nice, but...,
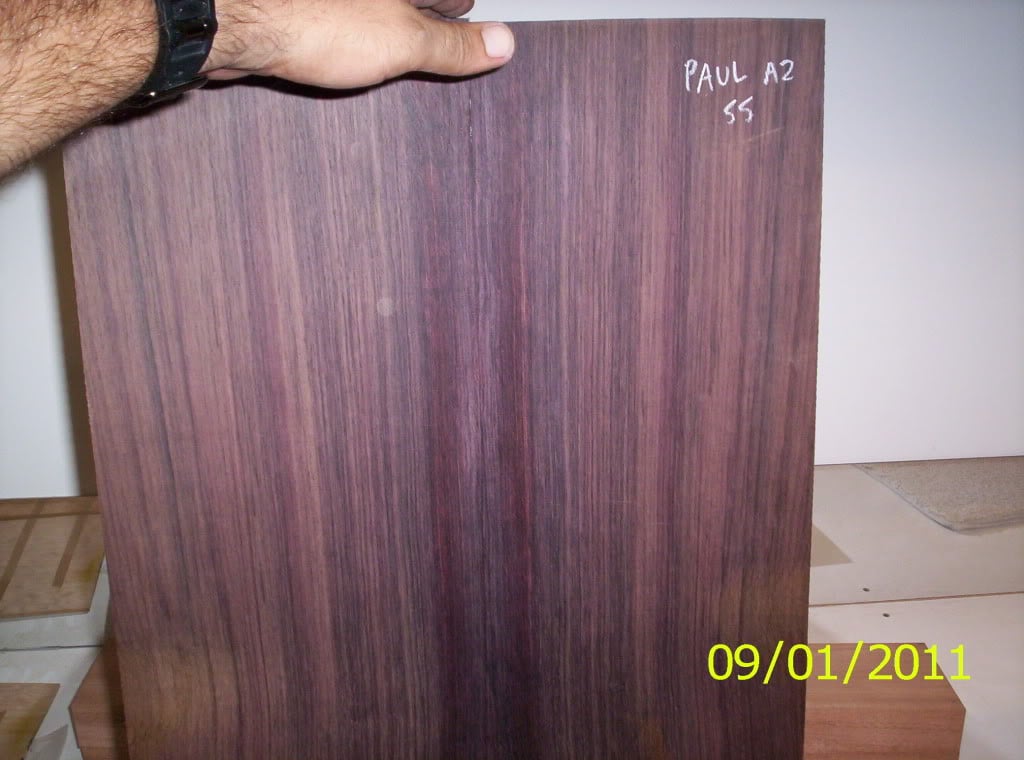
this seam is simply too nice to ruin with a backstrip. The bookmatching lines up beautifully, the color is exquisite, and, laquer will simply creep into the seam created by the backstrip, so...no.
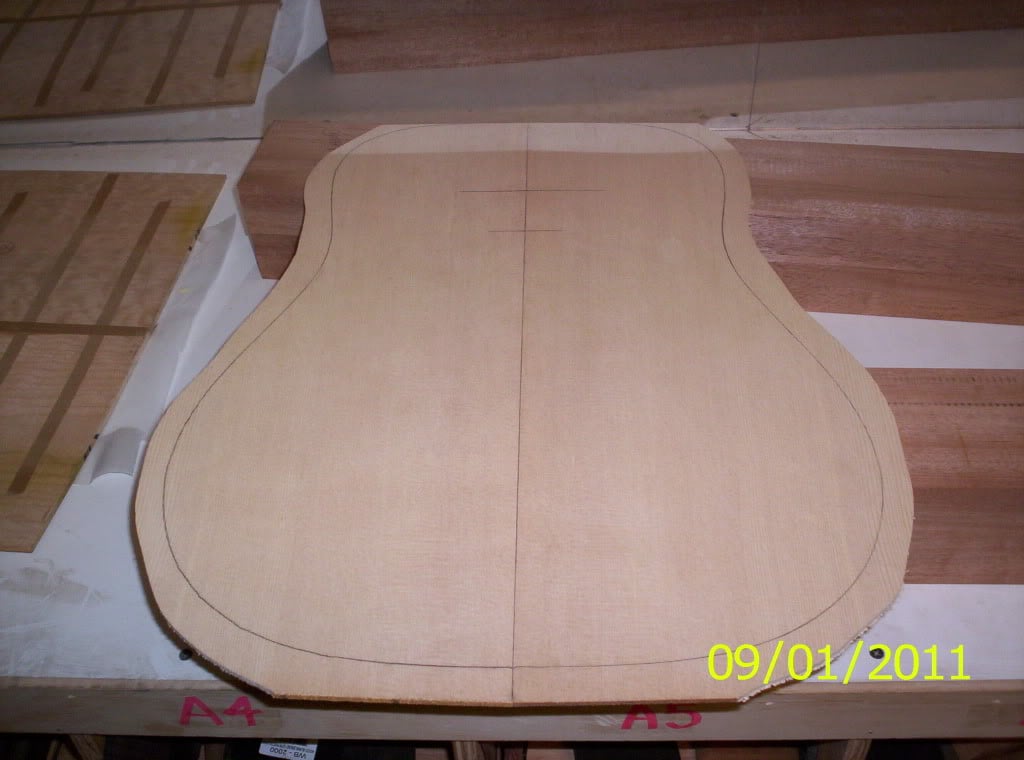
The spruce top was planed yesterday, which also turned out awesome, no visible seam, all fingerprints were removed, so today, we drew the outline with a mold, cut the excess off of the top (for bracing use later) measured for the soundhole, and cut the excess off from the top, leaving at least 1/4" outside the template line. That will probably be explained later.
We also recieved our acoustic neck blanks (mahogany). We had to pair up with someone because of the way the necks are cut out. I will go into further detail later. I'm not sure if I got a good picture of those, but, they are lurking in the other pictures.
Now...ON TO THE BASS!!!!!
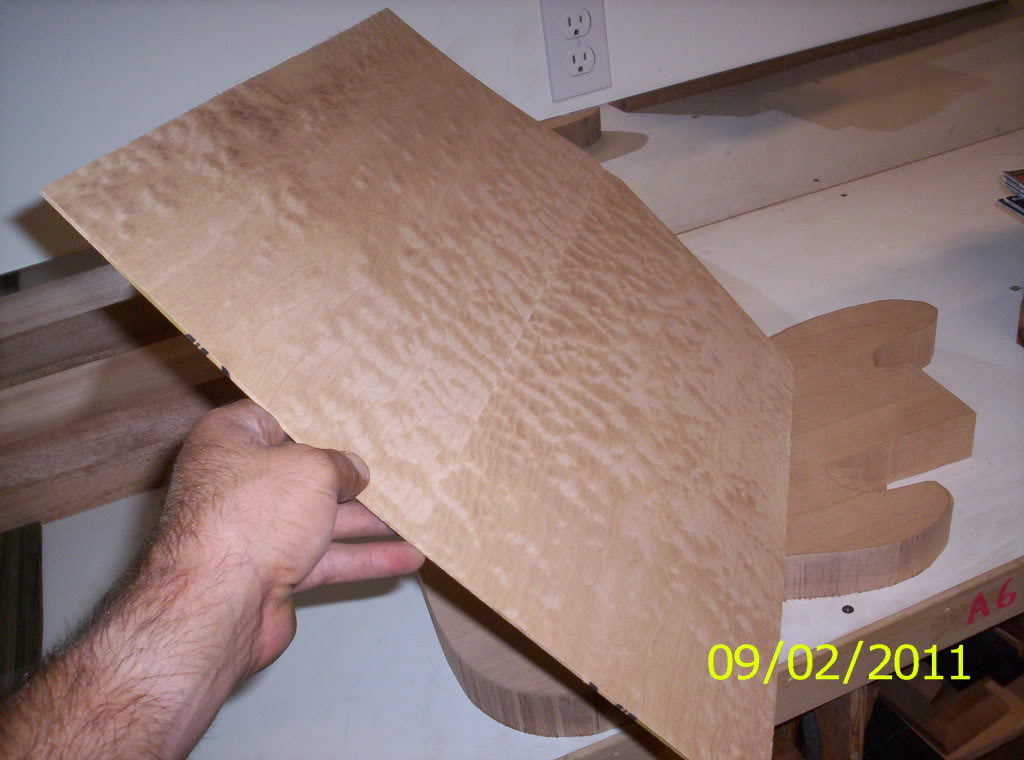
We selected our tops yesterday, and I was happy with the figure. When I started to look at the thickness of the wood, and where the actual figure would lie on the body, I was not so happy. The lowest part of the bookmatch seam was only .050" thick. Way too small to really make a good seam with wood that was .250" on the other side. Plus, with the design of my body, the quilt would only be below my bridge. I consulted one of the instructors (more for the thickness, than the figure) and, because I had not sanded anything, he found a MUCH nicer piece, with very nice quilt, for the same price. It was bowed, and I will find out tomorrow, when I take it out from clamping, if I have to redo the seam. You guys have no idea how long I sanded to get that seam close, well, some of you probably do know... anyway, here's piece number two...
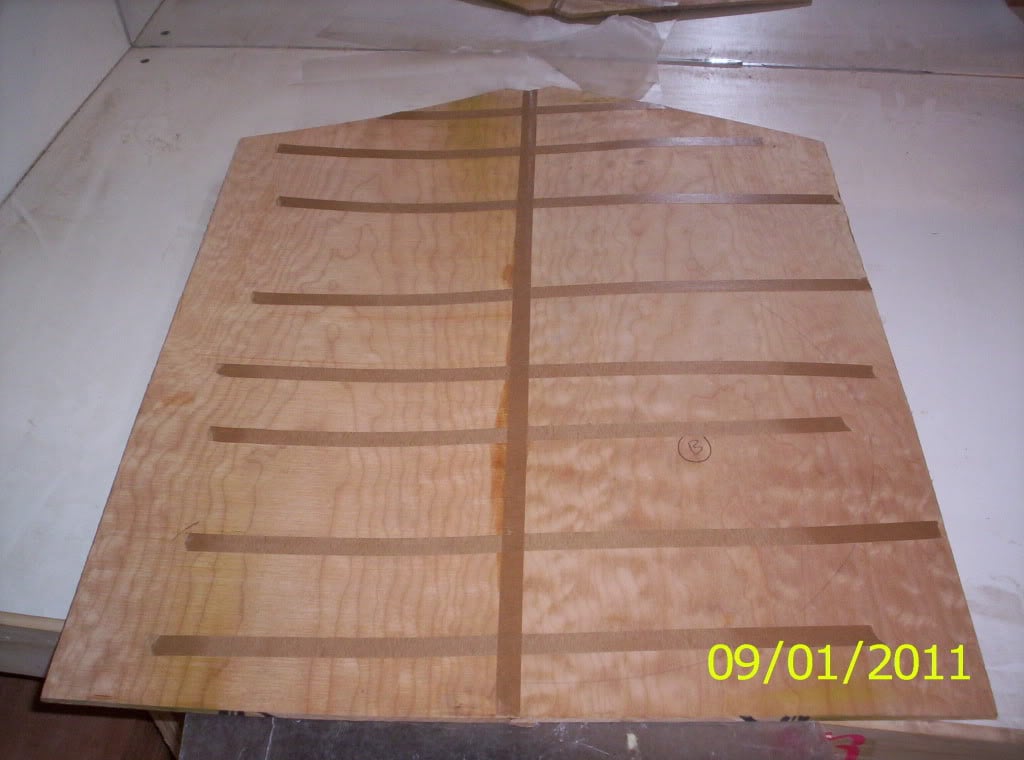
I absolutely love the quilt on this...It will look phenomenal(sp?)! The design aspect of a "drop top" came into play today. If we wanted it, we would need our bridge and pickup placement ironed out. Kris (the head electric guy, and a bass player) had a SR 4 body, with the correct measurement for the pickup. He brought that in, and I measured the correct distance for the pickup....wait...he had a Stingray body...wasn't that what I need to make an accurate tamplate...hmmmm. I might ask if I can redo my design(very quickly) I will have tonight to think about it, as class is moving very fast. Give me some opinions...CT, I know what you want...
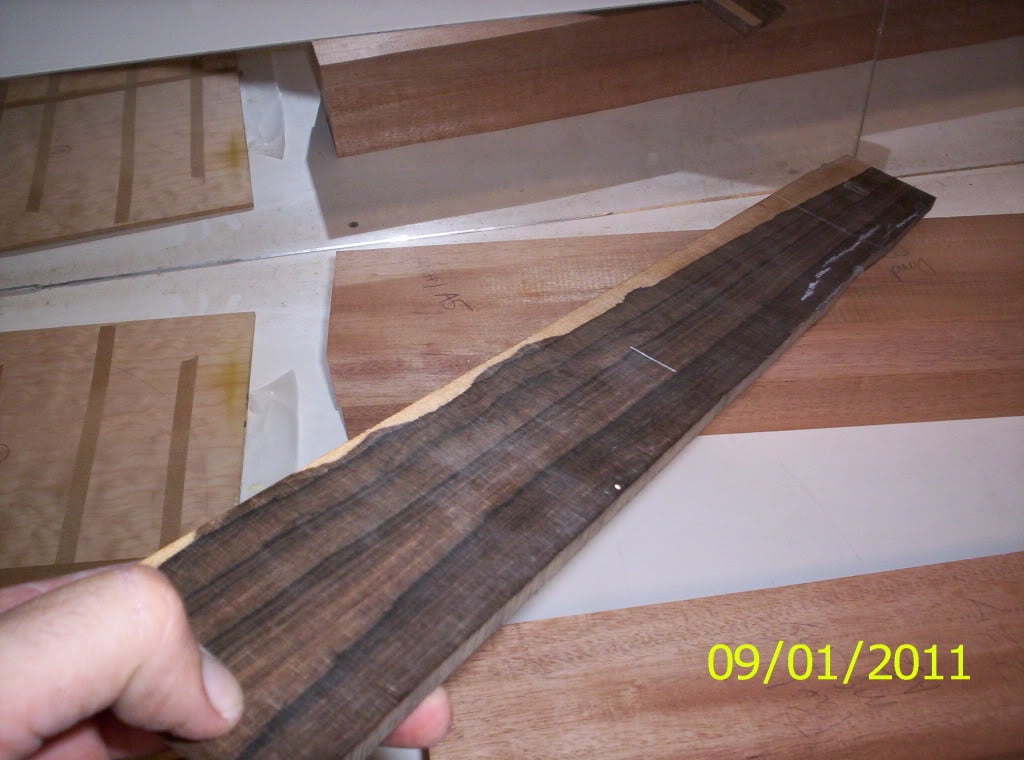
My last picture...we were given the choice of our electric fingerboards. ebony, cocobola, or zircote. The cocobola was the cheapest, but, guys...I do not want that headache this early into the build. The ebony was the most expensive, and the zircote...
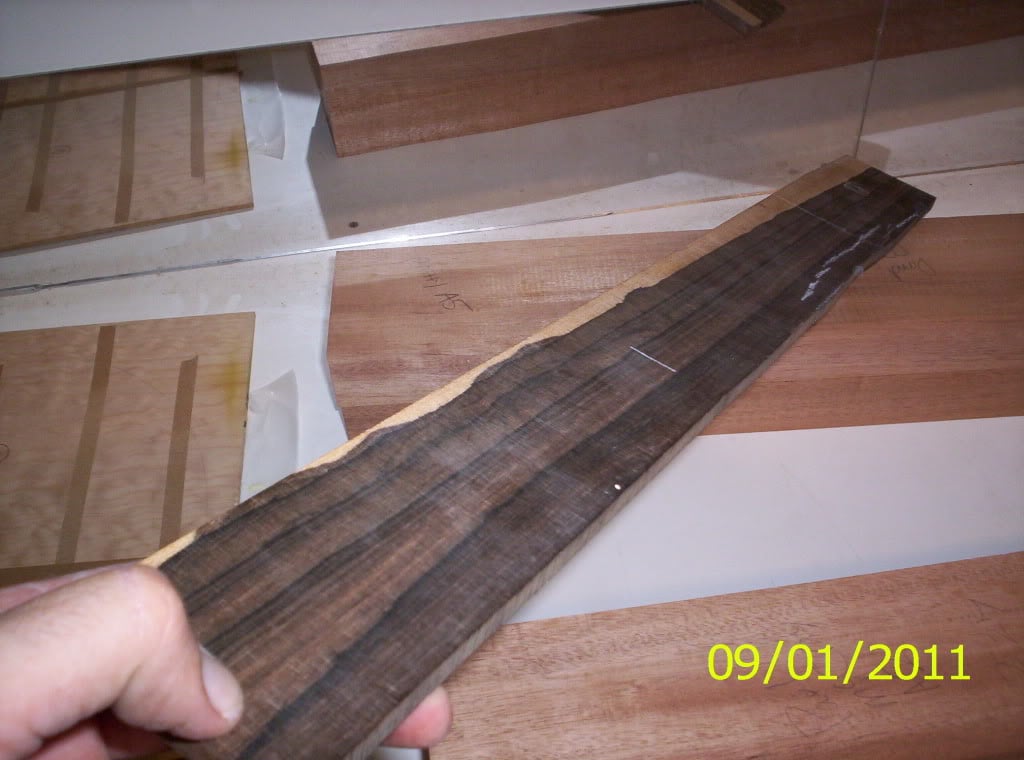
...was callin' my name. Check out the sapwood on that! And yes, I am keeping the sapwood!
So, I have accomplished quite a bit today, but, I am still considering changing things around. I like the contemporary feel of my design
with this:
and this:
But, I would like to stick to the original plan, a high class stingray, probably with 22 frets, we will see, and all the other classic SR goodies. BTW, no matter if I keep my design or copy the SR body, I am keeping the 3+1 headstock.
Very Tired,
Thumpin_P
Today was another whirlwind day, full of action! Quite a bit was accomplished on the acoustic and a few desicions were made. First, I FINALLY got the sides thickness sanded to .085", sanded the "top" side smooth, used a side template for dreadnaught, traced the outline, cut the scrap (which I saved) and...
There you go! There are arrows indicating the top side, the upper and lower edges, for meeting up in the mold.
The back was planed down, to remove any glue and reveal the true beauty of the seam, and, I gotta tell you, I think I hit this one out of the park! We discussed using a backstrip, and the different choices, which are nice, but...,
this seam is simply too nice to ruin with a backstrip. The bookmatching lines up beautifully, the color is exquisite, and, laquer will simply creep into the seam created by the backstrip, so...no.
The spruce top was planed yesterday, which also turned out awesome, no visible seam, all fingerprints were removed, so today, we drew the outline with a mold, cut the excess off of the top (for bracing use later) measured for the soundhole, and cut the excess off from the top, leaving at least 1/4" outside the template line. That will probably be explained later.
We also recieved our acoustic neck blanks (mahogany). We had to pair up with someone because of the way the necks are cut out. I will go into further detail later. I'm not sure if I got a good picture of those, but, they are lurking in the other pictures.
Now...ON TO THE BASS!!!!!
We selected our tops yesterday, and I was happy with the figure. When I started to look at the thickness of the wood, and where the actual figure would lie on the body, I was not so happy. The lowest part of the bookmatch seam was only .050" thick. Way too small to really make a good seam with wood that was .250" on the other side. Plus, with the design of my body, the quilt would only be below my bridge. I consulted one of the instructors (more for the thickness, than the figure) and, because I had not sanded anything, he found a MUCH nicer piece, with very nice quilt, for the same price. It was bowed, and I will find out tomorrow, when I take it out from clamping, if I have to redo the seam. You guys have no idea how long I sanded to get that seam close, well, some of you probably do know... anyway, here's piece number two...
I absolutely love the quilt on this...It will look phenomenal(sp?)! The design aspect of a "drop top" came into play today. If we wanted it, we would need our bridge and pickup placement ironed out. Kris (the head electric guy, and a bass player) had a SR 4 body, with the correct measurement for the pickup. He brought that in, and I measured the correct distance for the pickup....wait...he had a Stingray body...wasn't that what I need to make an accurate tamplate...hmmmm. I might ask if I can redo my design(very quickly) I will have tonight to think about it, as class is moving very fast. Give me some opinions...CT, I know what you want...
My last picture...we were given the choice of our electric fingerboards. ebony, cocobola, or zircote. The cocobola was the cheapest, but, guys...I do not want that headache this early into the build. The ebony was the most expensive, and the zircote...
...was callin' my name. Check out the sapwood on that! And yes, I am keeping the sapwood!
So, I have accomplished quite a bit today, but, I am still considering changing things around. I like the contemporary feel of my design
with this:
and this:
But, I would like to stick to the original plan, a high class stingray, probably with 22 frets, we will see, and all the other classic SR goodies. BTW, no matter if I keep my design or copy the SR body, I am keeping the 3+1 headstock.
Very Tired,
Thumpin_P
Ok,
Friday!!! Sorry for the delay, I was wiped out, and trying to plan Knuckhead G's birthday festivities, so, Saturday morning is update time. Also, Monday is a holiday, so no updates until Tuesday.
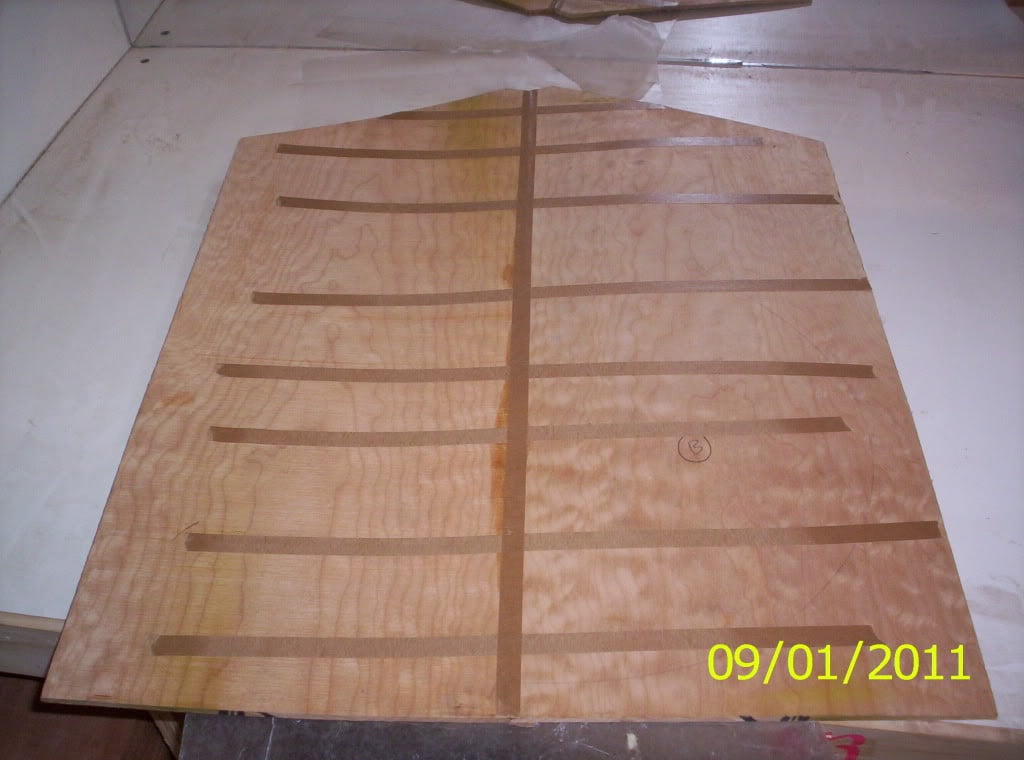
As I was saying, Friday!!!! The electric top was planed, and the seam turned out great! and the figure...ooooh, baby, it's there!
This is going to look great! The option of drop top vs. binding was discussed, and the top joinery on a binding-style top was done. Using nails, after drilling pilot holes, and a fair amount of Titebond (ed. note, Titebond is just about the only glue that we will use, super glue later, and, sometimes white glue...depending on the wood) about 20 clamps, and that was that.
I finally got my fretboard thickness sanded, after changing the sandpaper on the sander. I am still very happy with this zircote.
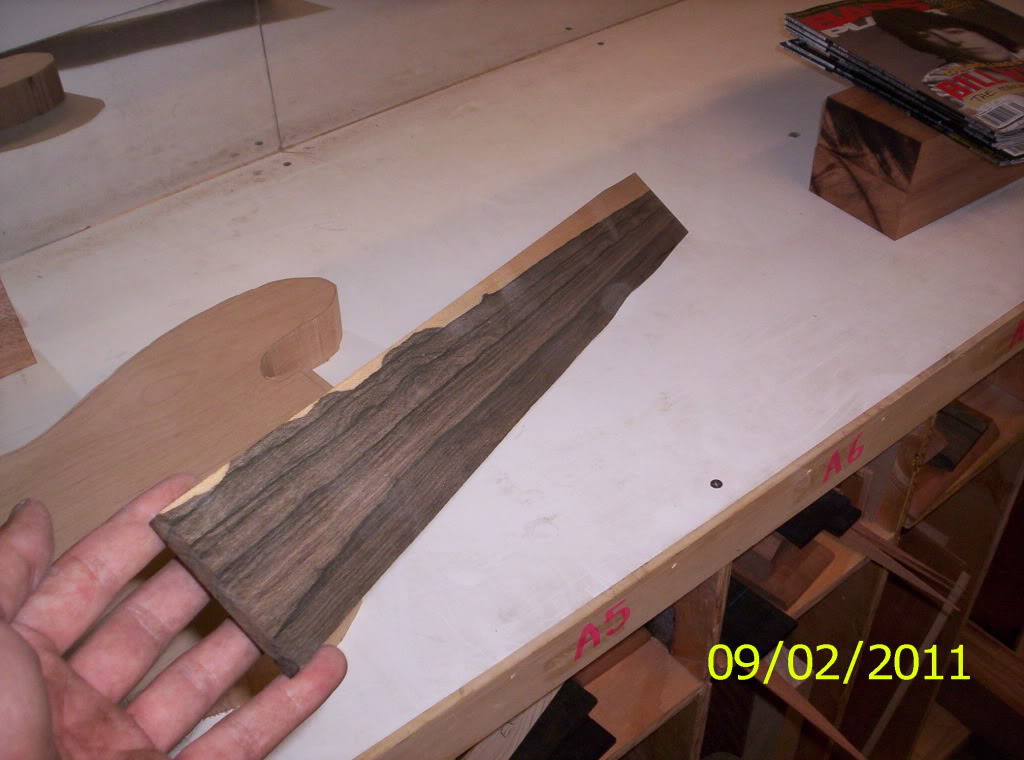
Yes...the sapwood will stay in there, that will be the straight edge, for creating the fretboard profile. I will, more than likely, have the sapwood at the nut end.
The body design...I got to thinking, time is not on my side, and I like that this design is mine. I like the contemporary feel of the design, and, if I were to change to a Stingray, I would have to use more that 22 frets (just experience). I know it has been done, but, I will run with what I have. I did trace the outline of the Stingray for future use. With that said, I needed to plot out the bridge placement and pickup placement, so that I could start on the comfort carve, join the top to the body, and vacuum-bag clamp the two together. When all is said and done, the figured top will flow over the carve, with a very professional look to it. So the progress made, towards the electric, ends with the outline cut out on the bandsaw.
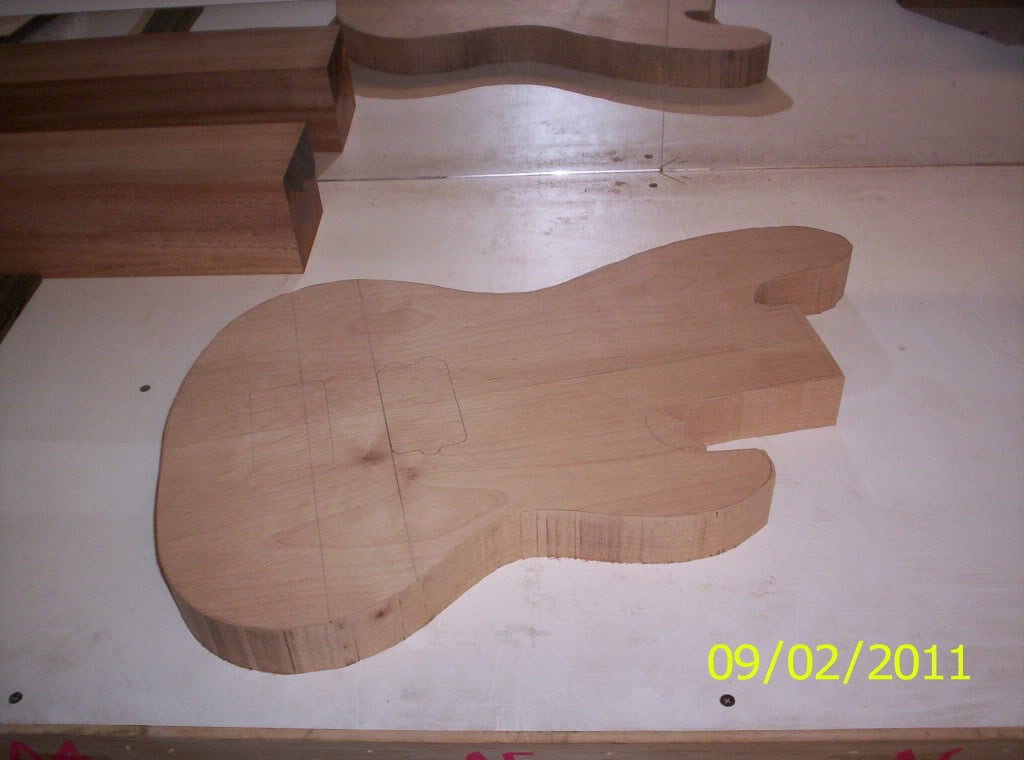
I have the bridge and pickup drawn onto the body. Oh... I forgot, The total body (with top) thickness will be 1 3/4", so I took the measurement of the top, then subtracted that from the total thickness. This was the core thickness. The core was planed down to this thickness, before I cut the excess off of the blank. So.. with that said, that is all the progress for today. I will true up the sapwood edge of the fretboard, then take my measurements for the final profile of the fretboard. Since I am doing a Fender-style headstock (flat, not scarfed) I will wait until the neck is shaped, then match the fretboard to the neck profile, because of the taper after the nut. So, until Tuesday, have a safe and happy holiday weekend, and be sure to have a designated driver!!!
Thumpin_P
Friday!!! Sorry for the delay, I was wiped out, and trying to plan Knuckhead G's birthday festivities, so, Saturday morning is update time. Also, Monday is a holiday, so no updates until Tuesday.
As I was saying, Friday!!!! The electric top was planed, and the seam turned out great! and the figure...ooooh, baby, it's there!
This is going to look great! The option of drop top vs. binding was discussed, and the top joinery on a binding-style top was done. Using nails, after drilling pilot holes, and a fair amount of Titebond (ed. note, Titebond is just about the only glue that we will use, super glue later, and, sometimes white glue...depending on the wood) about 20 clamps, and that was that.
I finally got my fretboard thickness sanded, after changing the sandpaper on the sander. I am still very happy with this zircote.
Yes...the sapwood will stay in there, that will be the straight edge, for creating the fretboard profile. I will, more than likely, have the sapwood at the nut end.
The body design...I got to thinking, time is not on my side, and I like that this design is mine. I like the contemporary feel of the design, and, if I were to change to a Stingray, I would have to use more that 22 frets (just experience). I know it has been done, but, I will run with what I have. I did trace the outline of the Stingray for future use. With that said, I needed to plot out the bridge placement and pickup placement, so that I could start on the comfort carve, join the top to the body, and vacuum-bag clamp the two together. When all is said and done, the figured top will flow over the carve, with a very professional look to it. So the progress made, towards the electric, ends with the outline cut out on the bandsaw.
I have the bridge and pickup drawn onto the body. Oh... I forgot, The total body (with top) thickness will be 1 3/4", so I took the measurement of the top, then subtracted that from the total thickness. This was the core thickness. The core was planed down to this thickness, before I cut the excess off of the blank. So.. with that said, that is all the progress for today. I will true up the sapwood edge of the fretboard, then take my measurements for the final profile of the fretboard. Since I am doing a Fender-style headstock (flat, not scarfed) I will wait until the neck is shaped, then match the fretboard to the neck profile, because of the taper after the nut. So, until Tuesday, have a safe and happy holiday weekend, and be sure to have a designated driver!!!
Thumpin_P
Alright, my avid watchers,
Week Three!!!
Today, it would seem as though I did not get as much accomplished today, but it was tedious work (I'll get to that).
To begin with, I trued up the sapwood edge of my electric fretboard, intending to keep as much sapwood as possible. That was easy. Next, I measured 2 18/32" from that edge, and drew my line. The widest point on a 4 string is 2 1/2", by their standards, and I wanted a little room to play. I will say this, squaring used to kick my butt, but, with all the practice and success that I have had, I can say I kicked sqauring "square" in the butt today. When I finished squaring up the other side, I took my measurements, and I was...2 18/32" all the way down the board! WooHoo!!! Oh, sorry...here's some pics...
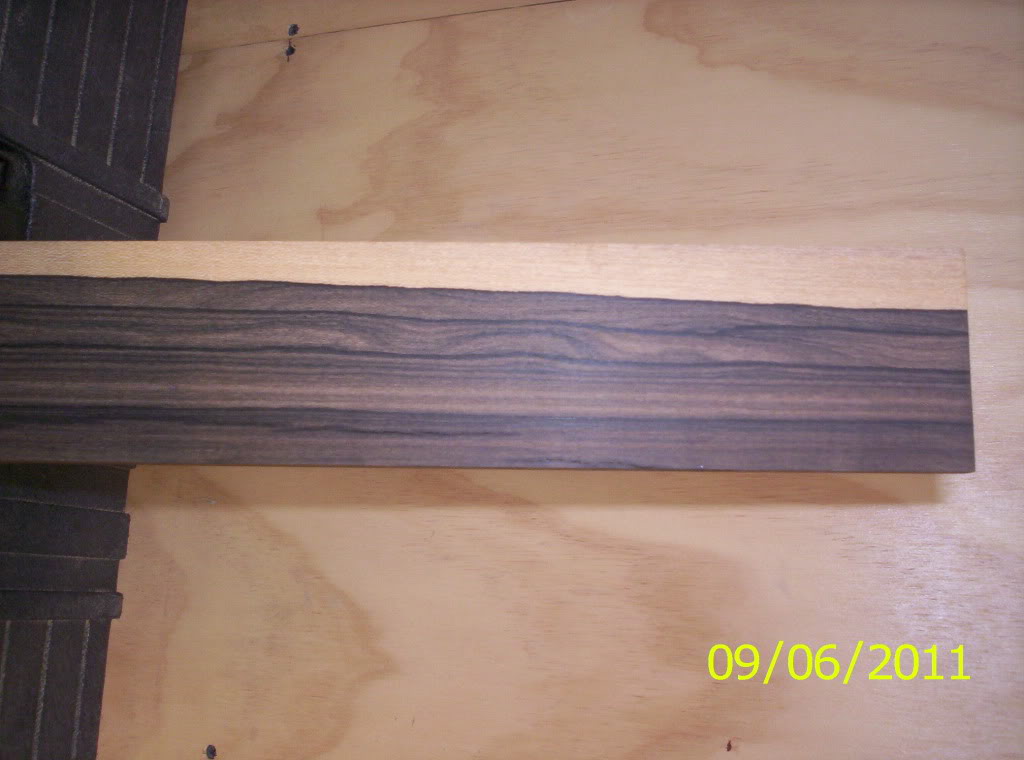
and the whole board,
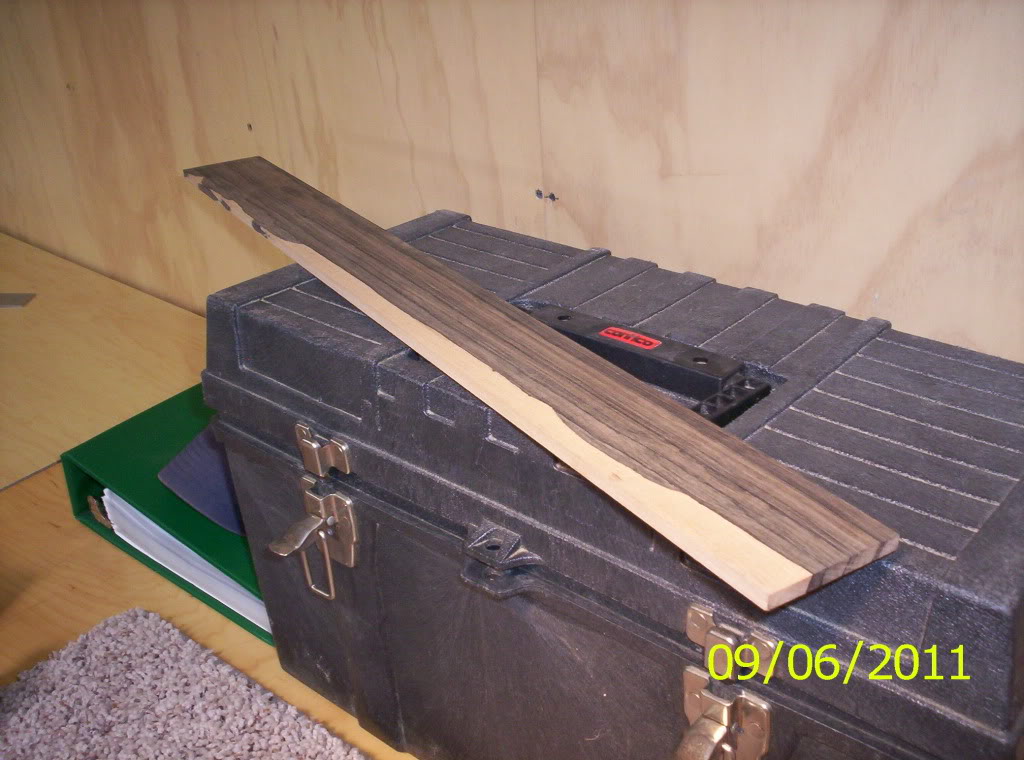
We discussed our rosette options, looked at a slideshow, very entertaining. I will talk more about that in depth.
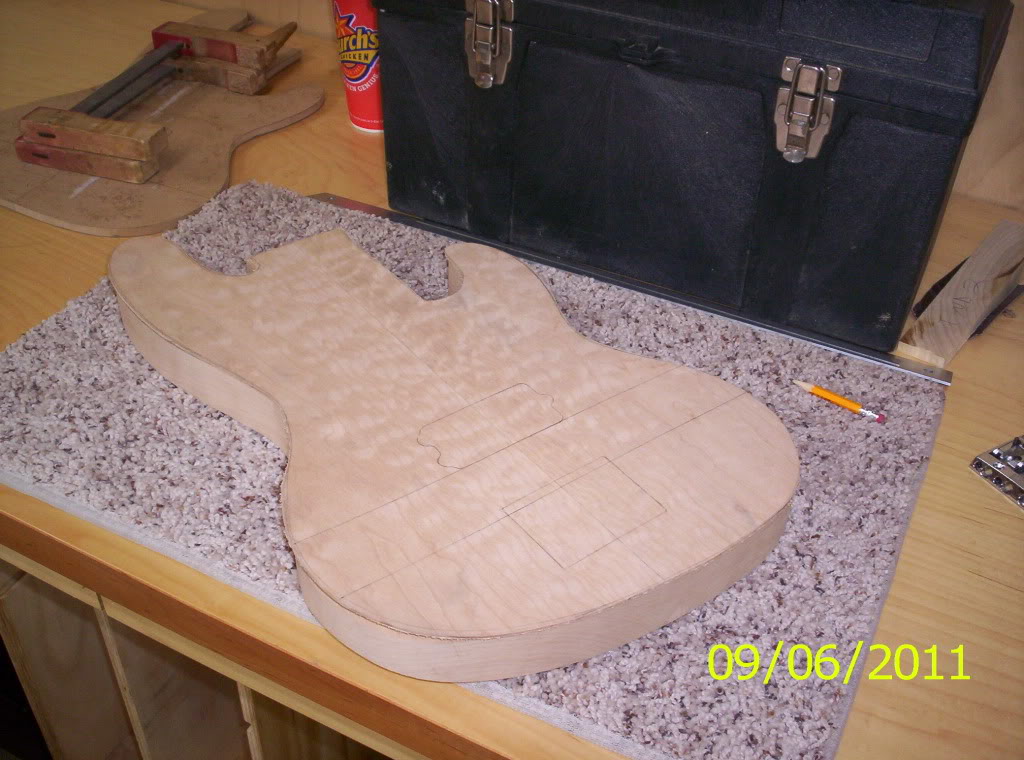
Now, the tedious stuff... I sketched out the template on the quilted maple...very pretty!
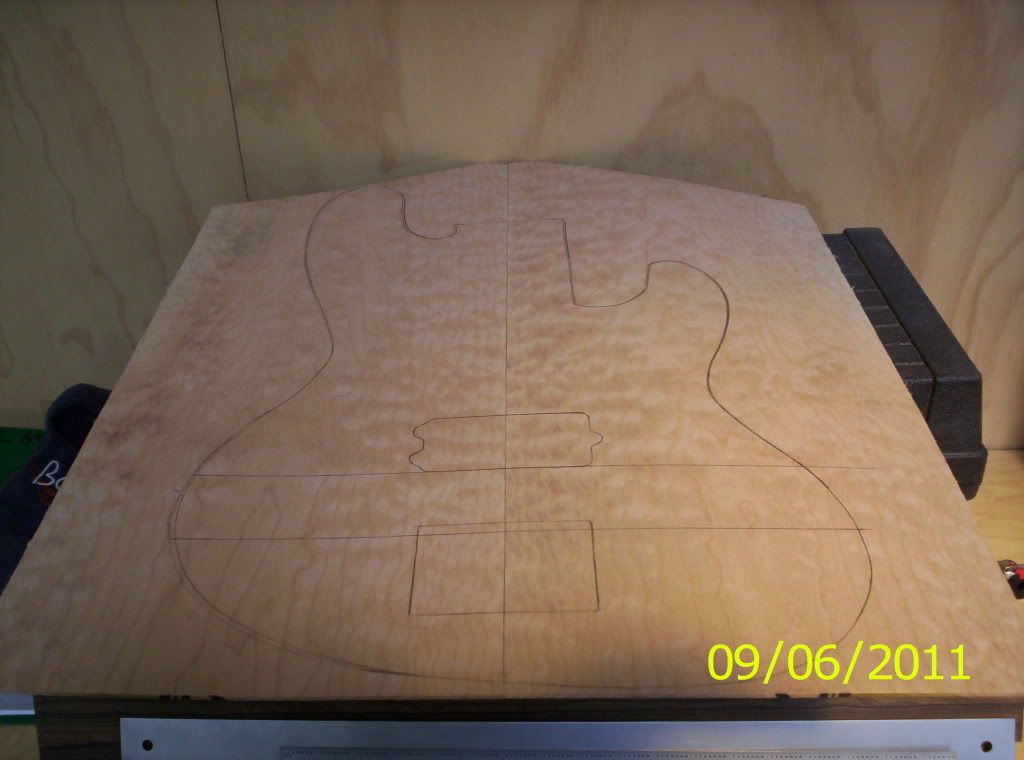
and some figure for ya!
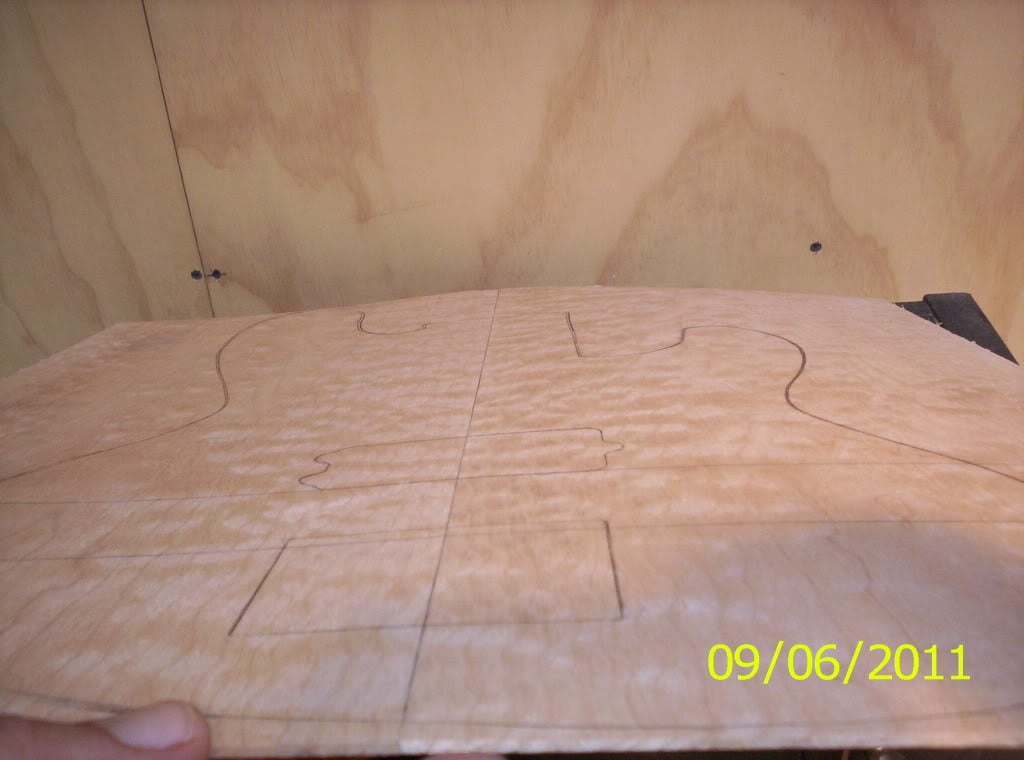
That's just good for the soul. I then cut out the outline of the quilted maple, which is very scary..that's all I need, to screw up this awesome piece of wood. I started sanding on my body blank, beginning the prepwork for joining the top to the body. I used the drum and disc sanders, smoothing out all the saw marks, removing the excess wood, which I didn't get with the bandsaw. I will need to practice on that, for now, I am ok with having excess to sand. After a couple of hours of sanding the body and top, I needed to sand the elbow carve on the body. Here's some pics...
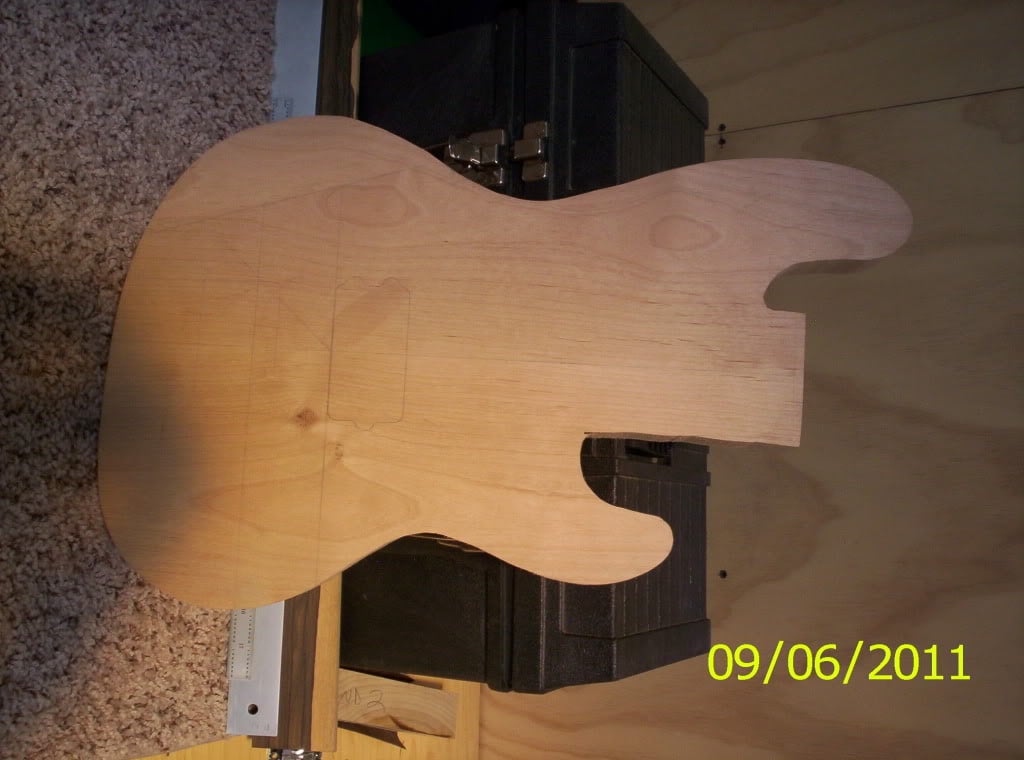
Here's the body with the carve, but, I think I need to do more fine touches.
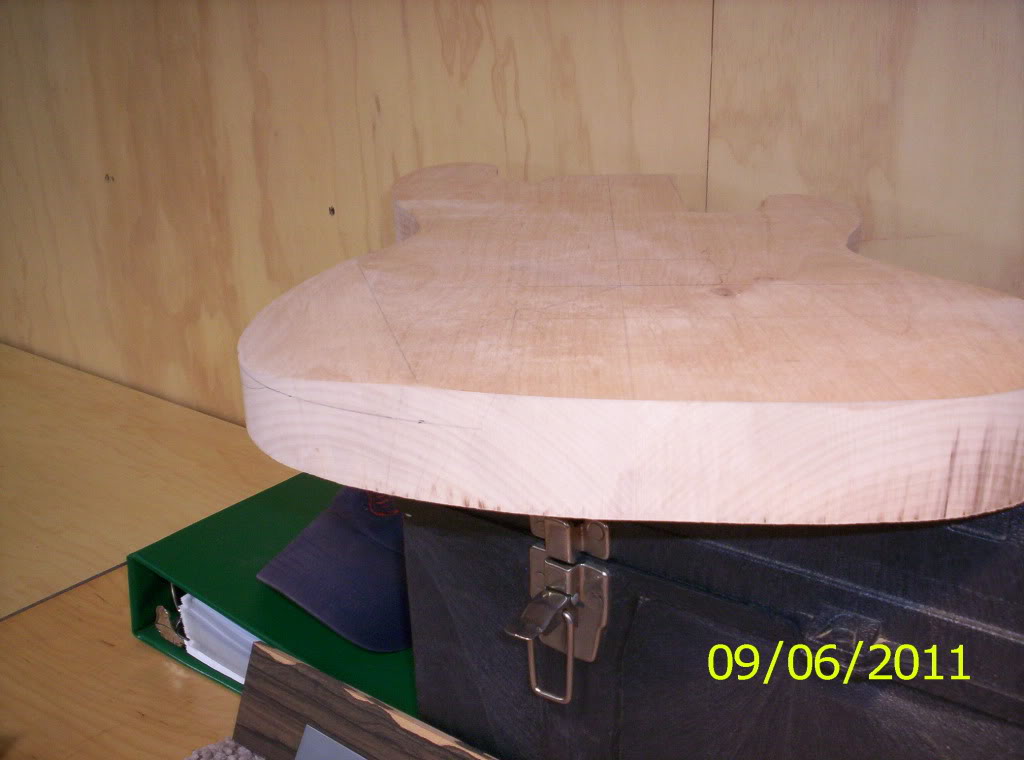
elbow carve (both pictures)
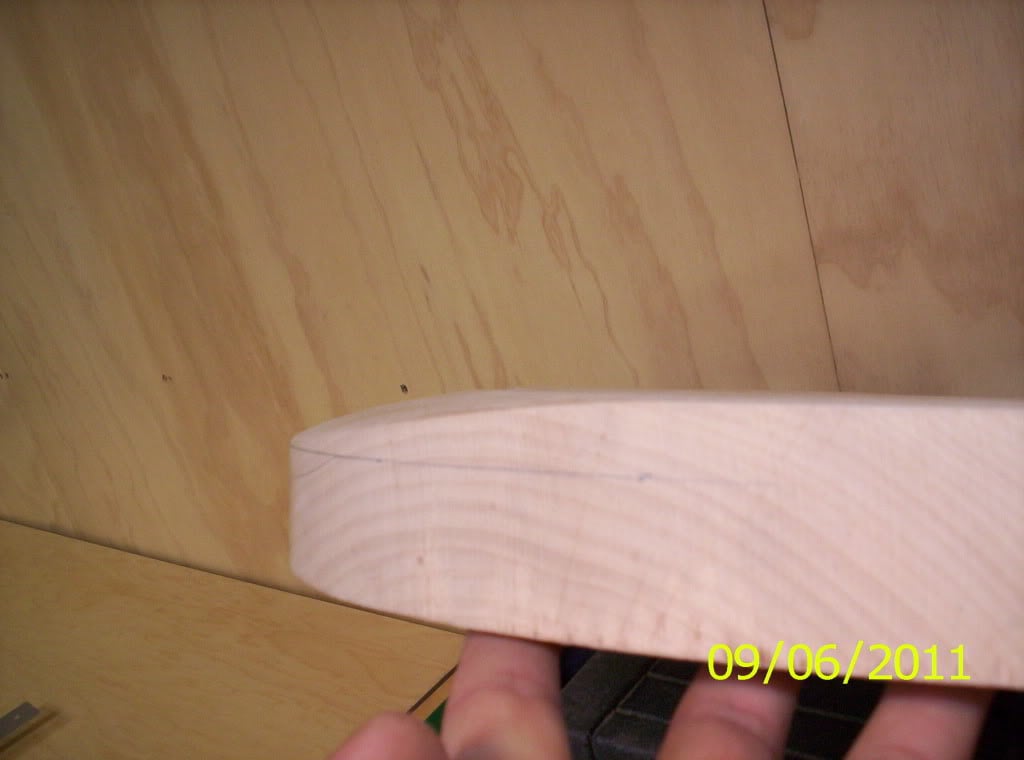
I think that I redid some of this after the pictures, maybe not. I took a lot of time getting everything smooth on the sides, no bumps, just a smooth outline. The body got even smaller after this, but that's ok, it weighs less now (ha ha!!!)
I think that the series of shot now are of the completed top and core, before joining.
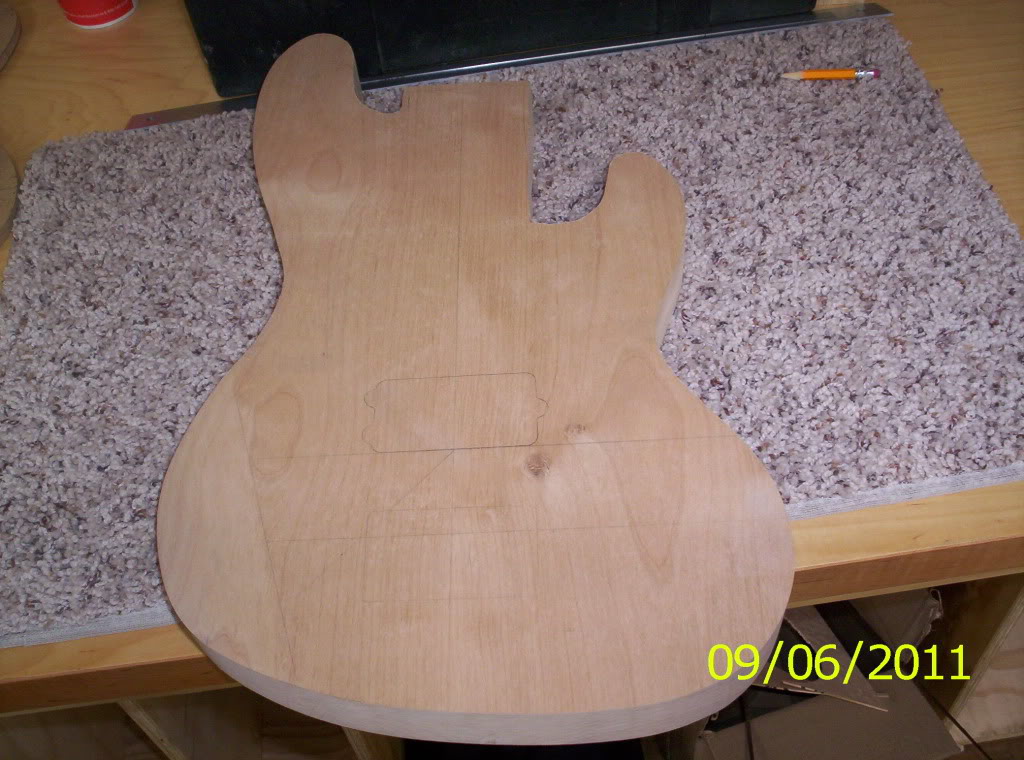
and the top, all ready...
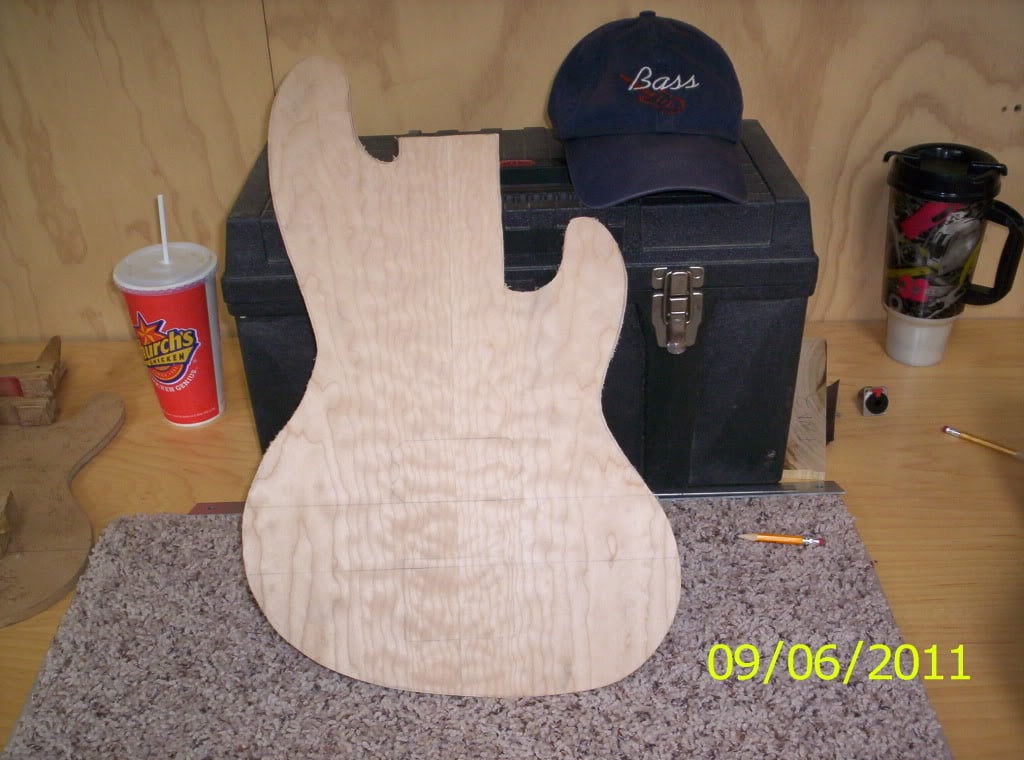
just an idea of the future (Todd, here you go! still eternally grateful!!!)
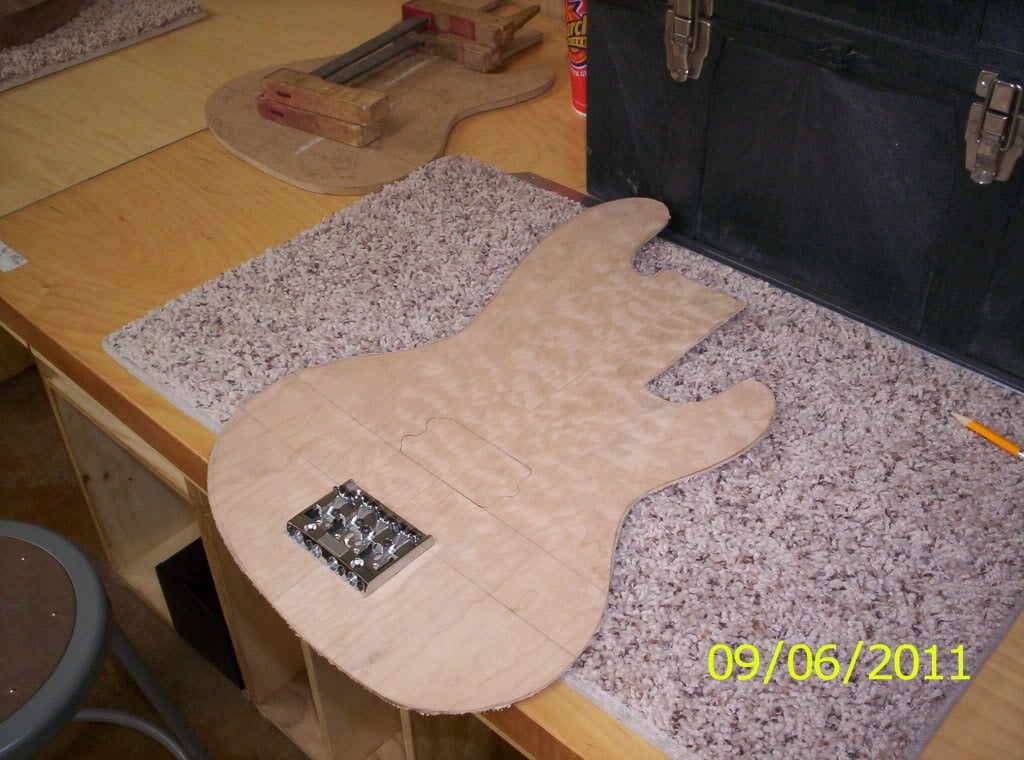
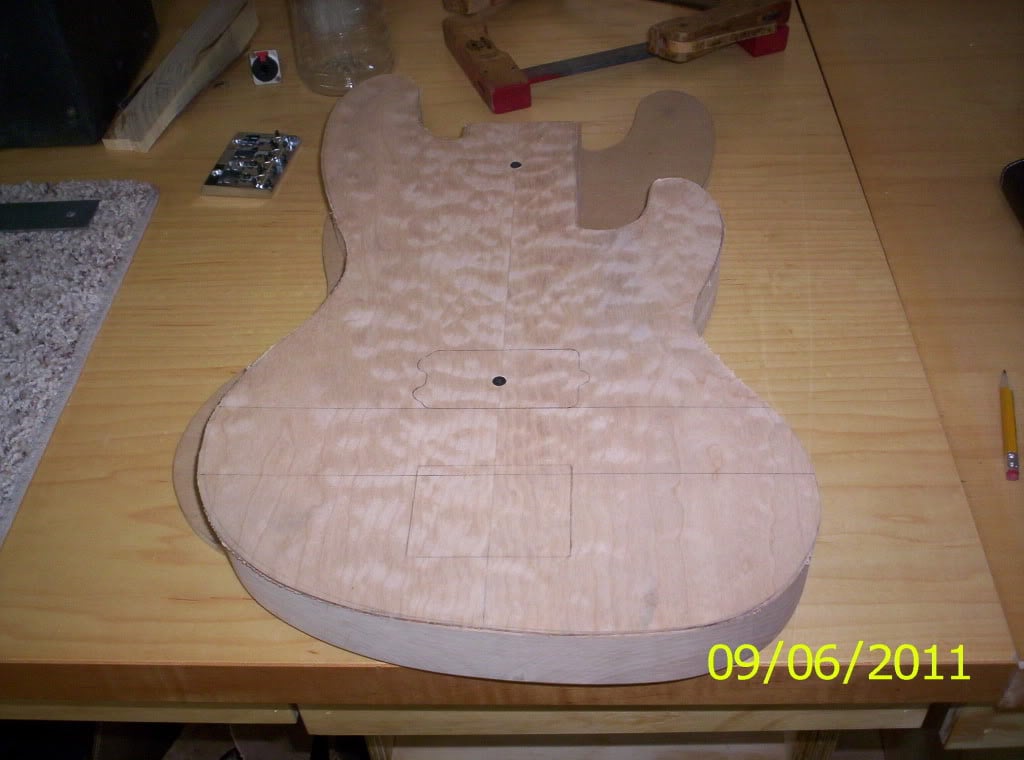
To properly do this, you need to drill a pilot hole in the neck pocket and, either the pickup location or the bridge. When routed, those screw holes will not be there. The screw help hold everything in place while the top is being glued on. Here are screw in the pickup and neck pocket locations.
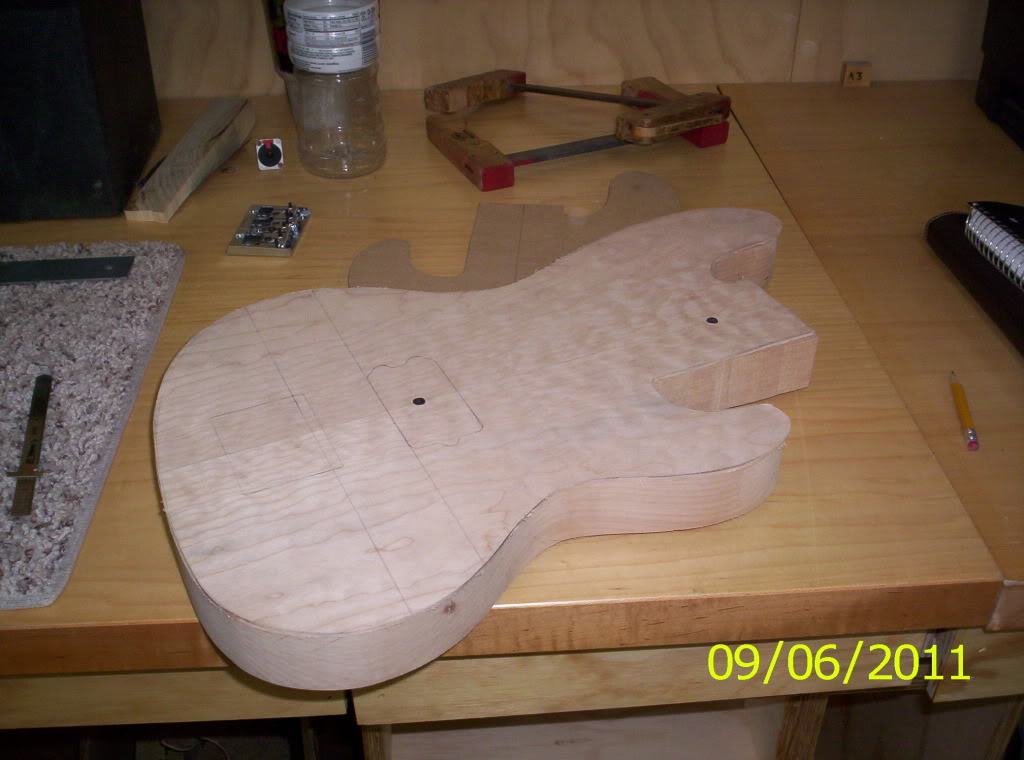
She's going to be beautiful!!!
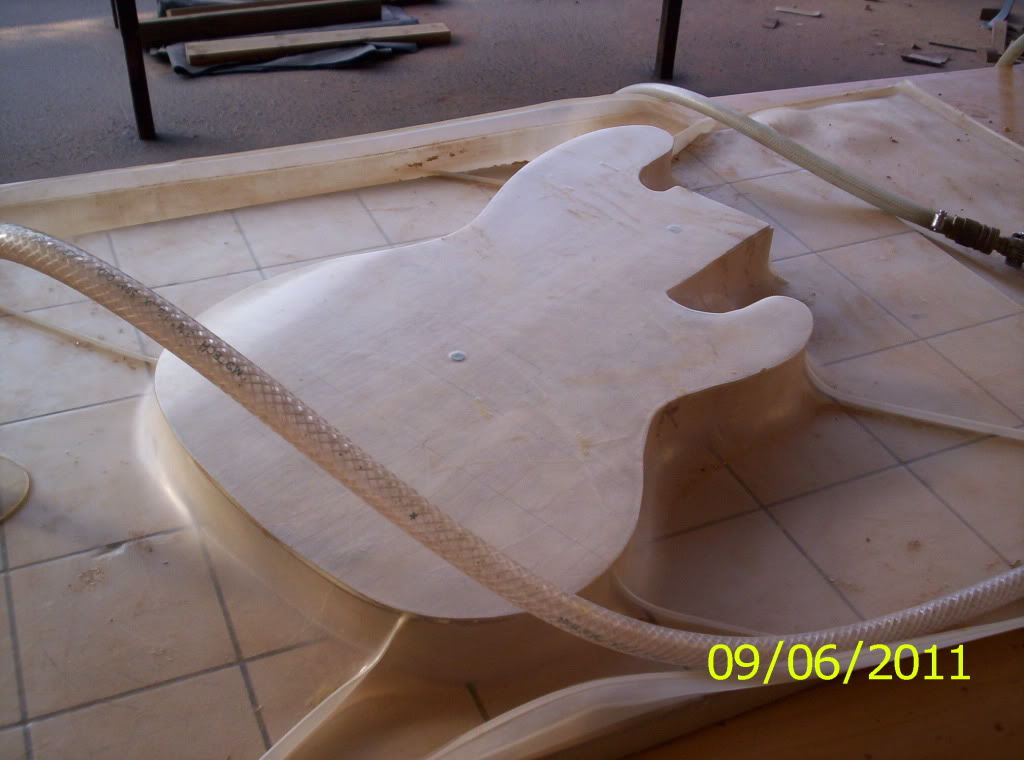
Now the clamp!! A vacuum bag and pump were used, removing any air and clamping every edge down to the next. Even the thin maple is glued down across the elbow carve. Here's a couple of shots in the bag.
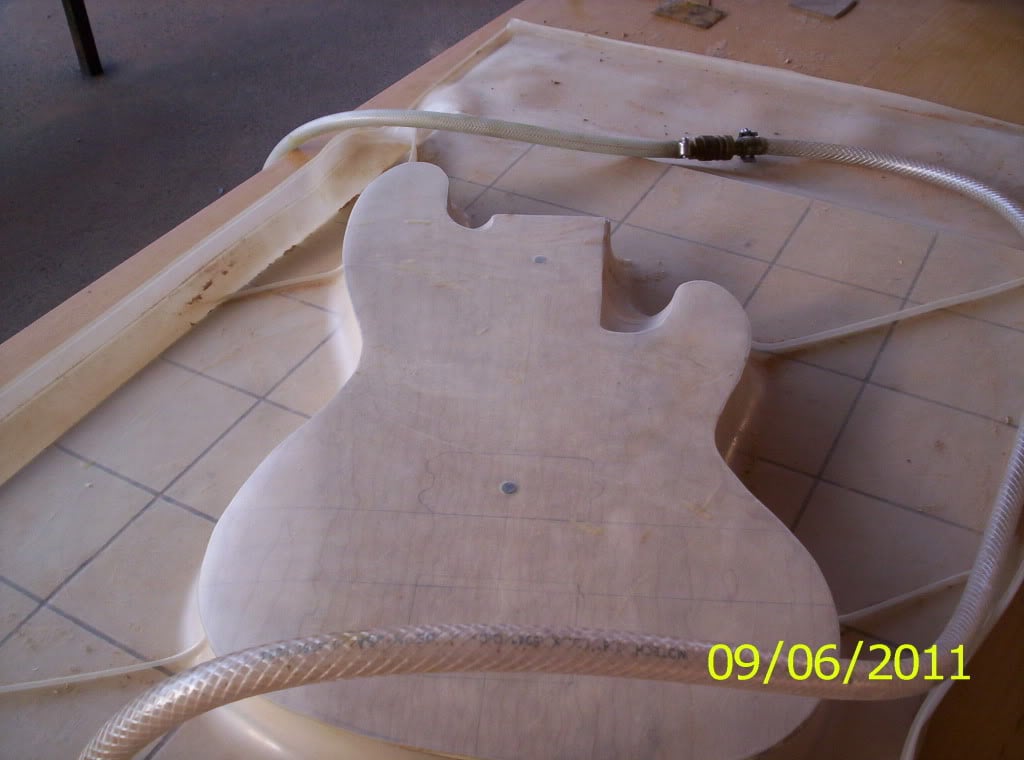
and it appears that the maple is doing well....
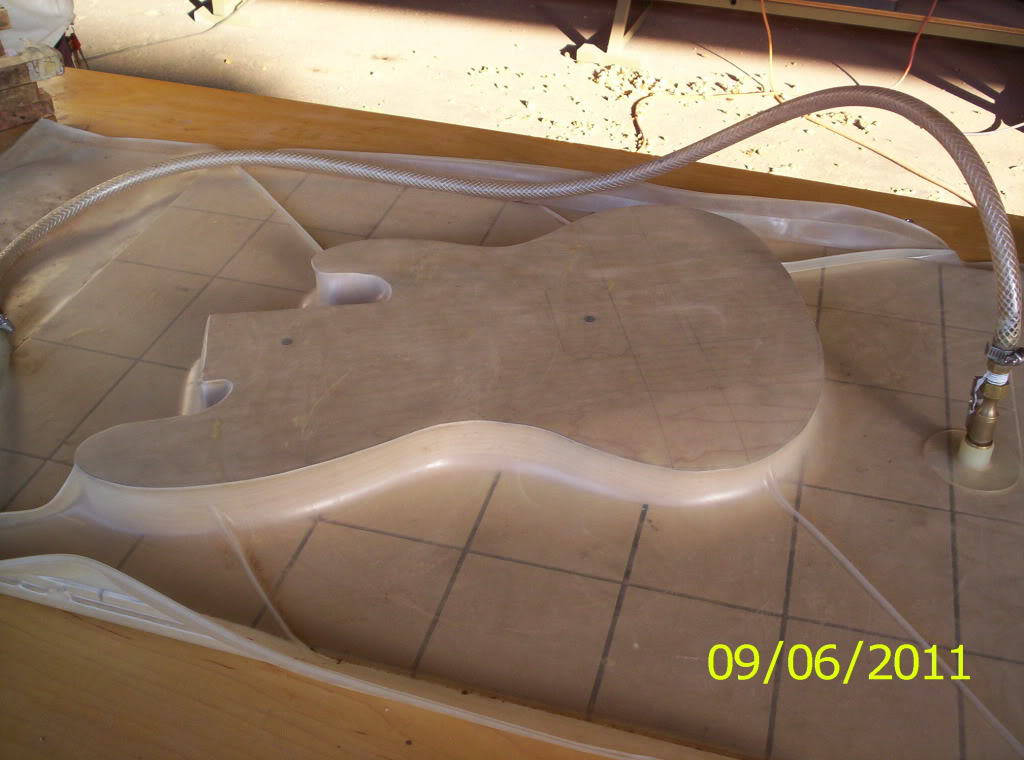
I am sure that some of you have used this method, but, I love this! very cool stuff!
I took the body out after 30 minutes, which was just the time to start cleanup, so no pictures, but, rest assured, the seams turned out good and no maple was harmed in the making of this body...
Tune in tommorrow, when Paul says "Gosh Batman! This bass is gonna be swell" Until next time, same bass-time, same bass-channel!
Thanks for watching!
Thumpin_P
Week Three!!!
Today, it would seem as though I did not get as much accomplished today, but it was tedious work (I'll get to that).
To begin with, I trued up the sapwood edge of my electric fretboard, intending to keep as much sapwood as possible. That was easy. Next, I measured 2 18/32" from that edge, and drew my line. The widest point on a 4 string is 2 1/2", by their standards, and I wanted a little room to play. I will say this, squaring used to kick my butt, but, with all the practice and success that I have had, I can say I kicked sqauring "square" in the butt today. When I finished squaring up the other side, I took my measurements, and I was...2 18/32" all the way down the board! WooHoo!!! Oh, sorry...here's some pics...
and the whole board,
We discussed our rosette options, looked at a slideshow, very entertaining. I will talk more about that in depth.
Now, the tedious stuff... I sketched out the template on the quilted maple...very pretty!
and some figure for ya!
That's just good for the soul. I then cut out the outline of the quilted maple, which is very scary..that's all I need, to screw up this awesome piece of wood. I started sanding on my body blank, beginning the prepwork for joining the top to the body. I used the drum and disc sanders, smoothing out all the saw marks, removing the excess wood, which I didn't get with the bandsaw. I will need to practice on that, for now, I am ok with having excess to sand. After a couple of hours of sanding the body and top, I needed to sand the elbow carve on the body. Here's some pics...
Here's the body with the carve, but, I think I need to do more fine touches.
elbow carve (both pictures)
I think that I redid some of this after the pictures, maybe not. I took a lot of time getting everything smooth on the sides, no bumps, just a smooth outline. The body got even smaller after this, but that's ok, it weighs less now (ha ha!!!)
I think that the series of shot now are of the completed top and core, before joining.
and the top, all ready...
just an idea of the future (Todd, here you go! still eternally grateful!!!)
To properly do this, you need to drill a pilot hole in the neck pocket and, either the pickup location or the bridge. When routed, those screw holes will not be there. The screw help hold everything in place while the top is being glued on. Here are screw in the pickup and neck pocket locations.
She's going to be beautiful!!!
Now the clamp!! A vacuum bag and pump were used, removing any air and clamping every edge down to the next. Even the thin maple is glued down across the elbow carve. Here's a couple of shots in the bag.
and it appears that the maple is doing well....
I am sure that some of you have used this method, but, I love this! very cool stuff!
I took the body out after 30 minutes, which was just the time to start cleanup, so no pictures, but, rest assured, the seams turned out good and no maple was harmed in the making of this body...
Tune in tommorrow, when Paul says "Gosh Batman! This bass is gonna be swell" Until next time, same bass-time, same bass-channel!
Thanks for watching!
Thumpin_P
Lookin good, Paul! I'm really excited about your build. I'm glad it's not just me making a bass. I really need to get my thread up...
As for the vacuum method, I think it is intriguing and could be useful in some ways, but I noticed that it is a bit temperamental. It seems to me a clamping caul with styrofoam would insure a solid glue line across the surface (and especially on the edge) ...but what do I know? Mabye I'm just jealous of their contraption.
Josh
As for the vacuum method, I think it is intriguing and could be useful in some ways, but I noticed that it is a bit temperamental. It seems to me a clamping caul with styrofoam would insure a solid glue line across the surface (and especially on the edge) ...but what do I know? Mabye I'm just jealous of their contraption.
Josh
Thanks Josh! I am really diggin yours too! And you may be right about the bag, but, that's what great about where we are at, as far as the big picture, not just school..., we have nothin' but time to learn how we want to do things and experiment along the way to where we want to end up in our careers. Very valid point, thanks! See you in the morning, hopefully, I'll have some coffee in me!
- Apr 18, 2008
- 16,008
- 1
- 31,708
- Disclosures
- I'm highly opinionated and extremely self-assured
So awesome! There's nothing better in my world than a quilted maple drop-top! And I love the vacuum press - I may have to rig up something like that soon!
Thanks for the updates, bro - keep it up!
Thanks for the updates, bro - keep it up!
Tommorrow is making the block look really stunning...trimming excess, sanding and maybe a roundover, we'll see....thanks CT!
- Aug 15, 2011
- 571
- 171
- Disclosures
- Owner/Luthier:RoseBud Basses & Guitars LLC
Thumpin P
sounds like your have-n fun,and you should be. keeping up with this thread is almost like taking the class again. Keep up the good work
sounds like your have-n fun,and you should be. keeping up with this thread is almost like taking the class again. Keep up the good work


