• TalkBass has been independent since 1998. Add your voice.
    Create a free account to reply to discussions, view embedded media, and browse with fewer display ads.
    Join freeLog in
    Want zero display ads or expanded classifieds tools? Compare plans.

Roberto-Venn: The Dream Starts...

Well, not much to talk about today. We discussed several aspects of building, choices of wood, hardware, pickups, on both electric and acoustic insturments. There are some limitations as to what you can build ( for good reasons). As far as acoustics, you can only build an OM or a dreadnought, They really only have those two forms and molds. As far as the electric, the options open up. But, no fretless, to prove you can install new frets. There is an option for a third instrument, and the sky is the limit on that one. If you are ahead of the game on the other two guitars (bass guitar he he), and your wallet can stand it, you can build an archtop, a neck through, a fretless, whatever.. I will not be travelling this route...I'm b ( I'm so broke, I can't afford the oke).

I did more work on the tele, which I will explain.

105_7253.jpg


105_7254.jpg


I took the router and finished the neck pickup route, and then took out some frustration on a chunk of poplar...with a rasp.

105_7255.jpg


I had not planned on adding the belly contour. I am old school. A tele is a tele. But, I figured I could use the practice, and this one will stay with me. I also added the arm contour.

105_7256.jpg


I also did this with a rasp, cleaning both up with a file, then an orbital sander and 220 grit. Not horribly bad for a first time...

Now,
the reason that I have frustrations is this. Squaring. I have issues trying to get things squared on a sanding belt, disc, whatever. I got very frustrated this morning, because I am slower than a lot of people, and the lines for the equipment is lengthy. Instead of screwing up a fresh block of mahogany, I started working on the tele. When I get frustrated, I have found that it is not a good idea to "get right back on the horse that threw you". The best thing to do is practice, practice, practice. But, when most of the equipment is taken...how do you practice? See my frustration? This is not the schools fault and I am not blaming the school, I just hate getting behind. Pardon the vent...but thanks.

Well, the weekend is here, I plan on sleeping in late, doing some laundry, teaching someone some bass, etc, etc...,

Thanks for watching, see you again Monday night!

Thumpin_P
 
Yes indeed. It may not be in a tin hut, but, because of a class of 40, it's still hot... Kris and John are there and actually pretty helpful , as long as you play by the rules. BTW, They have several slideshows, showcasing past graduates' guitars, and your OM is in one of them. The headstock was a dead giveaway...
 
J...glad to know that I am not alone. The trick, I think, is getting to know how the physics of each piece of equipment works with said wood. Those disc sanders are quite difficult, because the paper makes more passes per second, than the outside. It is a work in progress, but, with everyone else working on those same sanders, I don't have time to even practice on scrap pieces. I guess I'll try again on Monday...
 
Ah I remember making my toolbox tele...but you guys don't have the pleasure of working in the 110 degree heat in a tin hut do you? Also are Kris and Reuter bothering to show up for your semester?

Glad to see that Reuter and Kris weren't just skipping my classes because they didn't like us. ;) Of course, when I went to Roberto-Venn they had just gotten busted for spraying Nitro in a shed on the back of their property without any safety equipment or city permits, so they were scrambling around trying to figure out how my class would finish their guitars. :rollno:

Good luck on your guitars, Thumpin_P. Have you decided what you're doing for your acoustic yet? Also, are they letting people build jumbos again?
 
Hey Yvarg! Thanks for viewing! Question 1; they will let you do a jumbo, for a third instrument. Question 2; I will be building an homage to a Martin HD-28. Rosewoob back and sides, spruce top, snowflake inlays, herringbone purfling, 5/9/5 rosette, zippered backstrip, and my own logo (in the works) on the headstock, complete with "butterbean" tuners. The bass will be understated elegance in the form of a Stingray 4. Alder body, quilt top, elbow contour, with maple following the contour. Honey sunburst, RW or ebony board, maple neck machine inserts ( no neck plate) SD MM pickup and 3-band EQ. Still debating on hardware because of cost. I am on a financial aid budget. Thanks for looking and I will (hopefully) post some progress tomorrow. I am having a dickens of a time squaring the neck and tail blocks. I need to be determined to finish those tomorrow.
Peace Out...

Thumpin_P
 
Ah, thanks. That's the way it was with my class too (in regards to the Jumbo), but I thought I remember hearing that they used to let students build them for a first a while back. Just wondering if they had returned to that or not. The dreadnaught sounds like fun, I hope you post pictures of it here as well. :)
 
Everything Gets Posted! I am at full disclosure!!

Seriously, I wanted this thread to be a learning experience for people who wanted to go there. When I started really researching the school a few months ago, not everything was spelled out for me. I really didn't know which questions to ask. Luckilly, there was a graduate in my hometown (believe me, I was surprised, it IS a small town), and he was able to shed a lot of light on the correct questions to ask Bart, and how to go about things. Hopefully, this thread may shed some light for others, if they choose to go to R-V. When I did a search on the school, there was nothing definitive, at least for me, about the school, the ins and outs. I just want to chronicle my experiences, if anyone has the patience to read it. Well, time for bed, gotta hit it and git it @ 6:00, so, until tommorrow....C-Ya!
 
Ok people!
Week two, Day one;
Those of you who have been following this thread remember my frustrations with squaring up the tail block. Today..., I kicked the snot out of the tail block and the neck block. I believe that no lines on the sanders, plus a renewed sense of patience helped dramatically. So...

105_7260.jpg


and...tail block

105_7261.jpg


and neck block

105_7262.jpg


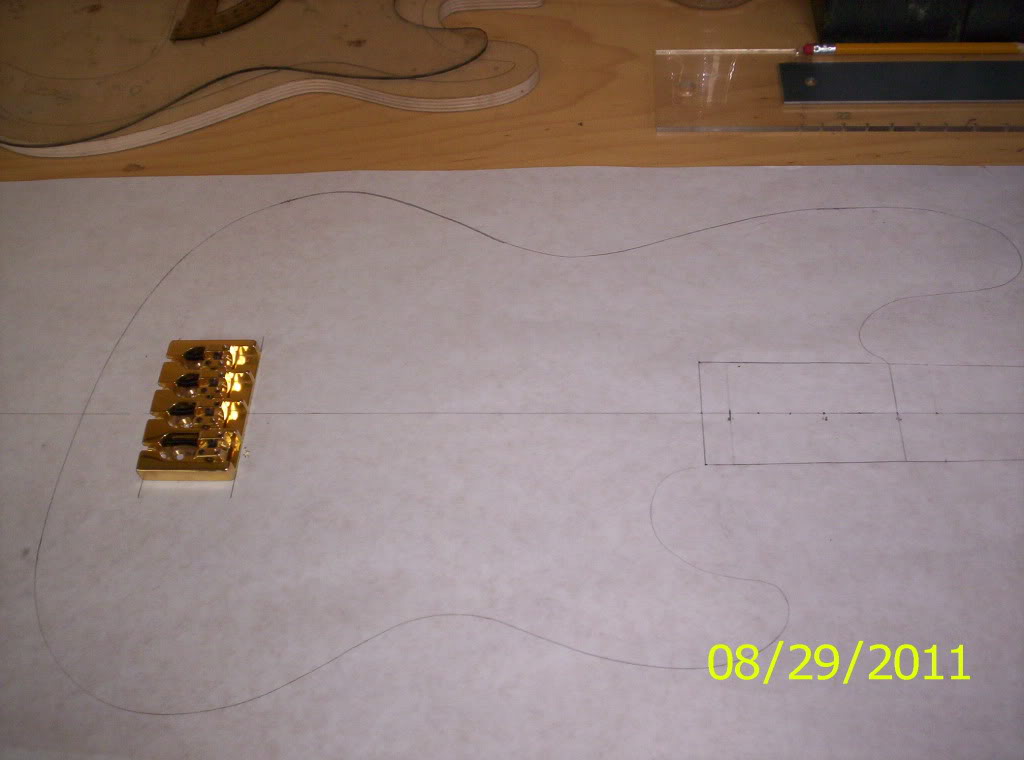
After conquering these two hurdles, a discussion was had regarding design. several aspects were covered, scale length, neck placement on various types of neck joints, basically a very in depth-discussion. At this point, it was time to design my bass. I had all intentions of designing a factory-accurate Stingray 4, but, every template that was to be had (for bass) was either a Jazz or Precision bass. The neck dimensions were either Jazz or Precision, etc, etc... So, I took a leap of faith and tried my hand at creating a one-of a kind, using what I had.
105_7259.jpg


Here you see the big picture, sans headstock (not on their agenda today) with a Hipshot A style bridge. I will probably use this style, just not in gold.(Sorry CT, they have a rule about used hardware) I used this for scale comparison and bridge placement, because 21 frets and 34" scale did not work with this design, I will have a better picture of the outline in a minute, that is another task completed. After the initial outline, complete with neck and scale length completed, you needed to make a seperate outline of just the body, to transfer to MDF for a body template...

105_7269.jpg


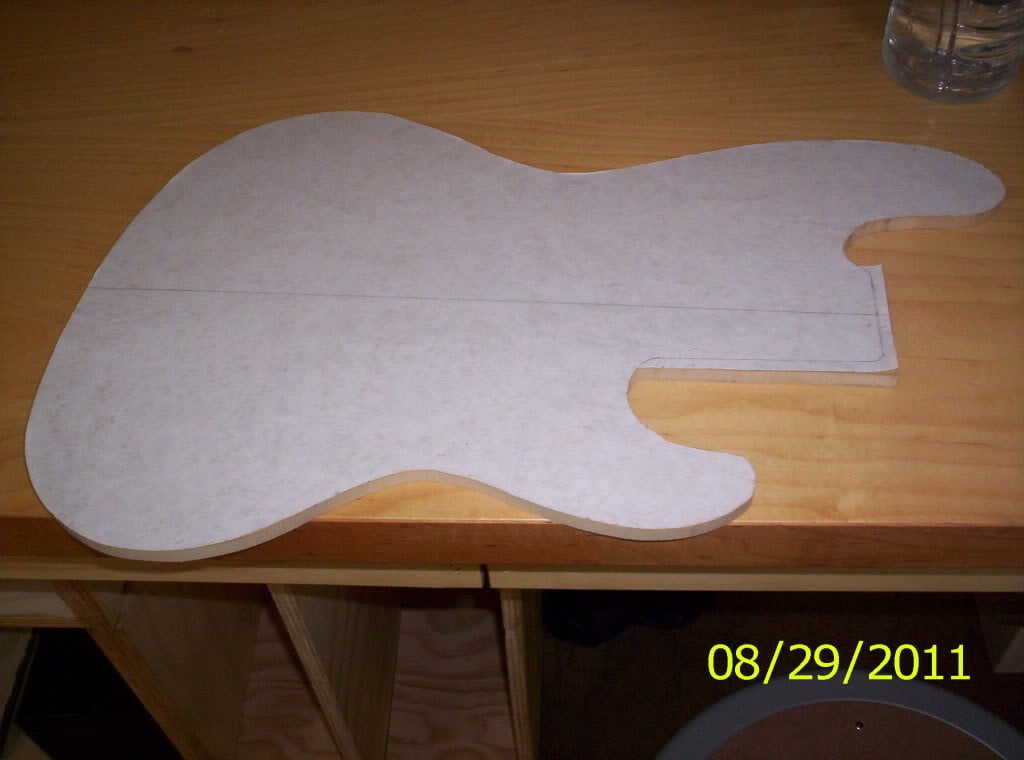
Done... here's a better view from the side.
105_7270.jpg


I do not have pickup placement yet, and the area around the neck pocket is bigger than it needs to be, but, that will get cleared off once the neck is fitted. To achieve the large lower cutaway, I tried a trick that was explained to me today. Take the existing template, following the centerline, and move the template until you like the size of the cutaway. I also had to use a precision bass template for the upper horn, as the jazz bass template was horribly screwed up on that horn (no, I didn't do that). I am definitely pleased with the outcome of the shape. I know that it is not what I had started with, but, I now understand why people say the design can change very easily. It will have a 6-bolt neck attachment, no plate, just threaded inserts,22 frets, and I am keeping with the traditional Stingray headstock, and pickup placement. Still quilted maple top, sunburst finish, arm contour, with the maple following the contour. No pickguard, or control plate on the front. I am thinking naming this "Understated Elegance" maybe...the name just came to me.

Moving on, I also recieved the back, sides, and top for my HD-28. We were allowed to pick from several VERY nice woods, some from Peru, and some from existing stock. I found a set of nice Indian Rosewood that really spoke to me, so I grabbed it, put my name on it, and I was good to go. So.... WOOD!!!

105_7263.jpg


sides... here's a detail of grain,

105_7264.jpg


back bookmatched set..

105_7265.jpg


and grain...

105_7266.jpg


and spruce top, also bookmatched...

105_7267.jpg


and grain...

105_7268.jpg


I have some sanding to do on the body template, then that will be ready. I did catch a break today. One of the instructors asked if he could use my freshly finished blocks to demonstrate measurong and trimming the height to match the sides. I said "sure, just don't screw up....I really don't want to have to do those again". He didn't. One line across the bottom of both of them, one swipe across the bandsaw...done. No more squaring either... Well, folks, it has been a whirlwind of a day, as you can tell. I am tired after celebrating with some great friends of mine, and ready to chill out with some NPR jazz. Thanks for watching, and see you tomorrow!

Love, Peace, and Chicken Grease

Thumpin_P
 
I had a bit too much chicken grease at that celebration, actually.

Great job on the neck and tail blocks! I think on the body I'd take the top cutaway down a bit further so the horns look more even. Or move the upper offset further forwards.. it just looks off balance for some reason, looking at the two halves. Maybe I just need to see it with a neck on it.
 
Hey folks..
Day two of week two, not a tremendous amount of pictures, but, a fair amount of progress. We received several more handouts on neck construction, spacing, trimming the fretboard for the acoustic...etc.. Our templates were taken to get the core wood for our electrics. We had three choices, ash, alder, or mahogany. I will be building a budget 1st build, so... yep,

105_7271.jpg


I got alder. I think it will work well with the maple top, it is easier to work than ash, and cheaper and lighter than mahogany. I f the wood looks large, it's because it is. You can see a set of safety glasses sitting on there for scale. With that said, I will be trimming quite a bit off of the sides and also trimming down the thickness. You'll see...

105_7272.jpg


See...? In addition to the electric body, we all worked on joining our top and back for our acoustics. I completed both of them, but, I am slightly embarrassed by the spruce, it was very dirty, and I will wait until it is thickness sanded, to get a good picture. The only other picture is of the Indian rosewood, clamped with reel tape. i took the tape off right before I left today, and didn't have time to take a picture.

105_7273.jpg


One of several handouts was the price list for parts, which I need to go over and plan a budget. We just got this today, after being given all this wood, which, I know as well as you, is not free. With that said, I did forget to mention a nice part of my day. I went to start joining the rosewood, probably took 1/16 of an inch off of the center, to get rid of rips and tool marks. When I got back to my bench and tried the dreadnaught template, the wood was possibly 1/2 an inch too small on both sides. I had picked out a set for OM models. I spoke to Steve, who Pointed me at John (academic director and acoustic guru), who had Matt and Steve pick me out a new set...very nice. When the back fit the template, the matched sides they gave me, did not fit a dreadnaught side template. All was fixed, and all I could do was laugh, after they started working to get me the right size of wood. It may not seem like much, but that was very cool. The school could have charged me for 2 sets, but I don't think they did. Anyway, got to get to budgeting. When I come up with some figures, I'll let you guys know.
Thanks for viewing,

Thumpin_P
 

Latest posts