

Enjoy the benefits of a premium membership!
Upgrade Account
-
TalkBass has been independent since 1998. Add your voice.
Create a free account to reply to discussions, view embedded media, and browse with fewer display ads.
Join free Log in
Want zero display ads or expanded classifieds tools? Compare plans.
You are using an out of date browser. It may not display this or other websites correctly.
You should upgrade or use an alternative browser.
You should upgrade or use an alternative browser.
SBMM Ray35 truss/neck, is this normal?
- Thread starter rojo412
- Start date
More options
Who Replied?

Here's what I got back from SBMM:
"Thank you for reaching out to Sterling by Music Man!
I am sorry to hear you are having issues with this bass.
Unfortunately if this bass is no longer under warranty we are unable to offer replacement of any type.
In regards to the truss rod pulling out as it is adjusted. You might try giving it a tap with a fret hammer to slide it back into place. This may also help with adjusting the relief once it is situated.
All SBMM Basses use a single action truss rod.
Let us know if this helps, or if there is any other info we can provide.
Best,"
So there you go!
I did re-assemble the bass today. It works. The neck is still bowed forward under no tension, but the rod allows it to go backward now. Again, not terribly impressed by that fact for as young as this bass is, but this is why I own an '89 SR5 and repair these newer ones.
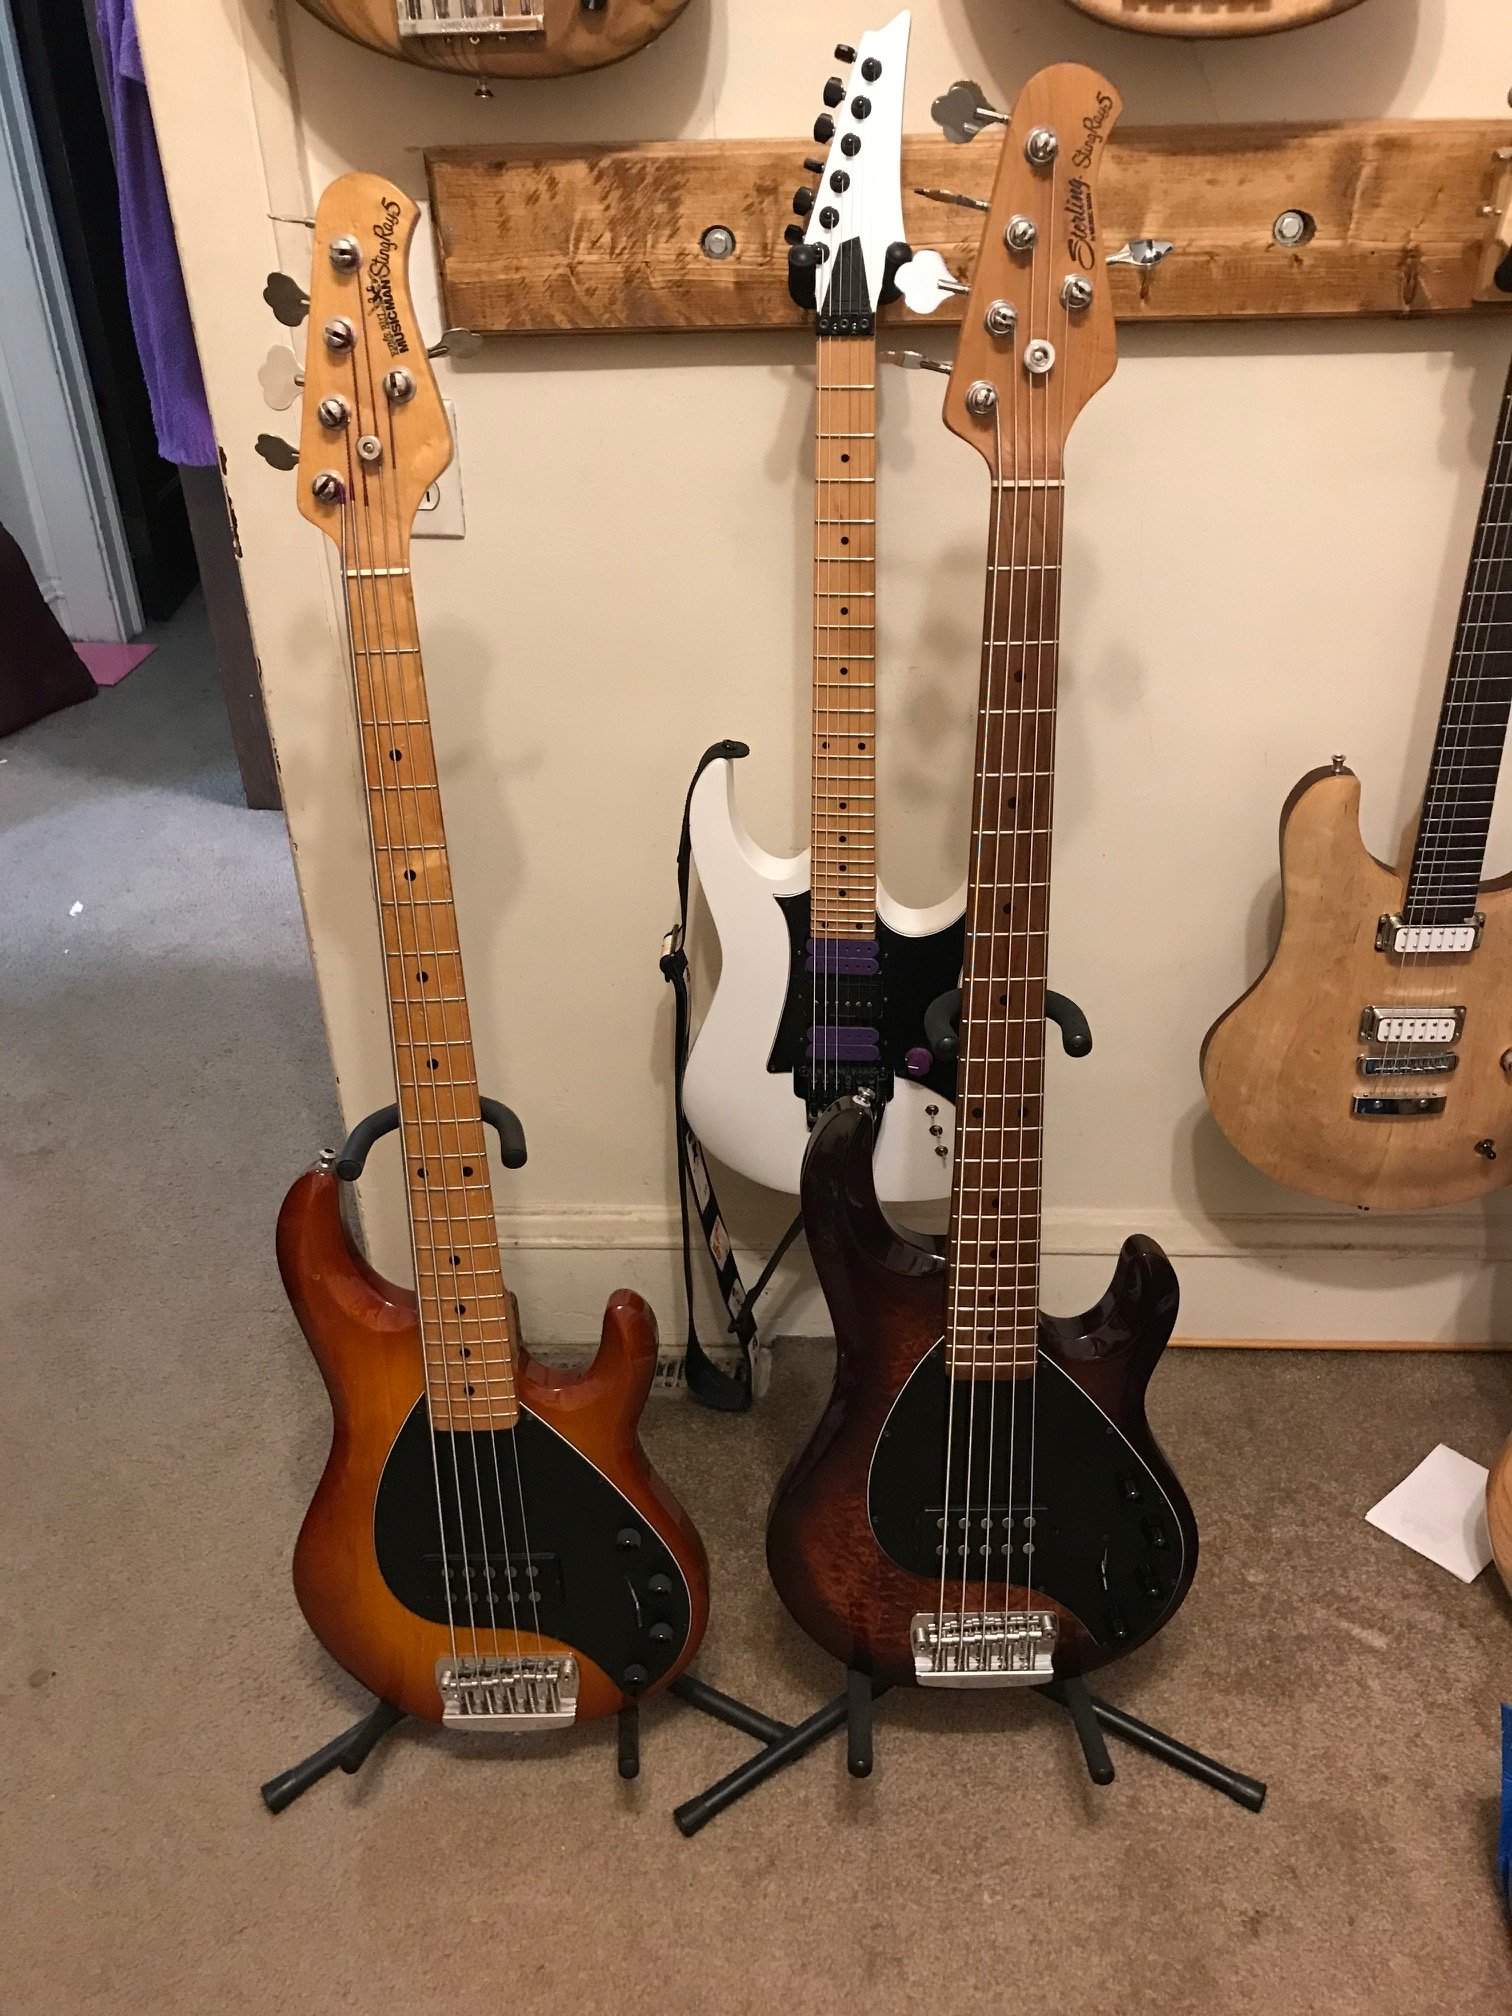
Seems like a $900 bass should have a better quality neck... but I'm not in marketing, so what do I know, right?
Oh, I think tuners that don't do this would be pretty sweet, too:
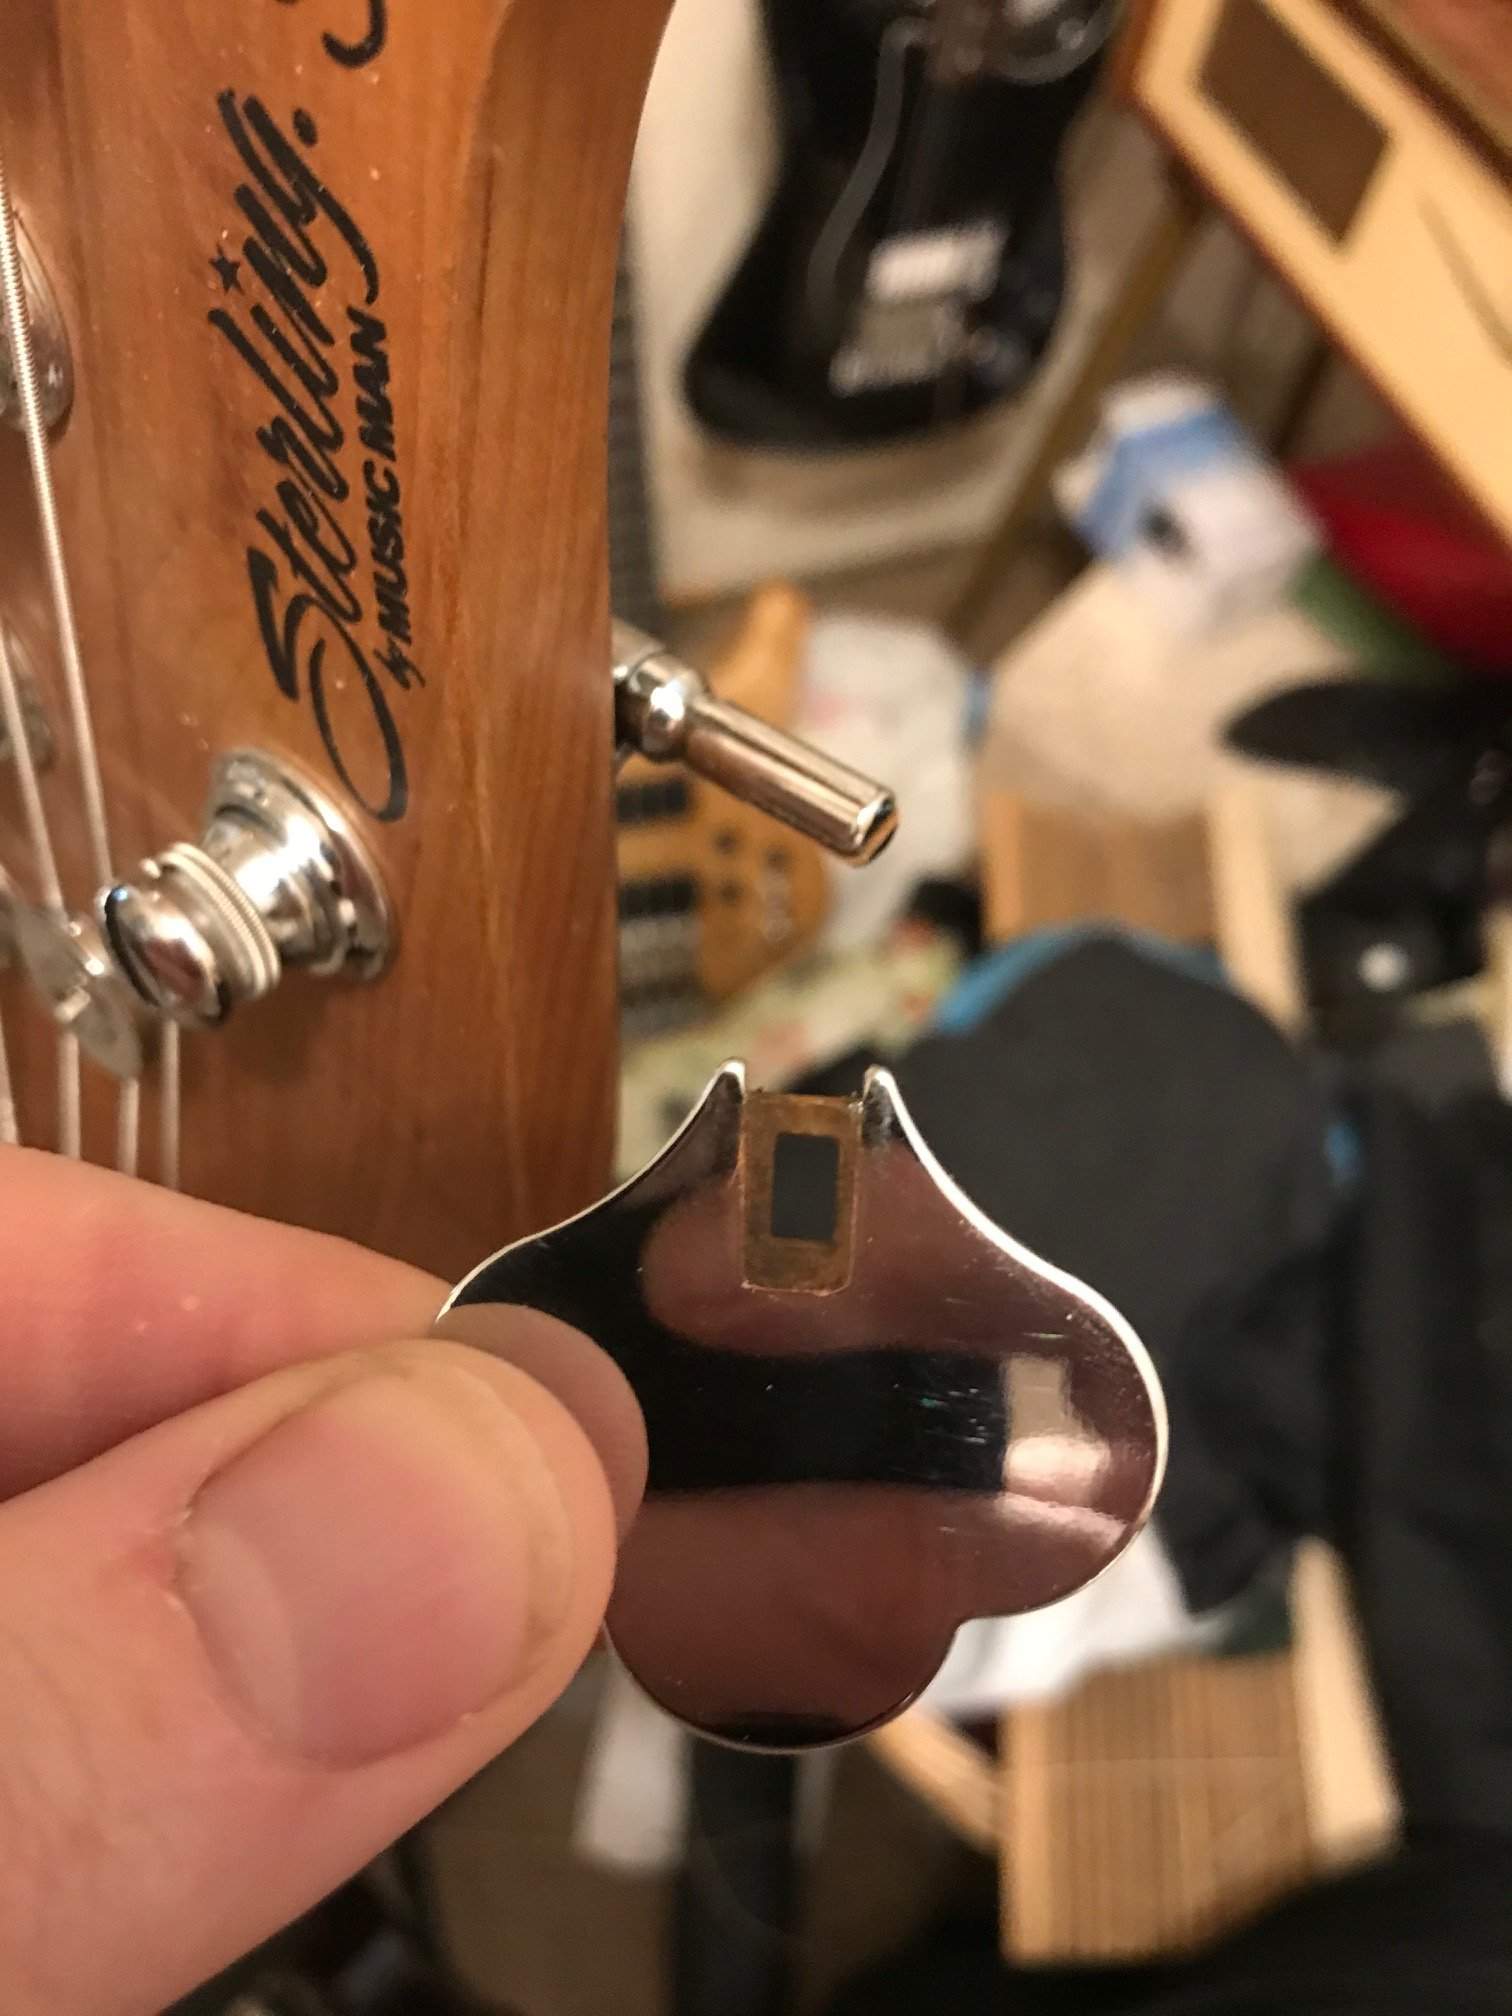
"Caveat emptor"
"Thank you for reaching out to Sterling by Music Man!
I am sorry to hear you are having issues with this bass.
Unfortunately if this bass is no longer under warranty we are unable to offer replacement of any type.
In regards to the truss rod pulling out as it is adjusted. You might try giving it a tap with a fret hammer to slide it back into place. This may also help with adjusting the relief once it is situated.
All SBMM Basses use a single action truss rod.
Let us know if this helps, or if there is any other info we can provide.
Best,"
So there you go!
I did re-assemble the bass today. It works. The neck is still bowed forward under no tension, but the rod allows it to go backward now. Again, not terribly impressed by that fact for as young as this bass is, but this is why I own an '89 SR5 and repair these newer ones.
Seems like a $900 bass should have a better quality neck... but I'm not in marketing, so what do I know, right?
Oh, I think tuners that don't do this would be pretty sweet, too:
"Caveat emptor"
Resurrecting this if yall don't mind. I know it's been a few years, and it took more than a few searches to find "THE" answer which @rojo412 figured out with this thread.
This is an amazing find and is exactly what's happening with mine (same bass from 2019 that I just got, with the same roasted neck). Thanks for sleuthing it.
My question is how can we get those chain rollers? Are they some standard size? I can remove links from chains, so not past ordering a bike chain to get em' but is there only one size?
Thanks
This is an amazing find and is exactly what's happening with mine (same bass from 2019 that I just got, with the same roasted neck). Thanks for sleuthing it.
My question is how can we get those chain rollers? Are they some standard size? I can remove links from chains, so not past ordering a bike chain to get em' but is there only one size?
Thanks
THE FIX AND HOW IT WORKS:
That little piece of wood that gets knocked out? It's trash. It's useless. You can toss it. Or glue it in carefully, if you want, but frankly, it's decoration more than function.
What you really need in there is the spacer that would fill the "travel area" and keep the rod from being pulled out of the neck.
On the left is the stock "washer" for the rod, on the right is the spacer. That spacer is actually a piece of a bicycle chain, THE ROLLER. I used to work at a bike shop and snagged a bunch of them from scrap chains to keep as truss rod spacers. They are hardened steel and drastically better than most "washers" because they won't mushroom like this one did under pressure.
I ended up using 2 of those rollers as spacers and they appear to be working fantastically. They fill the gap, the rod tension is borne on those, not the heel of the neck wood, and I can get a mad back-bow in this neck (it still has a wicked front bow naturally, but I'm going to keep torturing it).
This one lives to fight another day.
Okay, so why does that work without an anchor point?
Well, if you've ever had a "golden era" Warwick, you may or may not know that the truss rods in those could be removed without taking the neck apart. They just slid out as a unit. The concept was, once it was seated in place, the truss rod worked fine to add relief by pushing against itself. There was no shoulder or support built into the neck, it was built into the rod.
This is essentially the same design. As you can see, the truss could likely be removed like this without much effort, other than pulling. And the only reason to remove it completely would be if it were snapped, which this one isn't so I'm not going to force the issue.
Point is, if the rod functions, there's no reason to do much more than fill that gap with a nice spacer and make sure the rod is seated as far in the neck as possible.
'Cuda, or anyone else with this issue, the fix can be had with these chain rollers. I'm happy to help anyone out if they need a pair, but you can also go to your local bicycle shop and peruse their scrap chains. I guarantee, if they are anything like my shop used to be, you can bribe them with beer and/or pretzels and they'll hook you up.
So yeah... I think I can put this one to bed at the moment. There are design issues and wood quality issues, but the fix involved is not rocket science and should allow for better performance out of these basses for practically no money and little effort (compared to removing a fingerboard).
Speaking of beer... I deserve one now!
It's rather ironic that this comes up, as I'm currently working on another one of these! Kinda forgot all this and I think I needed to read it, as this neck could use the same kind of love.
OOPS! Forgot to answer this publically.
The rollers are from what was likely a Shimano 9 or 10 speed chain (at the time, those were thinner than other ones which might have been more common), unless it was a Campagnolo 9 or 10 speed. Those would have been rarer for us to have in the scrap bin though.
Here's the specs:


OOPS! Forgot to answer this publically.
The rollers are from what was likely a Shimano 9 or 10 speed chain (at the time, those were thinner than other ones which might have been more common), unless it was a Campagnolo 9 or 10 speed. Those would have been rarer for us to have in the scrap bin though.
Here's the specs:
Last edited:
OK, got some chain pieces from a local bike shop (the 8 speed on the right side is the thicker one, and an 11 speed on the left side).
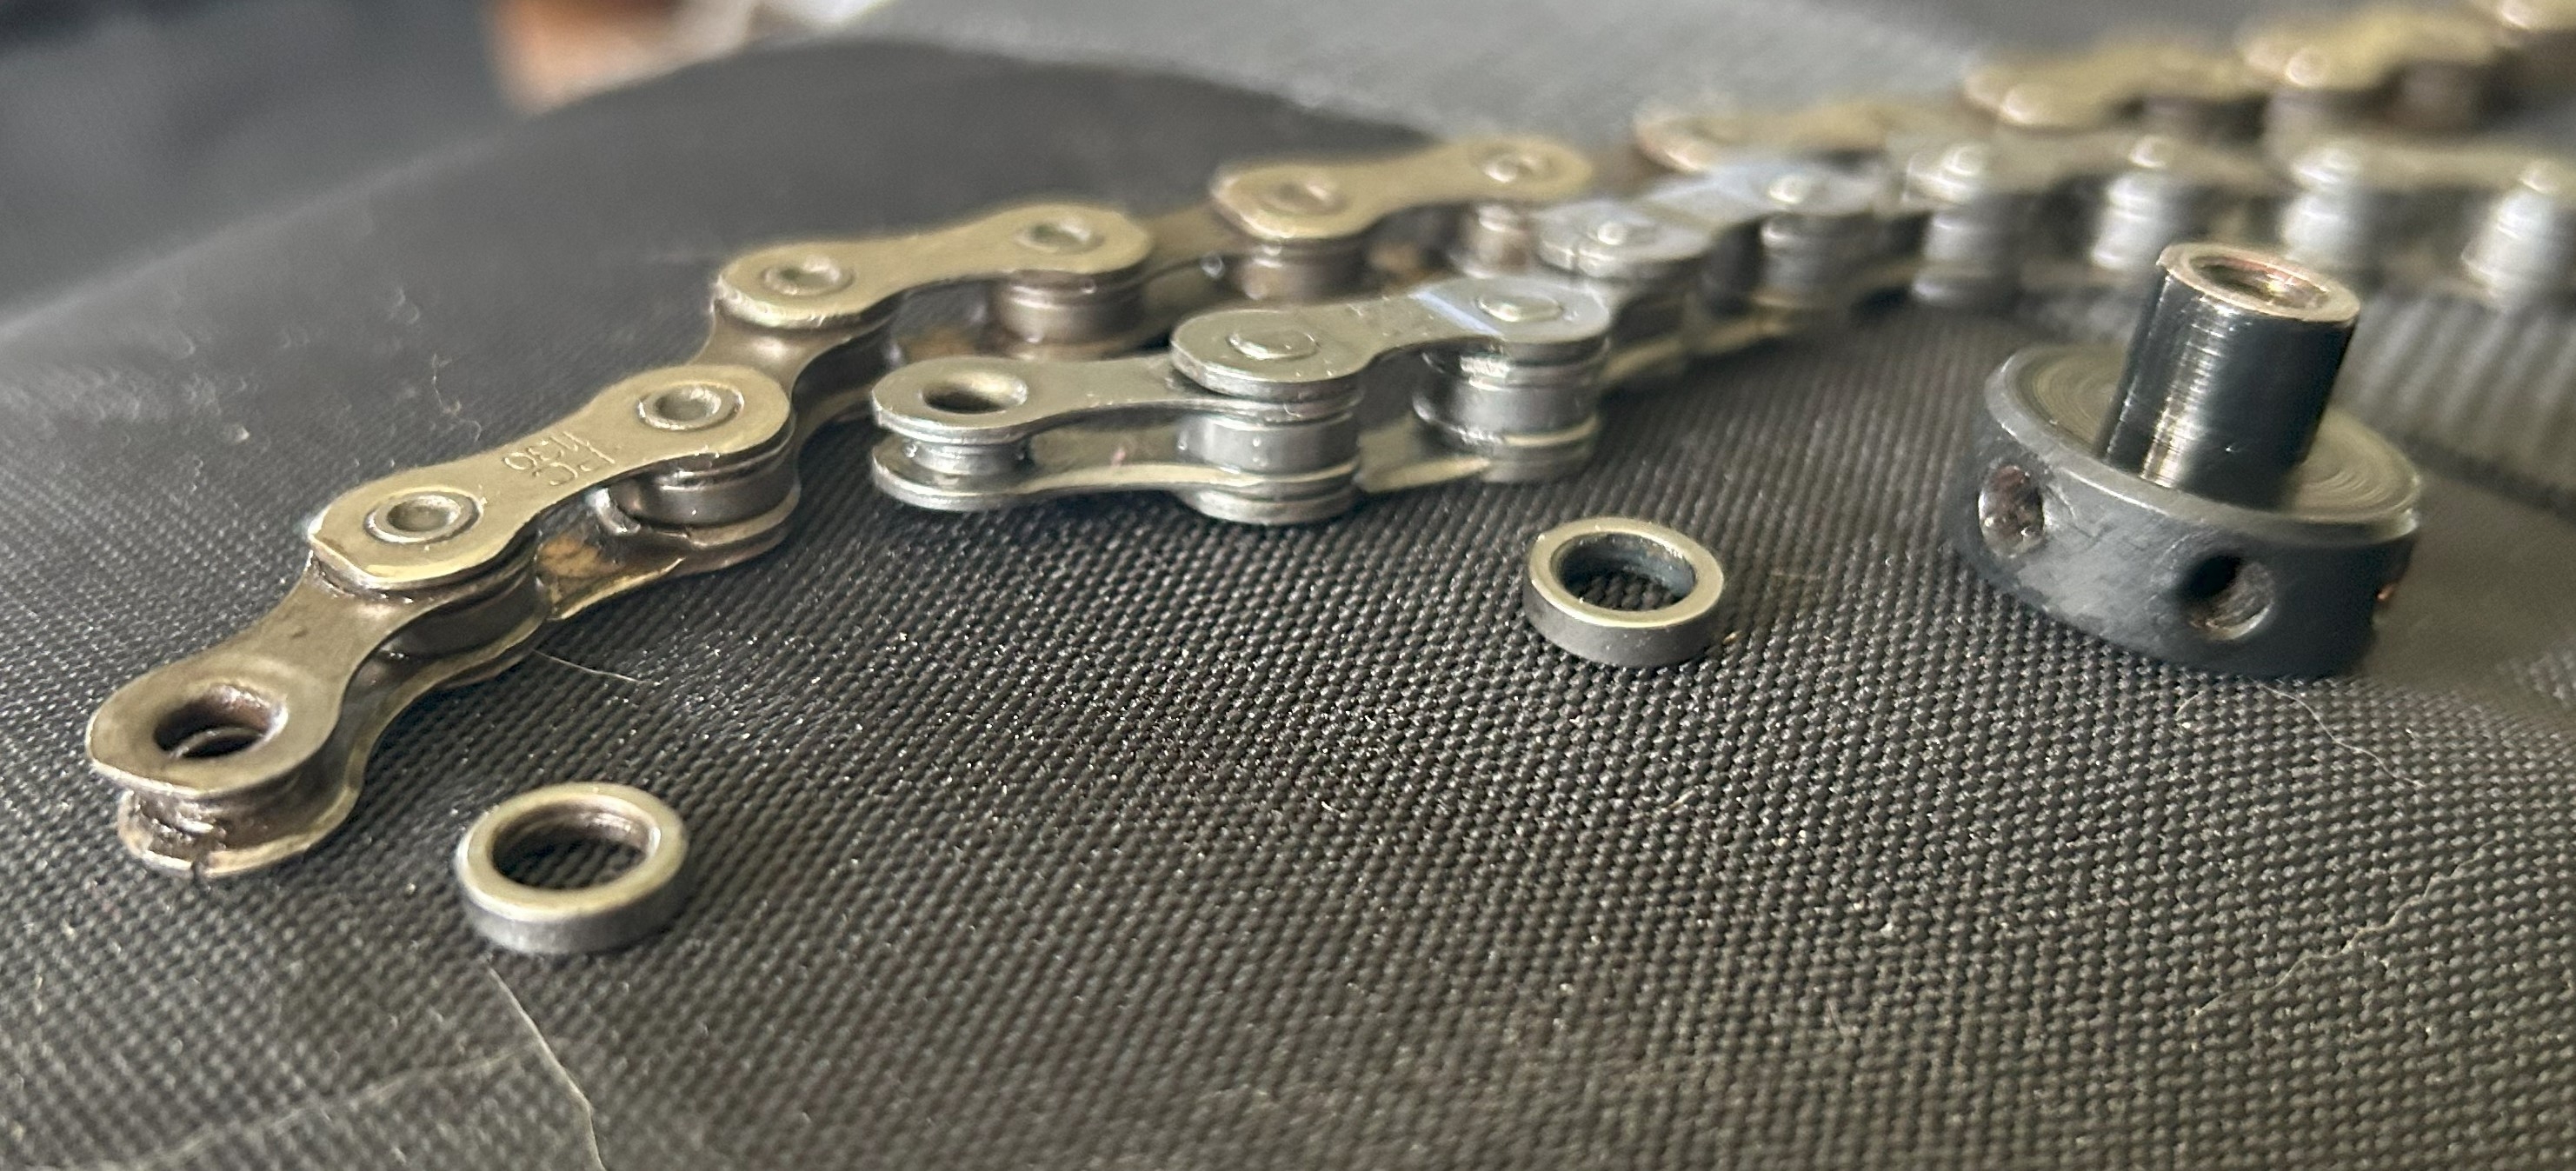
Both will fit it seems, so now it's just a matter of how many to put in there. @rojo412 how should I go about that?
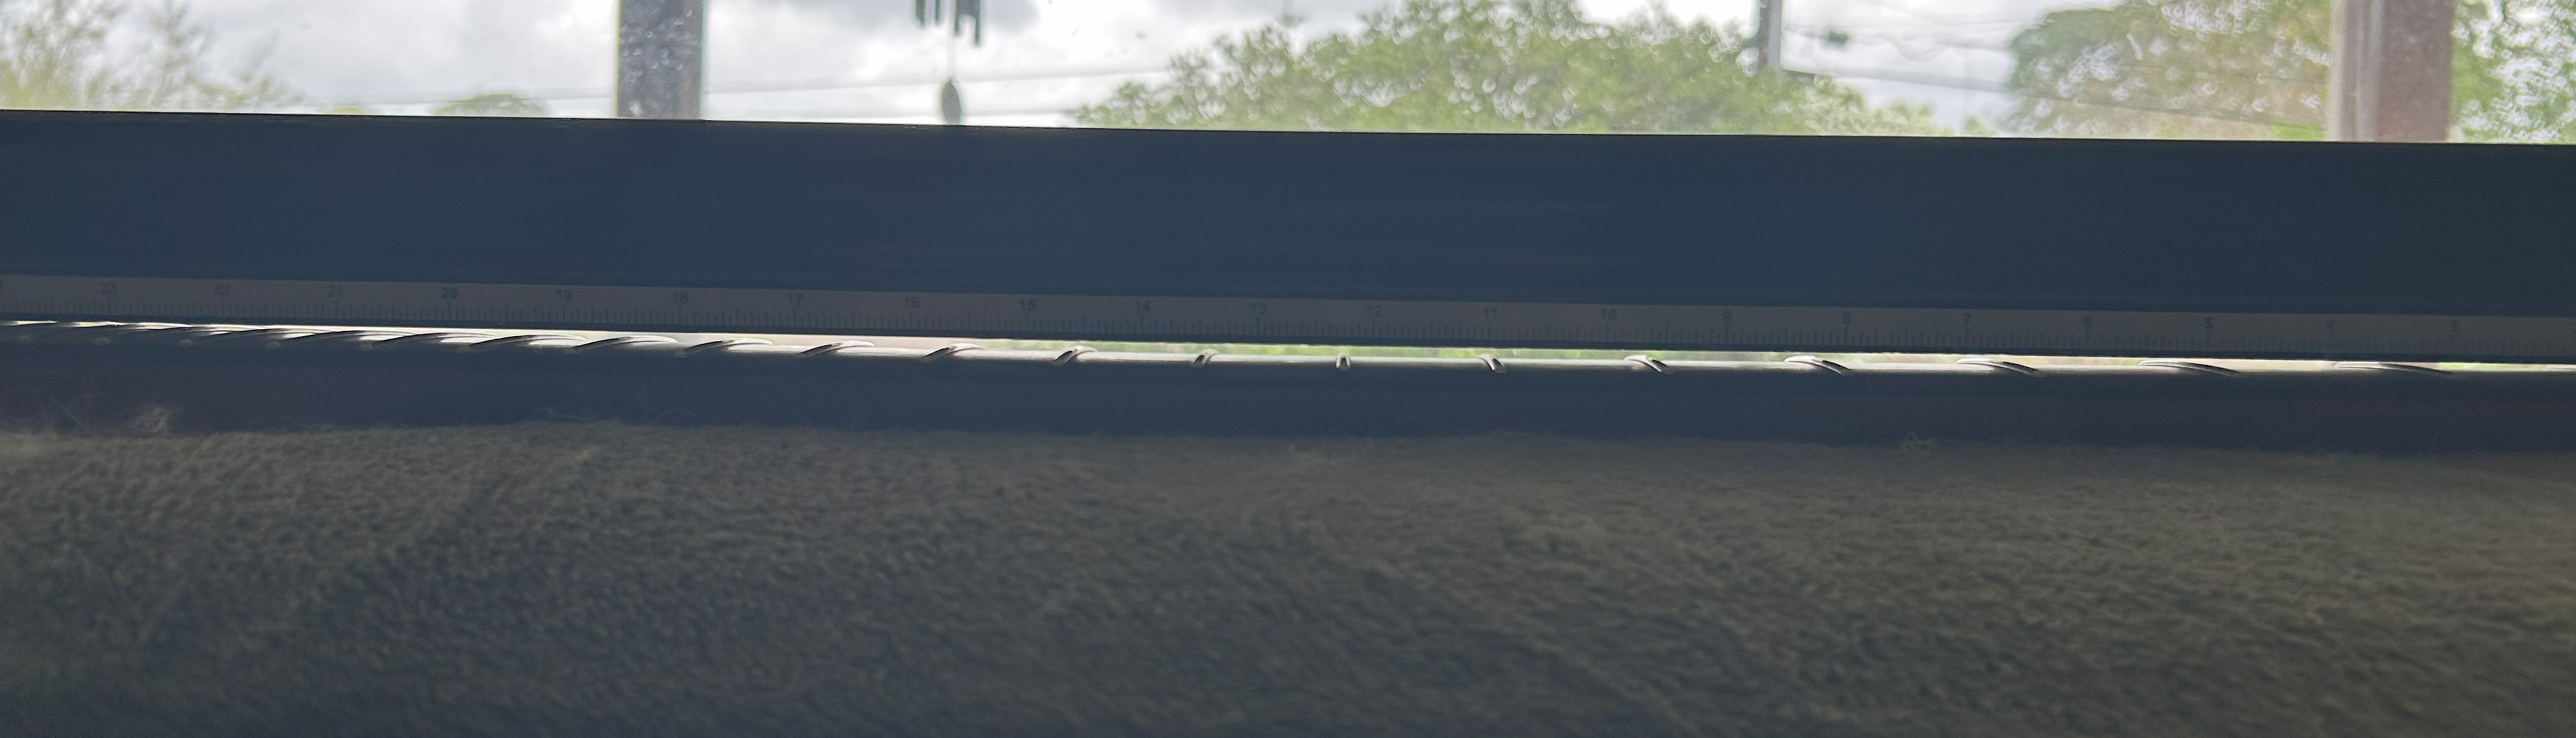
Here's the neck with no tension- about 1/8" or so bow in it:
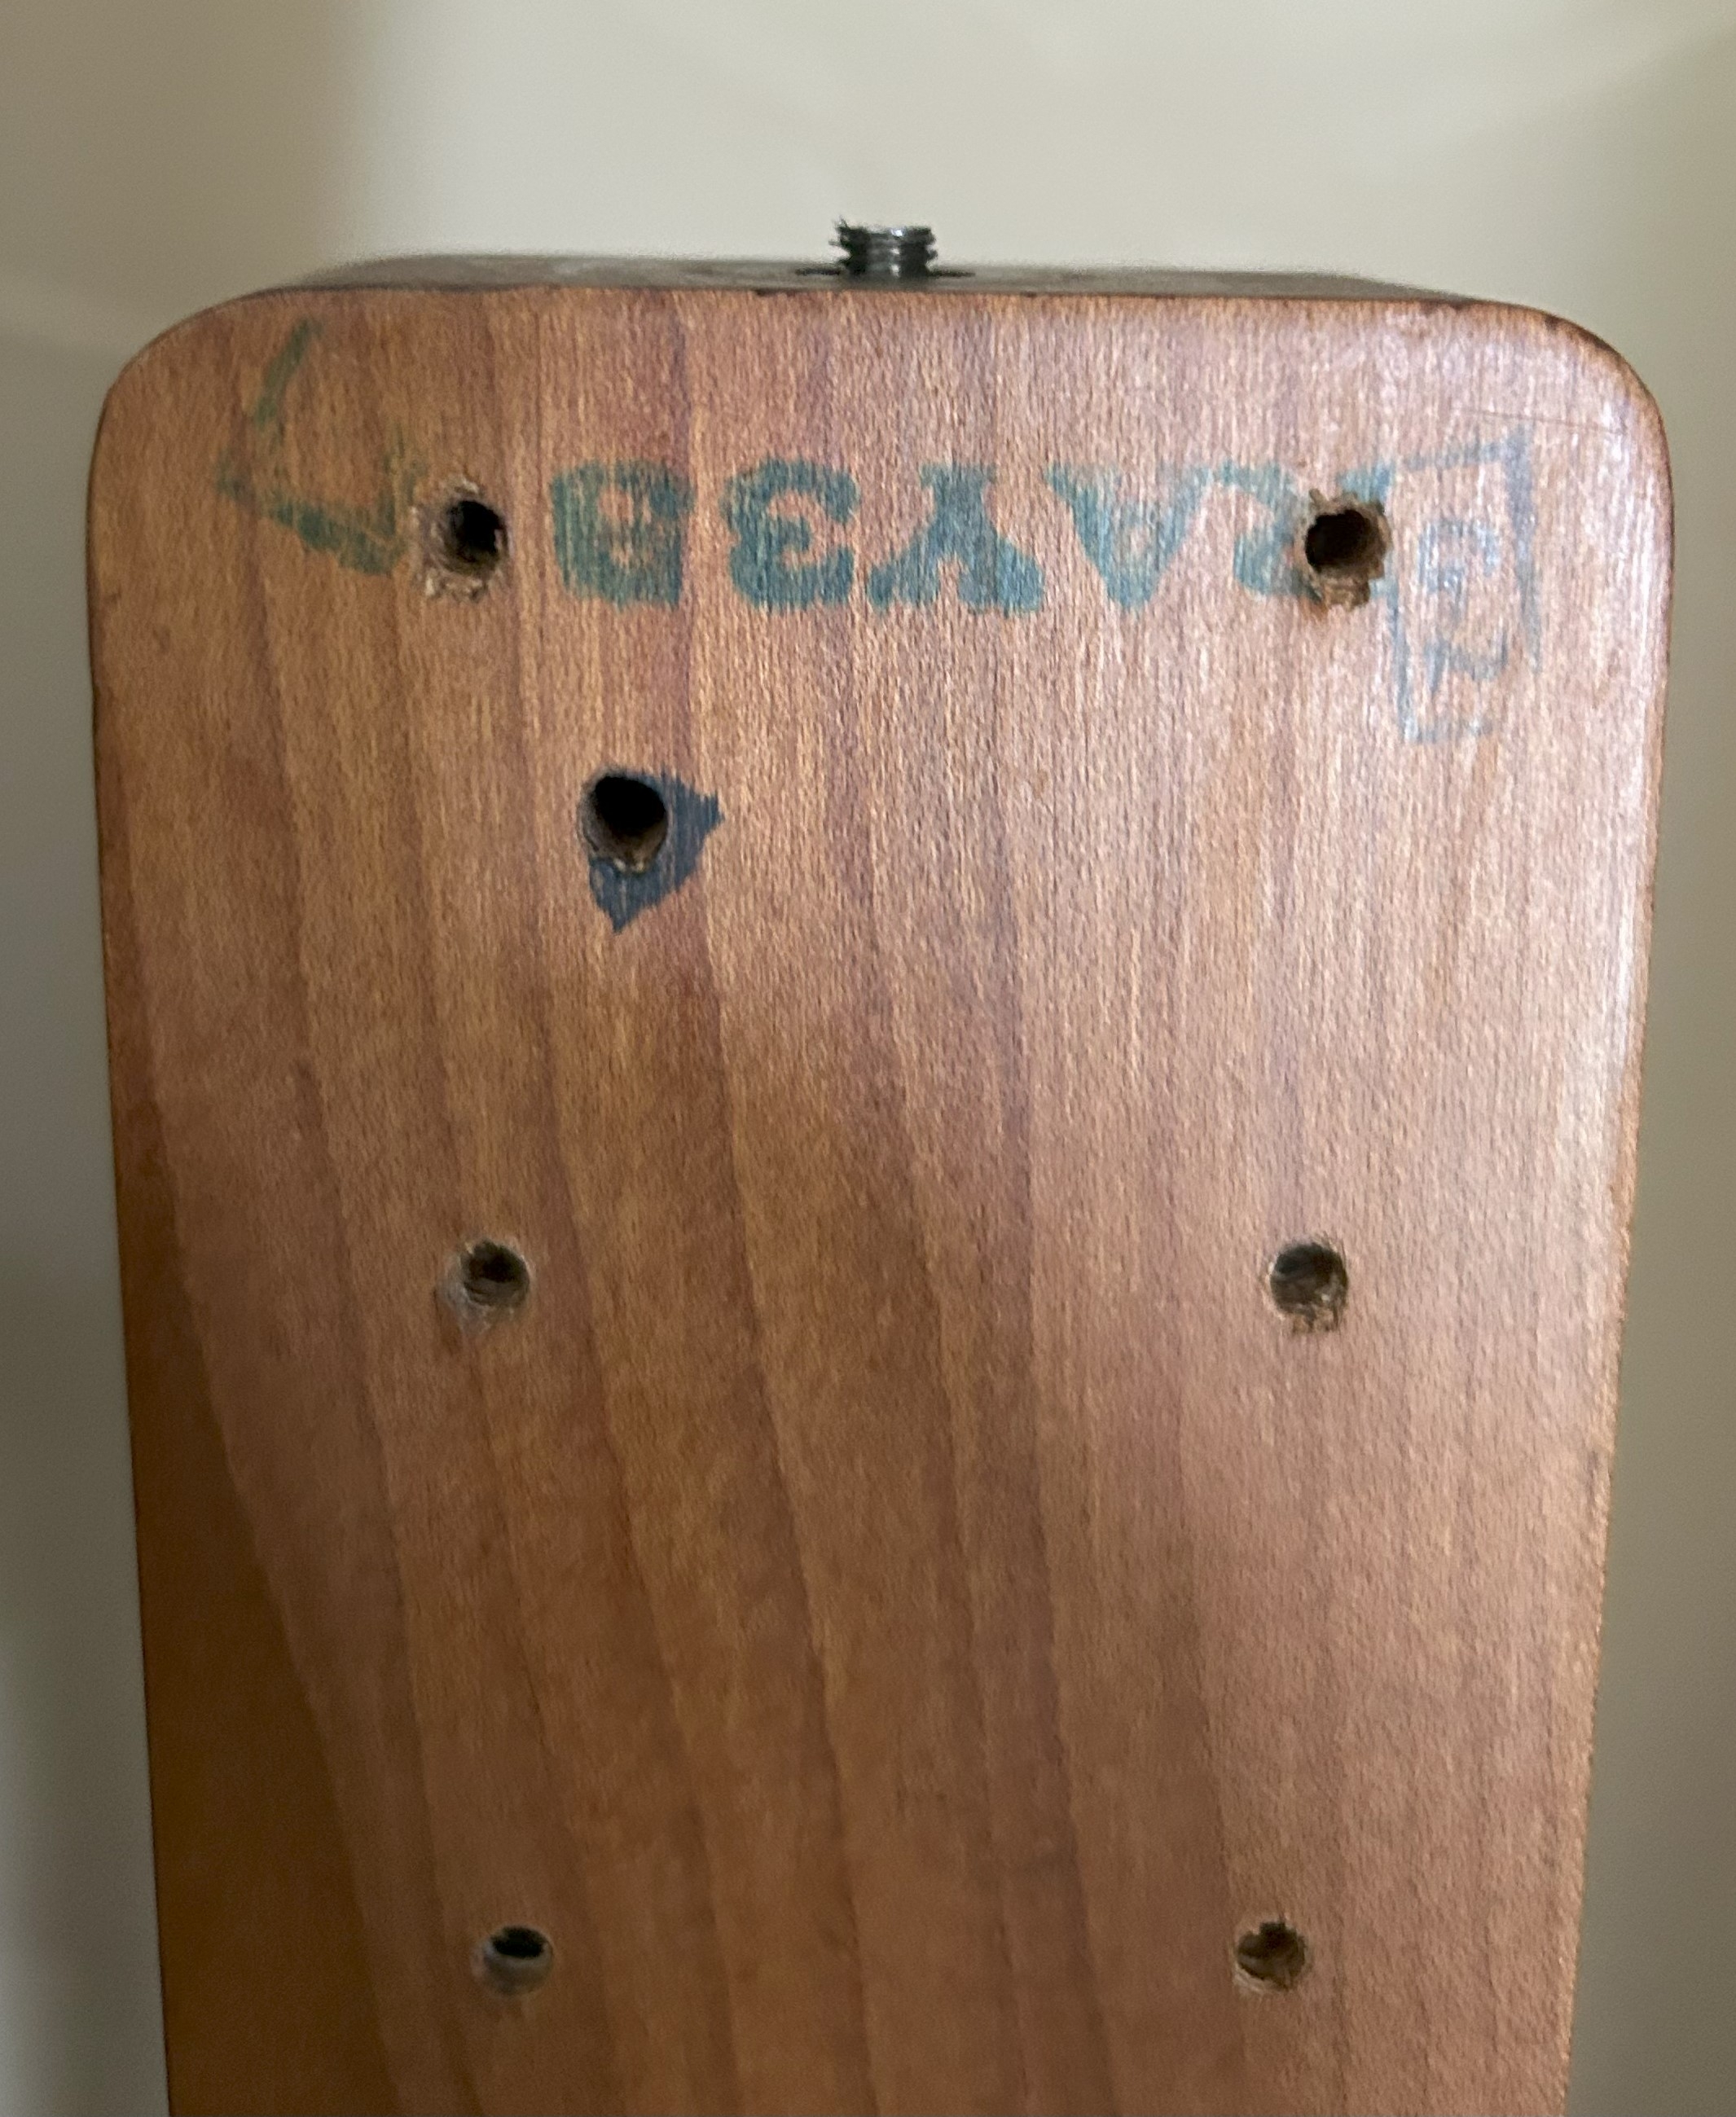
Here's the heal with the truss screw sticking out (I can push it back in):
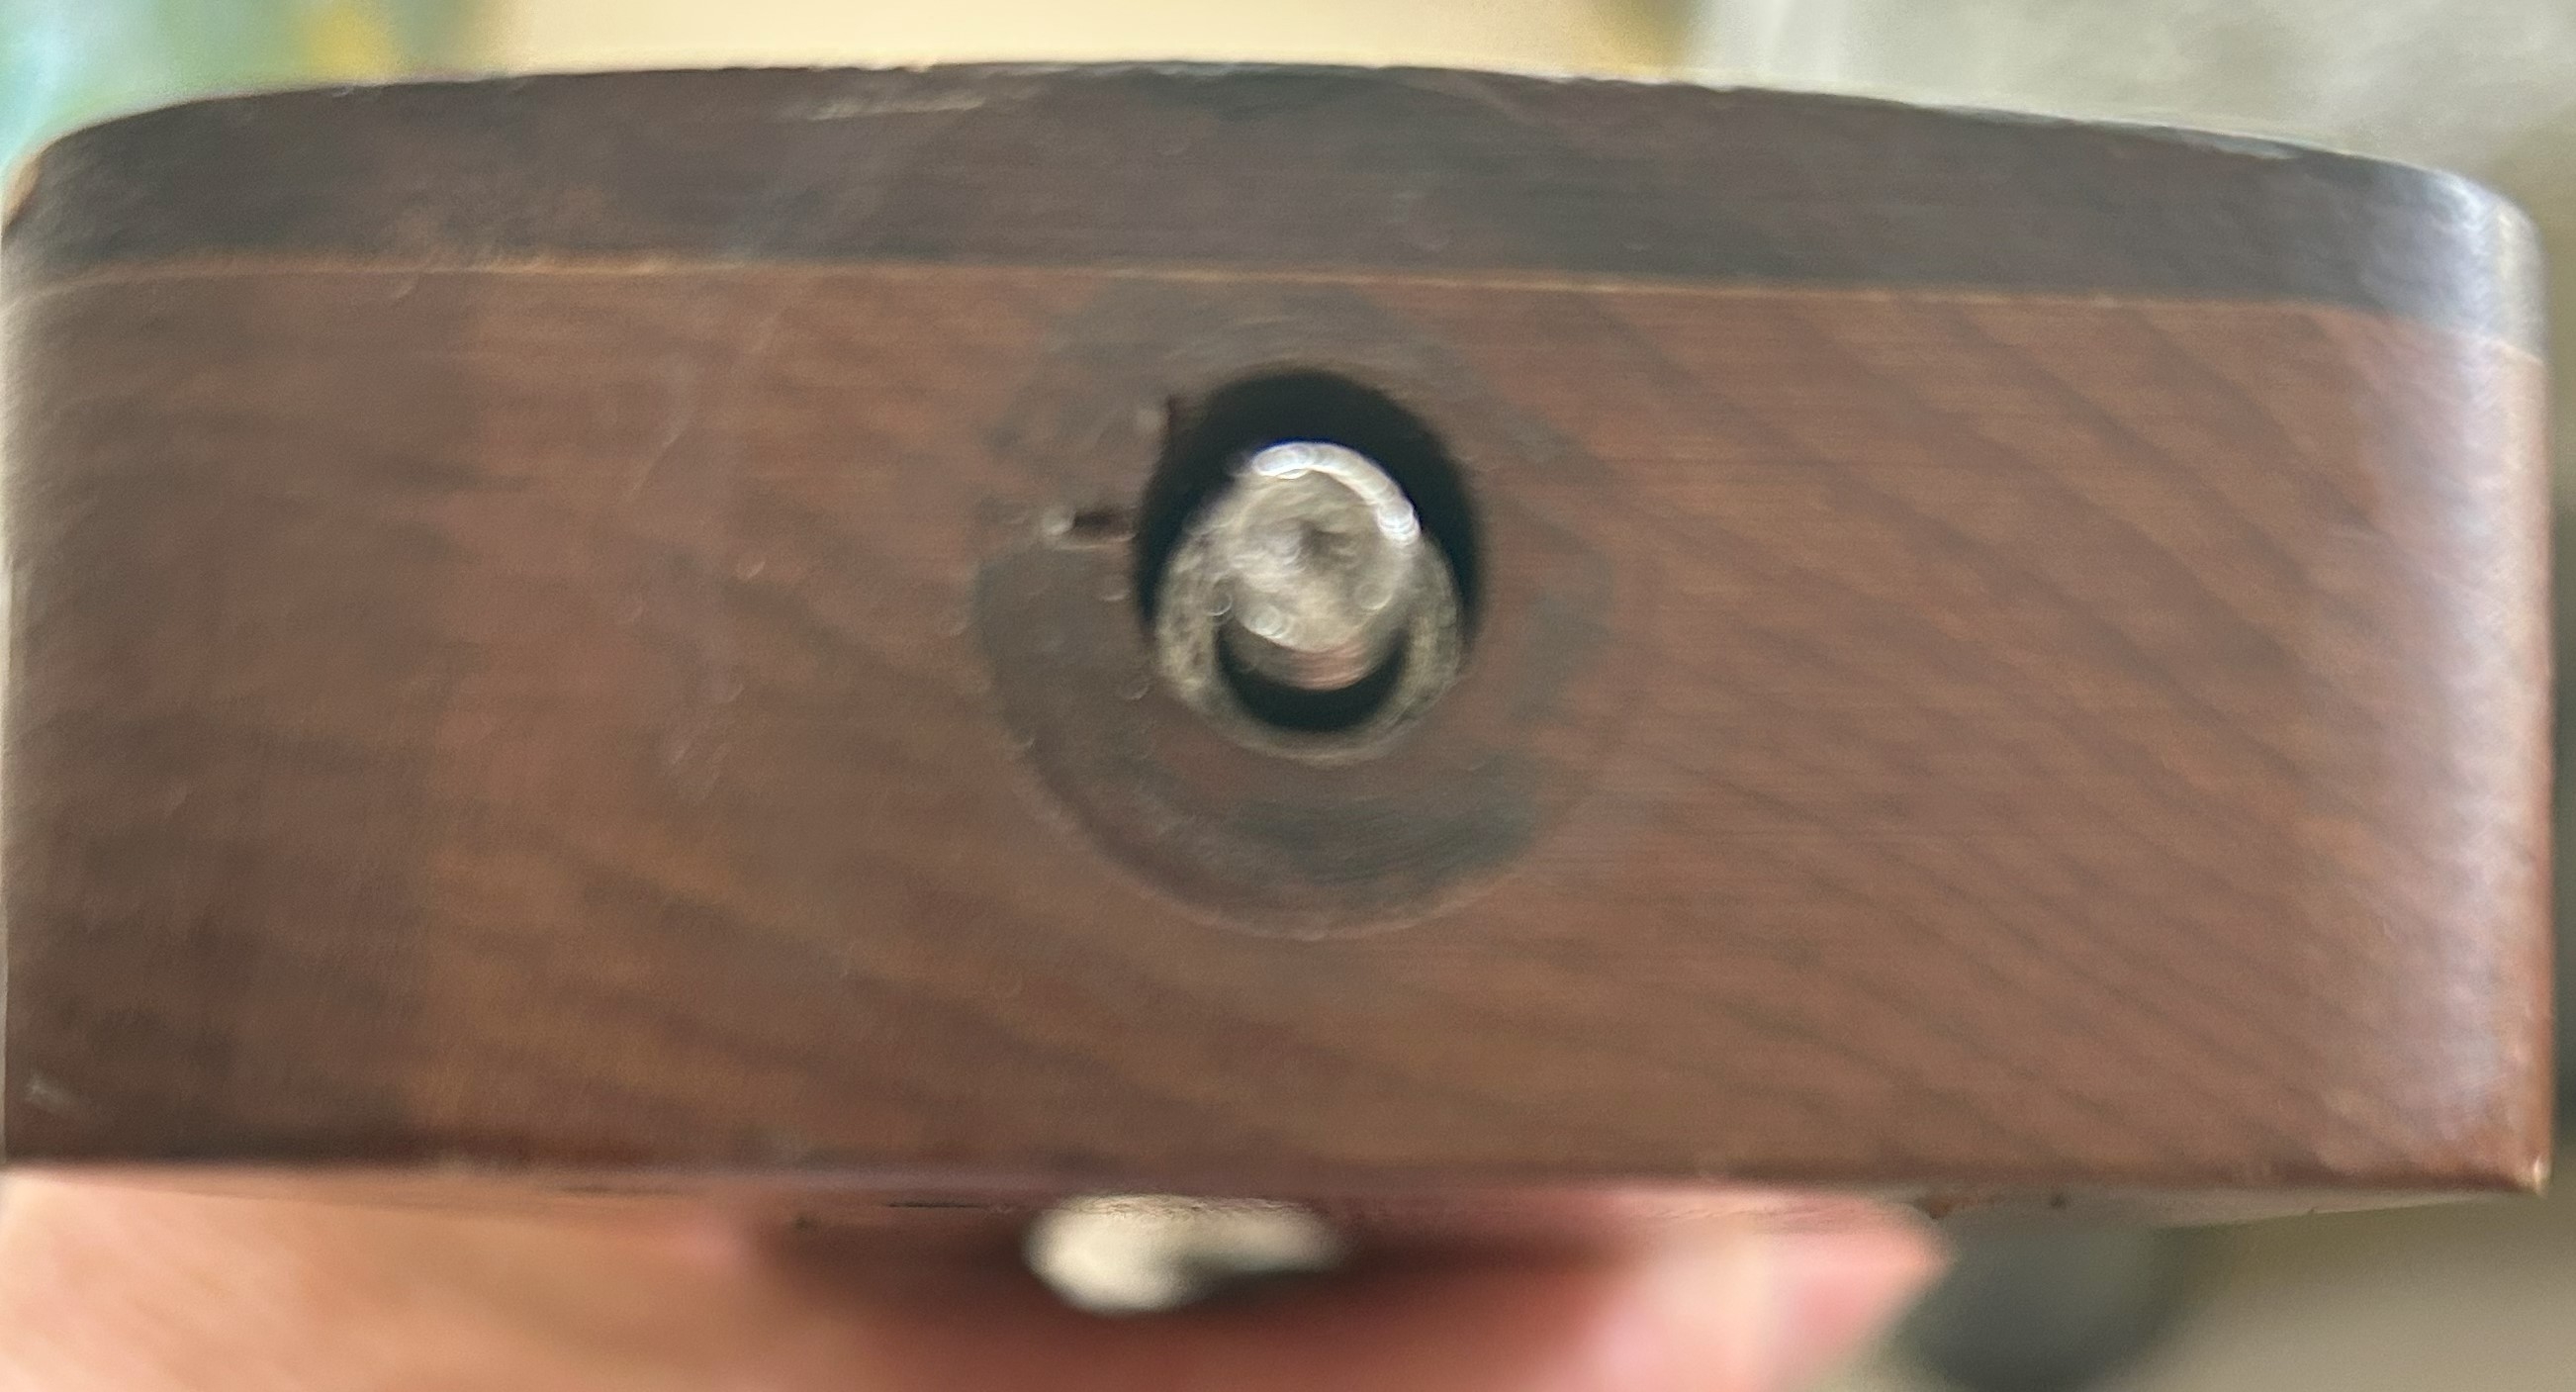
And I'm imagining the chain rollers just get put on the screw there? Do I need to try to remove the existing washer in there (and how can that be done?)
If your having a sterling neck like this, with this issue, this may be the most important thread you'll find on it thanks to @rojo412 and the other contributors.
Both will fit it seems, so now it's just a matter of how many to put in there. @rojo412 how should I go about that?
Here's the neck with no tension- about 1/8" or so bow in it:
Here's the heal with the truss screw sticking out (I can push it back in):
And I'm imagining the chain rollers just get put on the screw there? Do I need to try to remove the existing washer in there (and how can that be done?)
If your having a sterling neck like this, with this issue, this may be the most important thread you'll find on it thanks to @rojo412 and the other contributors.
I literally just did all of this yesterday!
- The washer can come out. I used a poker, kinda tapped it a little so it was loose, inverted the neck and hit it with my hand, washer popped out.
It's a decent idea to remove it because it's softer metal than the chain rollers.
- I used 2 spacers (rollers) in my neck work. One to replace the washer, one to afford me more threads.
- When putting it all back together, I'd definitely suggest pulling the neck backwards against string tension, then using the wheel to tension the rod. Go farther than you have to with the back bow, add tension to a tuned up neck (strings tuned to pitch), then see how it looks. Keep doing this until it looks straight enough.
- If you still are having issues with the bow and it's under a fair amount of tension, try to heat treat the neck.
I managed to flatten mine a bit by doing this.
Basically, support the body and clamp it to a raised position on a bench or table. Then use a clamp to add back bow to the neck, at the headstock, clamping to the table. Go a decent amount further than you think it would need.
Wrap the neck in a heating pad, using something to hold it in place and closed to transmit as much heat to it as you can (I just use spring clamps).
I do 3 hours on high, turn it off, then let it cool naturally, still wrapped and under tension.
Unwrap it and check the neck. Chances are, it will be straighter, but probably not back bowed under string tension.
- If none of this corrects it, then it may be a lost cause. The roasted one from years back ended up at GC because the owner was still not super happy with it. The neck was just impossible to truly cure (at least, what I was attempting with these methods). It could be a thing where warpedneck.com or whoever is gonna do it better than we could, but I honestly don't know from experience.
What I do know is, I would be hard pressed to either spend huge money on a replacement neck for one of these or spend huge money, having a fretboard removed, carbon supports added, then rebuilt.
LMK how it works out!
- The washer can come out. I used a poker, kinda tapped it a little so it was loose, inverted the neck and hit it with my hand, washer popped out.
It's a decent idea to remove it because it's softer metal than the chain rollers.
- I used 2 spacers (rollers) in my neck work. One to replace the washer, one to afford me more threads.
- When putting it all back together, I'd definitely suggest pulling the neck backwards against string tension, then using the wheel to tension the rod. Go farther than you have to with the back bow, add tension to a tuned up neck (strings tuned to pitch), then see how it looks. Keep doing this until it looks straight enough.
- If you still are having issues with the bow and it's under a fair amount of tension, try to heat treat the neck.
I managed to flatten mine a bit by doing this.
Basically, support the body and clamp it to a raised position on a bench or table. Then use a clamp to add back bow to the neck, at the headstock, clamping to the table. Go a decent amount further than you think it would need.
Wrap the neck in a heating pad, using something to hold it in place and closed to transmit as much heat to it as you can (I just use spring clamps).
I do 3 hours on high, turn it off, then let it cool naturally, still wrapped and under tension.
Unwrap it and check the neck. Chances are, it will be straighter, but probably not back bowed under string tension.
- If none of this corrects it, then it may be a lost cause. The roasted one from years back ended up at GC because the owner was still not super happy with it. The neck was just impossible to truly cure (at least, what I was attempting with these methods). It could be a thing where warpedneck.com or whoever is gonna do it better than we could, but I honestly don't know from experience.
What I do know is, I would be hard pressed to either spend huge money on a replacement neck for one of these or spend huge money, having a fretboard removed, carbon supports added, then rebuilt.
LMK how it works out!
I got to try it today, with two rollers, the neck is straight (with no string tension), I then put the neck back on and 3 of the neck screws are stripped. Is that normal? They do seem to be short, Do I just get bigger screws? I haven't put string tension on it yet.
thanks!
thanks!
This also had 2.5 stripped holes! Bigger screws would work, but likely stick out from the plate.
May need to plug, then redrill.
May need to plug, then redrill.
I was thinking that, however in trying to screw them to the neck itself they did bite with 1/4" more in the wood. Is 1.5" the standard length for these? They are only maybe 1/4" into the neck at that length with the body and plate on. I'm thinking I could just get screws that are 1.75".This also had 2.5 stripped holes! Bigger screws would work, but likely stick out from the plate.
May need to plug, then redrill.
They seem to be 5/32" diameter with the threads. Wonder if they are a special hardness. Going to ask Sterling and see what they say.
The good news is that I tuned the strings and the neck stayed straight with more wiggle room to back bend it.
My G string tuner also fell off like yours did lol. I was already going to replace em' with ultralights anyhows.
Cheers,
It does appear they are #8 1-1/2" oval head screws, .1665" diameter on the threaded part.
Typically, I see the more common 1-3/4" found on most Fender style basses. They are hard to find in a hardware store though.
I tested the look of a #10 screw in the plate and it does stick out a bit:

But it's .1860" on the threaded part and 1-1/2" are pretty common to find at HD, in stainless, and cheap. So that could be somewhat of an upgrade, if you don't mind the proud part on the plate (or widen the plate hole bevel slightly). Otherwise, yeah, a #8 in a longer thread could also do a similar job.
Typically, I see the more common 1-3/4" found on most Fender style basses. They are hard to find in a hardware store though.
I tested the look of a #10 screw in the plate and it does stick out a bit:
But it's .1860" on the threaded part and 1-1/2" are pretty common to find at HD, in stainless, and cheap. So that could be somewhat of an upgrade, if you don't mind the proud part on the plate (or widen the plate hole bevel slightly). Otherwise, yeah, a #8 in a longer thread could also do a similar job.
thanks, I wonder what the turn is on the screw threads - hardware stores usually have common sizes like 1/4 20 etc....It does appear they are #8 1-1/2" oval head screws, .1665" diameter on the threaded part.
Typically, I see the more common 1-3/4" found on most Fender style basses. They are hard to find in a hardware store though.
I tested the look of a #10 screw in the plate and it does stick out a bit:
View attachment 7189870
But it's .1860" on the threaded part and 1-1/2" are pretty common to find at HD, in stainless, and cheap. So that could be somewhat of an upgrade, if you don't mind the proud part on the plate (or widen the plate hole bevel slightly). Otherwise, yeah, a #8 in a longer thread could also do a similar job.
The 1.75" fender neck screws are going to do just fine. Not sure why Sterling is using 1.5", that's only 1/4" digging in there.
So I think I can overcome all the issues with this neck and get this thing rolling.
Will check and make sure the washers will be holding the neck good and post back.
thanks for all your help!!!
So I think I can overcome all the issues with this neck and get this thing rolling.
Will check and make sure the washers will be holding the neck good and post back.
thanks for all your help!!!


