
Most importantly it must weigh the same as a duck!If it sinks, it's not a witch.
But burn it anyway just to be sure.

Enjoy the benefits of a premium membership!
Upgrade Account
-
TalkBass has been independent since 1998. Add your voice.
Create a free account to reply to discussions, view embedded media, and browse with fewer display ads.
Join free Log in
Want zero display ads or expanded classifieds tools? Compare plans.
You are using an out of date browser. It may not display this or other websites correctly.
You should upgrade or use an alternative browser.
You should upgrade or use an alternative browser.
More options
Who Replied?

Haha, some of it is actually gonna get burned this weekend. It's midsummer in Finland which is traditionally celebrated with bonfires. Since I don't have a wood stove, I annually go through my wood scraps and make a big pile of stuff I don't want to keep, that's going to the fire then. Everybody knows that tonewood fire makes the loudest and most resonant pops and crackles.

Well, it has got a wart.

- Apr 18, 2008
- 16,016
- 1
- 31,730
- Disclosures
- I'm highly opinionated and extremely self-assured
Haha, some of it is actually gonna get burned this weekend. It's midsummer in Finland which is traditionally celebrated with bonfires. Since I don't have a wood stove, I annually go through my wood scraps and make a big pile of stuff I don't want to keep, that's going to the fire then. Everybody knows that tonewood fire makes the loudest and most resonant pops and crackles.
That sounds charming.
Midsummer (and early summer, and late summer, and early fall) is celebrated in Mississippi with air conditioners.

And will that stripe be wedge shaped, like the one in the body top?I will include a narrow maple centerstripe on the headstock as well.

Yes, exactly like the top, so it's a matching headstock. It will have the same curved taper as the top, too.And will that stripe be wedge shaped, like the one in the body top?
Mi
Might be cool if the flair on the headstock was at the top, sorta mirroring the bodyYes, exactly like the top, so it's a matching headstock. It will have the same curved taper as the top, too.
Excellent idea. Will do!Mi
Might be cool if the flair on the headstock was at the top, sorta mirroring the body
Update #2: Various luthier chores
Today I had time to get some work done. Some of this stuff is what I call "Luthier chores", rough cutting, flattening and thicknessing things.
I got the headstock veneer pieces thicknessed down to 1mm with the router sled, rough-cut the body shape, sawed and planed the headstock angle, routed a trussrod channel and cut the fretboard to the correct width. I like to start with the fretboard because I like to use it as a router guide for the neck shaft.
The neck blank ended up being a bit too short for this headstock, so I extended the headstock section with a cutoff piece, kind of like a scarf joint. The veneer lines don't line up perfectly (they never do), but it will be hidden by the headstock veneers anyway.
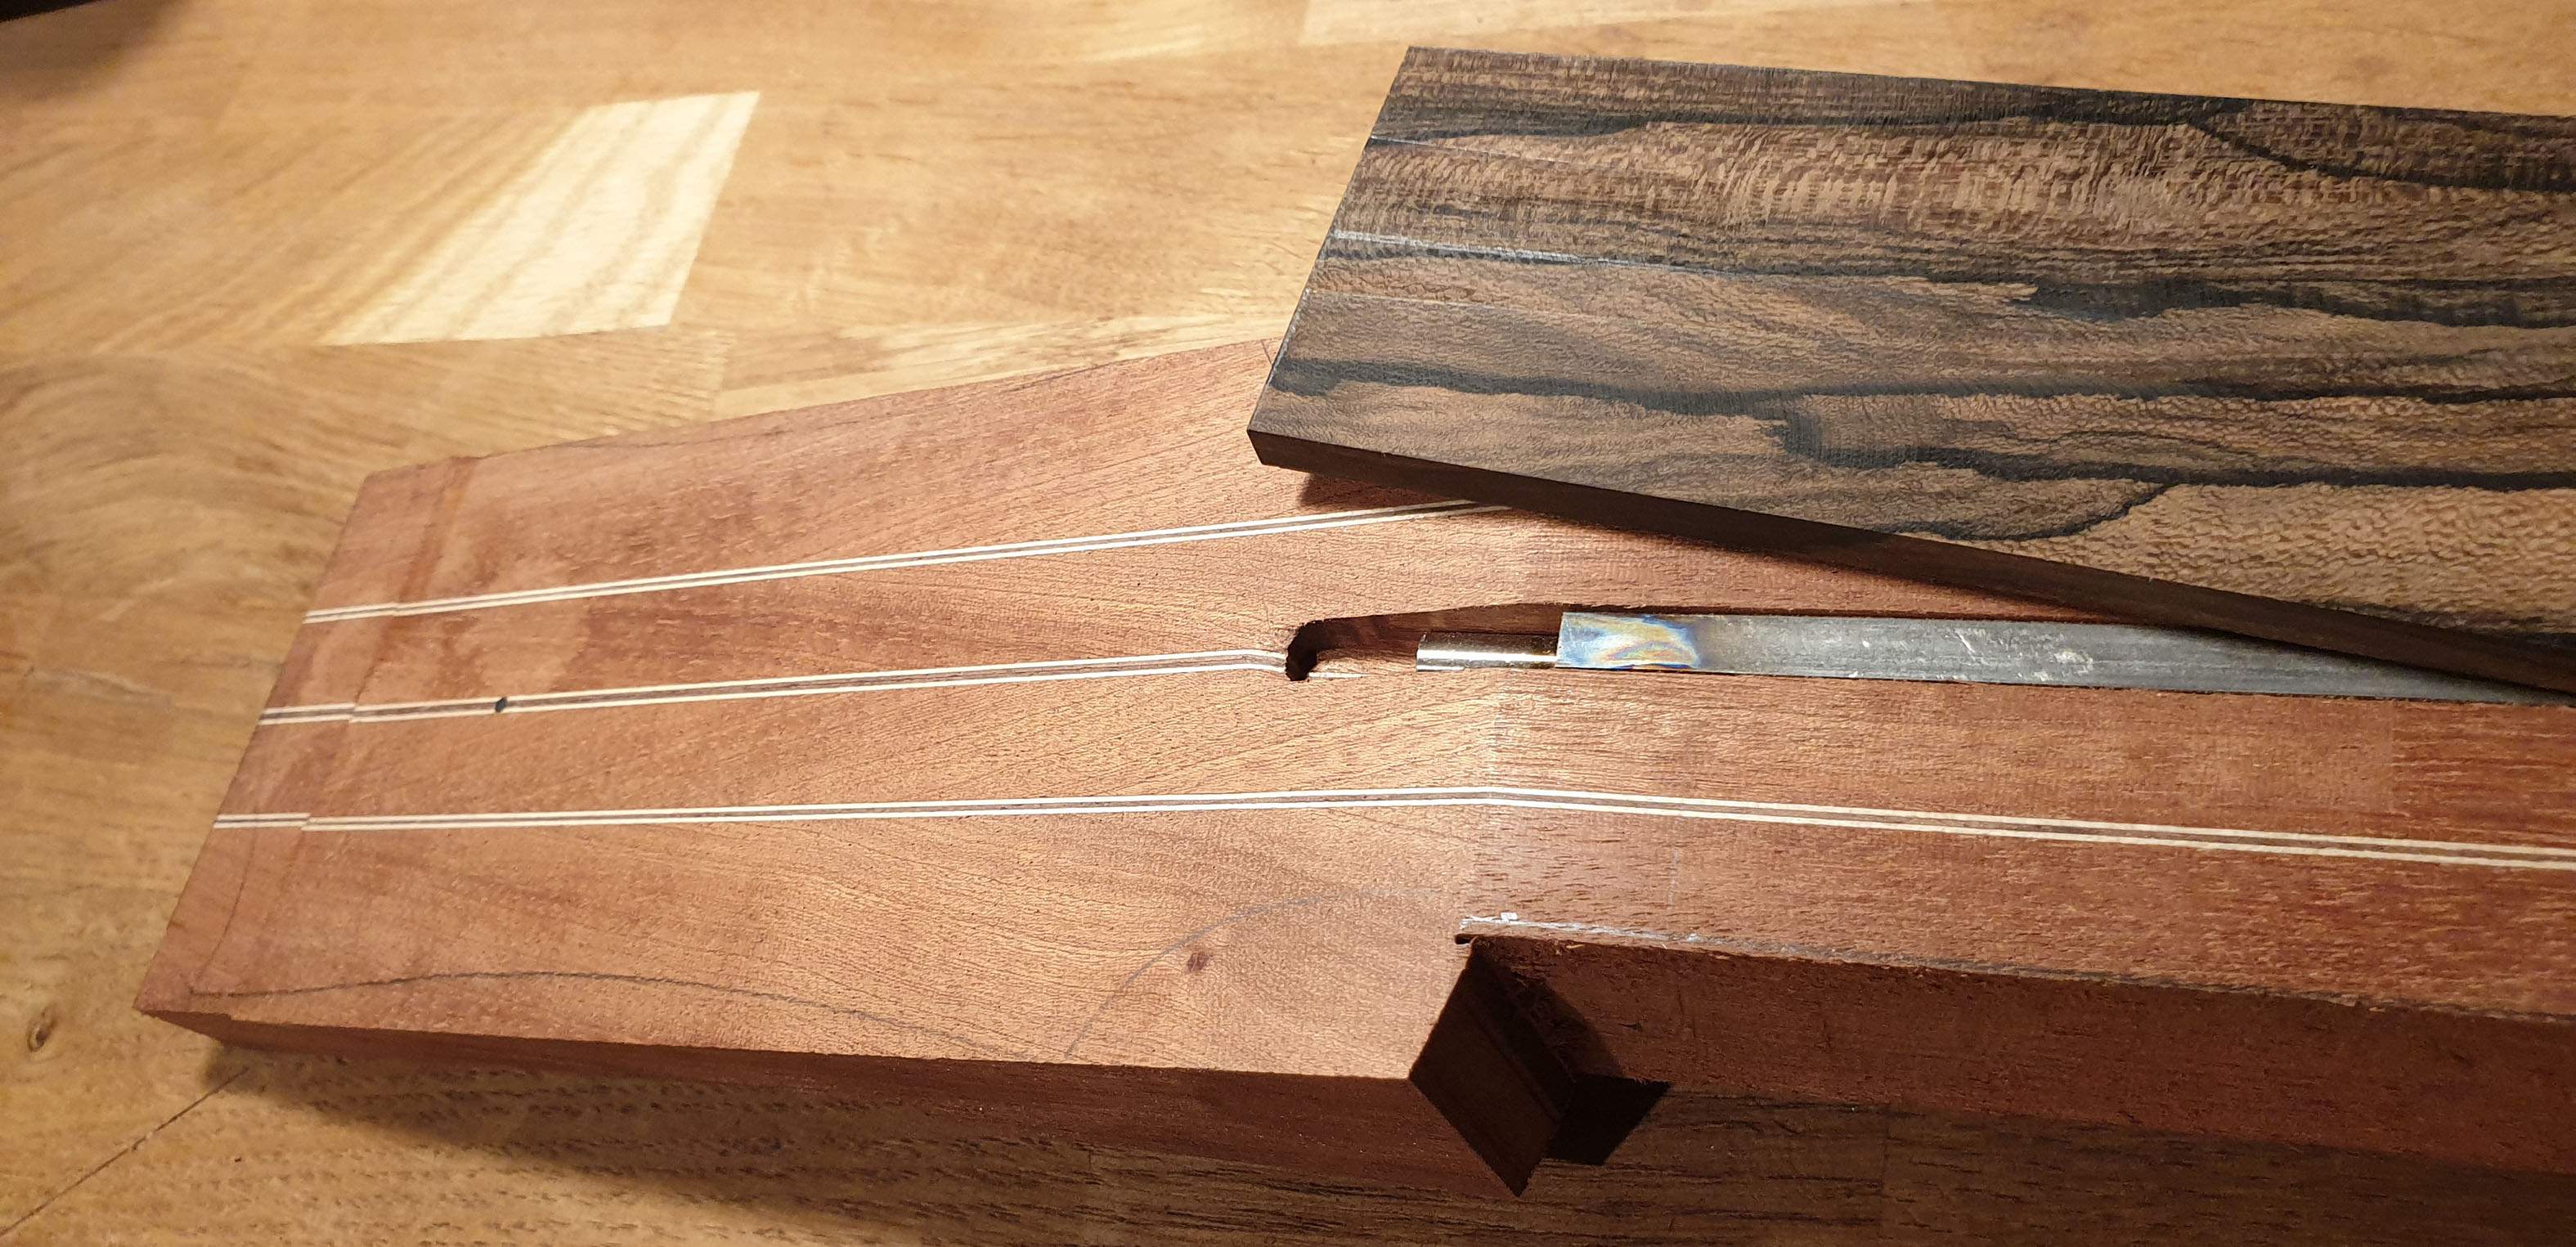
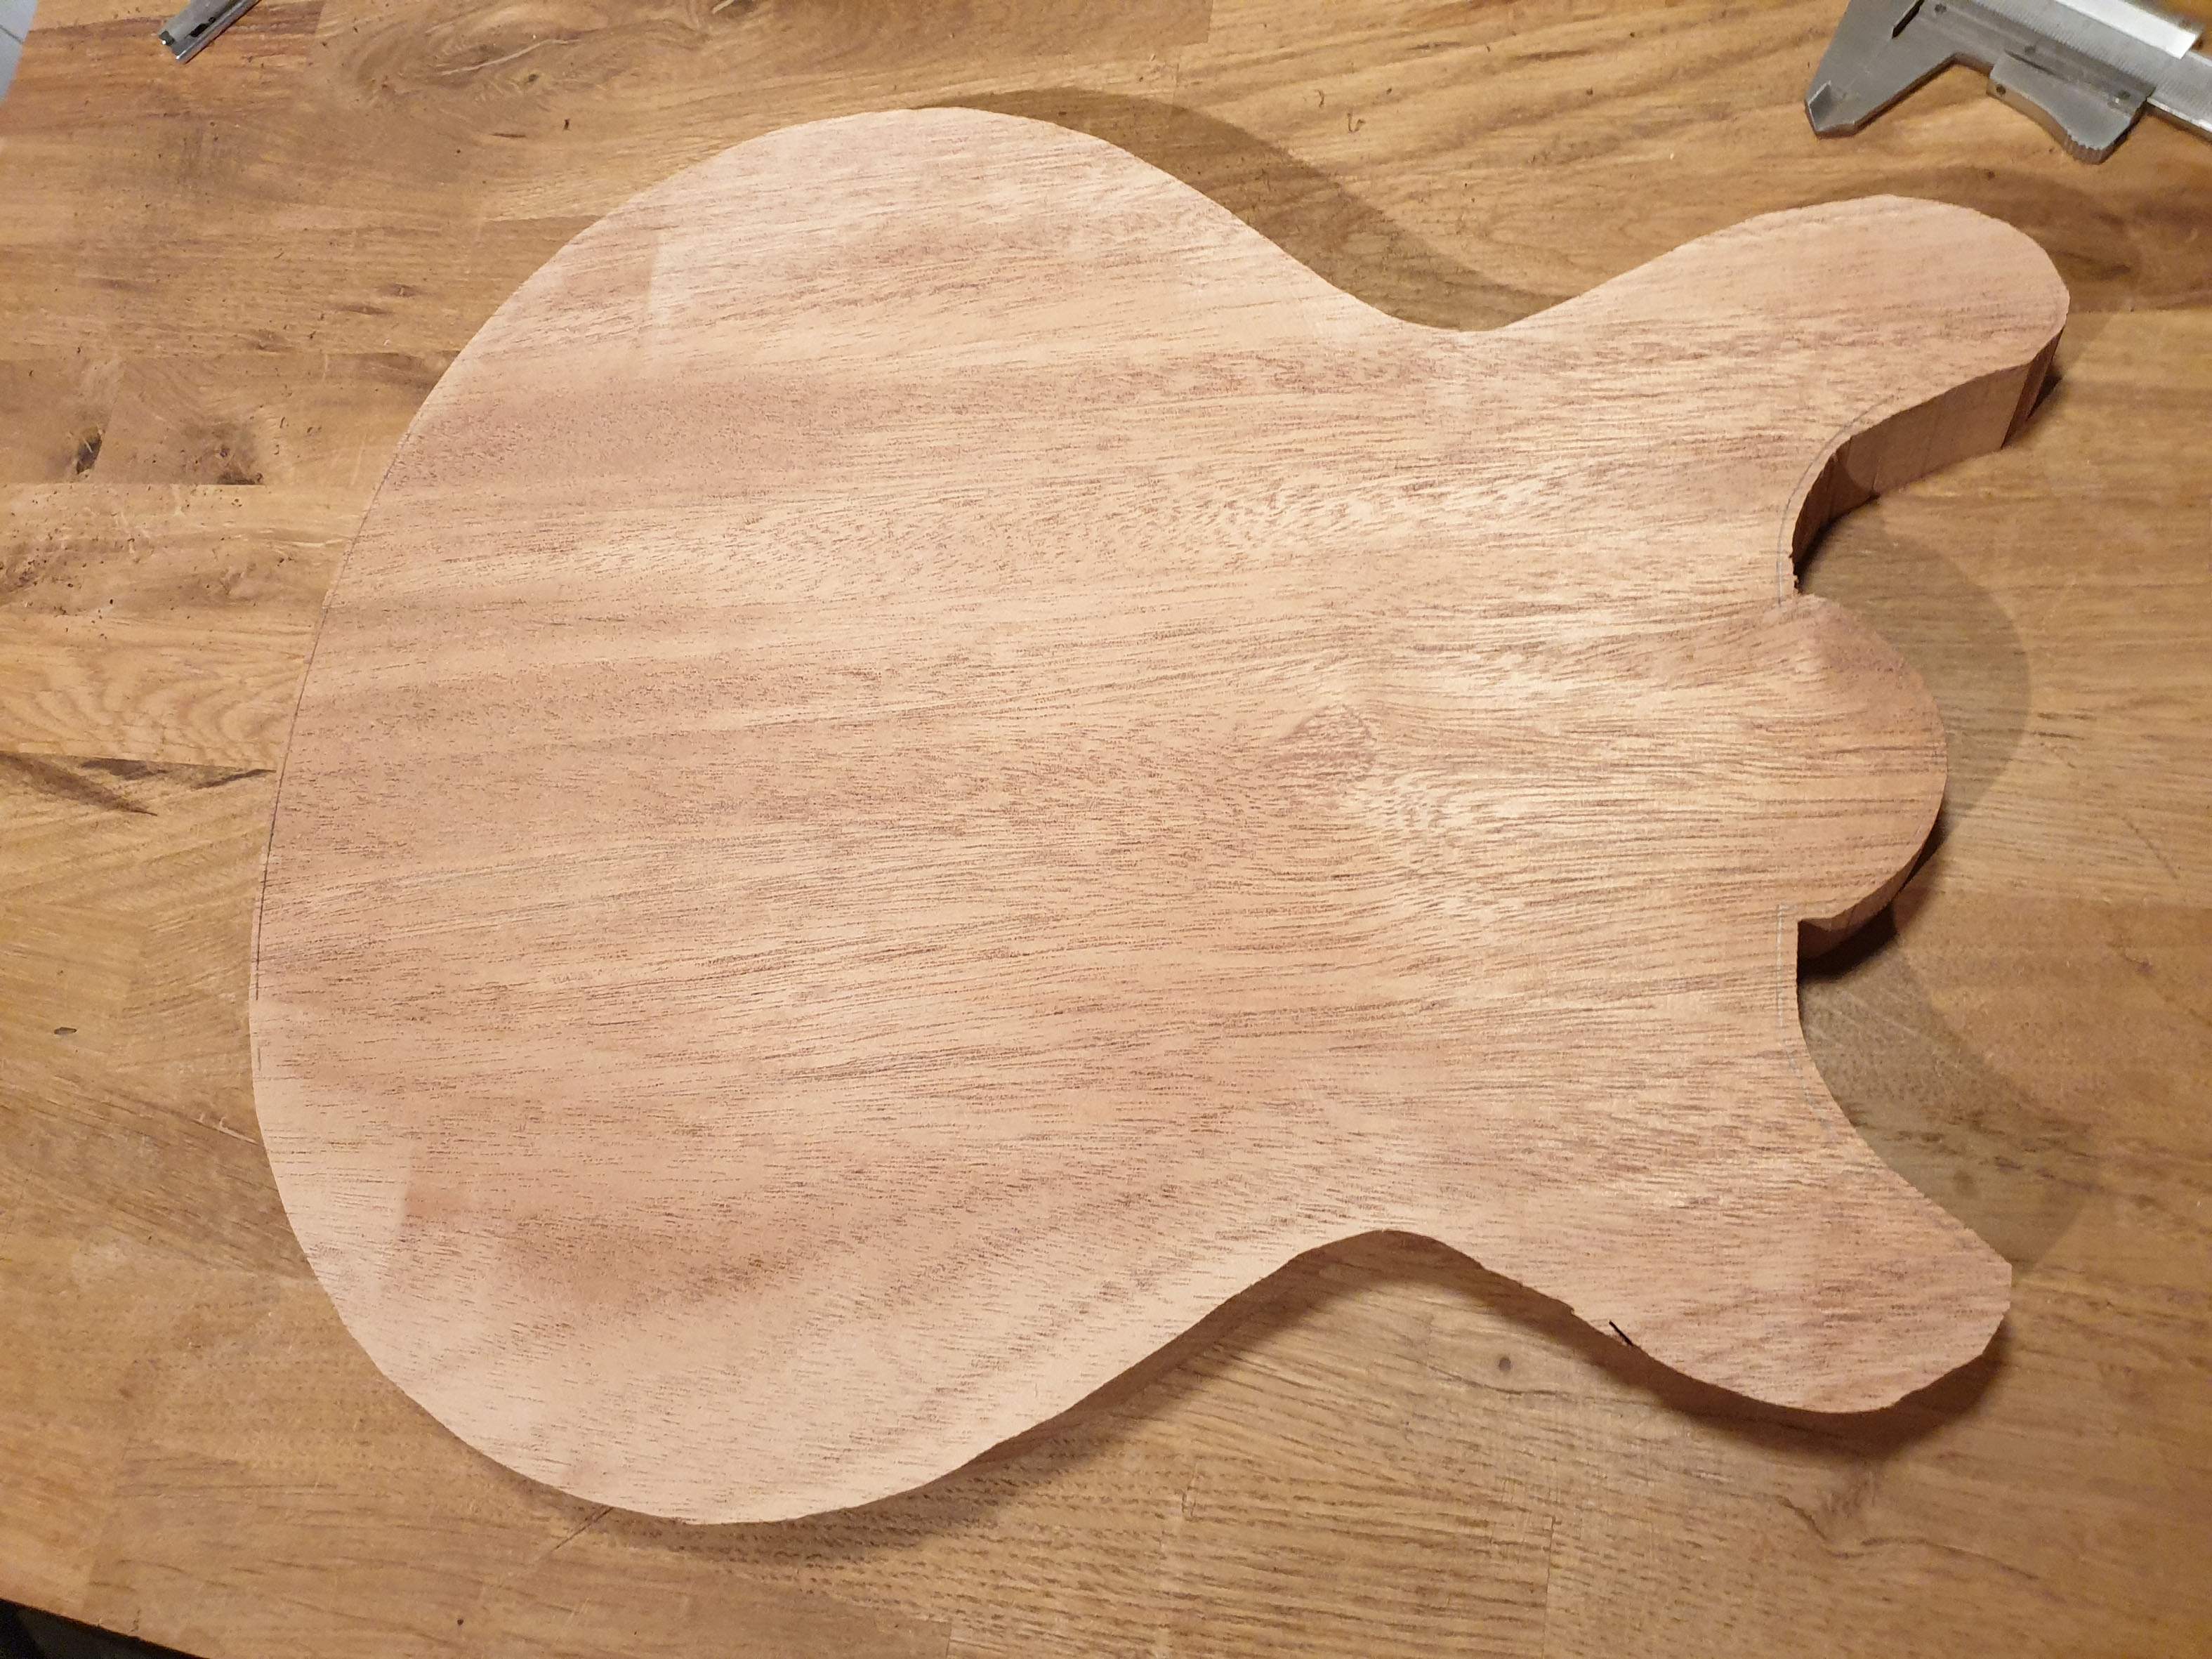
Today I had time to get some work done. Some of this stuff is what I call "Luthier chores", rough cutting, flattening and thicknessing things.
I got the headstock veneer pieces thicknessed down to 1mm with the router sled, rough-cut the body shape, sawed and planed the headstock angle, routed a trussrod channel and cut the fretboard to the correct width. I like to start with the fretboard because I like to use it as a router guide for the neck shaft.
The neck blank ended up being a bit too short for this headstock, so I extended the headstock section with a cutoff piece, kind of like a scarf joint. The veneer lines don't line up perfectly (they never do), but it will be hidden by the headstock veneers anyway.
Last edited:
Update #3: Down with the thickness!
I got two things done today: Thicknessing the top and cutting the back of the neck.
I usually like using a router sled, but today I found myself dreaming about a thickness sander. I started with a 9mm top and had to take it down to 4mm, so more than half of it was turned into dust...luckily it's good weather and I was able to do it outside.
I learned an important lesson today: Ziricote dust is sticky. My first router sled attempt was the base from my twisted sister build riding on two platforms of MDF. However, the ziricote dust made any movement of MDF on MDF difficult: it takes a lot of force and then the sled starts to vibrate and jump, leaving dents in the top.
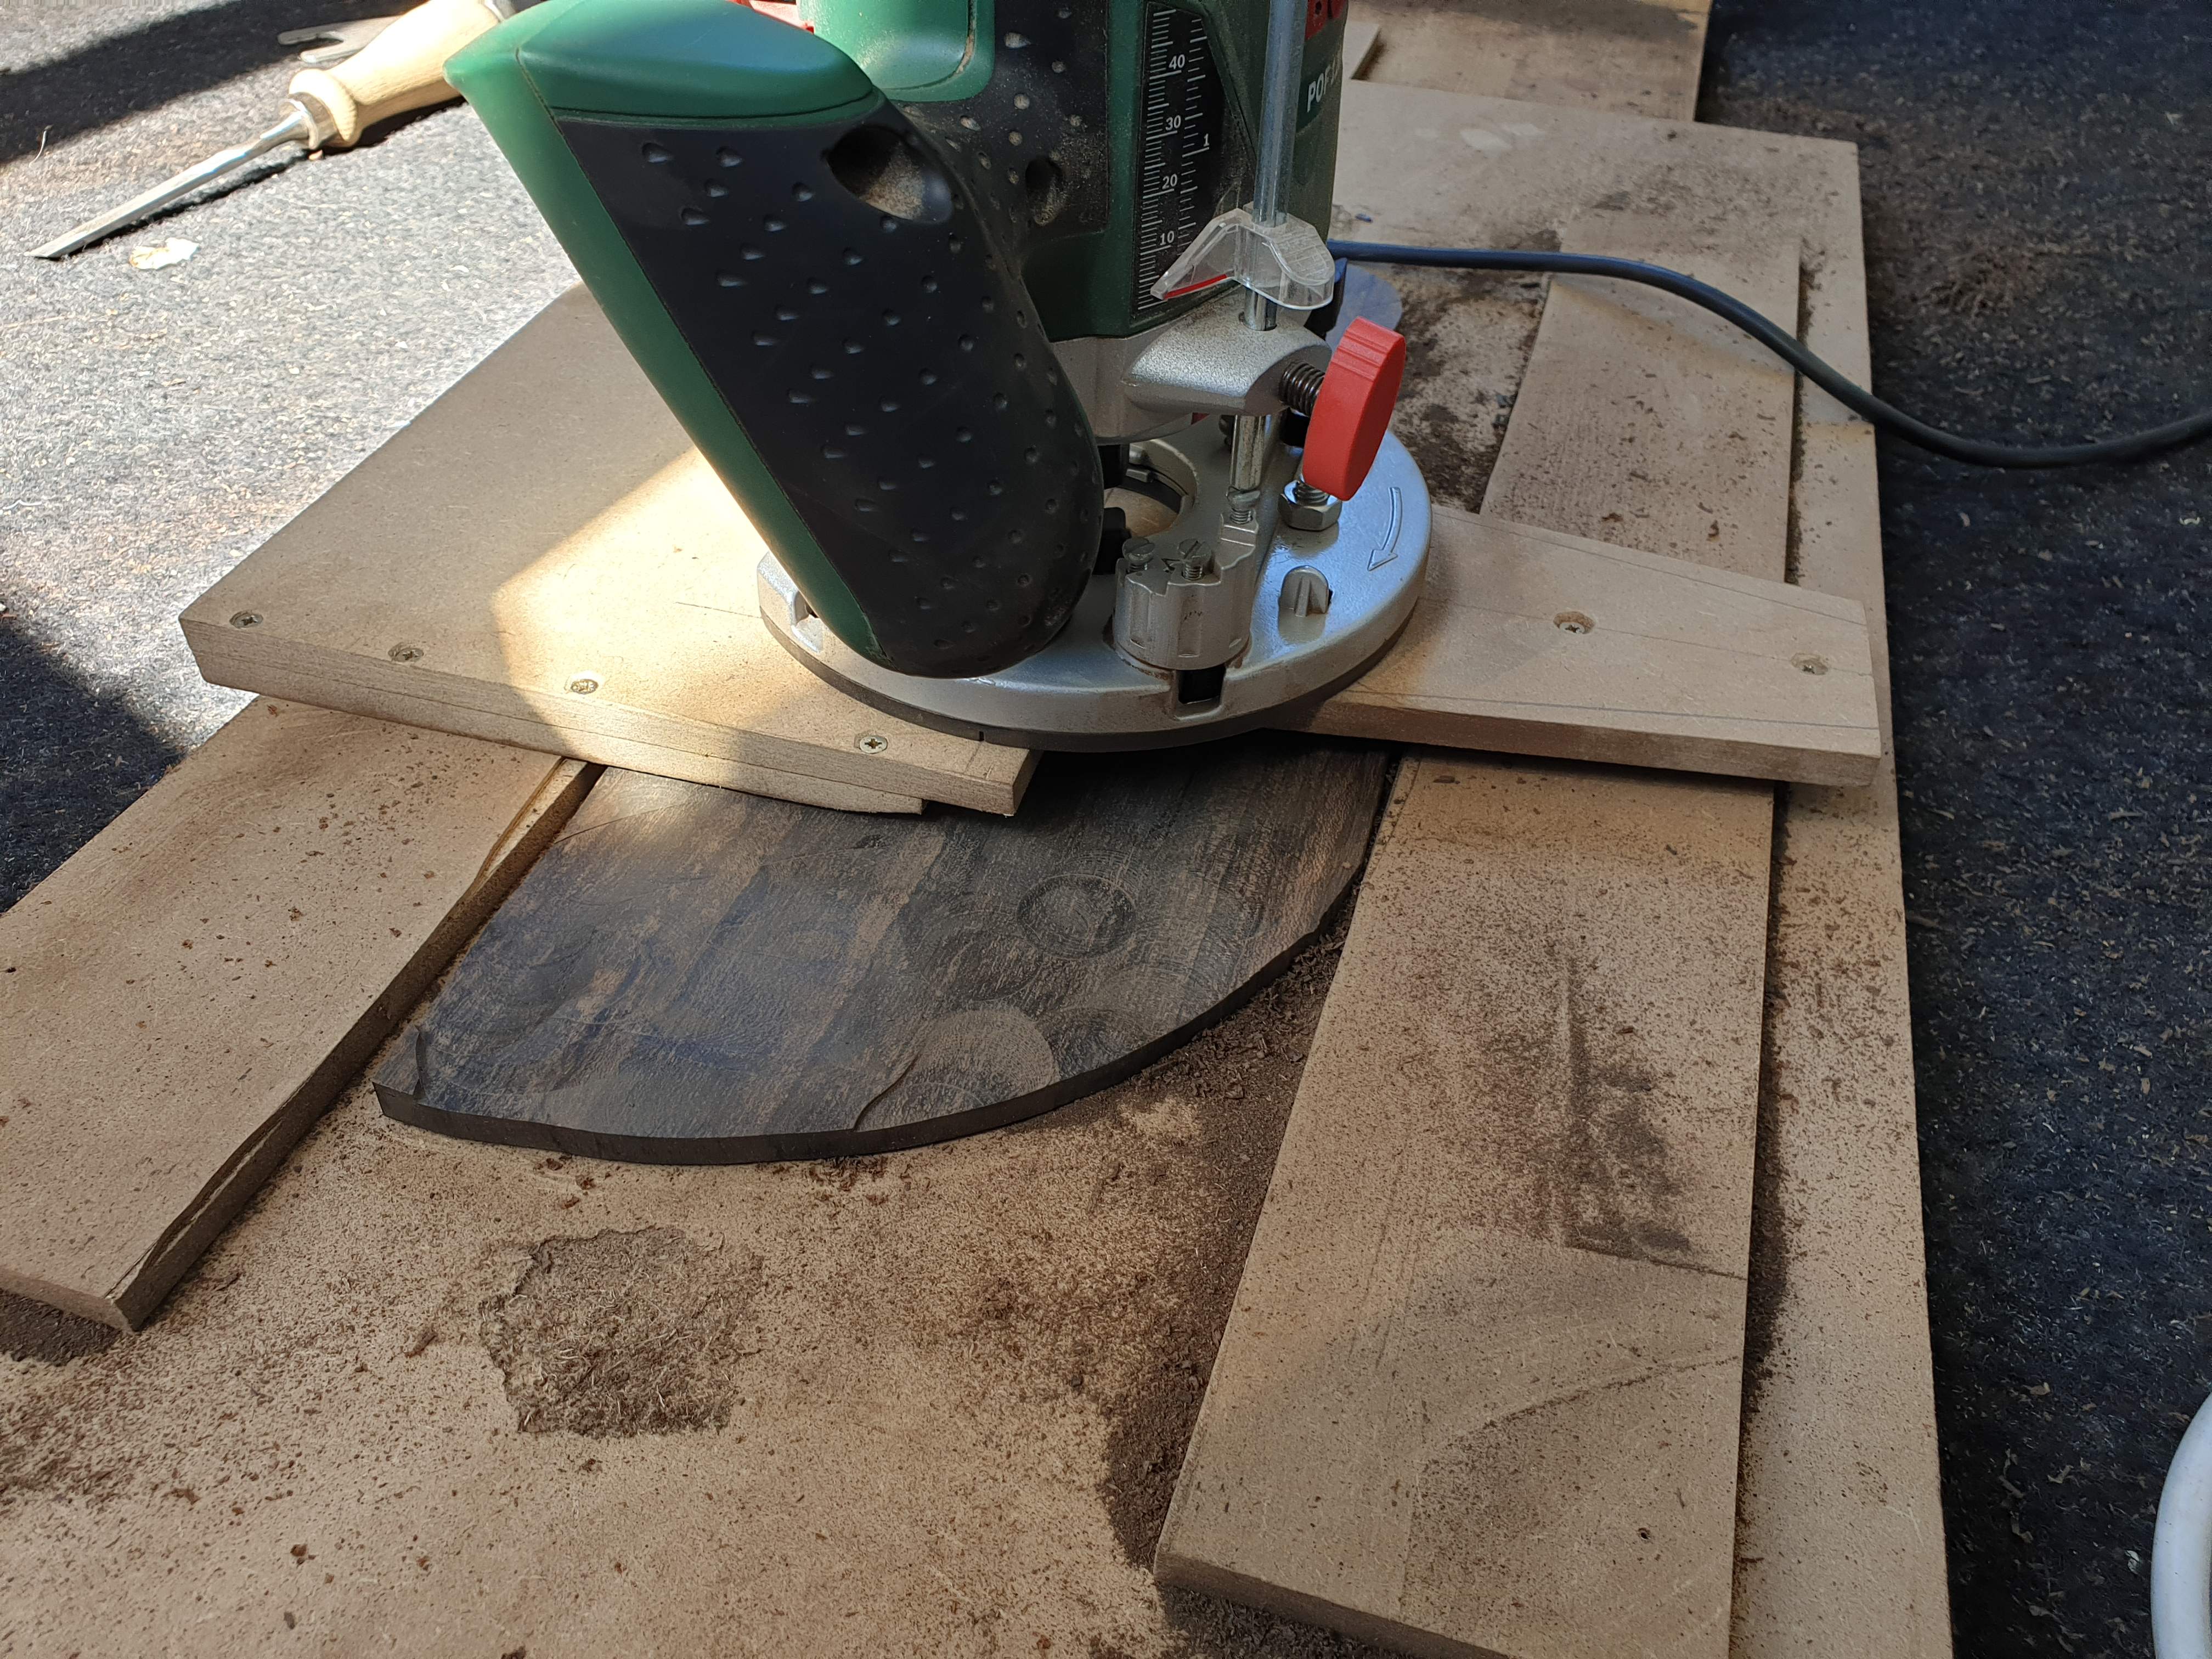
I then moved to my router sled with two rails (an actual sled), which worked much better. Still, the amount of ziricote dust was enormous.
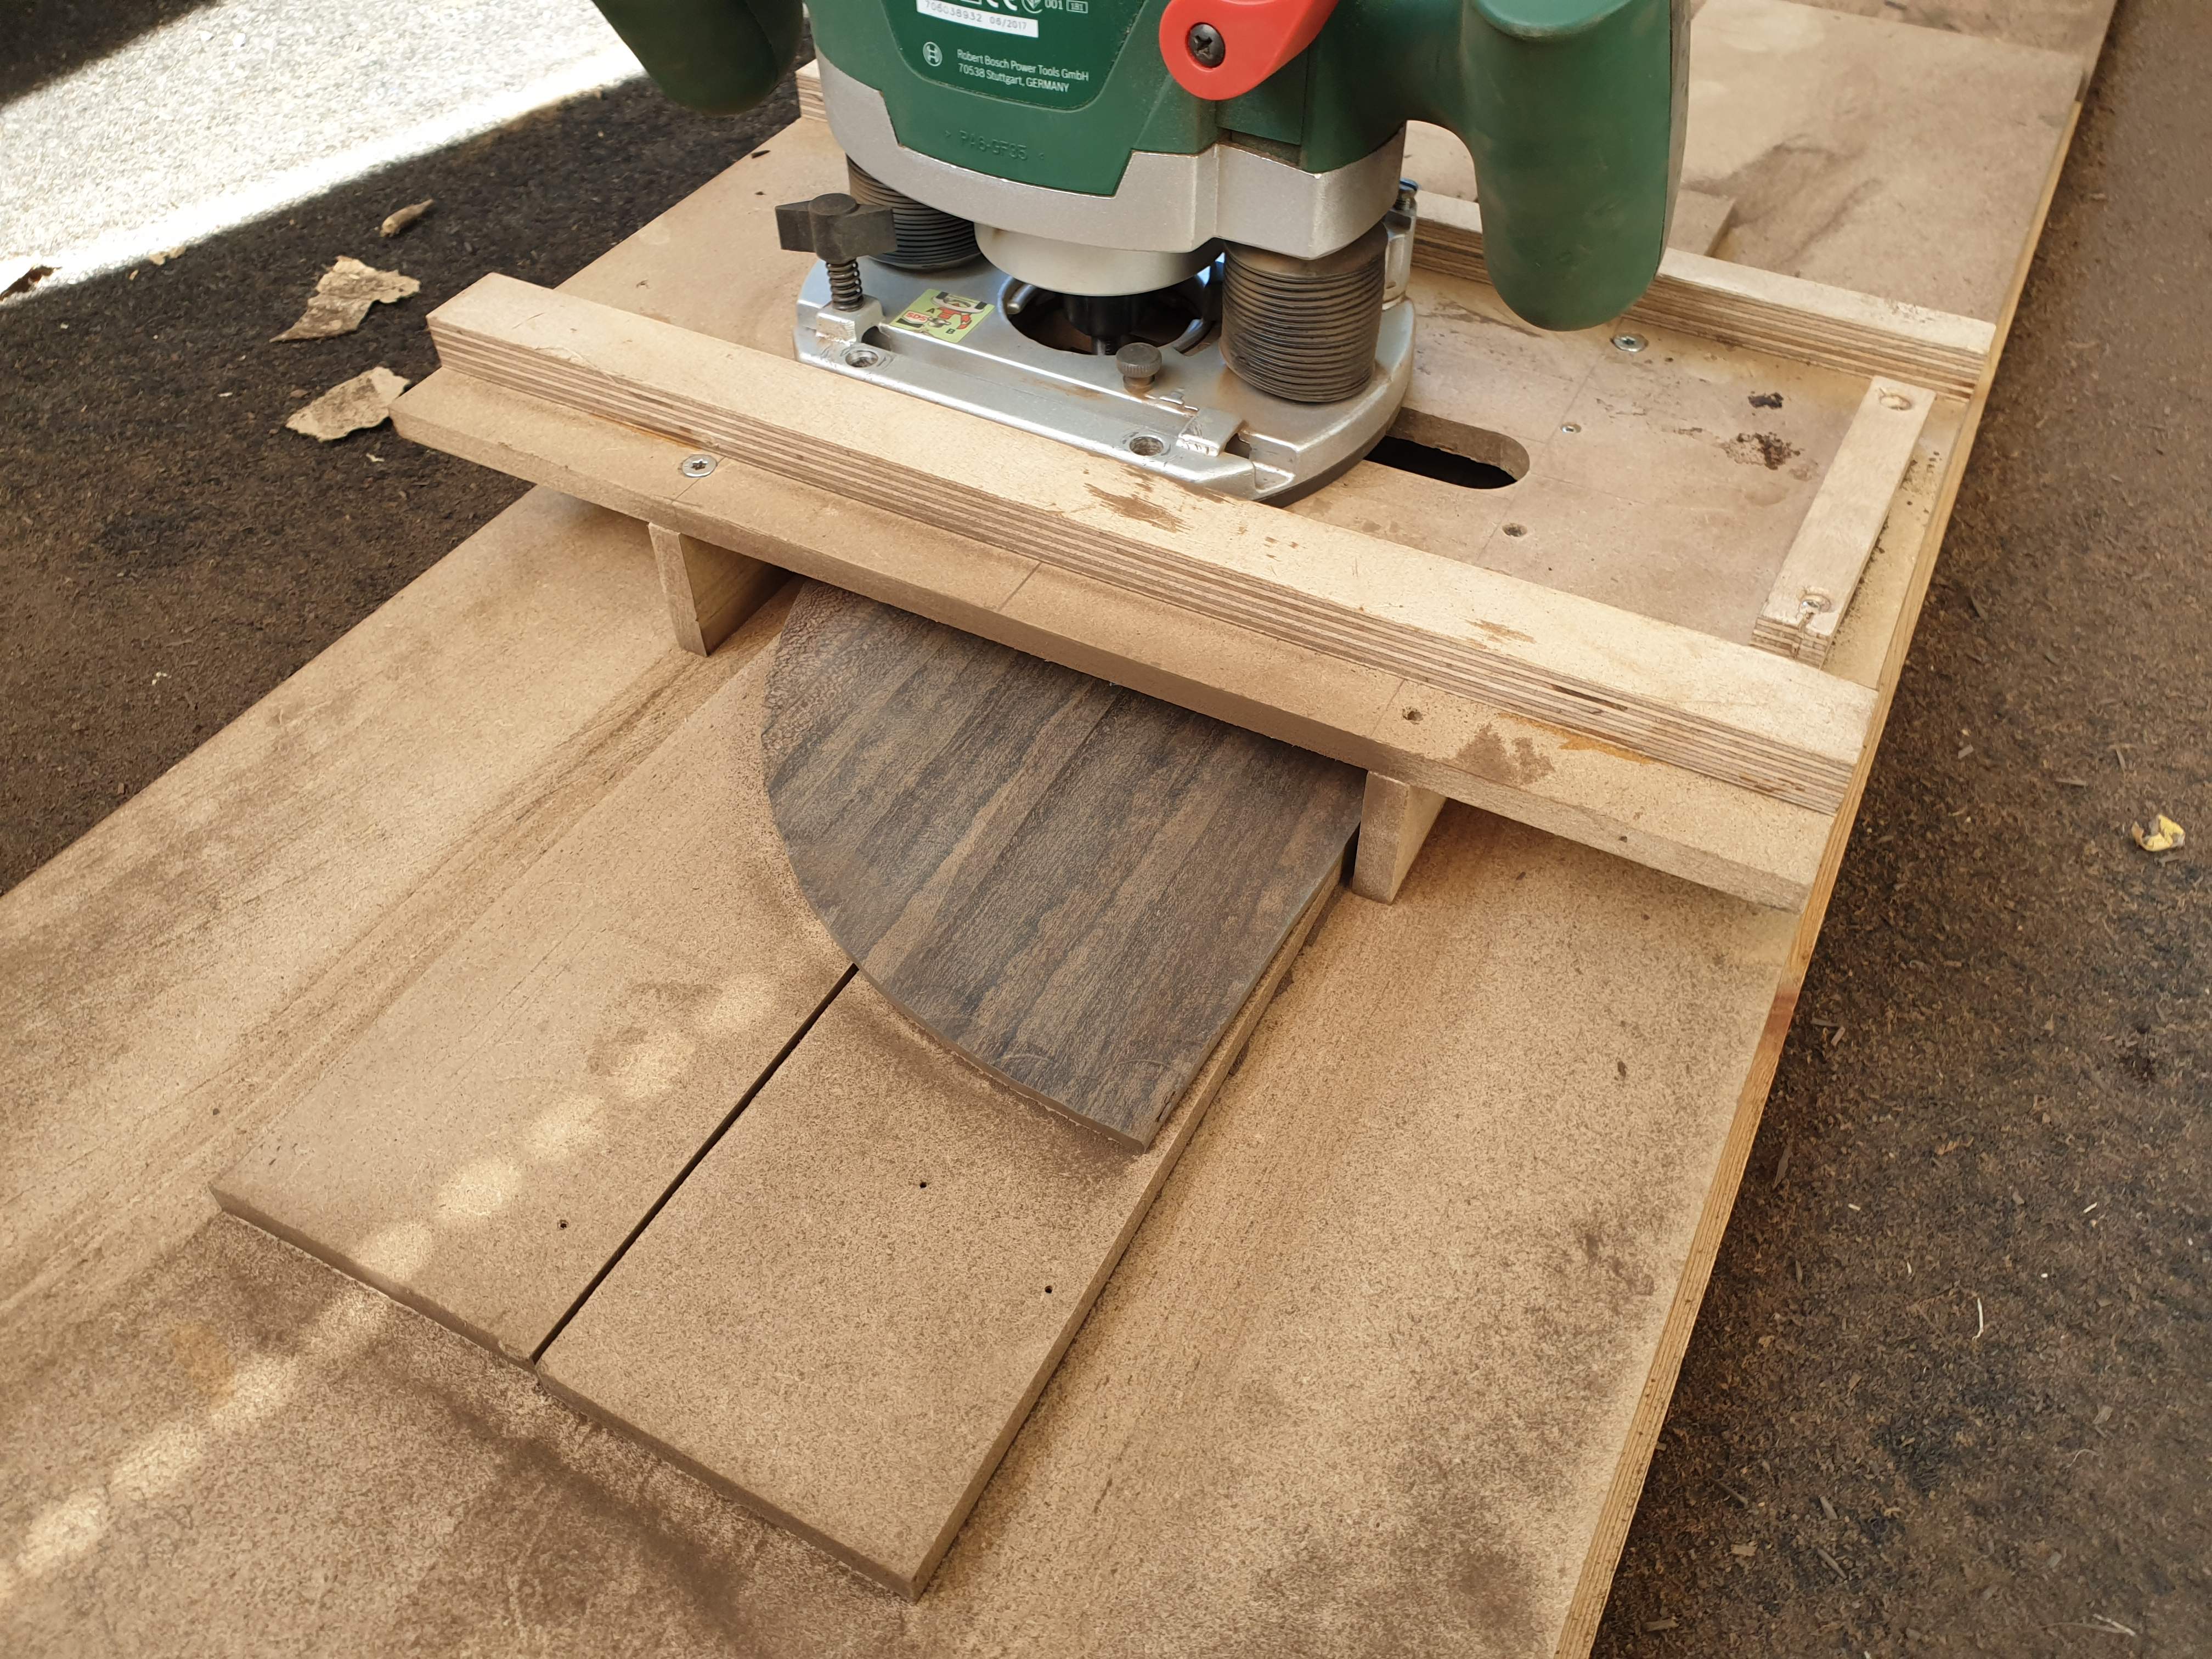
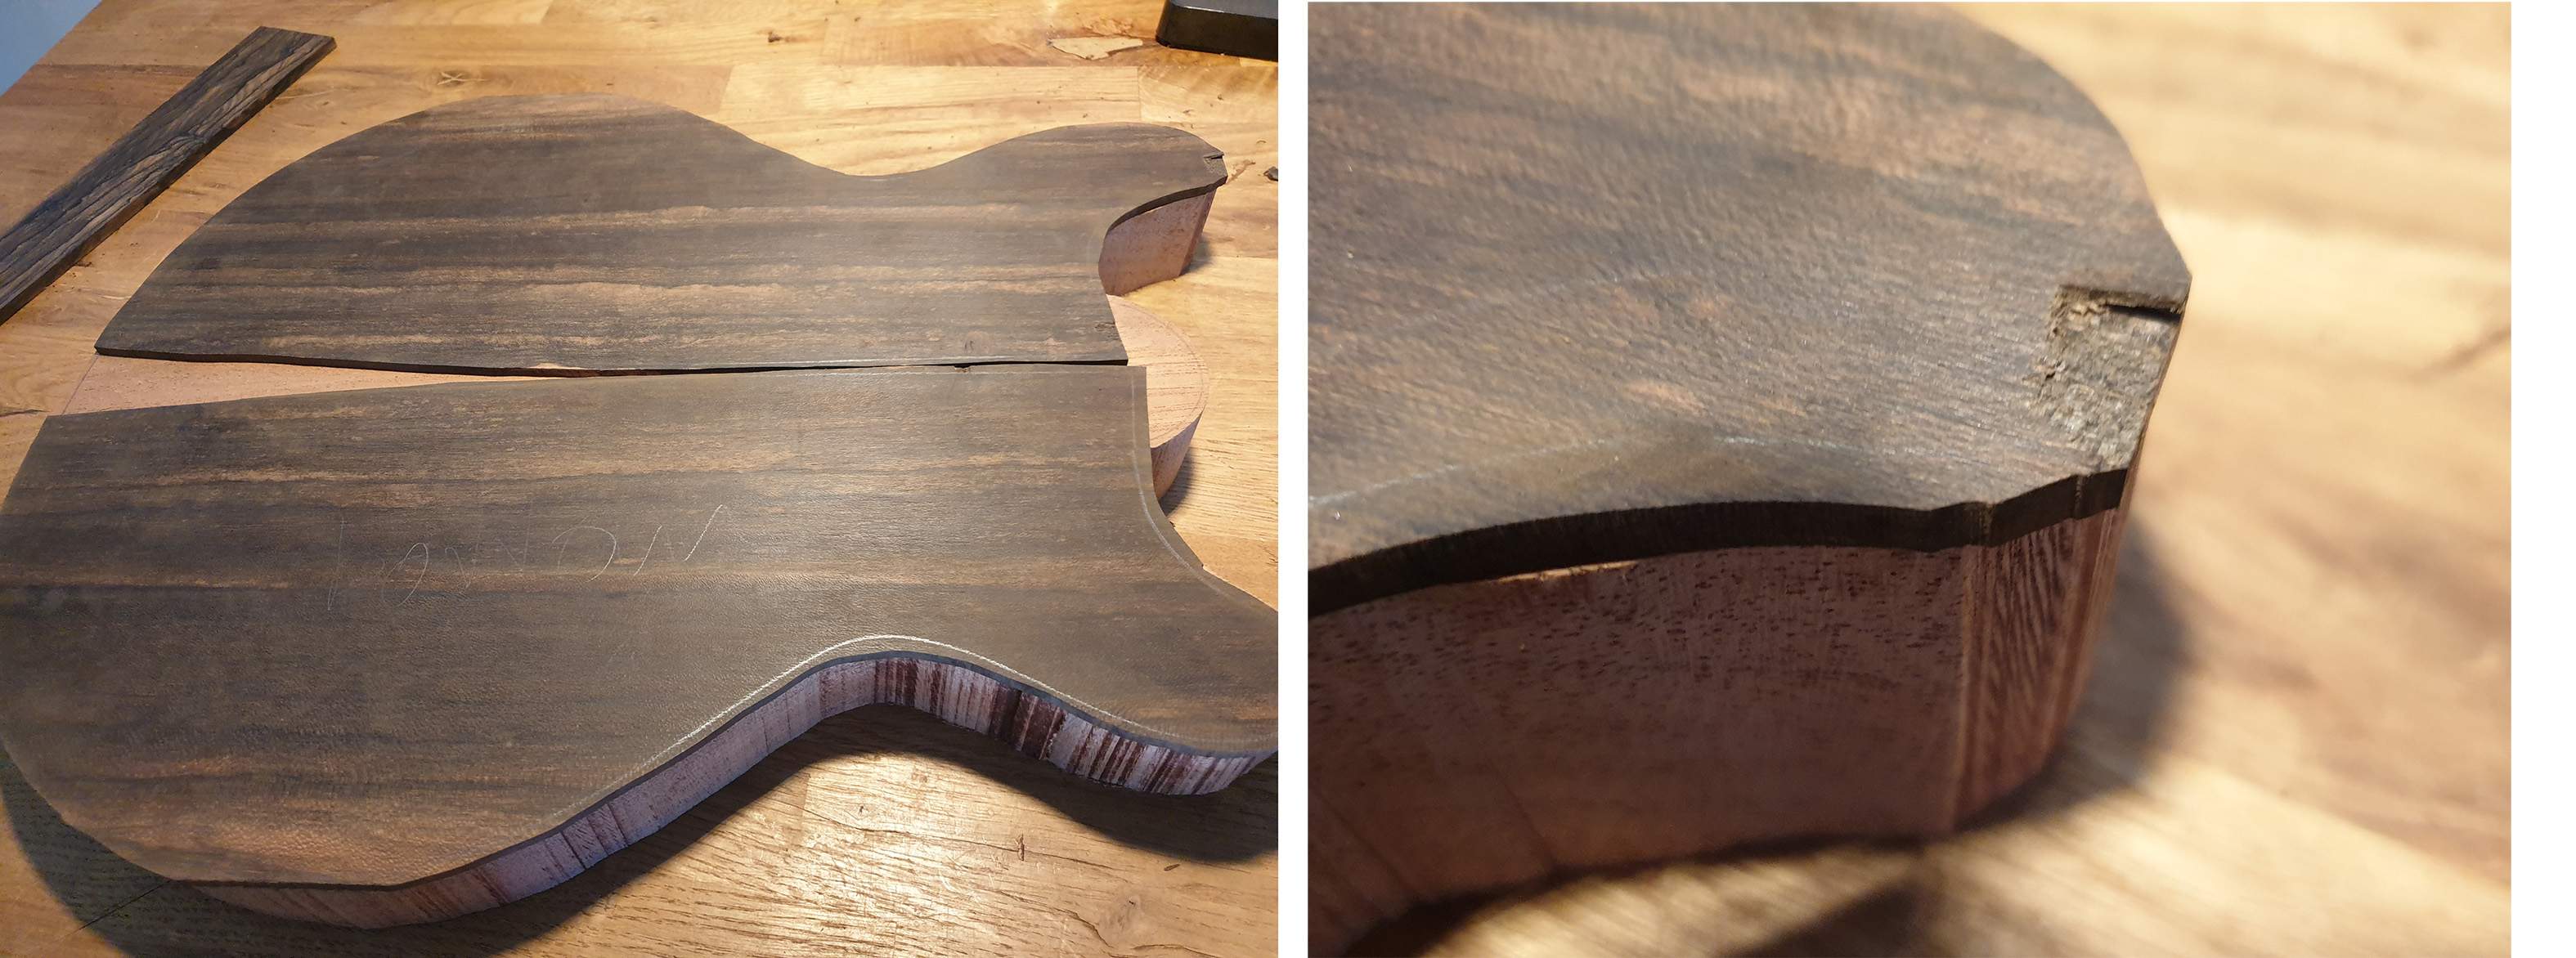
Here's the thicknessed top, just below 4mm. A chip came off at the upper horn while removing the tape after routing. I hope it will disappear with the roundover.
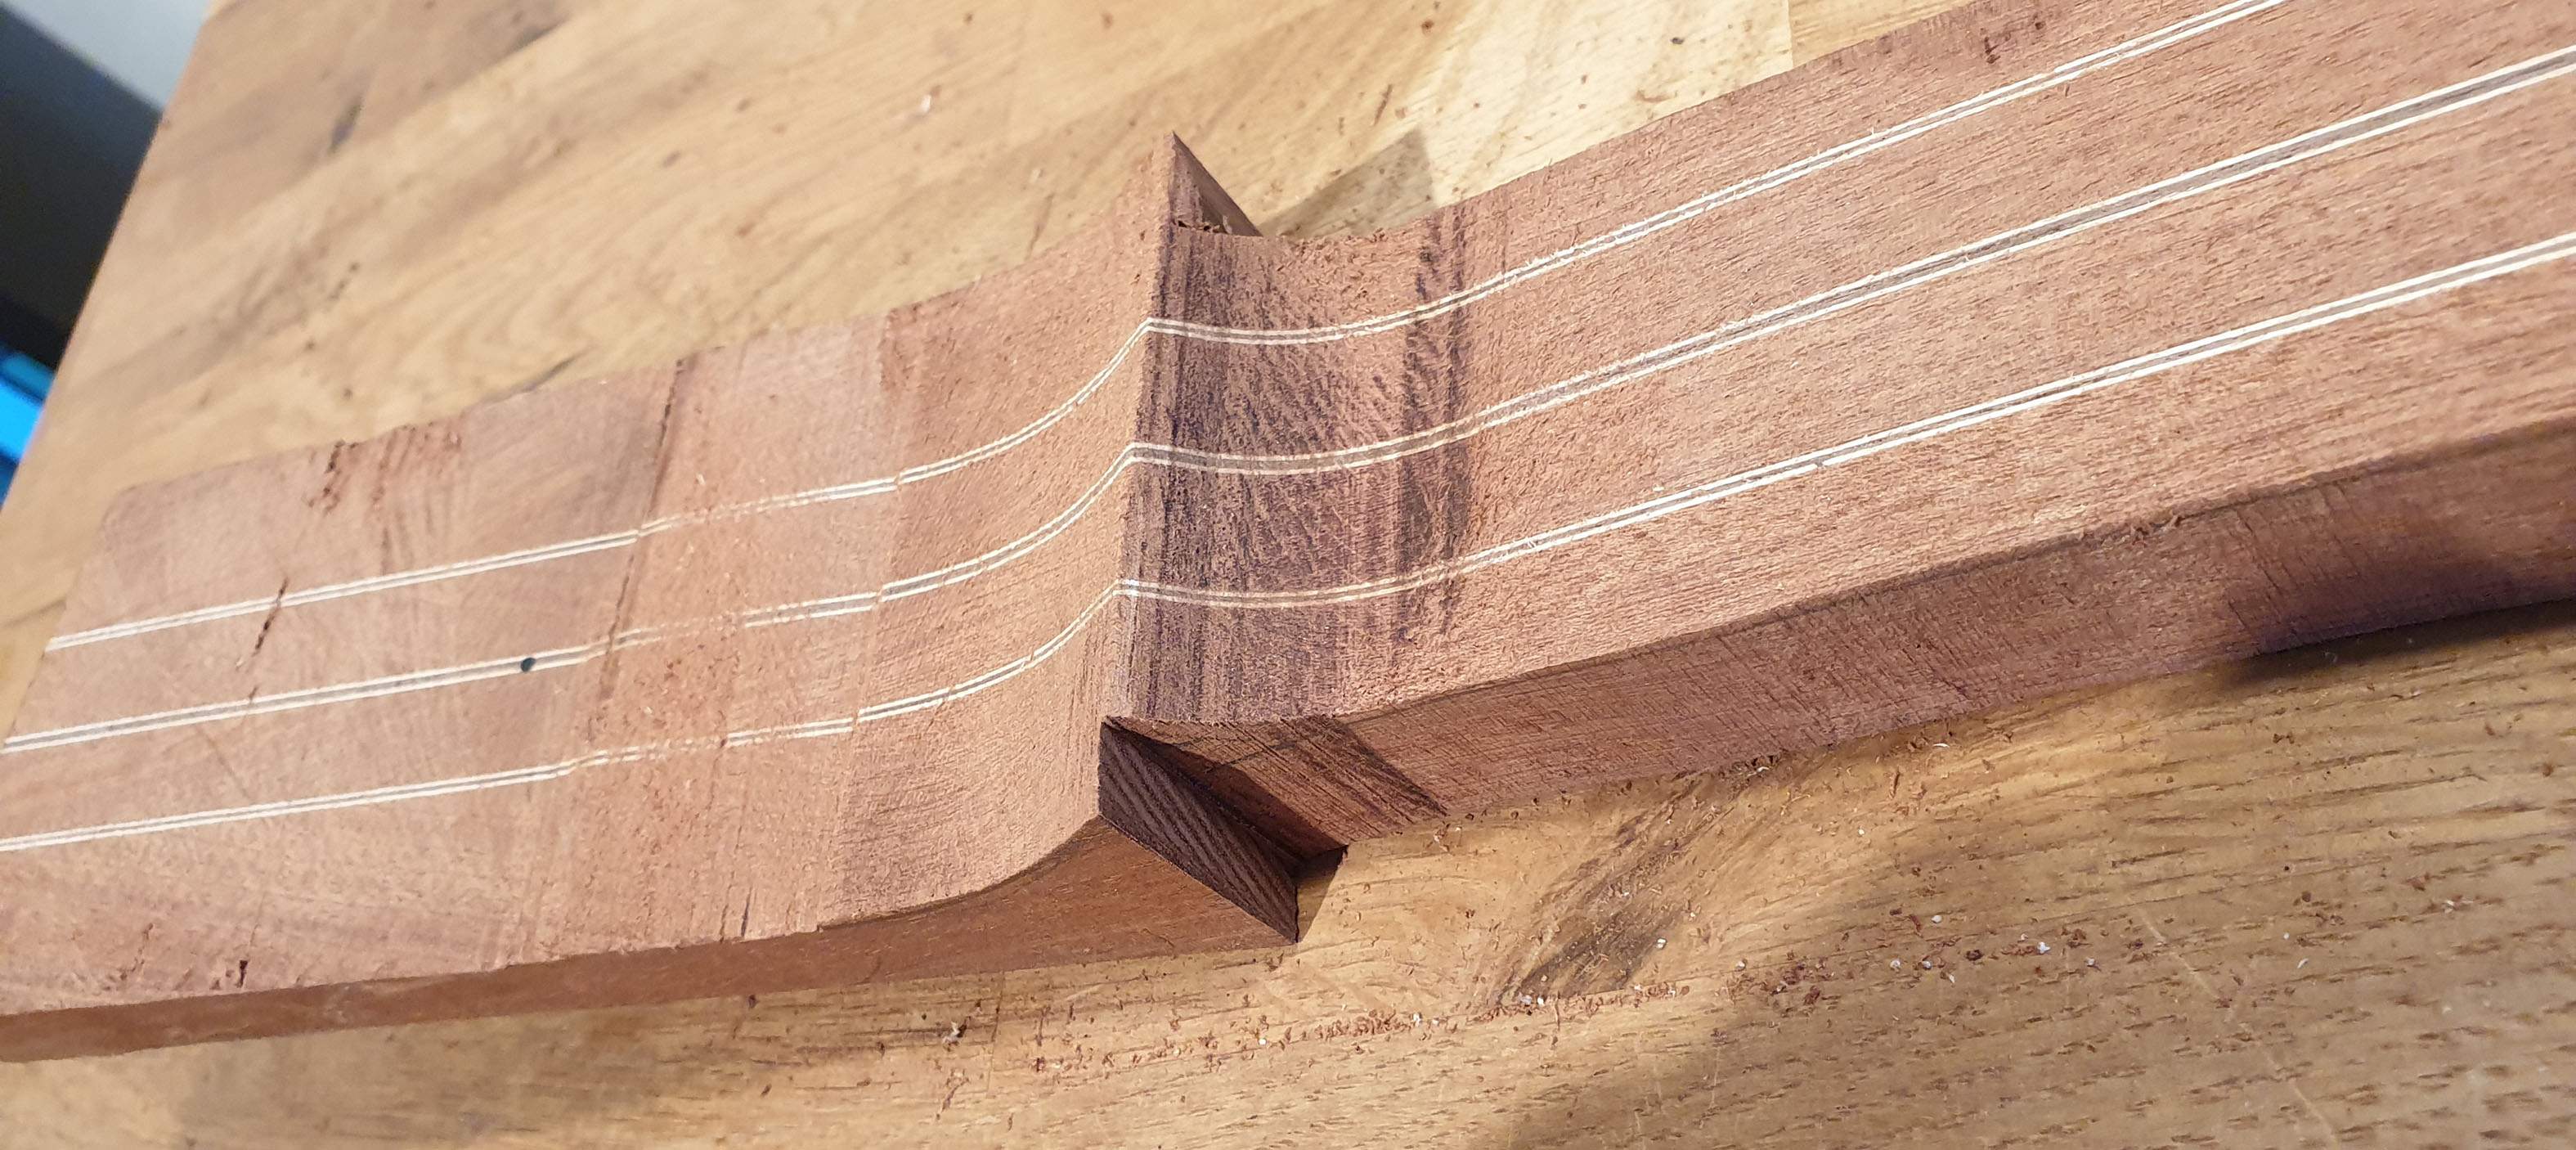
And here's the back of the neck. This cut is always a tough job form my little tabletop bandsaw, but it made it through. I'll let it sit for a few days to check for any movement.
I got two things done today: Thicknessing the top and cutting the back of the neck.
I usually like using a router sled, but today I found myself dreaming about a thickness sander. I started with a 9mm top and had to take it down to 4mm, so more than half of it was turned into dust...luckily it's good weather and I was able to do it outside.
I learned an important lesson today: Ziricote dust is sticky. My first router sled attempt was the base from my twisted sister build riding on two platforms of MDF. However, the ziricote dust made any movement of MDF on MDF difficult: it takes a lot of force and then the sled starts to vibrate and jump, leaving dents in the top.
I then moved to my router sled with two rails (an actual sled), which worked much better. Still, the amount of ziricote dust was enormous.
Here's the thicknessed top, just below 4mm. A chip came off at the upper horn while removing the tape after routing. I hope it will disappear with the roundover.
And here's the back of the neck. This cut is always a tough job form my little tabletop bandsaw, but it made it through. I'll let it sit for a few days to check for any movement.
Update #4: Let me get this straight...
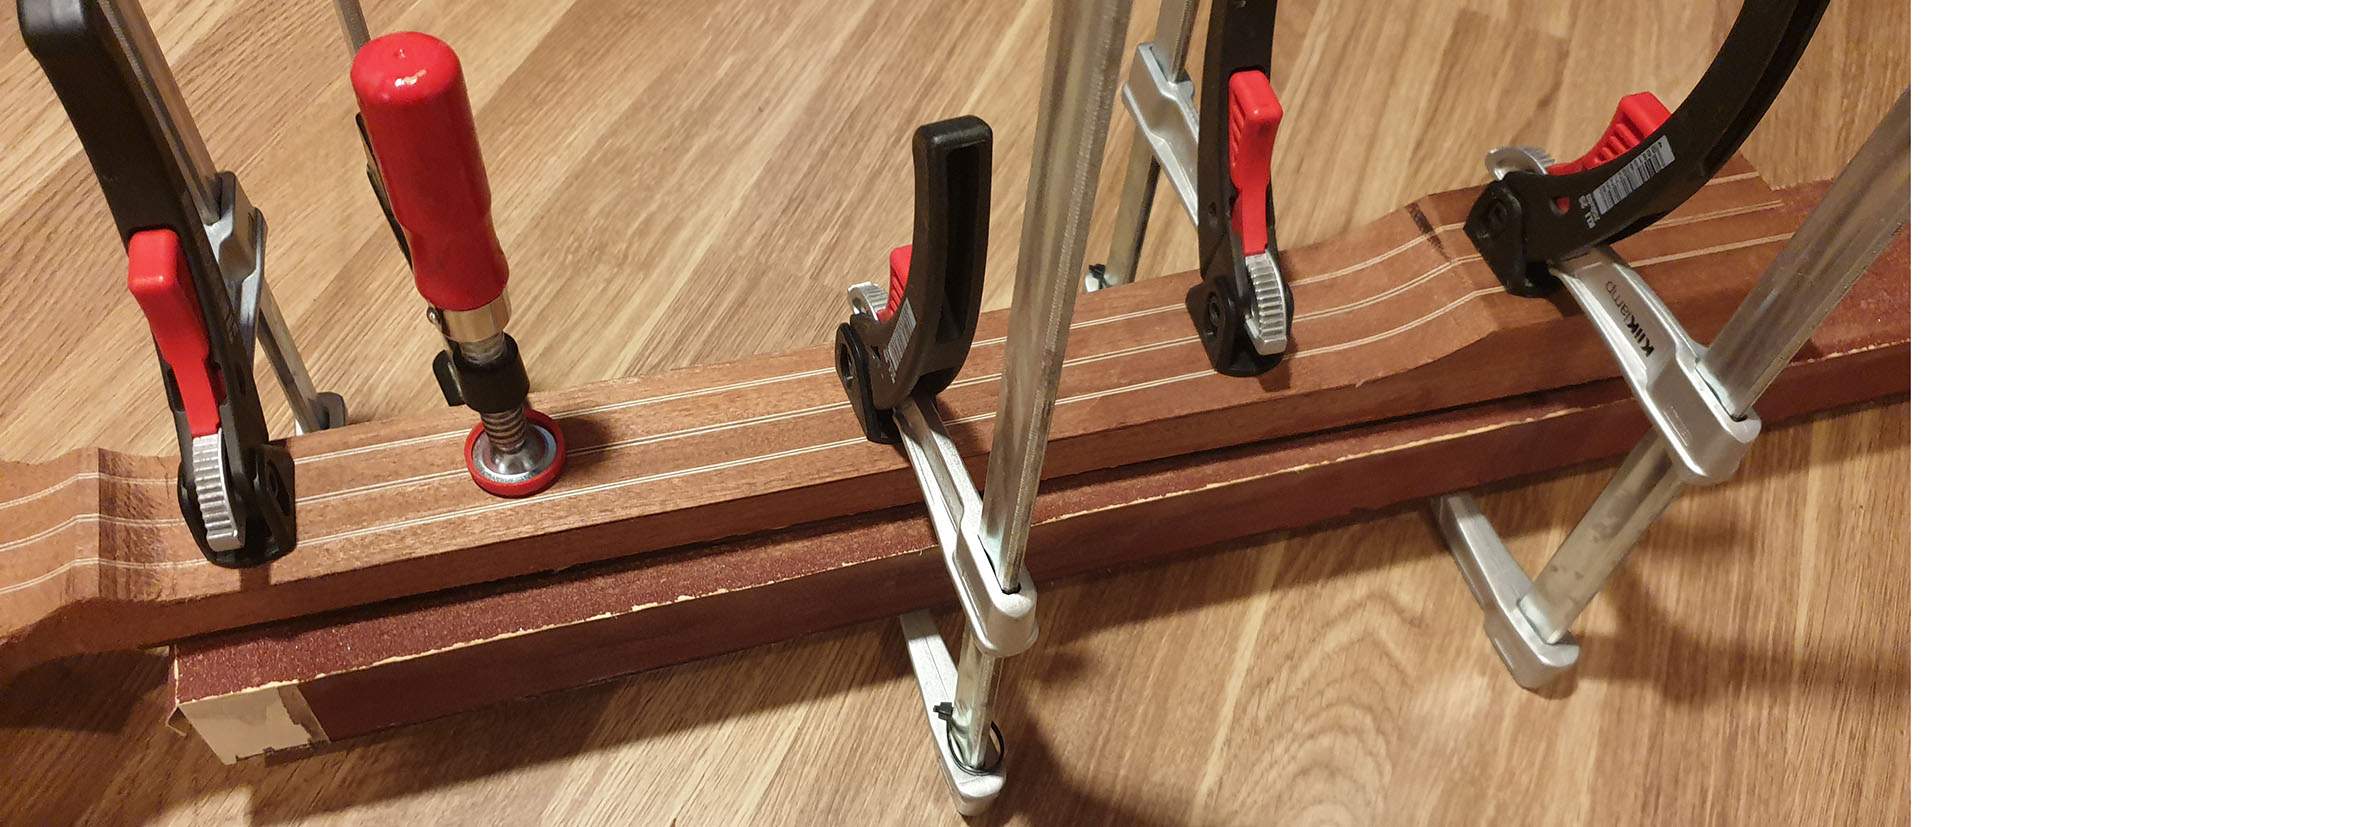
It's fretboard glue-up day! In preparation I got myself some gun oil and lubricated the Ti trussrod, as recommended by @Bruce Johnson. Worked like a charm, it is already turning much smoother. I put the trussrod in the slot with a bit of silicone and glued the fretboard on. It was really hot in my workshop today, let's hope that I was fast enough clamping everything together. To make matters worse, I used blind locator pins (no inlays this time) made from side dot plastic, one of which sheared off while clamping it down. Those ratchet clamps are always applying some sideways pressure. I aligned it manually with alternating clamp direction and I think it's ok. That was unnecessarily stressful.
I always clamp it to my big aluminum sanding beam, which is the only thing in the world I trust to be straight.
Now I'm wiggling the TR back and forth every 20 minutes, hoping the silicone doesn't block it.
It's fretboard glue-up day! In preparation I got myself some gun oil and lubricated the Ti trussrod, as recommended by @Bruce Johnson. Worked like a charm, it is already turning much smoother. I put the trussrod in the slot with a bit of silicone and glued the fretboard on. It was really hot in my workshop today, let's hope that I was fast enough clamping everything together. To make matters worse, I used blind locator pins (no inlays this time) made from side dot plastic, one of which sheared off while clamping it down. Those ratchet clamps are always applying some sideways pressure. I aligned it manually with alternating clamp direction and I think it's ok. That was unnecessarily stressful.
I always clamp it to my big aluminum sanding beam, which is the only thing in the world I trust to be straight.
Now I'm wiggling the TR back and forth every 20 minutes, hoping the silicone doesn't block it.
Update#5: Headstock side veneers. Wait, what?
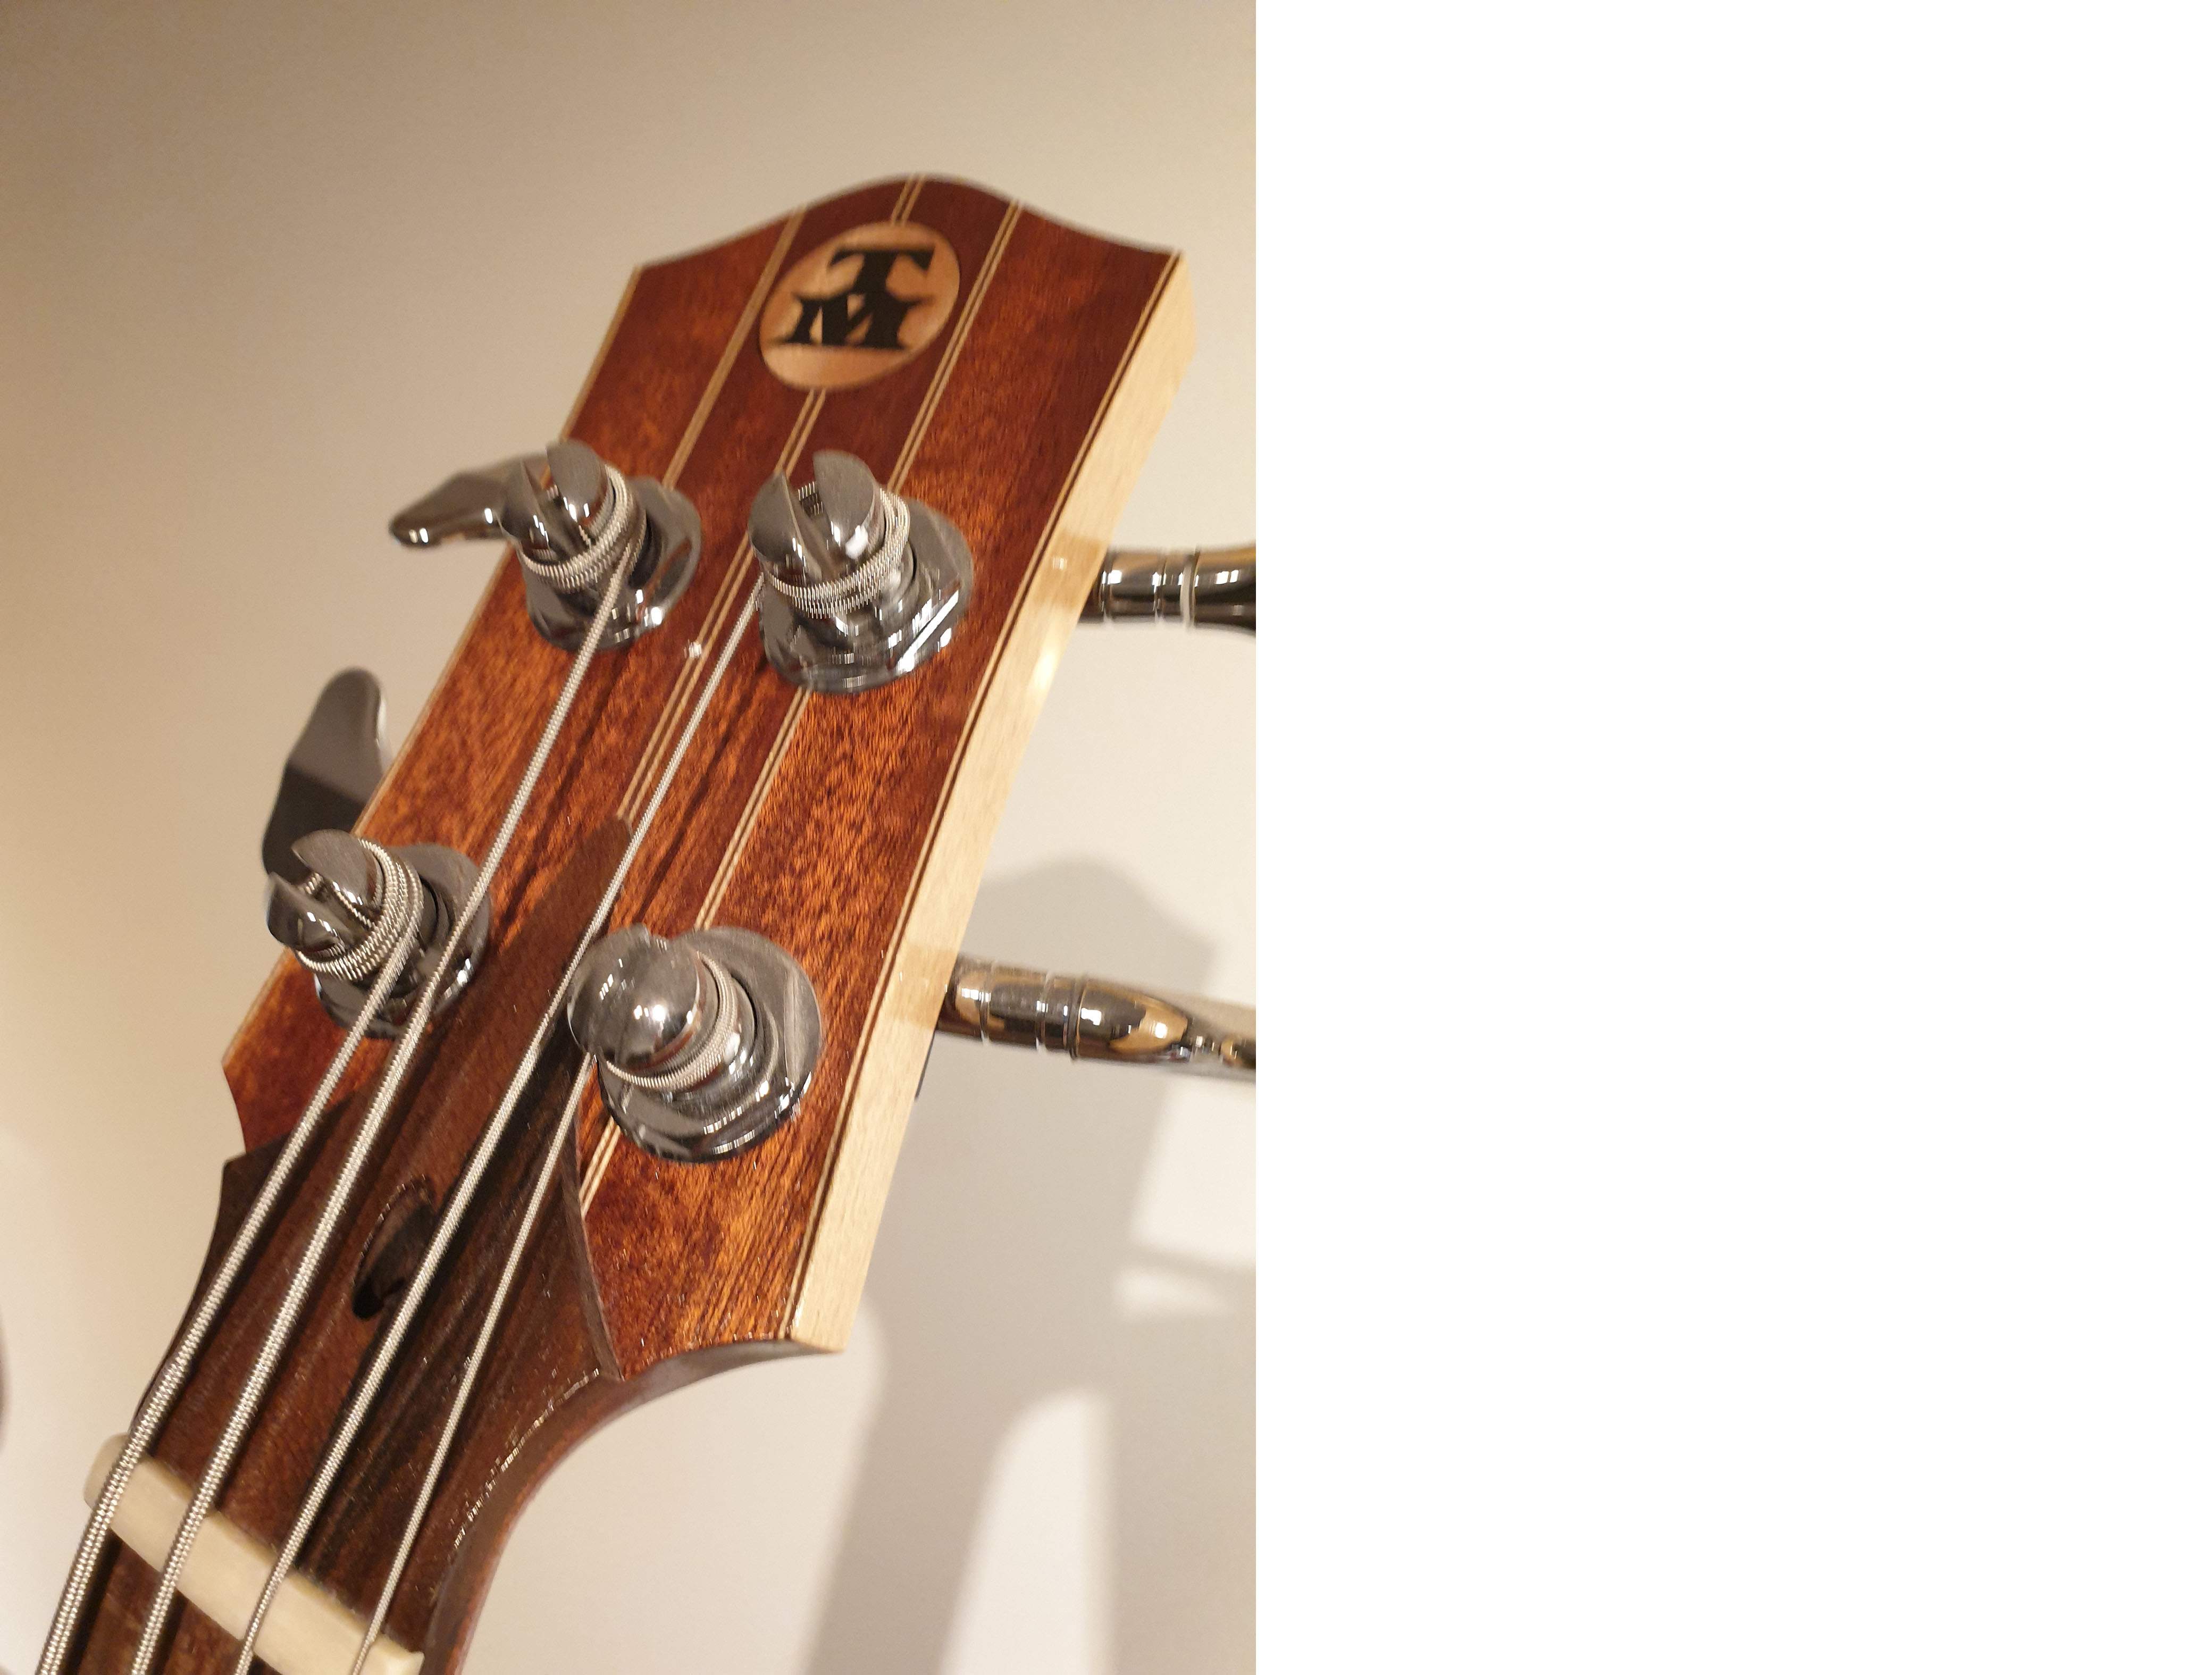
Yes, you read it right, headstock side veneers. I first tried this during my Billy-Bo build and ended up liking it, so I want to include it again. Here's how it turned out on my Billy-Bo, the side veneers mimick the laminate pattern:
Following the thread title, I had to make them from ziricote, about 1mm thick. Don't worry, I clamped it all along the edge, I removed a few clamps for the photo.
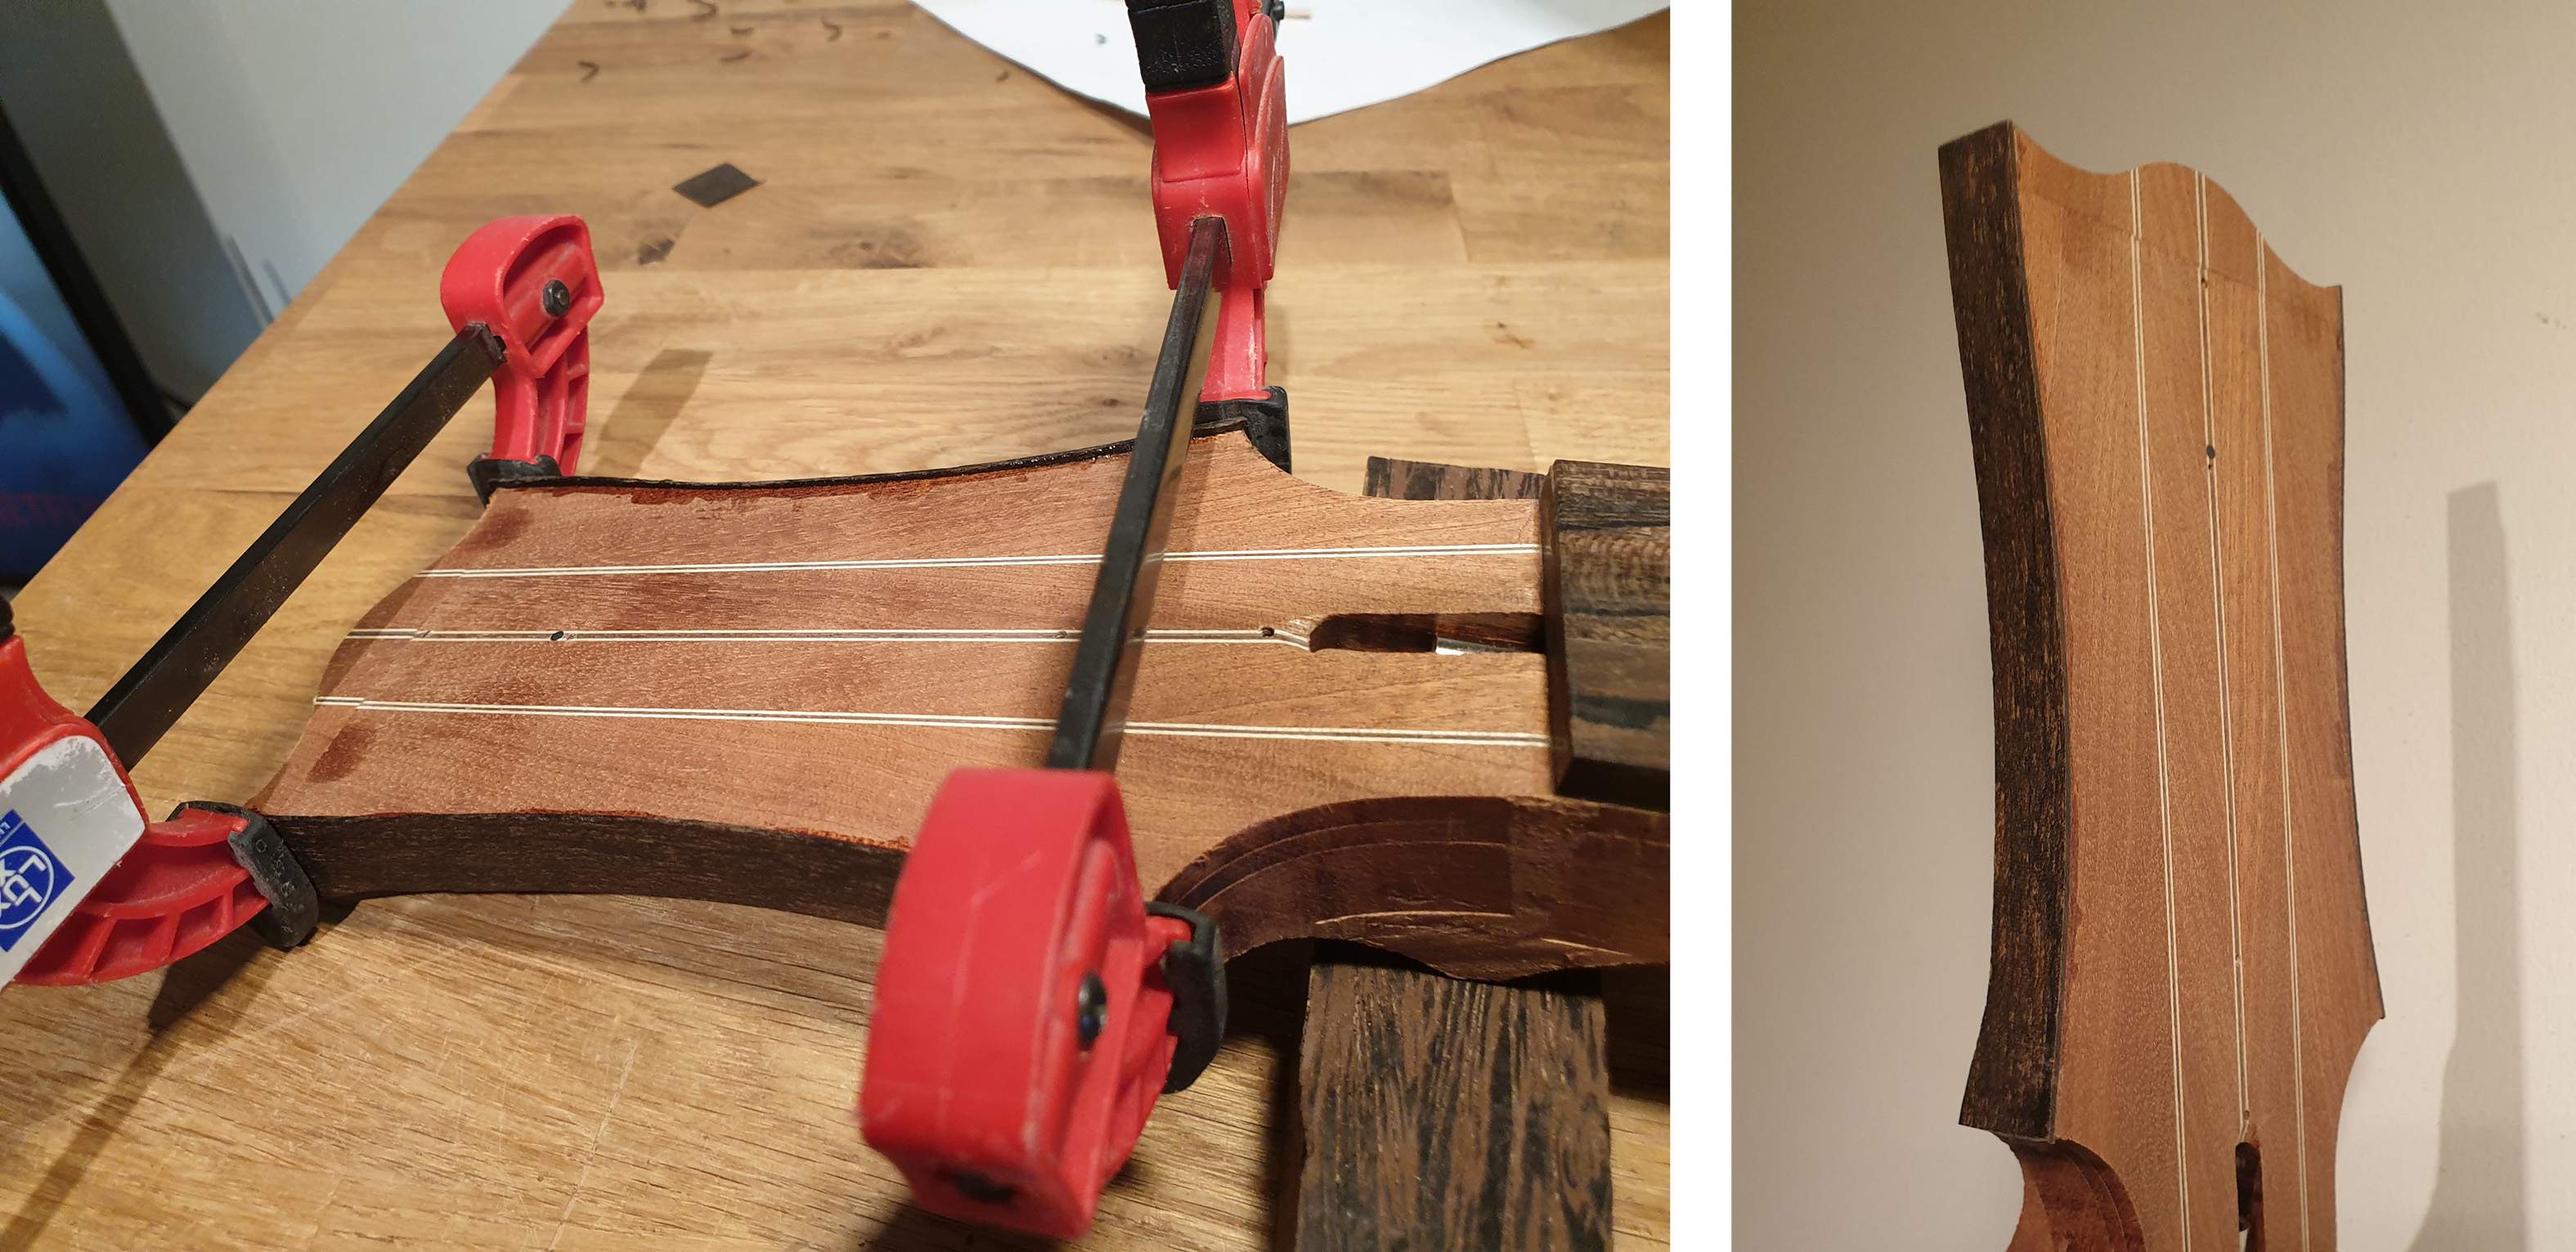
Turned out ok, but needs some more sanding at the ends. I also noticed that a dried film of titebond peeled off of the ziricote very easily, perhaps I have to switch to epoxy for the other ziricote glue-ups.
Yes, you read it right, headstock side veneers. I first tried this during my Billy-Bo build and ended up liking it, so I want to include it again. Here's how it turned out on my Billy-Bo, the side veneers mimick the laminate pattern:
Following the thread title, I had to make them from ziricote, about 1mm thick. Don't worry, I clamped it all along the edge, I removed a few clamps for the photo.
Turned out ok, but needs some more sanding at the ends. I also noticed that a dried film of titebond peeled off of the ziricote very easily, perhaps I have to switch to epoxy for the other ziricote glue-ups.
Update #6: It's a match!
It's sketchy template routing day today. I decided to finally make the templates for the flared joint in the top. I think I can use the same template for the headstock veneer joints too. This is the key element of this build, so it's important to get this right.
To get a set of matching curved templates I first made a thin master template with the convex flare. I then screwed it onto a piece of MDF and routed a 10mm channel along this template. This copies the shape into MDF, the convex shape as a true copy and the concave shape with a 10mm offset/kerf. Then I mount a 30mm ball bearing on my 10mm router bit (creating a 10mm offset between the bit and template) and run it along the concave curve to rout a new template, which now matches the convex shape.
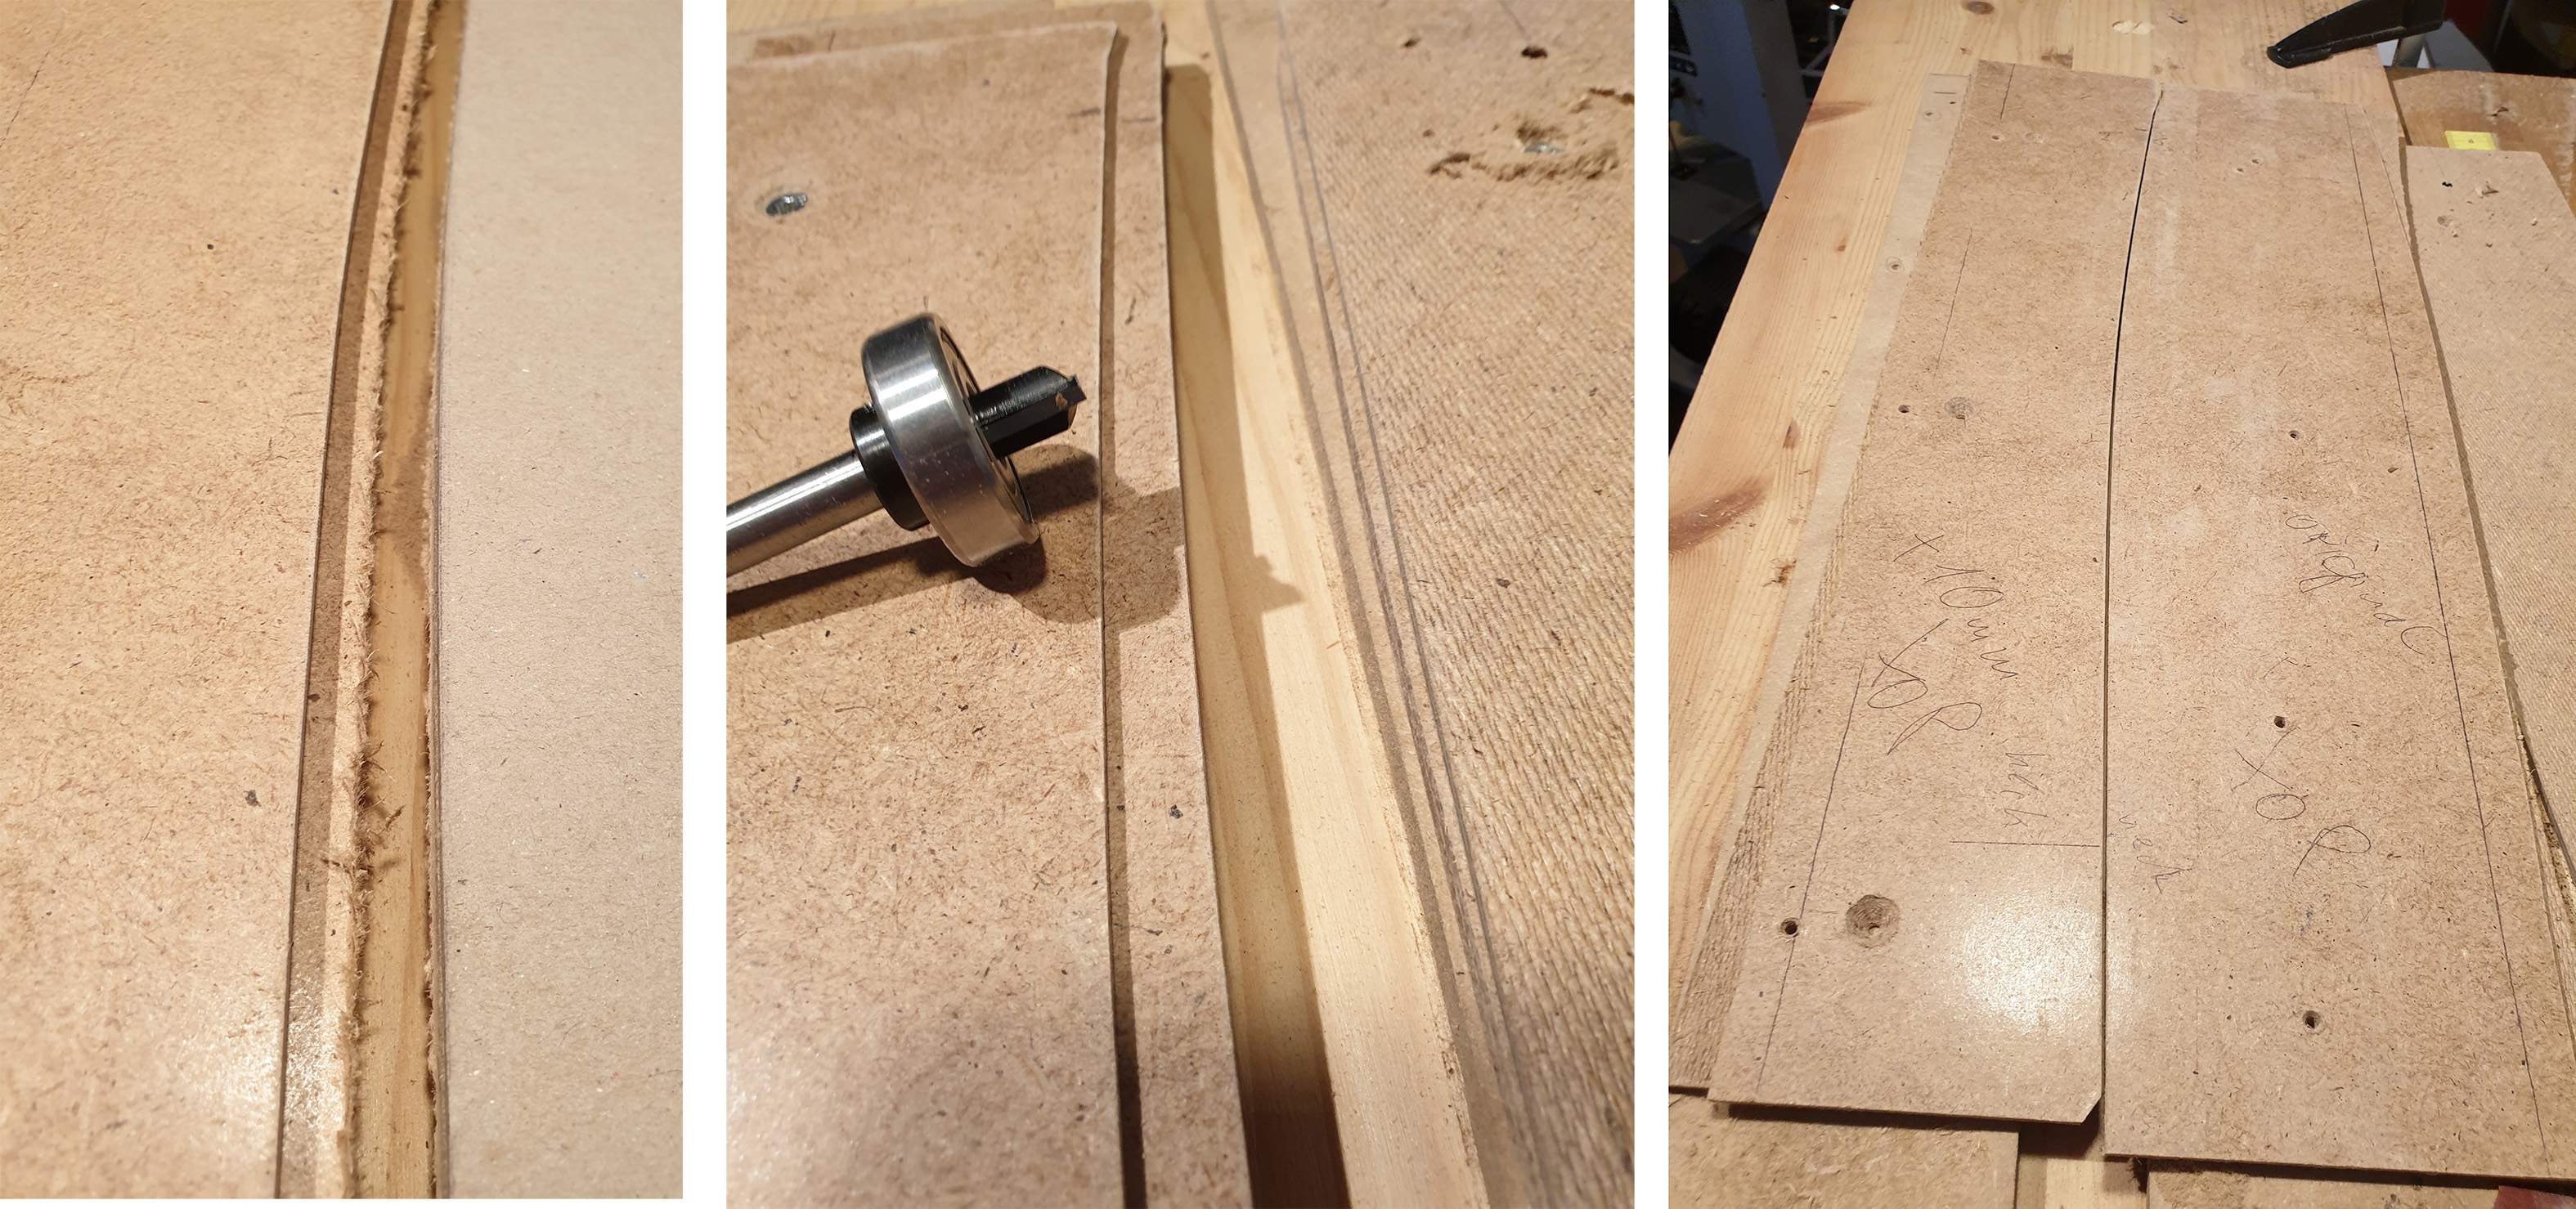
I just slid the big ball bearing over the smaller 10mm bearing of my template bit and put a locking ring on top. It felt sketchy at first because the bearing is so heavy, but with the slowest router speed it worked pretty well. Now I'm cleaning up the template edges and then I'm ready to rout the shapes.
It's sketchy template routing day today. I decided to finally make the templates for the flared joint in the top. I think I can use the same template for the headstock veneer joints too. This is the key element of this build, so it's important to get this right.
To get a set of matching curved templates I first made a thin master template with the convex flare. I then screwed it onto a piece of MDF and routed a 10mm channel along this template. This copies the shape into MDF, the convex shape as a true copy and the concave shape with a 10mm offset/kerf. Then I mount a 30mm ball bearing on my 10mm router bit (creating a 10mm offset between the bit and template) and run it along the concave curve to rout a new template, which now matches the convex shape.
I just slid the big ball bearing over the smaller 10mm bearing of my template bit and put a locking ring on top. It felt sketchy at first because the bearing is so heavy, but with the slowest router speed it worked pretty well. Now I'm cleaning up the template edges and then I'm ready to rout the shapes.
Update #7: Festival veneers
There's a big metal festival in town this weekend, so I have only little time to work on the guitar. However, I managed to rout and glue up the headstock veneers. They also serve as a test run for the top.
I clamped all ziricote veneers under the template from the last post and routed the edge. I did the same with the maple pieces and glued it up, but only on one side:
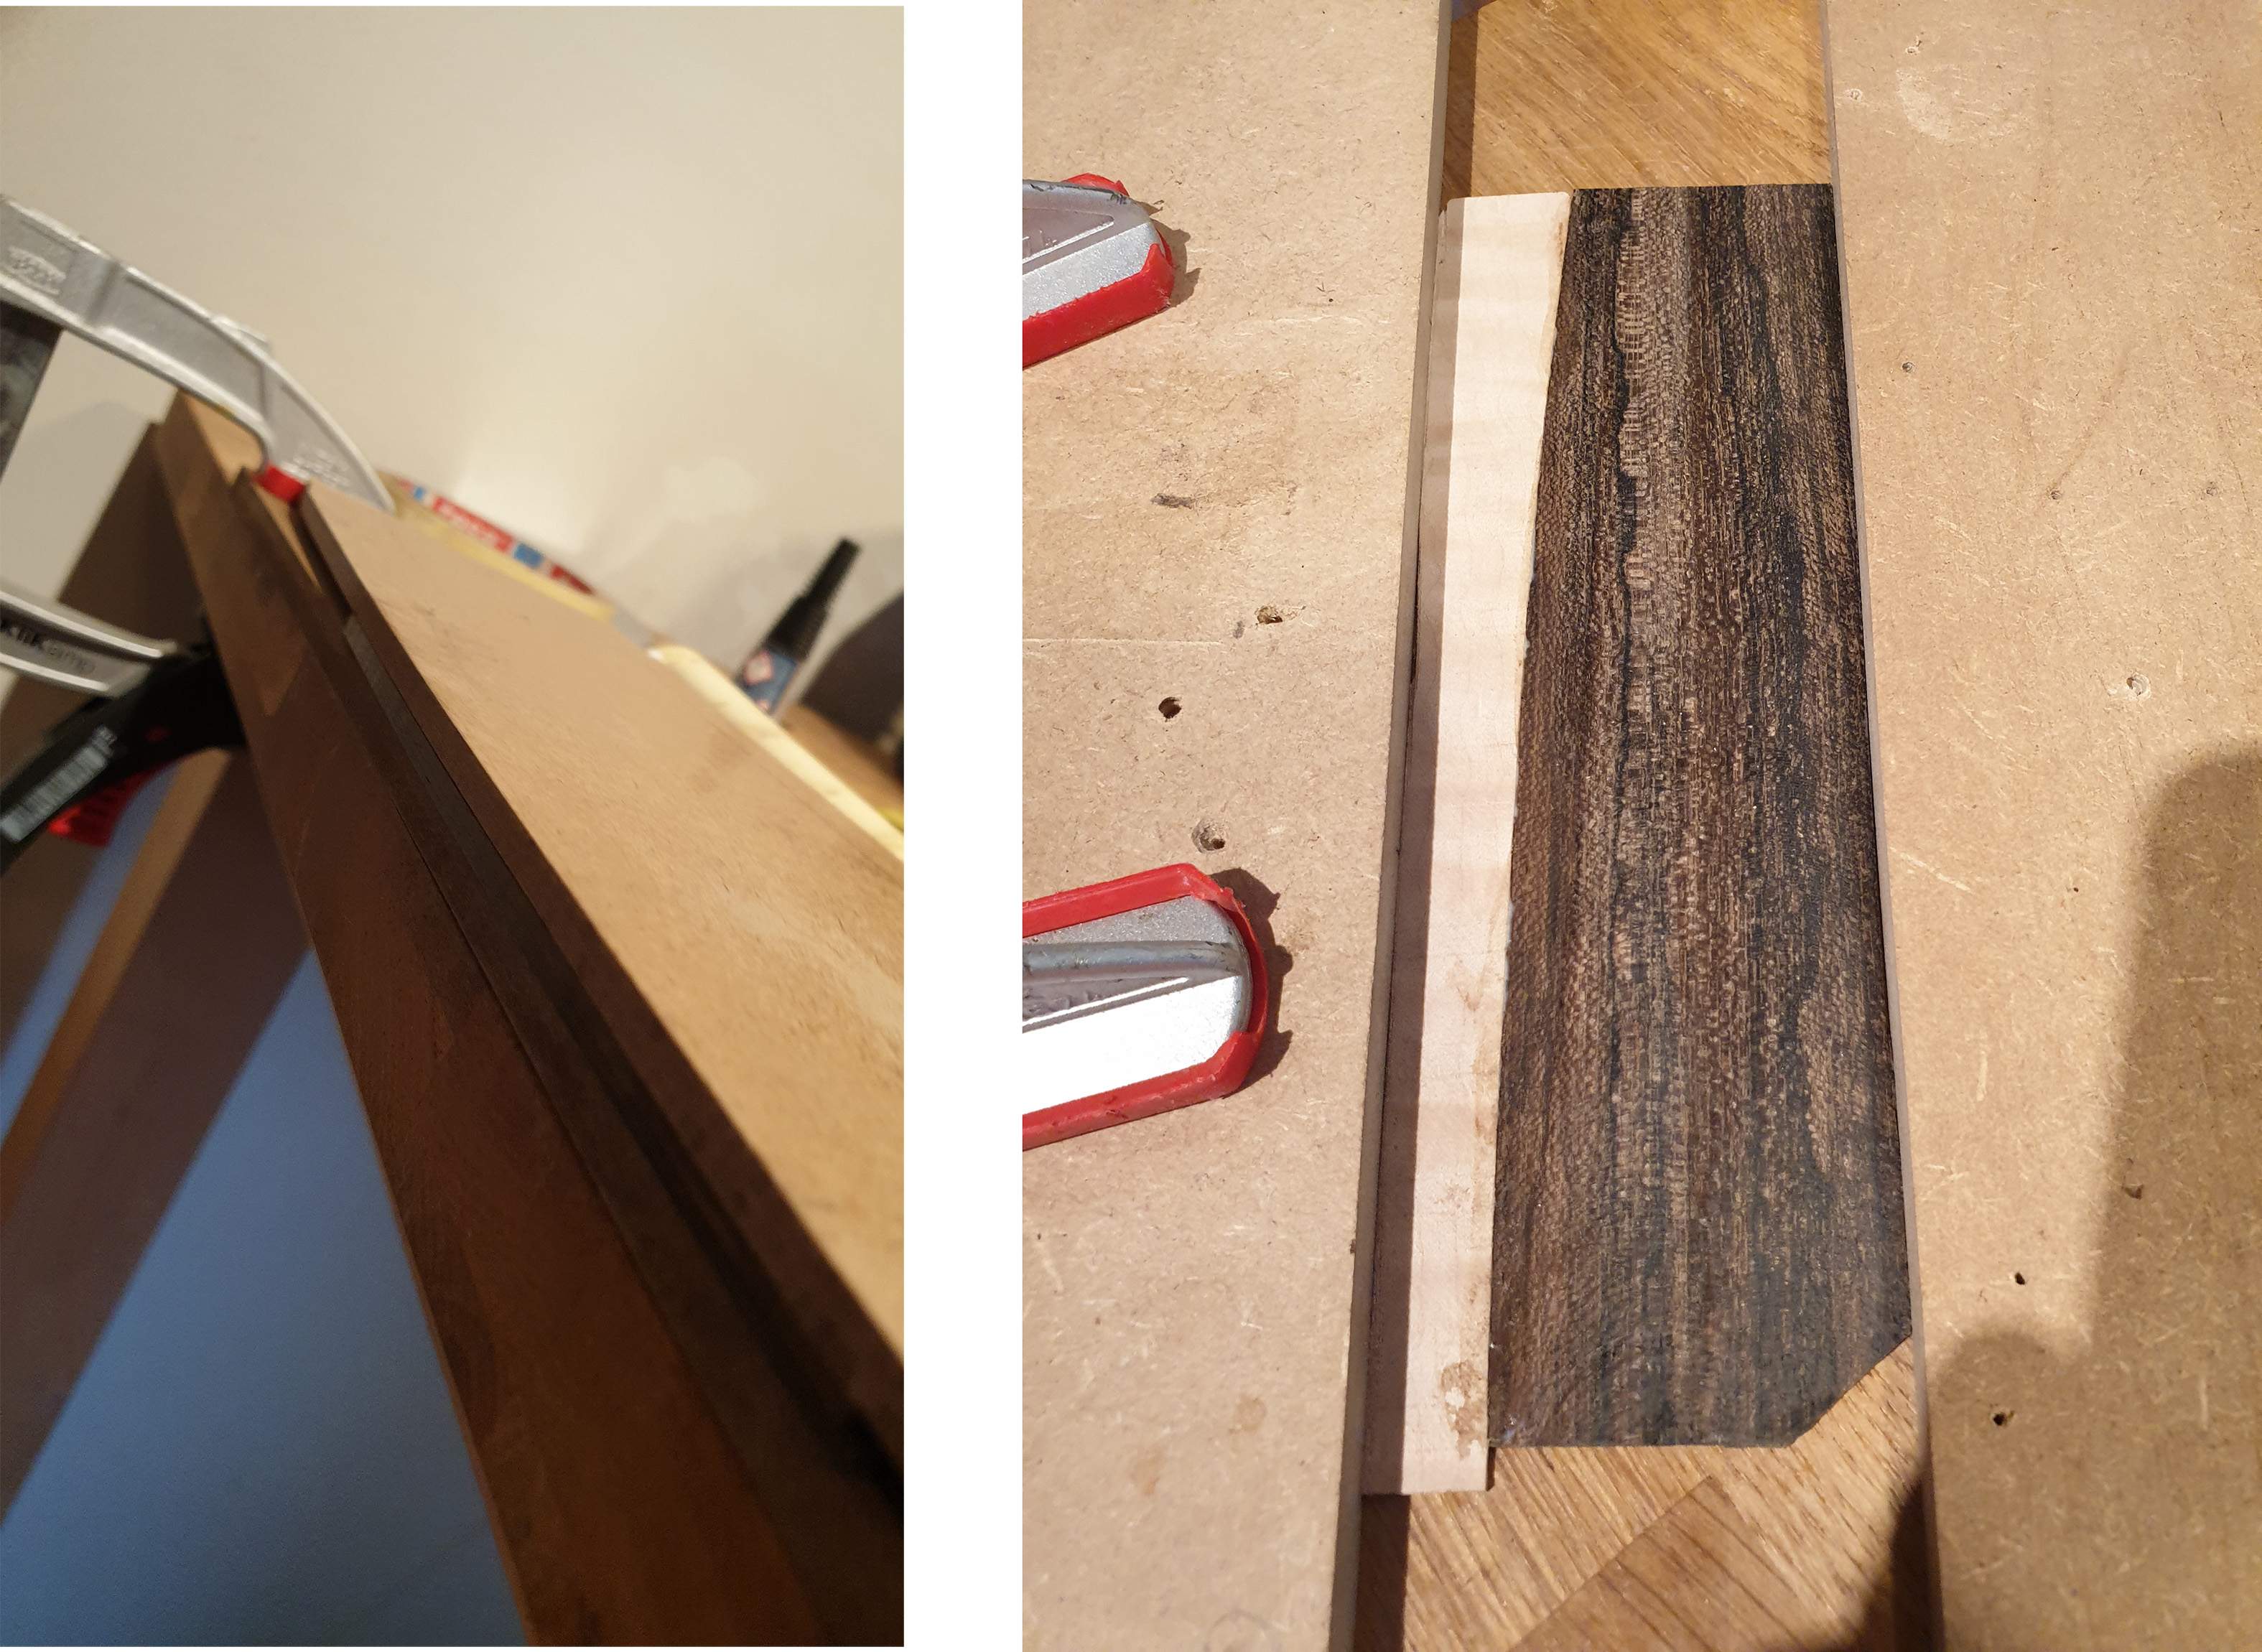
Then rinse and repeat with the other side and some sanding afterwards:
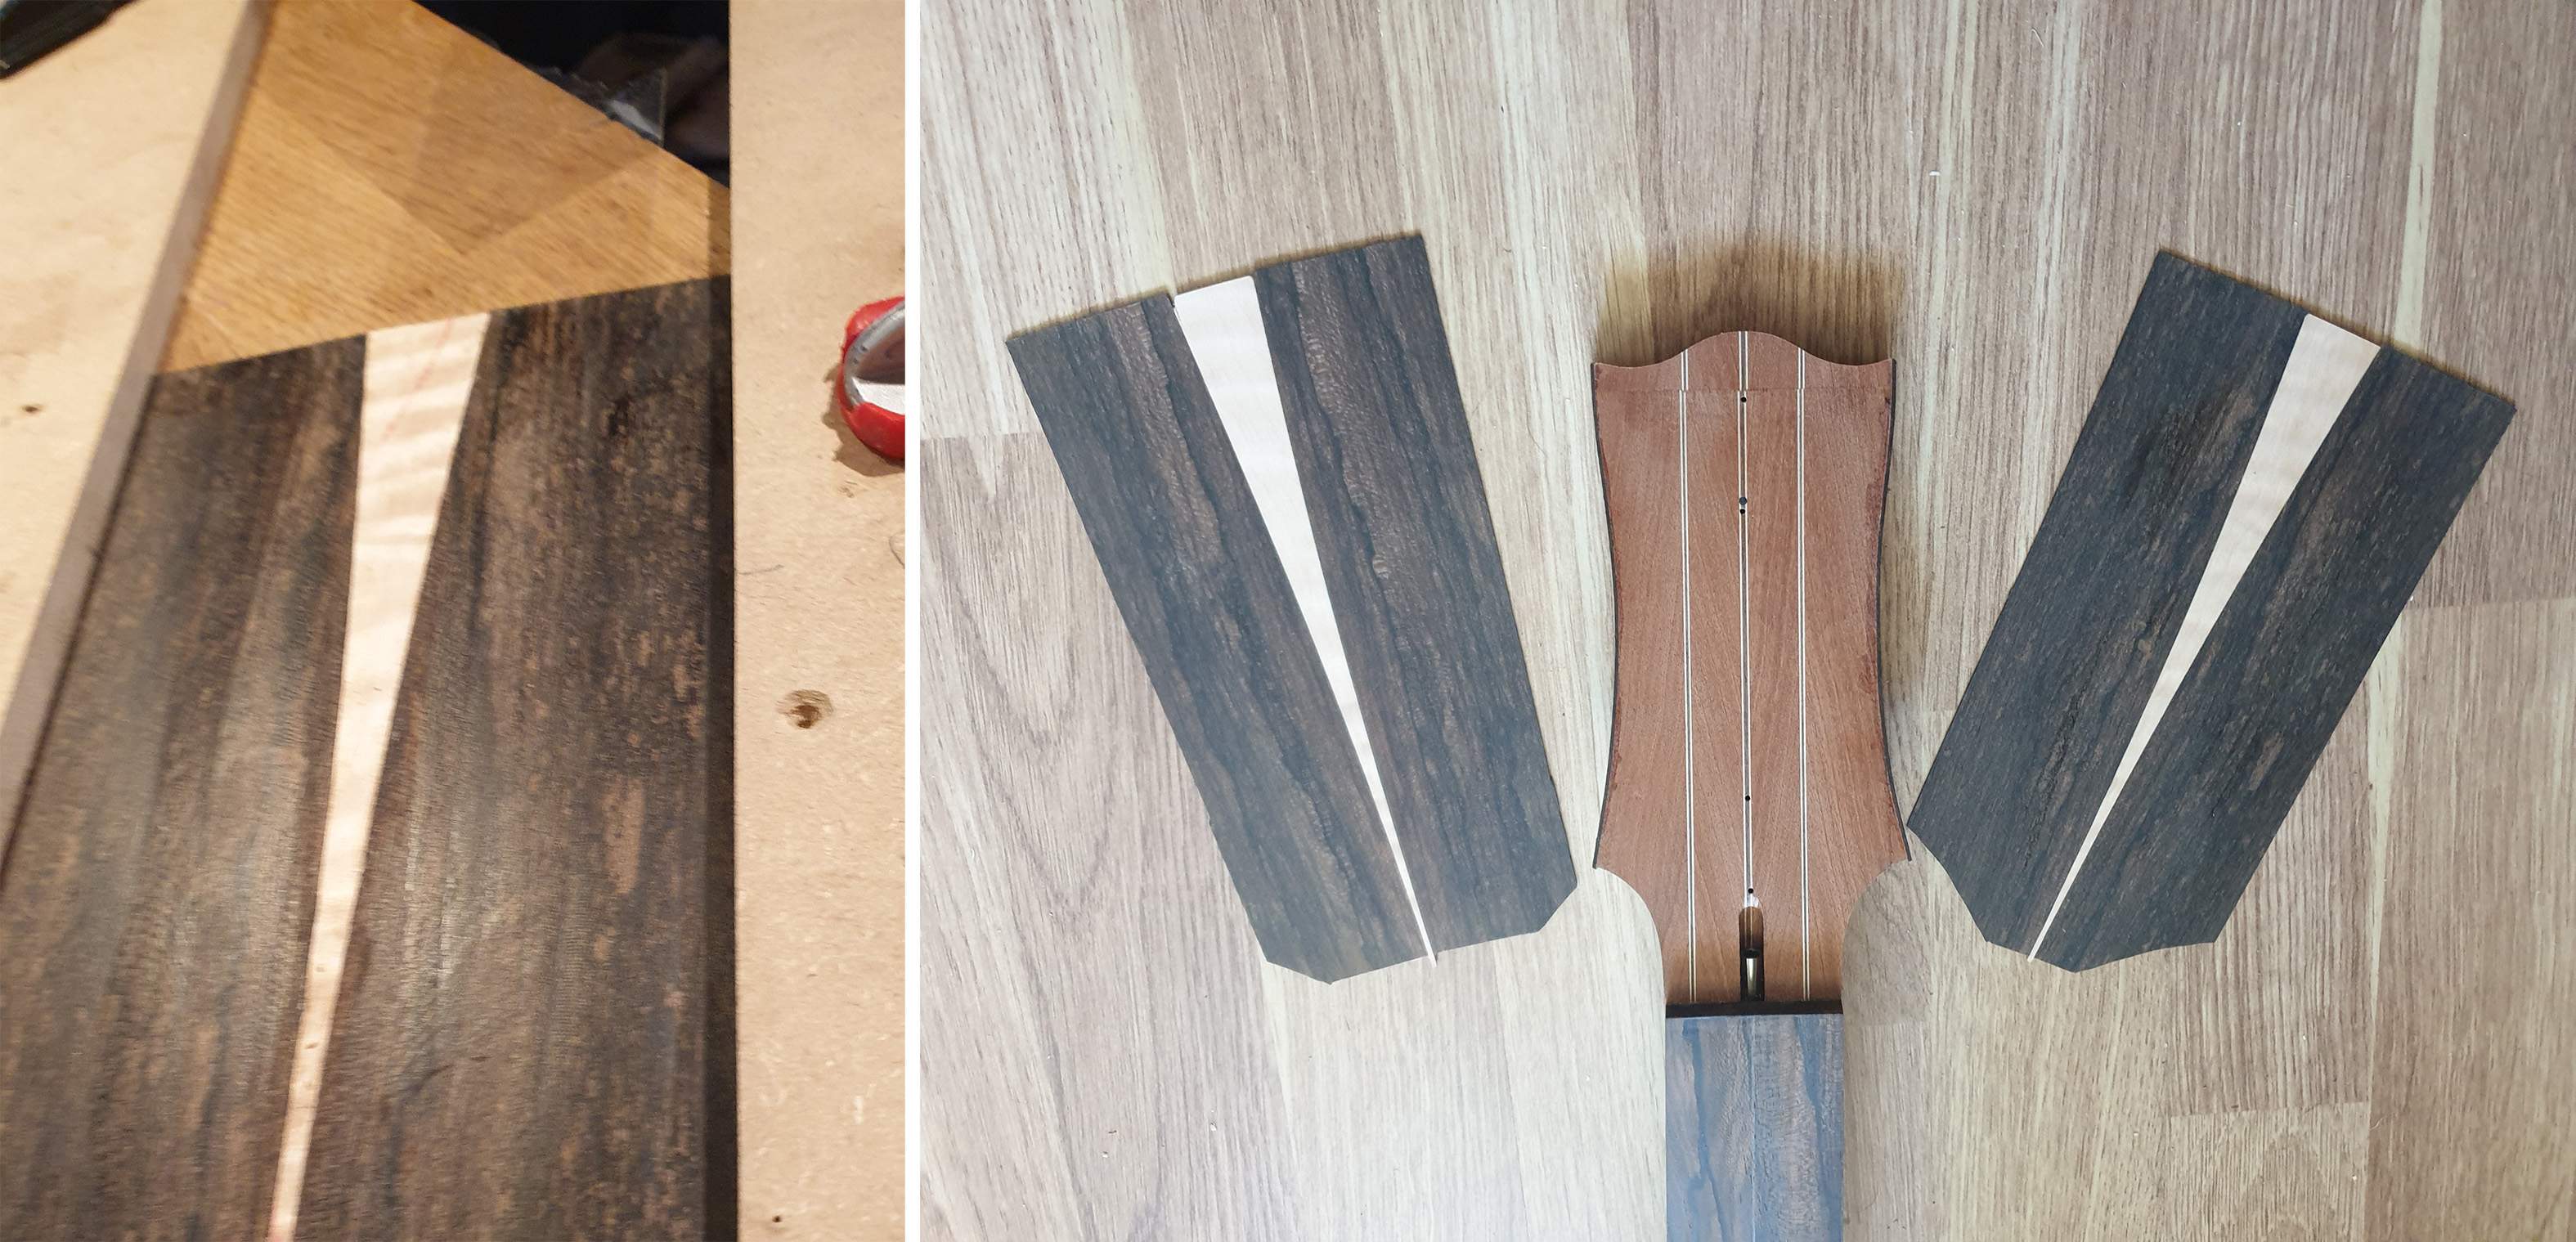
The flame doesn't come out too well in the last pic, but trust me, it's there. One piece goes on the front and one on the back of the headstock, but before that I still have to shape the volute.
There's a big metal festival in town this weekend, so I have only little time to work on the guitar. However, I managed to rout and glue up the headstock veneers. They also serve as a test run for the top.
I clamped all ziricote veneers under the template from the last post and routed the edge. I did the same with the maple pieces and glued it up, but only on one side:
Then rinse and repeat with the other side and some sanding afterwards:
The flame doesn't come out too well in the last pic, but trust me, it's there. One piece goes on the front and one on the back of the headstock, but before that I still have to shape the volute.

Seems like you've got your priorities in orderThere's a big metal festival in town this weekend, so I have only little time to work on the guitar.


Update #8: Time to get in shape
A little after-work lutherie today, routing the body outline and shaping the arm contour. I used a faceting technique to get a smooth, rounded contour along which the top can be bent.

The contour is currently 13mm/just over 1/2" deep at the outer edge and reaches about 4" into the body. I could make it steeper, but then it will be harder to bend the top. Hmm. @Gary_M , do you remember how deep it was on your ziricote strat?
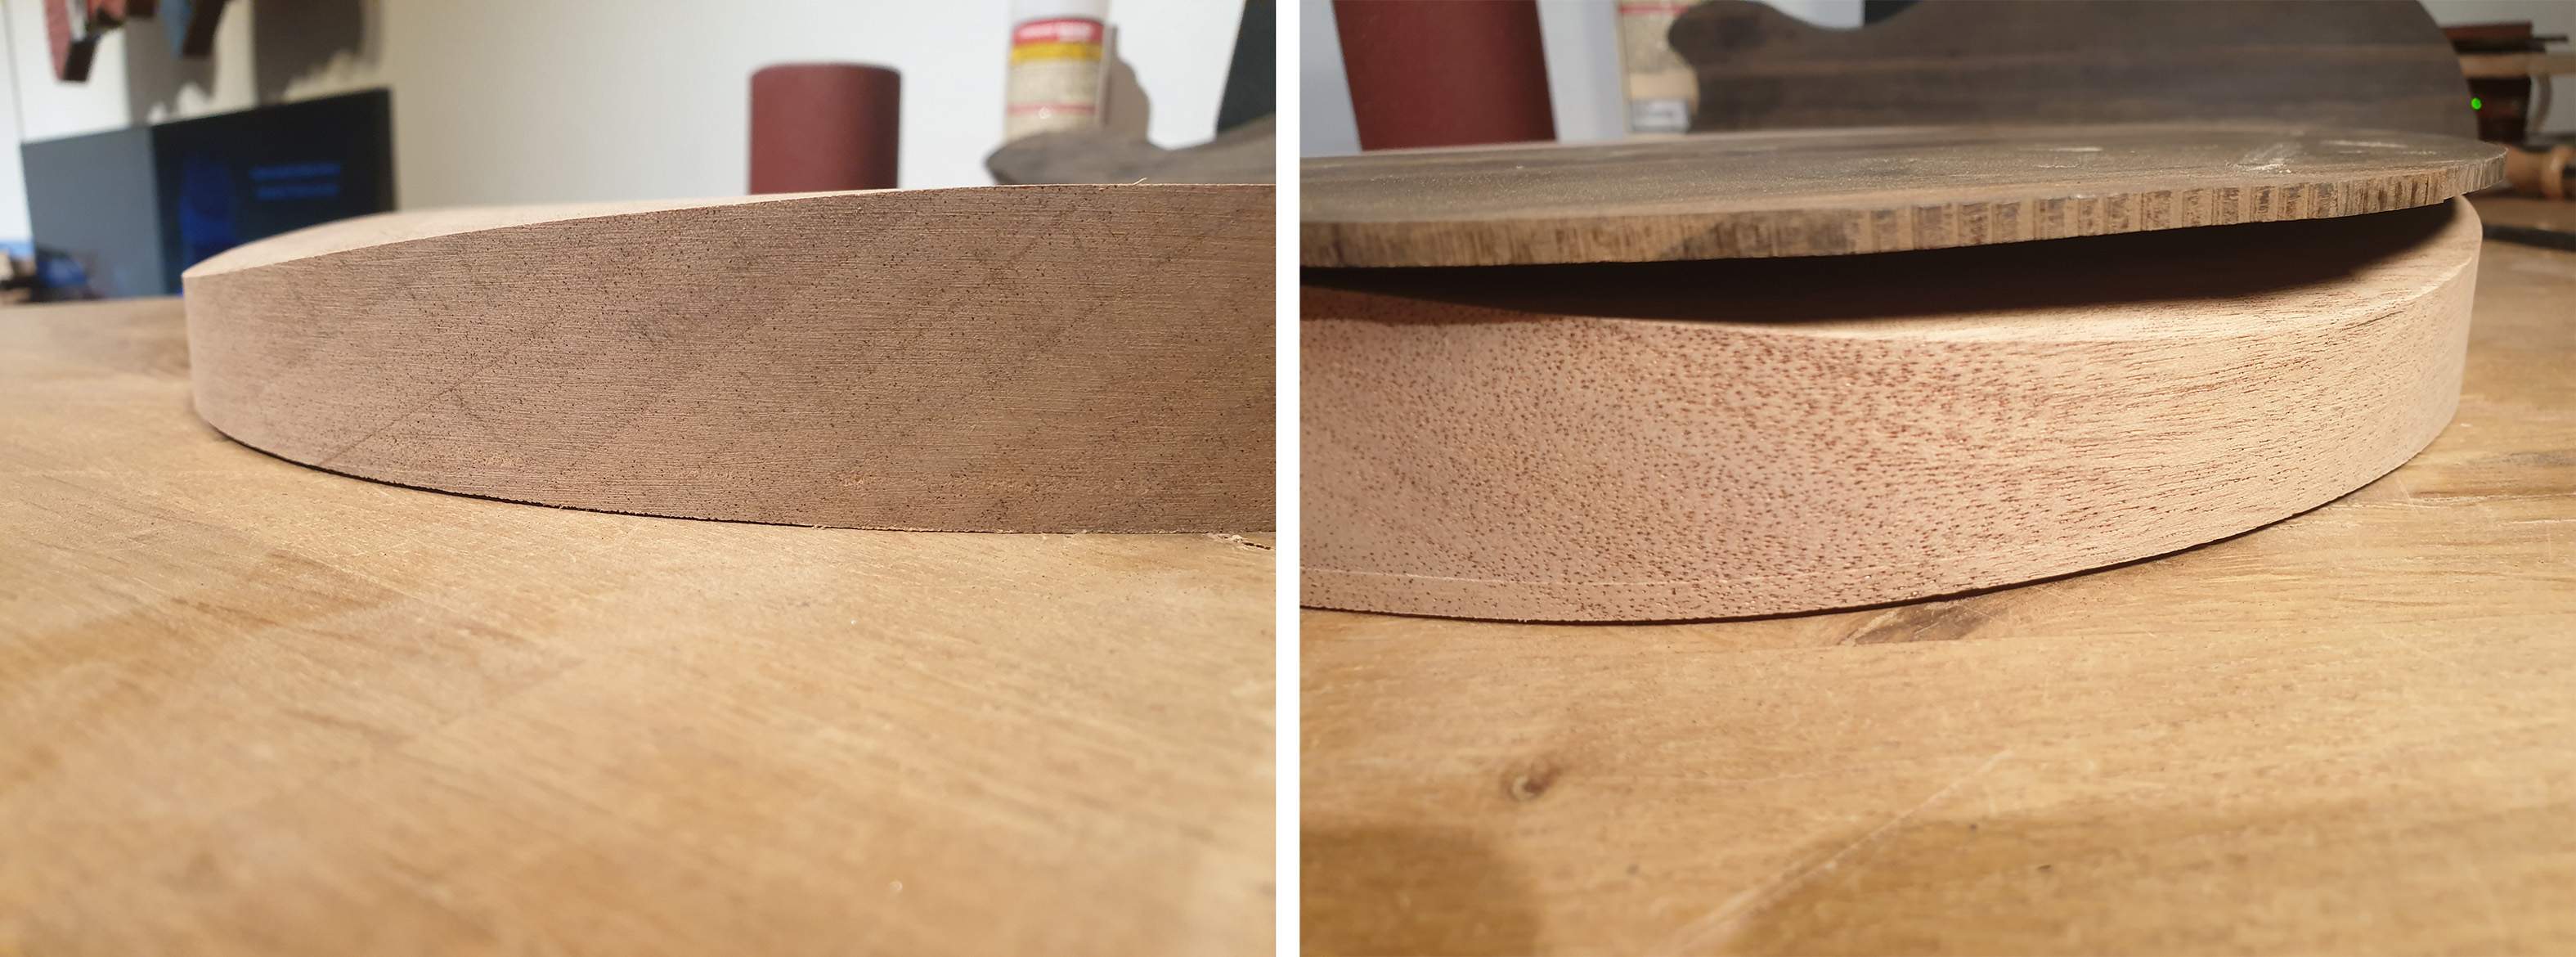
A little after-work lutherie today, routing the body outline and shaping the arm contour. I used a faceting technique to get a smooth, rounded contour along which the top can be bent.
The contour is currently 13mm/just over 1/2" deep at the outer edge and reaches about 4" into the body. I could make it steeper, but then it will be harder to bend the top. Hmm. @Gary_M , do you remember how deep it was on your ziricote strat?

Update #8: Time to get in shape
A little after-work lutherie today, routing the body outline and shaping the arm contour. I used a faceting technique to get a smooth, rounded contour along which the top can be bent.
View attachment 4741548
The contour is currently 13mm/just over 1/2" deep at the outer edge and reaches about 4" into the body. I could make it steeper, but then it will be harder to bend the top. Hmm. @Gary_M , do you remember how deep it was on your ziricote strat?
View attachment 4741551
I think the contour that I made was deeper/steeper than that, but it was a real pain to get the ziricote to bend to that extreme. I wouldn't go further than where you are now. Your slope looks fairly gentle, so that's good. Have you tried a little test bend yet to see how much resistance you're getting?
Yeah I went to your strat thread and noticed the depth of your cut...that must have been almost an inch. I clamped the top to the body and I can bend it all the way down by hand. It takes force, but it's doable. I haven't made any relief cuts on the back yet.I think the contour that I made was deeper/steeper than that, but it was a real pain to get the ziricote to bend to that extreme. I wouldn't go further than where you are now. Your slope looks fairly gentle, so that's good. Have you tried a little test bend yet to see how much resistance you're getting?
Perhaps I can go a little bit further.
Yeah I went to your strat thread and noticed the depth of your cut...that must have been almost an inch. I clamped the top to the body and I can bend it all the way down by hand. It takes force, but it's doable. I haven't made any relief cuts on the back yet.
Perhaps I can go a little bit further.
That's great. I don't recall if you're going to clamp or if you're going to use a vacuum bag. If you're doing a vacuum bag, a little extra material overhang will help with leverage. Looks like you've got it well in hand.

My plan is to put it in a vacuum bag. Unfortunately the ziricote piece for the top was so narrow that I could just fit the two pieces on it, no overhang whatsoever.That's great. I don't recall if you're going to clamp or if you're going to use a vacuum bag. If you're doing a vacuum bag, a little extra material overhang will help with leverage. Looks like you've got it well in hand.
 Before gluing I'll do a dry run in the vacuum bag to see if it presses all the way down. If not, I can still glue something to the edge for leverage or add a clamp with cauls outside the bag.
Latest posts
-
 Curious what the percentage of bass players use rounds vs flats is.
- Latest: Gianni "Orlandez" Orlati
-

-
 TC Electronic Spark Booster. Underrated champion of low-gain overdrives
- Latest: John D Harris
-

-