
Enjoy the benefits of a premium membership!
Upgrade Account
-
TalkBass has been independent since 1998. Add your voice.
Create a free account to reply to discussions, view embedded media, and browse with fewer display ads.
Join free Log in
Want zero display ads or expanded classifieds tools? Compare plans.
You are using an out of date browser. It may not display this or other websites correctly.
You should upgrade or use an alternative browser.
You should upgrade or use an alternative browser.
SBO 23 - Picobass V revival
- Thread starter joover
- Start date
More options
Who Replied?


That little dog in your avatar would make a cool inlay...Inlay is one cool idea. I'm concerned that it's going to take me longer to choose inlay design than headstock. How does one pick an inlay design that sparkles joy? Cause the goal of the build is to make me happier


If it were me I'd stick with the original.
If I were to tweak anything, it would be to adjust the string paths to be visually consistent. Currently all options have a mix of parallel, not quite parallel, and definitely angled. That's pretty 'tweaky', though, and it probably wouldn't have caught my eye if you hadn't asked.
If I were to tweak anything, it would be to adjust the string paths to be visually consistent. Currently all options have a mix of parallel, not quite parallel, and definitely angled. That's pretty 'tweaky', though, and it probably wouldn't have caught my eye if you hadn't asked.



I like number 1 best of your choices, just make sure there's at least 2" from the back edge of the nut to the leading edge of the tuner capstan (to accommodate various string types). 

I agree with your avatar as an inlay or it’s not really difficult to print out custom decals.
Currently all options have a mix of parallel, not quite parallel, and definitely angled.
Keeping strings parallel is the main motivating factor for the change. I've attempted to address it within existing headstock shape, but it didn't work out so far. I'll give it another try. I guess at this point nothing stops me from significantly altering the headstock. Thanks!
Last edited:
That little dog in your avatar would make a cool inlay...
I second the idea of your avatar as an inlay.
I agree with your avatar as an inlay or it’s not really difficult to print out custom decals.
Ok. I'm convinced. Puppy inlay it is!

I've finalized "puppy inlay" headstock design a while back, but haven't shared it. Here is the render:
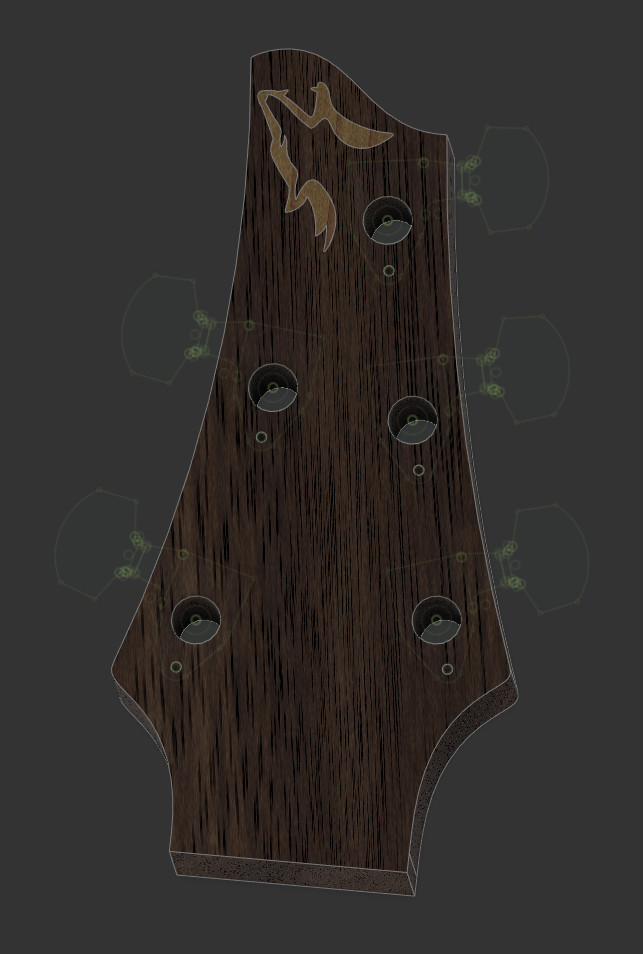
Strings are aligned at the same angle to the center line. Logo credit goes to IronSV at the noun project.
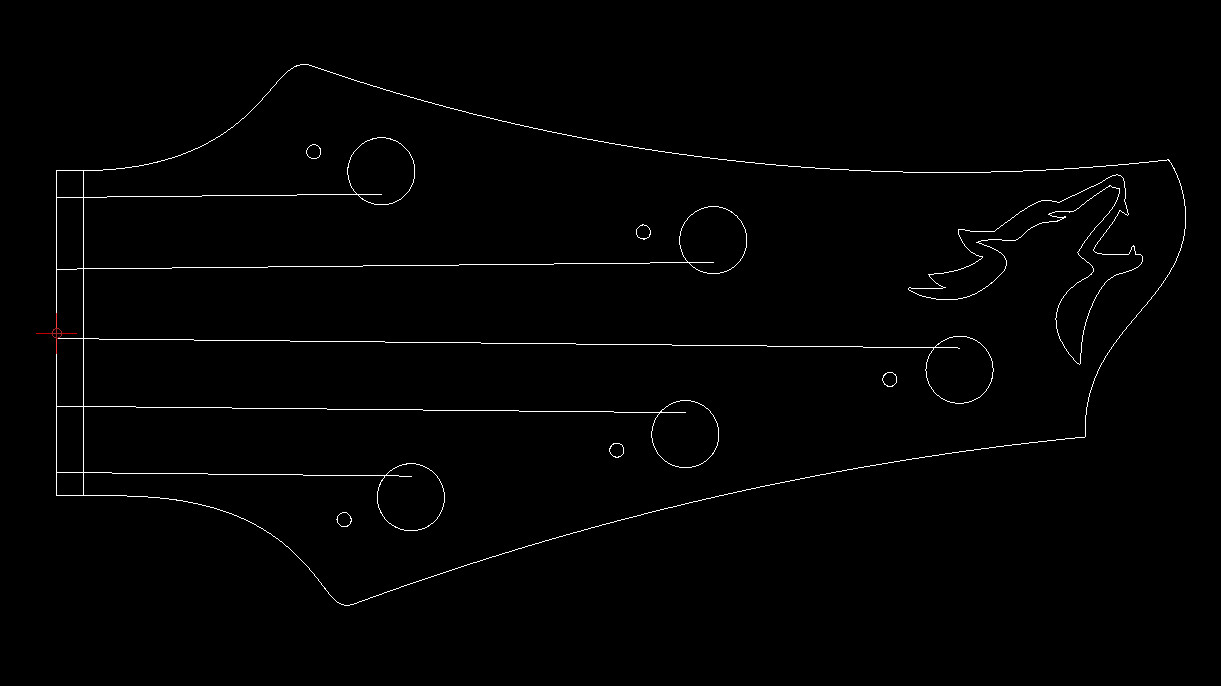
I haven't decided on the inlay process yet. Laser should be able to cut through 2 or 3 mm of walnut or maple and sharp burnt edge is likely to look well here. Need to run more tests.
Strings are aligned at the same angle to the center line. Logo credit goes to IronSV at the noun project.
I haven't decided on the inlay process yet. Laser should be able to cut through 2 or 3 mm of walnut or maple and sharp burnt edge is likely to look well here. Need to run more tests.
Last edited:
Meanwhile, most of the dust generation activities were related to improving my thicknessing router jig. Guides for my larger jig were sagging under router weight. I've tried a few ideas without much success. I've even ordered safe-t-planer from stewmac. Refund for it was requested within 2 hours after first use. IMO the drill press as a planer contraption is very imprecise and unsafe. I did final thiknessing with the original jig + extra quality sanding time.
Proof of clamping for the top plates glue up:

Here are sandwich pieces almost ready to be put together:

Top thinkness is 6mm, bottom is 2mm. I've removed ~3mm from the bottom of the body (I blame safe-t-planer, although 1mm is irrelevant). Body has lost 4mm from the top surface. Bridge setup range was limited earlier as bridge was sitting too low. I did measure height adjustment need. I've even written it down on a piece of paper.. which likely ended up in trash the next day. Whatever, 2mm seems to be a good compromise. I'll be able to adjust it further either by lowering neck pocket or sanding down the top (yey!).
Proof of clamping for the top plates glue up:
Here are sandwich pieces almost ready to be put together:
Top thinkness is 6mm, bottom is 2mm. I've removed ~3mm from the bottom of the body (I blame safe-t-planer, although 1mm is irrelevant). Body has lost 4mm from the top surface. Bridge setup range was limited earlier as bridge was sitting too low. I did measure height adjustment need. I've even written it down on a piece of paper.. which likely ended up in trash the next day. Whatever, 2mm seems to be a good compromise. I'll be able to adjust it further either by lowering neck pocket or sanding down the top (yey!).
Last edited:
Would it be better to use epoxy or tightbond original to glue the 2mm veneer? Is there are risk of tighbond sipping through the other side and ruining finish? I'm less concerned about the epoxy showing up on the other side, as I'm testing epoxy as a grain filler, and I like results so far.
I'm an unabashed epoxy fanboy. Both may bleed through, but titebond has water in it and I find it's more likely the veneer can warp or bubble than with epoxy. I also like the longer working time.


