• TalkBass has been independent since 1998. Add your voice.
    Create a free account to reply to discussions, view embedded media, and browse with fewer display ads.
    Join freeLog in
    Want zero display ads or expanded classifieds tools? Compare plans.

Silk Purse from a Sow's Ear, or The Squier-itter Bronc-ora

hey folks, been a while, how's things? :D

So the last time I made a thread here was for this: http://www.talkbass.com/forum/f57/praxists-1st-annual-tb-bass-build-competition-entry-p-rick-681961/

Went well and learned a ton of stuff but ended up doing precious little with my new skills for the last year and a half. Anyway, a friend let a Squier Bronco come my way for too cheap to pass up and after playing it for a while I decided to hack it up and turn it into something different. I was originally going to just do some mild mods, but a drunken argument with a friend led me to the current plan: take an average bronco and make it into a ritter or the like. Now i'm no luthier, and Mr. Ritter is obviously gifted, but i'm always up for a challenge! :D

My grand plan is to reshape the body and headstock to something like a Ritter Cora and apply a variation of his platinum antique finish. Like i did with the p-rick, i plan to pay homage to Mr. Ritter's fine boutique work, while also maintaining the Squier ethic of mass produced crap done quickly and cheaply.

So welcome along for the ride, please feel free to point out the folly of my plan, i probably won't listen but we can all be entertained lol.
 
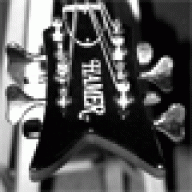
So first things first, here's a shot of the headstock with my alternative design:

6syj2g.jpg


And a shot of my lovely full scale drawing template thing:

crsl1.jpg


And here is a shot of the new shape drawn over the bronco tracing:
33nym43.jpg


and then here is the cut out template overlaid on the body:
2na2qo2.jpg


More to come
 
here is my high tech tracing of the shape of the template onto the body:
2hwfmde.jpg


mostly cut out and hit with the random orbital sander to start the roundovers. Still hadn't hit the cutaways at this point.
dqrblz.jpg


Rounded over everywhere and sanding started:
e7l090.jpg


the back:
2db5tds.jpg


And a closeup of the cutaways - I had to be cautious with these because they can't be rounded as much as the rest of ht e body plus I wanted meat to still support the neck well.
1199vsj.jpg


by they way, I know my grammar's bad and don't really want a bunch of grammar nazi's pointing out that there's no apostrophe in "nazi's" so if you're planning this kind of thing, dont' bother because my grammers' atroshious any wayz. :)
 
At this point, I had filled all the little screw holes in the body and was leting them dry so i turned my attention to the neck. I got it mostly cut out and then my jigsaw died.
2rqk64l.jpg


another angle:
34jdtef.jpg


quick purchase and beg forgiveness from wife and off to the races again.

Here is a picture of the neck heel, on which i drew some dots that I was hoping to put extra neck screws like ritter, but I ended up scrapping that idea after a while.
34rj9ma.jpg


I guess I should mention that this project is nearly finished, so these pics all represent work from back in January of this year.
 
So I went to do a body/neck/pickguard mockup at this point and realized I needed to reshape the pg, duh. I know ritter doesn't use them but this is one of those squier bronco details that I'm leaving in place.

new shape on the pg:
4sxvep.jpg


Here's the back of it with my pickup shape drawn over the hole:
vmt82d.jpg
 
I'd like to point out the folly of your plan. And your grammer and speling suks. And your ridiculous mashups always bring a smile to my face. :)

Carry on, demented sir!!
 
Thanks dudes, i dunno about the brilliant part. :P

So after working on the body FOREVER with sandpapery bits, it was still really messy:
xbdz08.jpg


Here's the back with the final shape and roundovers. Still getting the surface even everywhere with no problematic bits.
30dffgk.jpg


here's what the front looks like. The shiny dot near the bridge is my filling a dent with superglue.
2v28h9c.jpg


And another angle of the upper horn. I was trying to keep it from looking too phallic, and it took a lot of sanding. I've never spent so much time rubbing a phallic shape in my life. :D
123p2kn.jpg
 
So then i turned my attention to the headstock. I avoided overthinking things and beat the **** out of it. My drill work was as clean as it can be when done with a crooked shaft in a chuck that didn't close properly. Not bad for maple! Not to worry though, I'm able to pretty it up.
23u8ub6.jpg


And another shot. This one really shows how the Ritter headstock shape was nailed. -ish.
2aj6mc2.jpg


Ta da! See that half round file up there? That thing is awesome and highly recommended. Made very short work of the headstock edges and was quick and easy. .
34ot5l5.jpg


A better angle:
2n9weva.jpg


And last shot of that work, the back before the holes are filled:
ohsmbn.jpg
 
In the future, when enlarging the tuner holes, it is easiest to just plug the existing holes with dowels and then use a Forstner bit of the desired size to redrill them. Makes for much neater and more accurate holes.

Looking forward to seeing how this turns out ... the P-Rick was a cool project.
 
So my plan was to depart from ritter's foil finish and instead cover the entire bass with foil and antiquing, neck, fingerboard, nut, headstock, body, pickup and pickguard, all in platinum-looking foil. So i had to prepare everything for foiling, which means smoothing and priming everything. So you can see that i filled the one old bronco screw hole, cut the new pickguard shape to match the shape of the new body. THen I put it in place, drilled new holes in tasteful spots and started prepping and beveling.
293vr0l.jpg


A closer look:
eowoh.jpg


The holes drilled and the old one filled with a toothpick, epoxy and sanded down:
16401f.jpg
 
Thanks!

So to prepe the neck for foiling, I filed away every little nick and dent with the half round file, sanded it smooth with 120 180 220 320 and 400 and then sprayed it with black automotive filler/primer. It took two coats to get a nice smooth finish.
23rlc9w.jpg


You can see the remants of a mark on the headstock near the nut, it's just an artifact of the differing surfaces there. I left the tiny screwhole as a reminder of whence it came.

The whole neck got it, frets and all.
2dgmd5l.jpg


A shot of the back:
jj3aye.jpg


And the heel:
2m5dk03.jpg
 
Here's the leafing stuff i used. I bought two packages, but one was enough to do everything. I did a small tester piece twice and found that applying the leafing onto the unsanded primer gave a better finish than the sanded primer, so I left the actual guitar unsanded after priming.
25tyf0y.jpg


The adhesive sizing applied. It seems like it is basically very watered down white glue. It was as thin as water but dried quickly
33dds15.jpg


The sizing across the rest of the neck:
5kmwjp.jpg


And the foil applied. You just hold it over the surface and start placing it down and hten push on it with a brush to the surface before lightly burnishing with cheesecloth. Looks challenging but its supereasy to do it.
s1ol8i.jpg


This is the antiquing style that ritter has going on, but i think it looks too much like trompe loeil crazing and so i filled in all the nooks and crannnies
j9scxd.jpg


mid foiling:
devjok.jpg


the whole shebang
121d7ya.jpg


fretboard:
10wjyip.jpg


and the heel area:
333v42d.jpg


Next up is attacking the body for completion.:P
 

Latest posts