• TalkBass has been independent since 1998. Add your voice.
    Create a free account to reply to discussions, view embedded media, and browse with fewer display ads.
    Join freeLog in
    Want zero display ads or expanded classifieds tools? Compare plans.

Single Cut 6 string

SaintMez

Commercial User
Jan 3, 2010
428
59
Meridian, idaho
www.bloodbrothersguitars.com
Disclosures
Blood Brothers Guitars - Luthier, Porter Guitars - Contractor
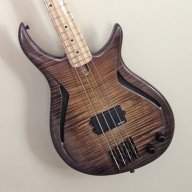
Here's a single cut 6 string Im currently working on. Its an Ash body with a Bastogne Walnut top. Maple and Bubinga neck with black veneer. Using Hipshot A style brass bridge with 19mm spacing. Pickups are yet to be selected but leaning toward Bartolinis or Delanos. Will be using Bartolini NTMB preamp. Just a couple quick pics. Will post more as progress is made.
View attachment Body Blank (2).bmp

View attachment Neck Blank.bmp
 
Here are a couple pics of the top wood for this bass and another that I'll be starting soon. I buy from a supplier in Oregon that has some great stuff.
2nd Bass.jpg

First Bass.jpg
Wood on the top is Bastogne Walnut, the bottom picture is Myrtlewood with Tiger striping.
Have some build photos coming to show how I got the point Im at right now with body glued up and edges rounded over. I love watching these build threads to see how an instrument goes from an idea in someones head to fine finished bass. Ive learned a lot from watching the others here. Hope you enjoy as this moves along.
 
View attachment model.bmp

IMG_1901.JPG
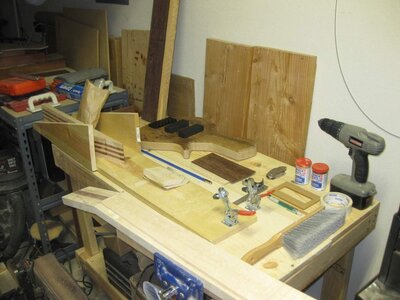
I started off by making up a model to check the scale and used FretFind to print a template fingerboard and made a template for the body from birch plywood (im planning on making a new one out of MDF) The bastogne walnut top was glued up on each side of ash individually then cut out on a 14" bandsaw. I ran the two sides over a jointer to ensure a nice flat surface before finally gluing and clamping them together. The Ash I used for this body was 8/4 lumber from Woodworkers Source in AZ (Ive had nothing but great service from them-they are highly recommended) so the total thickness of the body was about 2 1/4 inches before I took it down with my Safe-T planer to 1 3/4. Ive since purchased a thickness planer for my shop so i'll be using that from now on to thickness the body before the glue up (Althought the Safe T planer worked great I think the thickness planer is much faster). Sadly I sont have much in the way of photos of this process...

After the glue up the body edges were cleaned up using the template and a drum sander on my drill press. The edges were rounded over with a 1/2 inch bit. There were a couple voids in the top wood so Ive filled those with Superglue from Stewmac.
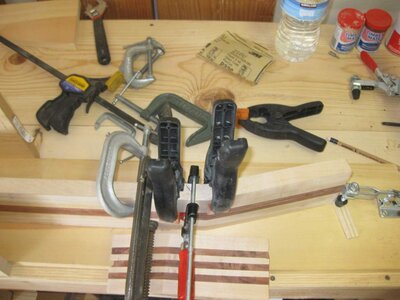
The neck is seven pieces, four Maple on the outside with 3 Bubinga for the center divided by .030" strips of black fiber veneer (which I got from LMII). I let it sit for a day in the clamps after the glue up and then ran it over jointer and then shot it through the thickness planer for a nice smooth surface. Next steps are the scarf joint and truss rod. Im also working on the Birdseye Maple fingerboard and the matching walnut headstock veneer.
 
:hyper:I ordered the pickups yesterday. Decided on Bartolini XXM56Cs from Best Bass Gear. If anyone has these currently in a bass I'd love to hear how you like them. From everything I've read they are great pickups. Guess I'll be finding out soon enough. Props go to Best Bass Gear as well. I've had nothing but good service from them and they've got the best stuff on their website.
 
I had some time this weekend to get some work done on the neck. Ive had the blank glued up for a couple weeks so it was time. This is a 35" scale so I got to work stewmac template and fret saw and slotted the maple fingerboard.
IMG_1954.jpg

IMG_1937.jpg

The blank was cut at 13 degrees for the scarf joint on my bandsaw and then I smoothed up the surface with my router in a jig I've seen around this forum a few times. Its also in Martin Kochs book. Worked like a charm. The scarf glued up easily and I was able to get the veneers to line up without any problems. I'll be working on the truss rod and transition laminates this week.
 
Just a little update. I got the truss rod channel routed and installed the double action rod on Saturday. Also glued up the headstock veneers of matching Bastogne Walnut and the same black fiber veneer used in the between the Bubinga. Also I was able to glue on the slotted radius fingerboard (radiused to 16 in).

Tonight I was able to cut the rough shape of the neck on my bandsaw. Slowly but surely its taking shape...Thanks for checking it out.
IMG_1984.jpg

IMG_1981.jpg
 
Thanks!
I wasn't a huge single cut fan at first but over the last couple years I've been very drawn to them. They just look cool to me.
Im very pleased with the Bastogne Walnut, its got a little bit of curl to it as well that looks pretty sweet. The pictures I have up don't do it justice. I hope to get some better ones on this thread soon.
 
Finally, I got a little more work done this weekend. Been delayed a bit with work and flying to Michigan for my 94 year old Grandfathers funeral (flying with 2 small children is no fun, let me tell you) so its been a while since I had anything significant to post.
The neck is nearly finished. Fretting was fairly easy. I have yet to drill the tuner holes in the headstock but that will come this week when I have some time after work. The neck pocket was routed along with the pickups. In these pics the neck is just resting in the pocket, along with the pickups and bridge. I have yet to glue in the set neck as I just want to make sure I don't need to do any final adjustments to anything. I have to route the control cavity before I glue in the neck anyway so I'm in no hurry. Have to make my templates for the cavity this week too. I have lots of sanding to do before I spray on the nitro too...never enough time...
IMG_2052.jpg
IMG_2045.jpg