
Enjoy the benefits of a premium membership!
Upgrade Account
-
TalkBass has been independent since 1998. Add your voice.
Create a free account to reply to discussions, view embedded media, and browse with fewer display ads.
Join free Log in
Want zero display ads or expanded classifieds tools? Compare plans.
You are using an out of date browser. It may not display this or other websites correctly.
You should upgrade or use an alternative browser.
You should upgrade or use an alternative browser.
Special Edition Build Off - Ariox
- Thread starter cholyoke
- Start date
-
- Tags
- aria pro zzb ox
More options
Who Replied?
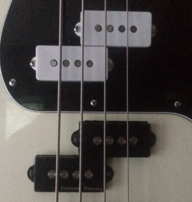
I dunno I think if you clean up that white stuff enough, leaving it natural might actually look kinda cool.
Yeah, I'm probably going to end up doing that. The boards are semi-parallel to the neck, which will look good. However, I have to think about making it way more complicated that it needs to be before settling on something that works.
Haha I thought I was taking the piss, didn't realize people actually felt strongly about that.
Dude, Vibroloo whammalamadingong devices are serious business!

So, also not the German Komposer?....I think it's that Mexican artist who kept painting selfies with a moustache?
My fave Whammy Bar was in Jamaica.....

The door is right over there....My fave Whammy Bar was in Jamaica.....
Can I get me coat first?.....The door is right over there....


I like this in a big way!
Love the Ox
Love Aria Pro
And a trem bridge to boot

Ditto!
Totally sub'd

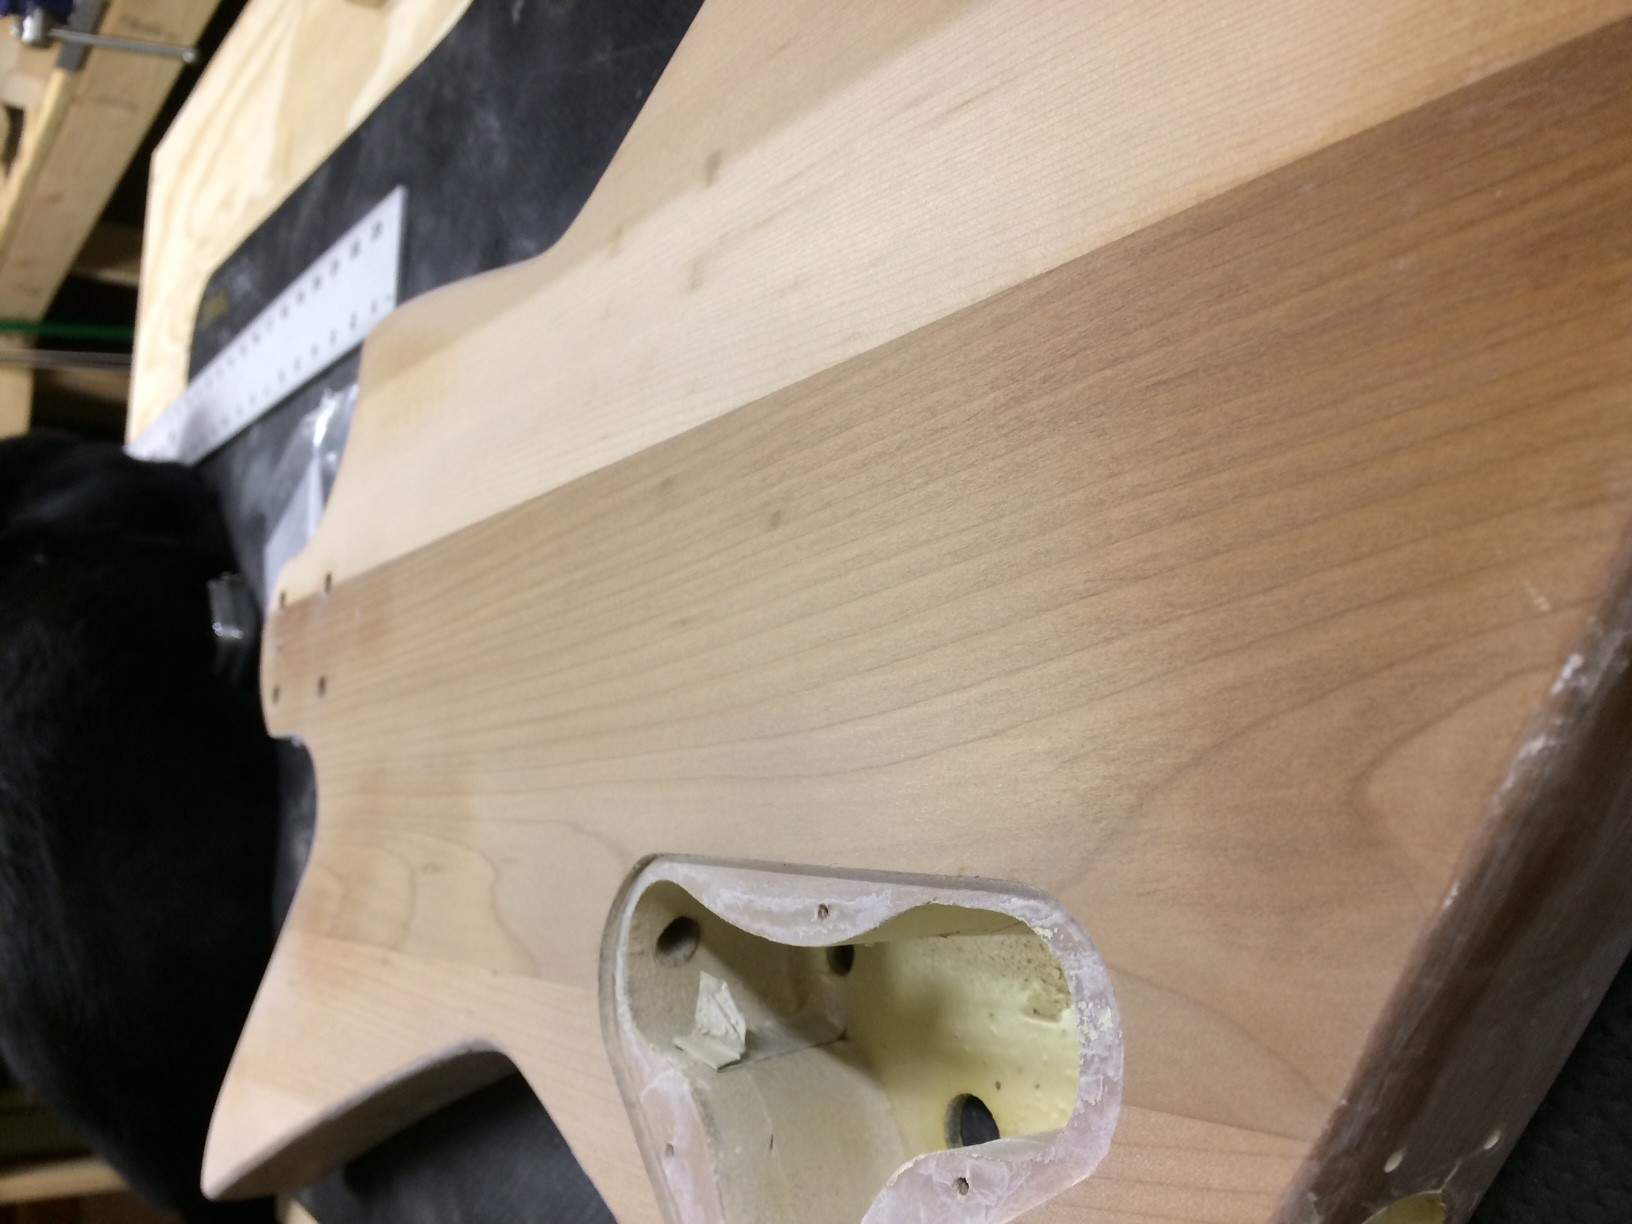
Rather than drink beer all evening I broke out the 220 grit and did some good. Doesn't all wood look nice when it is sanded?
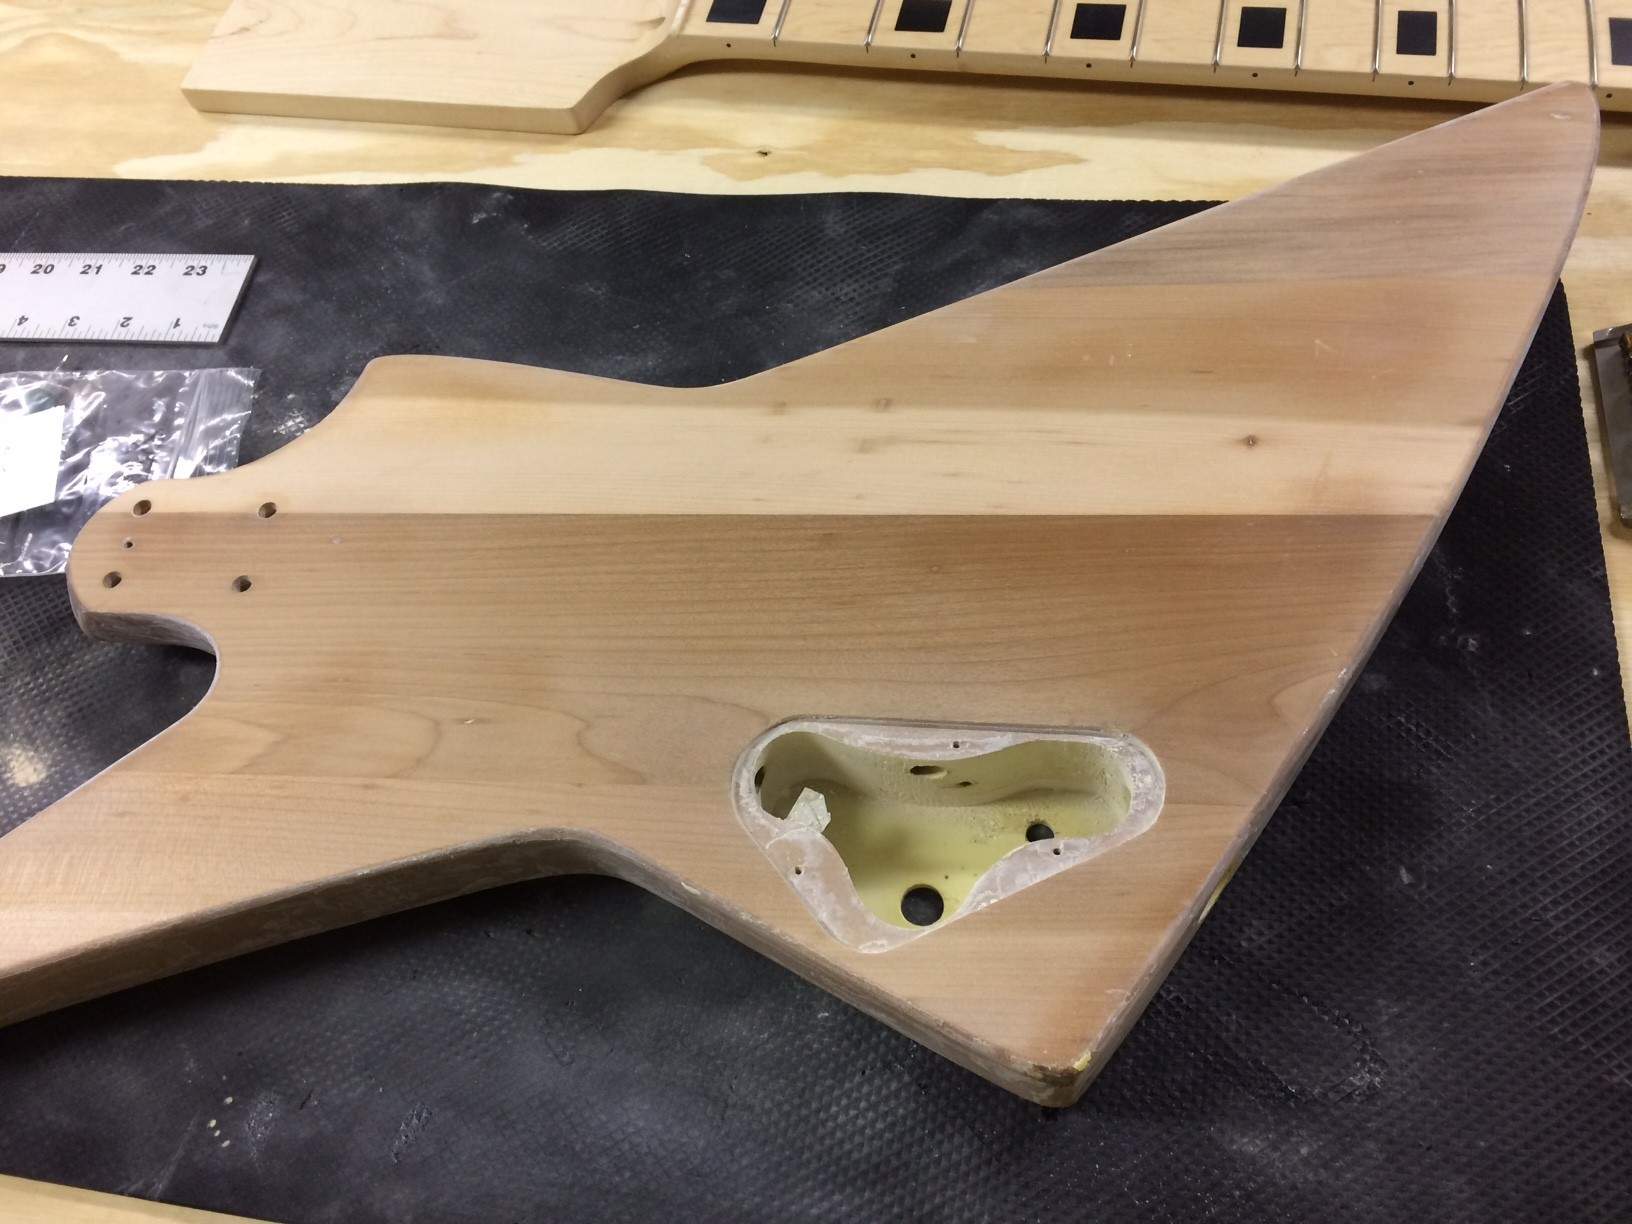
Still needs a little work, but it looks good. I still need to do the hard parts (sides, etc.), but the back looks nice.
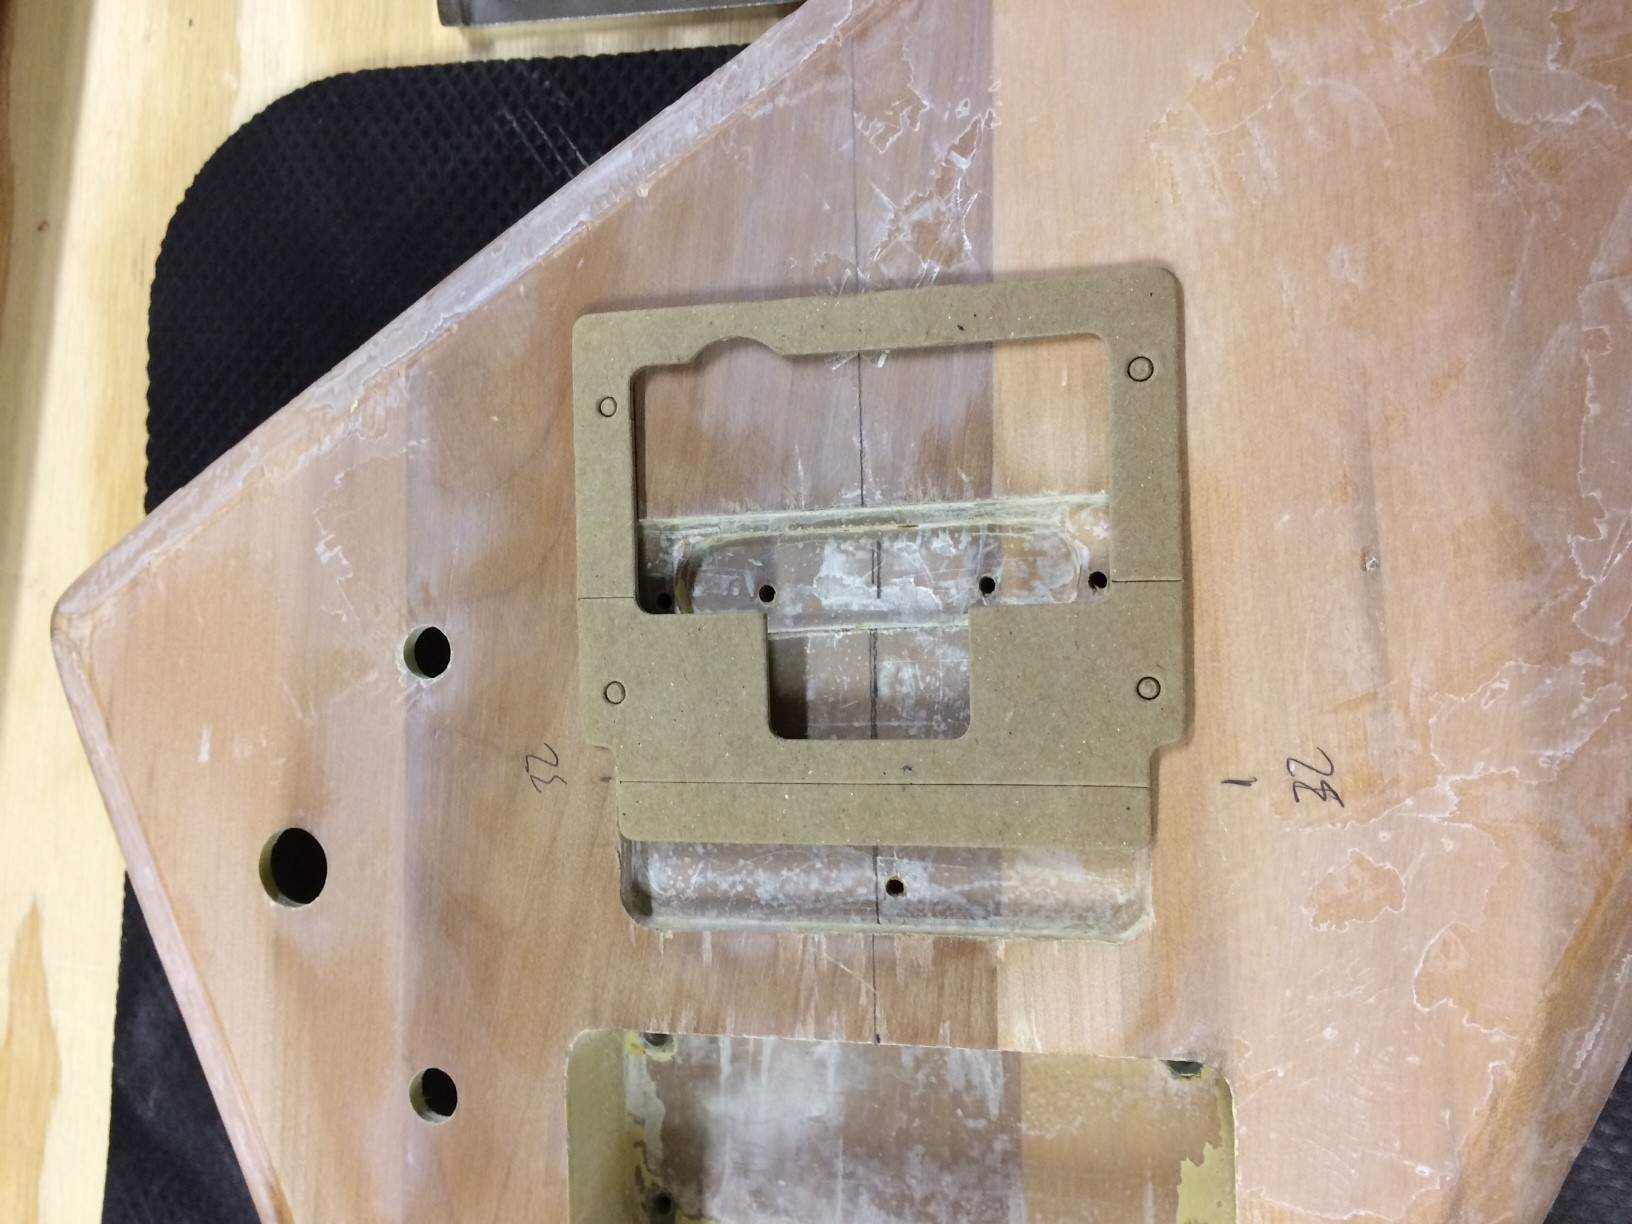
First semi-problem. I measured where 32" from the nut would be to determine where I'd need to rout and the previous bridge cavity sticks out beyond the location of the vibrolanator device. Total bummer. Do I rout space for another block of wood? Do I try to thin something down to fit inside the current hole? Do I just let it sit there, call it an ashtray or stash spot and call it a feature? I don't smoke, so I'll probably fill it with another piece of alder and just rock the patchwork body. Would a Jazz pickup fit there and be totally ridiculous? I'm open to ideas, though.
Punt. Onto the neck. The frets on the neck were very sharp, and stuck out over the edge of the neck. A long time ago after reading something Bruce Johnson wrote about dressing frets, I bought one of these fancy 3M combi-flap wheels. I have never used it because all of my frets needing work were on finished maple...until now. I put that puppy in the drill press and within five minutes I had rolled fretboard edges and super smooth fret ends. The frets are way nicer than anything I have ever done with a file, too. This Bruce Johnson character may know a thing or two.
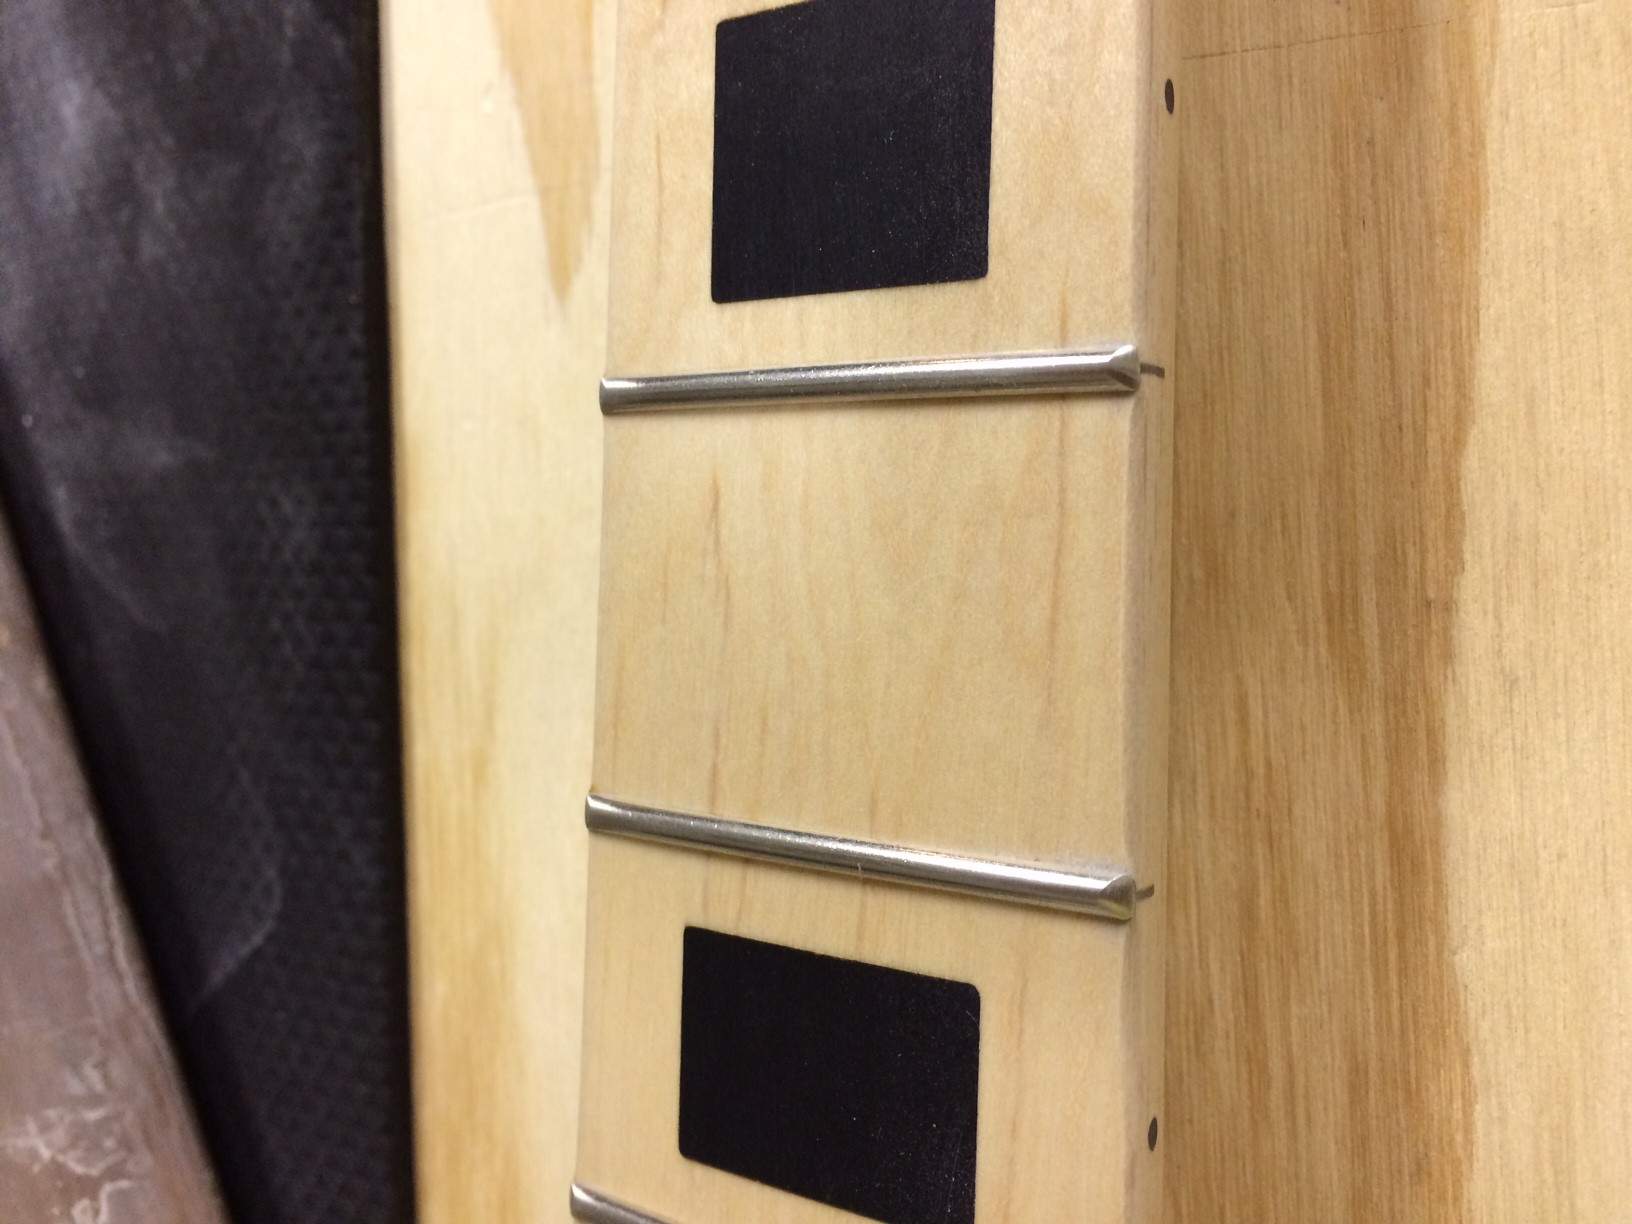
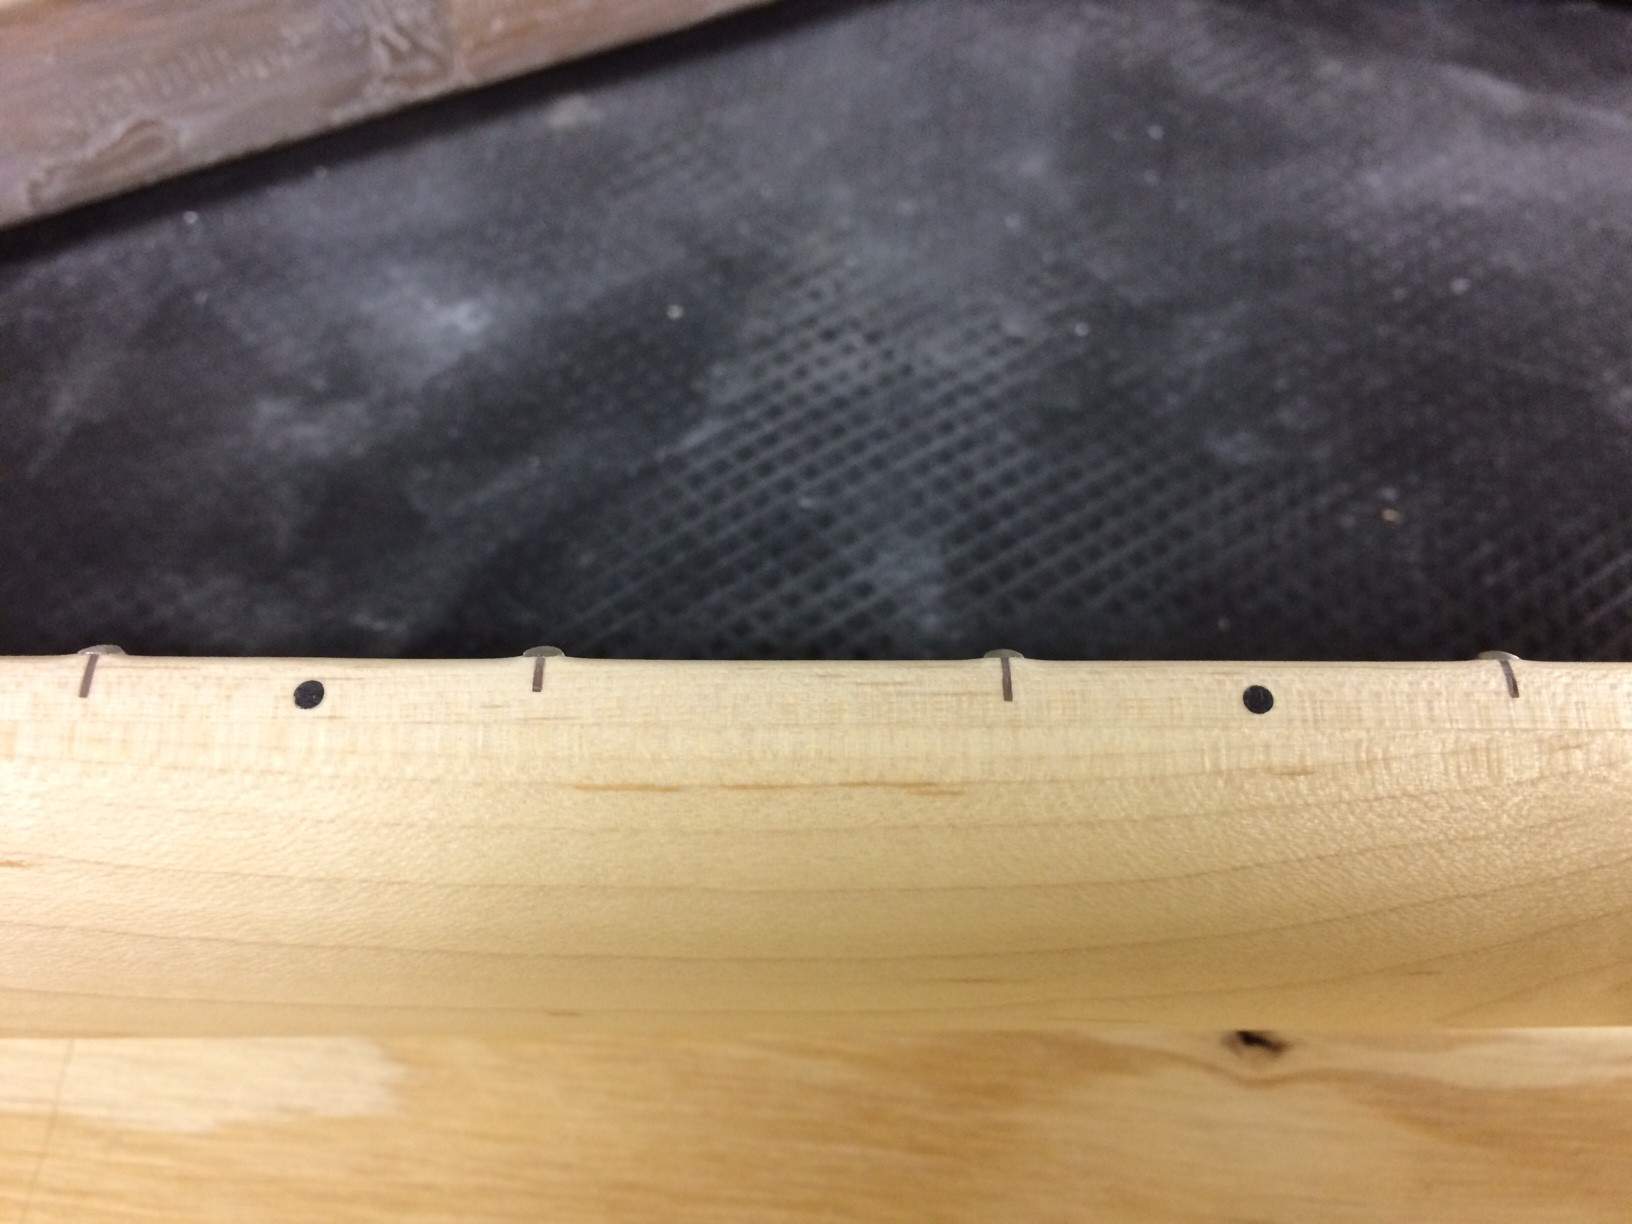
This thing is slicker than greased goose poo. Now I get to drink beer.
Still needs a little work, but it looks good. I still need to do the hard parts (sides, etc.), but the back looks nice.
First semi-problem. I measured where 32" from the nut would be to determine where I'd need to rout and the previous bridge cavity sticks out beyond the location of the vibrolanator device. Total bummer. Do I rout space for another block of wood? Do I try to thin something down to fit inside the current hole? Do I just let it sit there, call it an ashtray or stash spot and call it a feature? I don't smoke, so I'll probably fill it with another piece of alder and just rock the patchwork body. Would a Jazz pickup fit there and be totally ridiculous? I'm open to ideas, though.
Punt. Onto the neck. The frets on the neck were very sharp, and stuck out over the edge of the neck. A long time ago after reading something Bruce Johnson wrote about dressing frets, I bought one of these fancy 3M combi-flap wheels. I have never used it because all of my frets needing work were on finished maple...until now. I put that puppy in the drill press and within five minutes I had rolled fretboard edges and super smooth fret ends. The frets are way nicer than anything I have ever done with a file, too. This Bruce Johnson character may know a thing or two.
This thing is slicker than greased goose poo. Now I get to drink beer.


Man, you kids need to stop worrying about this vibroloo whammification device thing. Its like you are trapped at home, can't go out and are stir crazy. or something.
OK, I'll focus on the black cat.
You're lucky Friday the 13th was a couple weeks ago.
Next thing ya know you'll be showing us a broken mirror finish under a ladder

Psh. I was born under a bad sign. I like the broken mirror finish idea. I had never thought of that. After a quick googling, it appears to be cheezy enough for Paul Stanley, which is cheezy enough for me.
Maybe on the next build, though. Or maybe for filler under the clamato bar.
Maybe on the next build, though. Or maybe for filler under the clamato bar.

When you patch the body, route a channel from the neck to the tail (maybe 1/4 inch deep), and put a long patch in there - it'll look kinda neck through-ish if you do that.

This will be the title of my next album.under the clamato bar


I vote for this great idea, if only because I also had it, too.
When you patch the body, route a channel from the neck to the tail (maybe 1/4 inch deep), and put a long patch in there - it'll look kinda neck through-ish if you do that.
I vote for this great idea, if only because I also had it, too.
Great minds think alike.
Ours do, too.
When you patch the body, route a channel from the neck to the tail (maybe 1/4 inch deep), and put a long patch in there - it'll look kinda neck through-ish if you do that.
Yeah...that is one of the possible solutions and the first thing that ran through my head. It made me excited because I love removing wood from guitar bodies using high-pitched electric tools. The only issue is that the patch is wider (3.25") than the neck (2.5" at the heel). I had hoped to minimize my routing to complete this project.
I'm going to have to make a router planing setup to make the board no matter what. And really, what respectable looter doesn't have 32 router fixtures? I have a nice 3.5" wide maple board to use. I also have some select pine (radiata) that would work.
Wait! I can fill it with wood putty and use veneer to make the top look super fancy! Do they sell hippie sammich veneer? Ludicrous walnutburlcrotch veneer? What about contact paper? (I covered one of my early amps with marble contact paper. It is super awesome.)
Anyhow, I'm thinking before cutting. I'll fiddle with the neck later today.
This will be the title of my next album.
It is HARD to get that low.

I'm gonna vote for this option as well, this is what I was gonna say until I saw that it was already suggested.When you patch the body, route a channel from the neck to the tail (maybe 1/4 inch deep), and put a long patch in there - it'll look kinda neck through-ish if you do that.
Man this work thing is getting in the way of serious progress, but I'm glad to have it (the work, not the serious progress). Anyhow, not much done on this other than working on a router planing box, sketching some headstock ideas and sanding, sanding, sanding some more. That white stuff takes forever to get off using 220. All of the dents are amusing and I love the tiny piece of wood used at the point. I hope to finish the sanding by this weekend.
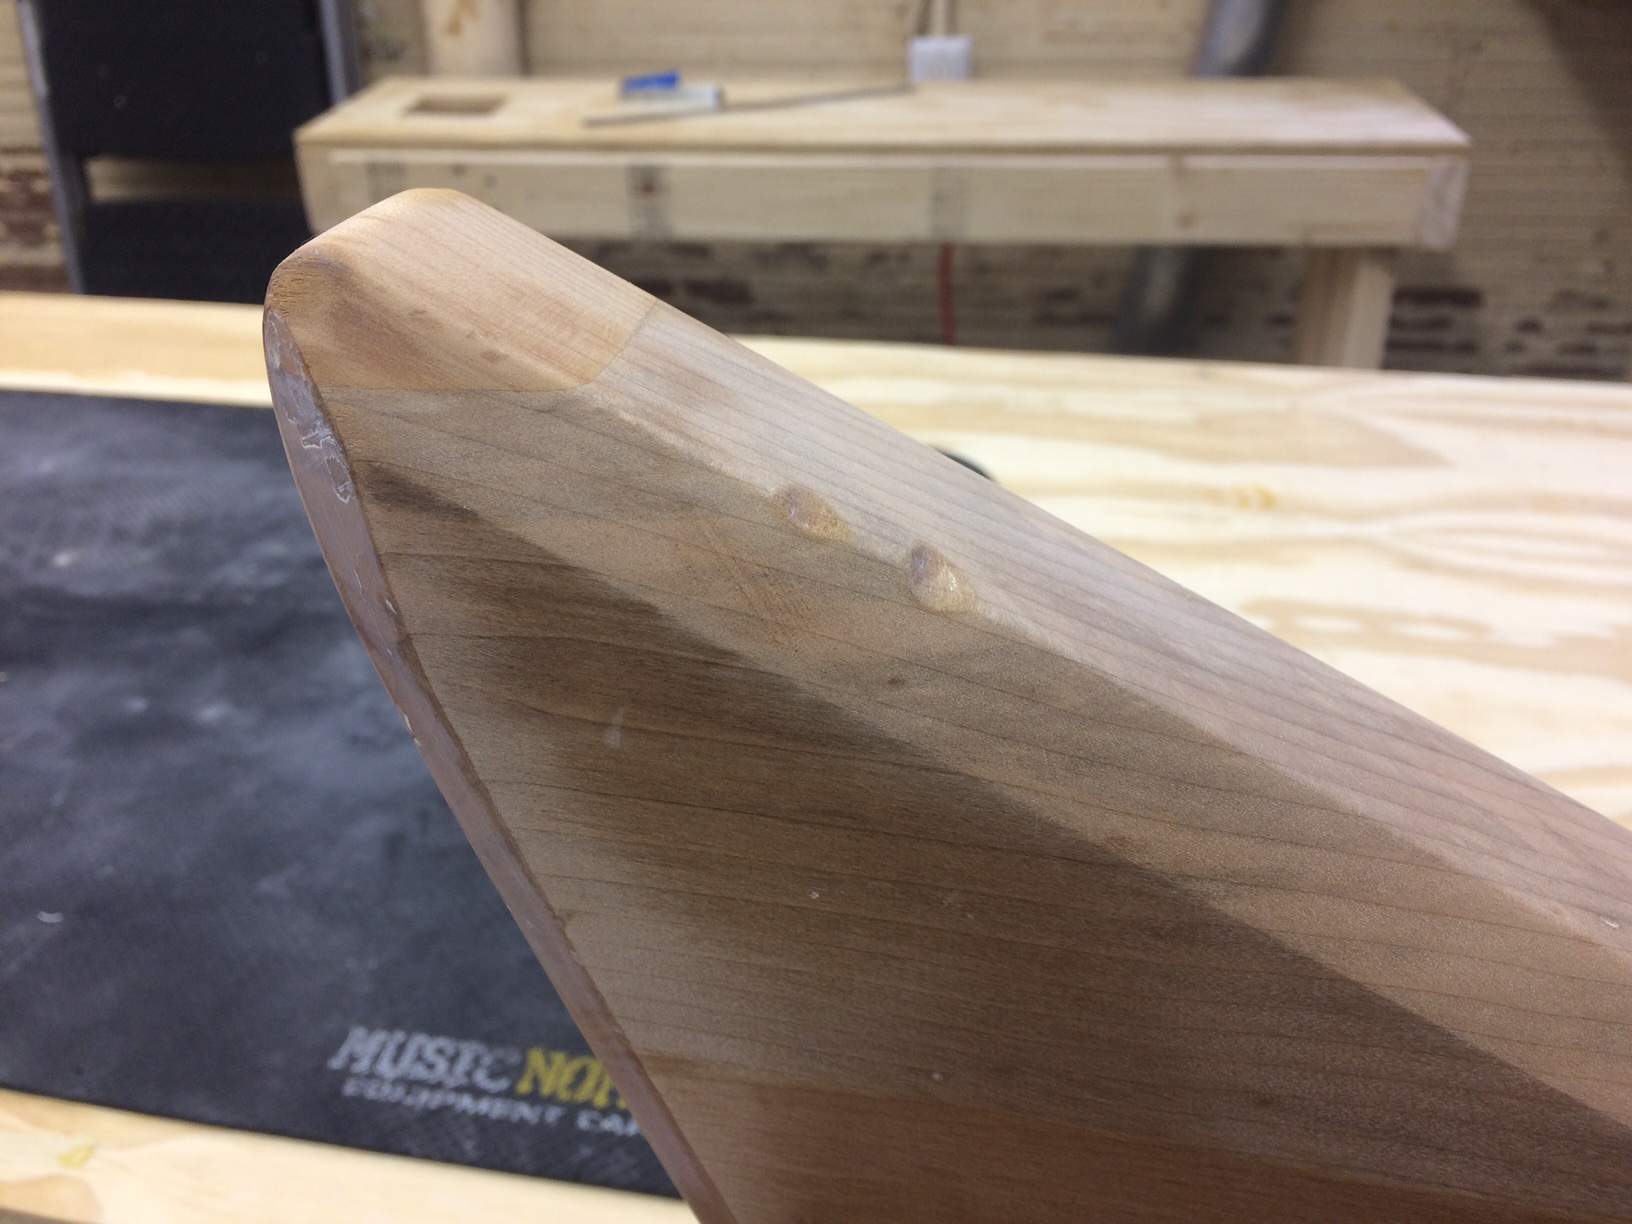
The real progress was fixing the forward bow on two necks, including the original ZZB Deluxe neck pictured in the first image. That neck had a bow and a slight kink at the end of the carved portion on the back. I think that is what people call the ski jump. I bought a 1/8" thick x 1.5" wide strip of aluminum, rested the neck on a ~1" wide cut from a 2x4 with the fretboard up, put the aluminum strip on the fretboard and clamped the neck at the first fret and the last fret. The block of 2x4 was at about the 8th fret or so. The clamps pulled the neck into a backbow, so that the ends of the fretboard were 1/8 to 1/4 of an inch below the part of the fretboard above the 2x4 chunk. Then I rested a clothes iron on the aluminum strip. All of this stuff was done with the truss rod nut totally loose.
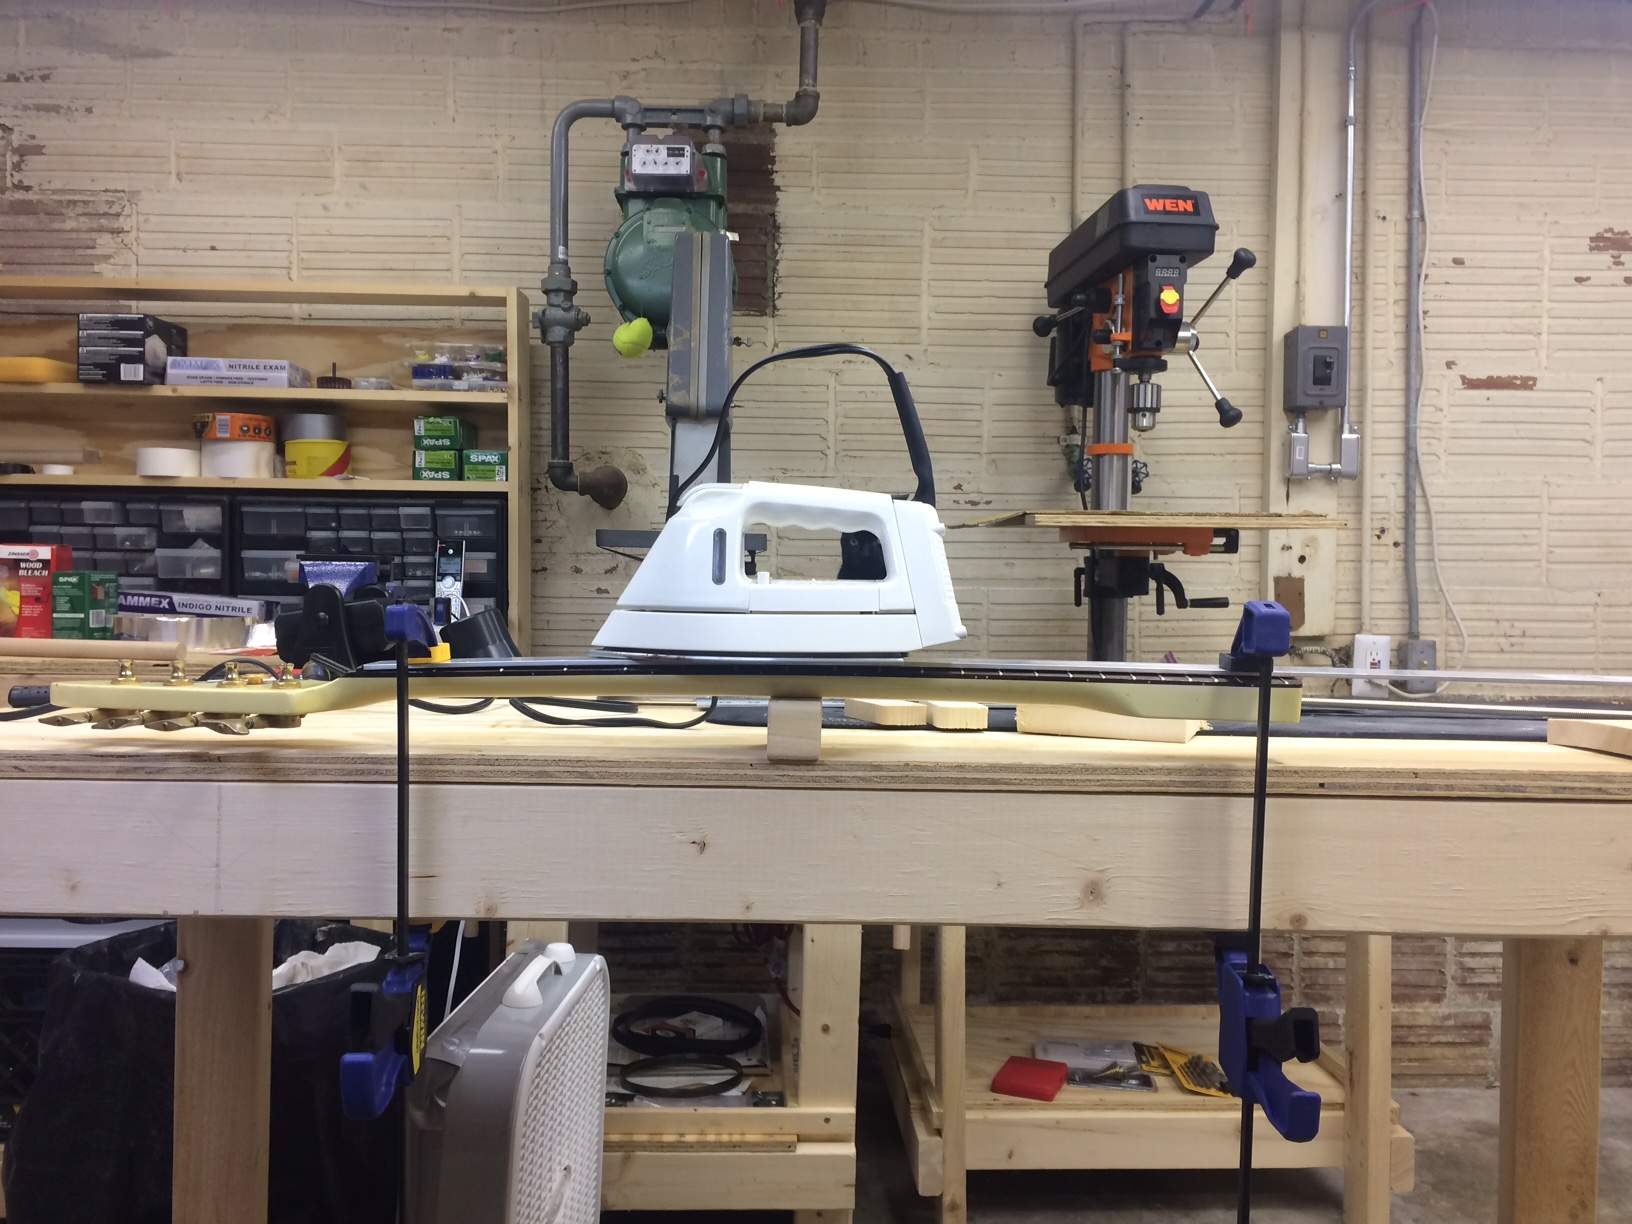
Initially, I set the iron for the lowest setting and let it sit on the center of the neck for ~20 minutes. I removed the iron and let it cool over night while clamped in the backbowed position. That didn't do much, so I increased the temperature to the polyester setting. That may be medium to medium low on your iron. It is the lowest among the "steam" range of heat settings on my iron. I did not use steam, just dry heat. Anyhow, you could feel that the back of the neck was very warm and the aluminum was hot to the touch. Let it sit for a half hour and let it stay clamped until the neck was cool. The forward bow was mostly removed, but the kink at the 14th fret was still there.
I put a 2x4 block beneath the part of the neck that mates to the body, put the aluminum strip on top and clamped it at the last fret. Then I put a clamp at the first fret and bent the neck down a half inch or more. These things are super flexible. I put the iron right over the kink and left it there for an hour and cooled while bent. Huzzah! No more skip jump or not enough that it matters to me.
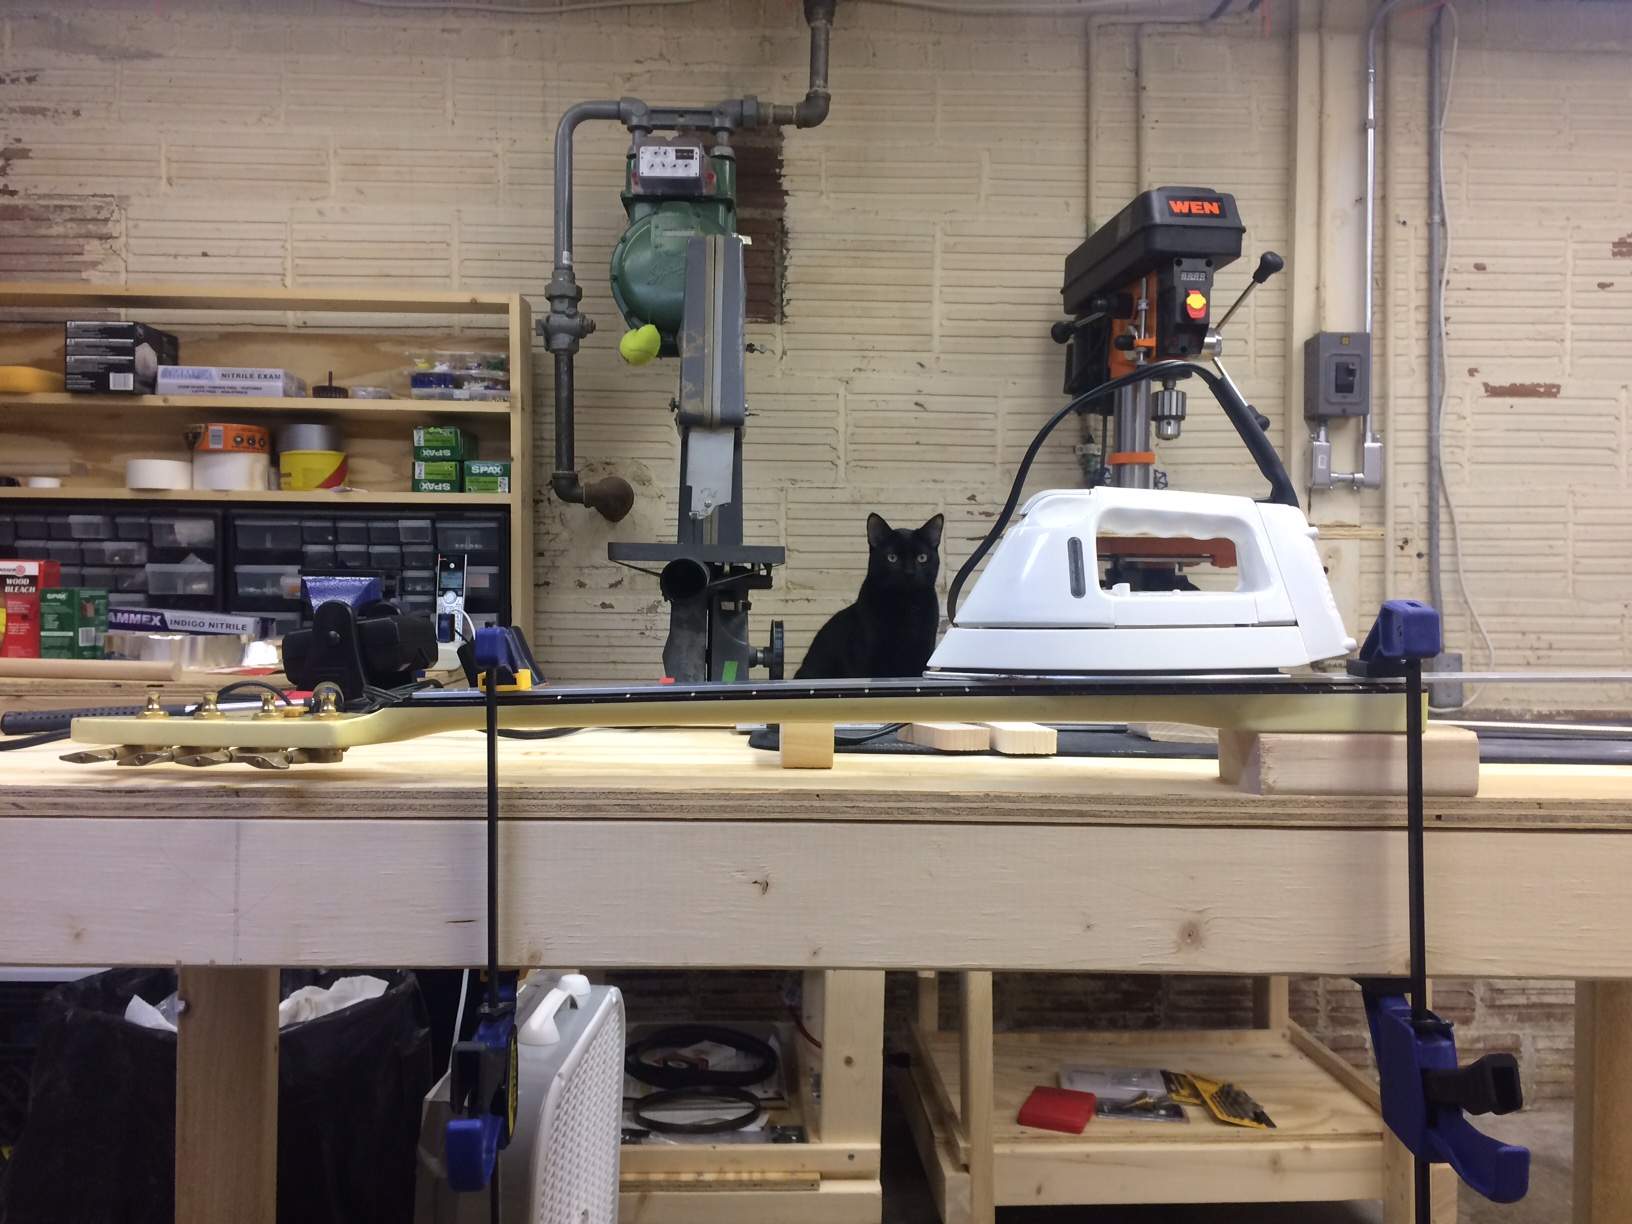
When I strung it up, it was way better than before. It might need a little more help, but I got the action down to a reasonable level, which I call good enough for this neck.
I didn't do this stuff to fix that neck and use it here, although it may make rojo412 happy. I did it to learn the method to fix the neck from a Fender Power Jazz bass that I bought for cheap because the owner couldn't figure out why it had no sound. The battery was totally corroded and the output jack was busted. Both of those were easy enough to fix. It was strung with really thin strings, which hid the backbow. Washers did not help the truss rod much. Now it is flat as a board and has my normal 45-105 strings on it. Huzzah! One fret is high and will be dealt with, but this one is ready to rumble. It has more room left for adjustment of the truss rod, which means it is good to go.
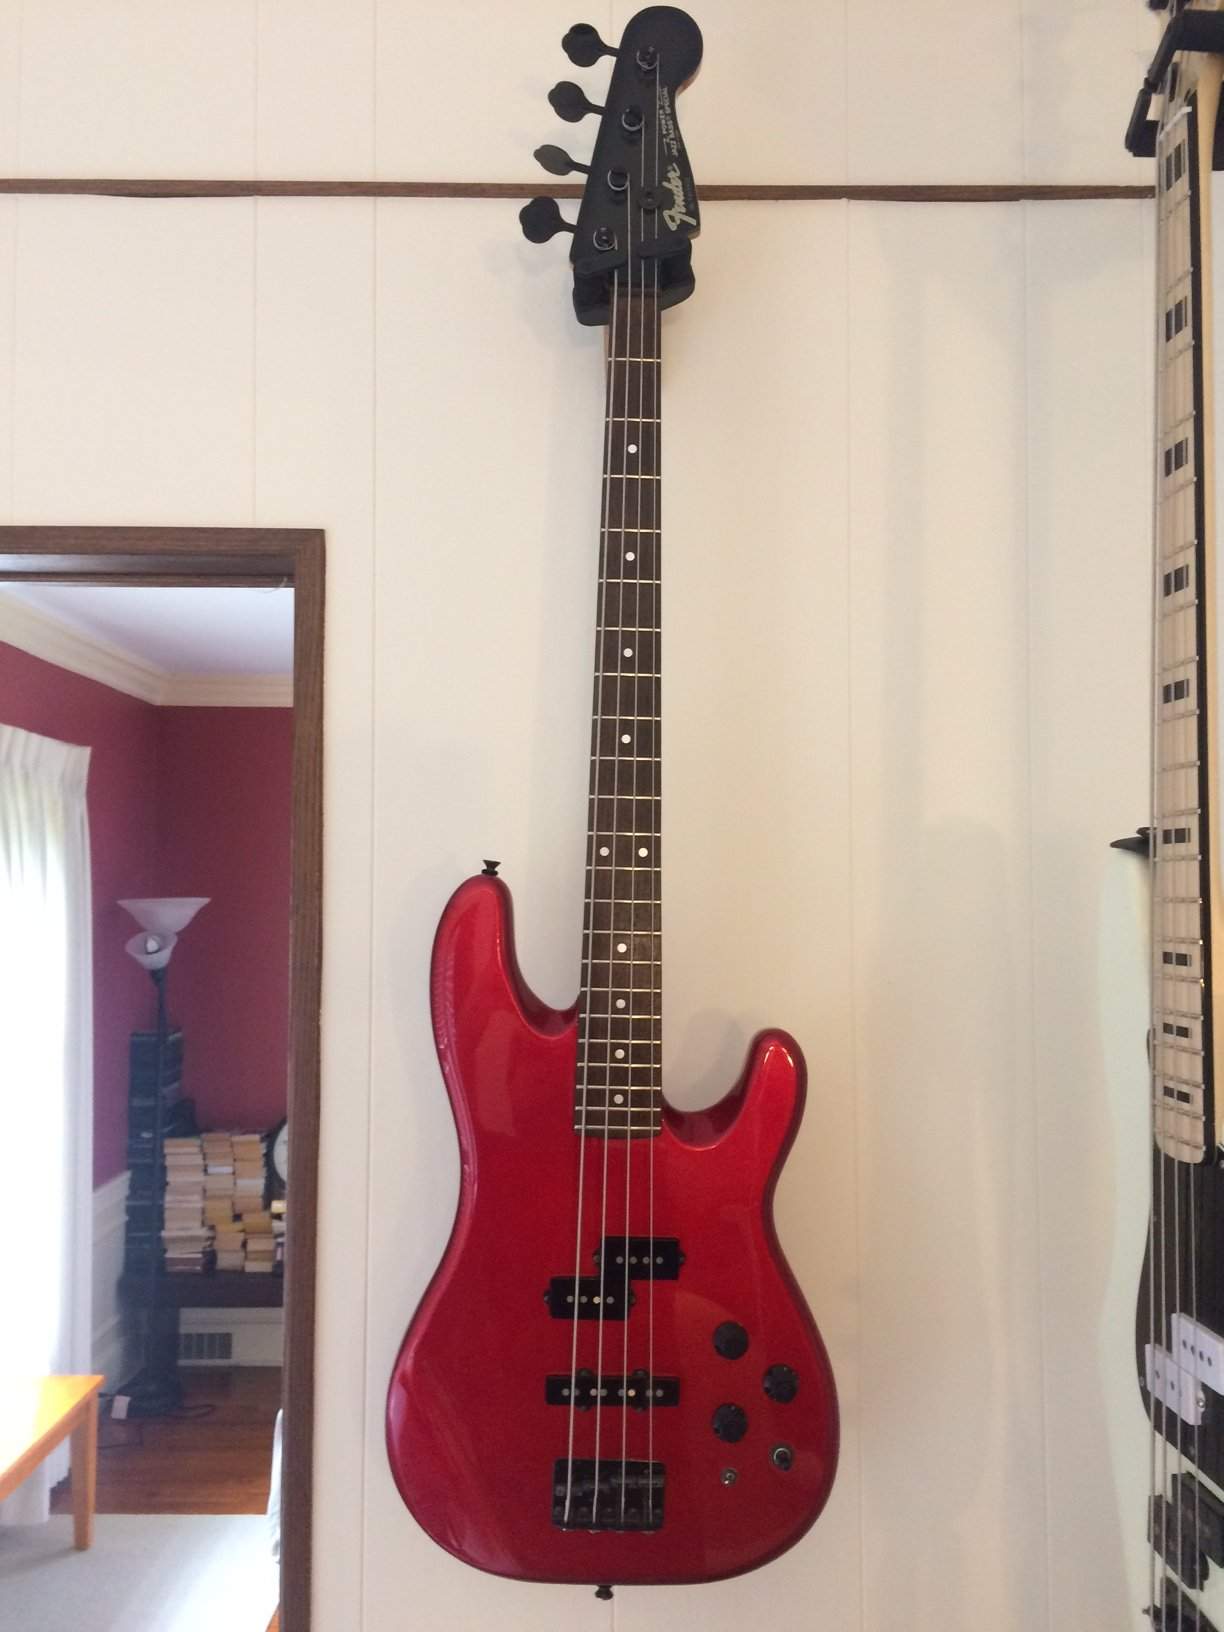
For a 30+ year old bass, it is in great condition and comes stock with a reverse P pickup. Shame about the J pickup, though.
The real progress was fixing the forward bow on two necks, including the original ZZB Deluxe neck pictured in the first image. That neck had a bow and a slight kink at the end of the carved portion on the back. I think that is what people call the ski jump. I bought a 1/8" thick x 1.5" wide strip of aluminum, rested the neck on a ~1" wide cut from a 2x4 with the fretboard up, put the aluminum strip on the fretboard and clamped the neck at the first fret and the last fret. The block of 2x4 was at about the 8th fret or so. The clamps pulled the neck into a backbow, so that the ends of the fretboard were 1/8 to 1/4 of an inch below the part of the fretboard above the 2x4 chunk. Then I rested a clothes iron on the aluminum strip. All of this stuff was done with the truss rod nut totally loose.
Initially, I set the iron for the lowest setting and let it sit on the center of the neck for ~20 minutes. I removed the iron and let it cool over night while clamped in the backbowed position. That didn't do much, so I increased the temperature to the polyester setting. That may be medium to medium low on your iron. It is the lowest among the "steam" range of heat settings on my iron. I did not use steam, just dry heat. Anyhow, you could feel that the back of the neck was very warm and the aluminum was hot to the touch. Let it sit for a half hour and let it stay clamped until the neck was cool. The forward bow was mostly removed, but the kink at the 14th fret was still there.
I put a 2x4 block beneath the part of the neck that mates to the body, put the aluminum strip on top and clamped it at the last fret. Then I put a clamp at the first fret and bent the neck down a half inch or more. These things are super flexible. I put the iron right over the kink and left it there for an hour and cooled while bent. Huzzah! No more skip jump or not enough that it matters to me.
When I strung it up, it was way better than before. It might need a little more help, but I got the action down to a reasonable level, which I call good enough for this neck.
I didn't do this stuff to fix that neck and use it here, although it may make rojo412 happy. I did it to learn the method to fix the neck from a Fender Power Jazz bass that I bought for cheap because the owner couldn't figure out why it had no sound. The battery was totally corroded and the output jack was busted. Both of those were easy enough to fix. It was strung with really thin strings, which hid the backbow. Washers did not help the truss rod much. Now it is flat as a board and has my normal 45-105 strings on it. Huzzah! One fret is high and will be dealt with, but this one is ready to rumble. It has more room left for adjustment of the truss rod, which means it is good to go.
For a 30+ year old bass, it is in great condition and comes stock with a reverse P pickup. Shame about the J pickup, though.
Backed it off to 150 to finish the sanding. That white junk is a pain. I need to go back over it with 220, but I can see everything at this point. There were some funky spots under dents that required more sanding than in other spots, but it looks OK at this point. I didn't sand the pickup routs because they will be covered in copper foil and pickups at some point.
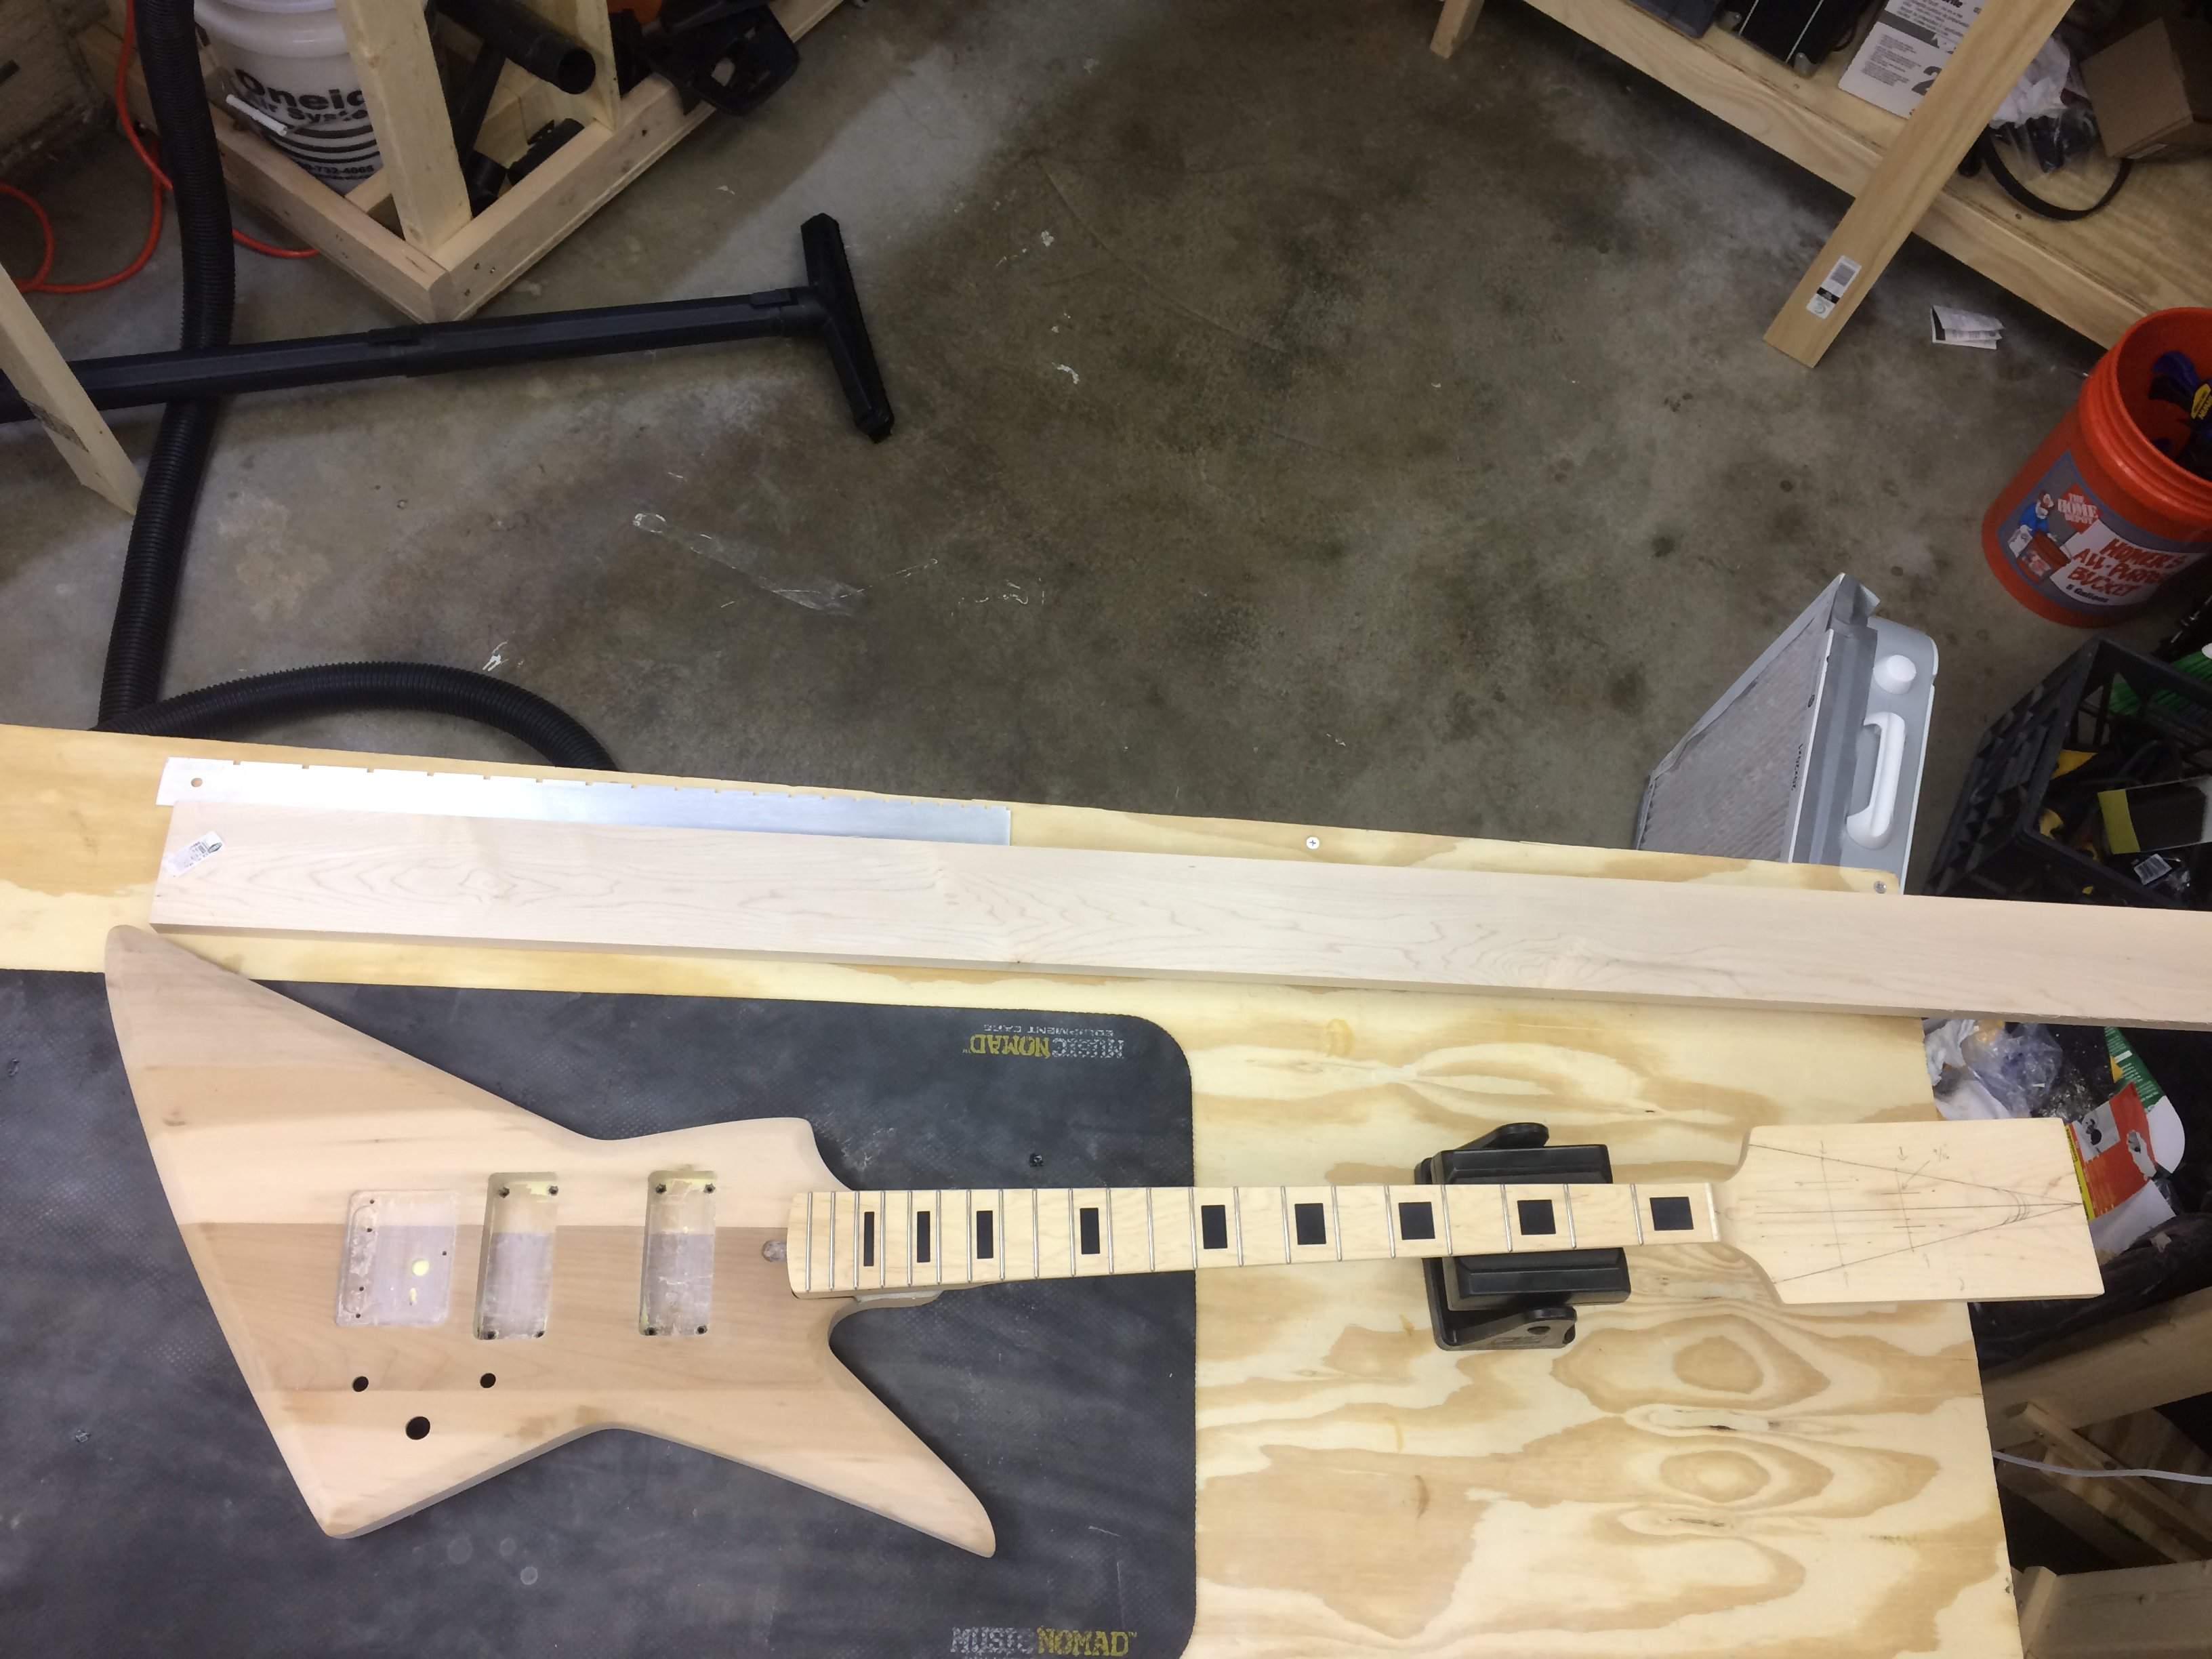
I kind of like it as-is. The possible faux-neck through maple board is sitting on the bench with the bass. I can't make up my mind if I want to do the faux neck-through or not. If I do, the rest of the body needs to be darker to make the maple stand out. That would mean trying to bleach it to a nominally uniform blandness and staining it back to some sort of wood-ish color. I kind of like the patchwork bass made of real freaking wood. Five boards, plus the chunk of alder to fill the old bridge rout. Maple neck. A true frankincense monster!
Figured out the positions for the tuners and drilled a test piece. The bit shifted a bit as I was starting and they ended up closer together than I wanted, but it still worked, by a hair. I should have drilled a pilot hole. Brad point bit on the way...

The rounding for the end of the headstock is probably going to be a penny radius. I was worried the tuners wouldn't fit with a straight string path. I want the string path to be as straight as possible with the clamato unit. There will be a string retainer bar to get a decent break angle on the strings.
Gratuitous body shots:
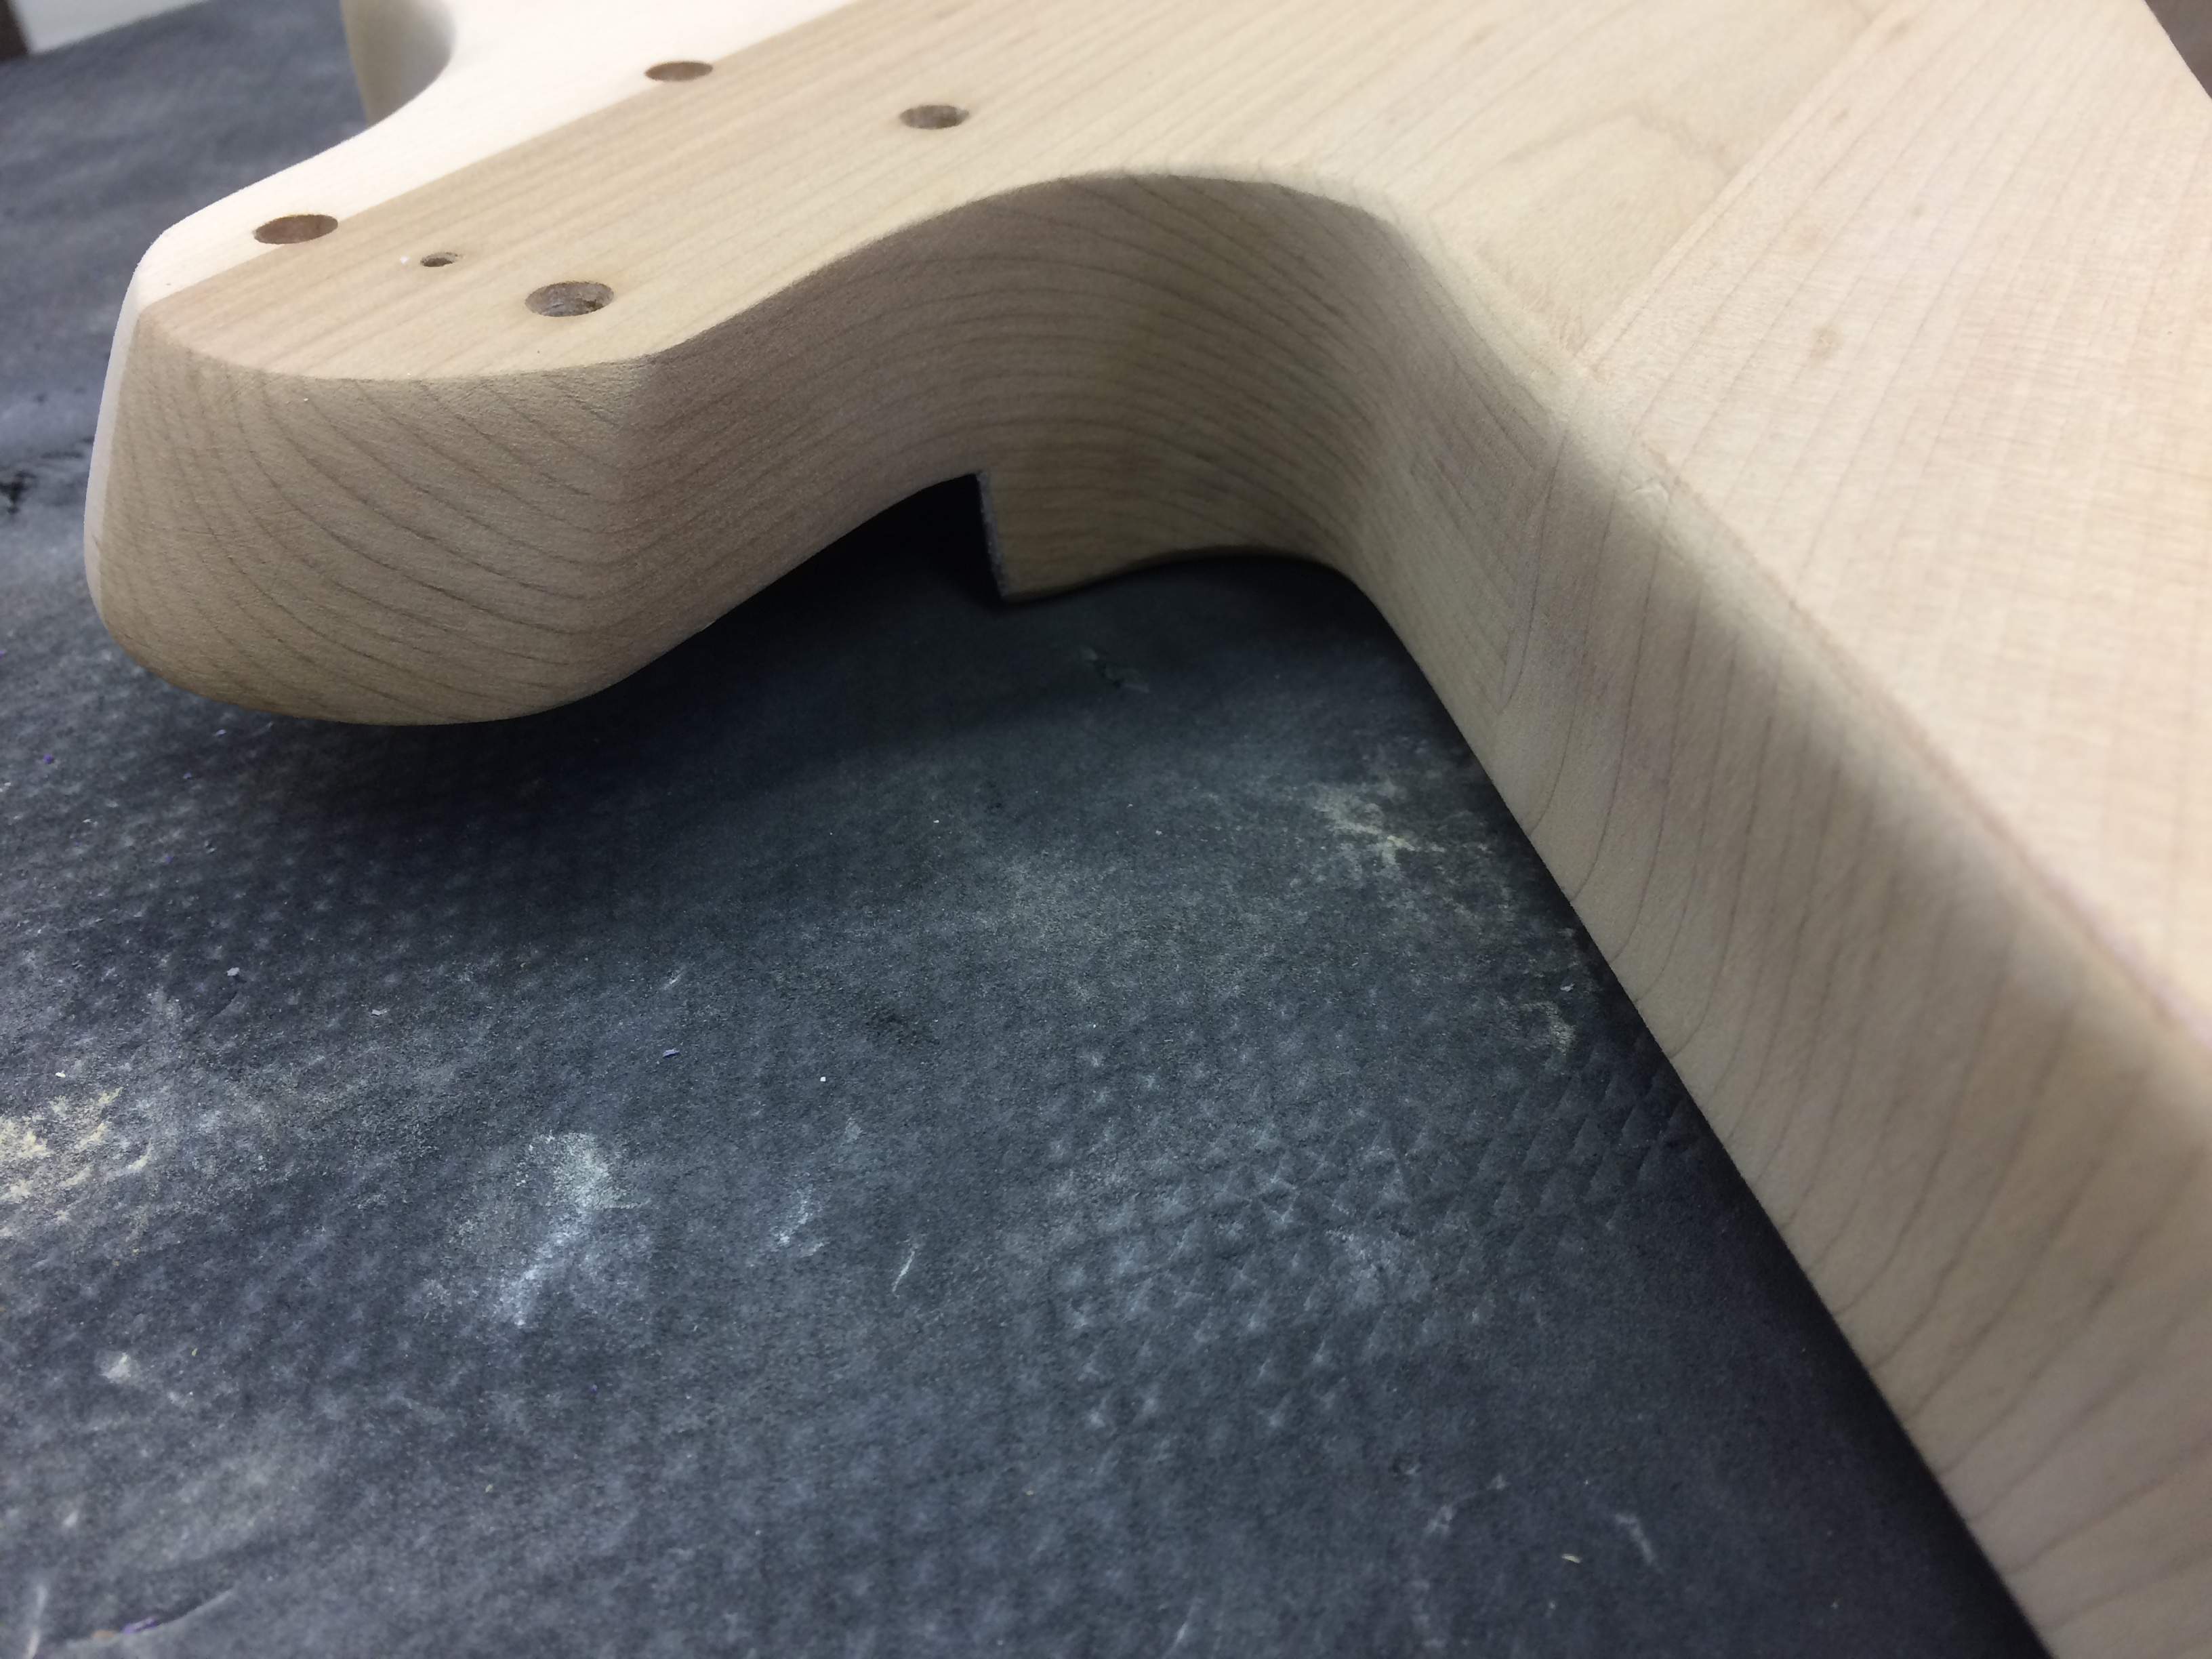
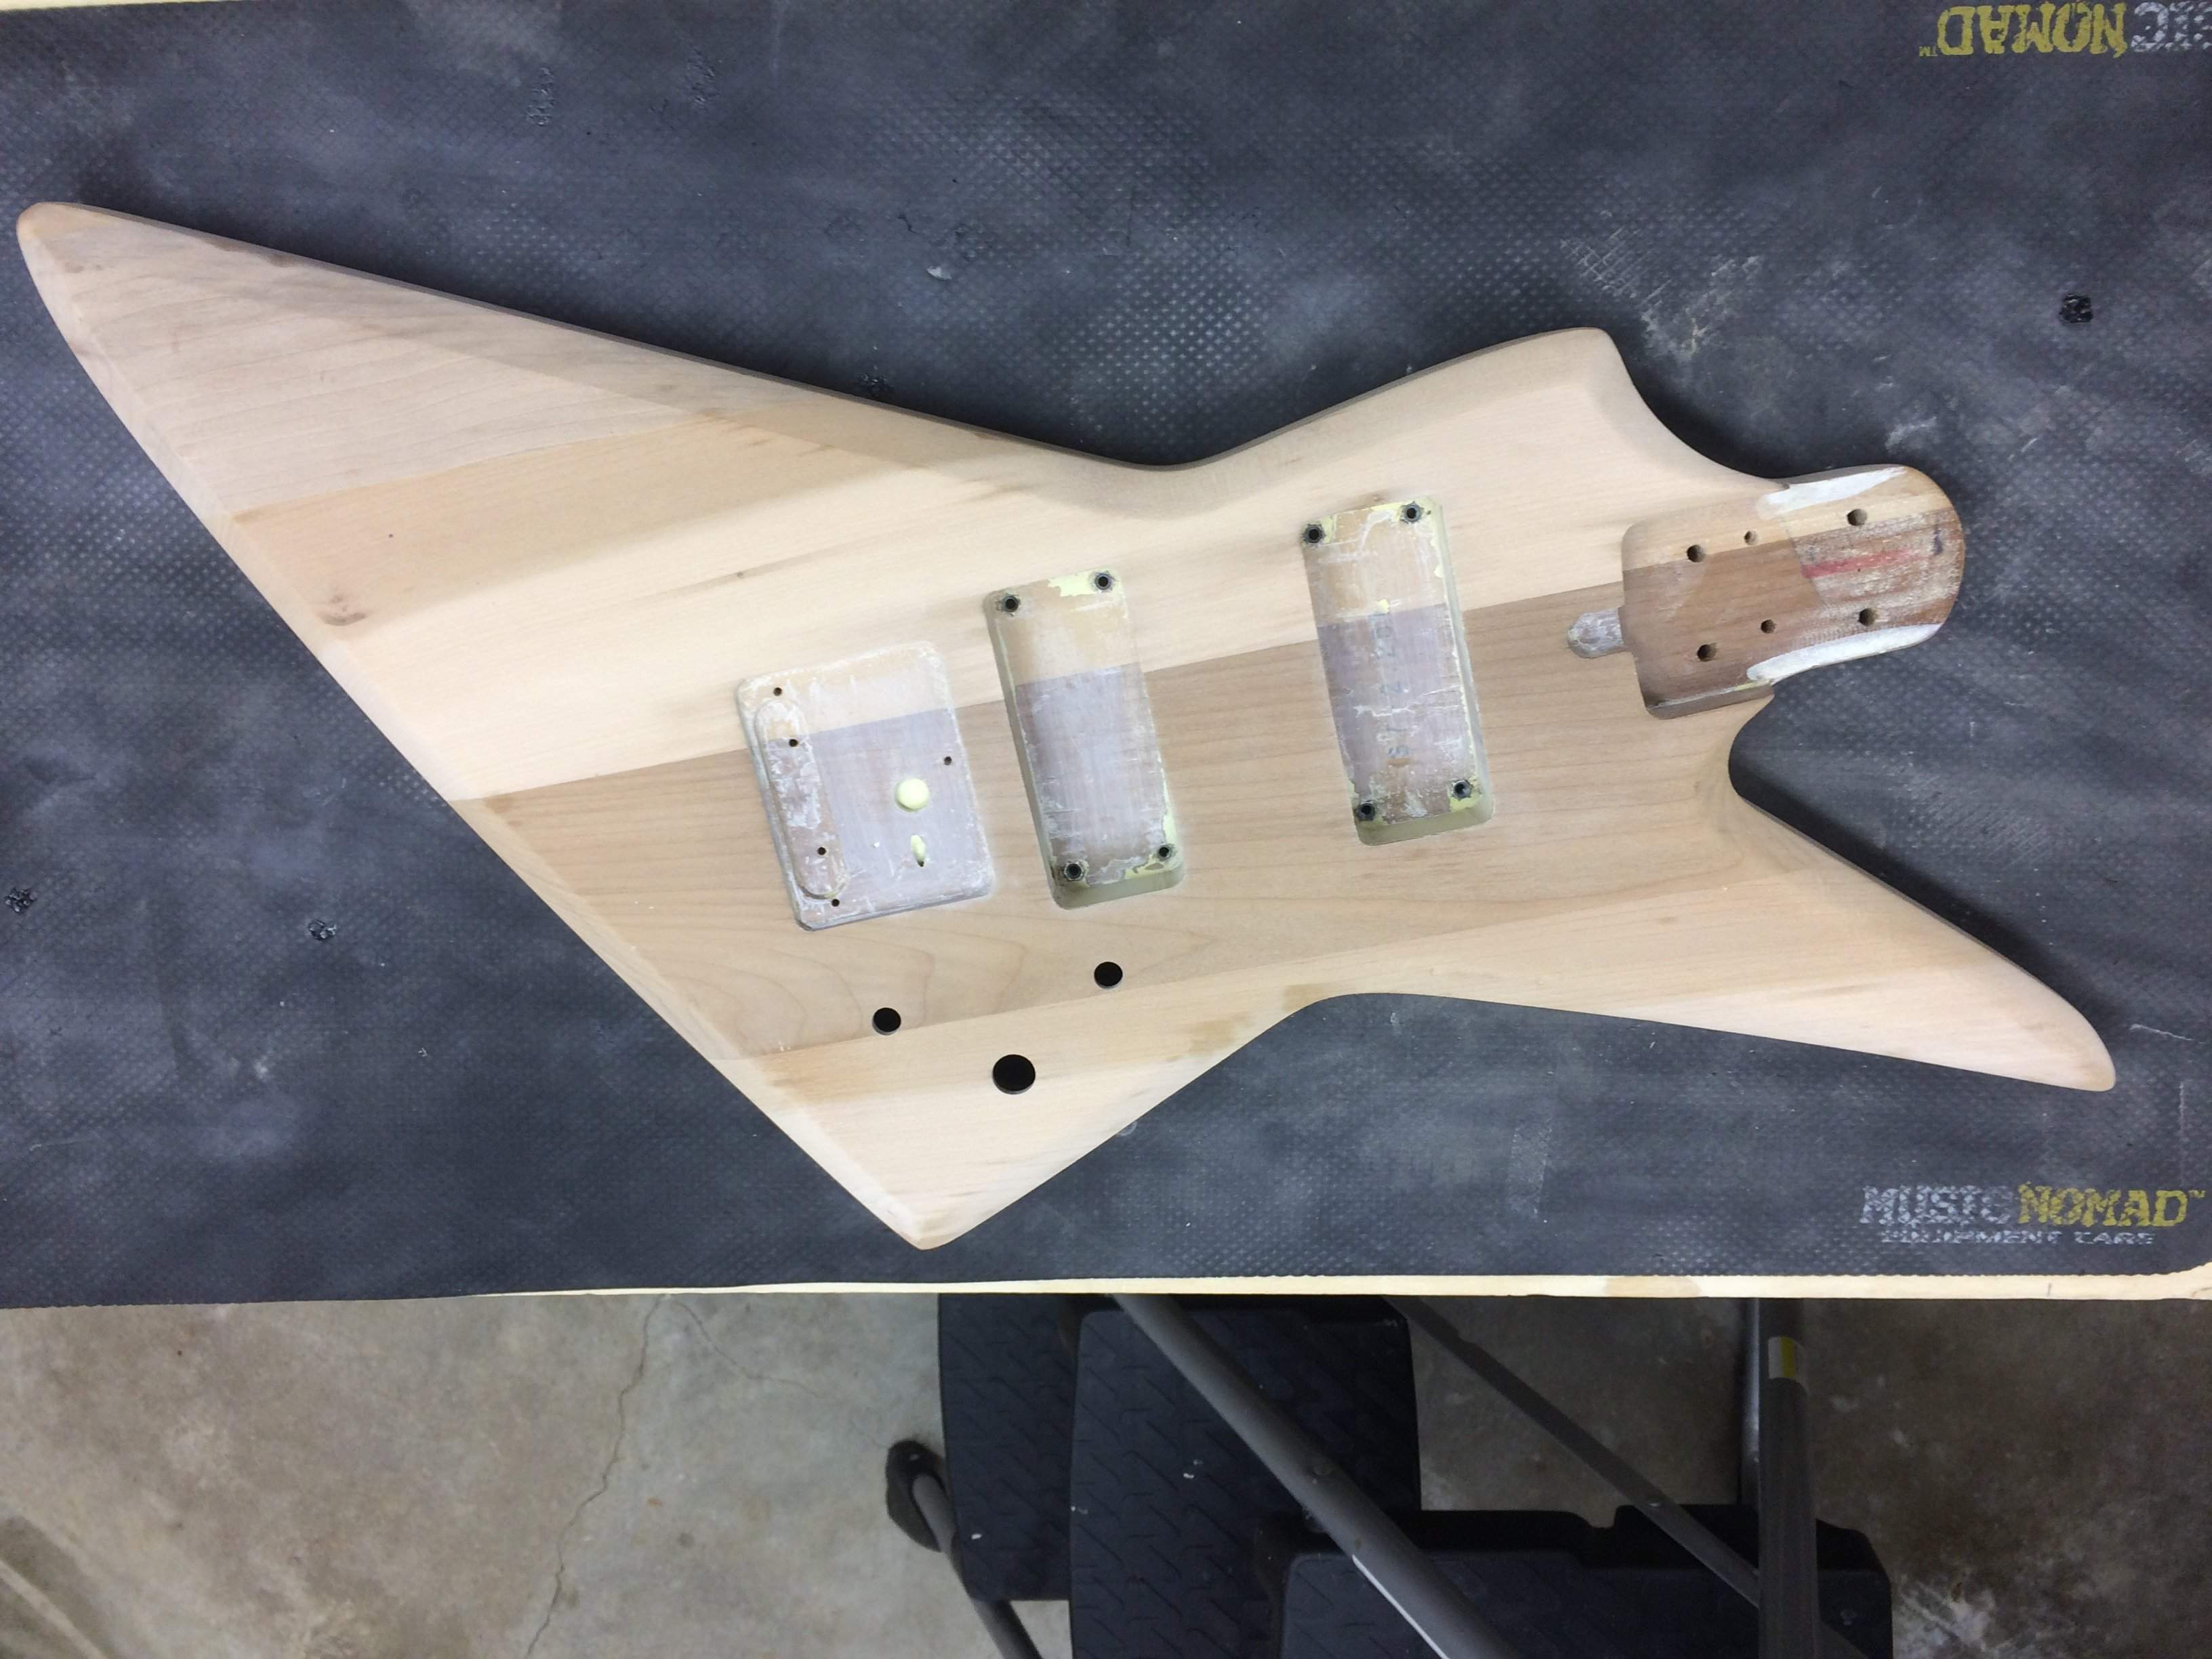
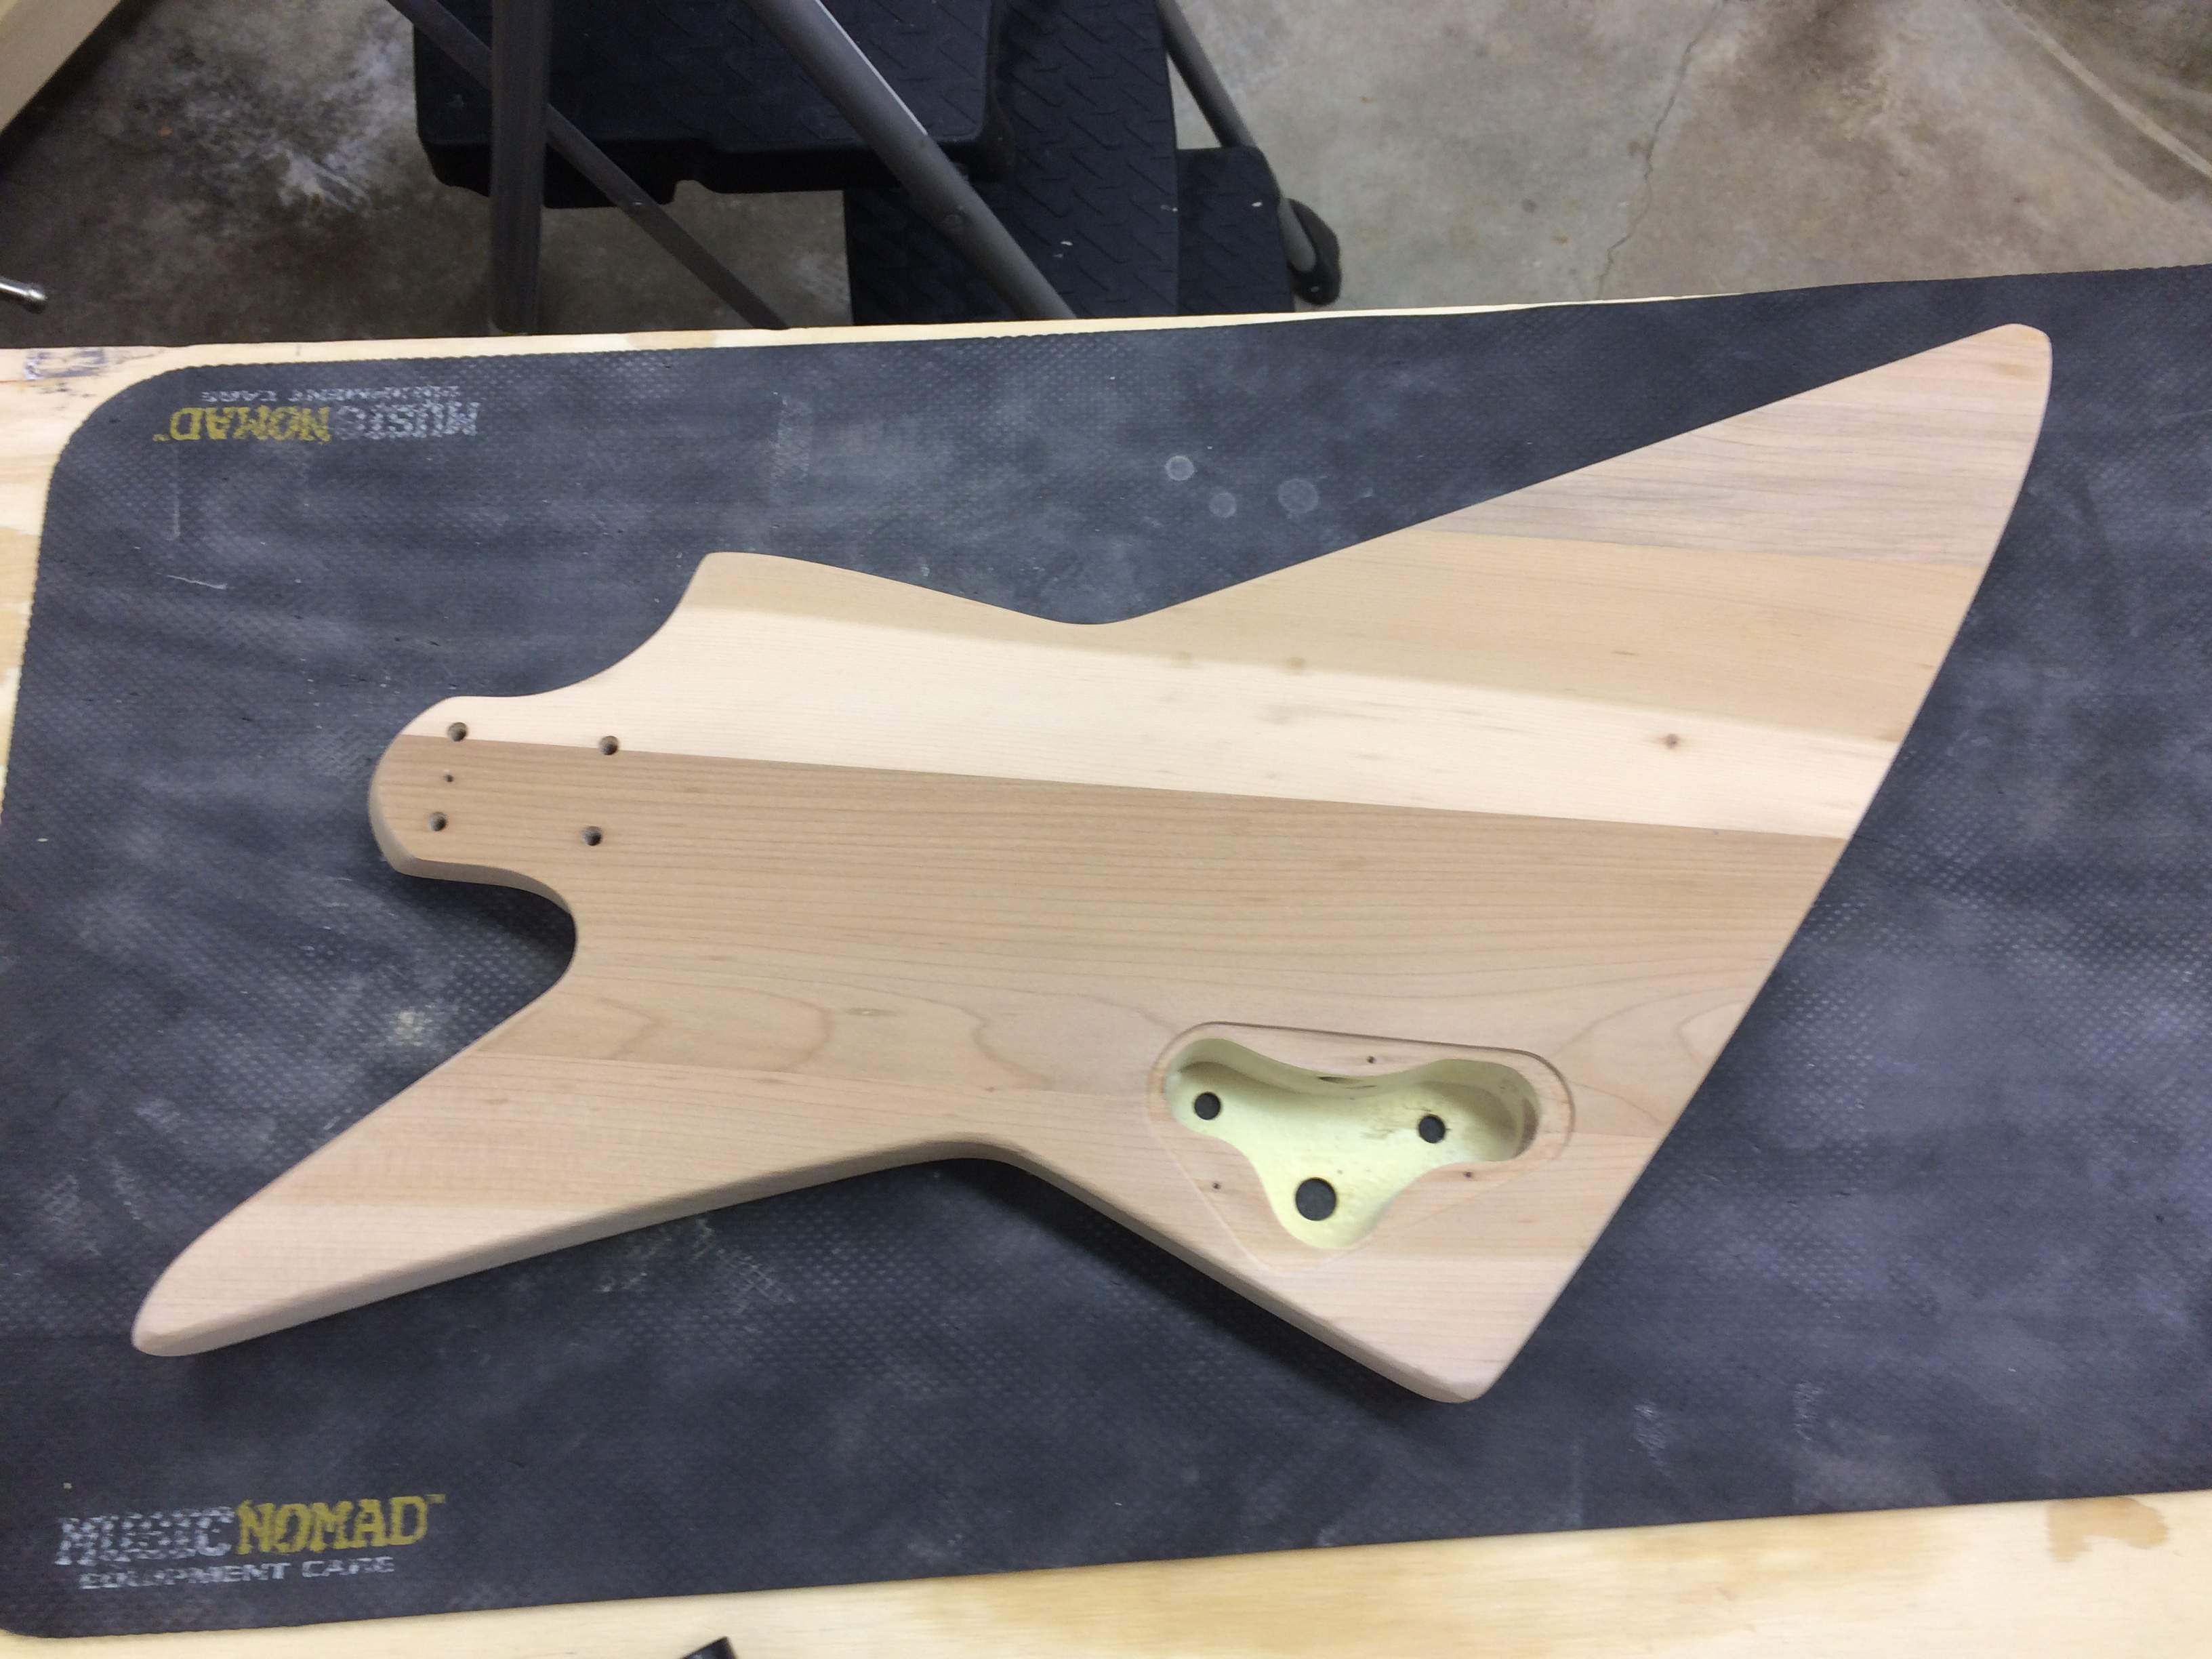
Yup. Some of those points are a bit rounded now and there are some dents. That happens to all of us.
I kind of like it as-is. The possible faux-neck through maple board is sitting on the bench with the bass. I can't make up my mind if I want to do the faux neck-through or not. If I do, the rest of the body needs to be darker to make the maple stand out. That would mean trying to bleach it to a nominally uniform blandness and staining it back to some sort of wood-ish color. I kind of like the patchwork bass made of real freaking wood. Five boards, plus the chunk of alder to fill the old bridge rout. Maple neck. A true frankincense monster!
Figured out the positions for the tuners and drilled a test piece. The bit shifted a bit as I was starting and they ended up closer together than I wanted, but it still worked, by a hair. I should have drilled a pilot hole. Brad point bit on the way...
The rounding for the end of the headstock is probably going to be a penny radius. I was worried the tuners wouldn't fit with a straight string path. I want the string path to be as straight as possible with the clamato unit. There will be a string retainer bar to get a decent break angle on the strings.
Gratuitous body shots:
Yup. Some of those points are a bit rounded now and there are some dents. That happens to all of us.


