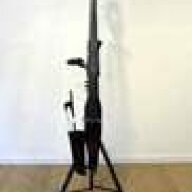
• TalkBass has been independent since 1998. Add your voice.
    Create a free account to reply to discussions, view embedded media, and browse with fewer display ads.
    Join freeLog in
    Want zero display ads or expanded classifieds tools? Compare plans.

Double Bass Stagg EUB megathread

Hi ! I have a question for Stagg EDB owners.

I just received a Harley Benton DB01 from Thomann, the endpin is only 47 centimeters (18.5 inches). I'm 180cm tall (5'9 feet), and I need to set the bass at the very end (like, 10-13cm above the last notch) ... Seems like a recipe for disaster.
I thought the Harley Benton was basically the same model as the Stagg, and this is the reason why I ask here.

I've seen countless messages on "endpin rattle" or "endpin flex", but never "endpin too short" ...

How long is the endpin, on the Stagg EDB model ?

IMG_20250521_134139.jpg
 
I just received a Harley Benton DB01 from Thomann, the endpin is only 47 centimeters (18.5 inches). I'm 180cm tall (5'9 feet), and I need to set the bass at the very end (like, 10-13cm above the last notch) ... Seems like a recipe for disaster.
Maybe you're setting it up too high?
My Carruthers EUB is set to have the nut at about eye level.
Granted I'm about 3 inches shorter than you.
 
Ok, thanks for your feedback.

Lessons are planned, but until then I've only checked to set the bass height up with youtube tutorials (general advice found was basically having the F from E string at eye level in playing position).

But with the endpin set on the last notch (15th) the nut is about the level of my nose... is it enough ?
 
Yes, I tried it with diverse blocky objects, and it helped by raising my plucking hand position. But I tought about the whole thing and decided to return it.

I was happy learning jazz on my own on my bass guitar, until last month, when my GAS went through the roof after a bass player let me put my hands on his upright bass after his set. I found this DB01 as a B-stock on Thomann with a good discount and ordered it. The return policy is a nice safety net.

The experience was a bit underwhelming: the height issue, and I would argue the cork block in your amazon link probably has more mojo. I think investing in lessons and seeking guidance for a nicely setup first acoustic upright bass is the sensible choice for now.

Thanks again!
 
Last edited:
Read through this whole thread and I think I know the answers but trying to make sure.

Been playing DB for about a year now, no real prior music experience to speak of before that. Recently I picked up a Stagg EUB for dirt cheap from FB marketplace. It's fun and since it's not my main instrument I'm ok with tinkering with it. I'm pretty sure this is the standard version with the ebonized fingerboard.

A few questions about it.

1. My A string, and to a lesser extent the E string, has a horrible buzz, everywhere from 1/2 position down to around C#/D. I'm thinking this is something for a luthier to fix after reading this thread. I tried adjusting the bridge height but it didn't seem to make a difference. (If it needs a luthier to fix it I can do that, I'm just hoping for a DIY solution before I go that route.) I already tried swapping the string with an Evah Pirazzi A string I had and it didn't make a difference. The string doesn't have any obvious bends or rough spots. I wiped it down and gently ran some fine sandpaper under it and again no difference. I didn't want to get too aggressive with it since this is a job for a skilled person.

2. I've seen some mention of a truss rod in this thread but haven't seen a good explanation of where it is/how to adjust it. I'm thinking that's worth a try before I go spend money on a luthier. Also considering shimming the neck pocket to see if that helps

3. I saw a brief mention in this thread about swapping the bridge with an Eminence EUB bridge. Is that worth it? How much work is required for that?

Thanks all, having fun with this EUB but that damn rattle is driving me nuts.
 
The truss rod screw is located below the nut. At least with my older weak headstock Staggs.

I have similar problems with my black coated fingerboards. Got a rosewood neck later, had a bit of instructions when my luthier planned my DB fingerboard, finished the DB FB myself below the high C string bit by bit until I was satisfied about once every week for two months until I was satisfied.

Checked the max space and position when the string was pressed down at it both ends of the FB and tried to transfer that to the Stagg FB.
I was using a scraper (you need to sharpen it regularly, learn how to do that correctly) as I didn’t had a plane/slicer that was fine enough.

Always go from the end of the fingerboard to the nut only. Go slow, check often. If it works, sand with fine paper. If the surface is wood, oil with boiled linseed oil.

You can try to sand the laquer, but you can be more precise with a scraper.

Remember the high spots are south of the fingering position when it buzzes and often below the finger when you finger more south and the buzzes stop.

The rosewood fingerboard was coated with a almost colorless transparent laquer that I removed completely to get to the bare wood.

Luthiers use totally straight edges of different lengths (your string pressed down at both ends is one of them) to identify high spots and remove them.

The camber of my rosewood fingerboard was inverted, like a large high spot in the middle where the string should have some space to vibrate without buzzing. So I had to remove one millimeter to get it completely plan (mostly below the E-string) and one mm more for some camber (2 would have been better but I thought go slow).

Remember the neck and FB on these black coated necks is a single piece of wood. You c as not replace the FB unless that part of the neck is cut off.

Maybe you start identifying with the straight edges where and how high the spot is and if there is some camber or not.

String height at the end of the FB should be 5/6/7/8 mm, not lower. Unfortunately the Stagg bridge is constructed for equal height and unequal height of the adjusters block them. Too much metal in the adjustment, there is bright wood below the black coating that can have gotten inside the wood partly.

Analyse yourself what the problem is.
I guess just scraping a bit of the laquer will not save by the problem.
That means the laquer needs to be removed completely from the FB before it can be planed and part of the laquer might split off at the sides when doing this.
That’s why I always recommend a rosewood FB Stagg although they got a bit expensive over the years.

Good luck and a nice learning experience!
 
Thanks for the info! Will take a look at those measurements and see. I've attached a couple of pictures, based on what I've read here I think this is the newer headstock (and the person I bought it from said it was only a few years old).

From the photos you can see there are no screws anywhere near the nut which is why I'm confused.

1000005071.jpg
1000005070.jpg
 
I'm not familiar with screws near the nut. I certainly don't see any screens there
Look from the headstock towards the bridge. On my Staggs there is a hole below the nut that has a hex screw in it. My Staggs came even with a hex tool for it.
But on a rebranded newer Stagg of a friend of mine I haven‘t found the trussrod either. Only played that one for an evening at a party. Only see him every few years …
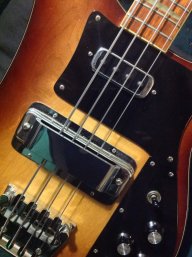
Not on mine and it's not a 1st Gen either
 
Not that this thread is a TB “club,” but I’m now in the club, having picked up a trans blue this afternoon in nearly pristine condition, complete with braces and a hard case for what I believe to be a good price, $350. I read through this entire thread a couple of weeks ago in anticipation will soon begin running through the recommended checks/adjustments, things like making sure the nut is cut properly, turning down the trimpots to extend battery life, possibly disconnecting one piezo element and comparing the sound, etc. I sure wish there was a sticky that compiles all the recommendations!

While not perfect, for now I’m using as a stand the bottom of a drum throne.

IMG_0952.jpeg
 
Read through this whole thread and I think I know the answers but trying to make sure.

Been playing DB for about a year now, no real prior music experience to speak of before that. Recently I picked up a Stagg EUB for dirt cheap from FB marketplace. It's fun and since it's not my main instrument I'm ok with tinkering with it. I'm pretty sure this is the standard version with the ebonized fingerboard.

A few questions about it.

1. My A string, and to a lesser extent the E string, has a horrible buzz, everywhere from 1/2 position down to around C#/D. I'm thinking this is something for a luthier to fix after reading this thread. I tried adjusting the bridge height but it didn't seem to make a difference. (If it needs a luthier to fix it I can do that, I'm just hoping for a DIY solution before I go that route.) I already tried swapping the string with an Evah Pirazzi A string I had and it didn't make a difference. The string doesn't have any obvious bends or rough spots. I wiped it down and gently ran some fine sandpaper under it and again no difference. I didn't want to get too aggressive with it since this is a job for a skilled person.

2. I've seen some mention of a truss rod in this thread but haven't seen a good explanation of where it is/how to adjust it. I'm thinking that's worth a try before I go spend money on a luthier. Also considering shimming the neck pocket to see if that helps

3. I saw a brief mention in this thread about swapping the bridge with an Eminence EUB bridge. Is that worth it? How much work is required for that?

Thanks all, having fun with this EUB but that damn rattle is driving me nuts.
Could be too late answer, but I haven't visited this forum for a while and just stumbled upon this tread. When I tried to lower action on my Stagg, E and A started buzzing first, and then - D (in lower, e.g. around half, 1st or 2nd positions). The fact that it started with E which vibrates side to side the most told me that it is touching the fingerboard somewhere. Interestingly, E and A when plucked empty, still buzzed, however not right away but a second or two AFTER plucking them. I realized two things: my nut height was set too low and why the buzz delay was happening. To confirm that my fingerboard was flat enough , I delay was because the string always vibrates in slowly rotating oval pattern, so initially it may start to vibrate rather toward the finger board and away from it than side-to-side - entirely depends on how you pluck it. In this case you will hear the buzz before vibration amplitude decays. In any case I'm quite positive you nave the nut set too low, and the bridge adjustment won't fix it. Test this by placing small plastic shims in the nut groves under buzzing strings - I'd start with something thin like plastic a yogurt can is made of. One layer will likely be enough but for severe buzz you may need two stacked shims or thicker plastic to start with. Leave the bridge where it is. On my Stagg I've used a jacket of the old 5-1/2" floppy disk I happen to have laying around just because it was already black, but you can always paint pre-made shims with black Sharpie before putting them into the nut groves. When you tighten the strings they may drag the shims along toward the peg box, so I usually cut them longer than I need and leave about 5-6mm tail sticking out beyond the nut edge, so by the time you're in tune the shim end lines up with the nut edge. You don't need to be very precise, but you can calibrate initial placement to get final position close enough. Good luck.
 
Nut height only helps for the open string, but not for fingered notes.
In my experience (I have three Staggs) there are two reasons:
1. The bridge is constructed for symmetry which results in equal string height which doesn‘t work. Either the lower strings are too low or the upper strings are too high.
2. This is the more important part, the fingerboards are mostly flat top to bottom where they should have some relief to give room for the vibrating string. I have even had one neck where the fingerboard was curved up a bit. On my instruments the truss rod didn’t work to change the neck curvature, so this has to be scraped off which works with the rosewood fingerboard versions, but on the standard black necks removes the black lacquer (maybe epoxy) and shows the neck wood. Since neck and fingerboard is a single piece of wood, removing the lacquer from the top but not anywhere else might be difficult.
Also scraping the fingerboard for a smooth relief without local bumps is not an easy task and needs a lot of time.

Setting the adjusters on different heights is not enough to equal out the misconstructed bridge and blocks the adjusters and bridge height.

That’s what you are faced with.
You can put a straight edge on the fingerboard from top to bottom. You need to see through in the middle of it about at least a millimeter up to 2.5 at the E-string side. If the edge wiggles you have a negative scoop which is really bad. You can try the trussrod, but I doubt it will get you the relief you need.
 
  • Like
Reactions: BlacksHole
Hi there!

I´ve been interested in trying out one of those EUBs for years, and now came across a quite inexpensive box of parts for an almost complete Stagg EDB I will put together again :-)
Missing: All the small screws from the backside (no problem), the tuners (already ordered new ones), and the pickups :(

I´ve read through several threads, and did searches for some keywords on this one (~62 pages are too long to read them all), but some questions remain:

- is this threaded insert on the back of the body original, or did someone put it in there? What could be it´s purpose?

P9161839.JPG

- looks like the nut is made of wood, not plastic. The truss rod is accessible from the bottom. The neck seems to be made of one part (no rosewood fingerboard :(). I read about a narrower and a wider headstock - which one is this?

P9161849.JPG P9161850.JPG P9161852.JPG P9161851.JPG

- on the bottom of both of the feet of the bridge I can see an imprint of the piezo pickup, so there were two. But the preamp board is missing the outer socket. It looks like someone already soldered on the board (bridged the contacts for that socket and did something with the two resistors between the capacitors) - but the FET and pot for the second piezo have never been there. I think I will have to order two "soft" or flexible piezos to put them into the body like shown here, but I´m only able to find ones that are ~80mm or longer - what is the length of the original ones? And how are both connected to the board having only one socket?

P9161855.JPG P9161854.JPG

Thanks for your help :)

Danyel


I´ve read through several threads, and did searches for some keywords on this one (~62 pages are too long to read them all), but some questions remain:

- is this threaded insert on the back of the body original, or did someone put it in there?
I think it is original, but it is not on the bodies of my older and newer headstock bodies. A lot of variations of the original Stagg design do exist now.
What could be it´s purpose?
Maybe to mount the Stagg on a tripod, but it is not a good position to do that. Probably it was the only one that was available to do so.
- looks like the nut is made of wood, not plastic. The truss rod is accessible from the bottom. The neck seems to be made of one part (no rosewood fingerboard :(). I read about a narrower and a wider headstock - which one is this?
It is the newer wider headstock. Fender style tuners fit.

The nut is made of an easily breakable plastic. I broke it using a wider G string. Either file it down so that the grooves are only 1/3 of a string diameter deep (don not use force or it may break) or replace it with a wooden one.

- on the bottom of both of the feet of the bridge I can see an imprint of the piezo pickup, so there were two. But the preamp board is missing the outer socket. It looks like someone already soldered on the board (bridged the contacts for that socket and did something with the two resistors between the capacitors) - but the FET and pot for the second piezo have never been there. I think I will have to order two "soft" or flexible piezos to put them into the body like shown here, but I´m only able to find ones that are ~80mm or longer - what is the length of the original ones? And how are both connected to the board having only one socket?
For the electronics you should scan again through the megathread. You will find a link to the schematic.

The piezos are about one to two inches of piezo cable bent in a loop (that‘s the imprint) soldered to a longer shielded cable going to the preamp.
Be warned that some of the preamps generate noise and there haven‘t been a good solution for this. Some only used the impedance buffer part of the preamp to solve this.

That was the german eBay offer from musik-wolff I assume. I got my Staggs from them too (Wolffstore at that time), but that was more than a decade ago.

Did you get the body supports too?
Didn’t see them in the offer.
These are bent aluminium rods coated with some rubberized black plastic, probably with a kind of screw on both ends.
The triangle one is not really needed (at least not with the sticky coating) but the long one is needed or should be replaced with something better. Otherwise the instrument is not stable enough to hold.
 
Yes, I won that auction on eBay from wolff-music, and I know wolffstore, they had good deals in the past. I´m more a collector then an active musician, and from time to time I buy parts or damaged instruments to bring them back to life. For me it´s fun :)

I had hope that the wooden parts are in good condition, as those are the important parts - everything else should be replaceable or rebuildable. I think I had luck, as there are only minor scratches and some chipped-off lacquer, but no cracks :)

I don´t have the body support parts, but it should be no big deal to bend them from aluminium or steel rods. I just don´t know yet where to get the end caps for the rods, as there are already threaded inserts in the body. Seems to be M10 thread, so if I cannot find some fitting parts, I might build them from aluminium or give 3D printing a try.

The nut looks as if it has some wooden structure on its sides, but if it is just plastic and breaks, I have some bits of hard wood somewhere, I could file a new one.

Electronics: I already found the schematics, but I cannot find anything about a version of the preamp missing the second input. I will first check if the preamp still works (solder some cheap piezo to it, as the socket is broken). If it does, maybe I´ll add the missing FET & pot - then it will be clear how to to connect both pickups :-D

I could not find soft piezo wire pickups shorter then 80mm, I will order some of those long ones and try to shorten them (I read somewhere, the can be cut to length if necessary). If that does not work, I´ll give 15mm diameter piezo plates a try.

Oh, before I screw it together again and put on strings: Am I missing some part to strengthen the tail piece? Are the strings just fed through the holes in the wood, or should there be some washers/metal plate with holes in there?

P9171861.JPG
 
Yes, I won that auction on eBay from wolff-music, and I know wolffstore, they had good deals in the past. I´m more a collector then an active musician, and from time to time I buy parts or damaged instruments to bring them back to life. For me it´s fun :)

I had hope that the wooden parts are in good condition, as those are the important parts - everything else should be replaceable or rebuildable. I think I had luck, as there are only minor scratches and some chipped-off lacquer, but no cracks :)

I don´t have the body support parts, but it should be no big deal to bend them from aluminium or steel rods. I just don´t know yet where to get the end caps for the rods, as there are already threaded inserts in the body. Seems to be M10 thread, so if I cannot find some fitting parts, I might build them from aluminium or give 3D printing a try.
The old weaker headstock instruments just had the bare rod at the ends and a rubber tube glued into the body where the rod went in.
I liked that design better than the screws which can be harder to screw in than sticking the rod into the rubber tube.
But a wooden bout like the Yamaha EUBs have would be a better solution than a bendable rod.
Electronics: I already found the schematics, but I cannot find anything about a version of the preamp missing the second input. I will first check if the preamp still works (solder some cheap piezo to it, as the socket is broken). If it does, maybe I´ll add the missing FET & pot - then it will be clear how to to connect both pickups :-D
Good idea to check first.
I could not find soft piezo wire pickups shorter then 80mm, I will order some of those long ones and try to shorten them (I read somewhere, the can be cut to length if necessary). If that does not work, I´ll give 15mm diameter piezo plates a try.
Just use a very sharp knife and use almost no pressure and move the knive a lot back and forth to cut.
Piezo disk are mostly bending sensitive and give a much lower output for pressure variation. But I even cut them to size with a scissor. One side gets damaged, but the other will be OK. I sandwiched them between wood so I can cut out the part with the cable and soldering points.
Oh, before I screw it together again and put on strings: Am I missing some part to strengthen the tail piece? Are the strings just fed through the holes in the wood, or should there be some washers/metal plate with holes in there?

View attachment 7323666
You don’t need any washers as the wood is thick. There might have been washers on the strings, but I’m pretty sure I have installed strings without them.
BTW, I still have a few sets of the originals strings that I do not use as they color my fingers black.