
Enjoy the benefits of a premium membership!
Upgrade Account
-
TalkBass has been independent since 1998. Add your voice.
Create a free account to reply to discussions, view embedded media, and browse with fewer display ads.
Join free Log in
Want zero display ads or expanded classifieds tools? Compare plans.
You are using an out of date browser. It may not display this or other websites correctly.
You should upgrade or use an alternative browser.
You should upgrade or use an alternative browser.
SX SPJ-62 Fretless conversion and neck refinish
- Thread starter OldBluesGuy
- Start date
More options
Who Replied?

I just love mirror finishes!
Absolutely beautiful amazing job, and a wonderful thread which I must thank you for, OBG.
Thank you!
- Ty
Absolutely beautiful amazing job, and a wonderful thread which I must thank you for, OBG.
Thank you!
- Ty
I'm dying to see the fingerboard after sanding. I'm thinking of doing the same to my BB300. That and a Darkstar pickup.
Are there dots top and bottom on the SX neck?
KO
Thanks! I'm looking forward to seeing it after sanding too!

There are just dots on the top (to me) of the neck.
Very Pretty!
Thanks!
that...is..epic...
LOL! Thanks for the kind words. It's been a lot of fun so far. The sanding is a bit tedious, but I keep thinking about how it's going to look when it's done.
obg
amazing process so far.. i wish i had the skill and money for that... im not very good with craftsmenship
I don't have a lot of developed woodworking skills or prior experience with this kind of stuff. The key here is having an instrument that you can take a risk with. This is a $109 SX, so it was a good axe to experiment with. This stuff isn't that hard really. Read as many threads as you can find, figure out what you to do and go for it! There's lots of help to be gotten from all the other DIY'ers on this forum.
I just love mirror finishes!
Absolutely beautiful amazing job, and a wonderful thread which I must thank you for, OBG.
Thank you!
- Ty
Thank you for the very kind words. You're very welcome!
obg
I'm back with a brief update. Work has just been killer the last couple of weeks and I've been working on my playing in the little bit of free time that I have had, so not as much progress made on the epoxy job as I would have liked.
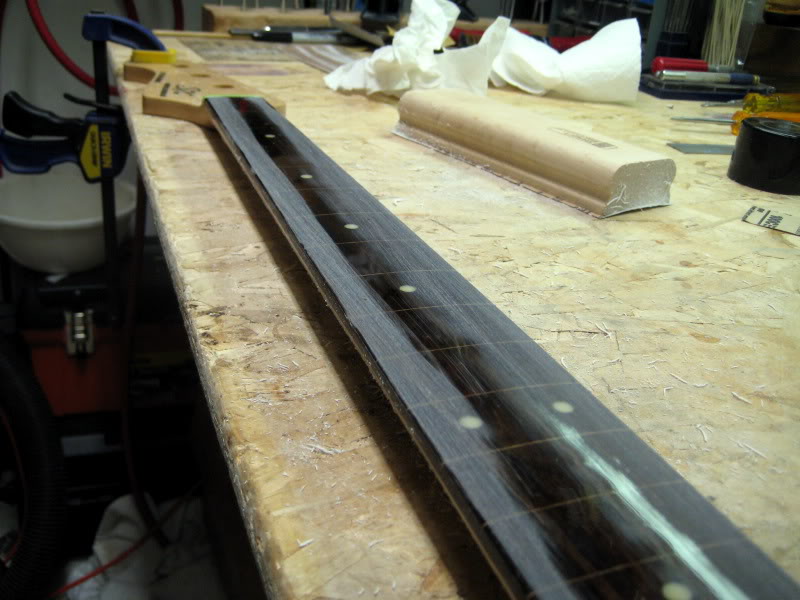
I did get to put in a couple hours the other night and I'm making fair progress. This stuff is tough to sand and the going is slow. I'm still on 100 grit and here's how she looks after an hour and a half and three strips of 100 grit:
obg
I did get to put in a couple hours the other night and I'm making fair progress. This stuff is tough to sand and the going is slow. I'm still on 100 grit and here's how she looks after an hour and a half and three strips of 100 grit:
obg
Very interesting thread, thanks to the author! 
I've just pulled of frets from my cheap Yamaha Rbx-375. And going to do the same thing with fretboard (epoxying).
But it's almost impossible for me to buy the radius sanding block (20").
So, I've decided to build a radius block by myself, using this scheme:
http://buildyourguitar.com/resources/tips/radblock.htm
It's obviously not precious, but I suggest, the resulting surface will be round enough cause of sheet of sanding paper between neck and block.
How do You think, will it be possible to sand epoxy with this thing? As I've heard, sanding epoxy is quite hard
I've just pulled of frets from my cheap Yamaha Rbx-375. And going to do the same thing with fretboard (epoxying).
But it's almost impossible for me to buy the radius sanding block (20").
So, I've decided to build a radius block by myself, using this scheme:
http://buildyourguitar.com/resources/tips/radblock.htm
It's obviously not precious, but I suggest, the resulting surface will be round enough cause of sheet of sanding paper between neck and block.
How do You think, will it be possible to sand epoxy with this thing? As I've heard, sanding epoxy is quite hard
Very interesting thread, thanks to the author!
I've just pulled of frets from my cheap Yamaha Rbx-375. And going to do the same thing with fretboard (epoxying).
But it's almost impossible for me to buy the radius sanding block (20").
So, I've decided to build a radius block by myself, using this scheme:
http://buildyourguitar.com/resources/tips/radblock.htm
It's obviously not precious, but I suggest, the resulting surface will be round enough cause of sheet of sanding paper between neck and block.
How do You think, will it be possible to sand epoxy with this thing? As I've heard, sanding epoxy is quite hard
Stew-Mac has 20" radius blocks just so you know ([Invalid or Expired Link Removed]).
The epoxy is very hard stuff. It's not terribly hard to sand, but it's going to take some time and some serious arm and shoulder work. I just got back in town and am hoping to get some serious sanding done on my neck this weekend. Please let us know how your fretless mod is progressing.
obg
The epoxy flowed on beautifully and I was able to remove most of the bubbles with a propane torch.
obg
Explain this please ^!! with a torch??!?!?!?!?!
yeah, the heat causes any bubbles to float to the surface and pop on top, you dont actually touch the fame to the finish, just the heat.

Great, now you've got me considering Citistriping my SX fretless P-Bass neck. The orangeness doesn't bother me too much; it's the satin finish that bothers me.
Awesome work so far!
Awesome work so far!
man this is an awesome thread. is there any pics of the finished product?
I was gonna put some mirror coat on my SX! looks pretty straight forward....
Not yet as I haven't finished it. Real life and other projects have kept me out of my workshop for quite a while. Seeing these posts again has invigorated me and I'm thinking about going back to work on it. I miss that bass. The neck is sanded down and ready for another coat of epoxy. I'm considering applying a very thin coat or series of coats versus putting it on thick and letting it flow. I'll post some pics later this weekend if the new strategy is successful.
obg

oh man, i seriously want to do this. When i get around to it i'll pm you asking for details on how you did it (just the neck stripping part). If that's quit alright
T-Chip - all of the stripping details are at the beginning of the thread. Let me know if there's any additional info you need.oh man, i seriously want to do this. When i get around to it i'll pm you asking for details on how you did it (just the neck stripping part). If that's quit alright
obg
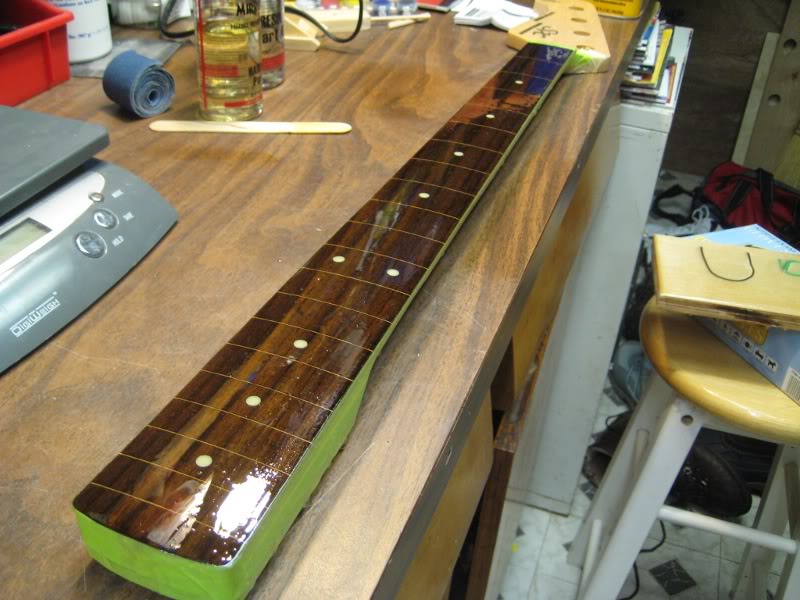
I got serious a few weeks back about finishing this project and I pushed myself out of my rut and got it done. My main problem with the epoxy was with my application. I was applying the epoxy too heavily. I decided to try a couple of light coats instead. The initial problem with light coats for me was getting rid of the bubbles. Removing the bubbles on a thin application of epoxy with heat or a pin just resulted in craters, so I decided to deal with the bubbles in the finishing stages instead.
Final coat - lots of little bubbles:
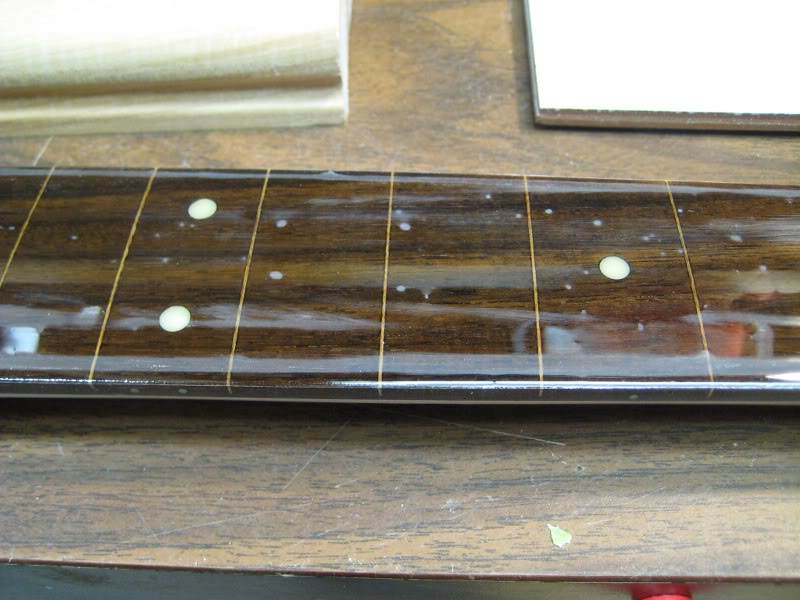
My plan was to lightly sand the epoxy with 800 grit wet/dry on a radius block until I could no longer feel the little bumps. Function over form right? I let the final coat cure for almost 4 weeks and got back to work.
1st pass - 800 grit on radius block:
I switched to flat piece of 800 grit and lightly sanded out the rest of the fretboard:

I moved up to 1000 grit:

I continued the sanding process with progressively finer grits: 1500/4000/6000/8000. I then applied white rubbing compound and finished off with some liquid carnuba.
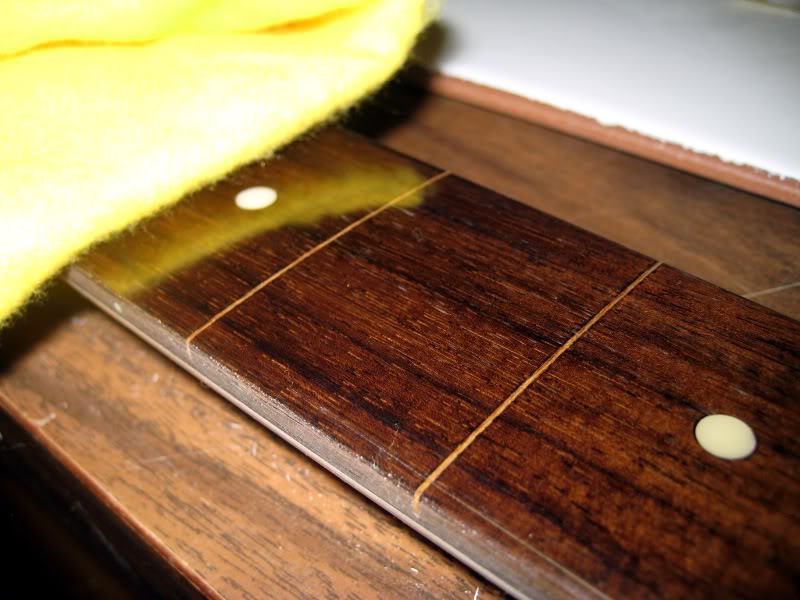
When I removed the tape, there were some rough spots on the sides of the fretboard where a little bit of the epoxy got through somehow. I sanded down the rough spots with 220 grit and then went over the entire back of the neck with 400 grit dry. I applied 2 more coats of the rub-on Watco poly and rubbed it out after drying with medium and then fine scotchbrite pads. I re-assembled the bass, put a fresh set of Dunlop nickel coated steel strings on it and gave it a quick setup. The bridge saddles had to be brought up a good bit, but the original nut worked fine. It needs a complete setup, but I want to play it a bit first now that it's finally done!
The finish isn't completely mirror-like, but it's close enough for me.
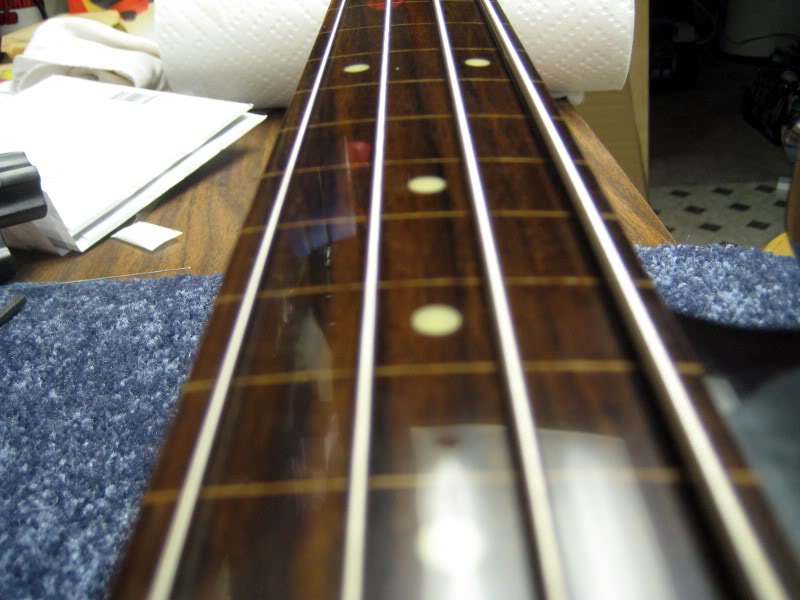
And finally back in the stand:
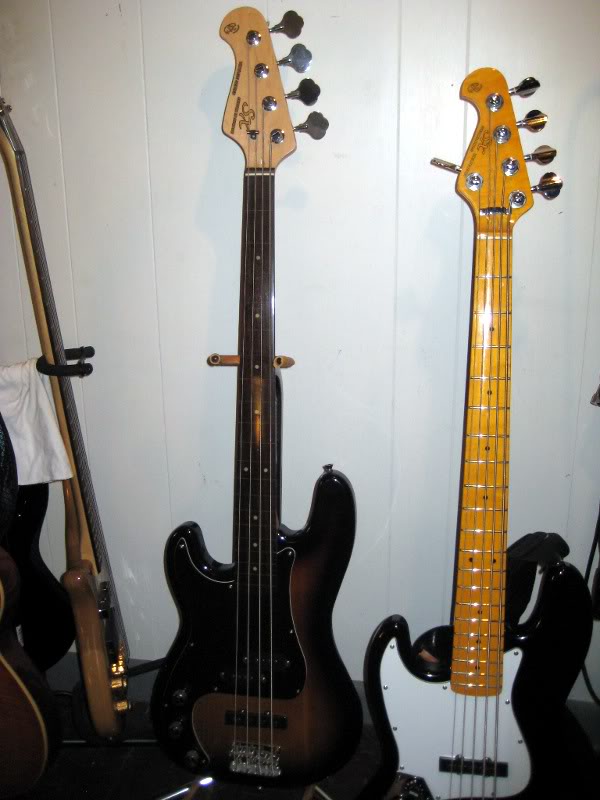
There are some plastic polishes I may yet try that are alleged to harness the power to bring the epoxy finish back to the original mirror-like quality. If I do, I'll post the results here for your consideration, but for now I'm just going to play it.
obg
Final coat - lots of little bubbles:
My plan was to lightly sand the epoxy with 800 grit wet/dry on a radius block until I could no longer feel the little bumps. Function over form right? I let the final coat cure for almost 4 weeks and got back to work.
1st pass - 800 grit on radius block:
I switched to flat piece of 800 grit and lightly sanded out the rest of the fretboard:
I moved up to 1000 grit:
I continued the sanding process with progressively finer grits: 1500/4000/6000/8000. I then applied white rubbing compound and finished off with some liquid carnuba.
When I removed the tape, there were some rough spots on the sides of the fretboard where a little bit of the epoxy got through somehow. I sanded down the rough spots with 220 grit and then went over the entire back of the neck with 400 grit dry. I applied 2 more coats of the rub-on Watco poly and rubbed it out after drying with medium and then fine scotchbrite pads. I re-assembled the bass, put a fresh set of Dunlop nickel coated steel strings on it and gave it a quick setup. The bridge saddles had to be brought up a good bit, but the original nut worked fine. It needs a complete setup, but I want to play it a bit first now that it's finally done!
The finish isn't completely mirror-like, but it's close enough for me.
And finally back in the stand:
There are some plastic polishes I may yet try that are alleged to harness the power to bring the epoxy finish back to the original mirror-like quality. If I do, I'll post the results here for your consideration, but for now I'm just going to play it.
obg

This thread has given me the courage to attempt a fretless conversion. The bass I really want (Schecter C5 in aged white) is not available in Fretless, so I am going to buy one and defret it.
This is the one I want:

I am going to take the frets out and fill the slots with Ebony veneer for a more subtle lined appearance. I think I'll use DR Black Beauties to match the hardware and finish out the black on white look (plus, I like the way those strings sound and feel).
Anyway, thanks for such good documentation OBG.
This is the one I want:
I am going to take the frets out and fill the slots with Ebony veneer for a more subtle lined appearance. I think I'll use DR Black Beauties to match the hardware and finish out the black on white look (plus, I like the way those strings sound and feel).
Anyway, thanks for such good documentation OBG.
This thread has given me the courage to attempt a fretless conversion. The bass I really want (Schecter C5 in aged white) is not available in Fretless, so I am going to buy one and defret it.
This is the one I want:

I am going to take the frets out and fill the slots with Ebony veneer for a more subtle lined appearance. I think I'll use DR Black Beauties to match the hardware and finish out the black on white look (plus, I like the way those strings sound and feel).
Anyway, thanks for such good documentation OBG.
That's awesome Hammerhed - I'm very pleased that you found my adventures with this neck conversion/refinish informative and inspiring. Please consider posting the results of your conversion. I'd be very interested to see how it turns out.
obg

Great job and results! Thanks so much for taking the time to take photos and document your work. it's because of your sharing that we are able to learn and move forward on our own projects, we can really inspire and inform each other.


