
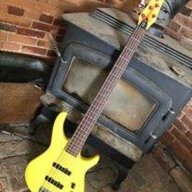
Good evening everyone, it has been too long, but I have enjoyed catching up on all the great build posts. My three kids are all more active than ever, so my build time has been even more limited this year. Same with my teaching job, we had a huge schedule change this year that really took a lot of on the fly adjustment. But things are calming as the school year winds down, and I am looking forward to early June when I can really dive in again.
I am doing some builds with students again this year, but one (a 7 string guitar) will go into next year, so I am not in a hurry. The other is a custom bass with a senior. However, he doesn't have a great attention span, so we have worked in fits and starts. I honestly don't think there is a chance we can finish by the end of the year, but there is a small chance we can get it done 'in the white' with no finish, and he can finish it up from there on his own.
Normally I would have stopped the project at this point, but he came up with a neat concept and we put some real work in designing components, so I think we will try our best to see what we can do.
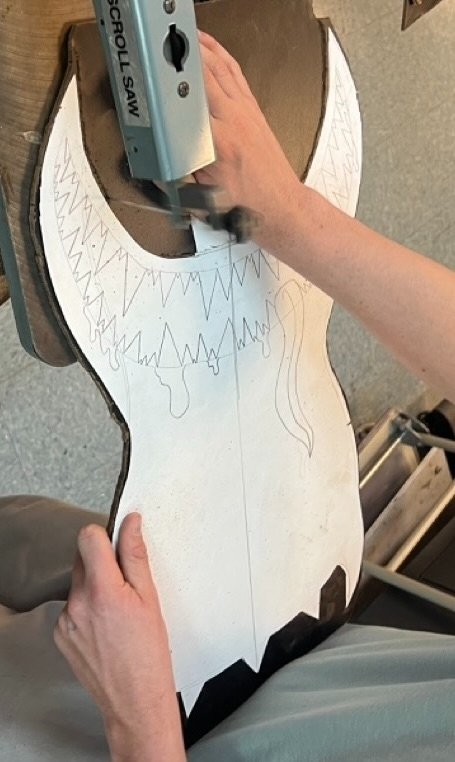
Originally, we were just going to make a copy of our school bass guitar, a 1981 Fender American P-Bass. It is a great bass, we are lucky to have it. However, he came in shortly after we started tracing plans, and had a concept he wanted to try. I don't have a great pic, but he started with a tracing of the P-Bass body. Then he rounded the horns and added a spiky bottom. Then he drew an evel smile with a tongue and drips of blood or saliva (he hasn't decided yet, all depends on paint color). Here is a pic of his concept being made into a template:
I thought is was a neat concept I would have liked as a teen as well! So we had a few challenges to overcome, which is my favorite:
-How to make the smile
-How to attach the neck
The smile is the big feature. We were thinking of a few solutions, such as having another student paint it on, or maybe cutting out pickguard material and gluing it up into the smile. We also though of making a vinyl print and giving it the paisley telecaster treatment, burying it like a decal under the finish.
However, after last summer's (unfinished) oddball project, I started really teaching myself the cad software Fusion. This year my only project so far has been building a copy of a 50's Gibson lap steel. That has plastic covers, so I learned enough to make decent 3d printed copies of the plastic covers. I am having a really great time with this new skill, and I thought that may work for this project.
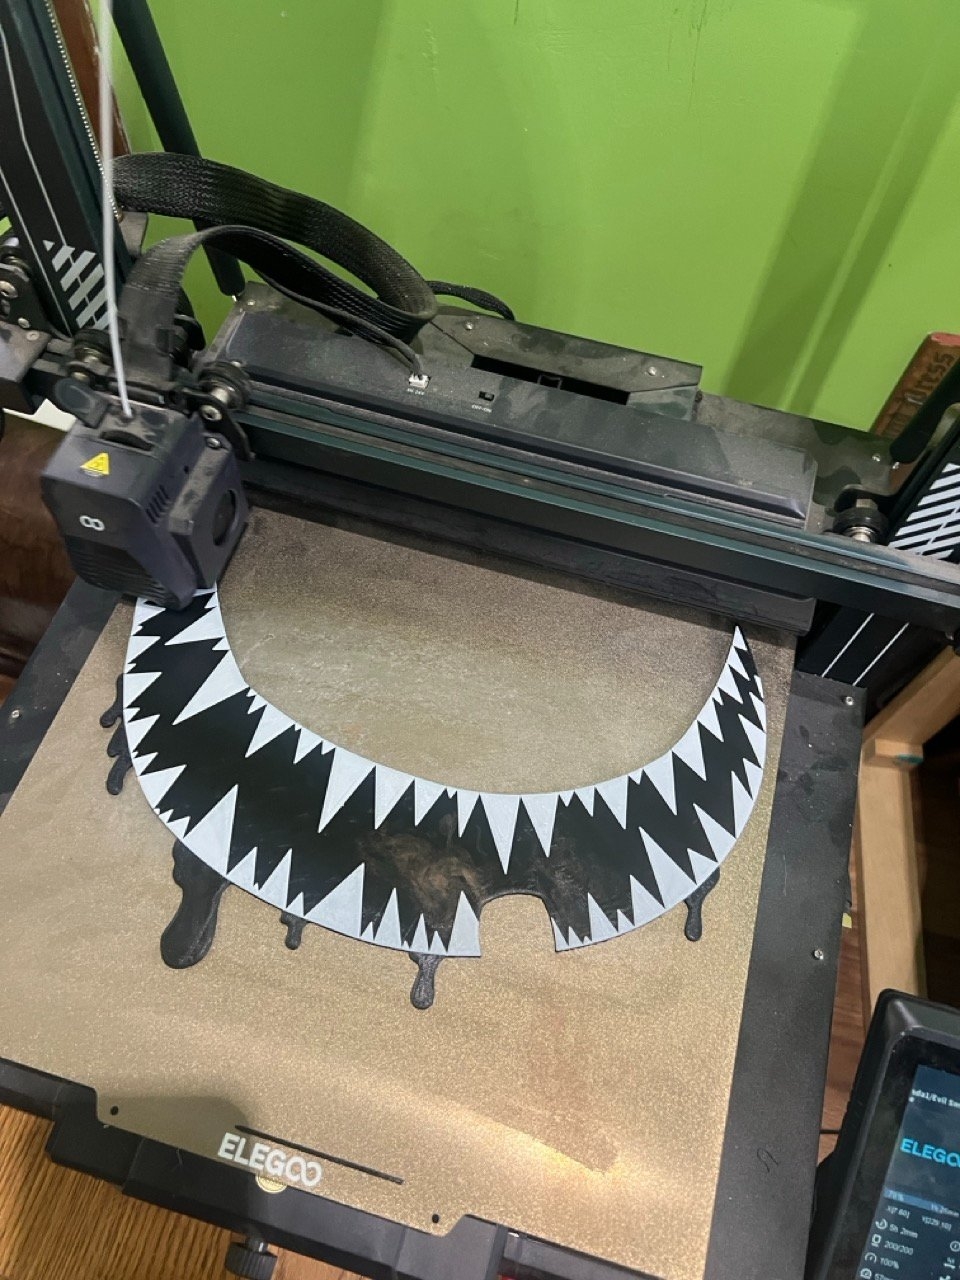
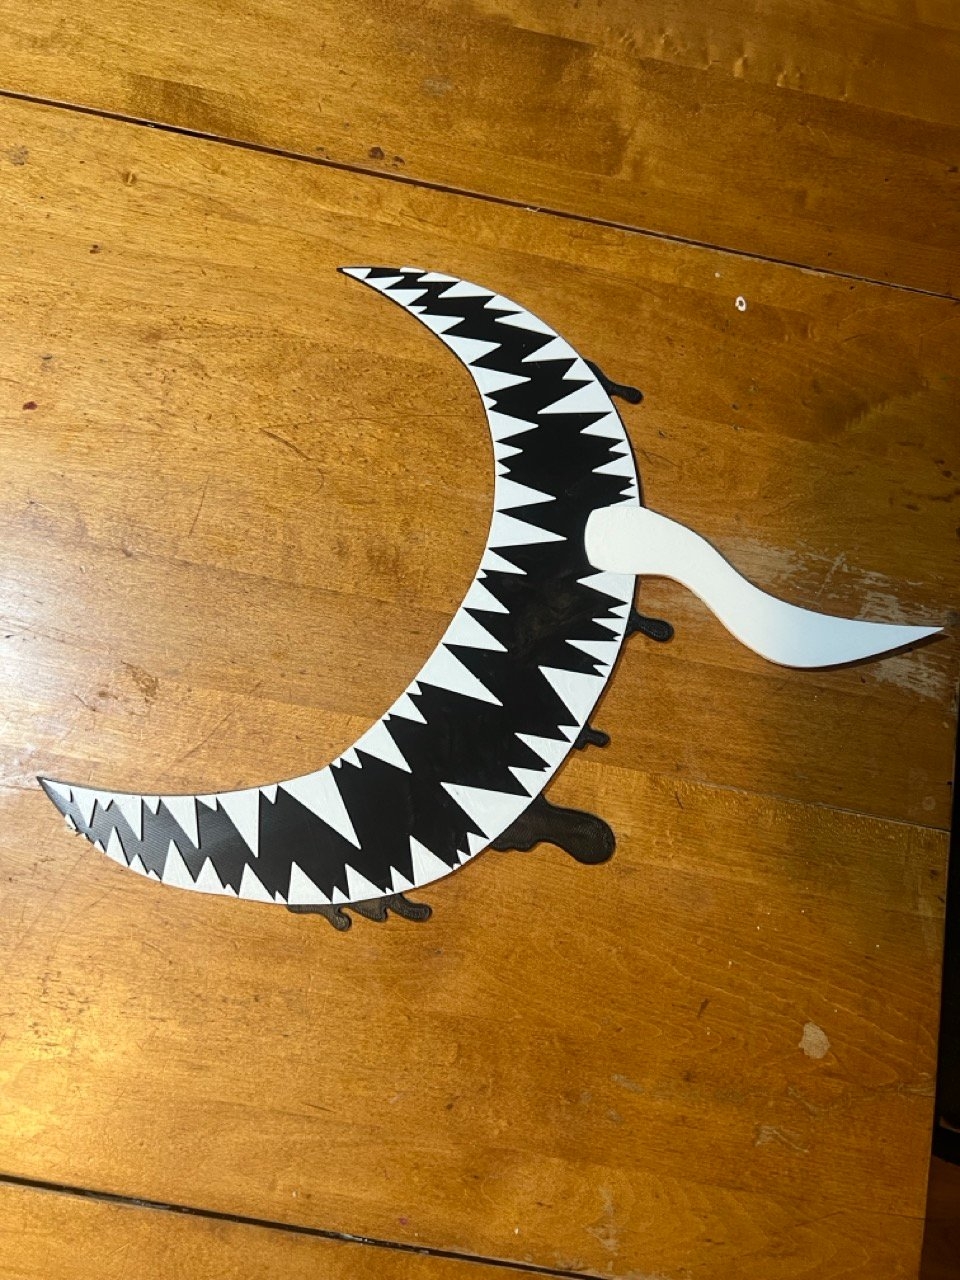
So I taped the smile from the template together, luckily it just barely fit the scanner bed on my printer, and used it to make a 3d model on fusion. I was just able to make it work on my 3d printer bed, and I staggered the print so I could use black and white for the mouth and teeth. I printed the tongue separately.
We will have to paint the drips.
So that worked out great! Took a few print starts to get that moving, but I have learned that 3d printing is a bit of an art. You have to experiment with different printing positions and parameters for every print.
The neck joint was a sticking point because of the pickguard. It won't have all the high frets, but he plays basic rock stuff and doesn't travel up that far for what he does. So after some thought, we decided on a set neck under the pickguard, like a les paul jr doublecut. Very simple neck joint (just a fender neck joint glued in really), and the fretboard will terminate at the pickguard.
So now we needed to decide on electronics. I have all the pickup winding materials and winder from last summer's project, and a monster bass should have a monster pickup. So I was thinking maybe two p90 bass pickups set right next to each other to look like a monster humbucker. We could reverse wind/reverse polarity them, so they would be hum canceling together, and p90s are pretty ballsy singles alone.
So I went into fusion again and made some models for a p90 bobbin, cover, as well as templates and covers for an electronics cavity. I already had all the p90 specs from the lap steel build I have been working on (I made the pickup for that as well, it is a p90 but with elongated pole spacing that doesn't exist anymore).

Then I printed them up. The prints came out really well, although they will need some filling and sanding if I want a smooth glossy finish.
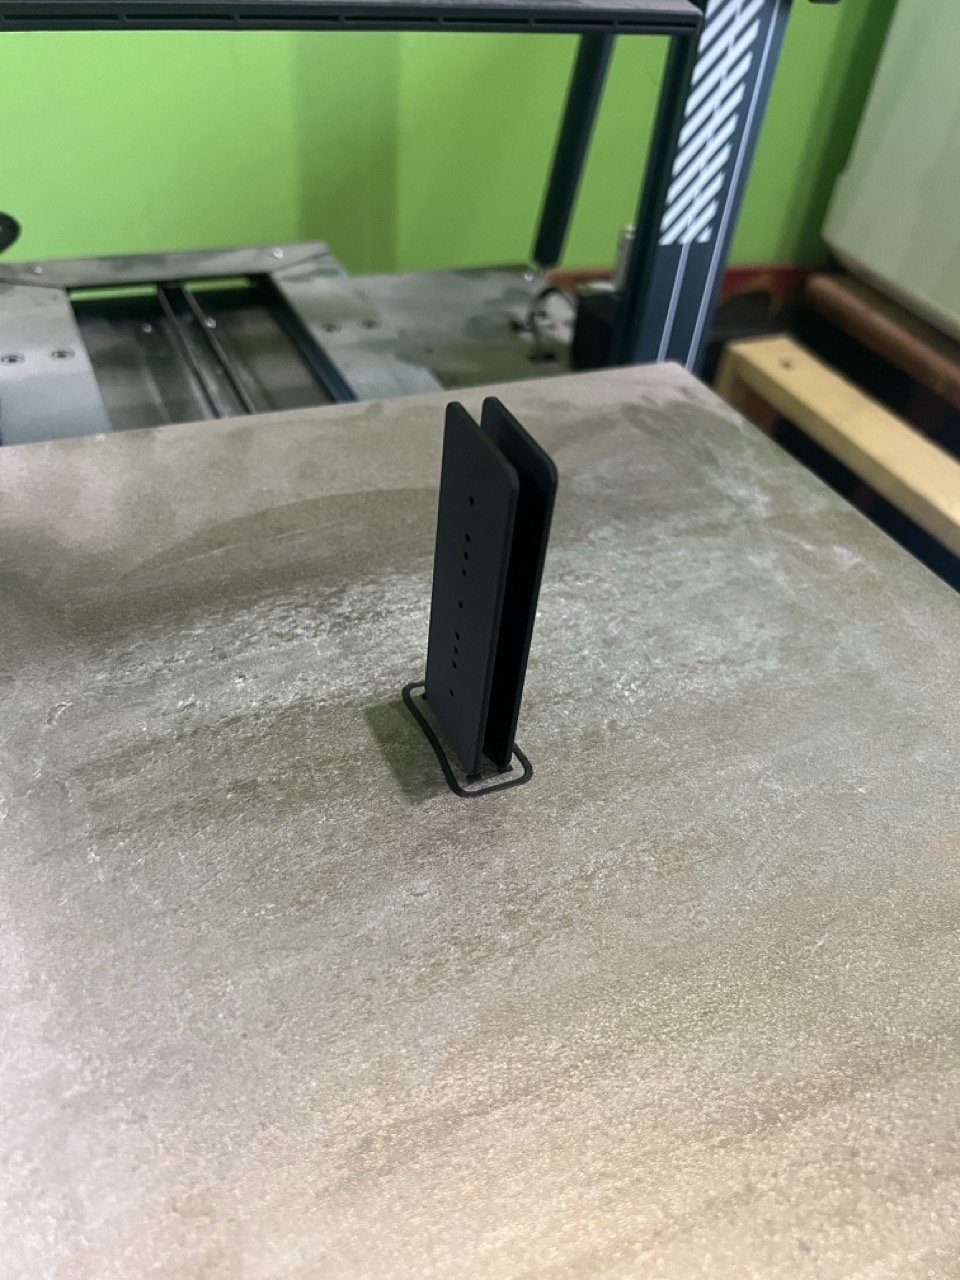
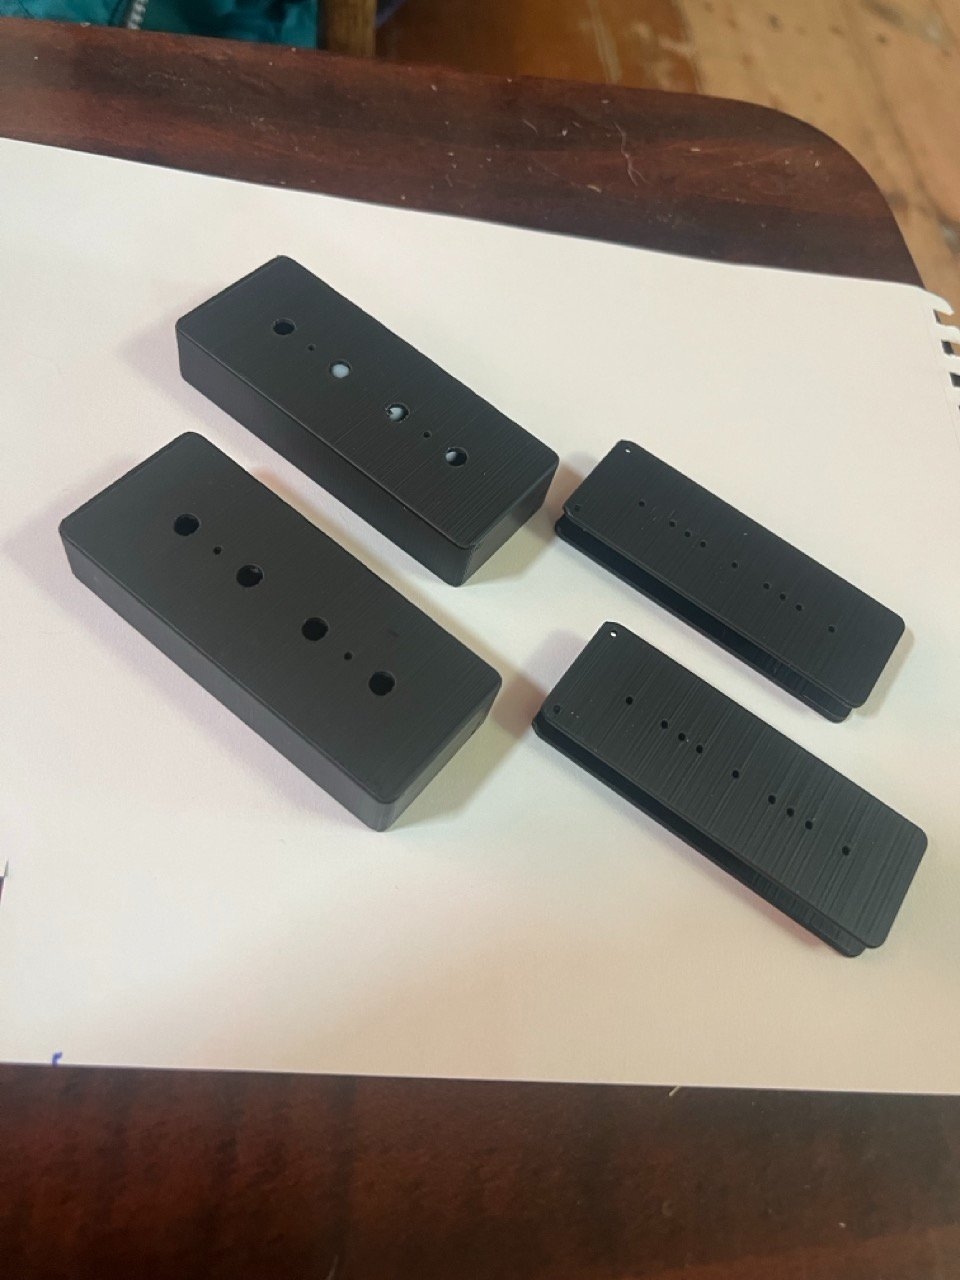
The 3d printed bobbins have only one weakness compared to the fibre bobbins, in that they cannot take the heat of a soldering iron. The plastic is made to melt, so I can't use the small metal eyelets to solder the wires to the flatwork. I'll have to run the wires out through the two openings after taping things up. Not a big deal, lots of pickups do that already.
So that is where we are at. I really don't think there is enough time left, but the concept seemed neat enough to share either way. Plus it opens up future possibilities now, like making my own printed covers, knobs, and pickup components right here at home. I'll update with what we get done, we will see! We have a body blank cut from some local basswood ready to go, that should get cut this week. I also have some cherry and maple I have been saving from some scrapped bed parts for necks, so the inputs will be pretty reasonable outside of the time invested.
Let me know what you think, or if you see anything I missed in my p90 bass pickup parts. If anyone wants the files I would be happy to share them, I don't know if we have a spot to park 3d printer files for such things. Glad to "see" everyone again! I love spring and summer, that's shop season!
I am doing some builds with students again this year, but one (a 7 string guitar) will go into next year, so I am not in a hurry. The other is a custom bass with a senior. However, he doesn't have a great attention span, so we have worked in fits and starts. I honestly don't think there is a chance we can finish by the end of the year, but there is a small chance we can get it done 'in the white' with no finish, and he can finish it up from there on his own.
Normally I would have stopped the project at this point, but he came up with a neat concept and we put some real work in designing components, so I think we will try our best to see what we can do.
Originally, we were just going to make a copy of our school bass guitar, a 1981 Fender American P-Bass. It is a great bass, we are lucky to have it. However, he came in shortly after we started tracing plans, and had a concept he wanted to try. I don't have a great pic, but he started with a tracing of the P-Bass body. Then he rounded the horns and added a spiky bottom. Then he drew an evel smile with a tongue and drips of blood or saliva (he hasn't decided yet, all depends on paint color). Here is a pic of his concept being made into a template:
I thought is was a neat concept I would have liked as a teen as well! So we had a few challenges to overcome, which is my favorite:
-How to make the smile
-How to attach the neck
The smile is the big feature. We were thinking of a few solutions, such as having another student paint it on, or maybe cutting out pickguard material and gluing it up into the smile. We also though of making a vinyl print and giving it the paisley telecaster treatment, burying it like a decal under the finish.
However, after last summer's (unfinished) oddball project, I started really teaching myself the cad software Fusion. This year my only project so far has been building a copy of a 50's Gibson lap steel. That has plastic covers, so I learned enough to make decent 3d printed copies of the plastic covers. I am having a really great time with this new skill, and I thought that may work for this project.
So I taped the smile from the template together, luckily it just barely fit the scanner bed on my printer, and used it to make a 3d model on fusion. I was just able to make it work on my 3d printer bed, and I staggered the print so I could use black and white for the mouth and teeth. I printed the tongue separately.
We will have to paint the drips.
So that worked out great! Took a few print starts to get that moving, but I have learned that 3d printing is a bit of an art. You have to experiment with different printing positions and parameters for every print.
The neck joint was a sticking point because of the pickguard. It won't have all the high frets, but he plays basic rock stuff and doesn't travel up that far for what he does. So after some thought, we decided on a set neck under the pickguard, like a les paul jr doublecut. Very simple neck joint (just a fender neck joint glued in really), and the fretboard will terminate at the pickguard.
So now we needed to decide on electronics. I have all the pickup winding materials and winder from last summer's project, and a monster bass should have a monster pickup. So I was thinking maybe two p90 bass pickups set right next to each other to look like a monster humbucker. We could reverse wind/reverse polarity them, so they would be hum canceling together, and p90s are pretty ballsy singles alone.
So I went into fusion again and made some models for a p90 bobbin, cover, as well as templates and covers for an electronics cavity. I already had all the p90 specs from the lap steel build I have been working on (I made the pickup for that as well, it is a p90 but with elongated pole spacing that doesn't exist anymore).
Then I printed them up. The prints came out really well, although they will need some filling and sanding if I want a smooth glossy finish.
The 3d printed bobbins have only one weakness compared to the fibre bobbins, in that they cannot take the heat of a soldering iron. The plastic is made to melt, so I can't use the small metal eyelets to solder the wires to the flatwork. I'll have to run the wires out through the two openings after taping things up. Not a big deal, lots of pickups do that already.
So that is where we are at. I really don't think there is enough time left, but the concept seemed neat enough to share either way. Plus it opens up future possibilities now, like making my own printed covers, knobs, and pickup components right here at home. I'll update with what we get done, we will see! We have a body blank cut from some local basswood ready to go, that should get cut this week. I also have some cherry and maple I have been saving from some scrapped bed parts for necks, so the inputs will be pretty reasonable outside of the time invested.
Let me know what you think, or if you see anything I missed in my p90 bass pickup parts. If anyone wants the files I would be happy to share them, I don't know if we have a spot to park 3d printer files for such things. Glad to "see" everyone again! I love spring and summer, that's shop season!
Last edited:


