• TalkBass has been independent since 1998. Add your voice.
    Create a free account to reply to discussions, view embedded media, and browse with fewer display ads.
    Join freeLog in
    Want zero display ads or expanded classifieds tools? Compare plans.

The Passinwind Open Source Preamp

@Passinwind , I don't see any changes in the repository, am I looking in the wrong place?

Also, if using the larger mid-switch board, what is CH?

Thanks!

The change is transparent, I just revised the gain pot board so the resistor reference number (R3) actually matches the schematic now.

On the larger board when doing a V4 build, you can just omit CH for the standard tuning. It's useful if you need an "in between" cap value for custom tunings though. It can also come in handy if building a V1 board, since the mid cap lives on the pot otherwise.
 
So I'm thinking 1590BBS for the enclosure, does this seem logical for a build with a footswitch? The bit of extra height over the 1590BB seems like a good idea.

Yep, I recommend that everyone starts with a 1590BBS build for either always-on/toggle bypass or footswitchable bypass V4 builds. And since you seem to be the first DIY builder for the footswitchable version, you can have some input into the graphics and layout if you want to use Amplifyfun for UV printing and/or drilling. This is where I'm currently at:

PW3B-LPF_V4F.png


If you want index marks around the knobs we'll probably need to change the logo and model designator locations and/or size a little bit. Control label color is easy to change globally, but yellow or off white will generally be the easiest to read on a dark stage. Indicator LED to the left of the switch, probably, but your choice of bezel may have some relevance to that. I've been having AF drill the power inlet on the back, but doing the input and output jacks myself, which makes doing the Tetris thing a bit easier IME.
 
  • Like
Reactions: Sanj and DJ Bebop
Do they supply the enclosures, or do they print user-supplied? I was originally thinking of doing an overlay like I did on the HPF build.

They only stock a few generic Tayda boxes, but they can handle procurement form elsewhere if you request that. They do pretty nice UV printed or laser etched faceplates in a variety of materials as well. It does get a bit expensive if you pay for shipping from Stompbox Parts to Amplfyfun, then again from AF to you. So I generally try to buy at least 2-3 enclosures at a time when going that route.
 
  • Like
Reactions: Jim C
"If you want index marks around the knobs we'll probably need to change the logo and model designator locations and/or size a little bit."

I don't have a horse in this race but here's a little user feedback on the index marks after a few months using the v4 switch version. They proved less useful than I anticipated.

There are too many marks: 4 marks in the noon to 3 o'clock position, so each mark is 45 minutes, not at the hour of a clock face. That makes it hard to read and remember the position, eg 3 marks is 2:15. If marks are used, consider putting them at the hours.

After the first month I started to learn my way around the box face, and came to think so many marks were visual clutter. I found it useful to have the 0dB on the bass and treble Bax. The gain, Hpf and resonance are set as needed, but the one place I do find having many hash marks useful is on the LPF frequency control because it has such range.
 
"If you want index marks around the knobs we'll probably need to change the logo and model designator locations and/or size a little bit."

I don't have a horse in this race but here's a little user feedback on the index marks after a few months using the v4 switch version. They proved less useful than I anticipated.

There are too many marks: 4 marks in the noon to 3 o'clock position, so each mark is 45 minutes, not at the hour of a clock face. That makes it hard to read and remember the position, eg 3 marks is 2:15. If marks are used, consider putting them at the hours.

After the first month I started to learn my way around the box face, and came to think so many marks were visual clutter. I found it useful to have the 0dB on the bass and treble Bax. The gain, Hpf and resonance are set as needed, but the one place I do find having many hash marks useful is on the LPF frequency control because it has such range.

Cool, thanks for the feedback. I went with a 0-12 scale, with 22.5 degree ticks. No problem doing one clockface style, which might look something like so, with 18mm knobs shown :

PW3B-LPF_V4_FS1.png


I kind of prefer the cleaner look of no ticks, but vive la difference.
 
Last edited:
  • Like
Reactions: AudioTaper and Sanj
upload_2024-1-31_7-46-39.jpeg


I'm still slogging away on saving V2 as well, just did a new board for the brown one yesterday. These two builds work pretty well and so far only one out of five builds has had stability issues, which could easily come down to a wonky pot or a build error. The one on the left needs mocha aluminum knobs, methinks. ;)
 
Update: here's the final (for now!) graphics package for the footswitchable V4 pedal:

WTHPF v4  Footswitchable.png


Similar to the last one I posted, but I spent a while tweaking the logo lettering and a few other tiny details.

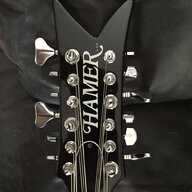
Meanwhile, I'll be working on the acoustic guitar version in the next few weeks, but I have a tube amp to finally get up and running first. Just bought my first ever acoustic guitar on Saturday, and my two filter fretted fiver has gone to an owner who will actually gig with it and can hopefully give me some good user feedback. It sounded amazing even through a humble Rumble 100 when we did a quick control run-though at the music store I was picking up my guitar at. And the obligatory new gear shot:

IMG_9372.JPG


Myrtlewood top, back and sides, and tort binding, for real. The way the Fishman preamp is mounted in there makes a DIY replacement very tempting, although the stock one plays very nicely with my V4 guitar pedal.
 
The art looks nice, did you widen the width of the script on the logo and model?

" but I have a tube amp to finally get up and running first."

Anything interesting about that amp? Is it to work with your guitar oriented circuit?
 
The art looks nice, did you widen the width of the script on the logo and model?

" but I have a tube amp to finally get up and running first."

Anything interesting about that amp? Is it to work with your guitar oriented circuit?

Good eye Dan. Yeah, I widened and straightened up the kerning a bit.

The tube amp has a transformer driven phase inverter/splitter section, and a really low noise floor in the power amp section. There's going to be a tube driven Aux in, and the tone stack is partially active, so it's kind of like a hybrid Fender/Ampeg mashup. I'm revisiting the guitar implications, I had been planning to do an AC30-ish build for my electric and may just try to kill both birds with this build instead now. Probably the most notable feature is the laser etched fascia panel though:

PW100_blond.jpg
 

There are several different versions already made, that one may just be a placeholder. My wife is tired of looking at rack gear and flat black Krylon finishes, and this approach allows quick cosmetic changes with relatively little pain, plus lasers are just plain cool!
 
"The tube amp has a transformer driven phase inverter/splitter section,"

What do you use to drive the xfmr?

"and a really low noise floor in the power amp section."

Big caps? Regulated B+ or screen? Elevated AC or regulated DC heaters?

" I had been planning to do an AC30-ish build for my electric "

A quartet of EL 84's? Seems like they wouldn't really need a xfmr drive, unless wanted a sheen ala Fender Musicmaster amp.
 
There are several different versions already made, that one may just be a placeholder. My wife is tired of looking at rack gear and flat black Krylon finishes, and this approach allows quick cosmetic changes with relatively little pain, plus lasers are just plain cool!
You don't see a lot of coffee table finish hippy amps these days :thumbsup:
 
"The tube amp has a transformer driven phase inverter/splitter section,"

What do you use to drive the xfmr?

"and a really low noise floor in the power amp section."

Big caps? Regulated B+ or screen? Elevated AC or regulated DC heaters?

" I had been planning to do an AC30-ish build for my electric "

A quartet of EL 84's? Seems like they wouldn't really need a xfmr drive, unless wanted a sheen ala Fender Musicmaster amp.

I'm using someone else's old commercial design for the power amp section and am not at liberty to go too deep, but:

It's 4 x EL34, the Vox thing would be a completely different project.

Simple opamp driver/buffer in front of the splitter transformer, but the transformer itself is a stepup type making about 20dB of gain. Filaments for the power tubes are just simple AC, but I believe the unusual driver/splitter format has a lot to do with the remarkably low noise floor. I've used stepup transformers in a number of my rack and desk preamps and Class D amps with similar results, FWIW. The tube preamp section will use John Broskie's Aikido format, which has a noise canceling scheme via out of phase power supply noise being summed back into the gain stage, which has also worked very well for me in the past.

I had the power amp section working standalone in the enclosure for several months and vetted it with a number of different preamps, both my own and commercial ones. This build is proof of concept, and is probably already spoken for. It could definitely be smaller, and if I decide I want one for myself the next one probably would be. There are a bunch of daughtercards done with little turret boards, but eventually I expect to do one of two PCBs incorporating whatever I decide are the coolest features.