• TalkBass has been independent since 1998. Add your voice.
    Create a free account to reply to discussions, view embedded media, and browse with fewer display ads.
    Join freeLog in
    Want zero display ads or expanded classifieds tools? Compare plans.

The Passinwind Open Source Preamp

I have never tried using flux when I solder SMD parts, maybe because I don't own any flux to start with, all my solder is leaded with flux in it so I never saw the point in using any flux.
I think I have read where people place a small dab of flux on the PCB first and then place the component on top, the flux helps hold the component in place from my understanding. I should get a small syringe of flux and try to place some on the PCB to see if it really helps hold the components in place, it might lead me to do more SMD jobs.
Someone enlighten me please
Mick
 
  • Like
Reactions: mikewalker
Hello Mr. Escher, very interested in your stomp box preamps. I saw a pic on Marco Bass Instagram and wanted to purchase your preamp pedal. If available for purchase, how would I go about it. Seems like a neat idea. Thanks so much, cheers!
Nope, I have nothing to sell. The idea is for you to build it, and I’ve by now spent nearly a full decade trying to show people how to do that. You could try PM’ing @Sanj or @AudioTaper though, both of whom are skilled technicians whose work I especially admire. While I have sold a very few of these pedals over the years, I am currently in poor health and not even up to soldering anything for more than a few minutes a day. The one you saw on Instagram was a personal gift to Marco, which may have been in his NAMM booth this year. He’s a long time personal friend who I have built some onboard preamps for in the past, and might again someday, with luck.

Thanks for reaching out and welcome to Talkbass!
 
Last edited by a moderator:
"I have never tried using flux when I solder SMD parts, maybe because I don't own any flux to start with, all my solder is leaded with flux in it so I never saw the point in using any flux.
I think I have read where people place a small dab of flux on the PCB first and then place the component on top, the flux helps hold the component in place from my understanding. I should get a small syringe of flux and try to place some on the PCB to see if it really helps hold the components in place, it might lead me to do more SMD jobs.
Someone enlighten me please."


To elaborate what works for me, I first take a paper towel and rub the board as it comes from Oshpark, just to make the solder pads bright.

I spread a bath towel out on the bench to catch resistors that jump out of my tweezers and work on a small fat book in the middle of the towel. The book gets the work up closer to my eyes. I have a small tray the size of the book, with maybe 1 cm tall sides, that I work in, with a paper towel in the bottom to damp falling/flying parts. The tray is not necessary, the paper towel is. I push out the next half dozen resistors from their packaging onto the tray, so I don't lose them.

I use a syringe dispenser of honey-consistency flux to put the smallest dab of flux on both pads of the board. I use the tweezers to place the part on the pad and and then use the closed tweezers to push it into alignment. Using the closed tweezers I push down evenly on the middle of the part so it makes contact with the pads. There's a chance the resistor will shift sideways as it gets pushed down, so I use the closed tweezers to realign if necessary. The part will then sit there from the gooey adherence of the flux, as you mention, but in practice when you go to heat it, the flux bubbles and it can shift around, so I push the closed tweezers down on the middle of the resistor to hold it in place when I solder.

With my other hand I then prep the solder tip as described in my previous post and touch the prepped tip to the board's pad to the side of the part. After the solder flows to the pad, I move the tip over to the vertical part of the resistor 'til it's wet, then remove the iron. Keep the time from when you add solder to the tip and when you apply it to the work at a minimum, or scale will form and you won't transmit enough heat to the work to wet up quickly.

To do the other end of the resistor, I click the tip of the iron on the waste solder can to remove the remaining solder and scale, momentarily dip the tip in an open container of flux on my tray and then melt a scant bit of solder on to the tip and touch the other pad. After it flows I move the tip toward the resistor 'til it wets and get off. The pad is first to keep unnecessary heat out of the resistor. The pad is not tinned and takes longer to wet up than the resistor, which is tinned.

Charlie is really good at not delivering too much solder to the joint so the surface is concave, but I get too much solder in there and it's a convex fat blob.

All this takes far less time to do than to tell. I position a half dozen resistors and then solder them.

I warm up on the resistors and then do the IC's. Same routine: pre-goo, position super well because the spacing is so fine, hold in place with closed tweezers while soldering with a fine tip. If leads bridge, use fluxed solder braid to remove solder, but be aware of over heating. I don't know if I'm courting disaster, but I've had success using the side of the solder tip to do all four leads at once, with scant solder on the tip and starting from the pads and then going in to the IC.

For the caps I put a tiny bit of flux on the pad with the syringe, insert the cap and use a finger to push it down from the component side while I hold the board with one hand and solder with the other. Pad wet first, lead wet and out. The caps are really vulnerable to overheating.

I only use 37/63 mix flux core cause it melts the earliest and is said to make a better joint. It also cools shiny, while the 60/40 cools dull. At the end of all soldering, I use rubbing alcohol and a stiff nylon 1/2" wide artist's brush to get the rosin off.
 
Last edited:
I have never tried using flux when I solder SMD parts, maybe because I don't own any flux to start with, all my solder is leaded with flux in it so I never saw the point in using any flux.
I think I have read where people place a small dab of flux on the PCB first and then place the component on top, the flux helps hold the component in place from my understanding. I should get a small syringe of flux and try to place some on the PCB to see if it really helps hold the components in place, it might lead me to do more SMD jobs.
Someone enlighten me please
Mick
Hey Mick,

I tend to use the other common method for hand soldering: pre-tin one pad for each component, which tends to leave a little flux along with the solder. Heat the tinned pad and slide the component end into the molten solder to tack it on, heat the component end briefly, then carefully align. If things look dodgy then carefully place the tweezers on top of the component, reheat the joint, and push down a little. After then tacking in the other component side, pretty up the first side as needed. I’m not shy about using solder wick if the fillet goes too blobby. On SOIC opamps I often use wick on all of a soldered pin row in a single shot, which ensures good contact right to the pad. If you use pre-fluxed wick it can help with joint wet out as well. I have a flux pen but only rarely need to use it. Oh, and pre clean all pads with 90% or better isopropyl alcohol, always.

One thing I’ve learned the hard way is to just leave minor misalignments alone. The pads on my boards are specifically meant for hand soldering and are pretty forgiving, and hand soldering these components will get prettier looking in time, but it’s always going to be a compromise. FWIW, I use different tweezers for different component types, and my SMT mentor who is a certified trainer recommended buying several types and working out what works best for yourself. In the US the Hakko website has a nice assortment and very reasonable pricing, and since I also use Hakko tips it’s easy to get to the free shipping threshold.
 
Last edited:
I think I always try to hold the components with the tweezers which makes it harder to hold it steady, and it's very hard to find the little buggers when they fly out of the tweezers cause I squeezed too hard.
I might go and get some flux I think, it makes so much more sense to press the component down in place then to try to hold the little critters with the tweezers.
Also since I've had 2 knee replacements it gets hard to crawl around on the knees looking for those little specks on the floor while I'm wondering if they actually landed on he floor.
 
In addition to the tips above, theres a couple things I would recommend to those working with SMT parts.

-Dont press the parts down with tweezers. Get fine tweezers and hold it in place gently by the sides. You can also nudge them in place with a small pointed wooden dowel/cotton swab shaft that's been sharpened.
-Flux? Yes! Be generous. Liquid or paste is fine, but the felt tip pen type dries out fast. I get both sides, and use the transfer solder method (described above) to tack one side down. I usually do this with a handful of resistors, then go back and tack the other side.
-Apply a little more flux and with two clean irons, reflow both sides at the same time. Pull the iron tips away from the resistor at the same time (along the board, not up) and the resistor will center itself. Also, excess solder will stick to the iron tip, and you will have a nice slightly concave fillet.
-Clean with the highest purity isopropyl you can get. I use 99%. You can use a small horsehair brush to gently scrub it, like Techspray #2031. Soaking the board for 5-15 minutes works the best. A small ESD safe container is good, even an old Altoids tin can work in a pinch (assuming its been cleaned....) Use compressed canned air (like PC duster) to blow the iso off the board. You might need to soak it again in a fresh iso bath.

Here's some of the completed 23B board
 

Attachments

  • 20250928_210652(0).jpg
    20250928_210652(0).jpg
    1.4 MB · Views: 23
  • 20250928_210605.jpg
    20250928_210605.jpg
    1.3 MB · Views: 27
@AudioTaper, thanks for those excellent tips. I'm just not quite as picky about build aesthetics, but I do truly appreciate having that target out there.

And on that note, time for me to cut back on social media involvement for the next few months and get to work on the next phase of physical rehab. Maybe I can sneak a tube amp build in while I'm at it...;)
 
A recap for folks just finding the thread and an update.

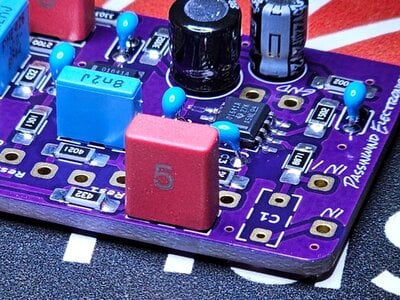
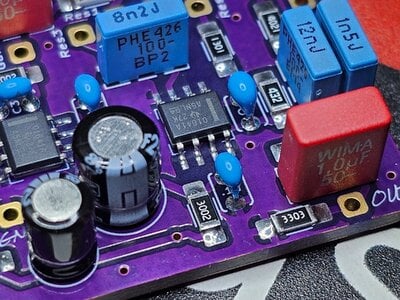
The first page of this DIY thread shows the general behavior available from the circuit, although there have been improvements until it is now version 4. The resistors and IC"s are the larger SMD size. The caps are small through-holes. There's information in the thread to help someone comfortable with through-hole-soldering to do SMD parts.

There are three main boards, a variable frequency, high pass filter to protect the speaker from too much low energy, a bass and mid Bax card with variable boost or cut and selectable mid frequencies, and a low pass filter to handle the treble, which has a variable amount of resonant boost or damping applied at a variable frequency.

For an enclosure, buy a painted 1590BBS size box and have the vendor drop ship it to AmplyFun. They have a CAD file to drill the holes and print the Passinwind label art. You can choose the color of the lettering. AmplifyFun then ships it to you.

The schematics, information for building the circuit, the links to purchase the circuit boards, and the ready to order bill of materials at Mouser are all available at the Passinwind Github site,

[This invalid link has been removed]

And the news is that today Charlie messaged:

" I have updated all relevant PCB layouts, schematics, and Mouser BOMs to address the discontinued Wima film cap issues. Board footprints now accommodate TDK 63v substitutes, with Kemet R82 as a possible slightly larger fallback. The new boards are all .025" wider, same heights as originals, with very similar physical layouts to the old ones. I won't be able to test them myself for a while, but they should be workable as is. OPA1642 is currently out of stock at Mouser, but there are plenty of other viable subs - just don't use OPA1656 in the PW1B board as it tends to be a bit messy."
 
Maybe I can sneak a tube amp build in while I'm at it...;)
Mental rehab can be just as important as physical rehab, so make sure you do something you love.
Our minds have an incredible control over the physical body, most people don't know that the body and skin can not produce pain, the brain will send out a "pain" signal so we take notice of any physical damage it thinks we have.
In the heat of passion a deep scratch down our back can feel pleasurable but the same scratch in a haunted house will feel very painful and scare the crap out of us, think about it.
All the best with your recovery Charlie, we are all behind you.
 
Hard to believe this thread is fast approaching a nine year tenure on Talkbass. Better yet, I still am finding circuit tweaks and getting to see numerous other people stepping up and taking things in their own directions.

I happened to notice that Mouser was/is showing backordered status on a few parts in my shared BOMs. I suggested a few part substitutions for the PW1B module (the Baxandall Bass/Mids one), but that BOM will hopefully revert to the preferred parts in the next month or two. If you just have to have cosmetically matching electrolytic caps Digikey have many thousands of the 7mm tall Panasonic KA-A series specified in the other BOMs, or you could use taller 6.3 and 5mm diameter caps of your choice, the footprint spacings are 2.5 and 2mm respectively. I may just port to SMT electrolytics for the next round of board revisions, as I feel the handwriting is on the wall for these TH parts.

I also changed the default open source midrange frequencies to my personal favorite bass centric values: 400Hz, 700Hz, and 1kHz. I'll put up a proper spreadsheet with several alternative tunings eventually as well.

And then I'm back to building, albeit at a very diminished scale. My latest pedal is going to be a higher headroom EQ format with a full parametric midrange section rather than a simple switchable fixed frequency arrangement. Internally the pedal runs on +/- 15V, with a Traco power brick that runs off standard 9V external power. Driving virtually any power amp directly will no longer be a problem and I've seen no downside but cost. Test resonant LPF boards should be in today or tomorrow, and the Bax board is drafted and ready to order. I have the next revision for the HPF/PEQ board done up too, but will hold off on that until I vet the first board set a bit more. The latter board is based on my DIY bass amps that go back quite a few years, so I don't expect too many surprises.

And finally, a shout out to @bowthing (Tim at Underhill), who kindly set me up with some surplus dual taper antilog pots, with long bushings and built in switches no less. They are 9mm format and really open up a lot of more compact build options, especially for onboard preamps. I went a bit crazy with different breakout boards allowing mix and match bypass and Q switches:

Breakouts.jpg


Both Tim and at @Jerry Catanescu (at JTEX) have helped me keep this long journey going via parts support and general encouragement, thanks again to both you guys!

Report

 
Hello Mr. Escher, very interested in your stomp box preamps. I saw a pic on Marco Bass Instagram and wanted to purchase your preamp pedal. If available for purchase, how would I go about it. Seems like a neat idea. Thanks so much, cheers!
Do yourself a HUGE favor, if you have the time, and go back to the beginning of this thread and work your way forward. Allow yourself some time to get through it. You will learn a lot, and then you will be able to build your own, which is very satisfying indeed. Besides, as you probably have already found out, Charlie doesn't sell these.
 
I guess you’re feeling better, Charlie!
Yep, at least well enough to finally play some tunes with other people at a house jam last night, and to start planning some open mike appearances. I've only touched a bass like three times in the last five months though, but I have been playing my acoustic guitar most days for the last few months.
 
Last edited:
Yep, at least well enough to finally play some tunes with other people at a house jam last night, and to start planning some open mike appearances. I've only touched a bass like three times in the last five months though, but I have been my playing acoustic guitar most days for the last few months.
You had me worried. I’m glad you’re on the mend.
 
Update: While contemplating documenting a two filter onboard config I found a schematic error for the filter board for the latest spec pedal. R1 is no longer on the board, with that connection now being a direct connection to the virtual ground/vRef. The schematic has been corrected and posted on Github. If have one of the older boards you can use the former spec 15k ohm resistor or a shorting jumper, either will work fine.

In other news, I have the +/- 15V Baxandall EQ board ready to go in a new pedal, and a matching resonant LPF board will be next up. I also tried making up some PCB based labels for my new Dojo boxes, like so:

OSH Labels.jpg


Not especially cost effective, but not too terribly expensive either. I did different labels on the back sides, which helps keep the cost down a bit. Purple board with gold text would be an option too, and that spec has a much quicker fulfillment time from Oshpark.
 
Last edited:
How nice for us you're still thinking about the preamp.

I went to your github at

[This invalid link has been removed]

and used the link to get to the boards at Oshpark, where up in the top right of the screen there is a link to all of your shared OS projects at


I hadn't been to the Oshpark boards list in a while and was glad to see you had added your SimpleGain and SimpleMixer back in October. I think they're super useful for builders.

When populated with the values of the first stage of the HPF, the SimpleGain is a very clean buffer/gain for onboard use or added to the PW3B to allow use of the Bax or LPF stages independently of the HPF, or as a stand alone buffer.

Did you ever find happiness with your explorations of a "full parametric midrange section" that you mentioned in November?
 
Did you ever find happiness with your explorations of a "full parametric midrange section" that you mentioned in November?
The original HPF/PEQ test board is going in my new Dojo EQ box along with the new high headroom Bax board mentioned above. Then I have a second build set to go in an old rack preamp. Once both those builds are fully vetted I’ll look at a possible PW3B-LPF v5 pedal, which I already have a control layout drawn up for. If that happens it’ll probably have a DI too, and possibly a headphone amp.