Matts Mutant Fretless Precision Bass
Ive had this idea for a bass for a while and I finally brought that idea to life. Heres a bit of the story behind this bass that took me about 7 months to build and modify. I havent done the numbers, but I want to say that I spent approximately $250-$300 over the course of 6 months, some stuff needed I already had, and that cost includes parts, paint, and some tools (router, polisher, etc
) that I needed.
The beginning of March 2012, about a week before my 30th birthday, my girlfriend at the time and I were in the process of moving into a place together and she asks what do you want for your birthday ya old goof?. So I tell her that I would like a beater bass something inexpensive, used, but not seriously damaged, preferably a Squier P-bass, probably get one on craigslist real cheap. I wanted to get weird and seriously modify it, repaint it, make it fretless, make a strange addition, add a second set of pickups, etc
I bought most of the parts sorta piece-meal on ebay, some parts I started buying before I got the bass, the whole plan was to be patient, not spend a lot of money, take my time and do it right. So I found a used blue squire p-bass in great condition for $80 on craigslist and she bought it for me. We move into a nice place and I get my work area set up and start working shortly after getting settled in.
[Invalid or Expired Link Removed]
I pretty much consider myself a 5 string player, my main basses are two late 90s Ibanez SR1205 neck-through 5 strings; I love the neck-through feel and sustain, I like the range of 24 frets and 5 strings for chords and positions, getting low as well as being able to shred and solo if I want to, I like the width of it, and they sound great. BUT when it comes to 4 string basses, the precision bass is kinda what defines it for me. I got my first job when I was 14 so that I could save up all summer to buy a MIM Fender Precision that I still own. Squiers/p-basses are very modifiable, many available options, many swappable parts.
I made my acoustic bass fretless with a polyurethane coat a few years ago that I was very happy with, and I wanted to explore that again with an electric bass but this time Id use a much more heavy duty epoxy.
[Invalid or Expired Link Removed]
I kinda wanted this new bass to be almost like a different instrument, a slightly different beast than Im used to but also have some familiar, kinda nostalgic, characteristics.
Step 1: Route (APRIL 2012)
I wanted to add a second set of p-bass pickups to this beast-to-be; 1 volume knob, 1 blend knob, 1 tone knob. I never used a router before, figured Im capable, and bought a decent router from Harbor Freight Tools for $50 (I friggin love that place I go there too often, I recommend that every dude get into that place). The key to using a router is having good templates, which can be difficult to make, especially for a p bass set, and the stewmac p bass pickup template had seemingly bad reviews so I stayed away from that. I made a template out of a scrap piece of wood and basically traced the pickguard pickup hole and cut it out with a coping saw. I started by cutting the bulk with a forstner bit, my coworker let me borrow his ¼
stew mac ball-bearing router bit (which I eventually bought one for myself later), and it came out pretty nice.
[Invalid or Expired Link Removed]
[Invalid or Expired Link Removed]
Step 2: Stripping
I had some chemical paint stripper which I tried but it couldnt remove everything. So I used a heat gun and scraper. A few more burn marks than I thought Id get, but overall smooth clean job. Do not even think about doing the heatgun/scraper method without using protective goggles and a respirator mask in a well-ventilated area, or you will probably poison yourself as the fumes are harsh.
[Invalid or Expired Link Removed]
While doing my research on how to paint my bass and refinish the neck. Deft lacquer products seemed like the way to go and easy to find at Lowes. Ive been building effects pedals for a few years, having painted many enclosures, I know that one should try to stick to the same brand of stuff as much as you can, which sort of ensures that everything agrees with each other. Deft Lacquer sanding sealer, BIN primer, Forest Green Dupli-Color (might be a different green in the picture, but Forest Green is what was actually used), Deft Clear gloss Lacquer (about 4 cans of that total in the end).
[Invalid or Expired Link Removed]
[Invalid or Expired Link Removed]
Step 3: Fretless Conversion
I started the fretless conversion while the sealer was drying. I converted my Ibanez acoustic bass to fretless a few years ago, and had plenty of veneer left over as well as the necessary saws to do this right. The only difference is that this time I decided to go with Systems 3 Mirror Coat because I wanted this to shine like glass, as well as having the option to use roundwound strings without worrying about scratching up the fingerboard if I want to.
[Invalid or Expired Link Removed]
[Invalid or Expired Link Removed]
[Invalid or Expired Link Removed]
I sanded it smooth from 150 grit to 600 or 800 grit.
[Invalid or Expired Link Removed]
Step 4: Epoxy
I bought Systems 3 Mirror Coat from Woodcraft. A lot of work to do, but it was worth the results. I made sure everything was level, but for some reason it ended up thicker on one end, so I put another layer to even it out. About 5 minutes after application I used my heat gun to get the bubbles out. I put it on too thick, but oh well, 80 grit with a palm sander brought it down well. Wet sanded with 320/400/600/800/1000/1500 I believe was the grit progression I used. I am very happy with the results.
[Invalid or Expired Link Removed]
[Invalid or Expired Link Removed]
[Invalid or Expired Link Removed]
[Invalid or Expired Link Removed]
[Invalid or Expired Link Removed]
[Invalid or Expired Link Removed]
Step 5: PAINT!!! (MAY 2012)
2-3 coats of primer
3-4 coats of paint
2 cans of Lacquer clear gloss (basically 1 2 coats a day until the cans are empty, only sanded thick spots if necessary between coats). Let it cure for 5+ weeks.
[Invalid or Expired Link Removed]
[Invalid or Expired Link Removed]
[Invalid or Expired Link Removed]
[Invalid or Expired Link Removed]
Step 6: Neck Refinish (JUNE 2012)
After the epoxy process and the headstock painted to match the body, I refinished the neck with Deft clear gloss lacquer. I taped off the epoxy and put a few coats of clear lacquer on the whole neck.
[Invalid or Expired Link Removed]
[Invalid or Expired Link Removed]
I pretty much let that cure until the bass body was done, so I could buff them to shine about the same time.
Step 7: Buff and Polish the Neck
I got a compact palm polisher (Harbor Freight Tools) with a terry cloth bonnet and used Meguiars polish compound and went over the entire neck. I am extremely happy with how the neck came out!
[Invalid or Expired Link Removed]
[Invalid or Expired Link Removed]
My stinky smelly dirty reflection.
Step 8: Buff and Polish the Body (JULY 2012)
I buffed and polished the body the same way I did the neck
THEN chip, a nice chunk of paint chipped off near the bridge. I was very mad and could not understand how or why this happened, but it looks like the paint didnt stick well to the primer. It was also a pretty rainy month. Who knows?
NOTE: If I were to do this again this way, Id probably skip primer completely, and do one or two more coats of sealer and paint and just allow the paint to stick to the sanding sealer.
[Invalid or Expired Link Removed]
I lightly sanded and smoothed with steel wool so I could try to patch it up. PAIN IN THE A**!!!! I started the copper shielding tape process just in an attempt to still be productive, but then figured I might as well wait on that as I gotta tape off and clear coat again.
The patch attempt was not bad though. You can kinda see a darker circle of the patched area, but the bridge will cover part of it and my hand while playing will probably cover the rest, so it wont be too noticeable. I also patched up a couple little dings too while doing this.
[Invalid or Expired Link Removed]
[Invalid or Expired Link Removed]
Then 2 more cans of clear gloss lacquer, wait another month+ for it to cure. Patience is key my friends
so is cannabis.
Step 9: Buff and Polish the Body
again (SEPTEMBER 2012)
Aaaaaah much better.
[Invalid or Expired Link Removed]
[Invalid or Expired Link Removed]
Step 10: Assemble the neck and copper shield the body
I used the same tuners that were already on the bass, not bad, but the screws are kinda crappy. I bought the additional tuner on ebay from a set cuz it was cheap. Copper shielding the body was an interesting task. Basically, I bought some and ran out with only a little left to cover. There wasnt a music store around me that had any. I did a bit of research and found that stores that sell stained glass supplies should have copper shielding tape. I found a place next town over from me, and the store owner was extremely nice and helpful. She didnt have anything wider than 3/8, so she gave me a bunch for free off an open roll from her shop and said that if I needed any more to give her a call. She gave me more than enough. Outside of my hobbies Ive fallen on some very unfortunate times all over, and that total stranger act of kind generosity really made my weekend.
[Invalid or Expired Link Removed]
[Invalid or Expired Link Removed]
Step 11: Assemble bass, install pickguard, pickups, and electronics
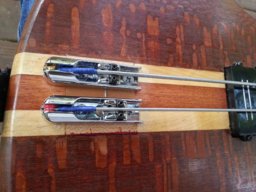
I got the pickups cheap on ebay they were somewhere around $14/set, two sets. For some reason the flanges on one of the covers were a bit long and didnt fit the hole I cut for them, so I got new All Parts covers for that set for $4 and they fit well.
[Invalid or Expired Link Removed]
[Invalid or Expired Link Removed]
[Invalid or Expired Link Removed]
Step 12: Adjust Bridge and Nut for additional high D string
Similar to a 12 string guitar, or 8 string bass, I coupled the D string with an octave higher D string. I had this idea a while ago to do that to only one string. My goal was to get weird with this and that I did. I drilled an extra hole in the bridge for the string. I filed a slot as far over as I could on the bridge saddle, measured that, and filed the nut the same distance. I was going to put a string tree at the headstock, but I couldnt do it successfully without blocking the truss rod, maybe Ill find a better string tree and install it later.
[Invalid or Expired Link Removed]
Step 13: MATTS MUTANT P-BASS IS COMPLETE AND READY TO SHRED!!!
strung up with GHS Flatwound strings (28)65-80-100-126
[Invalid or Expired Link Removed]
[Invalid or Expired Link Removed]
[Invalid or Expired Link Removed]
[Invalid or Expired Link Removed]
[Invalid or Expired Link Removed]
UPDATE 10/1/12: I put a string tree on this.
[Invalid or Expired Link Removed]
[Invalid or Expired Link Removed]
[Invalid or Expired Link Removed]
Here is a video of me playing it. See how it sounds.





 I added a Badass II