• TalkBass has been independent since 1998. Add your voice.
    Create a free account to reply to discussions, view embedded media, and browse with fewer display ads.
    Join freeLog in
    Want zero display ads or expanded classifieds tools? Compare plans.

Ugh... how to fix chipped finish

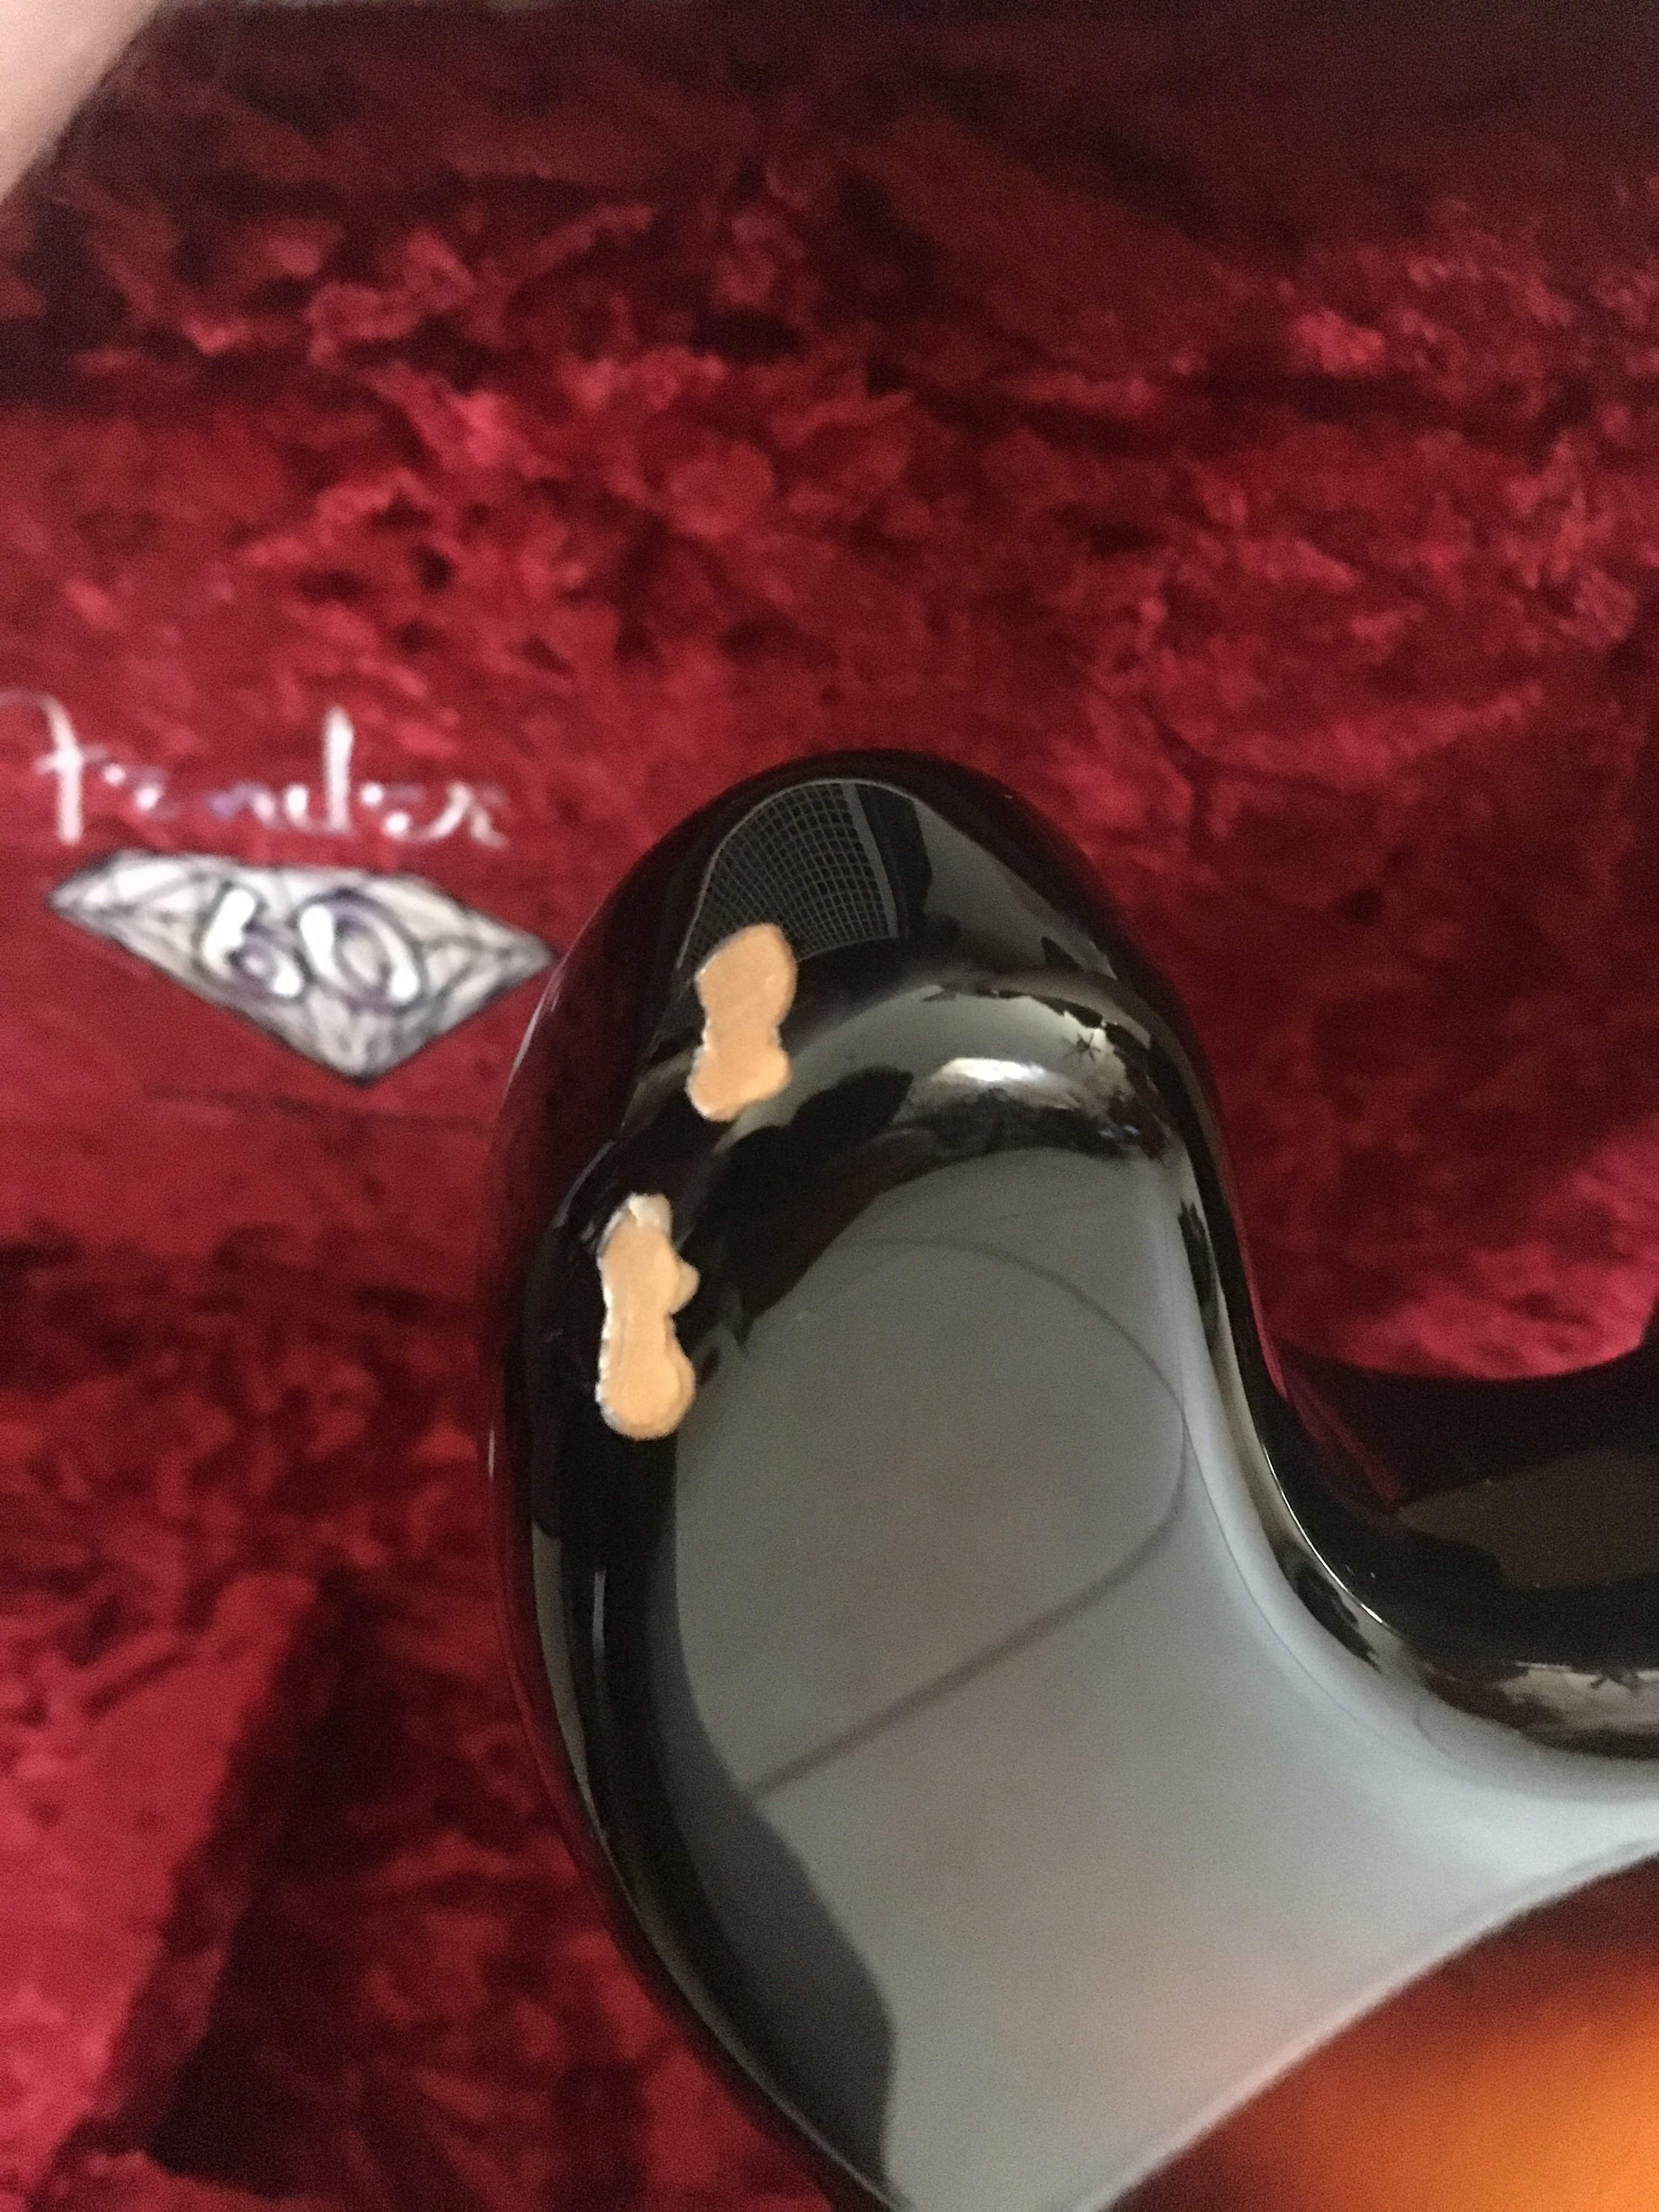
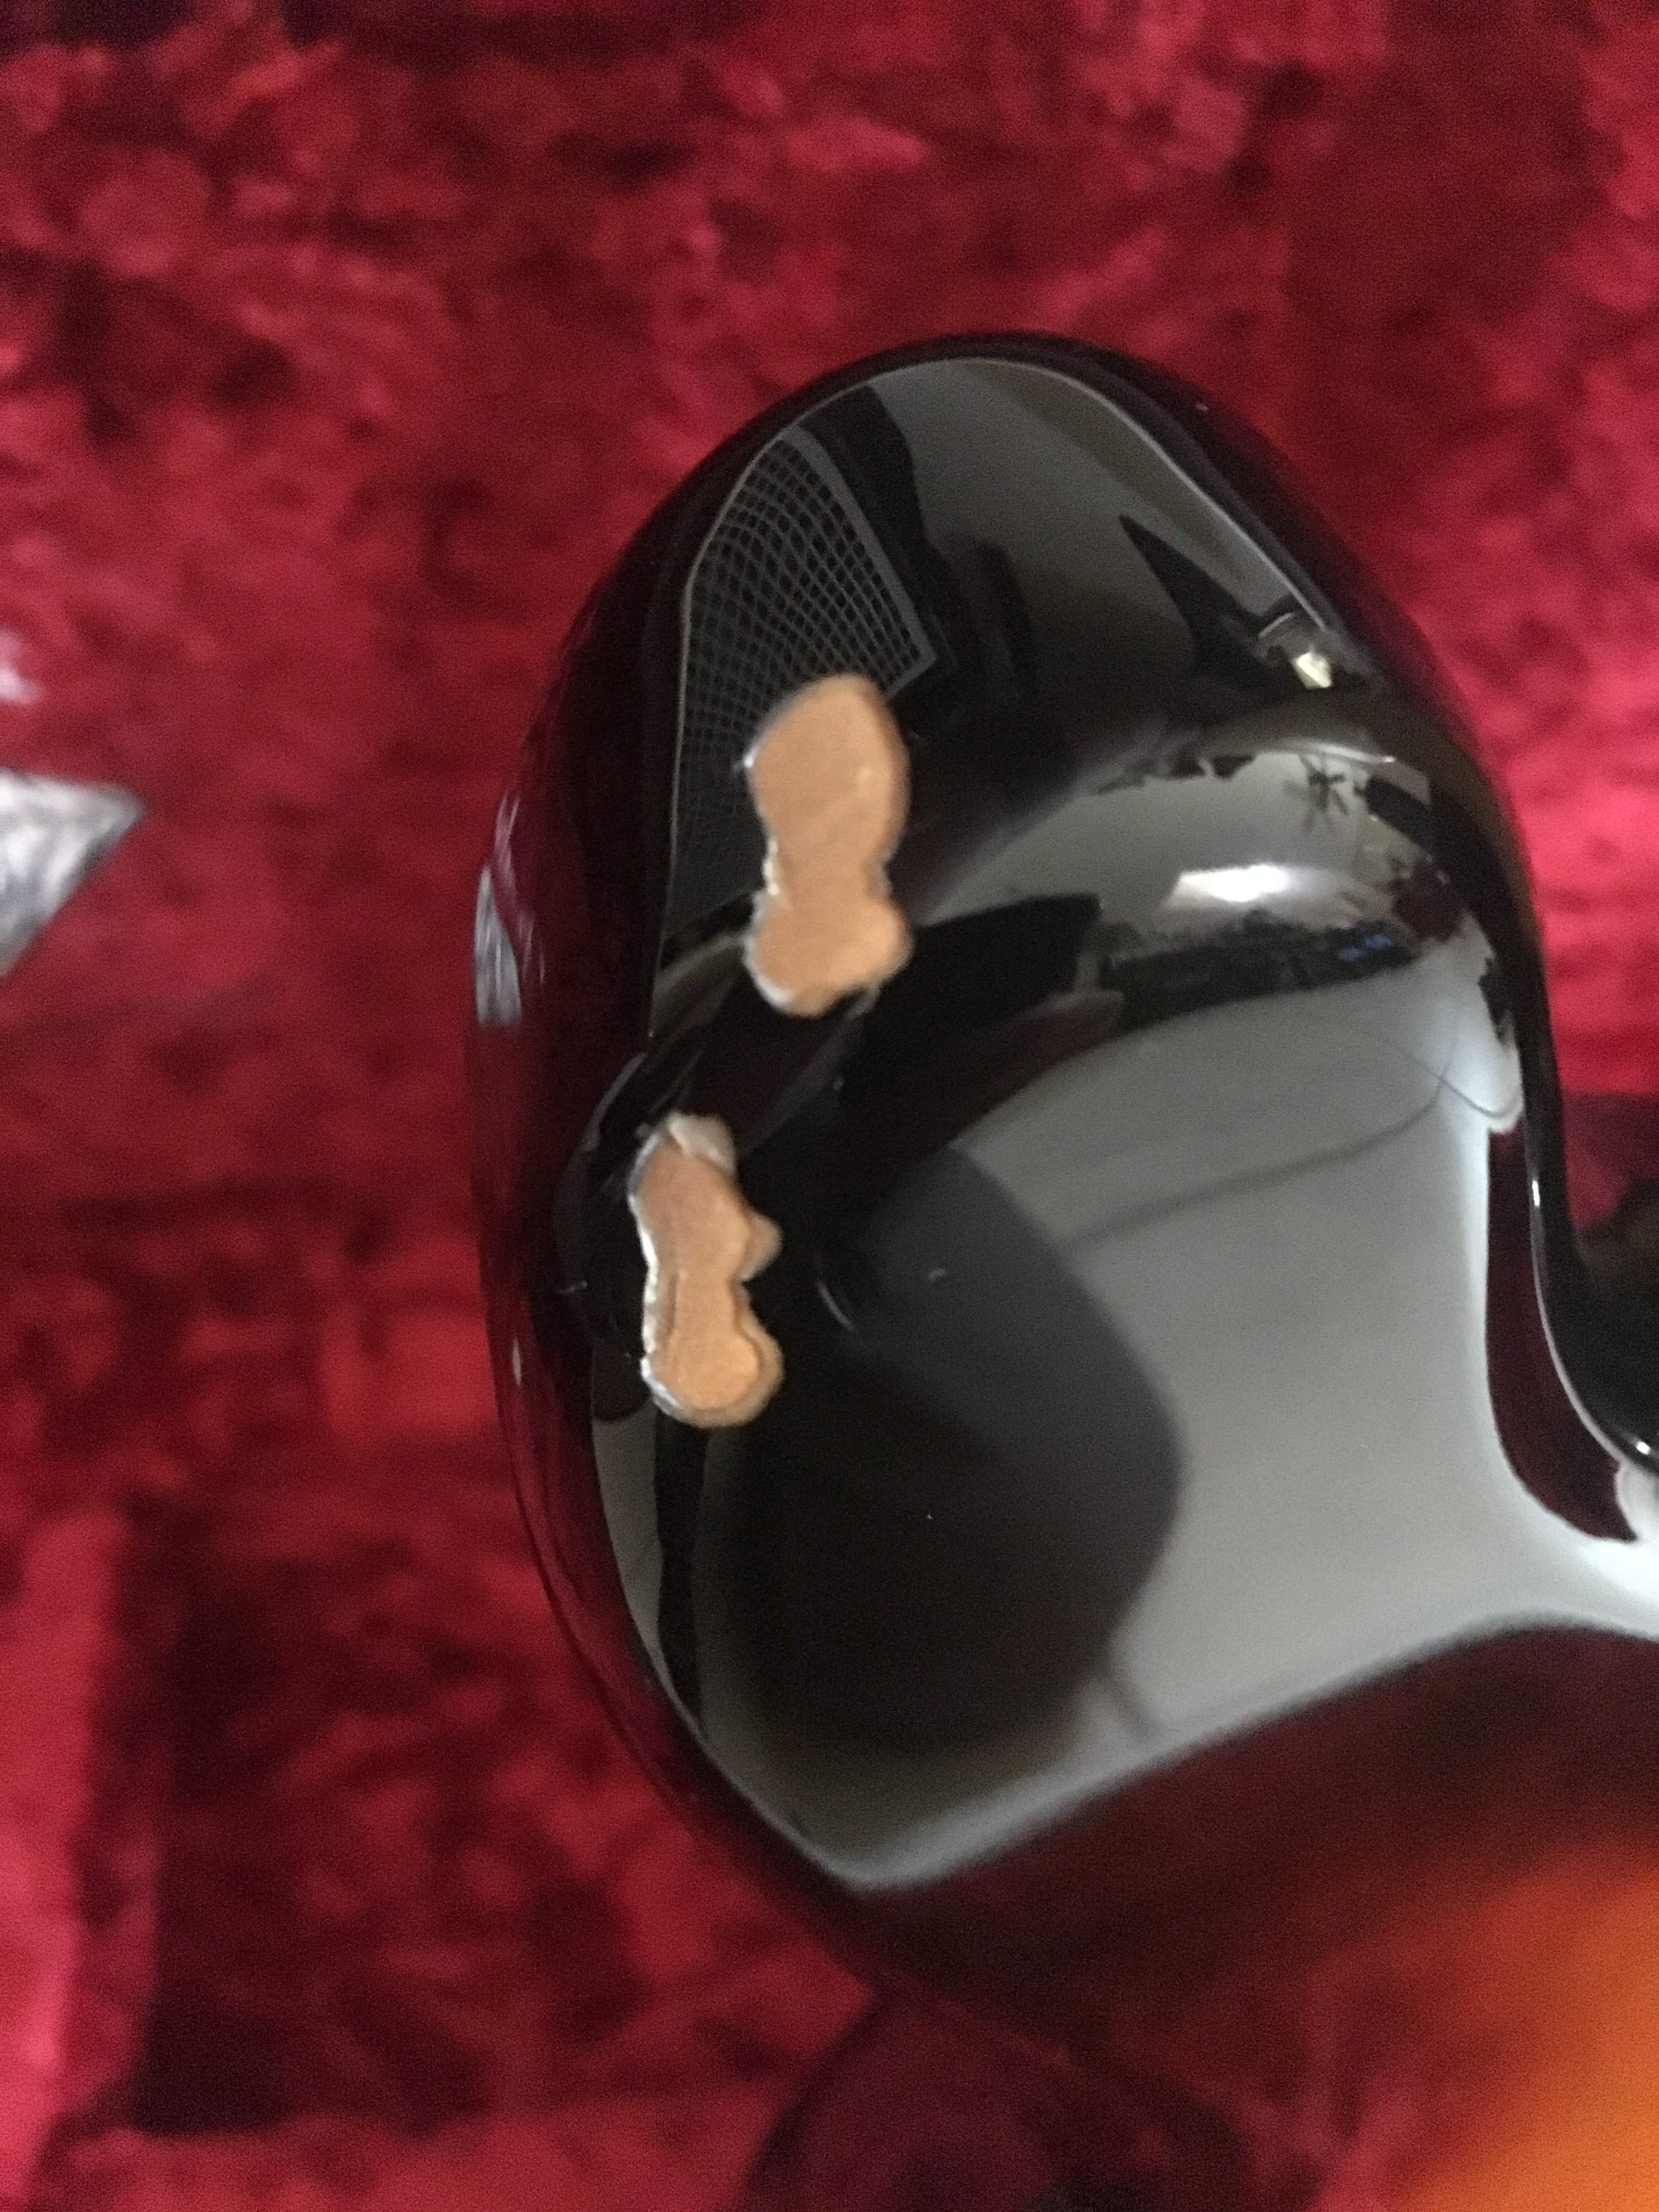
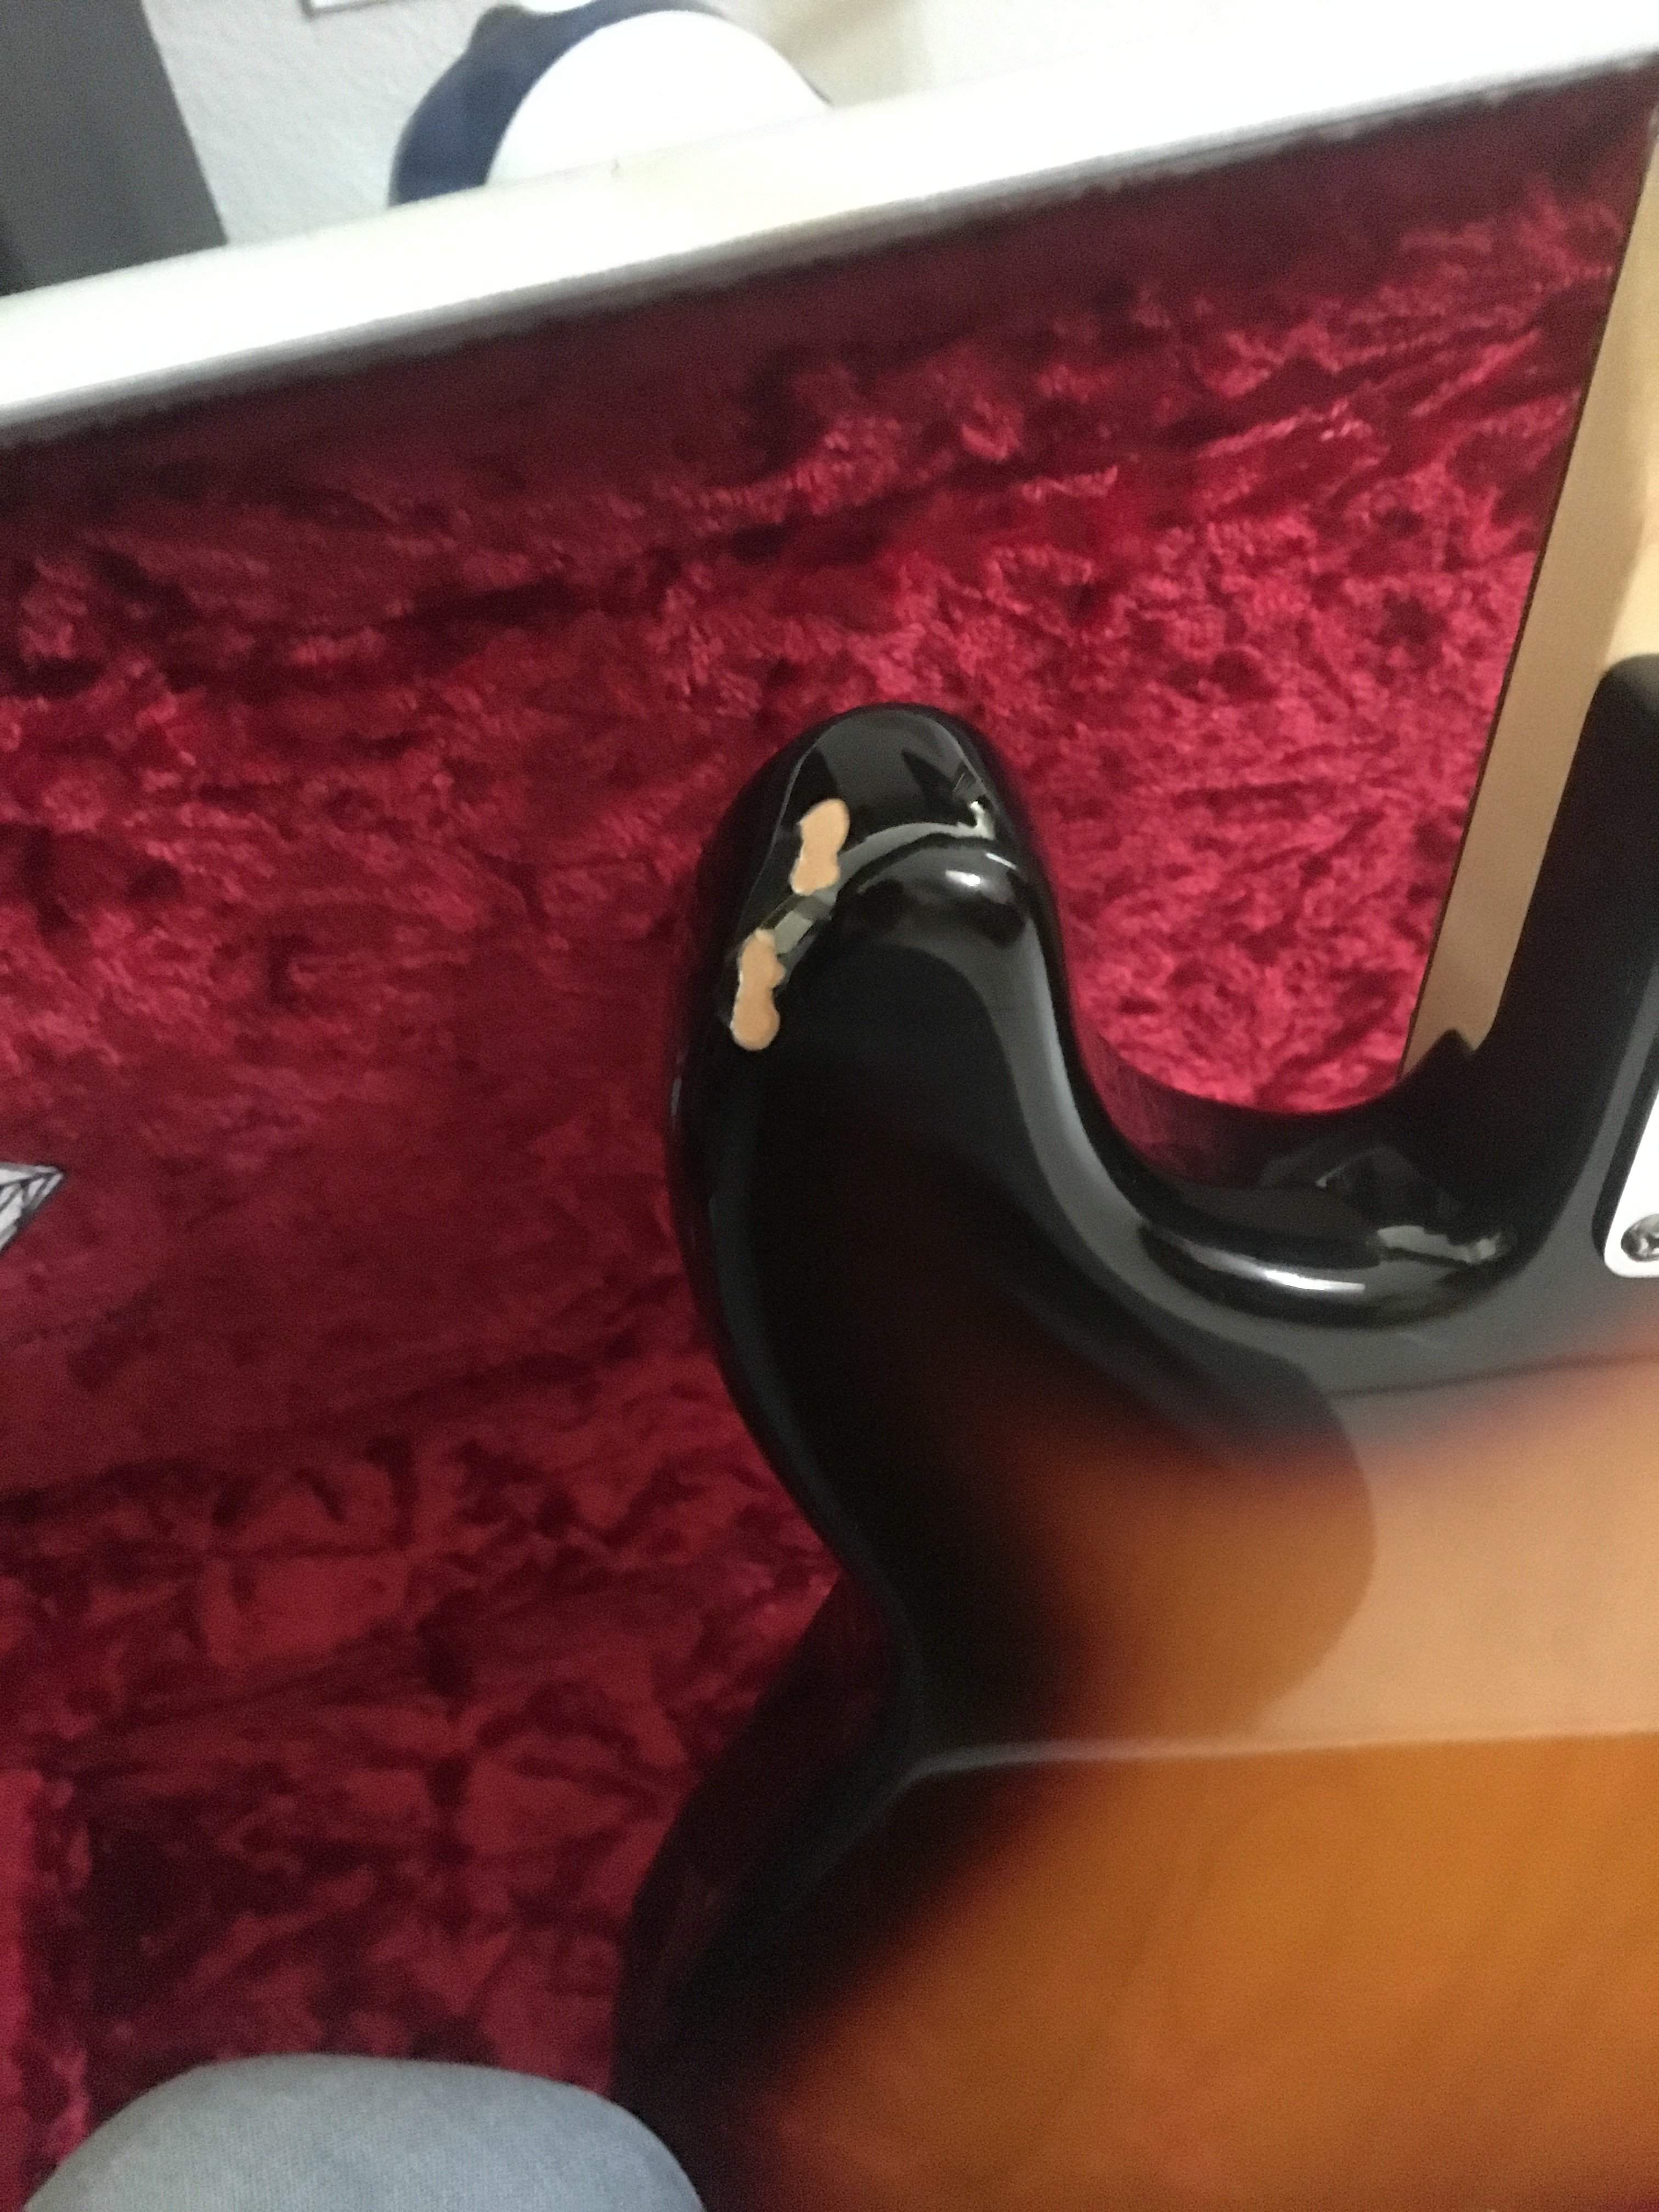
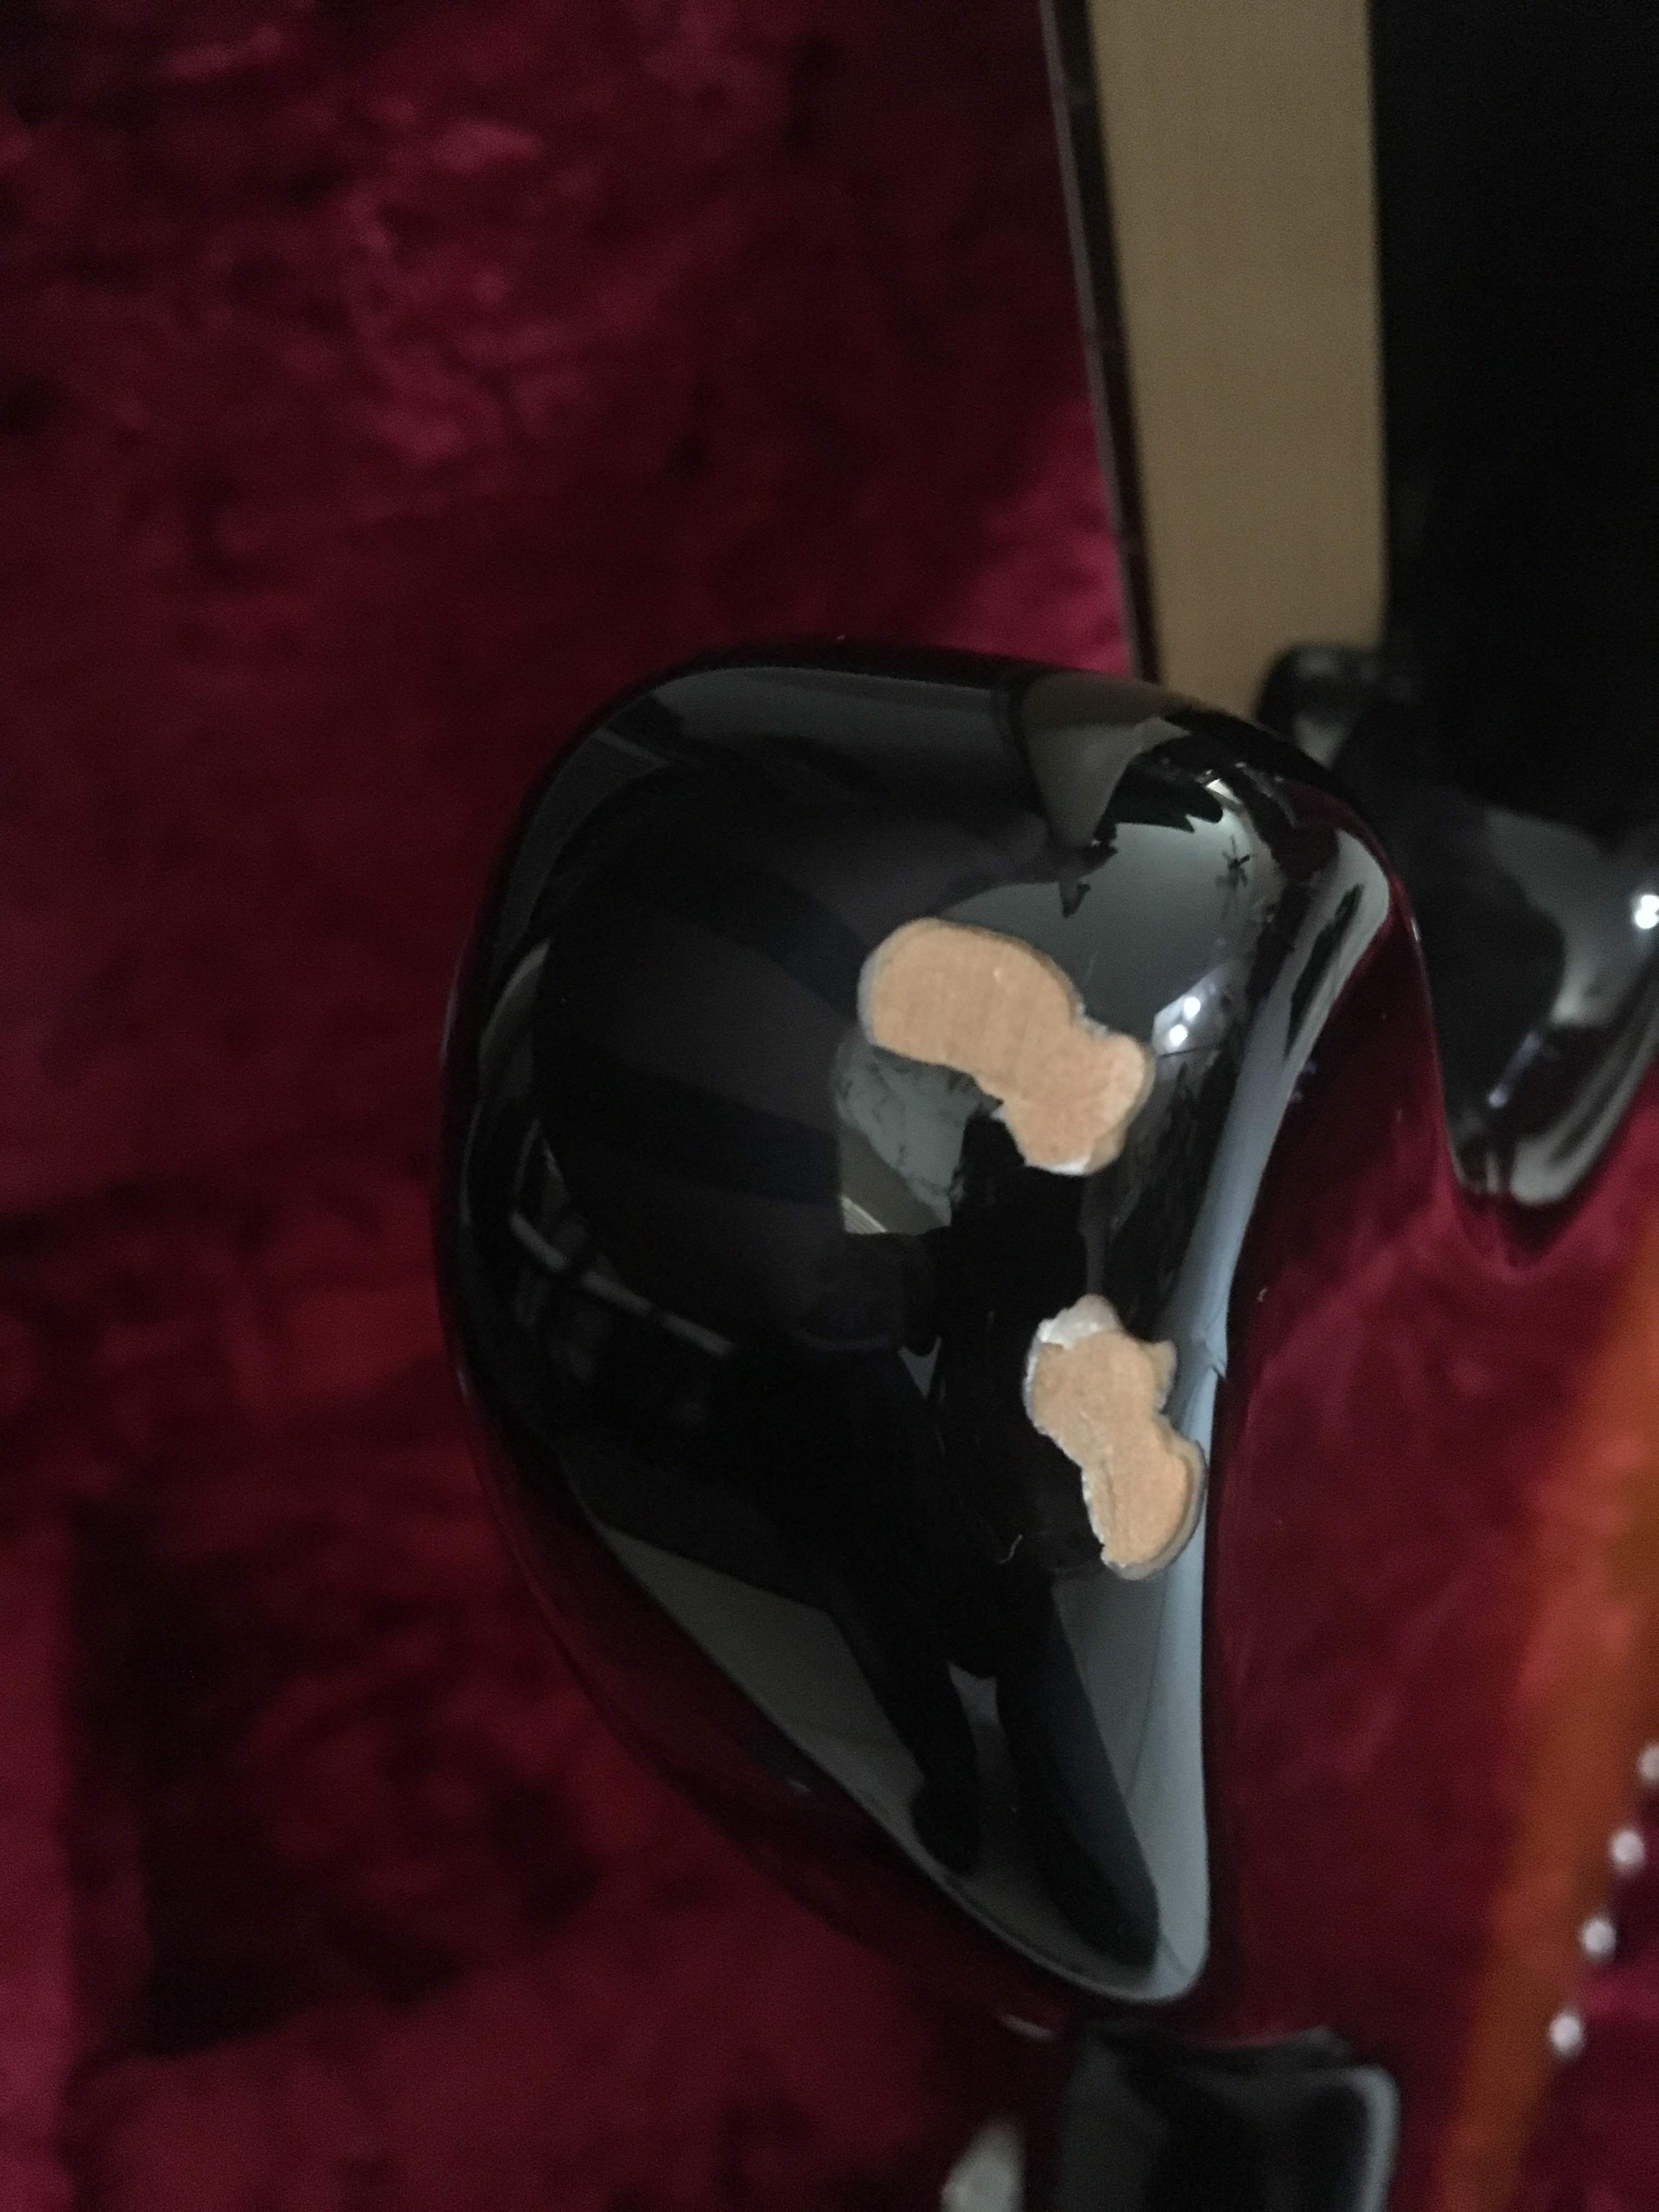
TL;DR - how to I stop this from spreading/fix it until I can get it professionally fixed?

I just did a NBD thread on this bass a month ago, a mint condition 2006 US 50th Anniversary Fender P Bass.
Got a great price on it, and never being a Fender Guy, it won me over in the first minute of playing it. A great instrument.

Anyway, I had decided to only take it out to more upscale gigs and for studio work. No need to put what can be a collectors bass in harms way when I have other Basses I love

Anyway, I don’t know when it happened; I didn’t notice it till after I got home from only my second show with it, that was at a Lounge in an upscale casino. I know I didn’t hit it, so I can only guess that on break someone hit it somehow?!? I’m sick no matter how it happened.

It’s a poly finish, but nice and thin as you can see...possibly why this bass has such amazing resonance.

So, here are the pics.
What is the best way to stop this from spreading and/or fixing it? I’m assuming it’ll need a professional touch up to get it back to mint, but in the meantime I just do t want it getting worse.

Thanks!
FF8BED2F-7DEC-448C-AA5A-EA5BE7416A81.jpeg
C5ED7CE8-81E5-4CE4-AE0B-F9E7DA8AFCBC.jpeg
6000A55A-9DDB-4C65-A169-79AEC3A15938.jpeg
E294020D-6C90-495C-B07B-D31B3F7AD68F.jpeg
 
Watching this thread to see if this is too big to be fixed via the "drop fill" technique (I don't have any advice in that regard.)

As far as it "spreading", the best way to prevent that is to stop banging it into things. ;) It's not going to spread on it's own. It takes quite a wack to chip that poly, somebody probably knocked it over when you weren't looking.

 
Thanks for reply.

That’s what I’m hoping, is that someone with more knowledge/experience than i can possibly help layout what the options are for a chip(s) of this size.
It’s not huge, but it’s definitely not just a little pin prick either.

Also wondering if I should wick ca around the chip in meantime to stabilize it, or if that’s even necessary and/or if that will make the repair more difficult.
 
  • Like
Reactions: Bugeyed Earl
I'm not an expert, but I think if you the hole with cyanoacrylate glue, you will make it more difficult to repair since they will have to remove that glue which will bond with the finish next to it. I've never had any of my chipped finishes spread. I don't know how any of my chips happened either. I've yet to fix any of them.

If you want to keep it from spreading and avoid making further repairs more difficult, my first thought turns to masking tape as the solution...but it would be very noticeable.
 
I would think about buying black dye from Stew-Mac and adding it to clear poly, then adding successive coats to the chipped areas, then sanding and polishing to get a gloss finish. I don't think it would hurt to use CA glue sparingly around the edges to nail them down, but the poly finish you add would have the same effect. I'd try not to touch or handle the area to keep finger oils off it, although before adding poly finish I'd wipe it off with denatured alcohol anyway.

I'm sure one of the more experienced refin gents will be along soon to comment.
 
Whew, that’s more than I would try without having a good think about it first.

But, carefully painting the exposed wood (but not the edges of the chipped clearcoat) opaque black, and then dropfilling using many very thin coats of poly finish might do it - CA is brittle, and those are very likely too large to make a durable fix using it.
 
  • Like
Reactions: RobTheRiot
Just to clarify, @Pilgrim & @HeavyDuty both of you are talking about using the wipe-on poly they have at any hardware store?

I actually finished one of my Basses in that & I’m really happy with it... may actually have some left.
I believe I used the high gloss Miniwax wipe on poly.

Thanks everyone for your help!
 
More good advice ^^. Chances of your DIY repair looking as good as that of a pro are a bit limited. The idea of coloring the wood black before attempting any kind of fill is an excellent one, as it eliminates a lot of variation in color based on the thickness of fill coats. A nice new black Sharpie can be your friend.
 
Last edited:
  • Like
Reactions: G-Z
Just to clarify, @Pilgrim & @HeavyDuty both of you are talking about using the wipe-on poly they have at any hardware store?

I actually finished one of my Basses in that & I’m really happy with it... may actually have some left.
I believe I used the high gloss Miniwax wipe on poly.

Thanks everyone for your help!
I think the wipe-on might be the wrong consistency, too thin - you need something with body. You’re definitely into “hold my beer and watch this” country if you try to fix it yourself... but just think how good you will feel if you pull it off?
 
  • Like
Reactions: RobTheRiot
I think the wipe-on might be the wrong consistency, too thin - you need something with body. You’re definitely into “hold my beer and watch this” country if you try to fix it yourself... but just think how good you will feel if you pull it off?

Haha!
Well put... maybe best to just get it done by an expert.

It just really ticks me off; this Bass was in mint condition - def one of the nicest Basses I’ve owned... and even with the conscious effort to keep it out of harms way this still happens.

An experienced tech should be able to make this blend in & virtually invisible, correct?
 
I have a couple of those that have been stable for 15 years or so.
It sucks but it happens. Let it go, embrace the battle scars. You will probably be dead before a 2006 instrument appreciates noticeably anyways and a refin/repair would make that pretty much never I'd wager.

Thanks - good to know it’s probably stable, and I don’t have to worry about it spreading.

It’s funny, I always take good care of my instruments but have never worried about wear & tear accumulated from use. It’s a bass made to be played - on stage - with people - where things can get bumped. In some ways I think sings can sometimes be like tattoos or scars, each one probably has a good story behind it.

I’m also def not saving this as some investment or it wouldn’t leave it’s case.
This one just bothers me because it’s a beautiful bass, and this wasn’t average wear & tear, it’s a sizable chip, that stands out, and that’s a complete mystery.

I’ll get it repaired or repair it at some point, because it does contrast so much against the dark finish, and it doesn’t have a good story.

Other than that, once I get a little bit of whining about it out of the way (this thread, I guess) it’ll be forgotten, especially when I’m playing it, because it truly is a dream to play.
 
  • Like
Reactions: Mister Boh
Dissenting opinion:

The proper repair is a drop fill. It is simply larger, which is not a problem, and curved, which is more challenging. All standard drop fill techniques apply.

A couple of notes on challenges:
  1. If you place any color under medium viscosity CA it will tend to migrate into the glue. That will dilute the color. A seal coat of of shellac is a good idea. Nitro will also work if the color is dry, as will acrylic. Vinyl might. Test on scrap.
  2. It doesn't matter if you get CA on the surrounding finish. As a matter of fact, that's what you want. It will be ground off during the leveling process and finished smooth during rub out.
  3. CA is not that brittle, especially when applied over large areas. It is actually gummy. That makes it easier to scrape with ease. Clean your files as you work. Swap out sandpaper as soon as it begins to load.
  4. Curves are a challenge. In repair work of this sort, "challenge" translates to "time consuming." If you have a good eye and feel it's not a big deal. If you don't, then it is better to start with a much larger drop fill and grind until the flats are true but raised and the curves are fair but raised before starting rub out. Raised is a roughly .010" or less.
  5. Most importantly for this particular repair, treat the two areas as one. It is one giant drop fill. If you attempt to do each separately it is likely to take twice as long and create four times the frustration.