• TalkBass has been independent since 1998. Add your voice.
    Create a free account to reply to discussions, view embedded media, and browse with fewer display ads.
    Join freeLog in
    Want zero display ads or expanded classifieds tools? Compare plans.

Walnut wishes, and six string dreams

Dec 31, 2007
1,725
2,306
Austin, TX
Howdy folks. Between the summer heat and my other professional obligations the bass building has been on the sparse side but I've been focusing more on making a few basses for myself. I've been looking to build a six string for myself for quite a while, my standard single cut shape with a bolt on neck), and in a bit of an homage to the Roscoe 6 I played for about 15 years, I've been looking for a nicely curled, dark grained board.

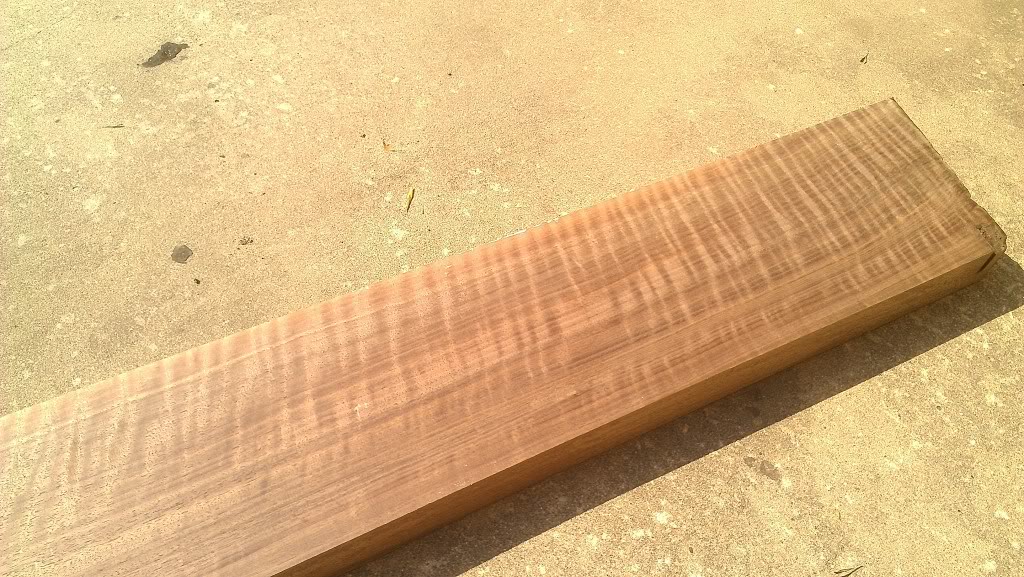
One of my recent tasks at work was to build some custom wood countertops for a kitchen. We recieved about 500 board feet of 10/4 walnut and even in the rough this board grabbed my eye from across the shop and my employer was nice enough to sell what was left to me at cost. It's a piece of curly black walnut. The original board was over 15 inches wide, 13 feet long, a full 2 3/4 inches thick and clean from end to end. Not even a tiny pin knot or defect. And to top it all, it has an awesome sapwood streak, my favorite!:bassist:

After surfacing, the board I took home is 13 feet long x 8 1/2 inches wide and 2 1/2 inches thick. About 21 board feet in all. It's been cut once to allow it to fit in my vehicle.
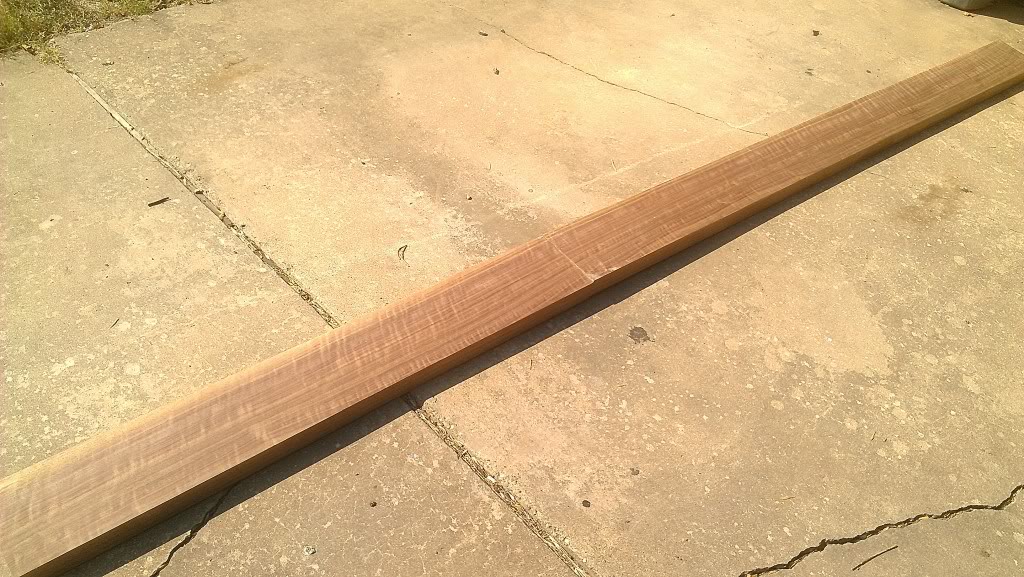
IMAG0462_zps61631c8d.jpg


One end is particularly figured and will make beautiful tops but the entire board is nice enough that it will make excellent necks and body wings/cores as well. Even the boring end is downright sexy...
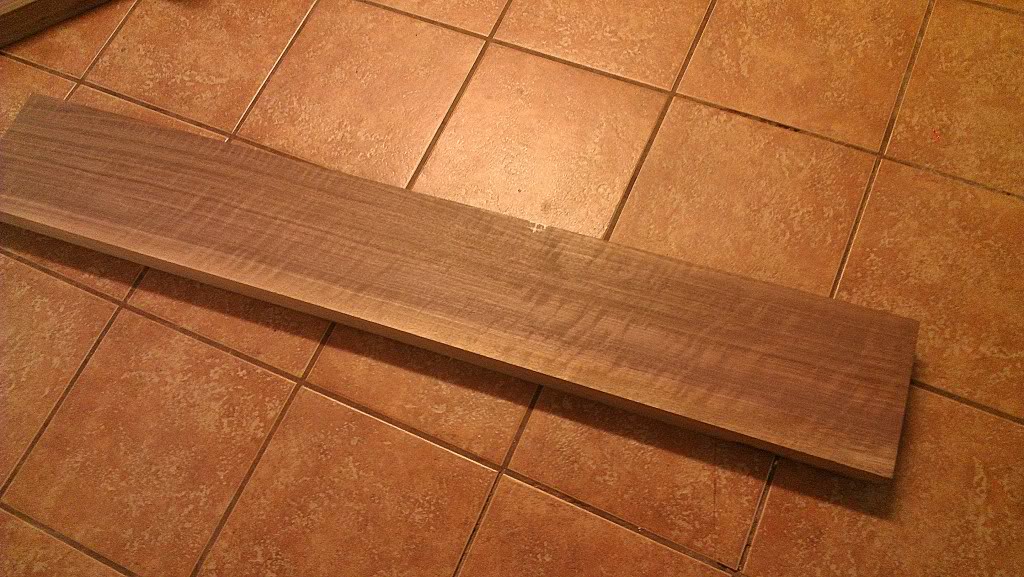
IMAG0468_zpsad5c50ec.jpg


And the business end has got in going on.:hyper:

IMAG0465_zpsd08d6001.jpg


IMAG0459_zpsc961480c.jpg


Pretty soon we'll start chopping this bad boy up and get to the building but I wanted to enjoy my walnut porn for a moment at least.;)
 
Last edited by a moderator:
Now that I've admired my walnut for a while it's time to get to work. Milling lumber is one of my favorite parts of woodworking. As the board gets cut down you get to see the grain from all sides and get a sense for how the board will work with tools. In my experience, curly walnut is very easy to work with and this board has been no exception. No tearout on even the most highly figured surfaces.

If you have followed many of my builds (and gracias if you have) you might have noticed I love to glue up lots of laminations and generally just overdo the hell out of everything. :bassist: With this bass I am going in the opposite direction and will instead let this gorgeous board do all the work. :)

First, I cut the highly figured end into two lengths for top sets. Each side of these bookmatched sets are 1 3/32" think and will yield four 1/2" thick tops. The left hand board of the set on the right of the picture will be used for this bass.

IMAG0470_zps8935a440.jpg


I use a body template to get an idea of where I will place the top to get the sweetest grain.

IMAG0471_zpsce0bf8a4.jpg


I could'nt help myself and had to rub on a bit of naptha to get a look at the grain.

IMAG0473_zps5fecfb9b.jpg


I'm definitely going with a maple board on this bass but I have'nt decided yet if I will use birdseye maple,

IMAG0475_zpsbc0b0d6c.jpg


Or if I will go with more available curly maple so the neck and fingerboard will match in grain. Only time (and wood availability) will tell.
 
Last edited by a moderator:
Once the top sets are cut loose I am left with two consistently figured, four foot lengths. These board are not quite tops in my mind but will make beautiful bodies and wings. First I rip the excess width off to be used for neck stringers, leaving me with 7" wide boards.

IMAG0476_zps0a6a5c82.jpg


Once the stringers are removed I cut the boards in half and match them up for bodies. In this pic the set on the left will be the body for this bass and the right hand set will be saved for future use. Below them you can see the stringers as well.

IMAG0478_zps0f2e51a9.jpg


Now it's time to resaw and glue the top. First I remove the extra width to make the job as easy as possible for the bandsaw.

IMAG0479_zps9c121acd.jpg


Next it gets split on the bandsaw and the two sides are surfaced through the planer. My knives are a little nicked up so after a bit of block sanding to remove the knife lines I have a perfectly bookmatched set.

IMAG0481_zps6942b156.jpg


The next task is gluing the top seam. I've seen some downright over engineered ways of doing this so I will offer a relatively fool proof method that has always given me consistently good results. First we take four boards around 2" wide to use as cauls. Joint one side flat and then rip all four boards to the same thickness. Having all four boards the same width is important to keeping the top flat while gluing. Place the boards, true sides up, on a flat table/bench and cover the edges with clear packing tape. (to keep glue from sticking to the cauls)

IMAG0482_zpsce38fe33.jpg


Now glue is applied to the seam and the matching sides are put together on top of the cauls. Four more cauls, different width is ok on the top, are covered with tape and then placed in line with the lower cauls.

IMAG0486_zpsc0bc02d5.jpg


Next I take 8 matching clamps (again, important for keeping the top flat during gluing) and clamp the cauls together but only loosely tightened.

IMAG0487_zps4da8abbe.jpg


Now take 2 or 3 clamps and clamp the boards tight from the side, adjusting the alignment and then pulling the seam together. Once the seam is tight, the other 8 clamps can be tightened and now the top can be left until cured.

IMAG0488_zpsd2afdd26.jpg


(I know, I know, my shop is a disaster. I spend my week working a cabinet shop you could do surgery in, so sue me. :bag:)

Next time I'll conquer the cutting and gluing of the body wings. As always, thanks for following. :cool:
 
Last edited by a moderator:
Thanks for the compliments folks. :)

Back again with a bit o' progress. I considered curly maple, birdseye, ash, and several other interesting woods for the neck but the more I look the more another figured wood seems to take away from the beauty of the walnut. Conveniently enough I have a few pieces of really clean, quartersawn maple I have been saving for necks. About 4' long and 2" square with really straight grain and some nice ray flecks too.

IMAG0493_zps184da6ec.jpg


Normally I tend to use more figured material for necks but as soon as I put the quartersawn board next to the walnut I knew it was a perfect match.

I used the tablesaw to resaw the neck blank, leaving me 2 bookmatched pieces for the outside of the neck black. Using some maple veneer I have on hand and the bookmatched walnut stringers I brewed up a nice little neck lamination. As I said, this bass is a bit of an homage to my long time Roscoe 6 I used to play and anyone familiar with their basses will see some inspiration in the neck laminations.

IMAG0495_zpsd152eb77.jpg


IMAG0496_zpsdc32412f.jpg


IMAG0497_zps101ba625.jpg


Once that is complete we can cut the scarf angle on the neck blank. I usually do this using a 12 degree sled on the tablesaw. My 10" saw at home will cut a 4 string or guitar neck but the blade is not large enough to allow for a 5,6, or 7 string neck. This time I'm gonna cheat just a bit and bring in some of the big guns from the dayjob. We have a 14" Powermatic tablesaw at work (7 hp:hyper:) that can power through thick hardwood like it's nobody's business.

IMAG0499_zps850d0b15.jpg


IMAG0498_zpsd1b41956.jpg


Unfortunately all of our 14" rip blades are out for sharpening but we still have a sweet 36 tooth 12" blade that leaves a really clean cut with no burns. It only has 3 7/8" capacity and my blank is 4" wide. That leaves a sliver of wood that must be removed but that's small potatoes for such a clean joint. Just a touch of sanding and the joint will be perfect. :bassist:

IMAG0502_zpsaac00ff6.jpg


Soon I'll glue the scarf joint and get the head plate veneer prepared.
 
Last edited by a moderator:
Now that the neck blank is underway we'll turn our attention back to the body.

First we have our bookmatched walnut tops.

IMAG0492_zpsbbdabb2c.jpg


If you look closely you will see that the grain of the boards coming from the left is straight and then curves in towards the center seam as it continues. I want the headplate veneers to match the tops so I will use the top drawn on the upper top and the headplate veneer will come from the same end of the other top to get as much of the curved grain as possible. The other top and headplate will come from the straight grained ends and will match each other as well.

Now for the body I chose two pieces from the less figured end of the board and matched the sapwood seam to create a sweet body blank.

IMAG0489_zps6528b44b.jpg


I do love me some walnut.

Before gluing the body a piece was resawn from the treble side of the back that we will later use to make the matching coverplate.

With the body and top glued I need to surface them. The top simply needs needs to be surfaced flat on the bottom side to allow for gluing. Our wide belt sander is down at work but we have a fantastic 20" planer that handles the figured walnut quite well.

IMAG0500_zps4ffad101.jpg

The body blank on the other hand is a bit thick so I again use the planer to bring the body to thickness. The top is currently just over 7/16" so I thickness the body down to 1 1/16" thick.

IMAG0501_zps7ef3520e.jpg


With the body at 1 1/16" and the top at 7/16" I will glue a sheet of maple veneer between the two leaving us just over 1 1/2" in thickness. After the shaping and sanding we should end up with a body thats right at 1 1/2" thick.

When next we meet the scarf joint and body should be glued and we'll continue on down the trail...:cool:
 
Last edited by a moderator:
Soooooo... here we go again. With the top and core surfaced its time to glue them together. I start by clamping the top to the core with no glue and take care to align the seams with each other. Once everything is in alignment I use a small drill bit and drill through each corner of the top and into the core. Next I applied glue to both the top and the core and placed the maple veneer between them. To align the tops I use 4 small nails and drive them into the pre drilled holes. Using the cauls we glued the top seams with, I clamp the whole assembly, taking special care to assure the seam alignment.

IMAG0503_zps1b9cfbe4.jpg


After sitting overnight it comes out of the clamps and the seam is nice and tight.

IMAG0506_zpsc2dd38ff.jpg

IMAG0509_zps1f655032.jpg


Now that everything is glued up I can transfer the body shape over from my template with a sharpie for visibility.

IMAG0517_zps8d63a1ef.jpg


Our next little task is to glue the scarf joint on the next blank.

The technique will essentially be the same as what we used to glue the top and core together. First we clamp the joint together with no glue and align the seams.

IMAG0510_zpsbe484350.jpg


Again, 4 holes in the corners align the joint in all directions.

IMAG0511_zpsc6bc1ba8.jpg


A nice, even layer of glue...

IMAG0512_zpsec951b8a.jpg


And into the clamps we go. The nails align the joint and any small discrepancy can be adjusted now before the clamps are completely tight.

IMAG0513_zpsa92db0c0.jpg


IMAG0514_zps4f919fa7.jpg


After a few hours the clamps come off...

IMAG0515_zps82052d9f.jpg


And we have liftoff. One pass across the jointer cleans and levels the joint and the laminations are properly aligned.

IMAG0518_zpsec98878d.jpg


Next time we'll install the carbon fiber rods and glue the headplate veneer.
 
Last edited by a moderator:
I've spent a bit of time in the shop since last we met and I've got pics to prove it. :ninja:

While I like the simplicity of a walnut top on a walnut body the sapwood in the center of the back doesnt jive with the dark walnut stringers in the center of the neck. To solve this I decided to add a walnut backplate as well.

The first step was to plane the body core down to allow for the new backplate. Once the final thickness is reached I glue a layer of maple veneer to the body to create an accent line to match the top.

IMAG0519_zps23f926c4.jpg


Now I can cut the body profile, slightly oversize to allow for a clean, routed edge later. I also leave 4 spots around the edge to place nails for gluing alignment.

IMAG0521_zps42d637e8.jpg


The blackplate is bookmatched and seamed along the heartwood edge instead of the sapwood to match the neck stringers. Next the plate is cut to the profile of the body with the same four alignment points, and the control cover plate is cut free before gluing.

IMAG0523_zpse5d063a5.jpg


The two are clamped together with seams aligned and a pilot whole is drilled through each of the alignment points.

IMAG0526_zps7ed33b0b.jpg


IMAG0525_zps7298d0ef.jpg


Now that everything is prepped it's time to bust out the glue bottle. A thin even layer is spread on the back plate. No more is needed and too much will just squeeze out across the control area veneer creating a huge mess to clean after the fact. Just a small amount of squeezeout around the edge is plenty.

IMAG0527_zpsf7829ec3.jpg

Now the clamps are tightened and we wait...

IMAG0528_zpseb1769d3.jpg


Once dry, the clamps are removed and I can route the final body shape with my mdf template.

IMAG0529_zps56659998.jpg


IMAG0530_zps6dd0bc07.jpg

Now one of my favorite things, routing the edge profile. This is when it starts looking like a bass to me.

I like to start with a 3/4" roundover and cut just a bit deep to allow the top edge to be rounded further over the body. Before routing begins, the cover plate screws are drilled and the plate attached. It gets profiled in the same router pass as the rest of the body.

IMAG0531_zps3c35872b.jpg


After a bit of sanding I am really liking the look so far. I will sculpt and shape the body a bit more but this makes for a nice starting point.

IMAG0537_zps49fce560.jpg


IMAG0534_zps3dc6765d.jpg


IMAG0533_zps3ea50539.jpg


I especially like how the rings follow each other at the endgrain. Just a small thing but I get irritated when the end grain doesnt all flow together.

IMAG0535_zps33def1d9.jpg


So there we have it. Progress will continue, and if you are kind enough to continue following we shall see you soon. :bassist:
 
Last edited by a moderator:
Man that walnut looks great! Those two layers of veneer you put in add a really nice accent too! It really ties everything together, especially how you picked up the veneer in the neck as well. I like your scarf joint jig, I'm going to have to come up with something like that in the coming weeks.