

Enjoy the benefits of a premium membership!
Upgrade Account
-
TalkBass has been independent since 1998. Add your voice.
Create a free account to reply to discussions, view embedded media, and browse with fewer display ads.
Join free Log in
Want zero display ads or expanded classifieds tools? Compare plans.
You are using an out of date browser. It may not display this or other websites correctly.
You should upgrade or use an alternative browser.
You should upgrade or use an alternative browser.
WBO 23 - Drop it like it's hot
- Thread starter Hout
- Start date
More options
Who Replied?

Where would we be without our dykes.
Underwater?


This is turning out great!
I don't know if I got this right, the capo will be the switch that changes the set of lit markers?
In the lost city of Amstertlantis.
I don't know if I got this right, the capo will be the switch that changes the set of lit markers?
Where would we be without our dykes.
In the lost city of Amstertlantis.


Thanks!
Yes, indeed that's the idea for the capo. My current plan is to have a small reed switch near the nut and a magnet in the capo so that when it's engaged, the switch causes a different led to shine.
Yes, indeed that's the idea for the capo. My current plan is to have a small reed switch near the nut and a magnet in the capo so that when it's engaged, the switch causes a different led to shine.
While the epoxy is drying, I'm trying to see what kind of color the finish will be.
I found these for inspiration
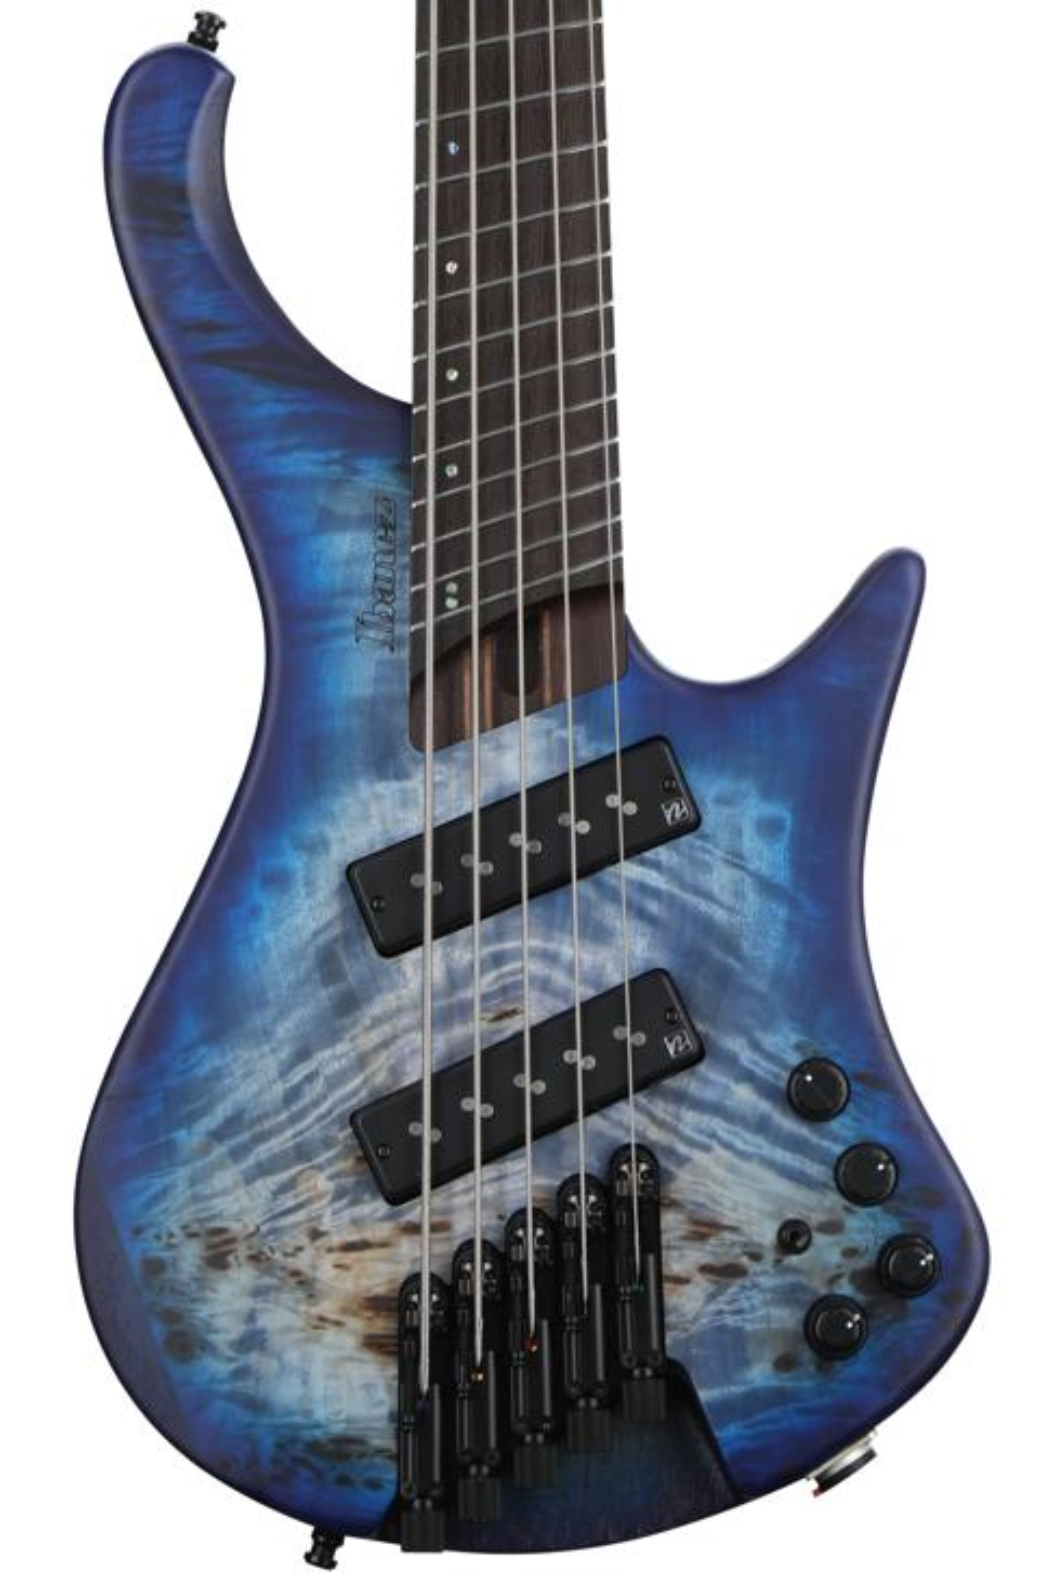
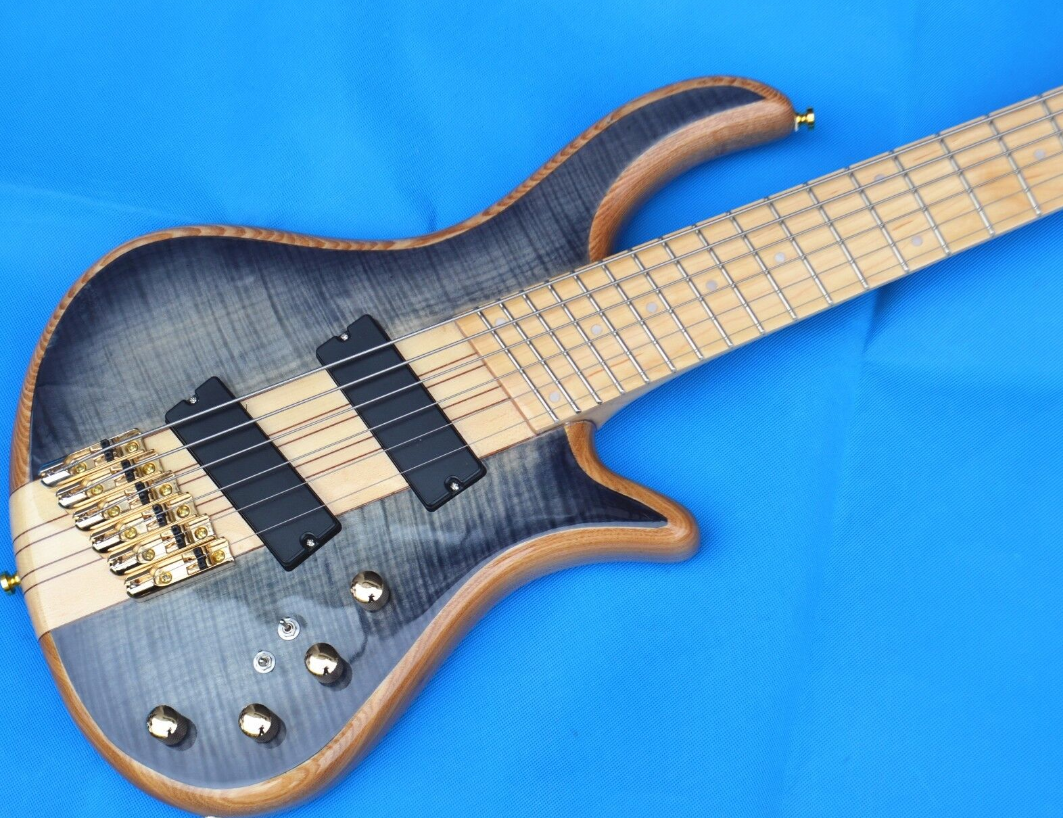
And here's a pic of what I'm getting at.

It looks like poop on the photo, way darker than in reality.
It's a bit of a blue/purple-ish burst. Top will be the light center part, progressing to blue with a purple hue right around the edges.
I found these for inspiration
And here's a pic of what I'm getting at.
It looks like poop on the photo, way darker than in reality.
It's a bit of a blue/purple-ish burst. Top will be the light center part, progressing to blue with a purple hue right around the edges.
It really took ages for the epoxy to dry.
After about 1,5 day it was set hard enough to support the 3d printed logo so I could do the 2nd part of the pour:

That was Sunday evening. Today the stuff was finally hard enough to remove the tape and start carving.

Man I love this Shinto rasp.
Got pretty far with one hour of carving and sanding. It's mostly the neck transition that will need work once I've glued the neck.
Here's the carved body with some mineral spirits


Pics don't really show it but the body is razor thin
After about 1,5 day it was set hard enough to support the 3d printed logo so I could do the 2nd part of the pour:
That was Sunday evening. Today the stuff was finally hard enough to remove the tape and start carving.
Man I love this Shinto rasp.
Got pretty far with one hour of carving and sanding. It's mostly the neck transition that will need work once I've glued the neck.
Here's the carved body with some mineral spirits
Pics don't really show it but the body is razor thin
I noticed quite a significant bow in the fretboard so in preparation of fretting I flattened the front.

I don't have an "official" straightedge but I use this contraption of a linear guide rail, an aluminum strip, double sided tape and 80 grit sandpaper.
The weight of the massive steel linear guide helps to keep the pressure of sanding distributed evenly
Then I drew lines all over the board and sanded until no lines were visible anymore.


 steady moving the bar back and forth without any additional pressure got me from the pretty wobbly purple wood to straight but ugly freshly sanded purpleheart.
I don't have an "official" straightedge but I use this contraption of a linear guide rail, an aluminum strip, double sided tape and 80 grit sandpaper.
The weight of the massive steel linear guide helps to keep the pressure of sanding distributed evenly
Then I drew lines all over the board and sanded until no lines were visible anymore.
Sanded to a mirror shine with 2000 grit and ready for fretwork

Preparing the fretwire and the fret ends


And hammer time

After filing the edges trim I put some purple heart sawdust in the slots, along with some thin CA glue


After it dries I can get to cleaning, leveling and polishing.
And hammer time
After filing the edges trim I put some purple heart sawdust in the slots, along with some thin CA glue
After it dries I can get to cleaning, leveling and polishing.
Did some sanding sanding sanding without much showable progress.. Before I can get the final shape in the neck area I need to set the neck but I figured anything I can do without a that clumsy stick attached to it would be pure bonus. I hardly have any workshop area and it will save me a lot of careful maneuvering, scratches, dents, knocked over stuff etc.
Here's the back sanded to 320 grit and wiped with naptha.

That's some weird figuring in the bubinga Also hard to get nica and smooth.
I must say I'm really enjoying the way this thing is turning out.
I'd also like to point out that I am really happy that I made this simple jig early in the build.

Really low tech, single serving and pretty flimsy, made especially for the glue up of the curved body, but it continues to be valuable throughout the build. It provides a solid surface for all kinds of work on the body. Goes to show that investing in fixes and jigs, even for one time use, is time well spent
Here's the back sanded to 320 grit and wiped with naptha.
That's some weird figuring in the bubinga
Also hard to get nica and smooth.I must say I'm really enjoying the way this thing is turning out.
I'd also like to point out that I am really happy that I made this simple jig early in the build.
Really low tech, single serving and pretty flimsy, made especially for the glue up of the curved body, but it continues to be valuable throughout the build. It provides a solid surface for all kinds of work on the body. Goes to show that investing in fixes and jigs, even for one time use, is time well spent

Glued the neck to the body just now
I am at home with covid since the weekend. Nothing bad other than a runny nose, although I think isolation isn't mandatory anymore over here, I don't want to infect my colleagues or clients plus working from home from time to time has it's upsides..
I prepared a lot more thorough than usual, put everything in place, changed to an old sweater, put on an apron etc. Surfaces sanded with 100 grit and cleaned with acetone.

I used black epoxy for the joint as the gap isn't all to accurate here and there, so if you're gonna see it anyway, better accent it.

After smearing it all over the glue surfaces, I added cotton fibers to the mix to get it to a thicker consistency, so hopefully it will properly fill all the gaps. I made a test glue with similar woods, and it doesn't appear to have any impact on the strength of the joint.
And here they are joined for life:

I am at home with covid since the weekend. Nothing bad other than a runny nose, although I think isolation isn't mandatory anymore over here, I don't want to infect my colleagues or clients plus working from home from time to time has it's upsides..
I prepared a lot more thorough than usual, put everything in place, changed to an old sweater, put on an apron etc. Surfaces sanded with 100 grit and cleaned with acetone.
I used black epoxy for the joint as the gap isn't all to accurate here and there, so if you're gonna see it anyway, better accent it.
After smearing it all over the glue surfaces, I added cotton fibers to the mix to get it to a thicker consistency, so hopefully it will properly fill all the gaps. I made a test glue with similar woods, and it doesn't appear to have any impact on the strength of the joint.
And here they are joined for life:
Okay, so this is me at my most impatient..

Carving semi dry epoxy or just dry enough not to clogg my tools epoxy..
I used handrasps but also this thing I bought recently:

Don't know what it's called, but it's really effective for carving inside corners and other nooks and crannies.
Here's what I got to once the glue was dried enough to remove the clamp.

I'm more or less assuming the glue surface is enough because of the fanned frets and the single cut, but on the treble side it looks a bit ehm.. daring..


I'm happy with the black, although I may be touching stuff up here and there later on to get it to look a bit more even across the joint.
And a Mugg shot

And that there is probably the closest I'll get to the finish line before the deadline
Still a whole lot of finish work to do that I don't want to be rushing, I've been slacking on the capo design, the pcb needs to be finalised and on top of that, I'm leaving for a week of snowboarding the weekend
Carving semi dry epoxy
or just dry enough not to clogg my tools epoxy..I used handrasps but also this thing I bought recently:
Don't know what it's called, but it's really effective for carving inside corners and other nooks and crannies.
Here's what I got to once the glue was dried enough to remove the clamp.
I'm more or less assuming the glue surface is enough because of the fanned frets and the single cut, but on the treble side it looks a bit ehm.. daring..
I'm happy with the black, although I may be touching stuff up here and there later on to get it to look a bit more even across the joint.
And a Mugg shot
And that there is probably the closest I'll get to the finish line before the deadline
Still a whole lot of finish work to do that I don't want to be rushing, I've been slacking on the capo design, the pcb needs to be finalised and on top of that, I'm leaving for a week of snowboarding the weekend
As expected, the holiday trip forced me to let the deadline pass by without any mentionable on the bass. But in all honesty, even without the trip I wouldn't have made it by a long shot.
Hats off to all contenders that did make the cut, I've seen some seriously impressive work here!
Last week I have been doing some work on the bass though, so pic heavy update time:
I like it when my strings run a bit close to the body, so I have set the neck a bit deep on purpose, and without a neck angle. To get that to work, I needed to recess the bridge pieces by a couple of mm's.
To do that accurately, I 3d printed two stages of templates:


As you can see, the shape of the deepest cavity is still a bit wonky. This was due to the wall of the 3d print caving in a bit because of using virtually no infill, and me using too much force. I was more carefully when routing with the second one.

Here's with the bridges in place.

In this pic you also see I drilled the holes for the knobs and switches. I had some trouble getting it all to fit and getting to an acceptable layout. It'll be a bit cramped I guess, but okay.
The thickness of the top was a bit too much for some of the pots, so I had to carefully mak a big mess with a few forstner bits.

Looks ugly, I know. Fortunately, I can use a bit of shielding tape to emphasize it even more
Then I made the holes for the string through stuff, also using another 3d printed part.


With this, I could line up the jig to the front, yet drill from the back. I've seen a number of usefull ways to do this here in LC, although certainly not the quickest, this one worked like a charm for me.

Thanks for watching!
Hats off to all contenders that did make the cut, I've seen some seriously impressive work here!
Last week I have been doing some work on the bass though, so pic heavy update time:
I like it when my strings run a bit close to the body, so I have set the neck a bit deep on purpose, and without a neck angle. To get that to work, I needed to recess the bridge pieces by a couple of mm's.
To do that accurately, I 3d printed two stages of templates:
As you can see, the shape of the deepest cavity is still a bit wonky. This was due to the wall of the 3d print caving in a bit because of using virtually no infill, and me using too much force. I was more carefully when routing with the second one.
Here's with the bridges in place.
In this pic you also see I drilled the holes for the knobs and switches. I had some trouble getting it all to fit and getting to an acceptable layout. It'll be a bit cramped I guess, but okay.
The thickness of the top was a bit too much for some of the pots, so I had to carefully mak a big mess with a few forstner bits.
Looks ugly, I know. Fortunately, I can use a bit of shielding tape to emphasize it even more
Then I made the holes for the string through stuff, also using another 3d printed part.
With this, I could line up the jig to the front, yet drill from the back. I've seen a number of usefull ways to do this here in LC, although certainly not the quickest, this one worked like a charm for me.
Thanks for watching!

Nice job. I really like the use of the 3D printer for template work.
I really like the use of the 3D printer for template work.
Yeah, I've been using 3d printers for about 10 years now and I've always considered making templates and jigs one of their more useful applications.


