• TalkBass has been independent since 1998. Add your voice.
    Create a free account to reply to discussions, view embedded media, and browse with fewer display ads.
    Join freeLog in
    Want zero display ads or expanded classifieds tools? Compare plans.

What's On Your Workbench?

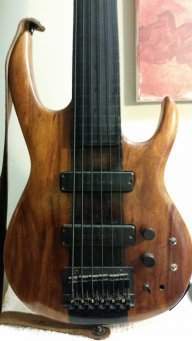
Smilodon: yes it's failed glue. There is residue of glue on both sides.
dwizum: nono, just bad photo.

I am thinking that I will detach fretboard, but it will be hard align and glue all these pieces together without need of lot of cleaning in the wood.

Strange. The good news is that it's probably fairly easy to remove the fretboard completely. (Be careful, just in case the glue adhered better elsewhere)

Aligning could be difficult, but if you drill in some aligning pins before gluing the scarf joint it should be doable. After the scarf is fixed it should be fairly easy to glue on the fretboard. If alignment is a problem you could put in a couple of clamps sideways to help hold the fretboard straight as you clamp the glue joint tight.
 
When I use the handheld router, I want its power cord to stay out of the way. Routing is tricky enough without having to worry about the cord.

Due to how it's attached, up is the natural way to go for this cord:
IMG_20220726_155102.jpg


Back when I did everything on a collapsible workbench in the back yard, I attached the cord to the laundry line. Problem solved. Now that I have a real workshop, there's no laundry line. What to do?

Here's what I've come up with, made from 2 metres of 2x2:
IMG_20220726_154236.jpg

It attaches tool-free, without moving parts, to the workbench.
On the bottom, there's this hook:
IMG_20220726_154429.jpg

It attaches to a leg of the workbench like this:
IMG_20220726_154544.jpg

And it cannot slip off that leg unless you lift it up:
IMG_20220726_154615.jpg


In the middle there's this hook:
IMG_20220726_154435.jpg

Which hooks into the workbench's tool gutter like this:
IMG_20220726_154530.jpg

From the other side:
IMG_20220726_154537.jpg


At the top there's this:
IMG_20220726_154500.jpg

... into which I insert the power cord:
IMG_20220726_154829.jpg

Or maybe like this:
IMG_20220726_154805.jpg


And that's it. My new fixture. Maybe it'll get other functions as well, like it may hold an extra lamp.
 
When I use the handheld router, I want its power cord to stay out of the way. Routing is tricky enough without having to worry about the cord.

Due to how it's attached, up is the natural way to go for this cord:
View attachment 4761966

Back when I did everything on a collapsible workbench in the back yard, I attached the cord to the laundry line. Problem solved. Now that I have a real workshop, there's no laundry line. What to do?

Here's what I've come up with, made from 2 metres of 2x2:
View attachment 4761972
It attaches tool-free, without moving parts, to the workbench.
On the bottom, there's this hook:
View attachment 4761976
It attaches to a leg of the workbench like this:
View attachment 4761977
And it cannot slip off that leg unless you lift it up:View attachment 4761979

In the middle there's this hook:
View attachment 4761983
Which hooks into the workbench's tool gutter like this:View attachment 4761984
From the other side:
View attachment 4761985

At the top there's this:
View attachment 4761988
... into which I insert the power cord:
View attachment 4761997
Or maybe like this:
View attachment 4761998

And that's it. My new fixture. Maybe it'll get other functions as well, like it may hold an extra lamp.


There's no kill like overkill. Good design. I'd likely use a shower curtain rod bolted to the ceiling at each end parallel to the bench face. Throwing the power cord over it to the extension cord. Your design certainly is sturdy, and will support a light, etc. with no issues.
Congrats on problem solving. Some of the workarounds we do become so useful we don't know how we worked without them for so long.
 
I'd likely use a shower curtain rod bolted to the ceiling at each end
I try to avoid drilling into the walls and ceilings at all costs. They are a horrible kind of concrete, cheap, crumbly, filled with half-inch pebbles that make your drill jump out of whack. :eek:

So I knew from the outset that whatever the solution was, must stand on the floor.

So here we are. :)
 
Last edited:
  • Like
Reactions: tubedude and Beej
Just did my cleanest routing job yet!
Which isn't saying too much, I've only done a couple but still - very happy with this one!

I had already done a big freehand messy route to add in the switch, but I just made a template so that I could clean it up and make it nice, then I put the bridge pickup route. Not perfect, but pretty dang good I think!

Still having a think on switching here.
When it was just the one pickup I had the tele switch doing series/split/parallel. Now that's going to become a pickup selector and I'll do two sliders or mini switches for series/split/parallel for each pickup.

I thought I found a diagram to use three position sliders (8 lugs) for this so yesterday I bought two but now I can't find it, so I'll need to dig more.
 

Attachments

  • PXL_20220726_164256929.jpg
    PXL_20220726_164256929.jpg
    1.7 MB · Views: 61
  • PXL_20220726_182232844.jpg
    PXL_20220726_182232844.jpg
    1.7 MB · Views: 62
  • PXL_20220726_184153558.jpg
    PXL_20220726_184153558.jpg
    1,000.7 KB · Views: 62
  • PXL_20220726_184143319.jpg
    PXL_20220726_184143319.jpg
    1.4 MB · Views: 62
Thanks! Theres really no reason outside of laziness for me to not use templates. I have a guy with a laser cutter two blocks from my house - charged me $10 for this one, turnaround time was about an hour. My template drawings aren't always the best though, and I need a skinnier router bit I think, but I made it work! Each time a bit better than the last.

Not sure if this is a good or bad place to ask but seeing as its what I'm working on... does this diagram look right? For use with this switch? Switchcraft 3-Way Guitar Slider Switch-Black or am I barking up the wrong tree?

Assuming I have wired it correctly (quadruple checked), either the diagram is wrong or I have the wrong switch. I have the bare wire wired with the green one.

In top position I am getting no output at all, then middle and back position seem about the same to me. Both coils are active, front coil is hotter than the back.
 

Attachments

  • humbuck5.gif
    humbuck5.gif
    5.3 KB · Views: 37
Thanks! Theres really no reason outside of laziness for me to not use templates. I have a guy with a laser cutter two blocks from my house - charged me $10 for this one, turnaround time was about an hour. My template drawings aren't always the best though, and I need a skinnier router bit I think, but I made it work! Each time a bit better than the last.

Not sure if this is a good or bad place to ask but seeing as its what I'm working on... does this diagram look right? For use with this switch? Switchcraft 3-Way Guitar Slider Switch-Black or am I barking up the wrong tree?

Assuming I have wired it correctly (quadruple checked), either the diagram is wrong or I have the wrong switch. I have the bare wire wired with the green one.

In top position I am getting no output at all, then middle and back position seem about the same to me. Both coils are active, front coil is hotter than the back.
Hook it up something like this:

wiring1.png

You need to convert the 4 contacts per side to 3 by shorting the top 2 on each side together.
 
@ARandGenUsrName
Your best chance of getting this question answered is asking in the "Pickups & Electronics" department.
I actually made a post there a few weeks ago and got crickets. I'll give it a bump if I can't figure it out

Hook it up something like this:

View attachment 4763014
You need to convert the 4 contacts per side to 3 by shorting the top 2 on each side together.
Thank you, I'll give it a go after work!
 
  • Like
Reactions: instrumentalist
Be sure to upload the schematic there. (I mean the file you added to your post here.)
Will do! I'll give Jons recommendation a shot first, and I found another diagram or two to test out.

I was able to find a few more posts about exactly this on TDPRI and similar forums, but they are all old and the image links are dead. Was able to get a couple using the Wayback Machine, so I have a few things to work with now.

I'm frustrated because I already did this legwork and could swear I found something that was confirmed to work, but depending on the time of day I'm doing stuff, I bounce between three computers and my phone and can't for the life of me find where I would have saved it.
 
  • Like
Reactions: instrumentalist
Woooo! Got it to work! At least sort of, mostly!
A diagram from here worked. As I mentioned above, I had to use the Wayback Machine to see the images, so I've re-upped it here to be double safe.
So seems to work (from tap test) as expected for the Donlis pickup (thats the aftermarket one with exposed pole pieces).
The stock pickup (now in bridge) will need some experimenting. I converted it from a two wire to four, but there was no bare ground wire, and I don't know where to add one. I am also not sure which is the start and end wire for each coil, so I need to do some testing to get things figured out. But I took a guess on that and I am definitely getting two different sounds for what should be series and parallel, so I think I might have got it right. Coil tap position doesn't work though. Would that have anything to do with my missing ground wire from the pickup, or is that a separate issue? Either way, I'll focus on making sure series and parallel switching is working as it should and that they both sound good to me, because if they don't I'll just order another Donlis pickup anyway, so no point mucking about too much. I want to have series/parallel/split to all be usable tones.

Ignore my insane wiring job here. I haven't cut the pickguard for the switches yet and am not totally decided where I'm going to put them, so I very quickly tossed everything together to test and will re-do it.
View attachment 4763014
You need to convert the 4 contacts per side to 3 by shorting the top 2 on each side together.
This didn't work for me - series and parallel seemed to work, but the top position just killed signal instead of splitting.
 

Attachments

  • diagram.jpg
    diagram.jpg
    6.3 KB · Views: 47
  • PXL_20220728_010744148.jpg
    PXL_20220728_010744148.jpg
    768.8 KB · Views: 46
Last edited:
  • Like
Reactions: RichterScale
Well, the old art room that I've been using as a shop for a few years? They need to use it as a classroom again. Well, they don't really "need" it, it has more to do with poor planning/management, last minute, low hanging fruit, etc.
So, I'm breaking it down, down sizing, cleaning and reorganizing the small basement area in the main building and moving/merging my stuff down there.
The 20 yr old Delta 14" that I hauled up from the basement and into my 2nd flr shop in another building and fixed up with my own money? I asked if I could buy it, instead of hauling back down again, to stick in a corner to collect dust, because it was never used and since I fixed it up, I've only used it once,....and it was for a personal project and not even for work. I didn't get a straight answer from the first person I asked. So, mentioned it to the guy who runs the general maint in my building and he said,......"why would you even ask that guy?We don't use the stupid thing,....just take it!"
He didn't need to say it twice.
 

Attachments

  • KIMG0238.JPG
    KIMG0238.JPG
    425.2 KB · Views: 53
  • KIMG0241.JPG
    KIMG0241.JPG
    602.2 KB · Views: 57