• TalkBass has been independent since 1998. Add your voice.
    Create a free account to reply to discussions, view embedded media, and browse with fewer display ads.
    Join freeLog in
    Want zero display ads or expanded classifieds tools? Compare plans.

Winter Build Off 2019- Der Hoffy Schnitzelblaster

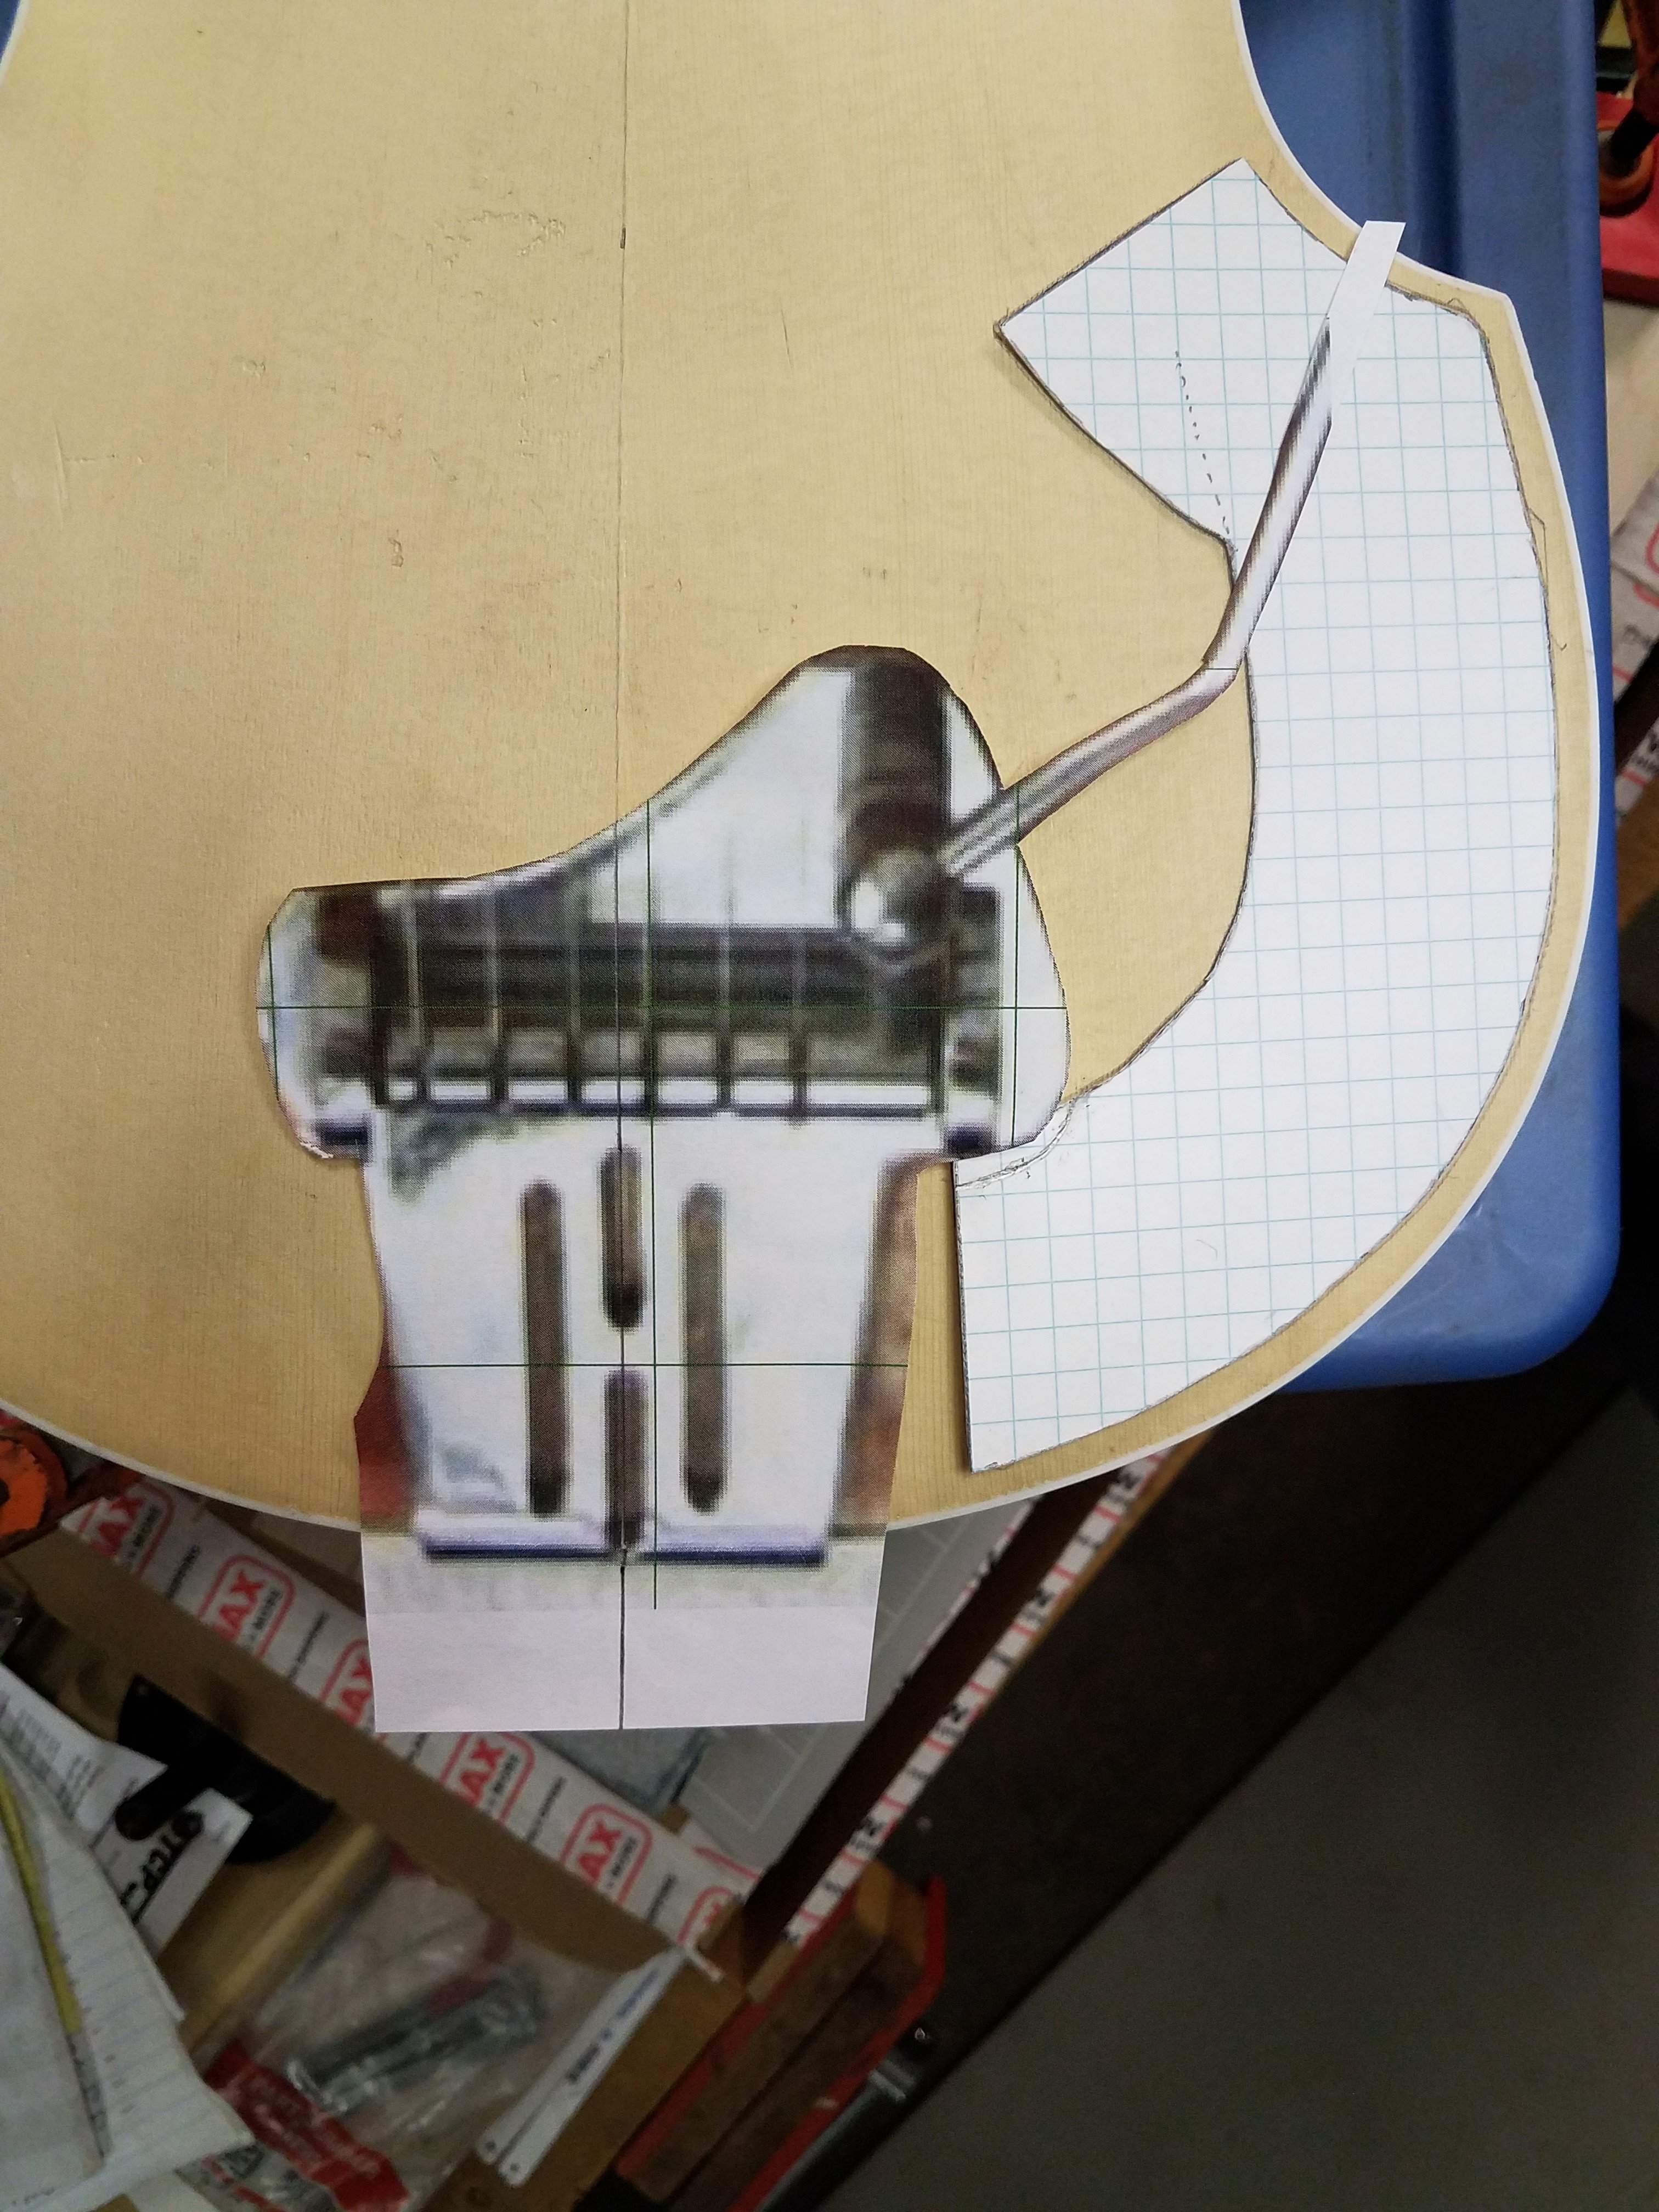
I printed out a scaled picture of a short Hofner vibrato to see how it would look and fit on the violin body.
It's a really simple design. Less than 10 pieces. One modification I would make is extending the front of the plate and adding a front bar to improve the angle of the strings from the bridge. Might not be necessary since the archtop bridge is pretty high to begin with.
20190106_182248.jpg
 
I decided to plug the smaller cracks too instead of sawdust and superglue and hoping I got it down into the depths.
1/4" Forstner bit and 1/4" poplar dowels.
20190109_193248.jpg

Titebond and a rubber mallet.
20190109_193228.jpg

And three plugs down.
20190109_191613.jpg

After the glue dries I will drill and plug a few more along the cracks which should lock them together good.
20190109_193335.jpg

This spot doesn't look like a crack to the naked eye so I haven't plugged it yet but looking at the picture blown up it sure is a crack and on the part of the block that isn't going to be routed away.
 
I am committed to the larger control plate with the built in booster and fuzz.
20190109_175745.jpg

Seriously committed. Like making holes committed.
20190109_193153.jpg

I also got back my pencil that fell in when I was cleaning out the chink in the neck block and a scrap of wood that had been sealed in the body at the factory and was rattling around inside since I got the body.
Another plus is that there is a bridge block. Knowing where the block is is helpful for knowing where the bridge has to go and how long the neck has to be so that the bridge is centered on the block.
 
A few more parts.
Cream pearl 4 ply pickguard material.
20190109_220130.jpg

And a couple of booster kits I bought a while back. Both are based on the Electro Harmonics LPB1 clean booster. One is through hole components on is surface mount. The through hole PCB is tiny. About the size of a postage stamp. The SMT board is even smaller.

20190109_220337 (1).jpg

The fuzz I will be making from scratch. The Bazz Fuss looks like it will do the job.
20190109_221321.jpg
 
Looking good! After you finish routing out the control cavity in the top, don't forget to add some doubler blocks where the screws for the control plate will go. Some blocks of 1/4" hard maple, glued and clamped up inside the top. The top itself won't have enough depth and strength for the screws.

I'm still chuckling about the name Schnitzelblaster. I'm picturing an old German black powder rifle with a flared bell on the barrel. And a guy in Lederhosen skeet shooting sausages with it.
 
Looking good! After you finish routing out the control cavity in the top, don't forget to add some doubler blocks where the screws for the control plate will go. Some blocks of 1/4" hard maple, glued and clamped up inside the top. The top itself won't have enough depth and strength for the screws.

I'm still chuckling about the name Schnitzelblaster. I'm picturing an old German black powder rifle with a flared bell on the barrel. And a guy in Lederhosen skeet shooting sausages with it.
I have an image of Elmer Fudd in full alpine regalia saying "Sei sehr, sehr ruhig! Ich jage Kaninchen...heheheheh"
 
Last edited:
Looking good! After you finish routing out the control cavity in the top, don't forget to add some doubler blocks where the screws for the control plate will go. Some blocks of 1/4" hard maple, glued and clamped up inside the top. The top itself won't have enough depth and strength for the screws.

I'm still chuckling about the name Schnitzelblaster. I'm picturing an old German black powder rifle with a flared bell on the barrel. And a guy in Lederhosen skeet shooting sausages with it.

Thanks for the tip Bruce.
One of my pet peeves too when screws are put in willy-nilly with no though as to whether the material being screwed can hold the screw. Don't get me started on self tappers being used when it would take like two minutes longer to get a tap and use a machine screw to do the job properly.

Ssssh! Sei sehr sehr leise. Ich jage Schnitzel!
f03d242618902269a7affeff797c7e81.jpg
 
  • Like
Reactions: ReasonablyHappy
So close and yet so far.
Between rain all week, work, and other commitments I haven't had a chance to do any real work on any of my builds.

Today I managed to get as far as setting up before I ran out of time and had to put everything away again.
20190120_160954_004.jpg

Good news is the weather is going to be good all week so I can finally make some more sawdust and get caught up.
20190120_160835.jpg
 
  • Like
Reactions: Matt Liebenau
Looking good! After you finish routing out the control cavity in the top, don't forget to add some doubler blocks where the screws for the control plate will go. Some blocks of 1/4" hard maple, glued and clamped up inside the top. The top itself won't have enough depth and strength for the screws.

I'm still chuckling about the name Schnitzelblaster. I'm picturing an old German black powder rifle with a flared bell on the barrel. And a guy in Lederhosen skeet shooting sausages with it.

I'll have what he's having!