• TalkBass has been independent since 1998. Add your voice.
    Create a free account to reply to discussions, view embedded media, and browse with fewer display ads.
    Join freeLog in
    Want zero display ads or expanded classifieds tools? Compare plans.

Winter Build Off 2020 - Kuun Space

The only thing holding me back is my love for long boring conference calls.
You should get a coffee cup like my boss's -
i_survived.jpg
 
Another morning in the shop.
I pulled the body out of the bag (that could be the start of an interesting short story in a different context). I was concerned that as the bag pushed the laminate down inside it would pull it out from between the two pieces of cherry. That concern was unfounded, the laminate stayed in place. I was also thinking that the laminate would get glued to the cherry all over the place, this didn't happen either. I cleaned everything up, it looks great, no gaps or anything unusual. I have a lot more cleanup to do inside the body.
20191231_120721.jpg
20191231_120726.jpg

I placed the top on to see what I'm up against. I need to figure out two things:
1) do I need to brace under the top (current thinking is I don't)
2) how should I shape the cherry that's proud on the back (I'm not going to do anything until after I get everything glued up)

Given the gap between the cherry and top you can see quite a ways into the body, so it will have to be well sanded and finished inside.
20191231_090718.jpg

I pulled the pickup cover out of the clamps and worked on it a bit, probably doesn't look any different than yesterday. I'll glue some wood in across the bottom to hold the pickup in the cover. I may need to add blocks for the pickup screws too.

20191231_080143.jpg
20191231_120733.jpg

I put the SIDE dots on the fingerboard, I used abalone which looks great. Unfortunately I mistook one of the fret lines for a marker line and drilled right through it. Ugh. I loaded the hole up with quilted maple shavings and recut the fretline. Considering all the knots in the birds eye, you can't tell it's been repaired at all. Then I glued on the fretboard. As I sit here typing I realized that was premature. I was planning on not gluing it on until after I got the inlay done, that way if I messed it up, I could just cut another one. hmm. Nothing like "de-gluing" the clamps AFTER getting the glue put on the parts. A little stressful.
20191231_120716.jpg

I was checking things out and found that I had cut the neck pocket crooked, it was so nice and tight too. I went about repairing that, it should be largely invisible. I didn't take any pics of that.

I think I've glued myself out of being able to do much this afternoon and the honey-do list has been ignored for too long.
 

Attachments

  • 20191230_115253.jpg
    20191230_115253.jpg
    944.3 KB · Views: 76
You should get a coffee cup like my boss's -
View attachment 3649735
I work from home and my office is in the same space as my music studio, I often have a bass in hand during the "listen only" conference calls, I've only gotten caught 2 or 3 times in all my years of working from home where I forgot to mute the phone.

The latest trend is to do video rather than audio conference calls, which makes things a bit more complicated for playing at work :-D
 
I work from home and my office is in the same space as my music studio, I often have a bass in hand during the "listen only" conference calls, I've only gotten caught 2 or 3 times in all my years of working from home where I forgot to mute the phone.

The latest trend is to do video rather than audio conference calls, which makes things a bit more complicated for playing at work :-D
I suppose it also requires you put pants on too. :roflmao:
 
I pulled the neck out of the clamps, all good. Then I went to work to recut the neck pocket, hey it's straight this time! As expected the patch I had to put in on the body is invisible, another good thing about working with wood that has straight grain!


I normalized the pickup cover as best I could then got to cutting out the hole in the top. I carried the oval shape into the end of the neck. I did the hole the old manual way - lined up the cover, traced the outline, cut it on the scroll saw then used the oscillating drum sander to make it perfect.
20200101_144529.jpg

the pickup cover slides in perfectly right now, I've got a some finish sanding to do, which should create the space for the finish.
20200101_144522.jpg

The amount left between the neck pocket and the pickup hole is a bit scary, I'll have to be super careful of it until I get the top glued on, it will get glued onto the back. You can see the lines I made on the hole to mark where there was interference with the cover, I just take a little off on the sander and try again until it's perfect.
20200101_144534.jpg

Then I used a forstner bit and then the router to create clearance for the cover in the back of the body.
20200101_150046.jpg

Which looks super ugly when I take the top off!
20200101_150051.jpg

I've got an hour before dinner, maybe I'll start working on the neck profile, then I'll need to sand the interior, cut an access hole cover and put a finish on it before I can glue the top on.
 
I ended up not having an hour last night, well I did, but after I sat down in the comfy chair in the living room with the fire going, that was the beginning of a little rest before band practice. Probably a good thing. I played the Carl Factor last night, whew that thing is a monster. Love it.

During my sleep lapse this morning I thought that I really need to work to get the top glued on, that is going to be my focus for the next little bit, and there's a lot to be done. First is the most stressful - carving the inside of the top. I have done this a few times before, you have to learn to trust the machines and pay attention.

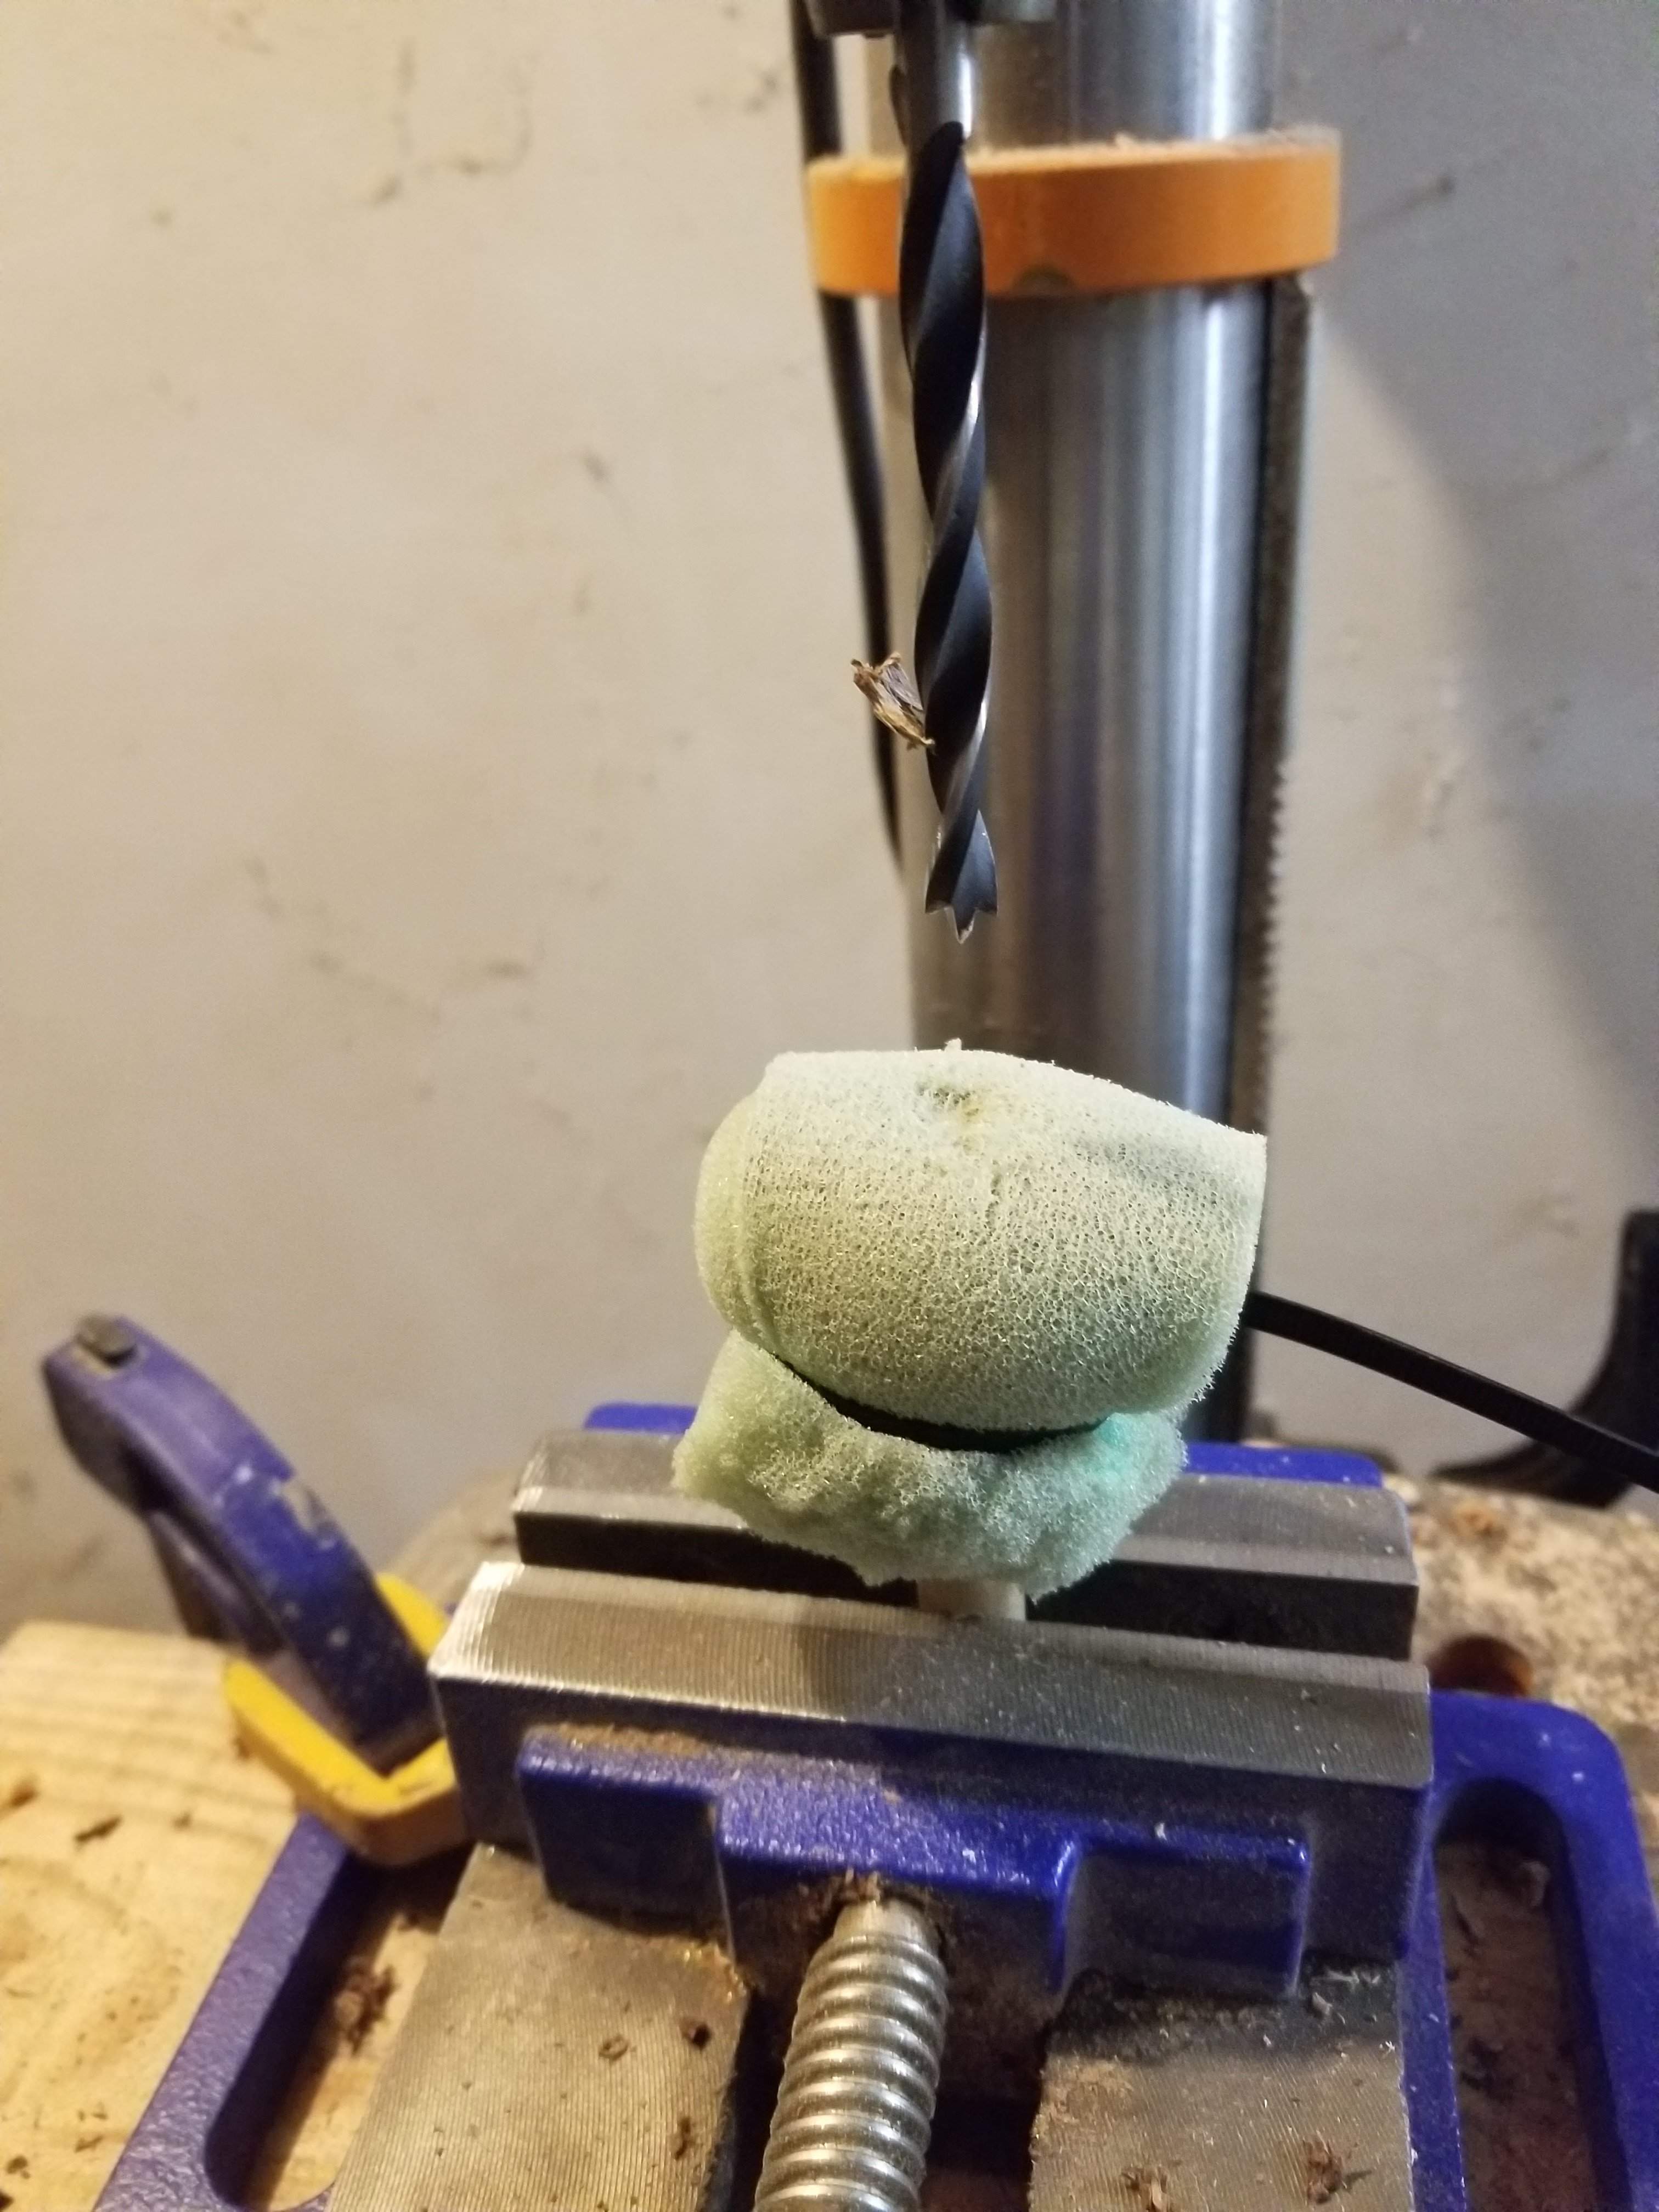
I start with a dowel clamped in a vice on my drill press. I set the distance between the tip of the drill bit and the top of the dowel as the thickness I am looking for on the top. Honestly this is thicker than I want, but I'll go with this for now and assume the difference will be made up in final sanding on the front and back. The first time I did this I made the end of the dowel pointy, figuring that would give me the most accurate depth in the smallest possible area. It also made little dings in the front. Ugh, that was not fun. The dowel is now rounded off, but has a lot of flat surface area to spread the load a bit, no dings on the front. The foam just makes sure I don't drag the dowel across and scratch the front.
20200102_080334.jpg

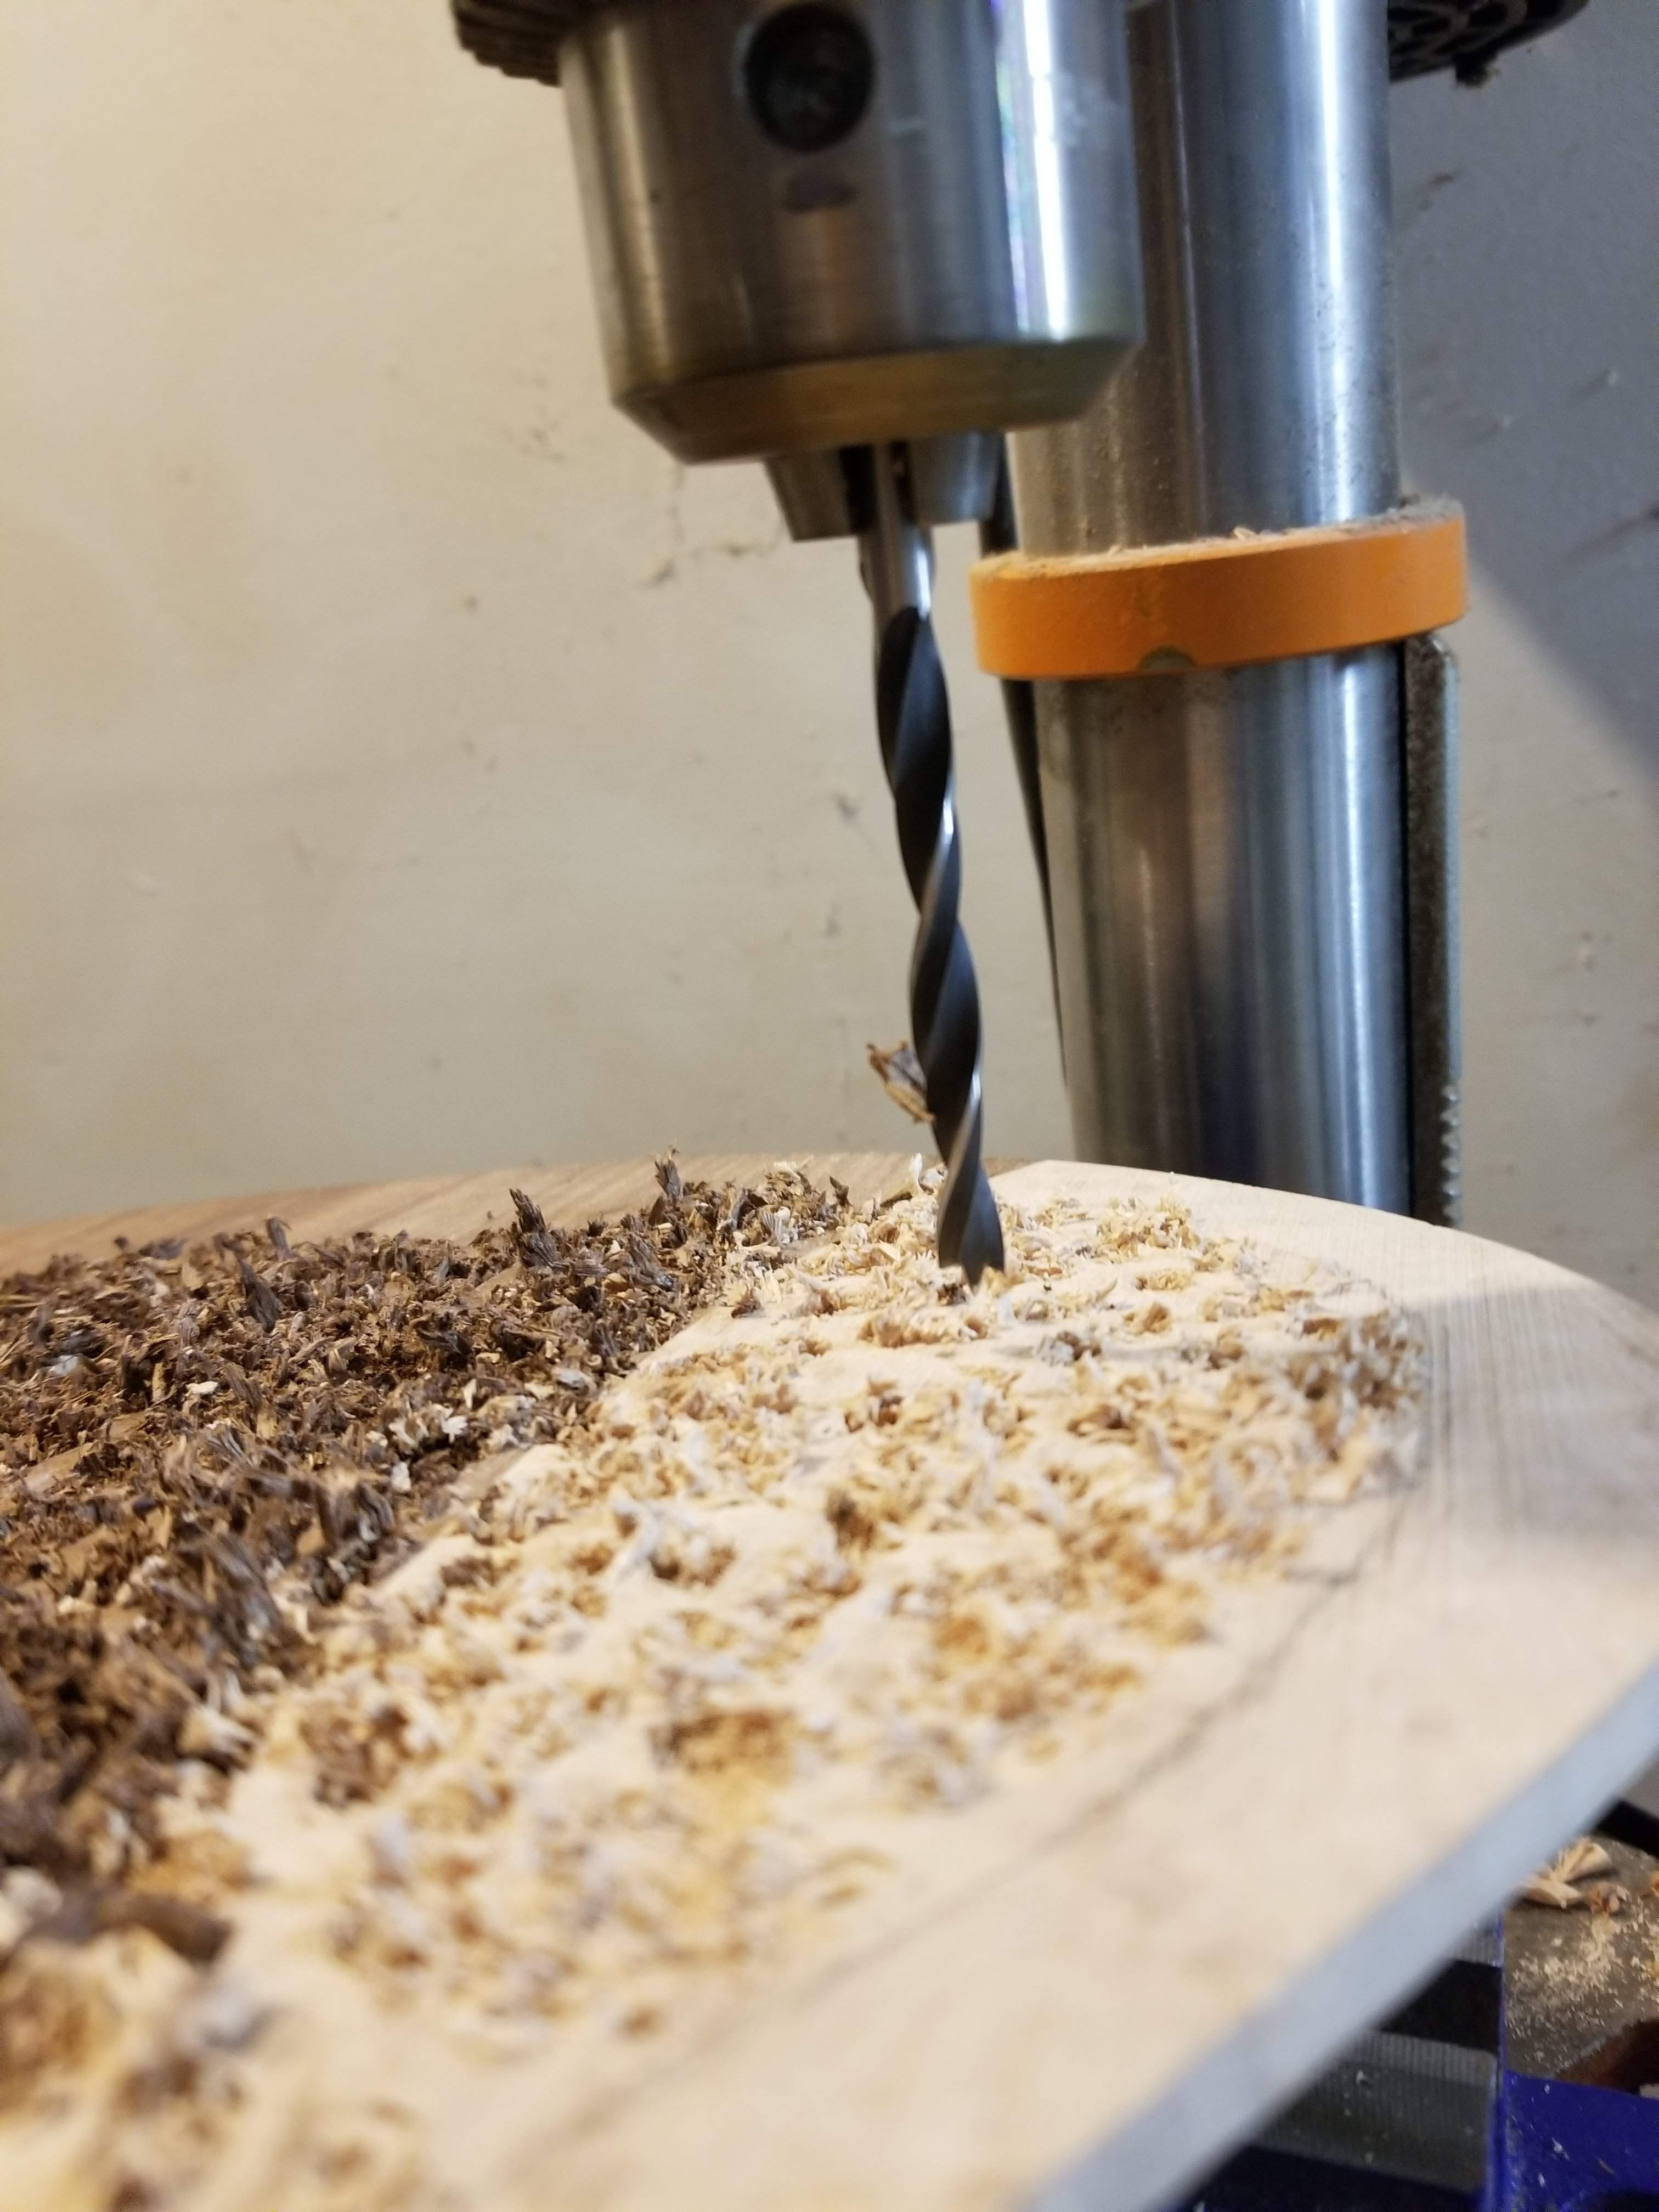
Then I drilled about a thousand holes, very repetitious and boring, but after a while you get in a groove, it probably took me 20 minutes to do all these holes. I used a small bit like this so that there is very little pressure and so that it's more accurate with the smaller surface area of each hole.
20200102_080332.jpg

Then I put a core box bit in my palm router and started working my way around, this is where the "pay attention" part comes in. First I have to pay attention to where the bottom of the router is and what it is resting on to make sure it's not leaning, second I have to watch for the dimples from the drill bit, the intent is to get rid of all the dimples, but the holes and dimples are more shallow the closer you get to the edges, or other places where it's contoured. At this point I've gotten rid of most of the outside edges and I just need to go down to remove the dimples. The dimples will leave the top a little over 3/16" deep, with a target closer to 1/8". You can see on the outer edges where the dimples are starting to disappear.
20200102_084205.jpg

And yeah I missed an opportunity to buy a finger plane here. Had I thought further ahead I should have done that.
 
You might consider using a standard drill bit next time instead of brad points. Cleaner bottom to the holes and will leave less material for planning or chiseling.
I considered which drill to use - the reason I picked a brad point was because it would cut easier and therefore require less pressure. That experience of putting dings all of the front of my last one has me spooked, I guess.
 
Lunch was productive. I started out by calling around to the local wood places, really there are only two I can think of that might have finger planes and neither had them in stock. I took out my gouge and started removing material, it went well on the walnut, except I did get a couple of spots where it grabbed the grain and pulled up more material than I was happy with. Given the swirling grain on birds eye, it didn't work well there at all.

I remembered I have an angle grinder with a flap disc, so I figured I'd try that. I tried both 80 and 120 grits, the 80 was much better, it removed material slowly enough that it was comfortable and it didn't burn, the 120 tended to burn easily. I got the first round all the way done and took a measurement, it was still too thick. I did another round of drill holes in the body area (not in the horns) and repeated with the angle grinder then ROS. At this point it's just a little under 3/16" (5mm) thick. I think I'm going to leave it there.

If anyone has suggestions on whether I should go thinner, I'm open to ideas, I have very little experience here. I will be using a tailpiece with a floating bridge, if that helps.
20200102_130651.jpg
 

Latest posts





