• TalkBass has been independent since 1998. Add your voice.
    Create a free account to reply to discussions, view embedded media, and browse with fewer display ads.
    Join freeLog in
    Want zero display ads or expanded classifieds tools? Compare plans.

Winter Build Off 2020 - Sub-woofer On A Stick

Don't mind the Zero Fret Haters. There will always be a few of them. I use zero frets on all of my own models. For lots of sound technical reasons. Don't be afraid to ignore Luthier traditions when you think you have a better way. Of course, looking at this project, I don't need to tell you that! Carry on!
 
I'd leave that artifact, and lean into it even.
Go with the glass cloth that wets clear, show the air and the bones and the ideas of the thing... Make all the bits work together.

...or, I might just need coffee.


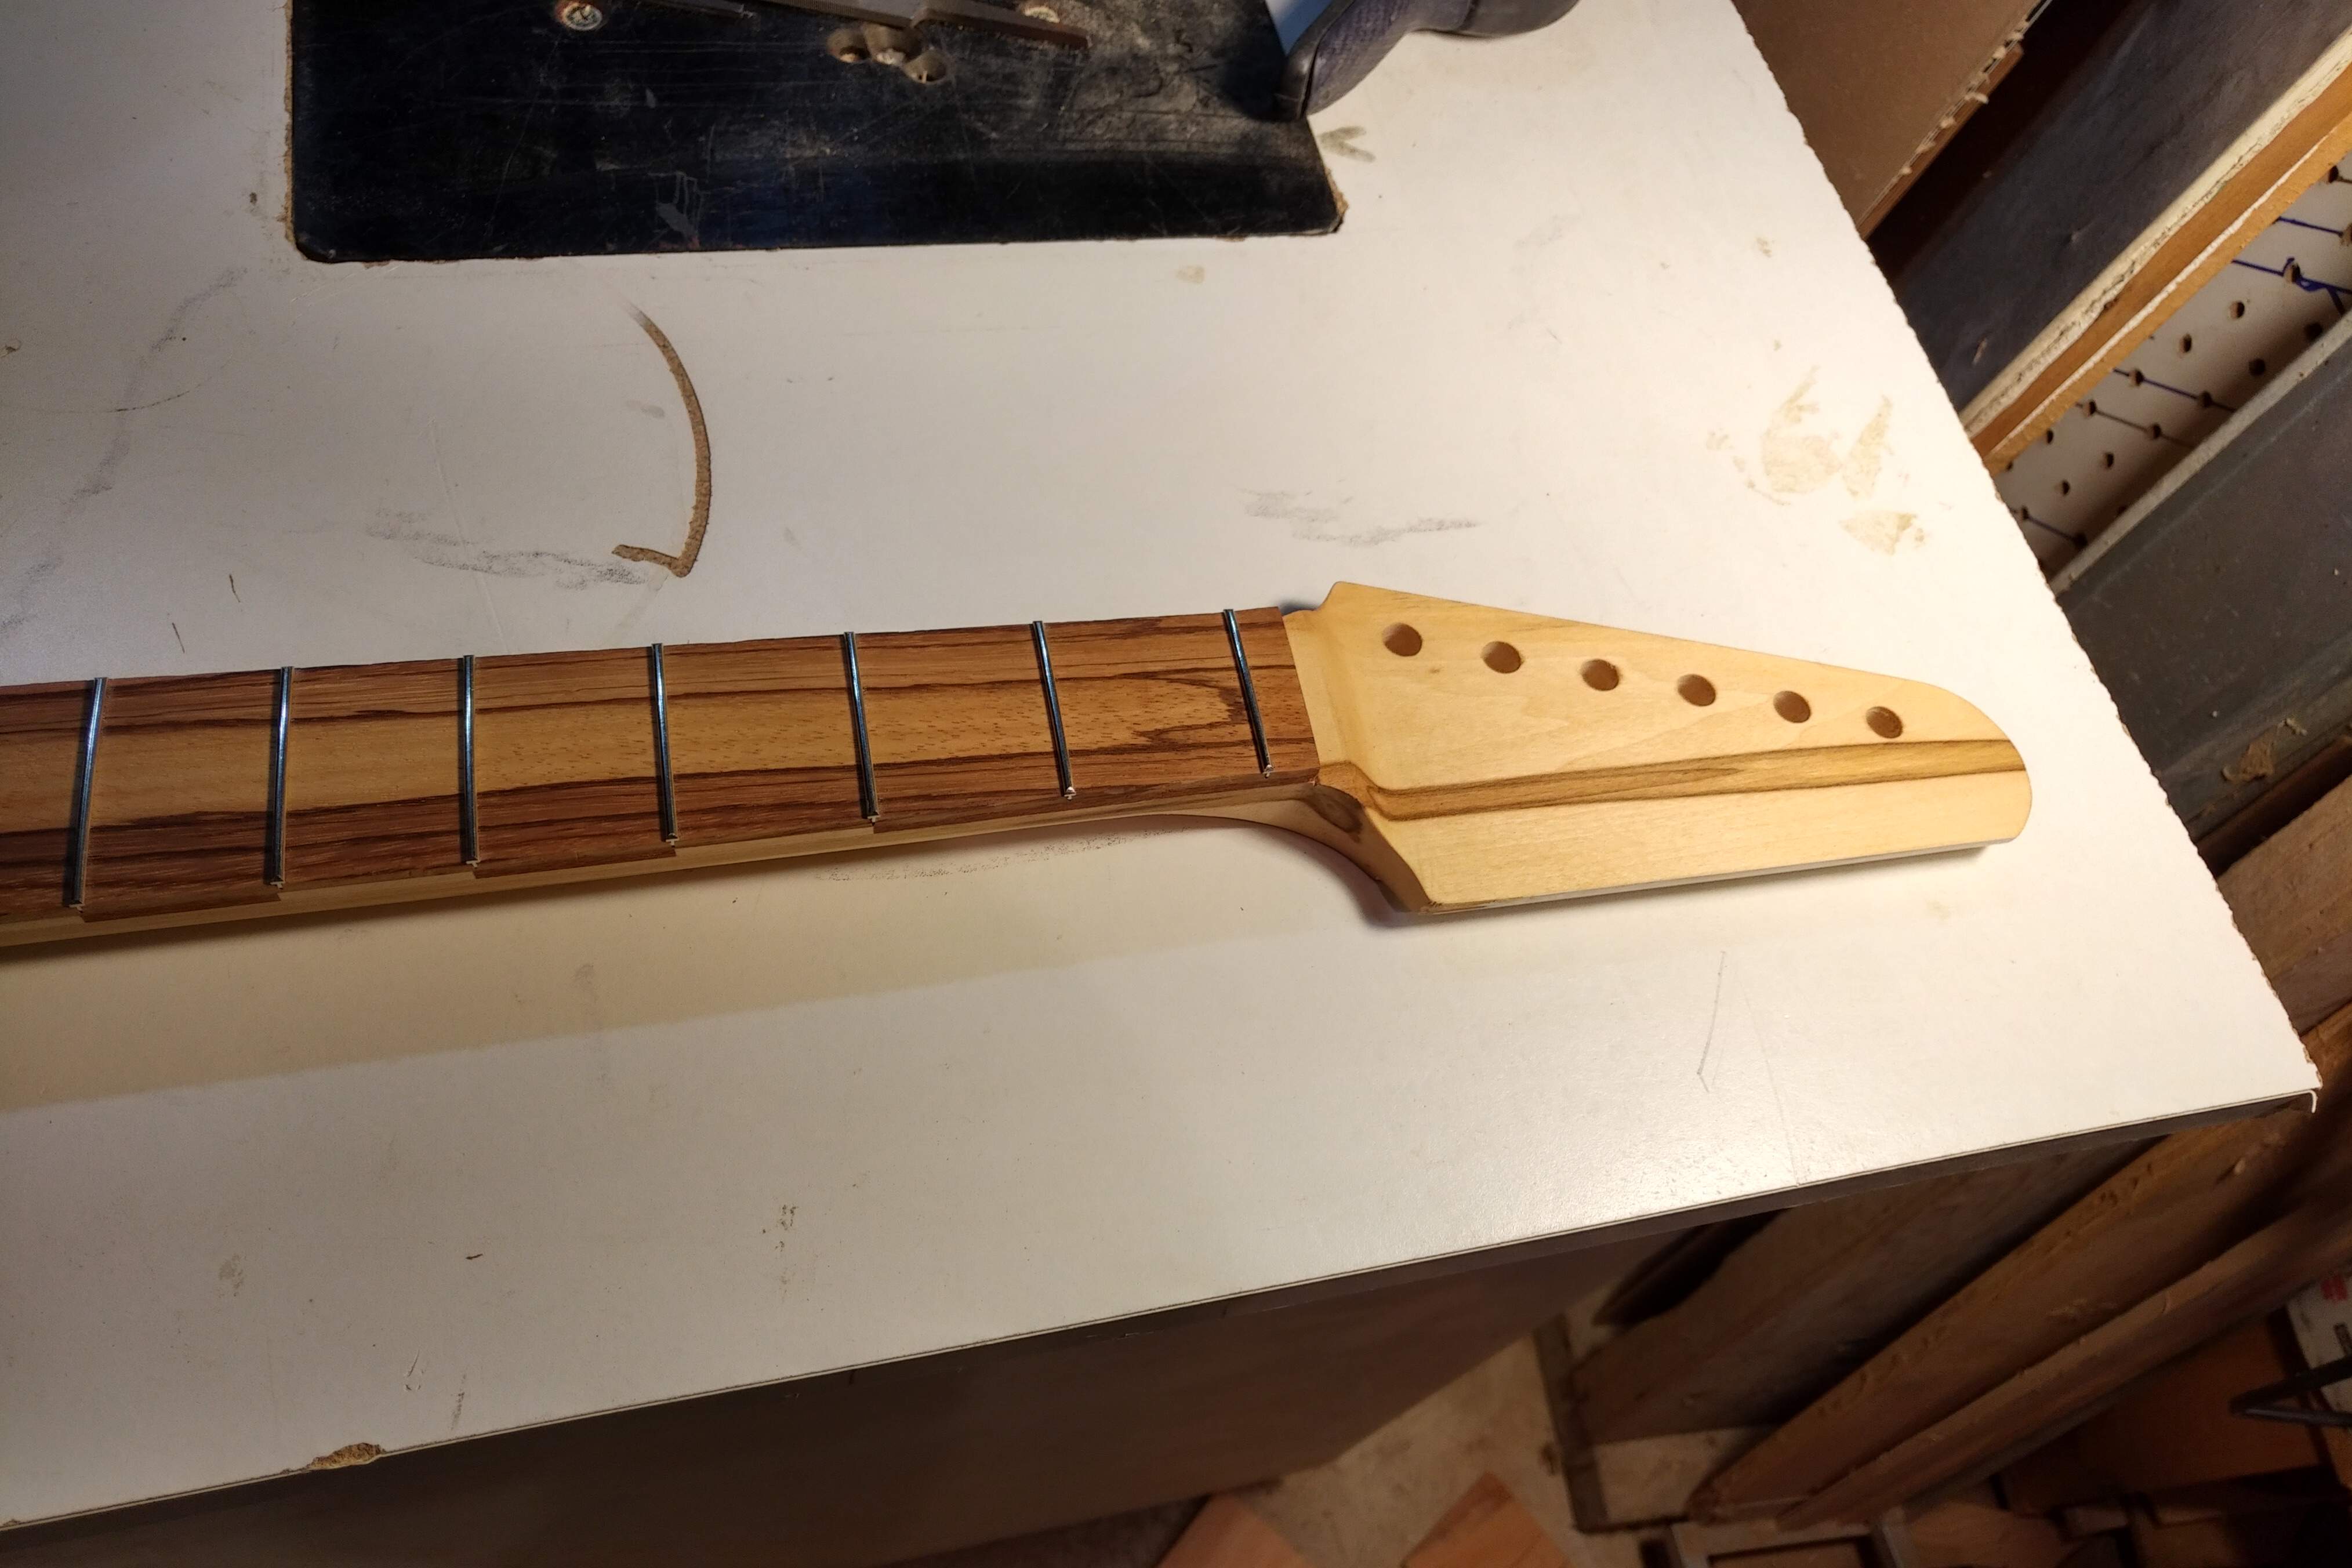
I've gotten the neck to the point where I can cut the neck pocket and get back to building the body and test some resonator configurations.
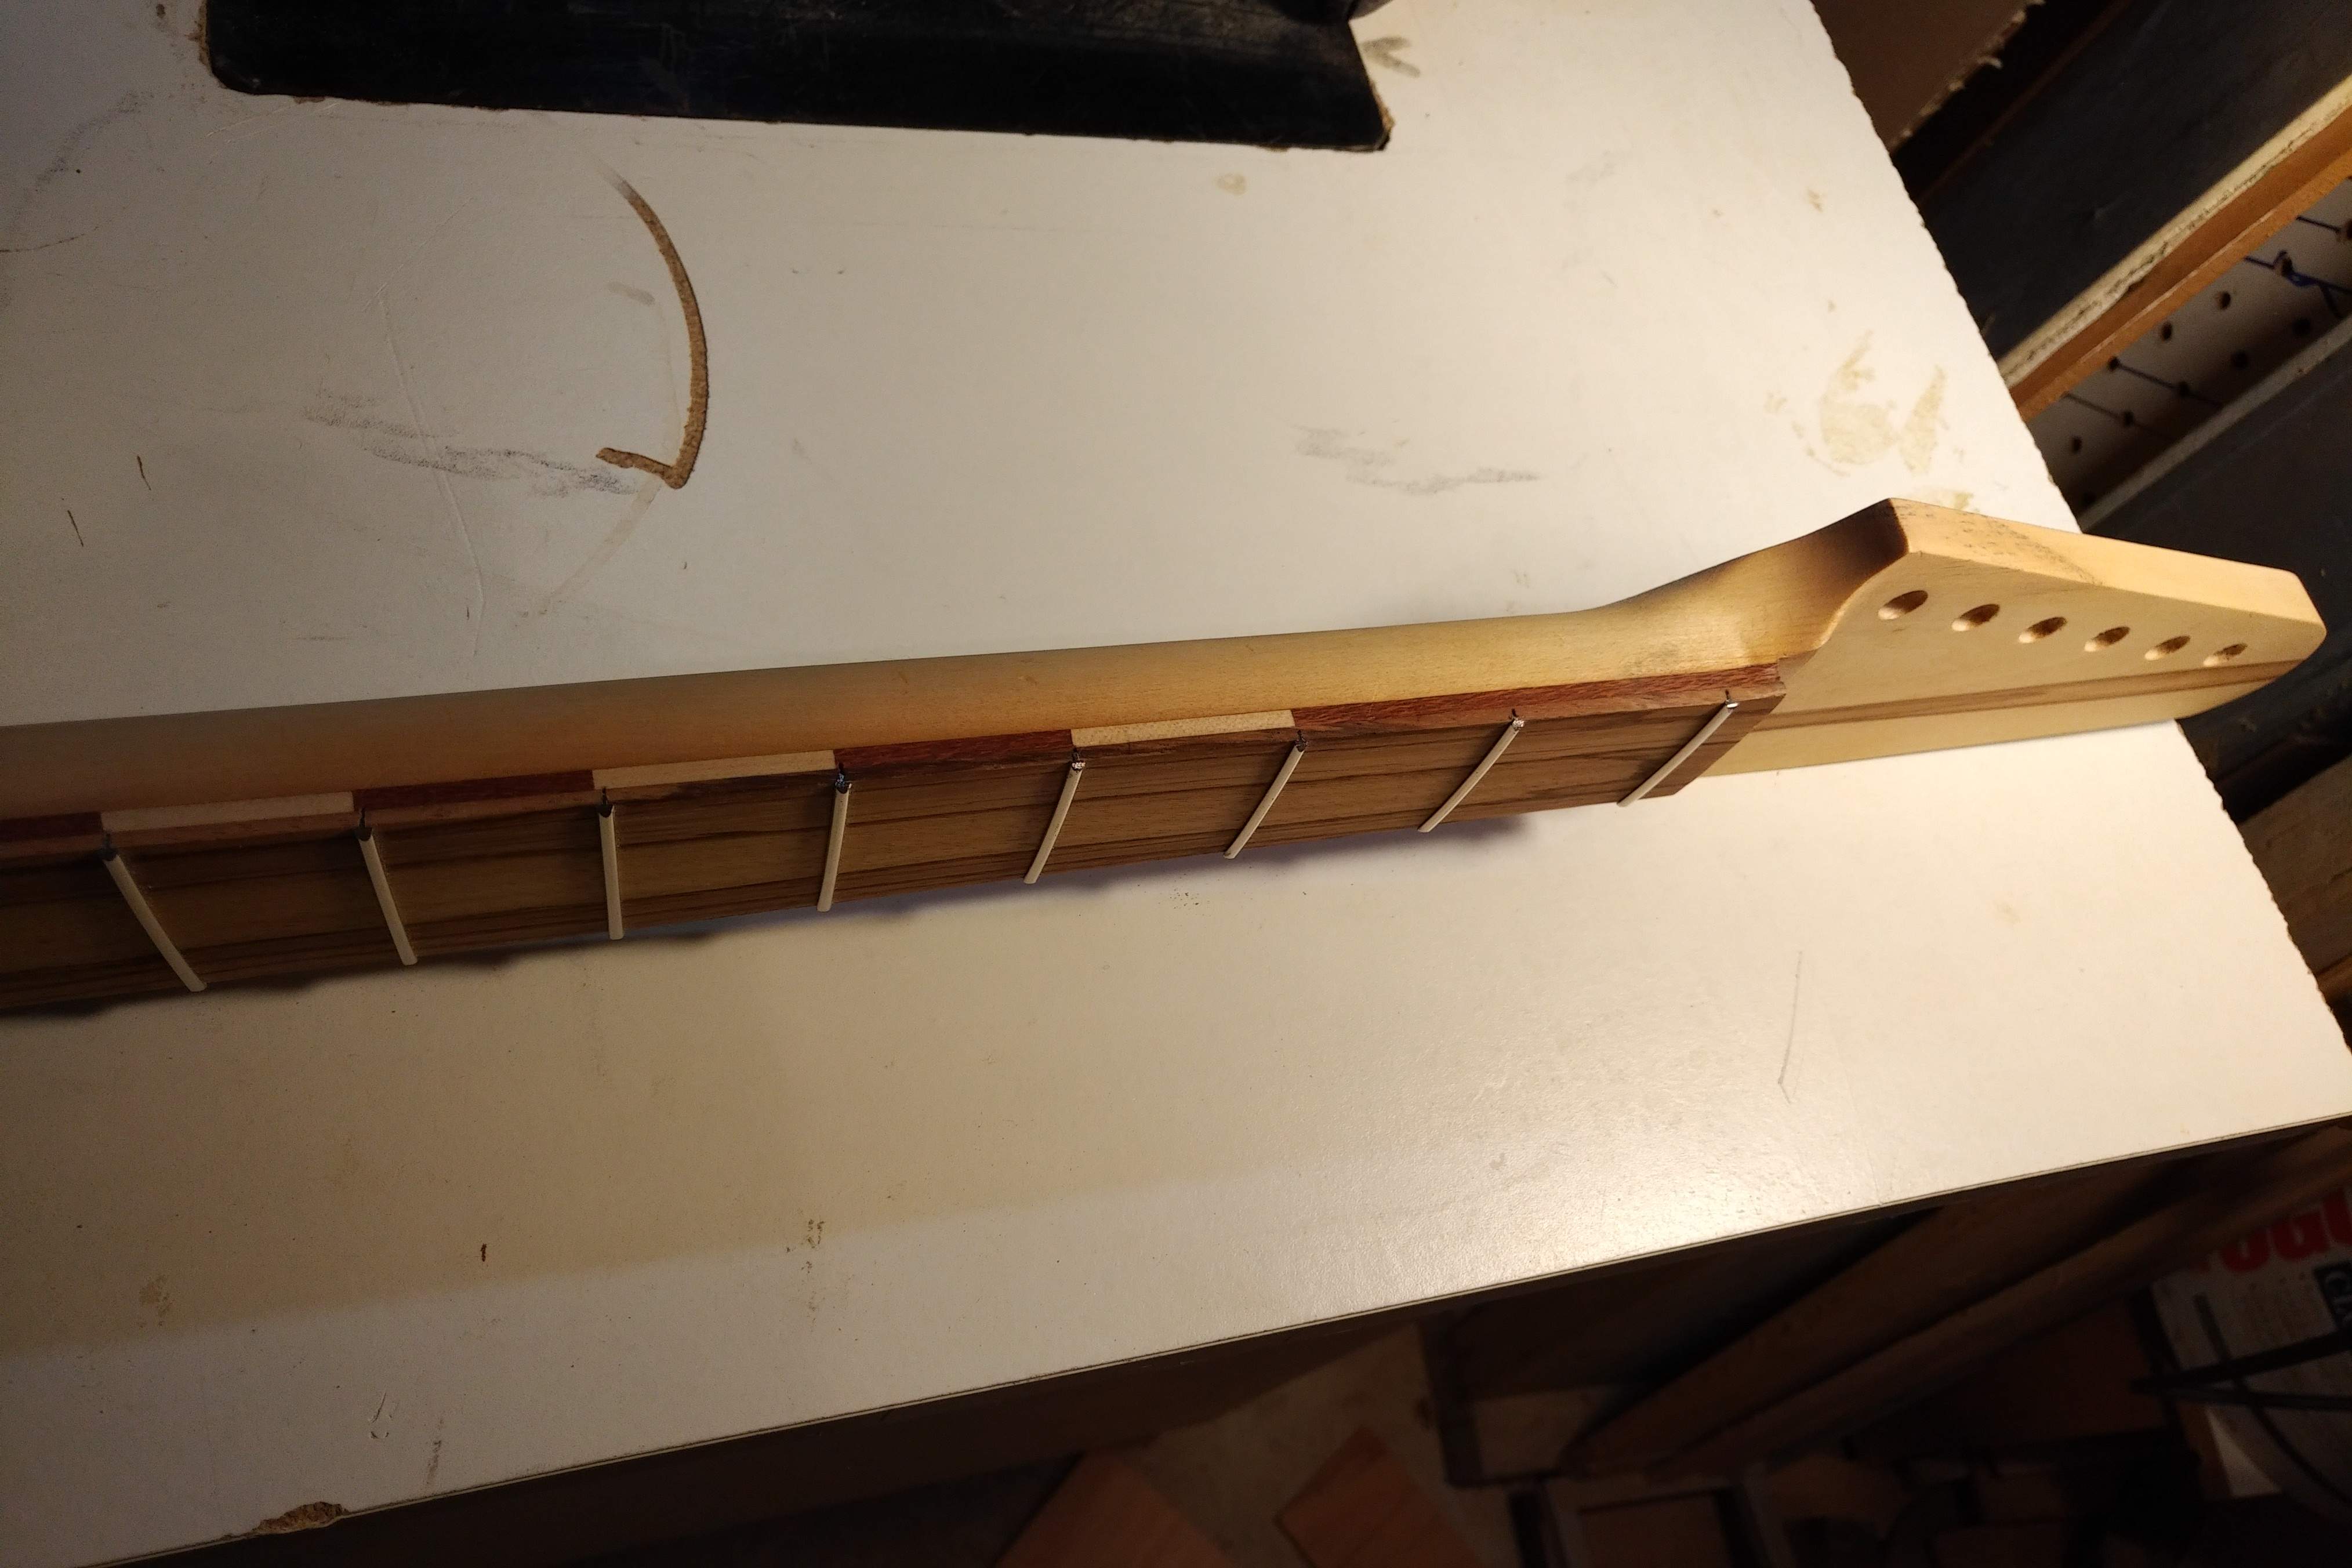
Interesting how the streak of discolouration in the poplar lines up like a racing stripe on the head stock. Maybe it will help me play faster. ;)

And here is the artifact - the painted bullnose on the back of the headstock remains from the window sill I removed in one of the house renovations.

Oh yeah.. zero fret. Hate away. I don't care because it make cutting the nut sooooo much easier.
 
I got some more time in the man-cave today

I used the tape and crazy glue trick that I learned in last year's winter build to cut for the neck pocket into the body template, then used the body template to cut the neck pocket into the test top.

I cut a deliberately shallow neck pocket into the body because I will still have to decide on neck angle and depth based on the resonator and bridge. The pocket was only cut about half an inch deep but it's tight enough to hold the neck in place with no other supports.

The resonator will be suspended under the face using springs. It will need a cover plate to support it. So next up is metal work.
 
I spent some time in the last few days thinking through ways to cover the resonator cone. I took one of the faces that I had set aside for testing and made the sound hole smaller so that this face wouldn't use a cover at all.

I assembled the cone with springs and found that I need longer screws, more flexible weather stripping, and wider clearance holes so the con doesn't rub the threads as it moves. Here's what is looks like, kowing that those fixes are still to be done.

from the inside:

from the outside:

For the other test face with the larger sound hole, I will probably make a metal cover with a similar motif. (dog bones covering the dog bowl on the sub-woofer):smug:
 
I spent some time in the last few days thinking through ways to cover the resonator cone. I took one of the faces that I had set aside for testing and made the sound hole smaller so that this face wouldn't use a cover at all.

I assembled the cone with springs and found that I need longer screws, more flexible weather stripping, and wider clearance holes so the con doesn't rub the threads as it moves. Here's what is looks like, kowing that those fixes are still to be done.

from the inside:

from the outside:

For the other test face with the larger sound hole, I will probably make a metal cover with a similar motif. (dog bones covering the dog bowl on the sub-woofer):smug:
:hyper:
 
I spent some time in the last few days thinking through ways to cover the resonator cone. I took one of the faces that I had set aside for testing and made the sound hole smaller so that this face wouldn't use a cover at all.

I assembled the cone with springs and found that I need longer screws, more flexible weather stripping, and wider clearance holes so the con doesn't rub the threads as it moves. Here's what is looks like, kowing that those fixes are still to be done.

from the inside:

from the outside:

For the other test face with the larger sound hole, I will probably make a metal cover with a similar motif. (dog bones covering the dog bowl on the sub-woofer):smug:
That looks killer!

I wonder if you'd do better to make a sort of rubber skirt to do the work of making a seal between the bowl and the top. All it has to do functionally is stop air from escaping right? if you took something like an innertube and cut it in half, attach one side to the bowl, the other to the top. That or maybe something like small diameter heater hose, or surgical tubing instead of weather stripping?
 
That looks killer!

I wonder if you'd do better to make a sort of rubber skirt to do the work of making a seal between the bowl and the top. All it has to do functionally is stop air from escaping right? if you took something like an innertube and cut it in half, attach one side to the bowl, the other to the top. That or maybe something like small diameter heater hose, or surgical tubing instead of weather stripping?
Been there a while back.....Seems the idea wasn't used.....:D....

As I said something like before was that a bunch of Reggae players that I knew in NW London were working on a kind of mega superwoofer using a hubcap as the dog bowl....Innertube was being attempted as a suspension solution the last I saw of them...
Never saw or heard it finished....which is probably for the best.....:eek:
 
More progress...
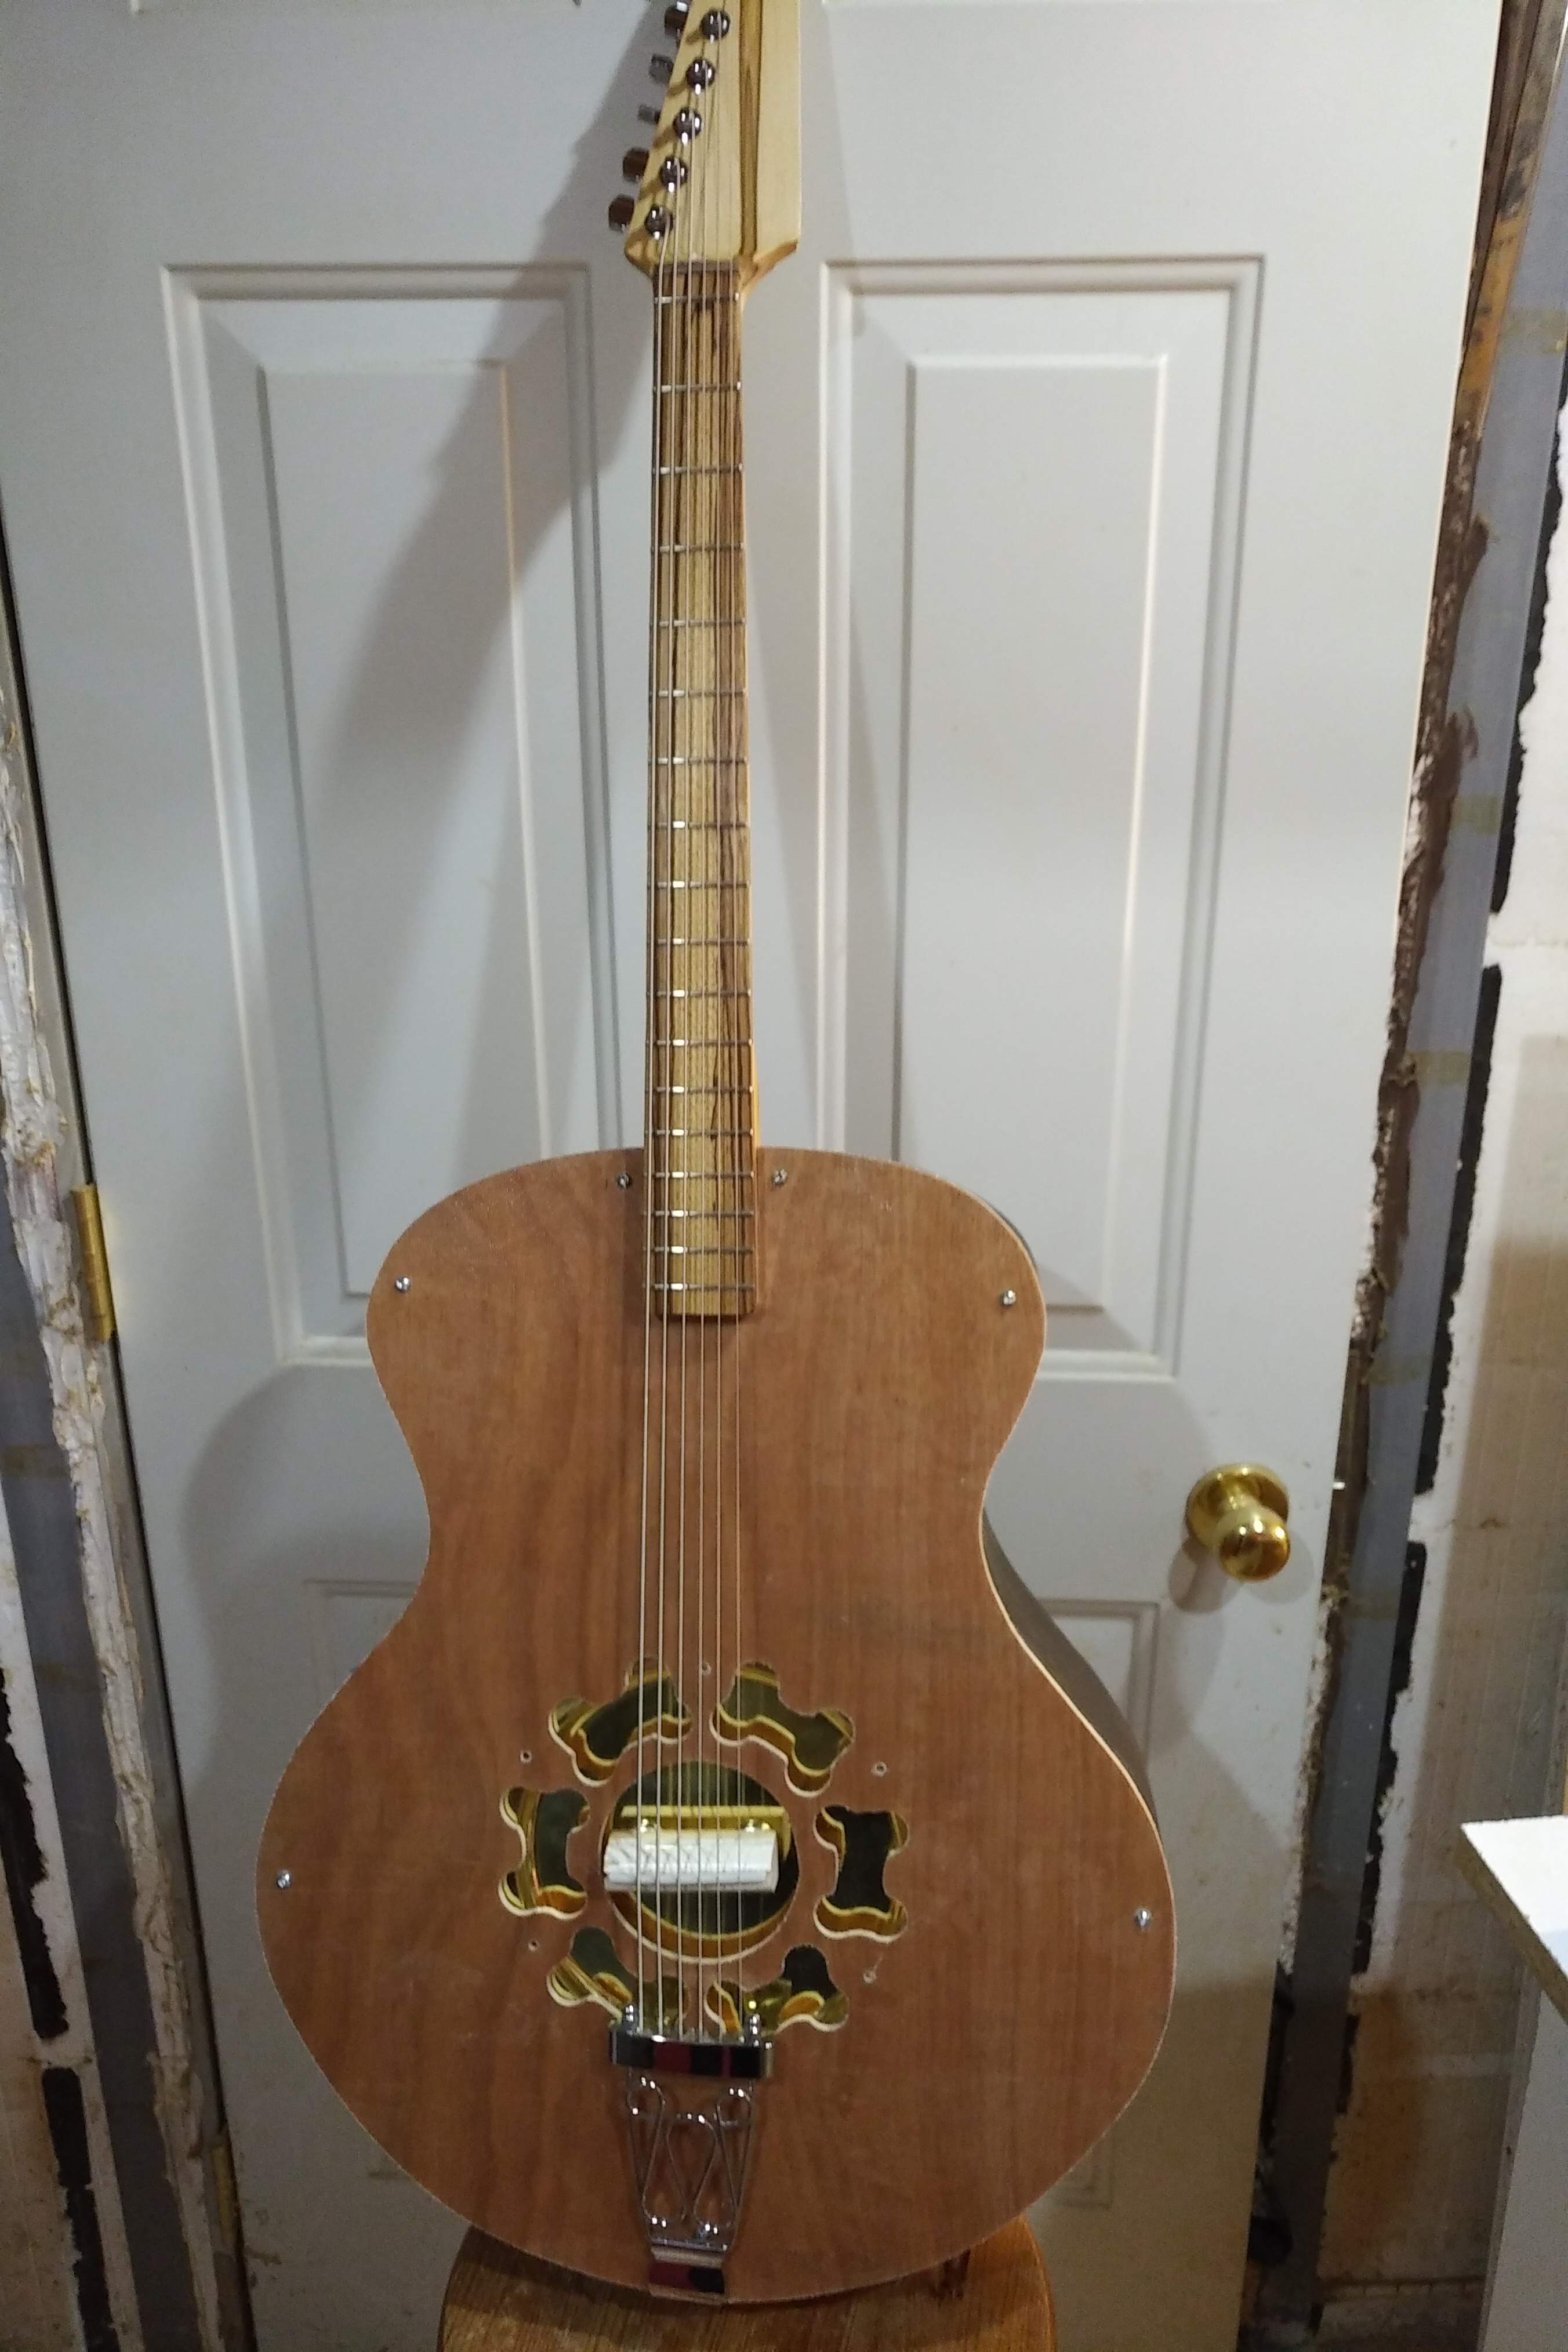
  • I set the neck a few days ago.
  • I made up a wood nut out of zebra wood and walnut. The grains are running perpendicular for strength. Wood should be fine because of the zero fret.
  • I assembled using the simplest test resonator and top
  • I needed a floating bridge with a lot of adjustment so I made a temporary piece using a scrap from the window sill and a pair of leveling feet
  • Aaaaand... I strung it up and played it for a bit. :woot:

It's playable now, and reasonably loud without suspension, but there is still a long list of things to be done:
  • test various resonator cones/plates with or without suspension (I'm leaning towards leaf springs because the coil-over-bolts were noisy)
  • Decide about sound holes. The duct has no port at the end yet. Theoretically, at 1/4 of the wave, the volume is zero, but that assumes one specific frequency.
  • String tree for the high 2 strings
  • binding and finish for the top
  • finish for the rest of the body
  • final bridge and setup
  • Test alternate tunings. I normally play EADGCF but am curious about EBEBG#E.
 
I still haven't decided on what to do about the port(s) / sound hole(s). I want to see if different materials for the resonator cone change the timbre. I came up with this. I'll let it cure for the rest of the day before installing it.

I suppose that strings would matter too, but I am limited in choices for a 30 inch scale bass VI.
 
Saw this today....:smug:....

soqcchzohmkyoh8ibaq2.jpg


Am I helping?....am I?....:eek:
 
The port location(s) are not set yet. I want to avoid putting it/them on the face because it will cancel out certain frequencies. That leaves the back or the end, either side of the neck block. Because the back is flat, it will be easier to plug and disguise any holes that I make and regret.

What I really don't know is if having multiple ports will help boost multiple frequency ranges or if only the closest port to the resonator will matter. The shorter path will boost higher frequencies. If the shortest path rules, I'll have to plug any holes that knock out the low end.

Seeing as the port(s) are likely to be on the back, I'm going to get an parka and goggles to prepare for the flurry of Richard-in-the-box jokes.:bag:
 
I still haven't decided on what to do about the port(s) / sound hole(s). I want to see if different materials for the resonator cone change the timbre. I came up with this. I'll let it cure for the rest of the day before installing it.

Making up a cone from carbon fiber is a good starting point. Light and stiff. And it will be easy to stick weights to it to see what happens. In general, if you reduce the mass/weight of the cone, it will respond and accelerate faster when it's hit by the bridge. This will probably increase the high frequency levels. But it will also slow down faster, which means that the back side of the notes will drop down quicker; lower sustain.

I'm wrestling with that issue on my design too. Do I want to make the moving parts as light/stiff as possible? Or deliberately build them heavier? Toward a banjo-like plunk, or a deep boom? More likely, somewhere in between. I don't know the answer to that yet. A good reason to build a bench mule testbed.
 
  • Like
Reactions: 2groggy
The port location(s) are not set yet. I want to avoid putting it/them on the face because it will cancel out certain frequencies. That leaves the back or the end, either side of the neck block. Because the back is flat, it will be easier to plug and disguise any holes that I make and regret.

What I really don't know is if having multiple ports will help boost multiple frequency ranges or if only the closest port to the resonator will matter. The shorter path will boost higher frequencies. If the shortest path rules, I'll have to plug any holes that knock out the low end.

Seeing as the port(s) are likely to be on the back, I'm going to get an parka and goggles to prepare for the flurry of Richard-in-the-box jokes.:bag:

For the ports, I'd go ahead and make several, so you can test and choose. Make them somewhat decorative, and so that you can later block them with a darker plate from the inside. Test them by blocking them off with cardboard and tape on the outside.

Remember that a tuned port tube gets its power by restricting the airflow at the outer end. The larger the port, the less power and effect it will have, and the frequency bump will be widened out. Multiple ports will have the most power/effect on the first one in line, and much less effect from the others. If you put in multiple ports, block off the ones ahead of the one you want to test.
 
  • Like
Reactions: 2groggy
Interesting build and now, of course, I want a carbon fiber cone for my resonators! Thanks! :roflmao:
Hmmm, might you have a spare resonator cone sitting around? If you could send it to me, I could use is as a mold for a few carbon fibre resonator cones. I could send you a couple of CF cones, each built from the supplied cone, but constructed with a with different number of layers. I'd send you a couple to test and keep the mold for further testing.
 

Latest posts