• TalkBass has been independent since 1998. Add your voice.
    Create a free account to reply to discussions, view embedded media, and browse with fewer display ads.
    Join freeLog in
    Want zero display ads or expanded classifieds tools? Compare plans.

Winter Build Off 2020 - Sub-woofer On A Stick

Not technically a wood pile, but I'm in.
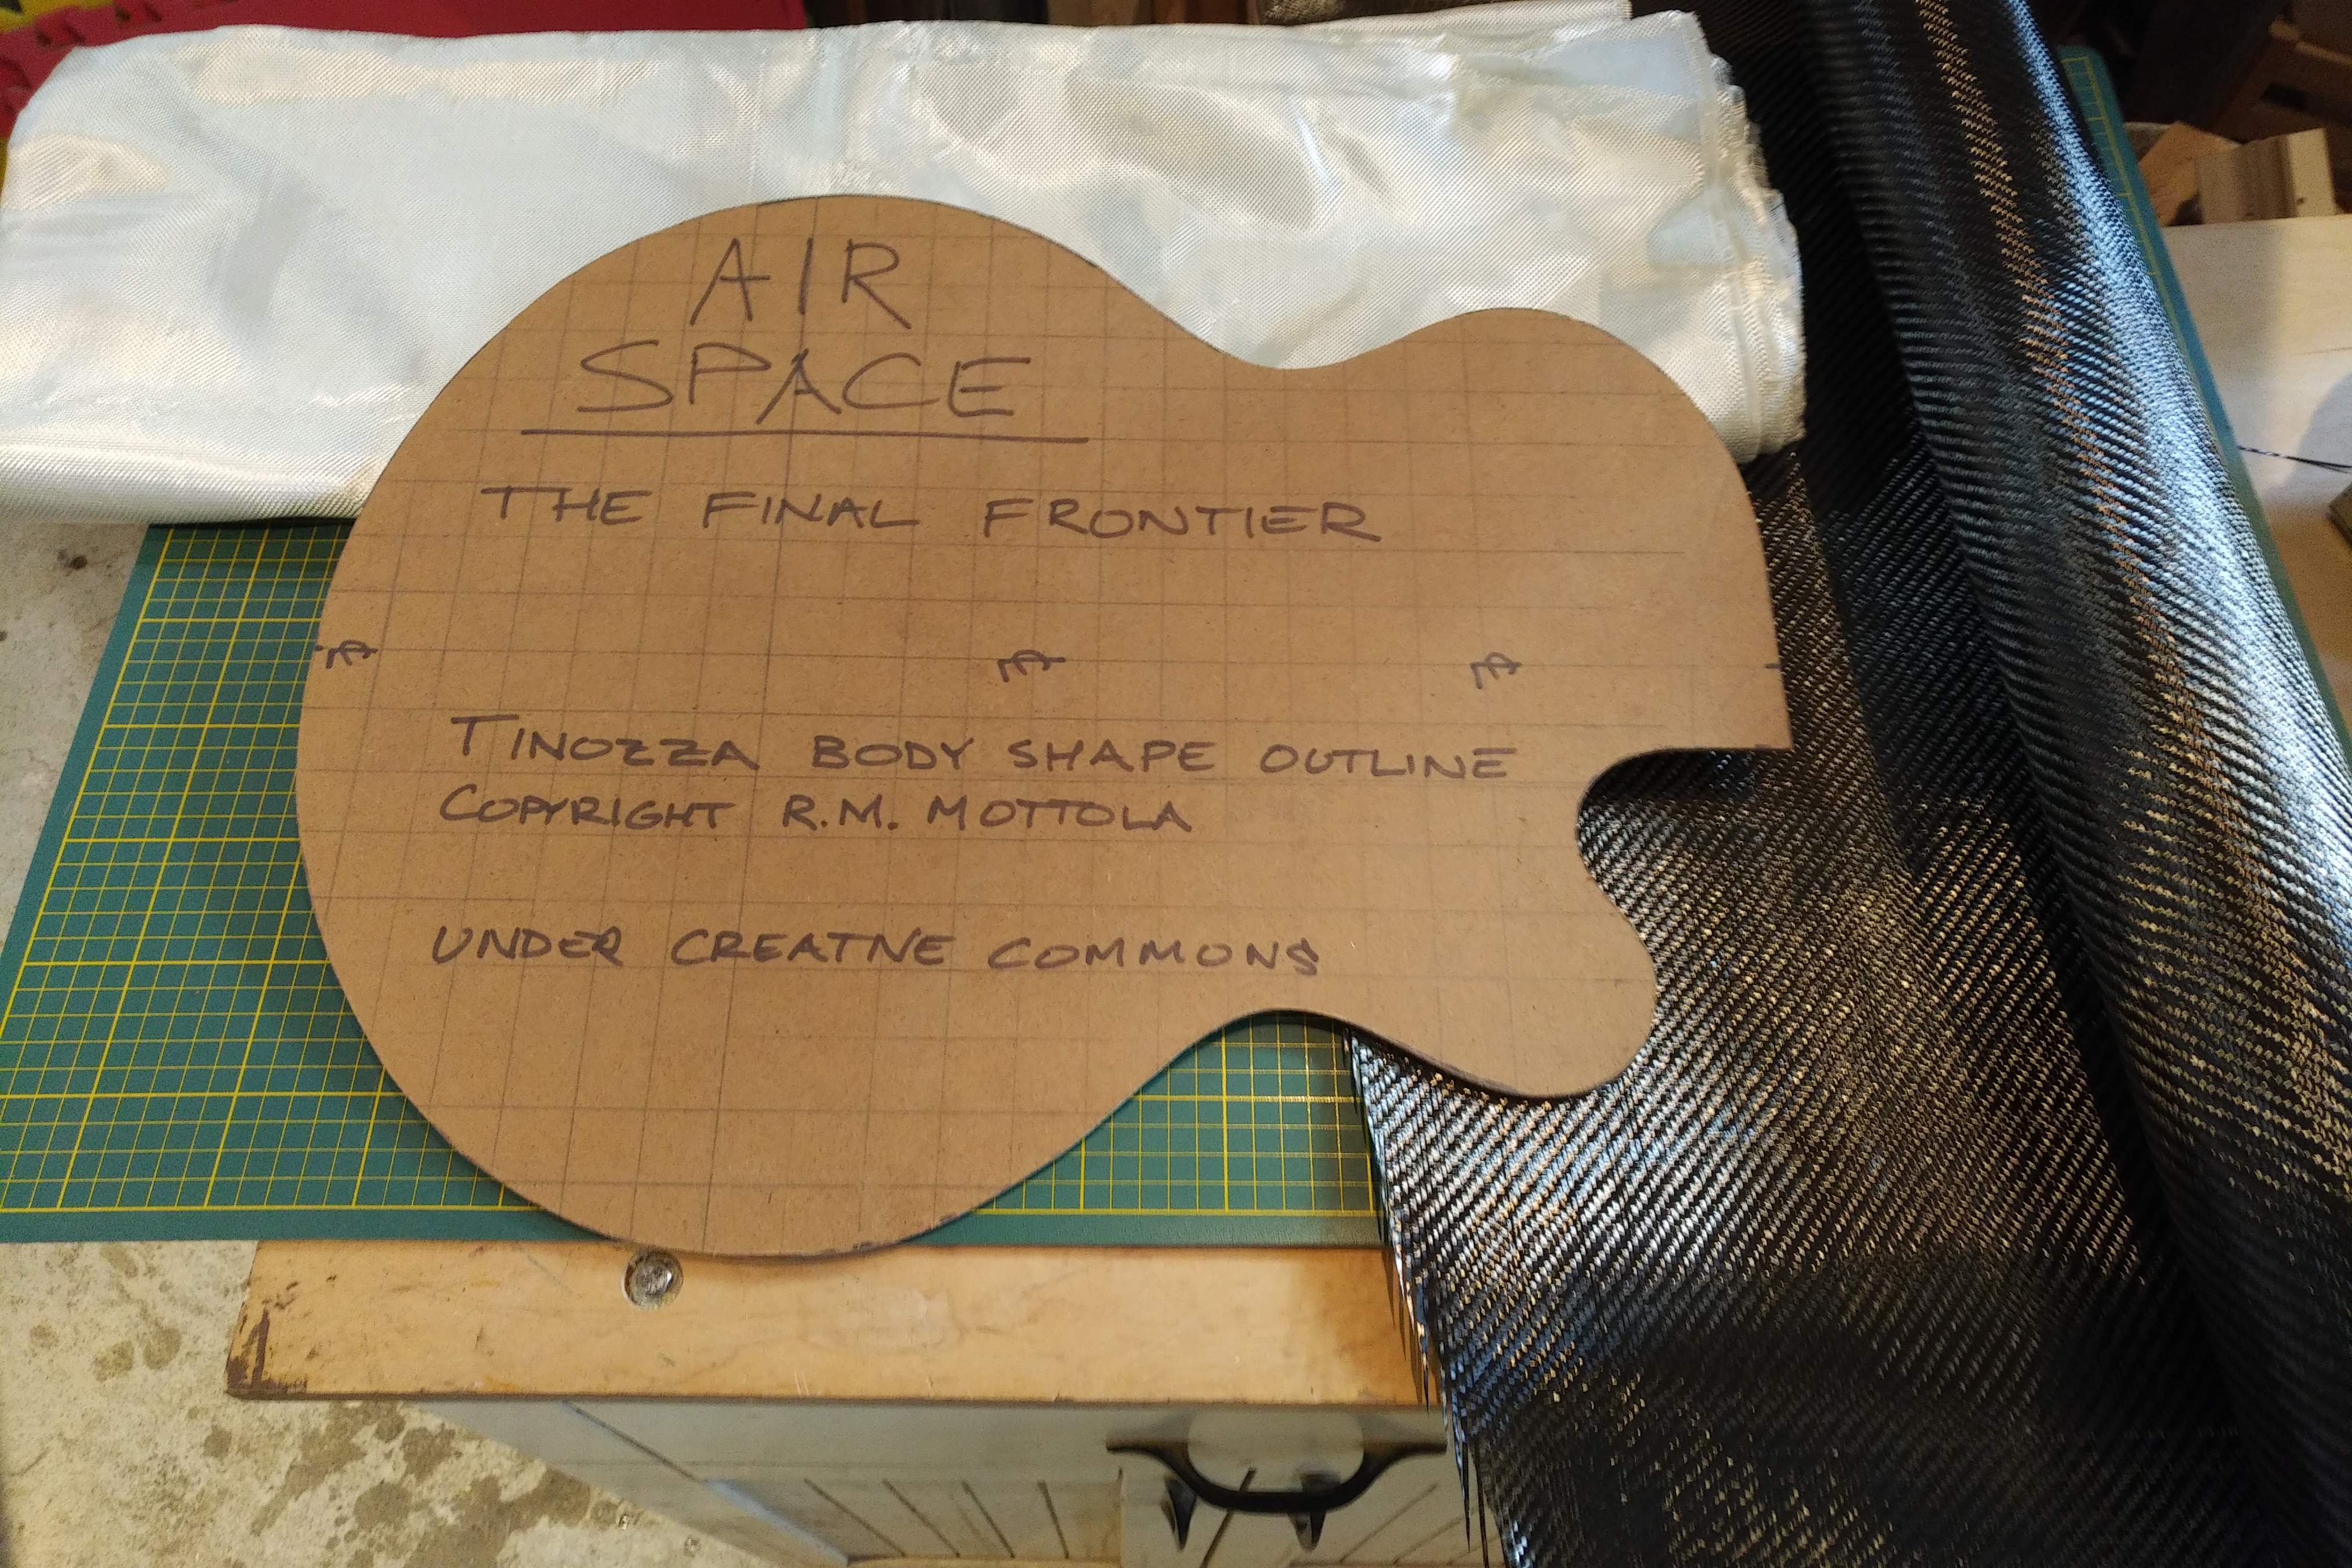

The body will be molded composite top and bottom. There face will be a resonating panel connected to a 60" serpentine duct to the sound hole.

The neck is still TBD. I have decided on 30" scale. A separate material pile picture will be added when I decide.

Background acoustic theory to follow...
 
copied from my own post in an earlier thread, and edited...

From the research that I've done so far...
  • The length of the duct is related to 1/4 of the wavelength of the target frequency. So to tune for low A at 55 Hz, the duct should be about 60" long. This should help amplify the range of frequencies between half a octave up and down.
  • The cross section of the duct should be as close to the cross section of the speaker as possible. This would make the body far too large, so I plan to compromise on this rule of thumb.
  • I'm thinking of having a bridge on some kind of resonator cone in place of a powered speaker.
  • The duct should be damped with lots of sound absorbing material to reduce standing waves and pesky guitar frequency wanky sounds.
  • I will make the rest up as I go along.

The duct shape will start out as a spiral, once around the resonating panel on the lower bout, then fold once or twice in the upper bout before becoming the sound hole.

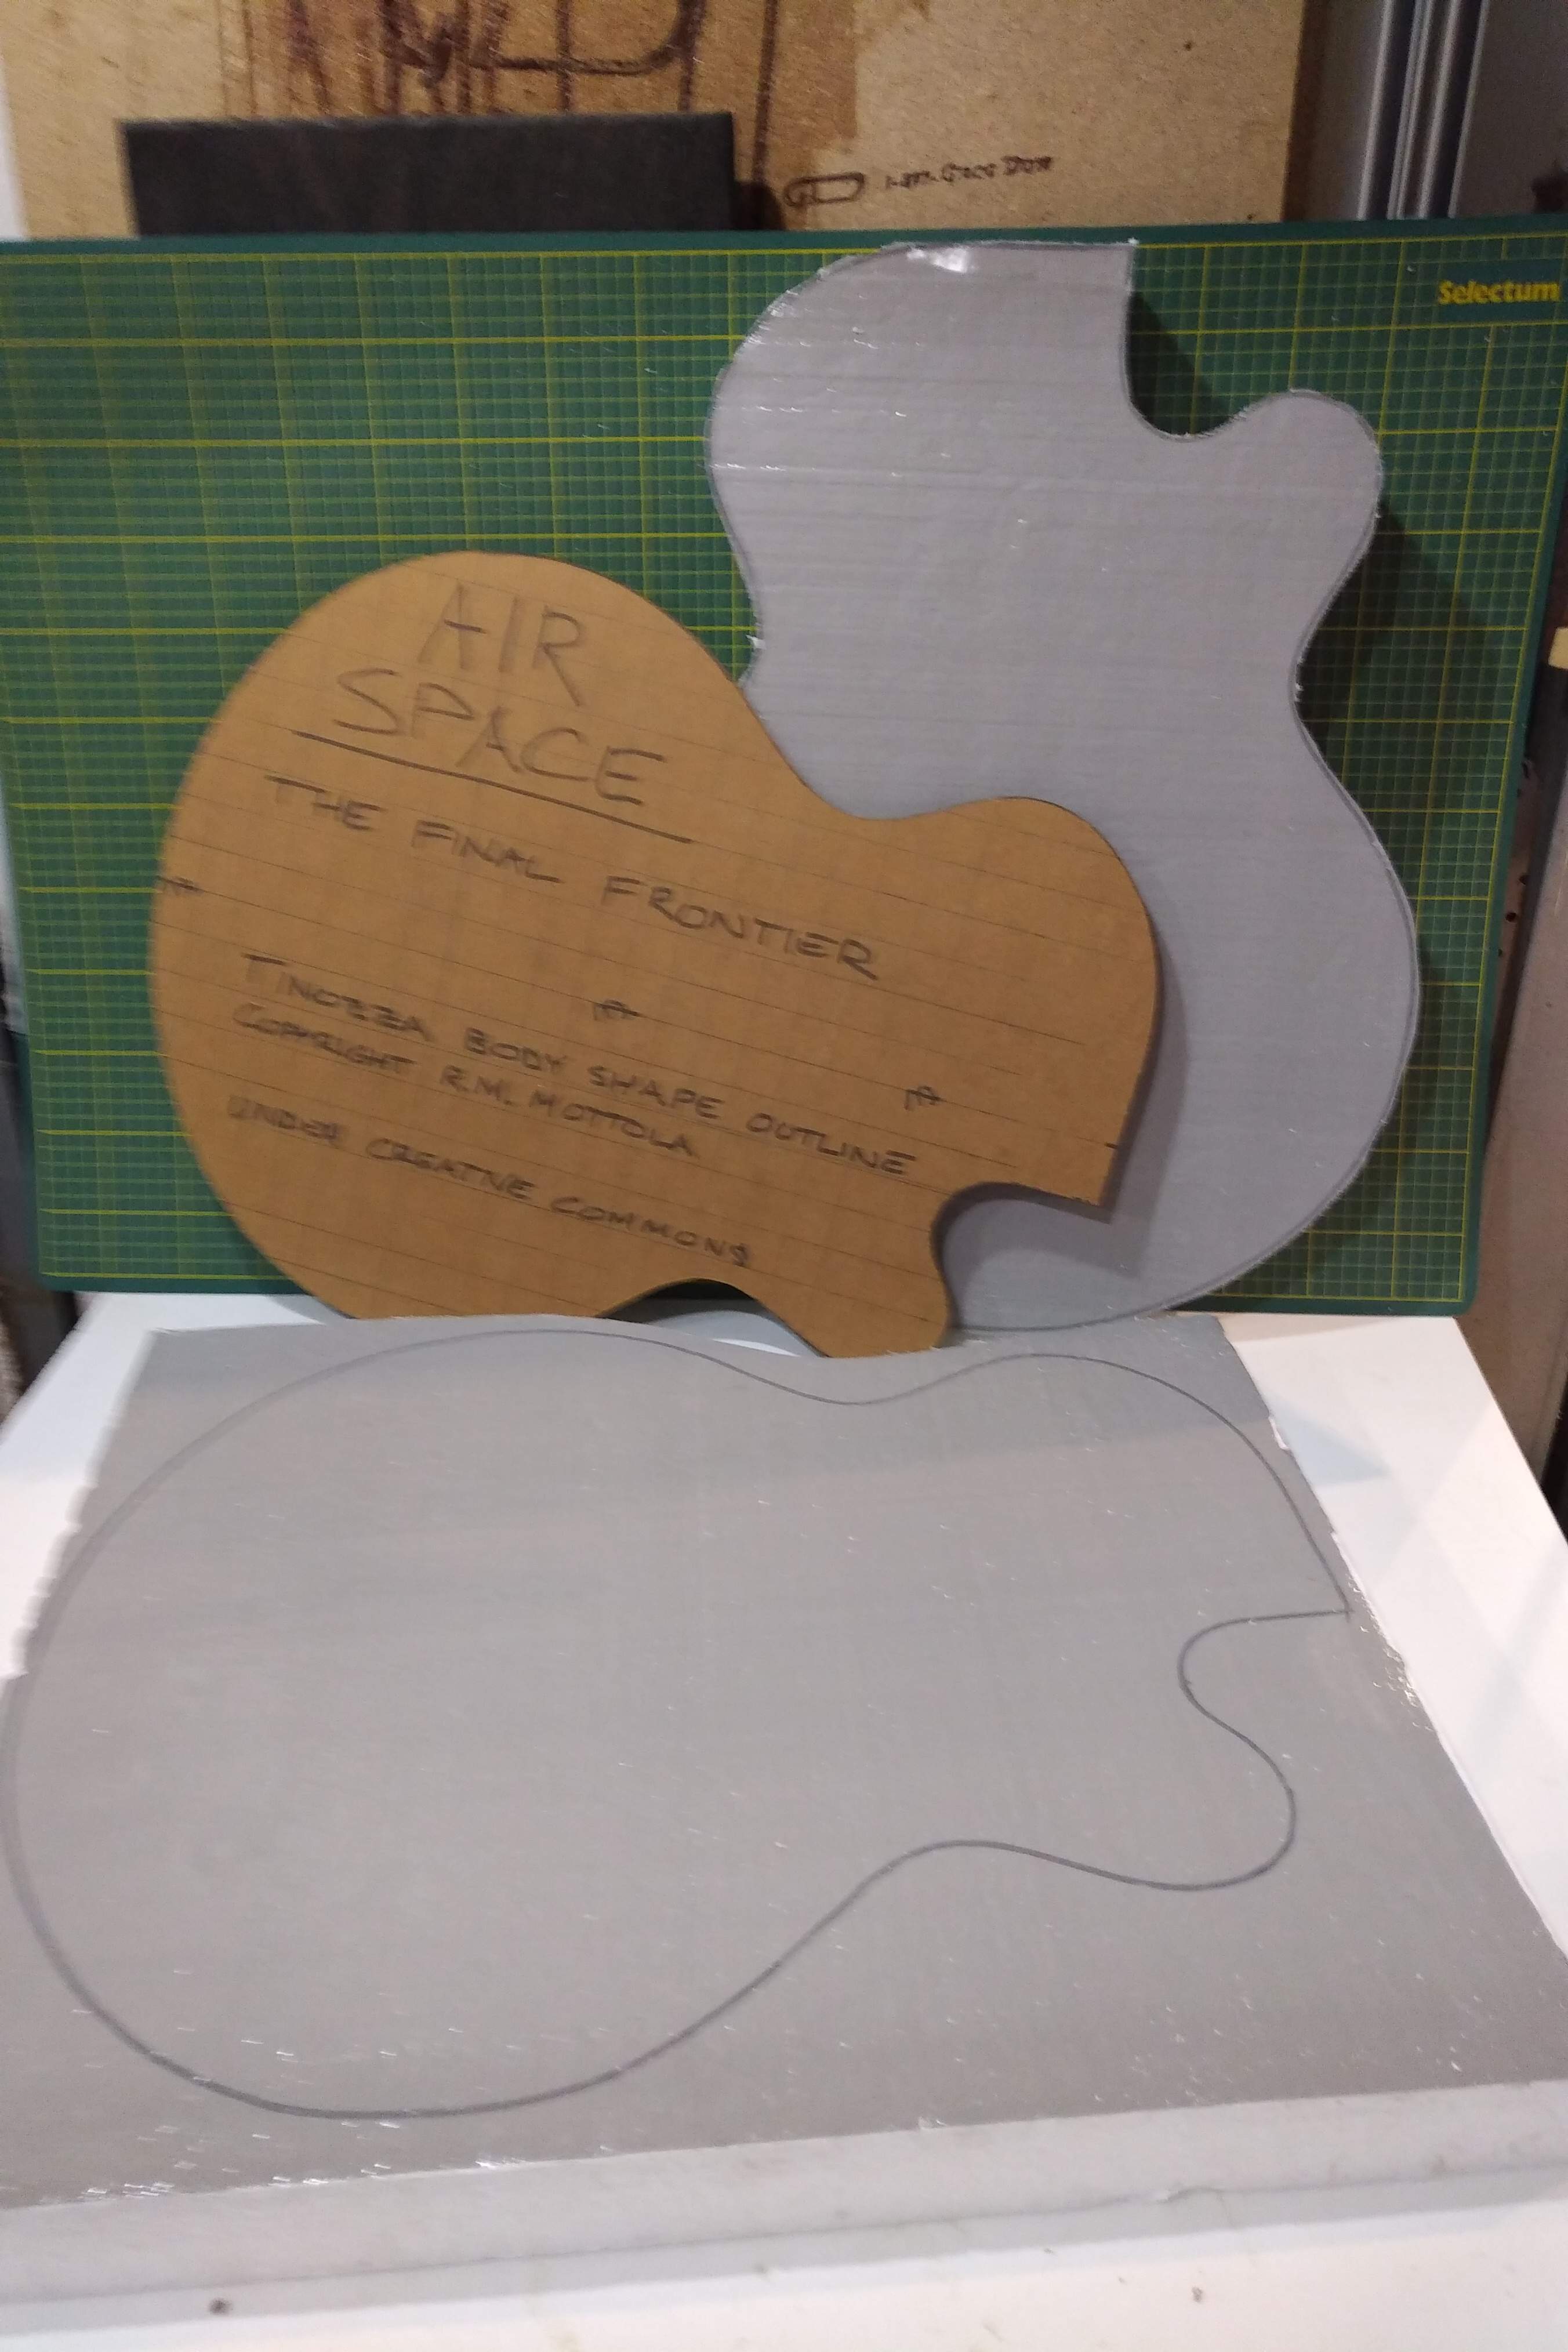
I'll start by making styrofoam inner molds for the top and bottom of the body shape, and lay out the body pieces.
 
I love this idea! I had a very similar thought a few years back, that hasn’t yet gotten past daydreaming stage, so I’ll be watching keenly!
 
  • Like
Reactions: Reedt2000
I used the template to cut two pieces of styrofoam for the molds for the body.

There are two pieces, each 2" thick. I held them together for rough sanding to make sure that the shapes match.

The body will be big - something like 23" x 18" x 4". Oddly enough, I held it in a playing position to see how much round over and other shaping was required and it turned out that remarkable little needed to be done.


I've pulled them apart for filling. There will probably be a couple of coats of fill before I can do the lay-up of the glass and carbon.
 
I made some progress on the neck yesterday and today. I'm still mulling over how to lay up the carbon and glass fibre for the body, so I set is aside to wait for inspiration.

I had an old window sill from a bathroom reno. It's 1" thick, straight, stable and probably maple. See the slab on the left.

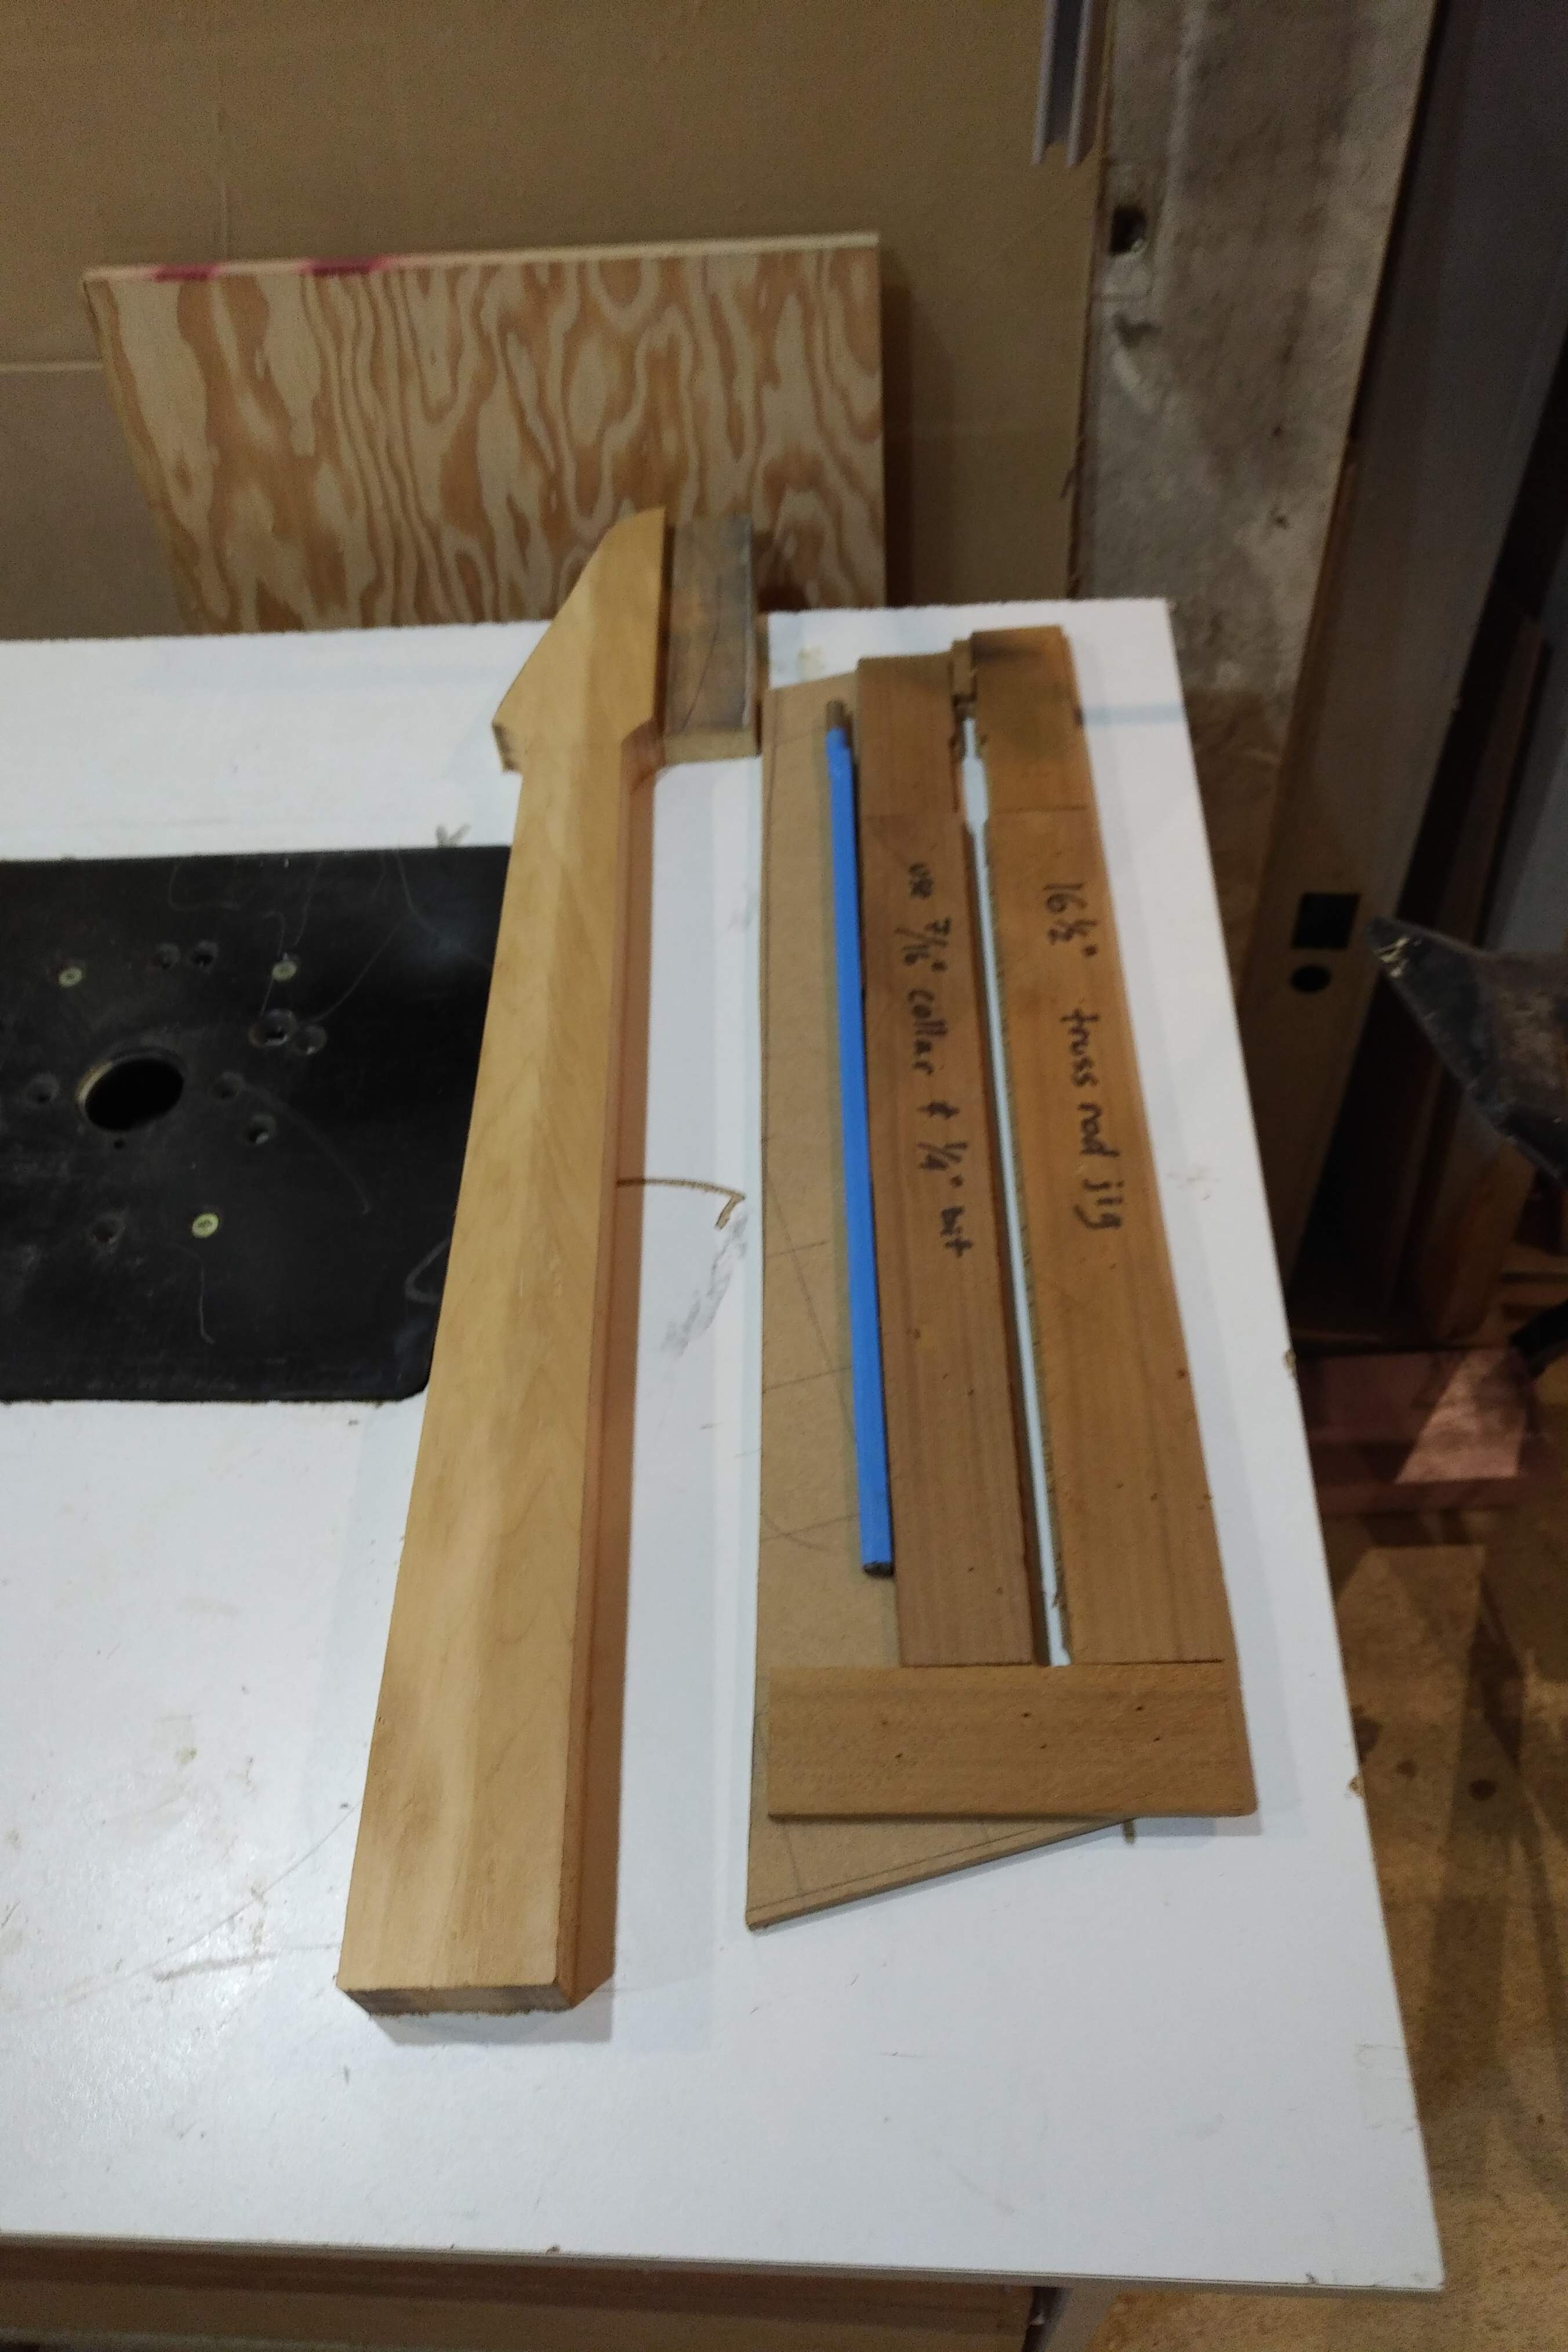
I forgot to take a picture of the neck template, but here is the rough shaped neck and truss rod template. When I need straight lines, I make two level templates. The bottom layer is oversized mdf. I glue down and tack straight edged pieces of scrap sized to accommodate a collar. Once the glue dries, I remove the tacks and rout through the mdf.

With the truss rod in... BTW, I used a handheld router with a collar, not the router table in the picture.

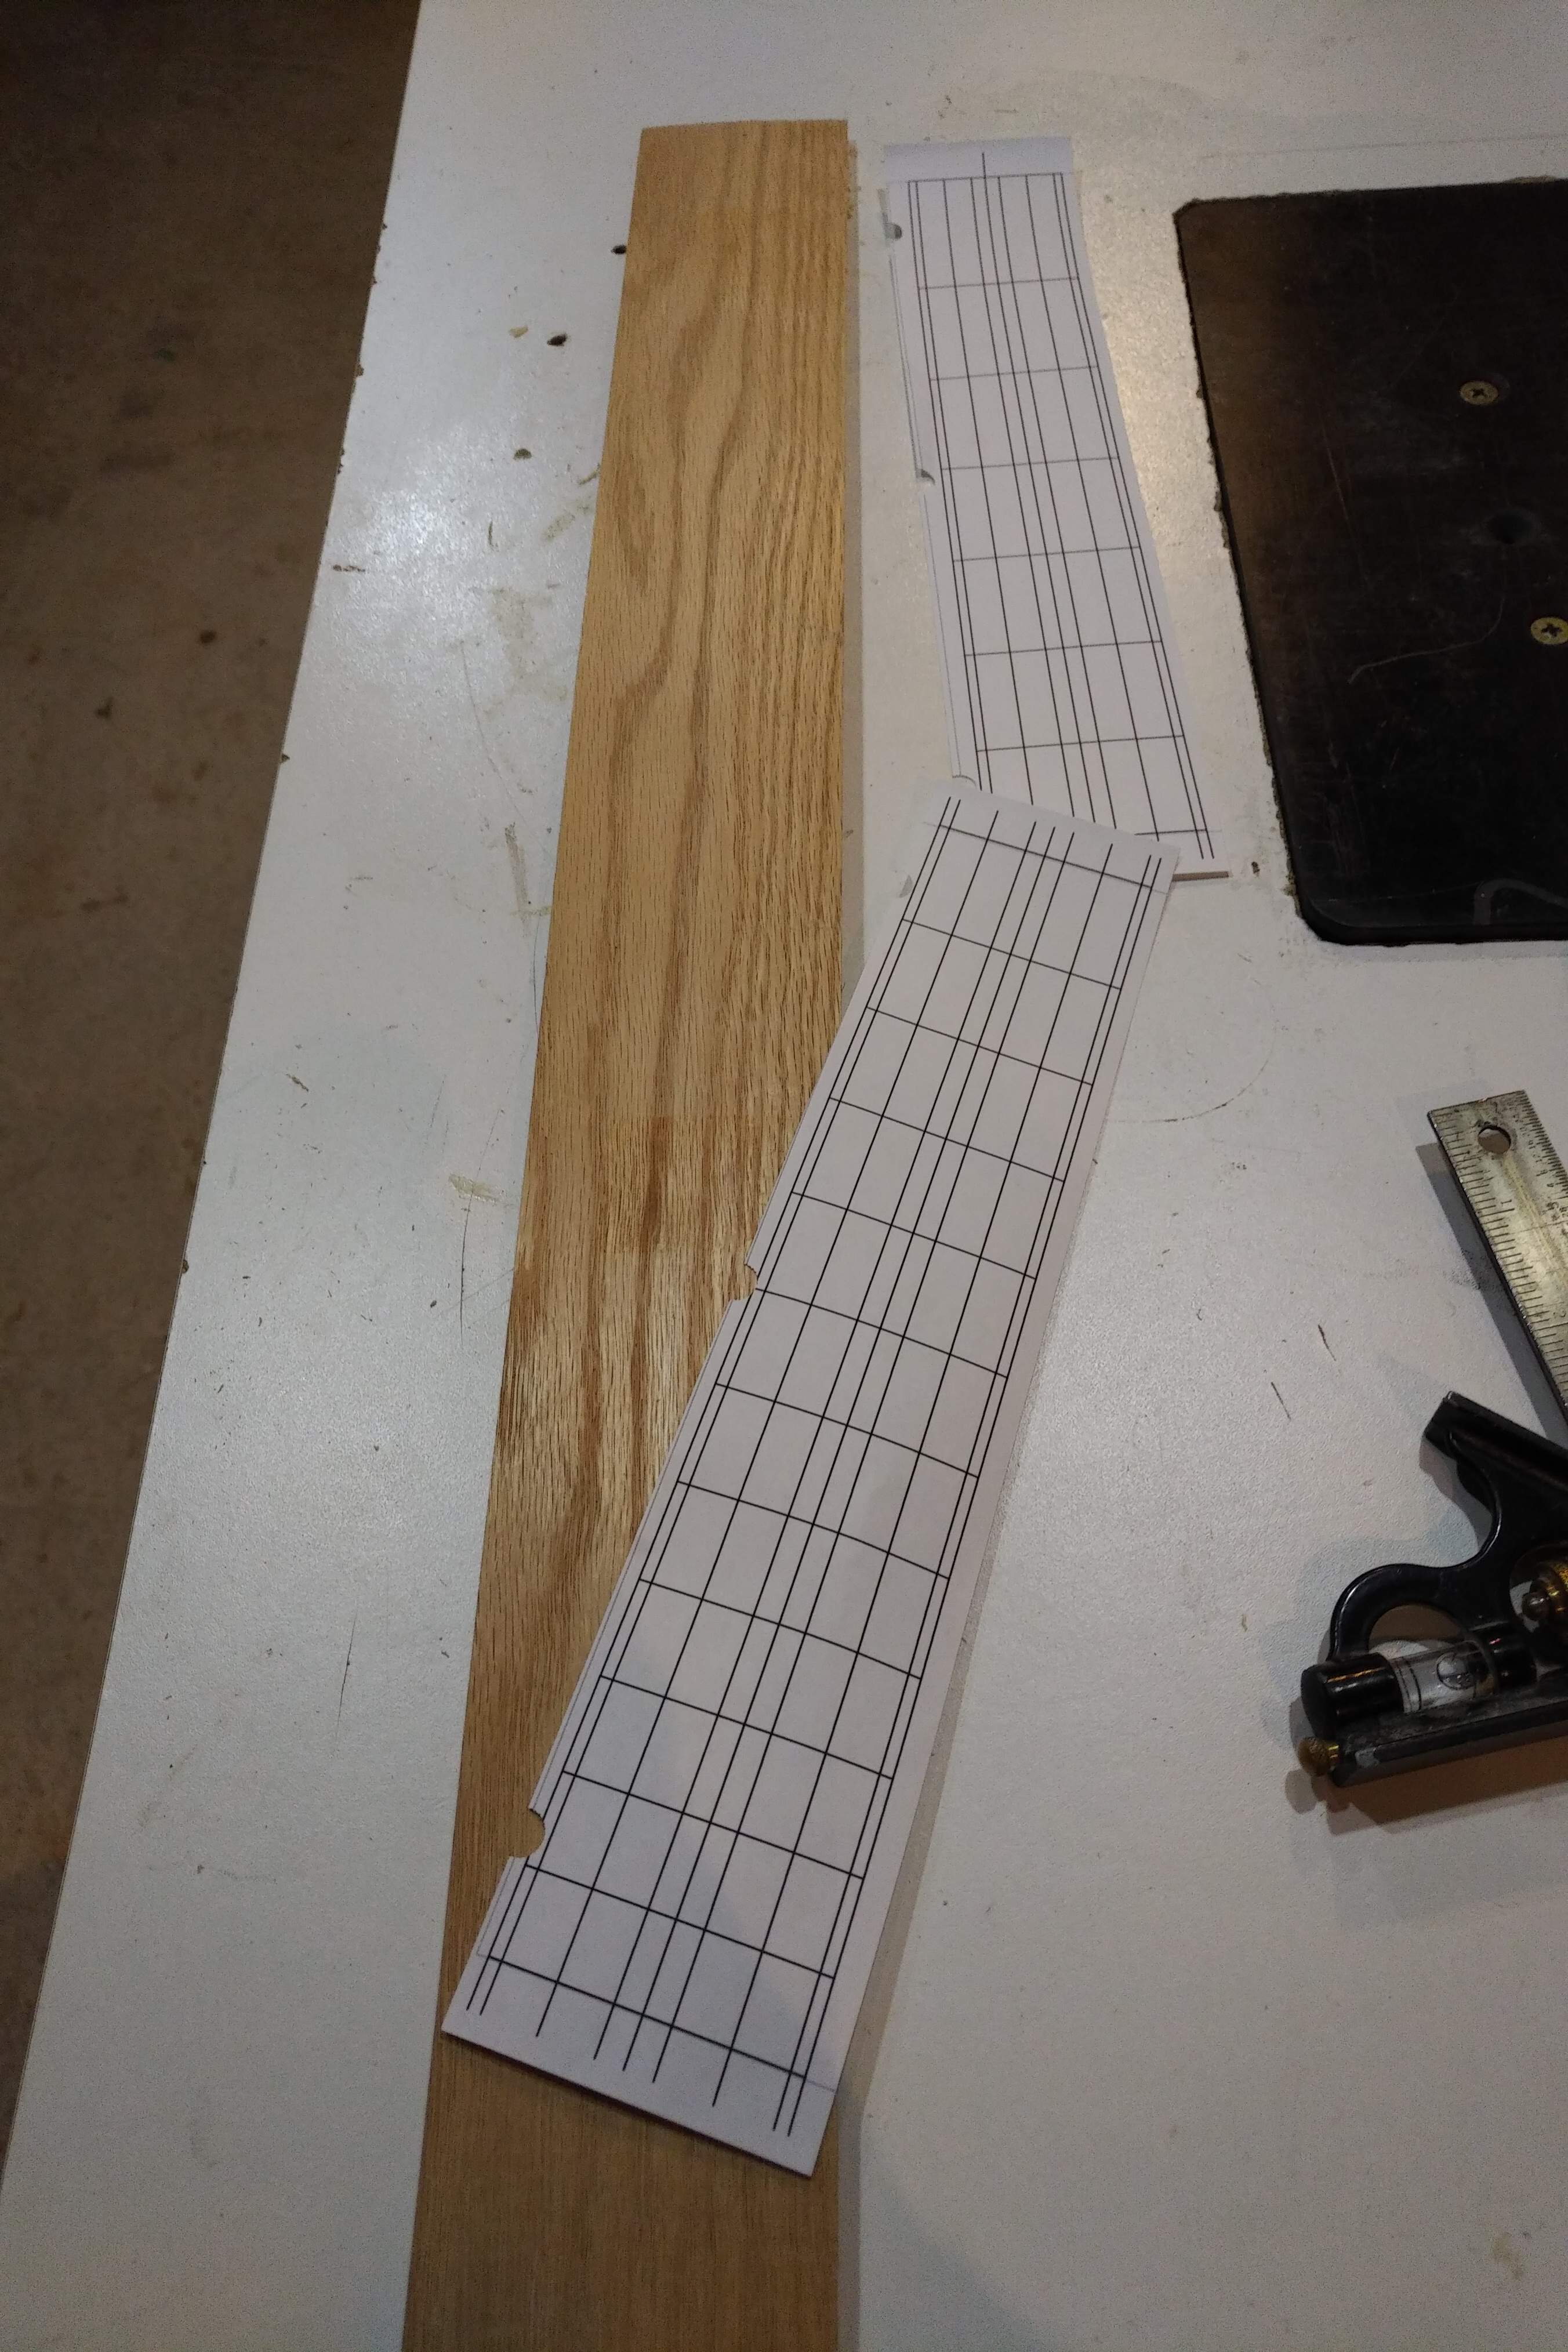
I found a perfectly sized piece of oak from my late father's hobby supplies, so that will be my fretboard.

Fret slots are cut. Holes for fret marker dots are drilled. The fretboard is glued to the neck and in clamps. More pictures will be posted soon.
 
I used oak for the fingerboard on my acoustic-guitar-to-bass conversion... I'd advise using caution while shaping that fingerboard... oak can split in long runs, and the bits can be quite sharp. ;)

[snip]

I found a perfectly sized piece of oak from my late father's hobby supplies, so that will be my fretboard.

Fret slots are cut. Holes for fret marker dots are drilled. The fretboard is glued to the neck and in clamps. More pictures will be posted soon.
 
I used oak for the fingerboard on my acoustic-guitar-to-bass conversion... I'd advise using caution while shaping that fingerboard... oak can split in long runs, and the bits can be quite sharp. ;)
Too late, but thanks. I had some chips routing the fingerboard flush to the neck. Of course, the chips started at the fret slots I'll take a picture later today.
 
  • Like
Reactions: wraub
Here's the picture of the tear out on the FB
If anyone has any ideas of how to fix or hide that, let me know.

I don't trust my ability to shape a neck by hand, so I started by routing the taper of the thickness. There is a block under the headstock and heel of different thicknesses to make the taper, and the blocks act as stoppers against the collar on the router, so I don't go too far.


Yep...that's oak, alright.

I trusted my ability to learn on the go, and shaped with a couple of files, and sanding. It came out well, but it was meant to be a janky build anyway, so it's not even finished yet. :D
I've just been playing it...it's fun. :)

I'd suggest files, several less coarse sandpapers, a variety of sanding tools, and patience. Sorry I can't be more help.
 
I got to shaping the neck. I considered my one previous attempt to hand shape a neck to be a dismal failure, so I designed and built the world's simplest neck shaping jig.
This picture is the neck and jig overturned to show the result. I could cut one half of the neck at a time. I would raise the router bit in small increments and move the neck and jig by hand. My hands and fingers were kept on the head and heel of the neck, so the jig panels were kept between the collar/bit and anything that bleeds.

That still needs some smoothing, but it is a lot better than I could do with a spoke shave.